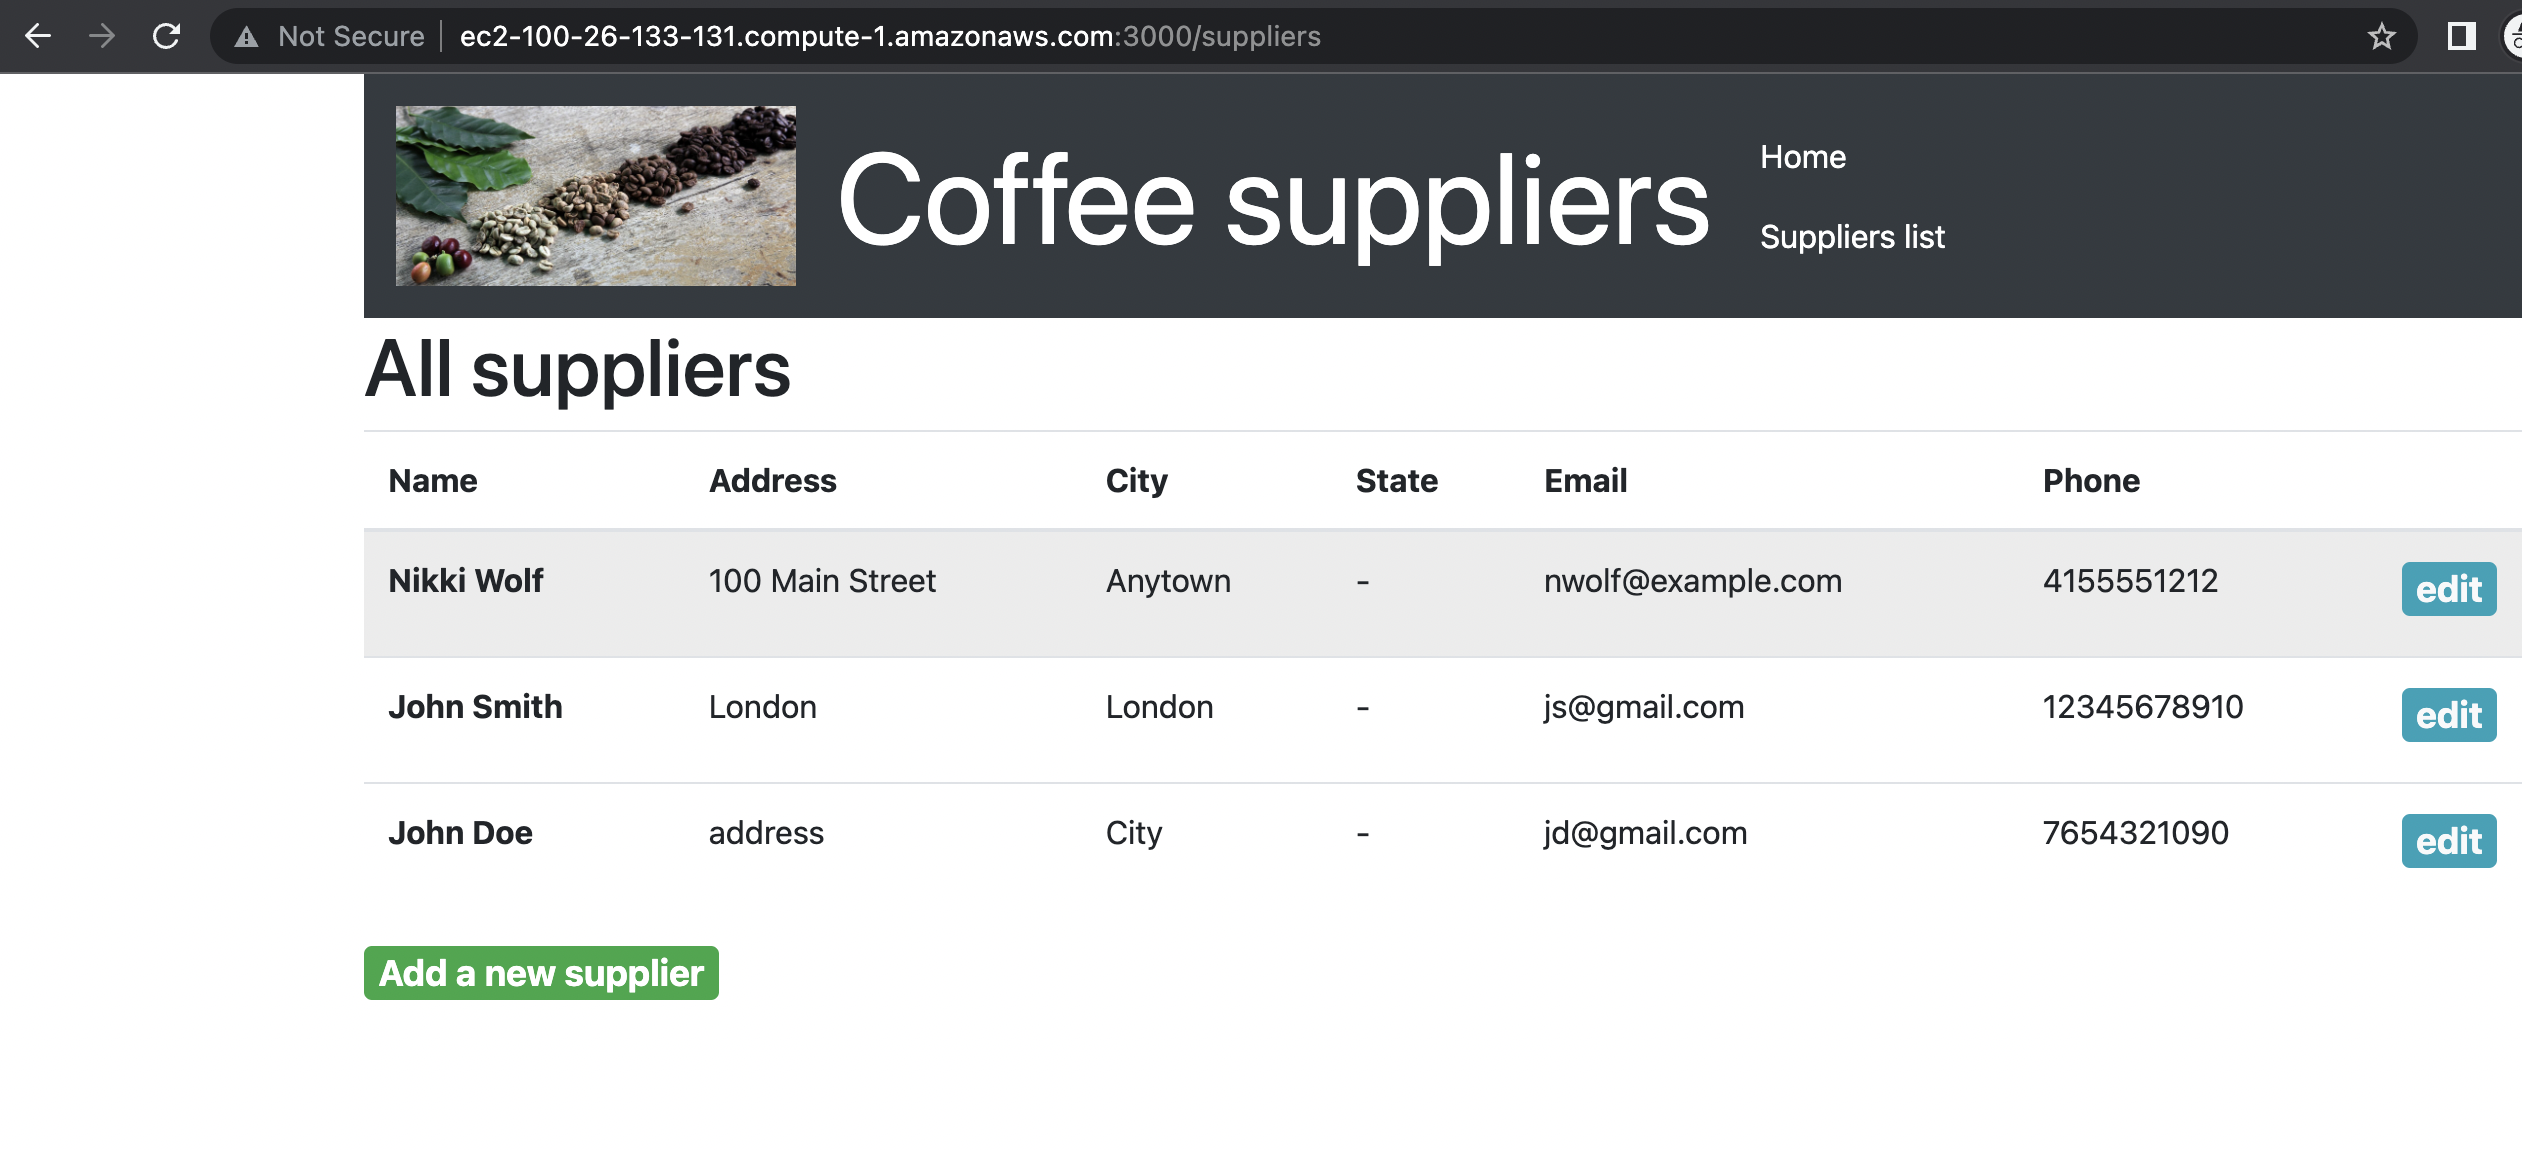
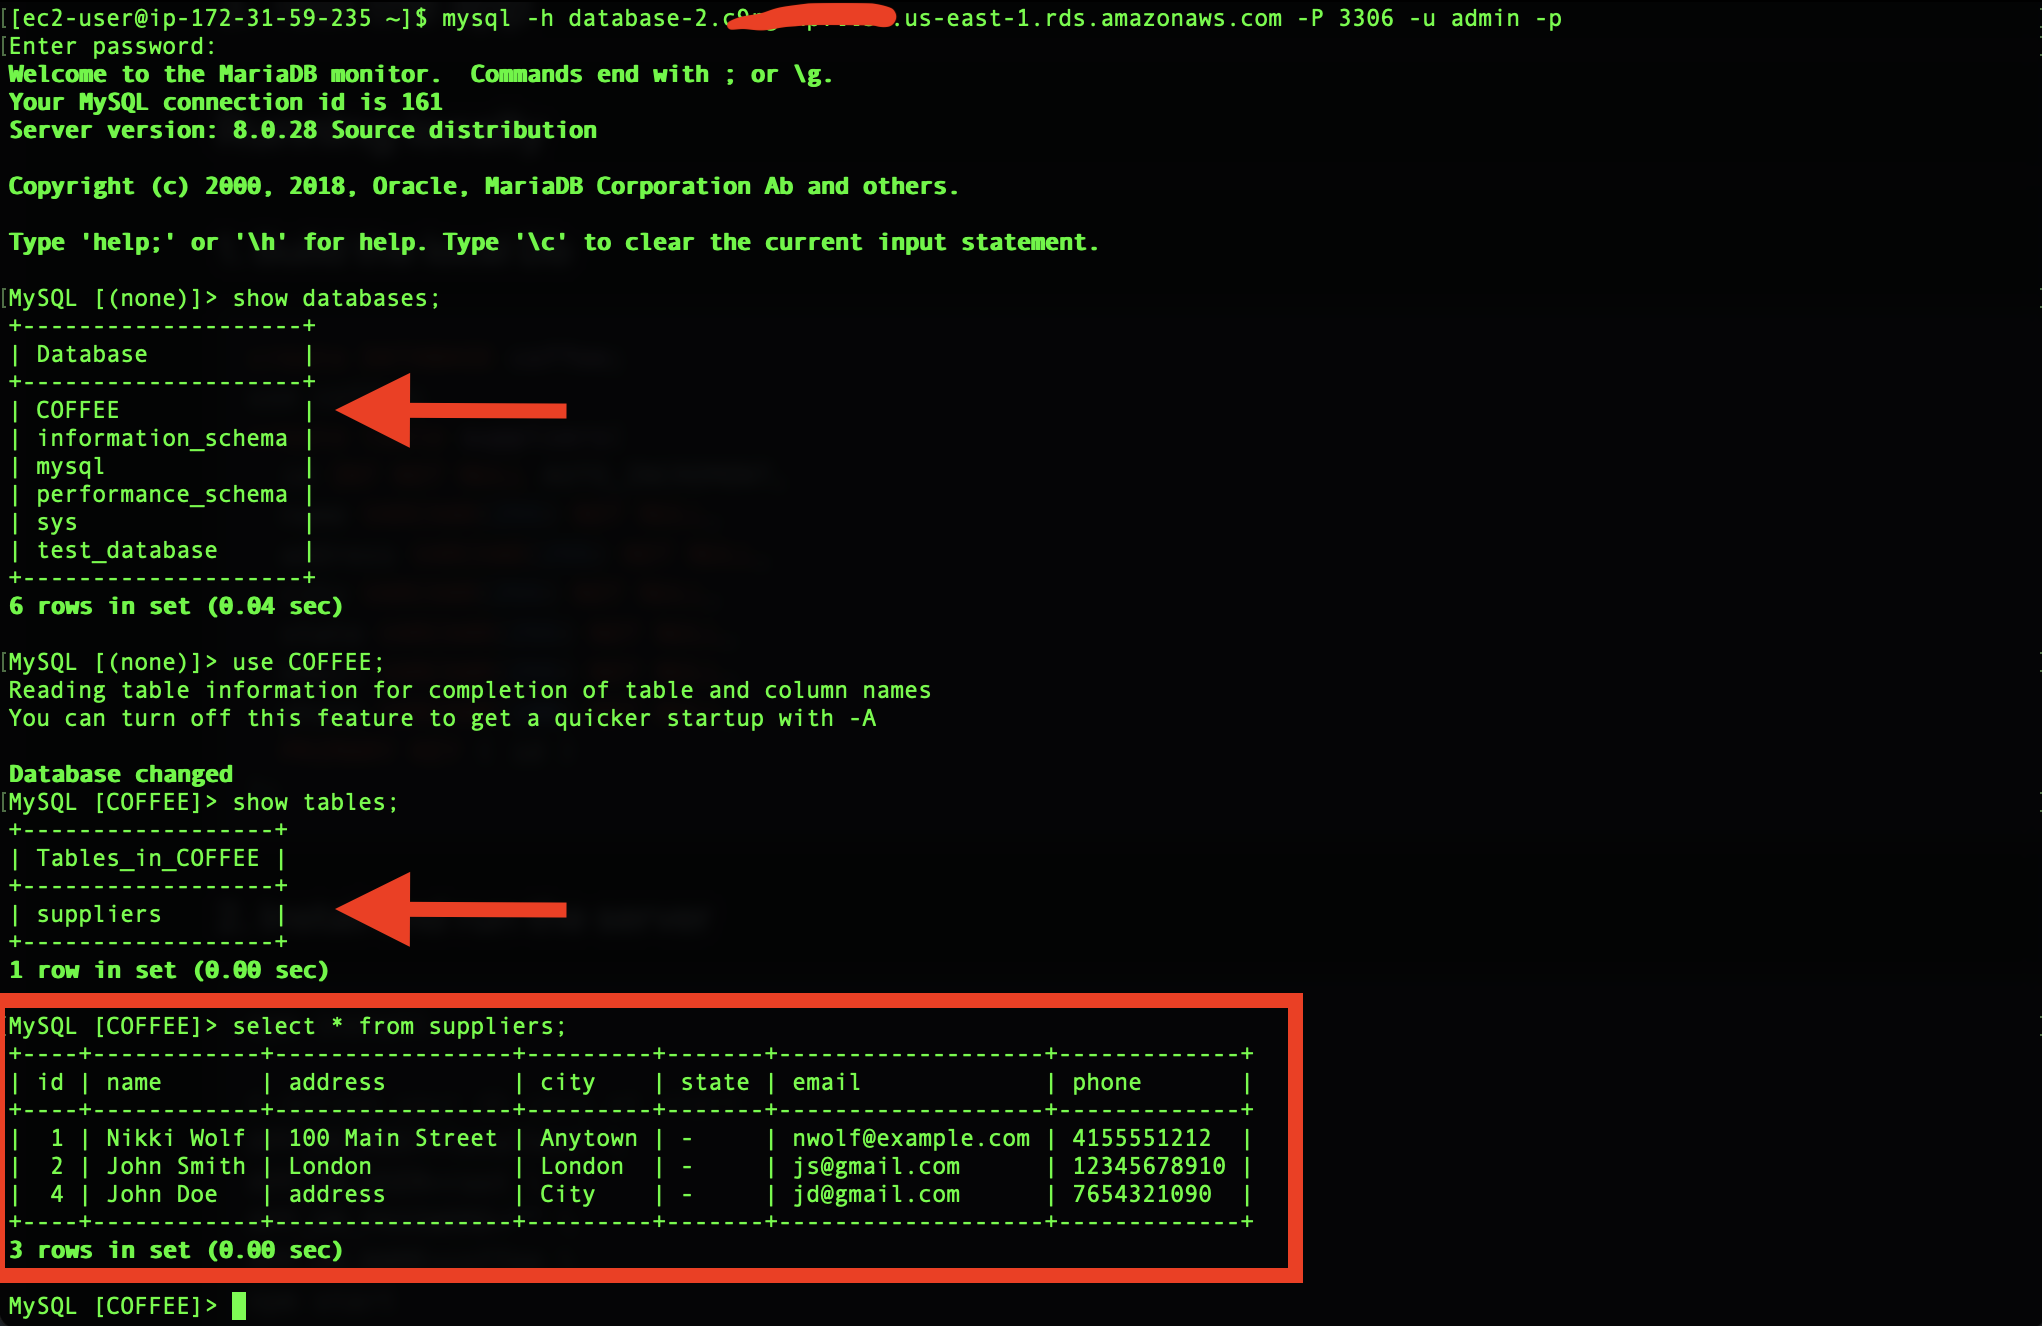
This is a simple Node.JS Express application deployed on infrastructure managed by Terraform. The app connects directly to a MySQL database hosted on an AWS RDS instance, allowing for CRUD operations.
Express is a minimal and flexible Node.js web application framework that provides a robust set of features for web and mobile applications.
Prerequisites
- AWS Account
- Proper Permissions for your user
- Terraform installed
The template description:
This Terraform configuration file provisions resources on the Amazon Web Services (AWS) platform.
The provider block sets the AWS region to "us-east-1" and specifies the shared config and credentials files for authentication.
The two data blocks retrieve the available AWS availability zones and the latest Amazon Linux 2 AMI ID from the AWS Simple System Manager (SSM) service.
The resource blocks define various AWS resources such as VPC, subnets, security groups, and EC2 and RDS instances. For simplicity, the aws_default_vpc block provisions a default VPC in AWS with the specified settings, while the aws_subnet blocks define the public and private subnets within the VPC. If you are ok using the default VPC, just replace cidr_block "172.31.99.128/25" with factual value of your default VPC.
The aws_security_group block creates an EC2 security group with specified inbound and outbound rules.
The aws_instance block provisions an EC2 instance of type t2.micro in the public subnet with specified security group and instance details. The EC2 instance runs a script after launching that clones a Git repository, installs node.js and the dependencies for a CRUD web application, and starts the application on port 3000.
The AWS RDS (Relational Database Service) instance. The first block defines an AWS RDS instance using the aws_db_instance resource. The properties of the RDS instance, such as the database engine (MySQL), the engine version, instance class, database name, username, password, storage, security groups, and subnet group are defined using variables. The RDS instance is set to be publicly accessible.
The "null_resource" named "setup_db". This resource has a "depends_on" property that specifies the RDS instance must be created and ready before this resource can be executed. The provisioner "local-exec" block defines a shell command that connects to the RDS instance using the mysql command and runs the my_sql.sql script to set up the database.
The following outputs provide information about the RDS instance, such as:
its hostname, port, username, and endpoint, as well as information about the EC2 instance, such as its public DNS and public IP. These outputs can be used for further Terraform configurations or for retrieving information about the instances.
The full Terraform template is available here:
https://github.com/otammato/CRUD_WebApp_NodeJS_AWS_RDS_MySql/tree/main/Terraform_template
provider "aws" {
  region                    = "us-east-1"
  shared_config_files       = ["/home/ec2-user/.aws/config"]
  shared_credentials_files  = ["/home/ec2-user/.aws/credentials"]
}


data "aws_availability_zones" "available" {
  state = "available"
}
data "aws_ssm_parameter" "current-ami" {
  name = "/aws/service/ami-amazon-linux-latest/amzn2-ami-hvm-x86_64-gp2"
}

resource "aws_default_vpc" "default" {
  enable_dns_hostnames = true
  enable_dns_support   = true
  tags = {
    Name = "Default VPC"
  }
}

resource "aws_subnet" "public_subnet" {
  vpc_id     = aws_default_vpc.default.id
  cidr_block = "172.31.98.128/25"
  availability_zone = data.aws_availability_zones.available.names[0]

  tags = {
    Name = "test-public-subnet"
  }
}

resource "aws_subnet" "private_subnet" {
  vpc_id     = aws_default_vpc.default.id
  cidr_block = "172.31.99.128/25"
  availability_zone = data.aws_availability_zones.available.names[1]

  tags = {
    Name     = "test-private-subnet"
  }
}


resource "aws_security_group" "ec2_security_group" {
  name        = "test-ec2-security-group"
  description = "Allow access"
  vpc_id      = aws_default_vpc.default.id

  ingress {
    from_port   = 22
    to_port     = 22
    protocol    = "tcp"
    cidr_blocks = ["123.123.123.123/32"] # use your ip here
  }

  ingress {
    from_port   = 80
    to_port     = 80
    protocol    = "tcp"
    cidr_blocks = ["0.0.0.0/0"]
  }

  ingress {
    from_port   = 3000
    to_port     = 3000
    protocol    = "tcp"
    cidr_blocks = ["0.0.0.0/0"]
  }

  egress {
    from_port   = 0
    to_port     = 0
    protocol    = "-1"
    cidr_blocks = ["0.0.0.0/0"]
  }
}

resource "aws_instance" "ec2_instance" {
  ami           = data.aws_ssm_parameter.current-ami.value
  instance_type = "t2.micro"
  subnet_id     = aws_subnet.public_subnet.id
  vpc_security_group_ids = [aws_security_group.ec2_security_group.id]
  associate_public_ip_address = true
  key_name      = "test_delete"

  user_data     = <<-EOF
  #!/bin/bash -xe
  sudo su
  yum install git
  git clone https://github.com/otammato/CRUD_WebApp_NodeJS_AWS_RDS_MySql.git
  cd CRUD_WebApp_NodeJS_AWS_RDS_MySql/resources/codebase_partner/
  curl -o- https://raw.githubusercontent.com/nvm-sh/nvm/v0.35.3/install.sh | bash
  export NVM_DIR="$HOME/.nvm"
  [ -s "$NVM_DIR/nvm.sh" ] && \. "$NVM_DIR/nvm.sh"  # This loads nvm
  [ -s "$NVM_DIR/bash_completion" ] && \. "$NVM_DIR/bash_completion"  # This loads nvm bash_completion
  nvm install node
  nvm install --lts
  nvm install 10.16.0
  npm install express
  EOF

  tags = {
    Name = "web-server-terr"
  }
}

resource "aws_security_group" "rds_security_group" {
  name        = "test-rds-security-group"
  description = "Allow mysql access"
  vpc_id      = aws_default_vpc.default.id

  ingress {
    from_port   = 3306
    to_port     = 3306
    protocol    = "tcp"
    cidr_blocks = ["123.123.123.123/32"] # use the ip of created EC2 instance or the id of its security group
  }
}

resource "aws_db_subnet_group" "rds_subnet_group" {
  name        = "test-rds-subnet-group"
  subnet_ids  = [aws_subnet.private_subnet.id, aws_subnet.public_subnet.id]
}

resource "aws_db_instance" "rds_instance" {
  engine                  = "mysql"
  engine_version          = "5.7"
  instance_class          = "db.t2.micro"
  db_name                 = var.dbname
  username                = var.dbuser
  password                = var.dbpassword
  allocated_storage       = 20
  vpc_security_group_ids  = [aws_security_group.rds_security_group.id]
  db_subnet_group_name    = aws_db_subnet_group.rds_subnet_group.name
  skip_final_snapshot     = true
}

resource "null_resource" "setup_db" {
  depends_on = [aws_db_instance.rds_instance] #wait for the db to be ready
  provisioner "local-exec" {
    command = "mysql -h ${aws_db_instance.rds_instance.address} -u ${aws_db_instance.rds_instance.username} --password=${var.dbpassword}  ${var.dbname} < my_sql.sql"
  }
}


output "rds_hostname" {
  description = "RDS instance hostname"
  value       = aws_db_instance.rds_instance.address
}

output "rds_port" {
  description = "RDS instance port"
  value       = aws_db_instance.rds_instance.port
}

output "rds_username" {
  description = "RDS instance root username"
  value       = aws_db_instance.rds_instance.username
  sensitive   = true
}

output "rds_endpoint" {
  value = aws_db_instance.rds_instance.endpoint
}

output "ec2_public_dns" {
  value = aws_instance.ec2_instance.public_dns
}

output "ec2_public_ip" {
  value = aws_instance.ec2_instance.public_ip
}
Launch the template:
terraform init

terraform validate

terraform plan

terraform apply

# the commands to destroy all resources or partially
# terraform destroy

# terraform state rm RESOURCE, example: terraform state rm aws_ebs_volume.volume.

# terraform state list

# terraform destroy --target=resource.name
clone the project files:
git clone https://github.com/otammato/CRUD_WebApp_NodeJS_AWS_RDS_MySql.git
navigate to the app directory:
cd CRUD_WebApp_NodeJS_AWS_RDS_MySql/resources/codebase_partner/
install Node, NPM and Express using NVM
curl -o- https://raw.githubusercontent.com/nvm-sh/nvm/v0.35.3/install.sh | bash
export NVM_DIR="$HOME/.nvm"
[ -s "$NVM_DIR/nvm.sh" ] && \. "$NVM_DIR/nvm.sh"  # This loads nvm
[ -s "$NVM_DIR/bash_completion" ] && \. "$NVM_DIR/bash_completion"  # This loads nvm bash_completion
nvm install node
nvm install --lts
nvm install 10.16.0
npm install express
assign the environment variables received as outputs after Terraform template is applied:
export APP_DB_HOST=<paste here the output endpoint of the created RDS instance> \
export APP_DB_USER=admin \
export APP_DB_PASSWORD="<your password>" \
export APP_DB_NAME=COFFEE \
install the pm2 to run the app in the background
npm i -g pm2

sudo pm2 startup

pm2 start server.js

#pm2 unstartup systemd
#pm2 list
#pm2 kill
#ps aux | grep PM2
#kill -9 [pid]
this command is used in Linux to redirect incoming network traffic from port 80 to port 3000 using iptables.
sudo iptables -t nat -A PREROUTING -p tcp --dport 80 -j REDIRECT --to-ports 3000

#sudo iptables -L
#sudo iptables -t nat -L
#sudo iptables -t nat -L --line-numbers
#sudo iptables -t nat -D PREROUTING 1
use these commands to check and upload the database backup file to your RDS instance
# replace the endpoint with yours:
# this is to check and connect to an AWS RDS DB using the command line:
mysql -h database-2.xxxxxxxxxxxx.us-east-1.rds.amazonaws.com -P 3306 -u admin -p

# this is to import manually a backup file with a MySQL DB from the project folder.
mysql -h database-2.xxxxxxxxxxxx.us-east-1.rds.amazonaws.com -u admin -p  COFFEE < my_sql.sql
Verify your app's connection using your web browser. Enter the output received after executing "terraform apply", either the DNS address or the public IP of the created EC2 instance, in the browser's address bar.
Check the connection to your RDS instance using the mysql command from previous steps and content of your dataabase
create DATABASE coffee;
use coffee;
create table suppliers(
  id INT NOT NULL AUTO_INCREMENT,
  name VARCHAR(255) NOT NULL,
  address VARCHAR(255) NOT NULL,
  city VARCHAR(255) NOT NULL,
  state VARCHAR(255) NOT NULL,
  email VARCHAR(255) NOT NULL,
  phone VARCHAR(100) NOT NULL,
  PRIMARY KEY ( id )
);npm install
# define your db vars at start
export APP_DB_HOST=localhost \
export APP_DB_USER=root \
export APP_DB_PASSWORD="" \
export APP_DB_NAME=coffee \
npm startIf you do not set the env vars when starting the app the values
from app/config/config.js will be used


