The Starburst Sandbox is a community-driven initiative that aims to offer a rapid demonstration and development environment by leveraging docker-compose. Its primary objective is to showcase Data Products and BIAC functionalities to users. It is worth noting that this sandbox is not an officially supported project by Starburst Data and is not suitable for production purposes.
This Sandbox is based on the https://github.com/starburstdata/dbt-trino project and includes modification to enable Starburst Enterprise Features.
- quick trials and functional testing
- development and demo purposes
- tutorials
- Sanbox Environment
- BIAC Demos
- Data Product Demos
- API testing
- Performance testing
- Production workloads
- Support
- Authentication and encryption
- Large data workloads
- git or github cli
- running docker daemon and docker compose
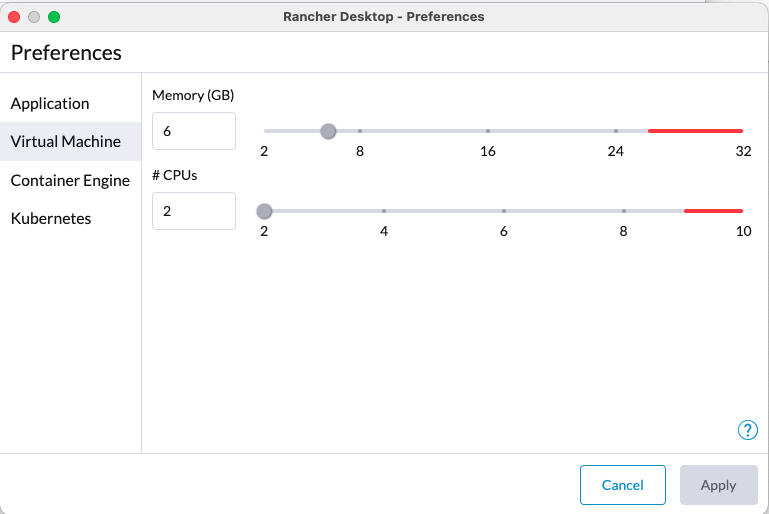
- Resources: 6GB RAM, 2 Cores, x GB Free Space
- Available Ports: localhost:8080 and :9001
- Access to the Starburst Harbor Registry
- A valid Starburst Enterprise License request here https://www.starburst.io/contact
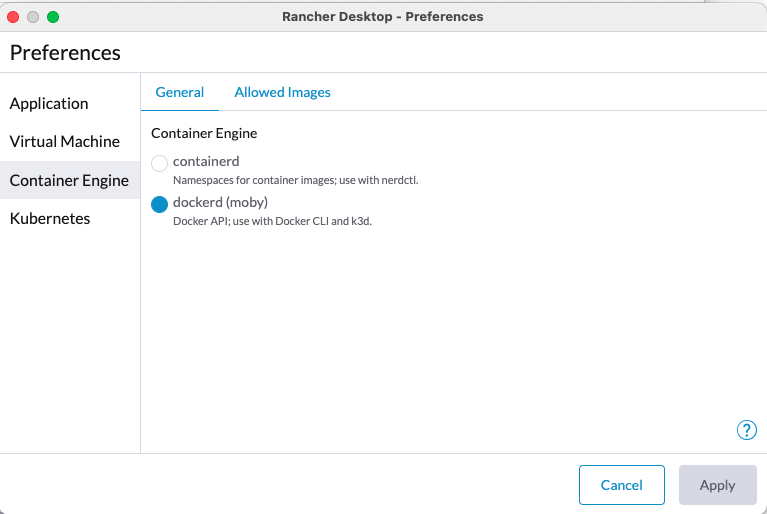
- Tested on Docker version 23.0.1 and Rancher Desktop Version 1.8.1
- Tested on Docker Desktop
- Version 4.17.8
- Version 4.18.5
- Tested with Starburst Enterprise versions
- SEP STS 4.10
Open a Terminal and enter the following comand:
docker login harbor.starburstdata.net/starburstdata --username <your-starburst-harbor-user --password <your-starburst-harbor-password>
docker search starburst-enterprise | grep starburstdata/starburst-enterprise
You should receive the following output
starburstdata/starburst-enterprise Docker image of Starburst Enterprise platform 4
git clone https://github.com/chrisstarburst/starburst-sandbox.git
or using github cli
gh repo clone chrisstarburst/starburst-sandbox
4. Copy your requested Starburst license file (https://www.starburst.io/contact) to the starburst-sandbox folder in the ./docker/starburst/etc/ directory
cp starburstdata.license ./docker/starburst/etc/starburstdata.license
./start-starburst.sh
Starburst UI -> http://localhost:8080
user: admin
password:
Minio UI -> http://localhost:9001
user: minio
password minio123
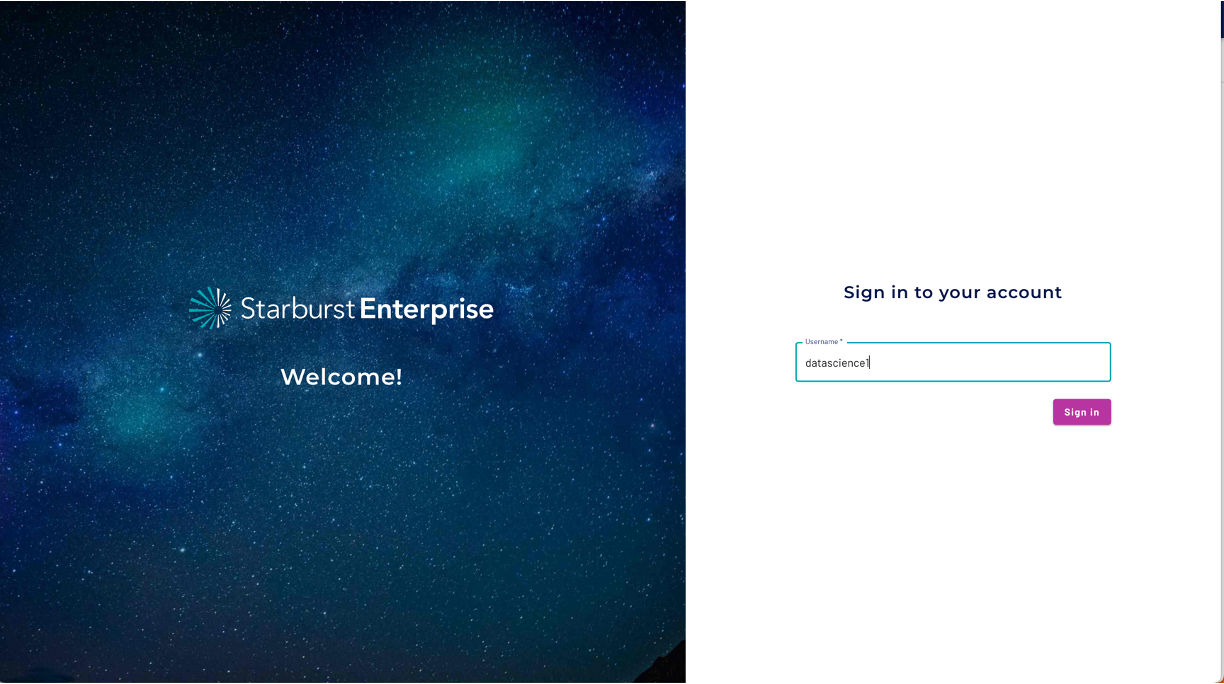
Starburst Login Page
You have already started the Sandbox, however you can find below the instructions on how you can start|stop|remove the instance in case needed. You can skip this section and continue with the tutorial.
You can start the Starburst Sandbox using the following command:
./start-starburst.sh
You can stop the Starburst Sandbox using the following
./stop-starburst.sh
You can remove the instance including the data volumes
./remove-starburst.sh
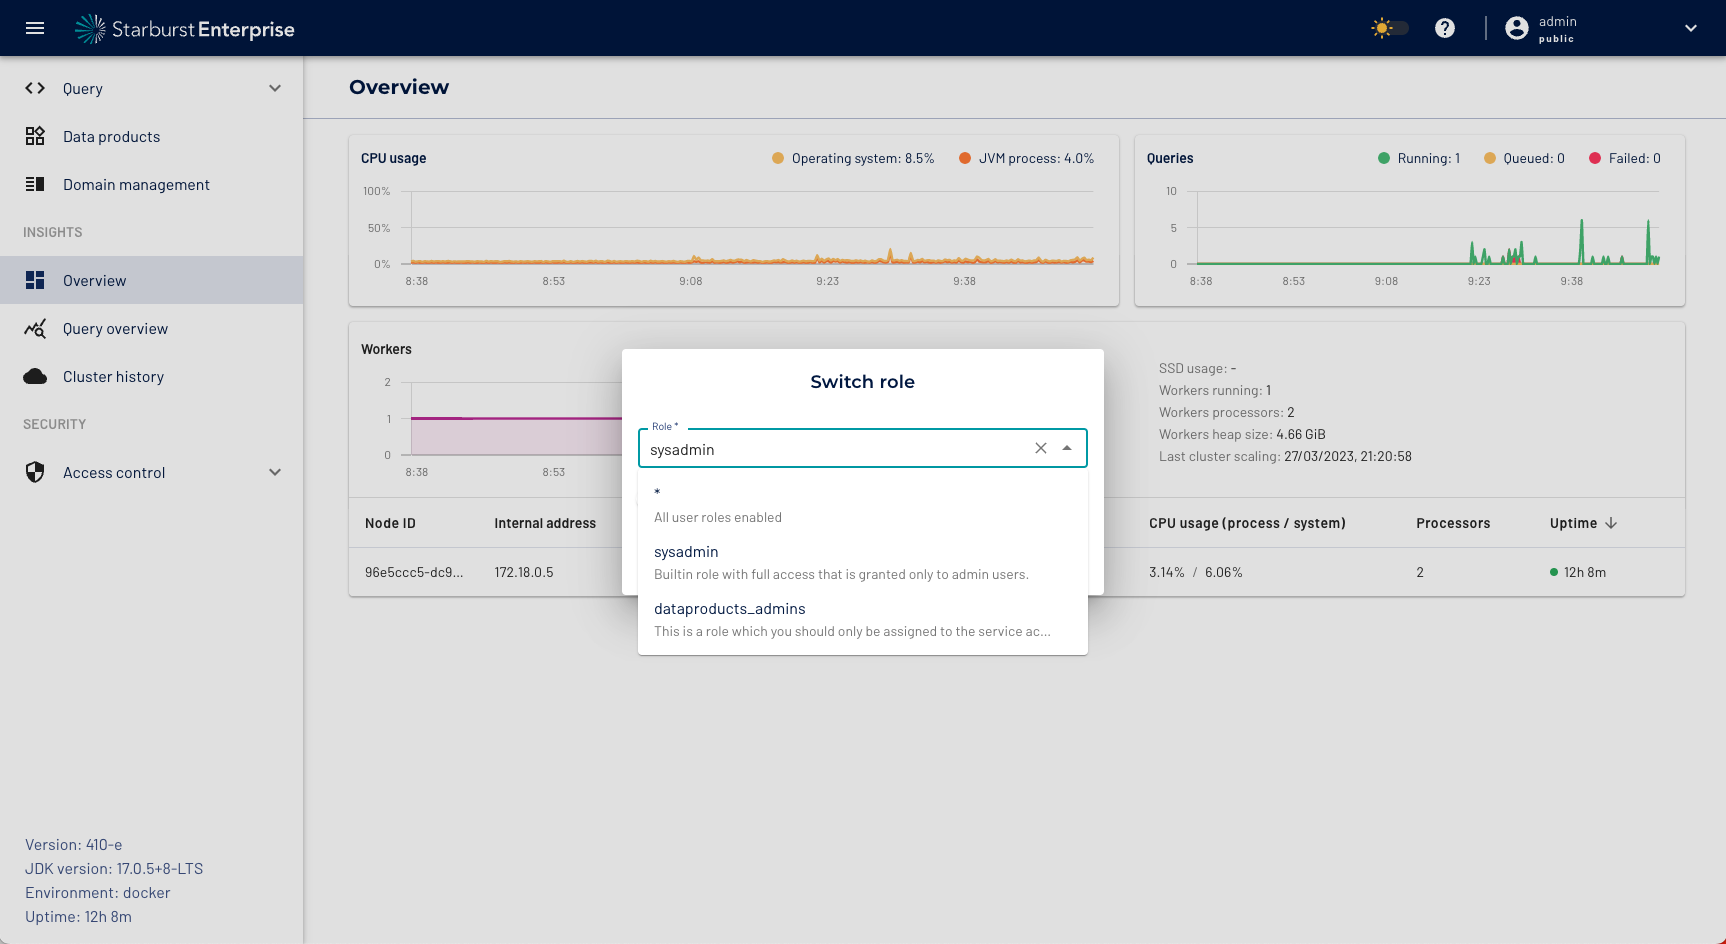
Select the sysadmin role
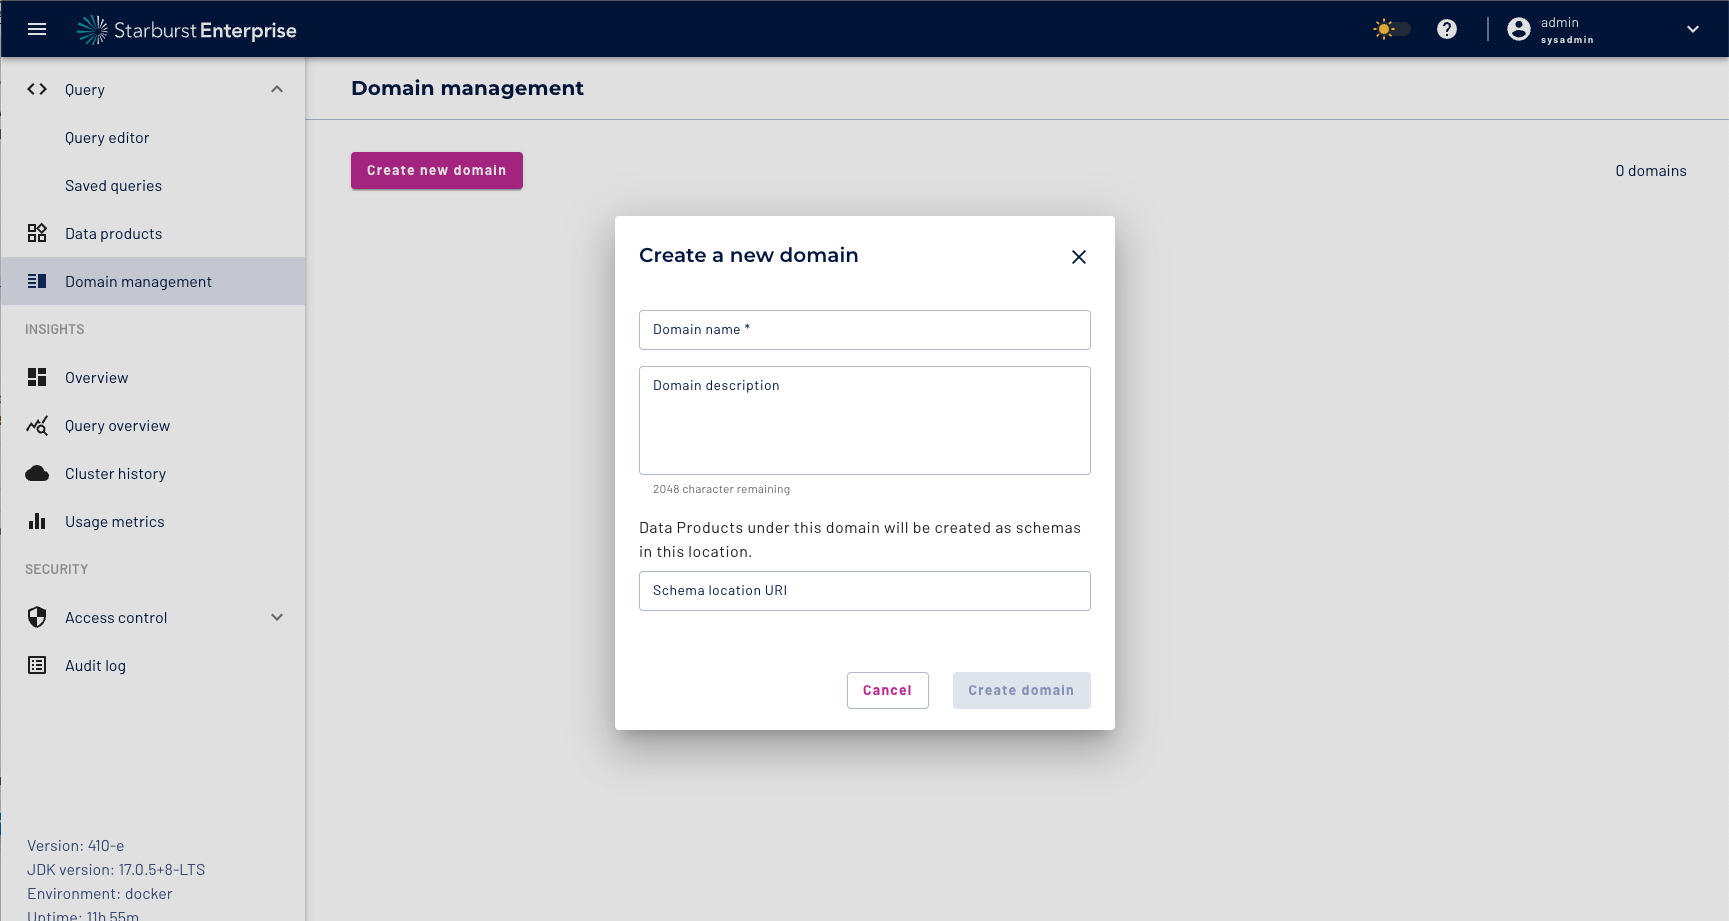
Create a sales domain
| Domain name | Sales |
| Domain Description | Sales Domain |
| Schema location URI | s3://datalake/sales |
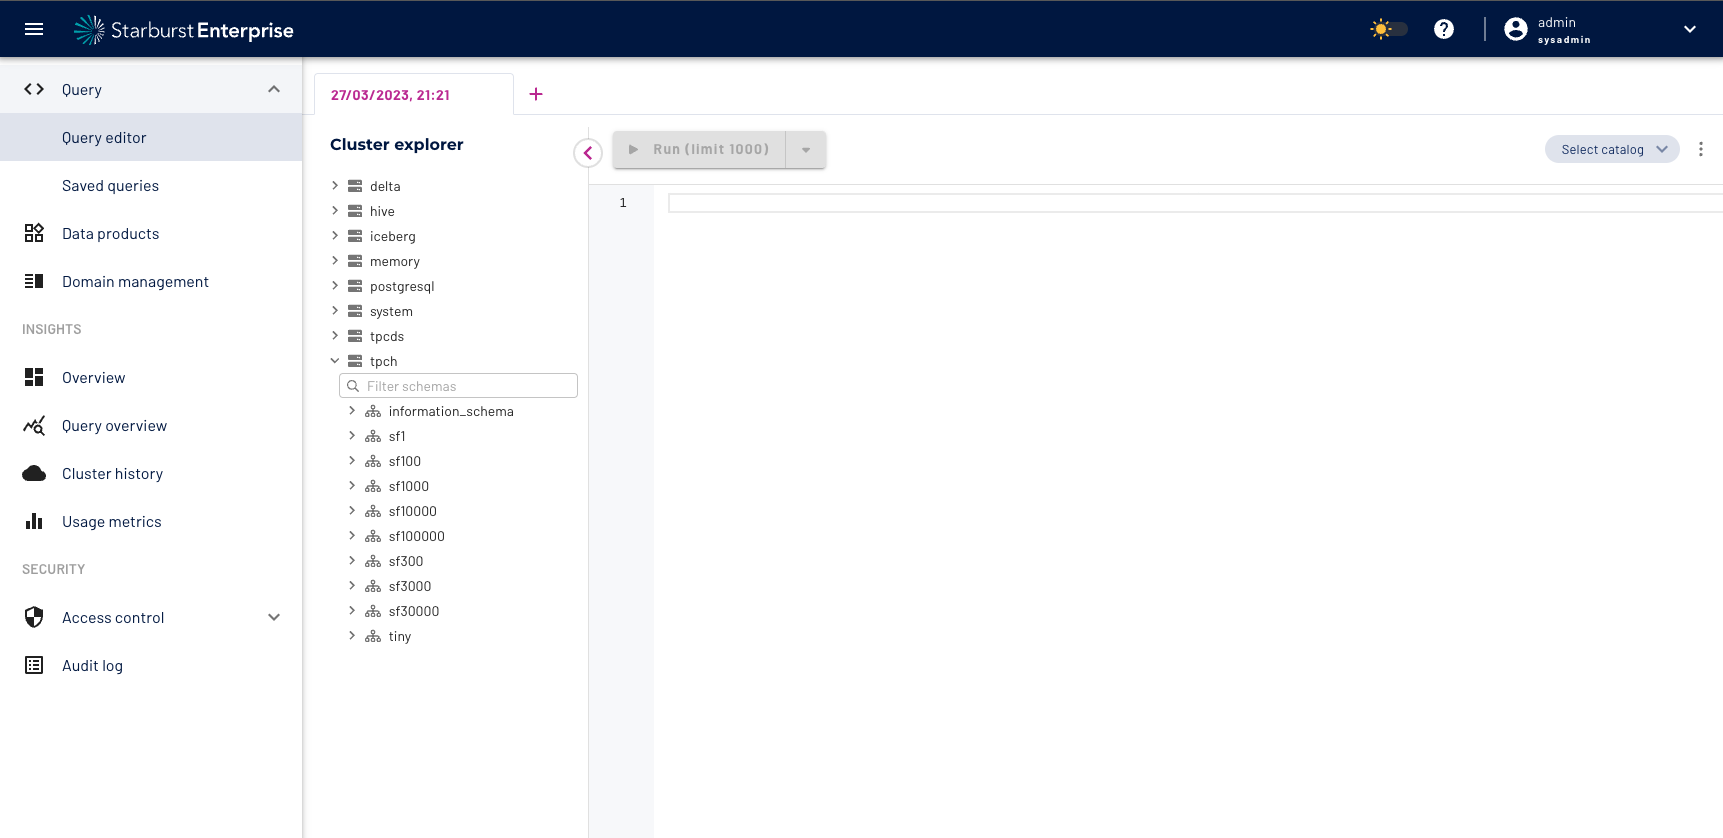
Get famliar with the Query Editor and browse the connected data sources
- Use Starburst to write some data to the connected postgres and minio s3 data source. Execute the following CTAS statements using the Starburst Insight Query Editor
Tip: You can use your mouse and mark all the create table statements and then click the Run button. This will execute multiple CTAS statements in a sequential order.
-- Use Starburst Trino to write data to RDBMS like postgres and to a Datalake S3,ADLS,GCP,HDFS
create table postgresql.public.customer as select * from tpch.tiny.customer;
create table hive.default.orders as select *from tpch.tiny.orders;
create table hive.default.lineitem as select * from tpch.tiny.lineitem;
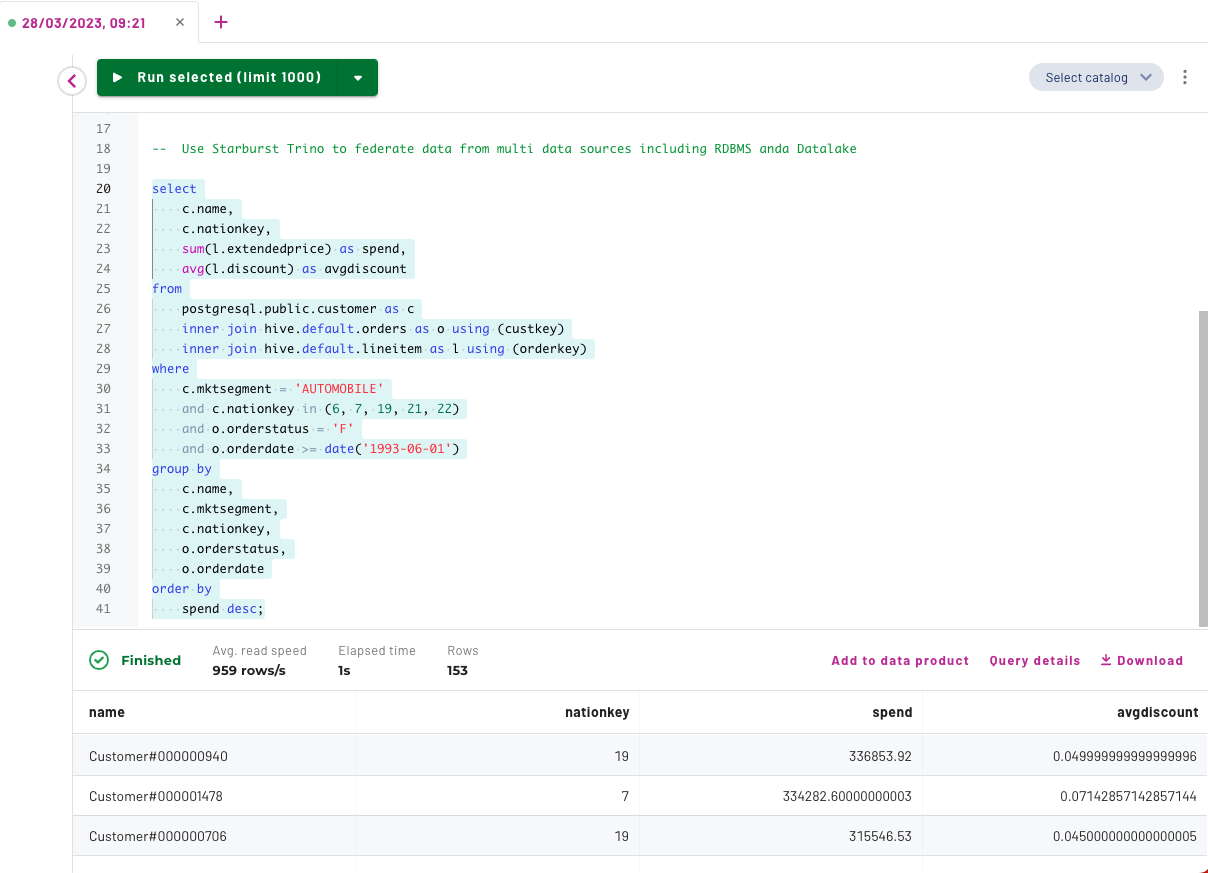
9. Use Starburst to run a federated query accross different data sources including a datalake and rdbms.
Execute the following query using the Starburst Insight Query Editor
select c.name, c.nationkey, sum(l.extendedprice) as spend, avg(l.discount) as avgdiscount from postgresql.public.customer as c inner join hive.default.orders as o using (custkey) inner join hive.default.lineitem as l using (orderkey) where c.mktsegment = 'AUTOMOBILE' and c.nationkey in (6, 7, 19, 21, 22) and o.orderstatus = 'F' and o.orderdate >= date('1993-06-01') group by c.name, c.mktsegment, c.nationkey, o.orderstatus, o.orderdate order by spend desc;
The goal of data products is to make data accessible, consumable, insightful, and actionable for the increasing number of stakeholders who rely on data to inform their decision-making.
Data has immense value, but it’s hard to extract information that drives business objectives from raw data. Data products take raw data and translate it into something relevant and useful within its domain — a product people can utilize to achieve business goals.
In our next step we will create a data product that’s fit for consumption by downstream users.
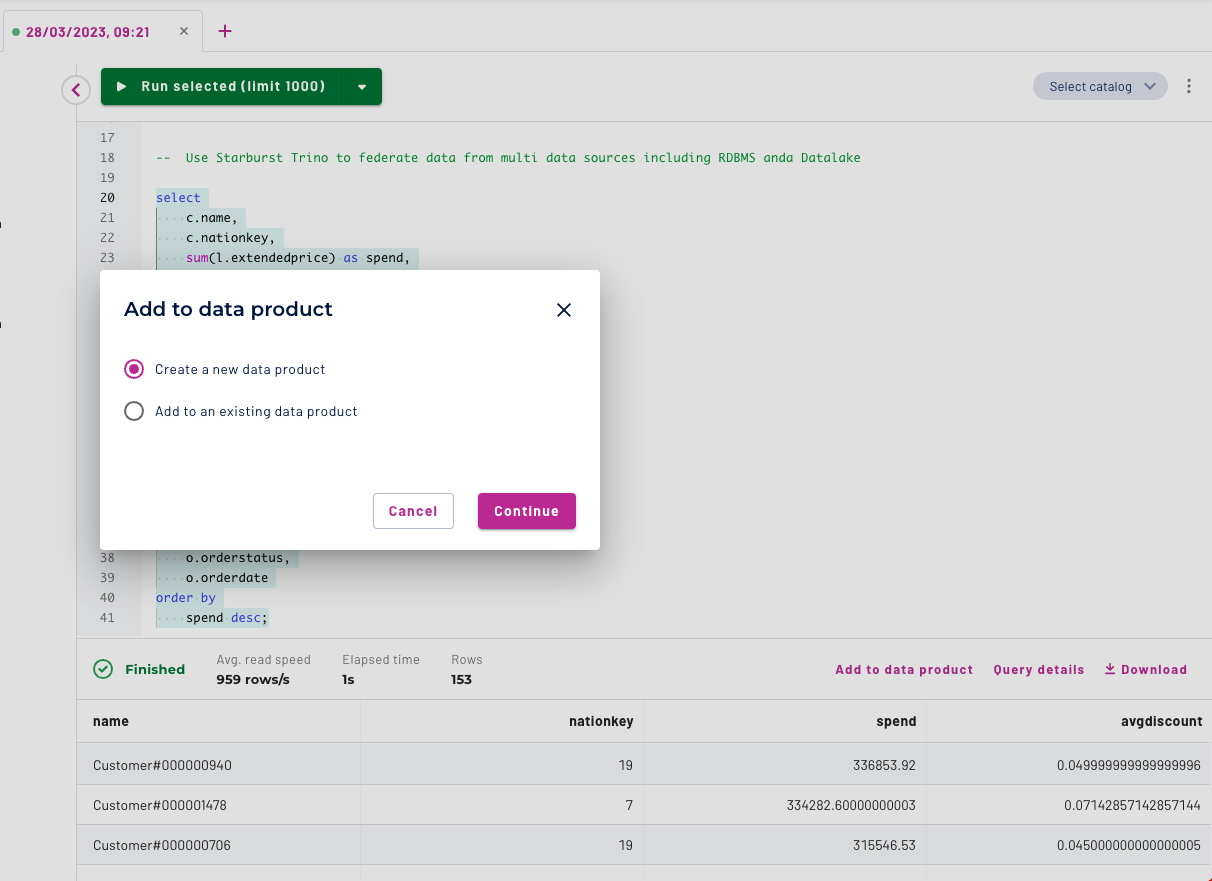
Click on the "Add to Data Product" link and then select the Dialog "Create New data product"
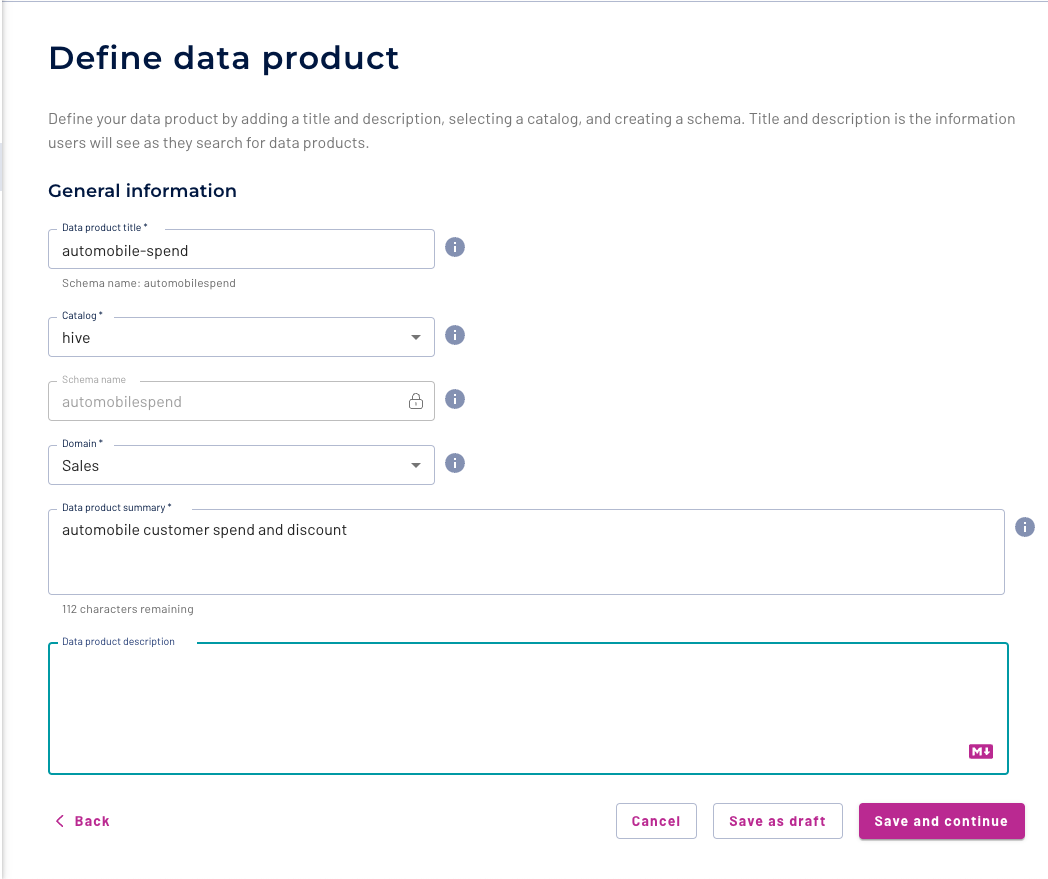
Provide a title and a description for your data product, select the Hive Catalog, the Sales Domain and click 'Save and Continue'.
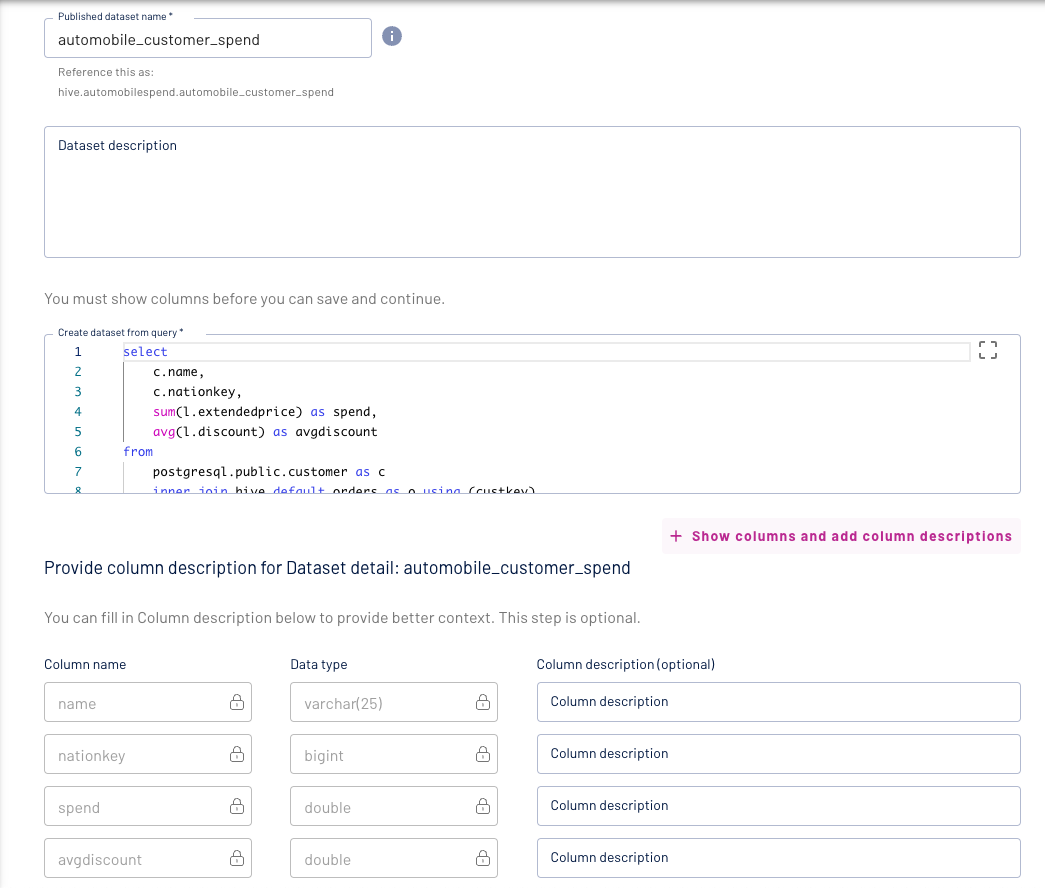
Now we will add our federated query as a dataset.
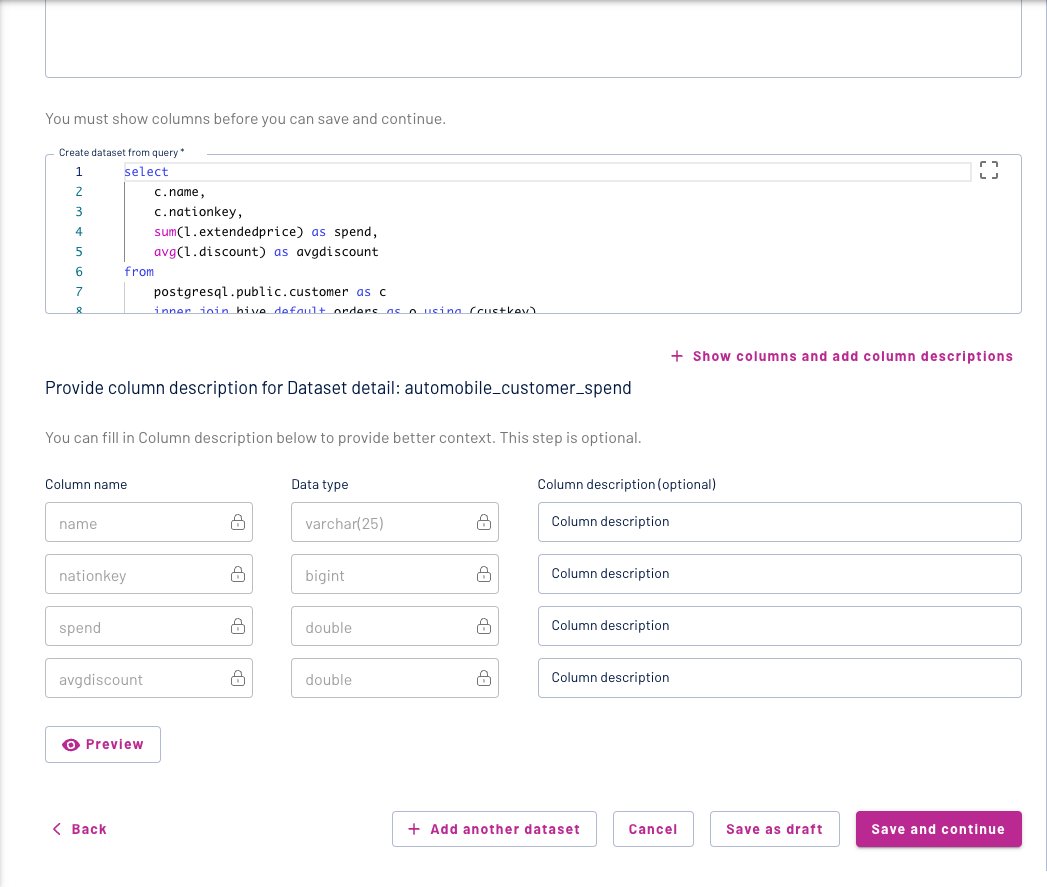
Update the name of the dataset and add a description to your query. You can expand the show columns and add descriptions menu:
to add additional information to the columns on your data set and make it more meaningful for your data consumers.
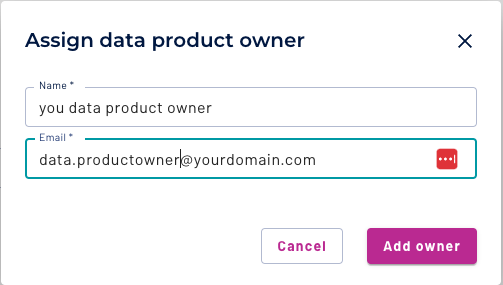
The people who build data products are also responsible for security, provenance, and ownership so that the final product better reflects the technical requirements of the data within the domain. Adding a data product owner is mandatory!
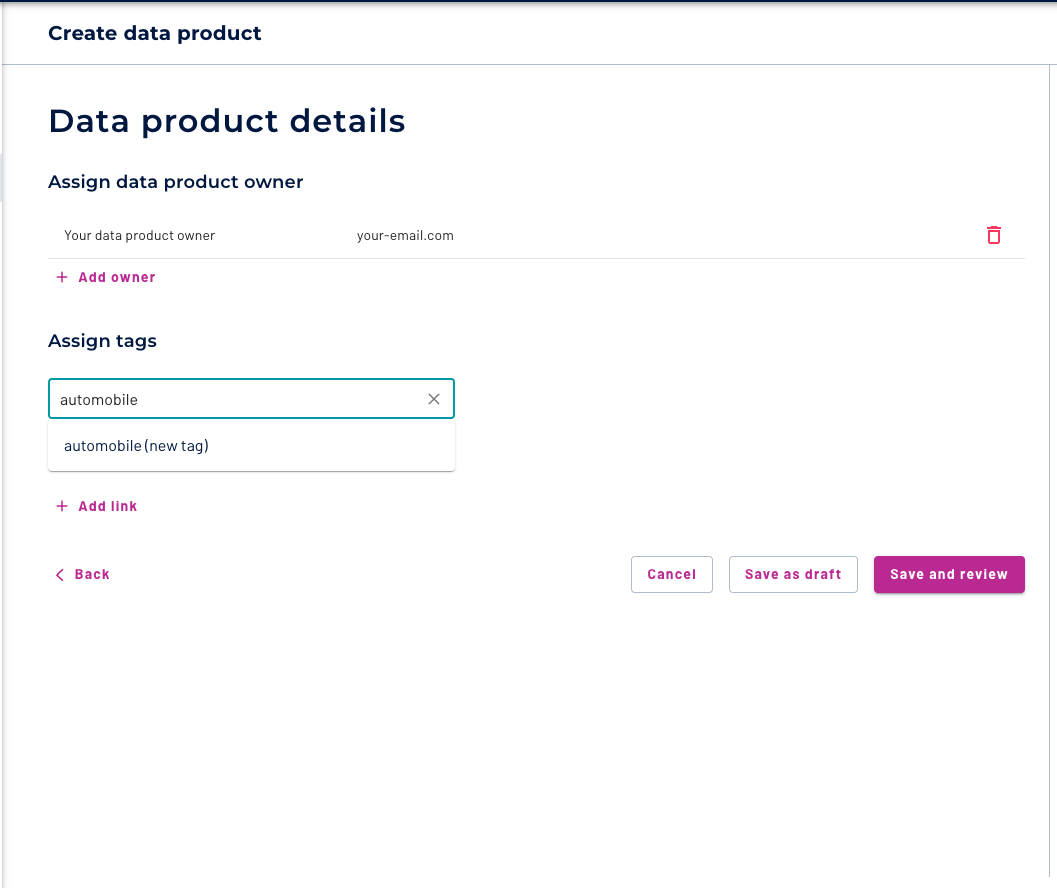
Add some tags and Click Save and review.
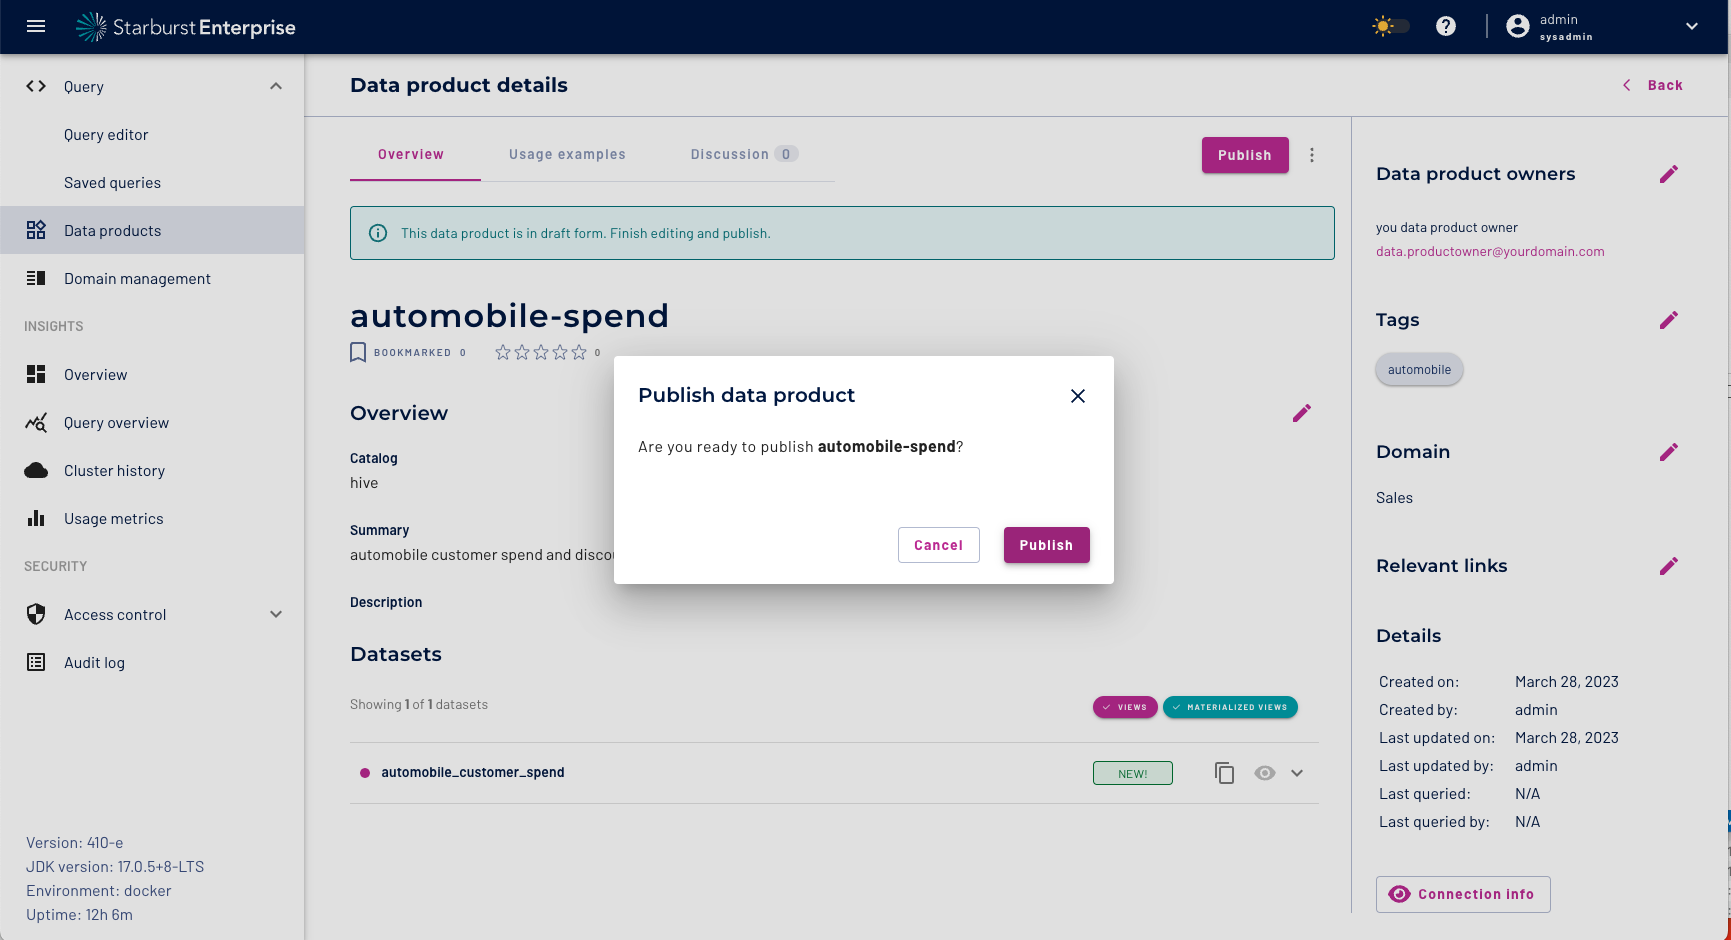
As a last step we have to publish our data product before we can query and consume it.
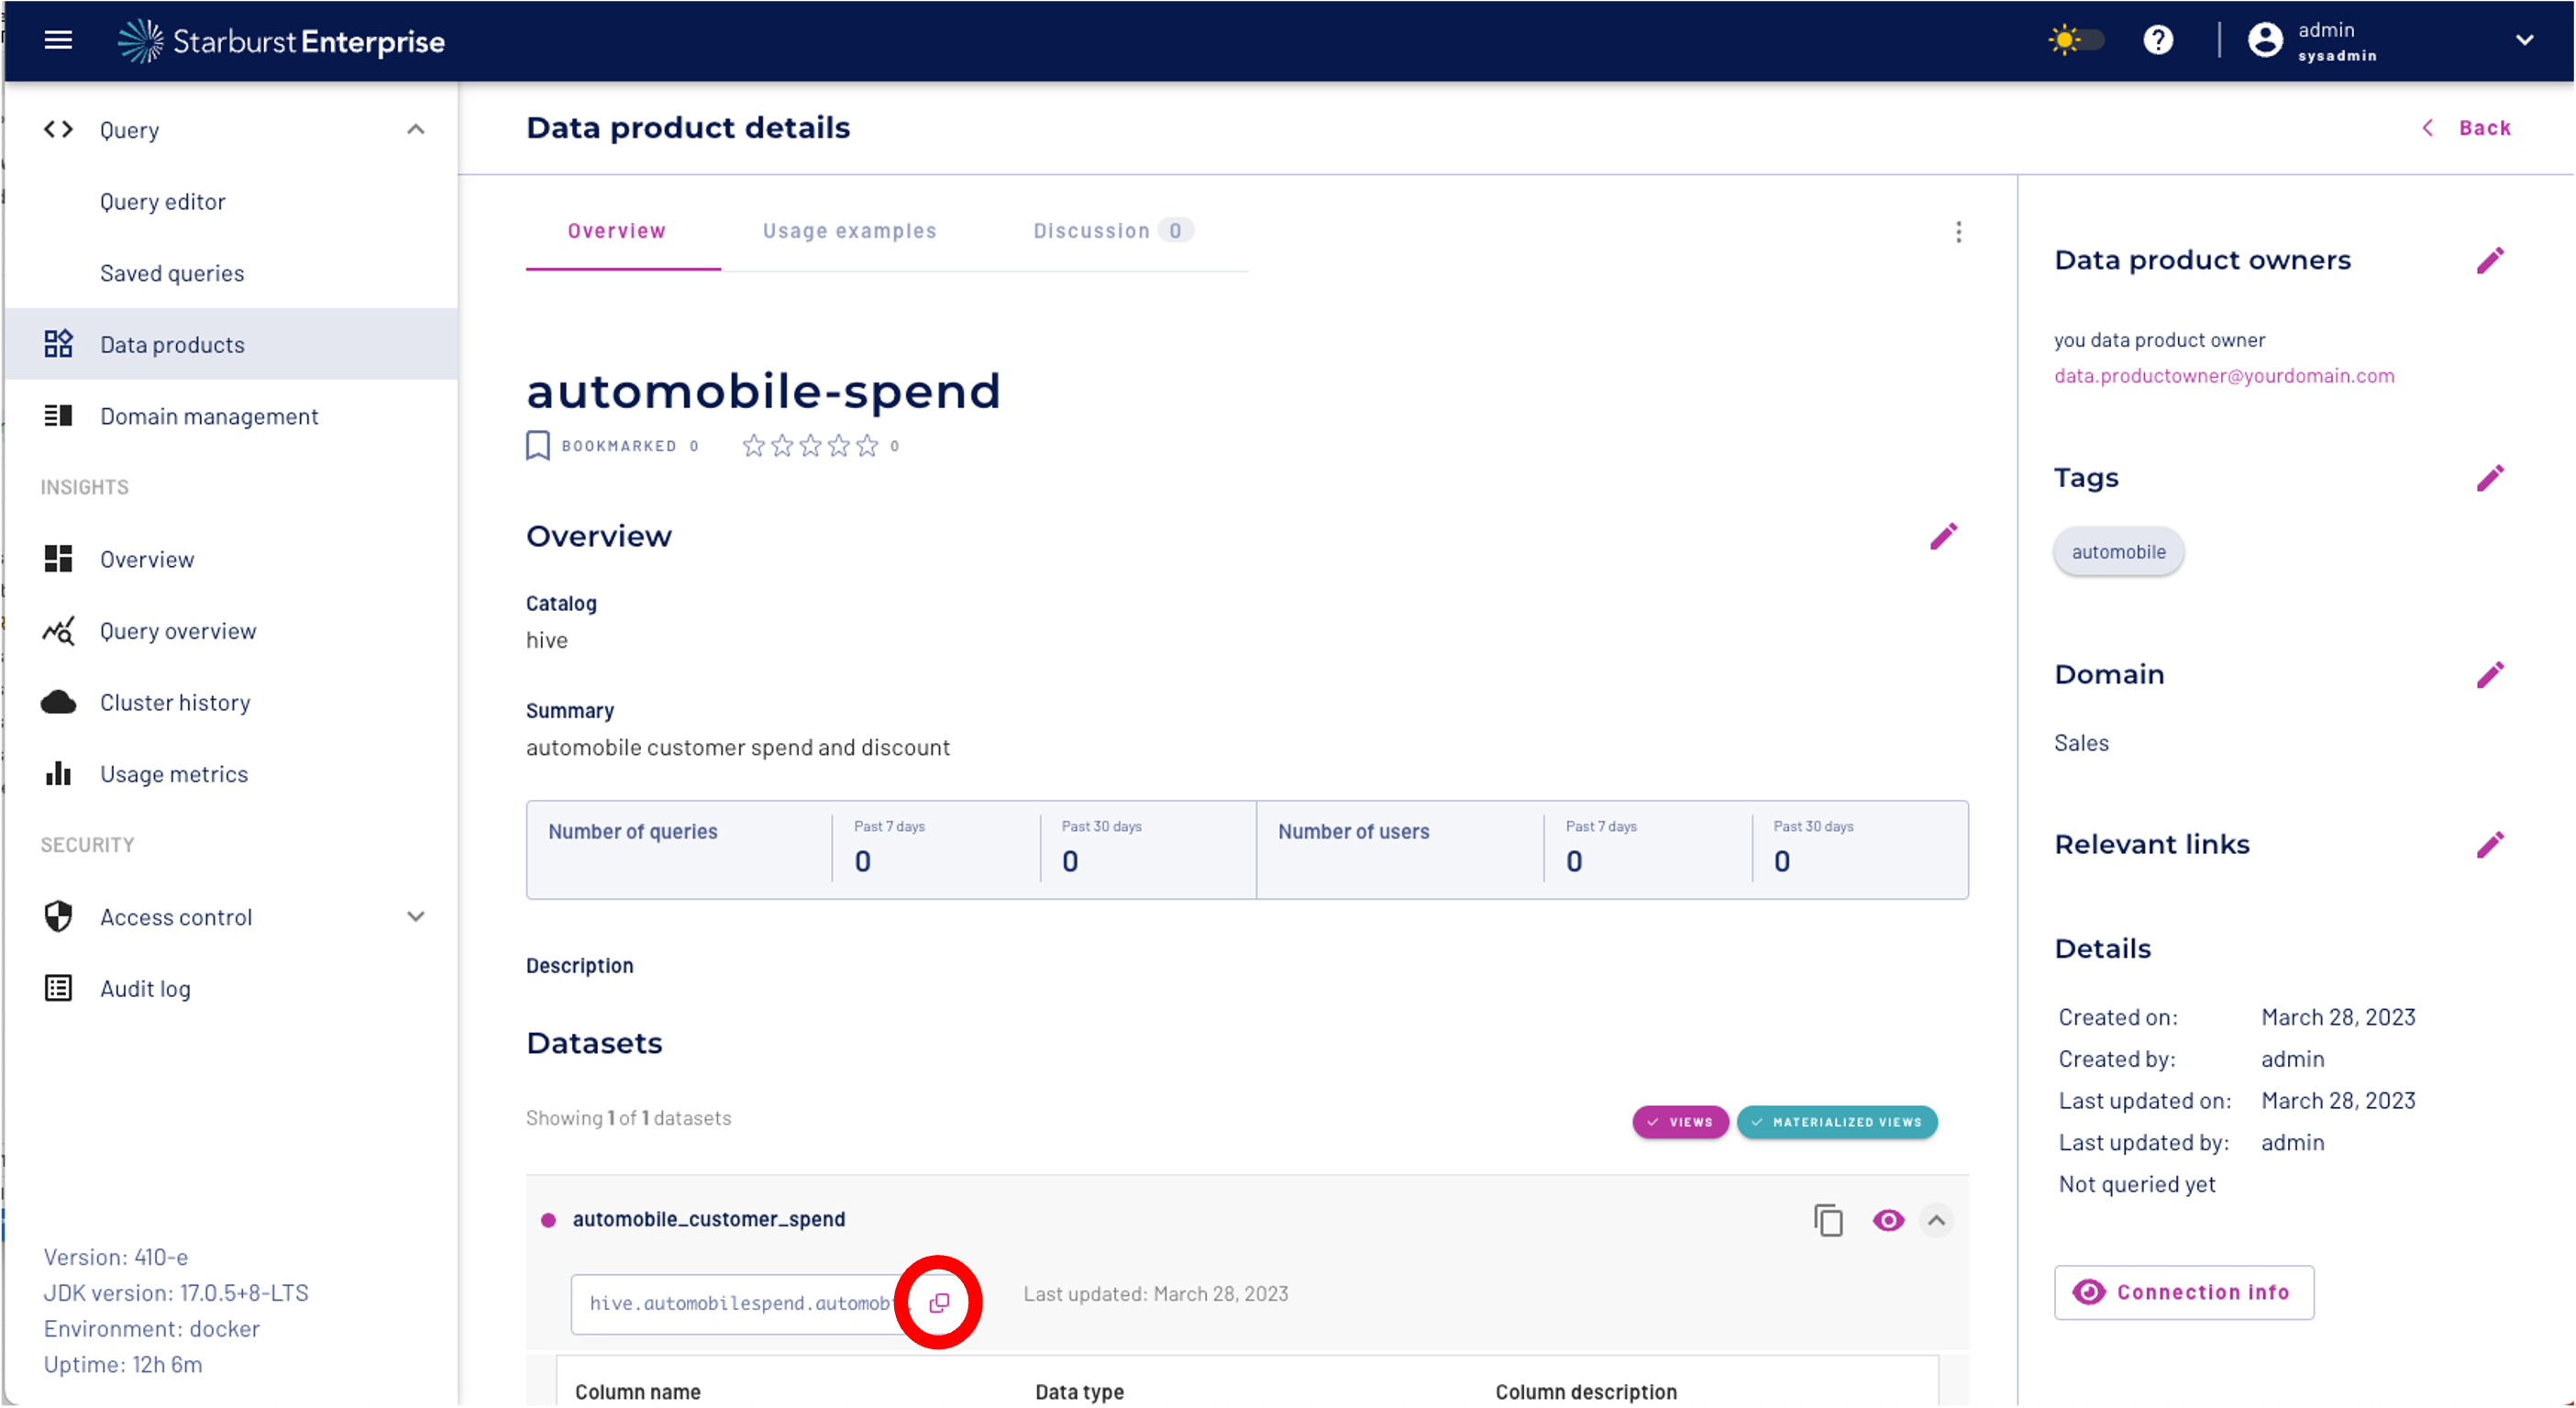
Now we can copy the location "catalog.schema.table" of our dataset using the "Copy icon" under the automobile_customer_spend data set: In our example the location is:
hive.automobilespend.automobile_customer_spend
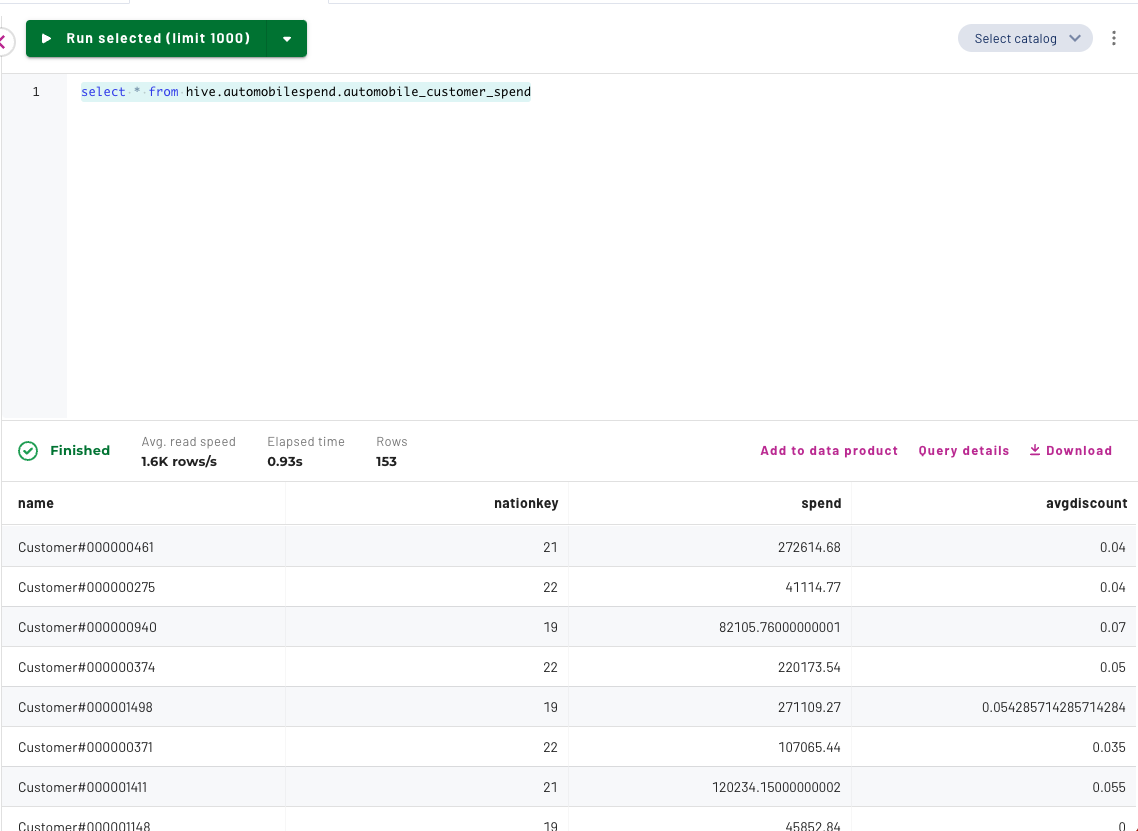
You can go to the Query Editor and query the data product dataset using the following query:
select * from hive.automobilespend.automobile_customer_spend
Starburst Enterprise platform (SEP) provides a built-in role-based access control (RBAC) system that is integrated with the Starburst Enterprise web UI. The RBAC system makes it easy to configure any user’s correct access rights to catalogs, individual schemas, and tables. If your security needs require more granular control, you can restrict or allow access to specific columns within a table, or to functions, stored procedures, session properties, or data products. The built-in access control audit log displays the log of access control changes made using the SEP built-in access control system.
In this section we will use the built-in access control to restrict access to our data product by applying a row filter that let our data science role only access data with nationkey 7. We will also apply a column mask for the customer name to protect PII data.
The masking and role level filters are applied on the fly without any requirements for data duplication on the source systems. Starburst provides a governance layer on top of different connected data sources. The access to data as well as any changes are captured in an audit log.
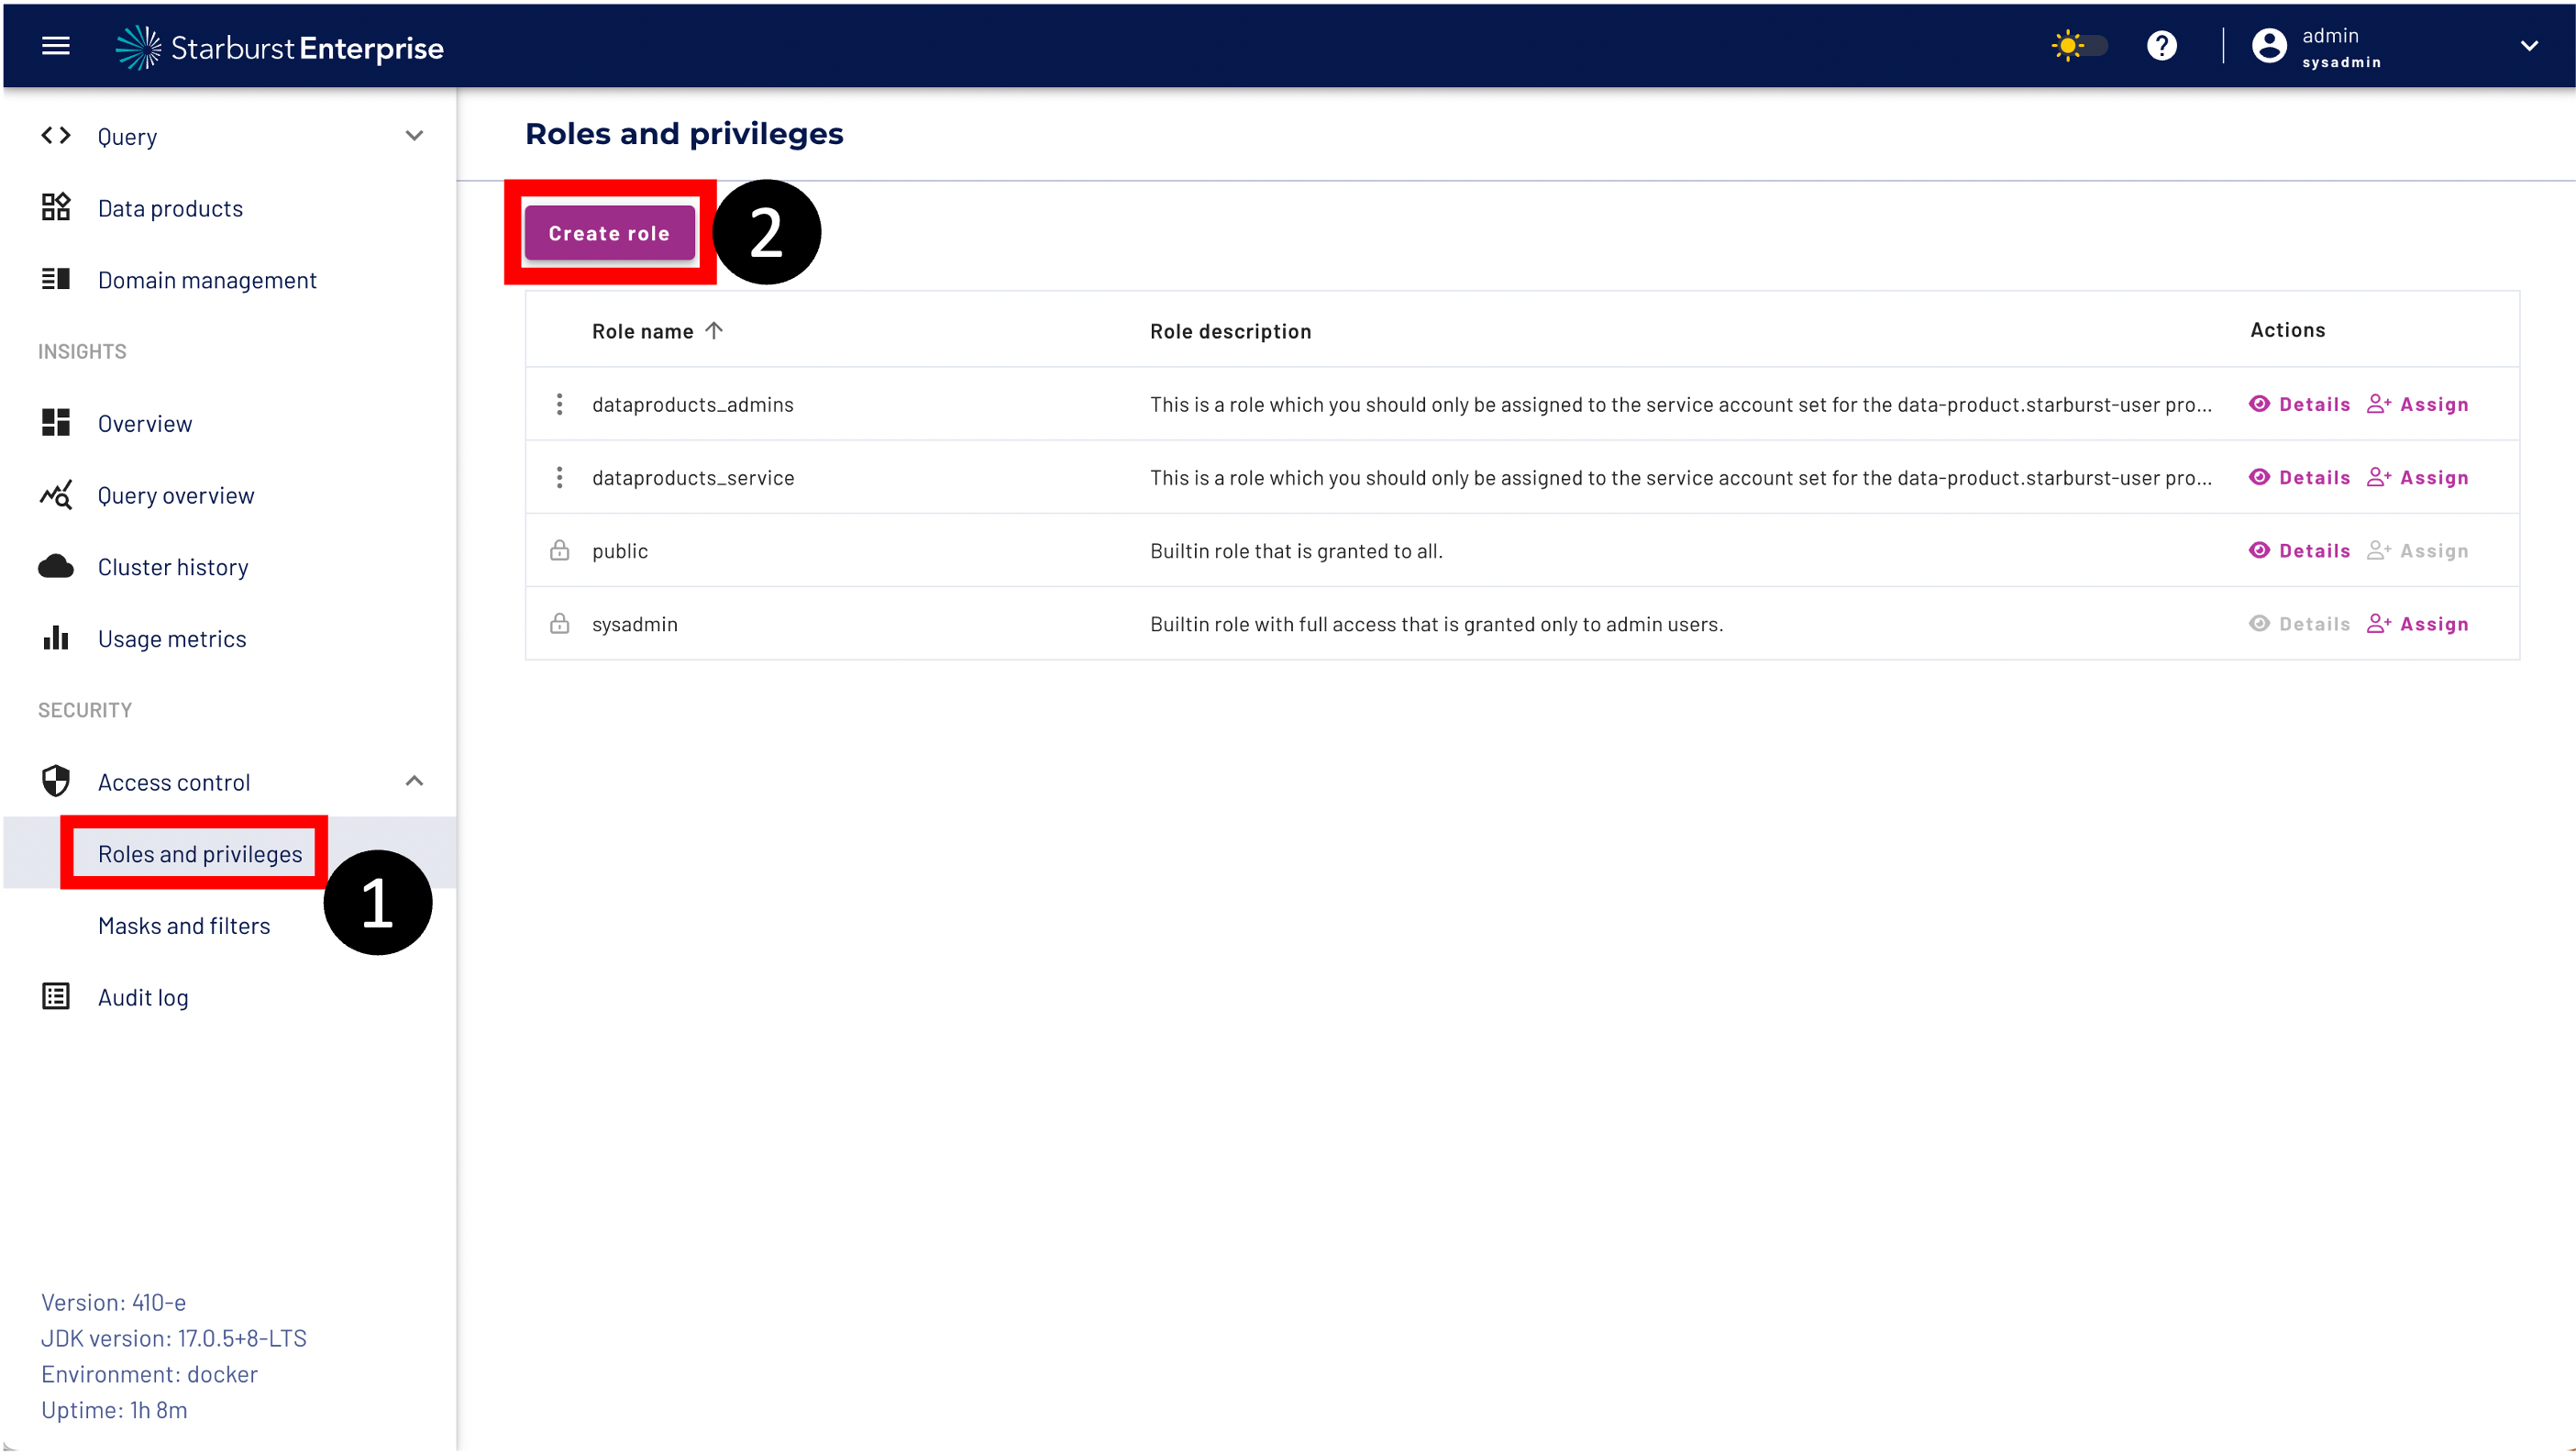
Step 1: Navigate to the Roles and privileges menu bar.
Step 2: Click the Create role Button
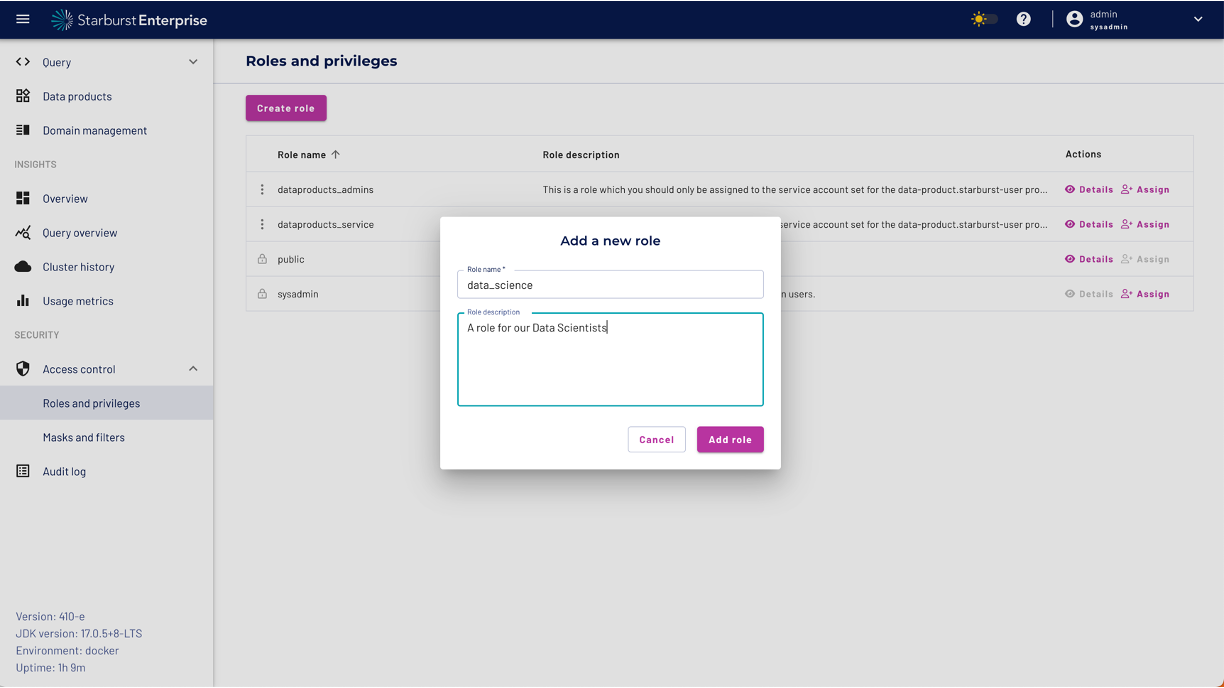
Please enter Role name. In our example the name of the role is data_science.
Enter a description for your role and click the "Add role" button.
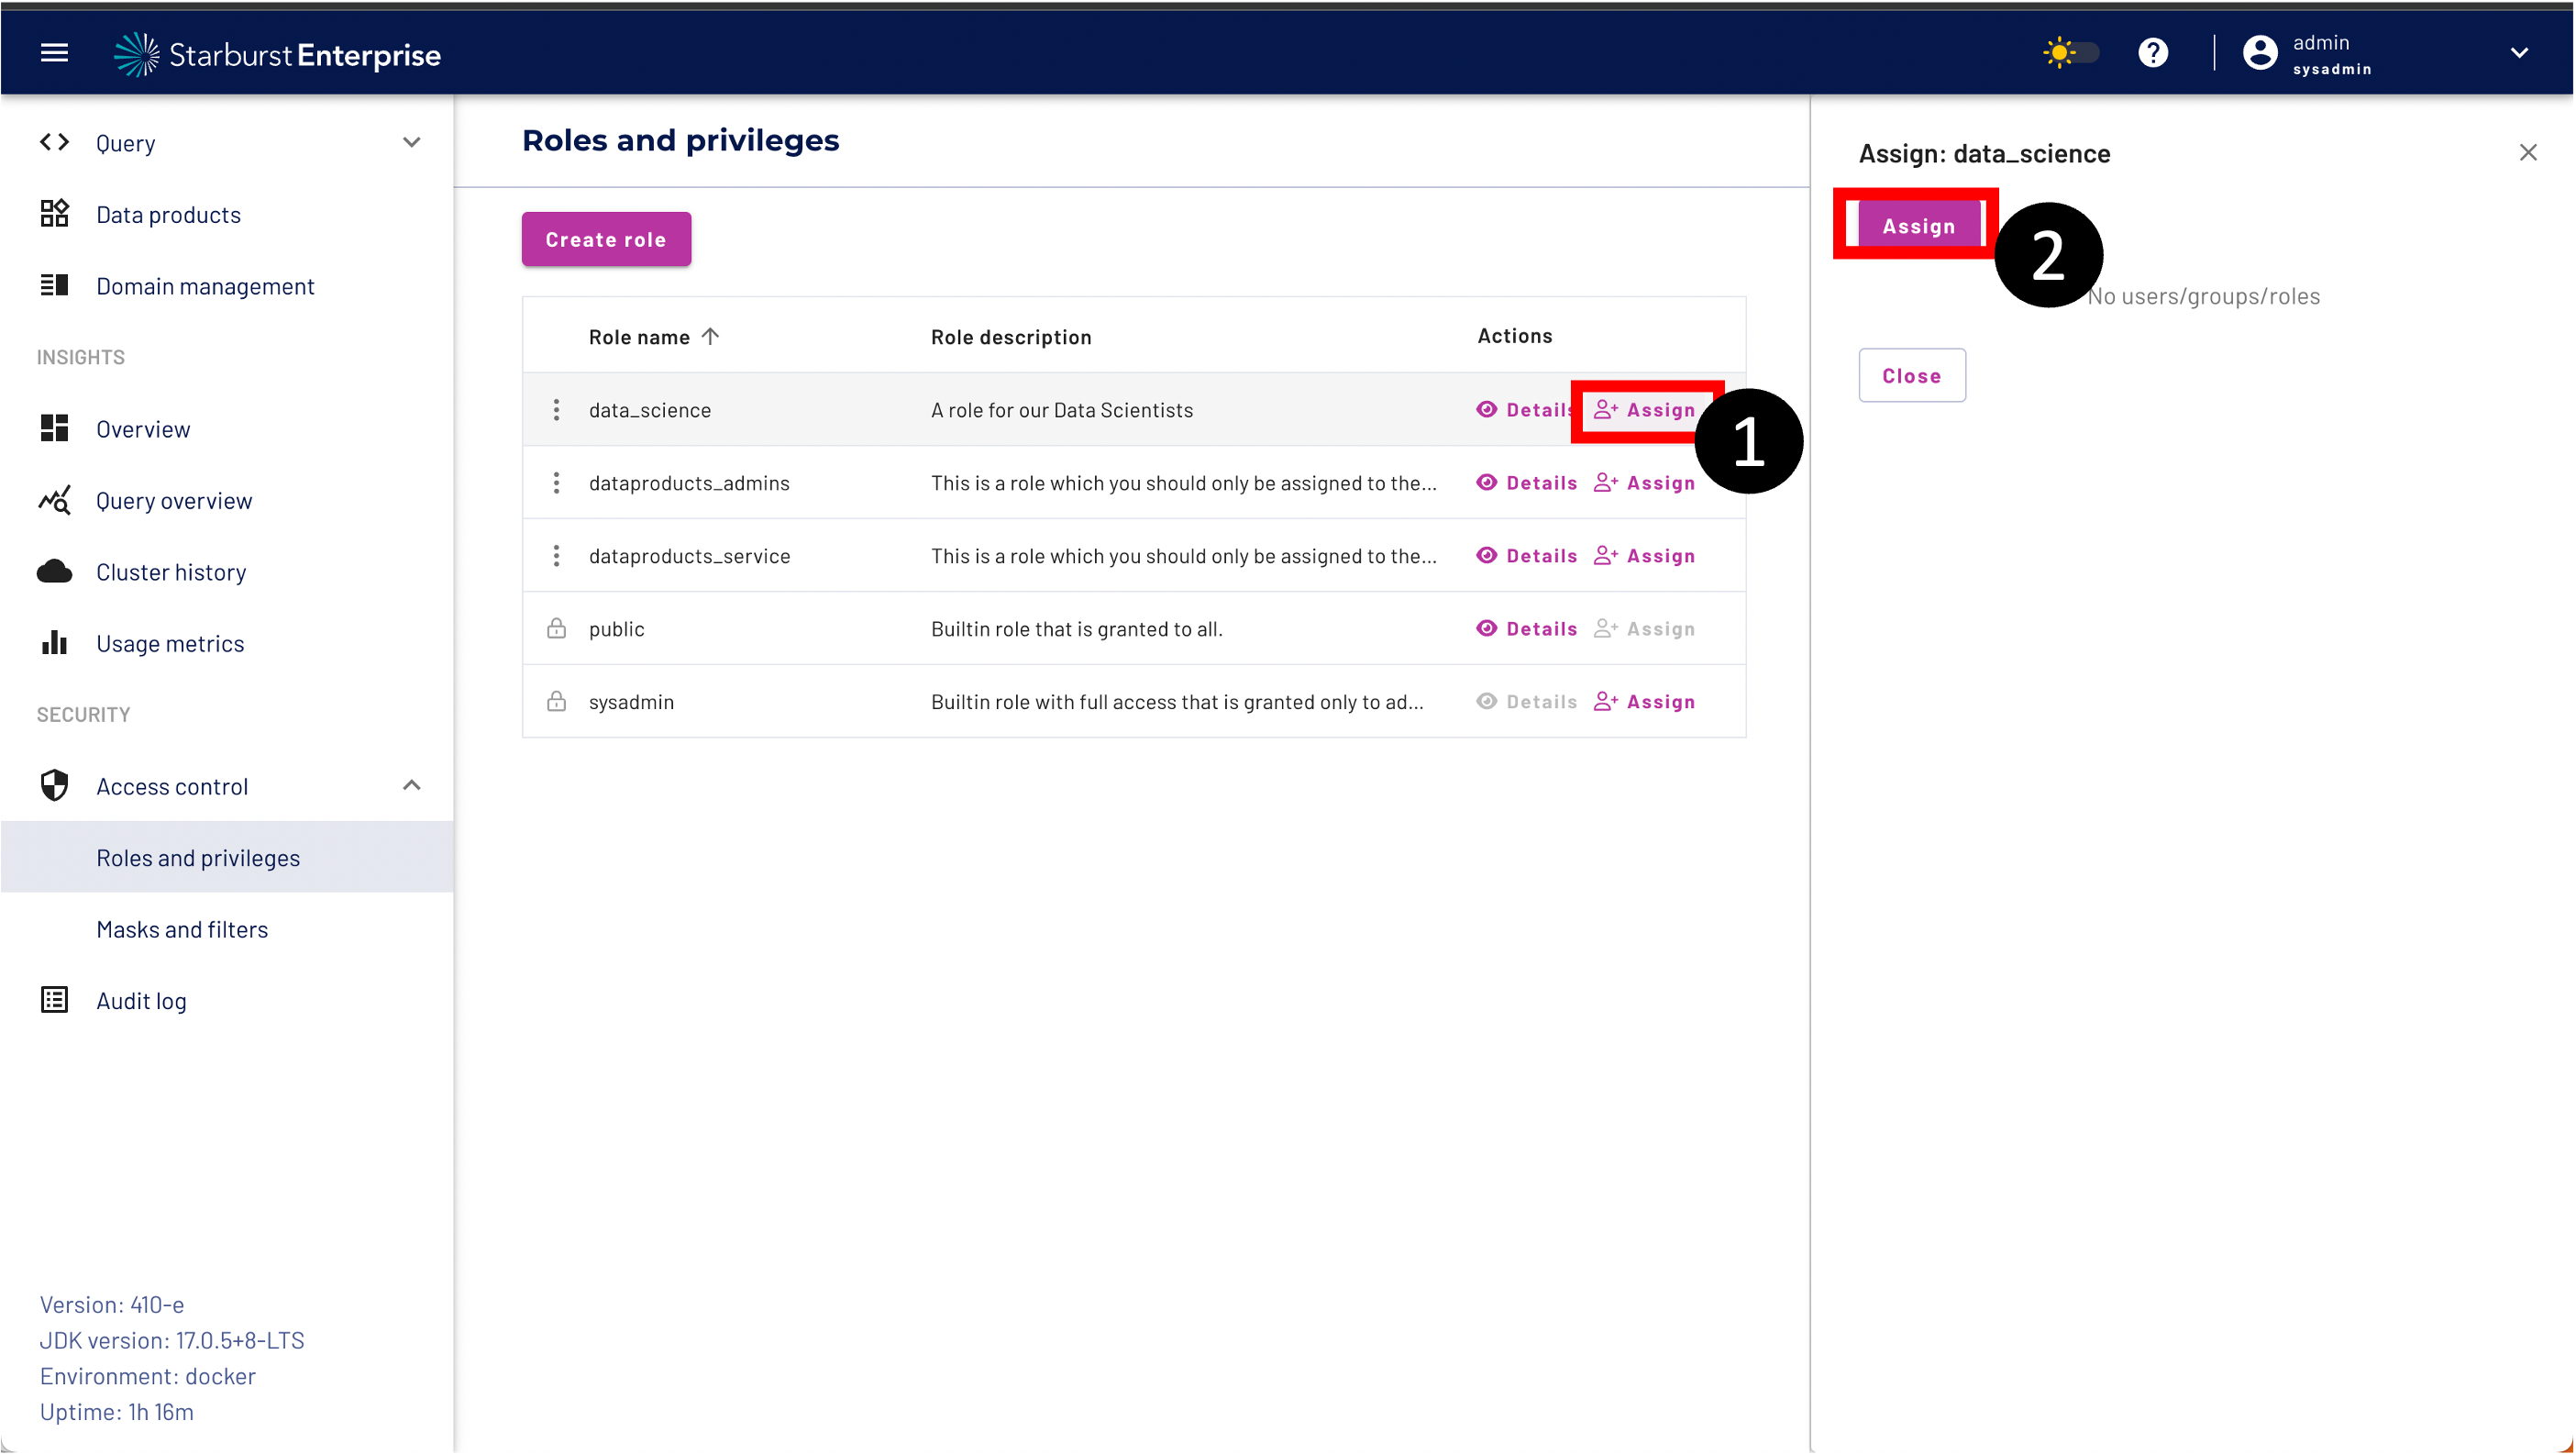
You can assign users, groups and other roles to a role.
Step 1: Click the Assign Button on the Actions tab.
Step 2: Click the Assign Button
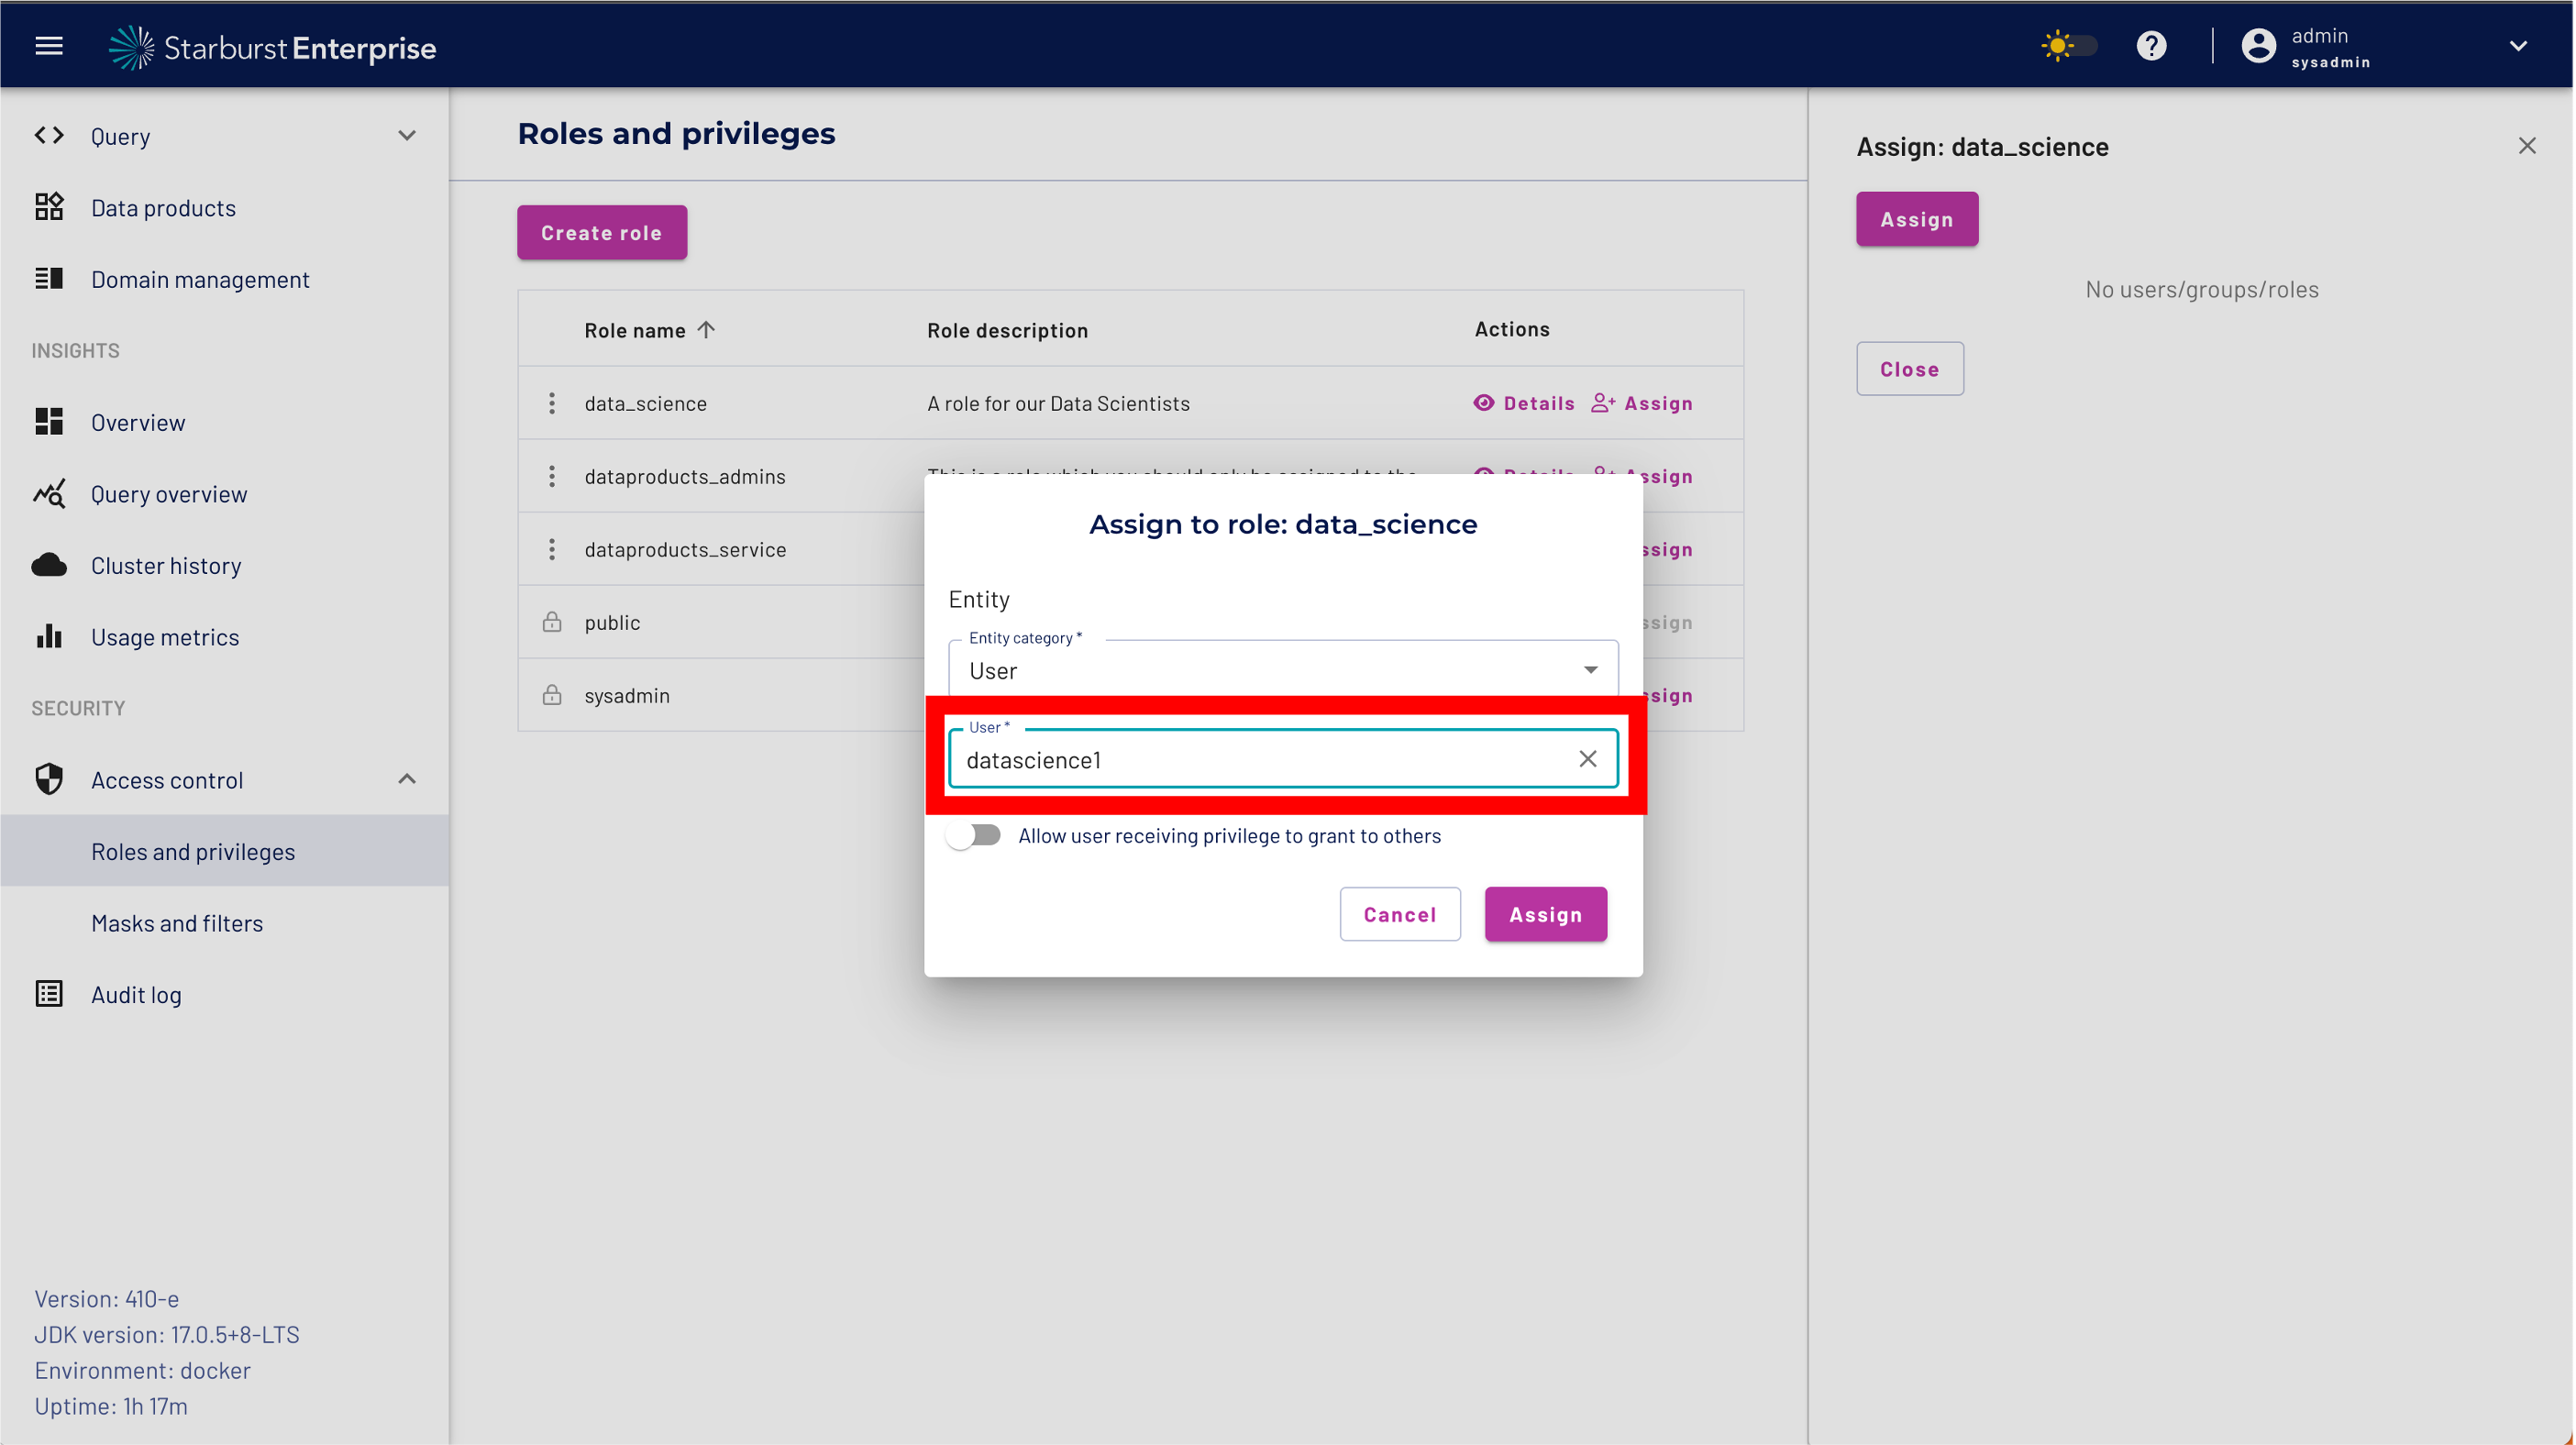
Please select User from the Entity Category.
Enter datascience1 as the user name.
It is very important that you enter the name correctly. We will use the name later to login to the Starburst UI and demonstrate the access control defined for our data_science role.
Click the "Assign Button" to add the user.
For our data scientists we want to allow only access to data with the nationkey 7 .
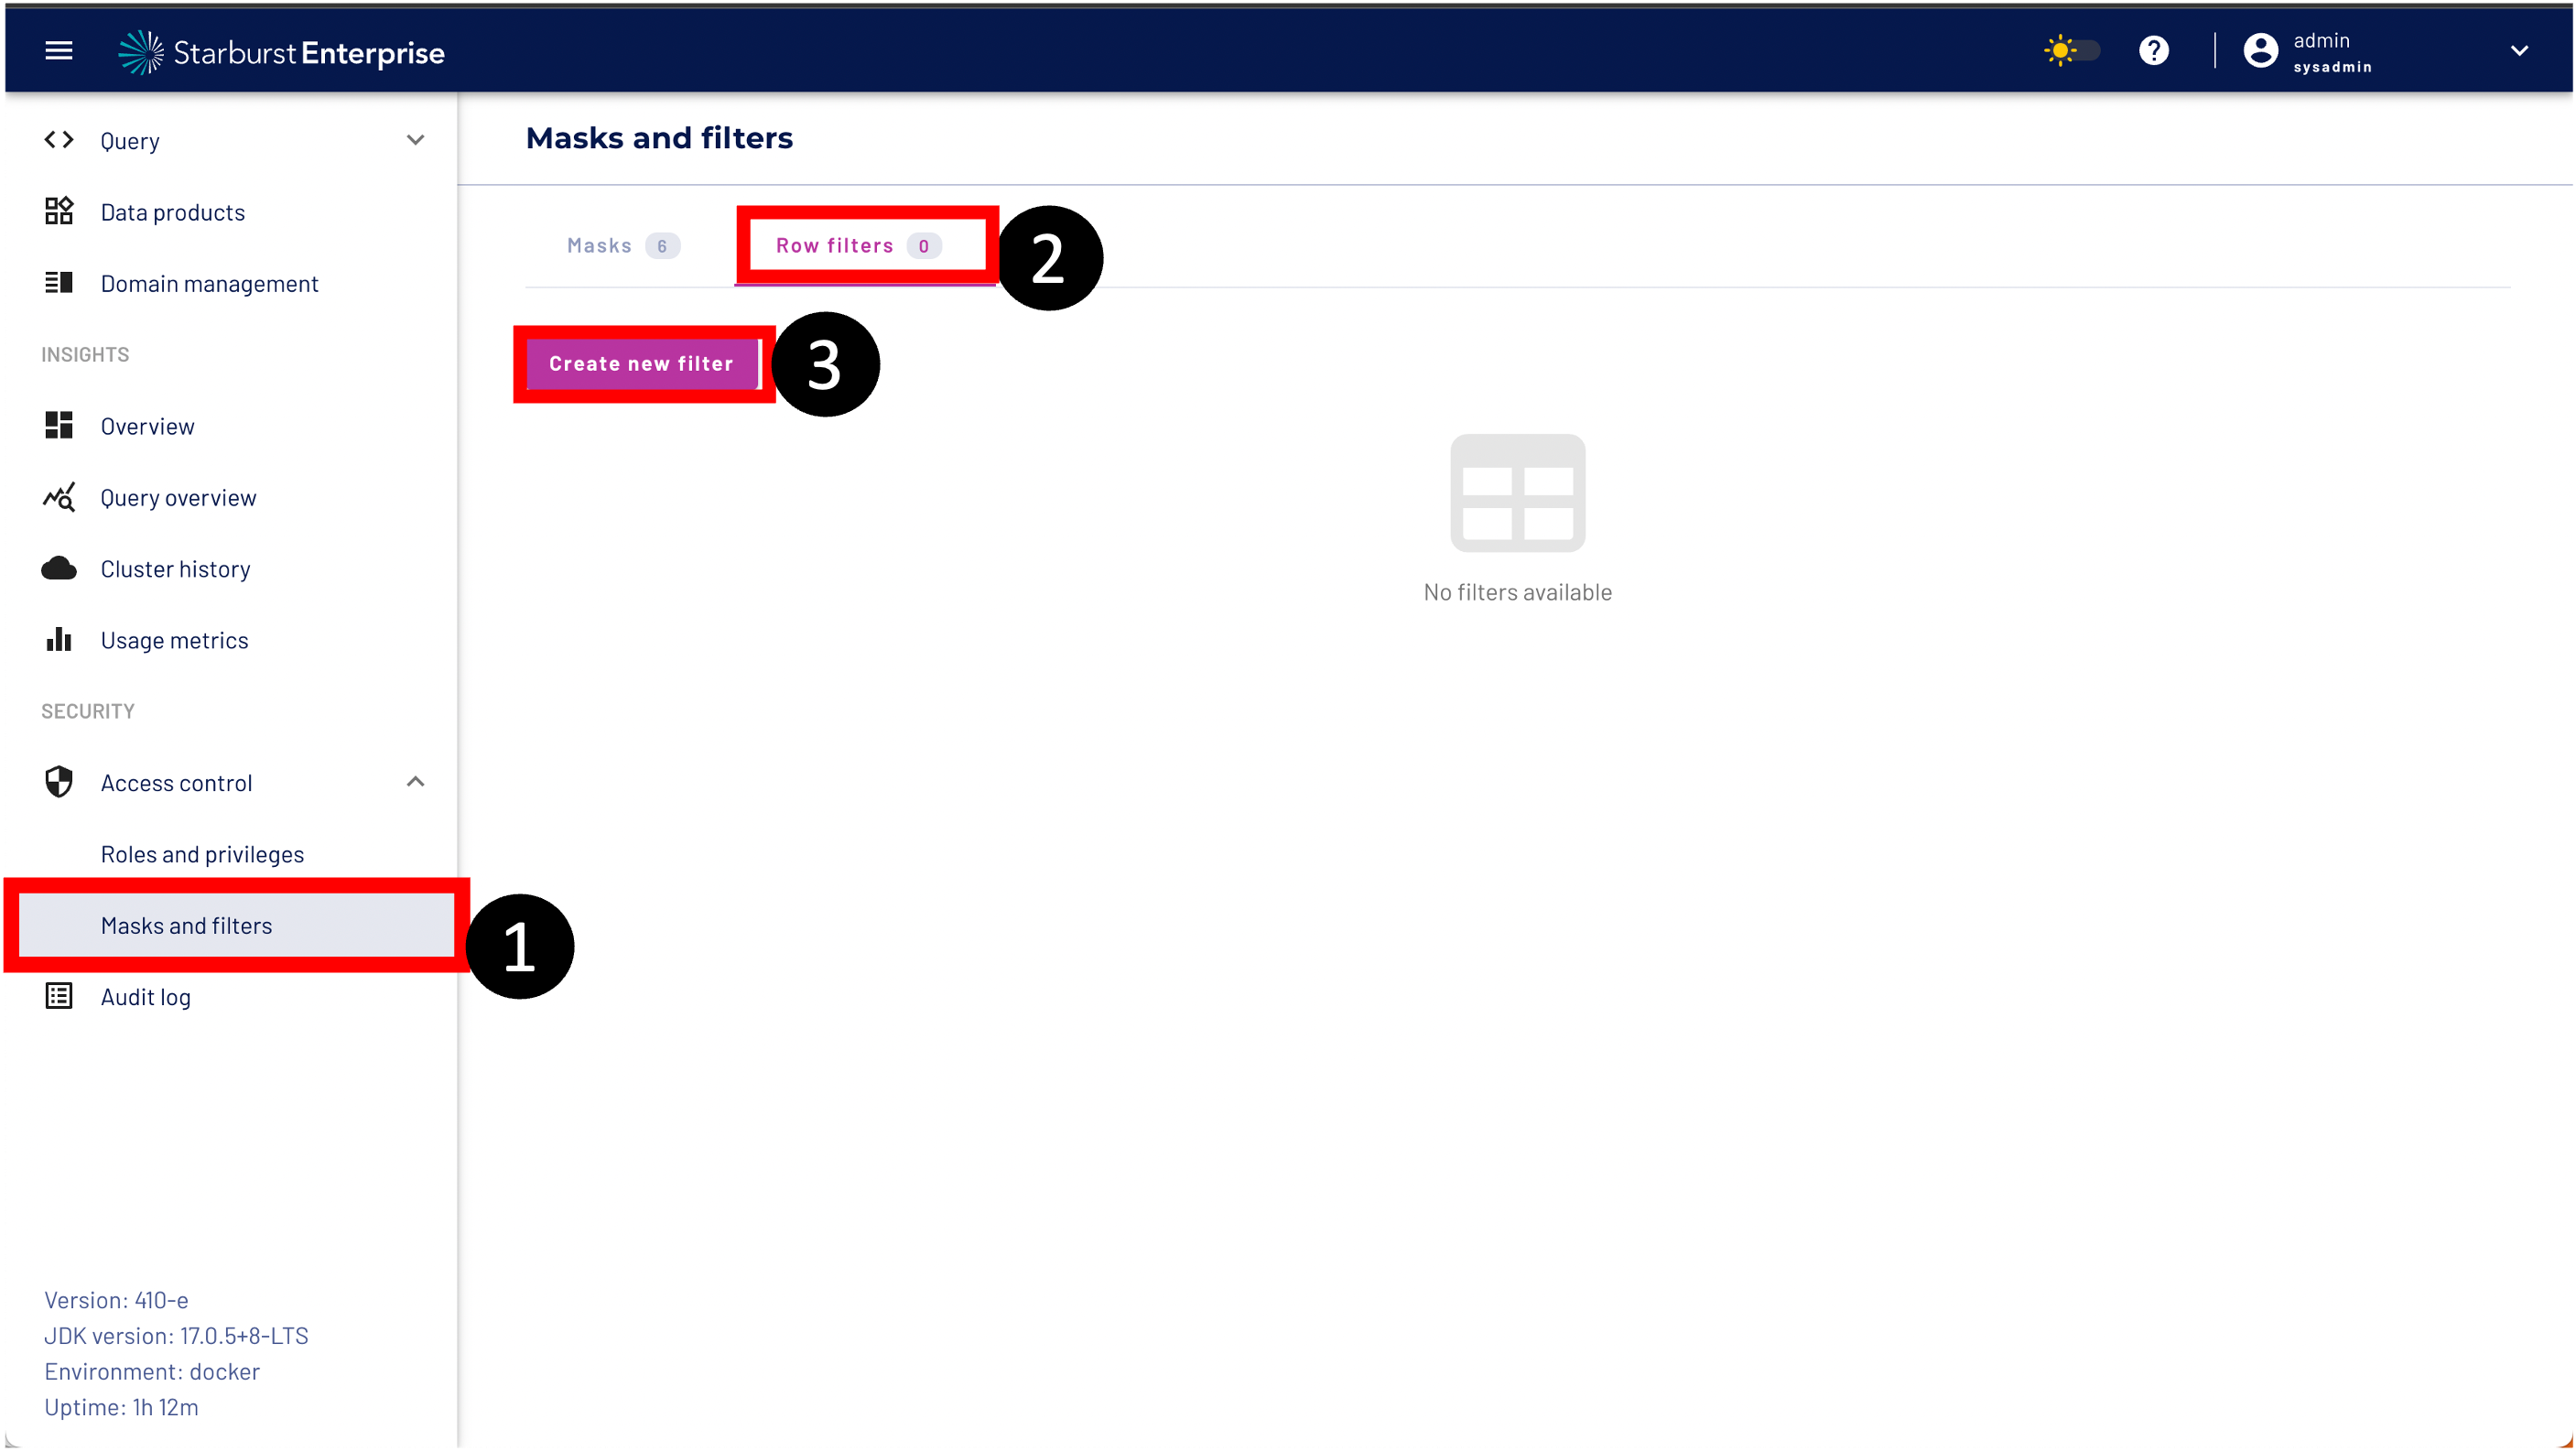
Step 1: Navigate to Masks and filters
Step 2: Got to the Row filters tab
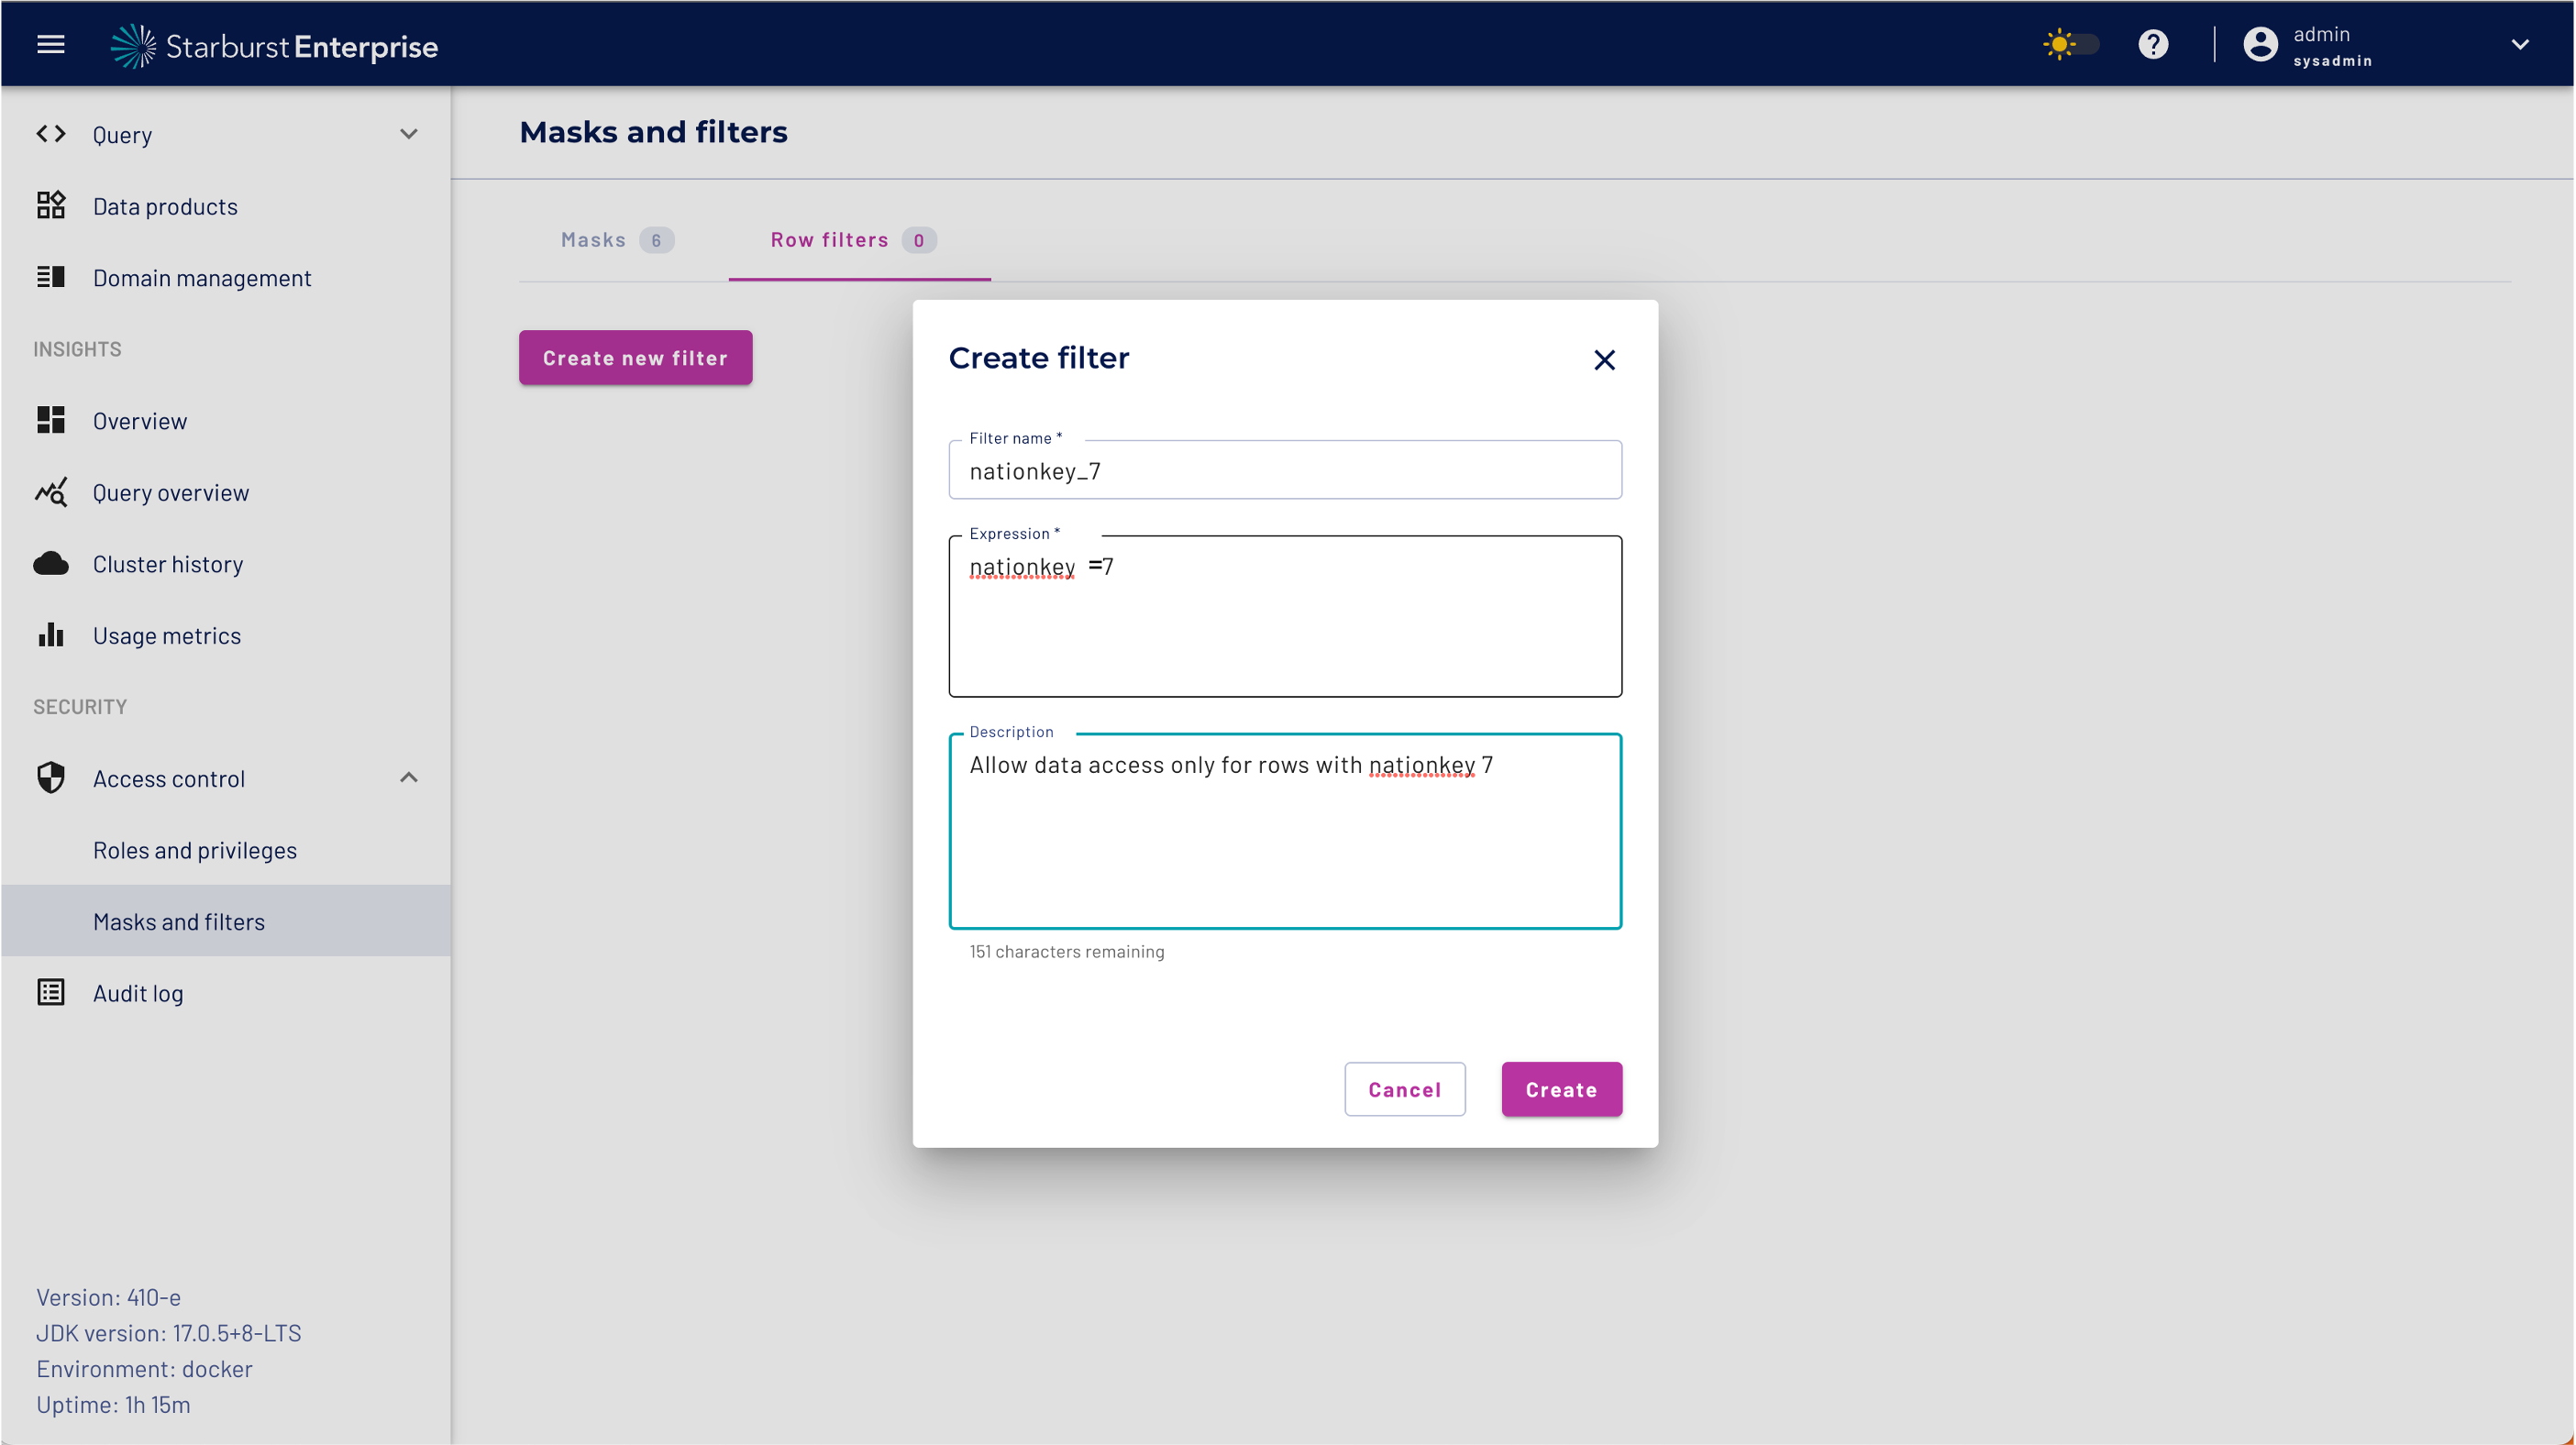
Step 3: Click the create new filter button
A row filter consists of a SQL condition that excludes rows from appearing where the condition is met. For example, a row filter containing the expression country-code='US' excludes any rows from the result set where the country-code column has a value of US.
Please create the filter with the following entries and click the create Button
| Filter name | nationkey_7 |
| Expression | nationkey=7 |
| Description | Allow data access only for rows with nationkey 7 |
With BIAC we are able to seperate the Data Product metadata permissions from the data access permissions.
We will first define what our data scientists can do with a data product and in a later step we will define the access to the dataset.
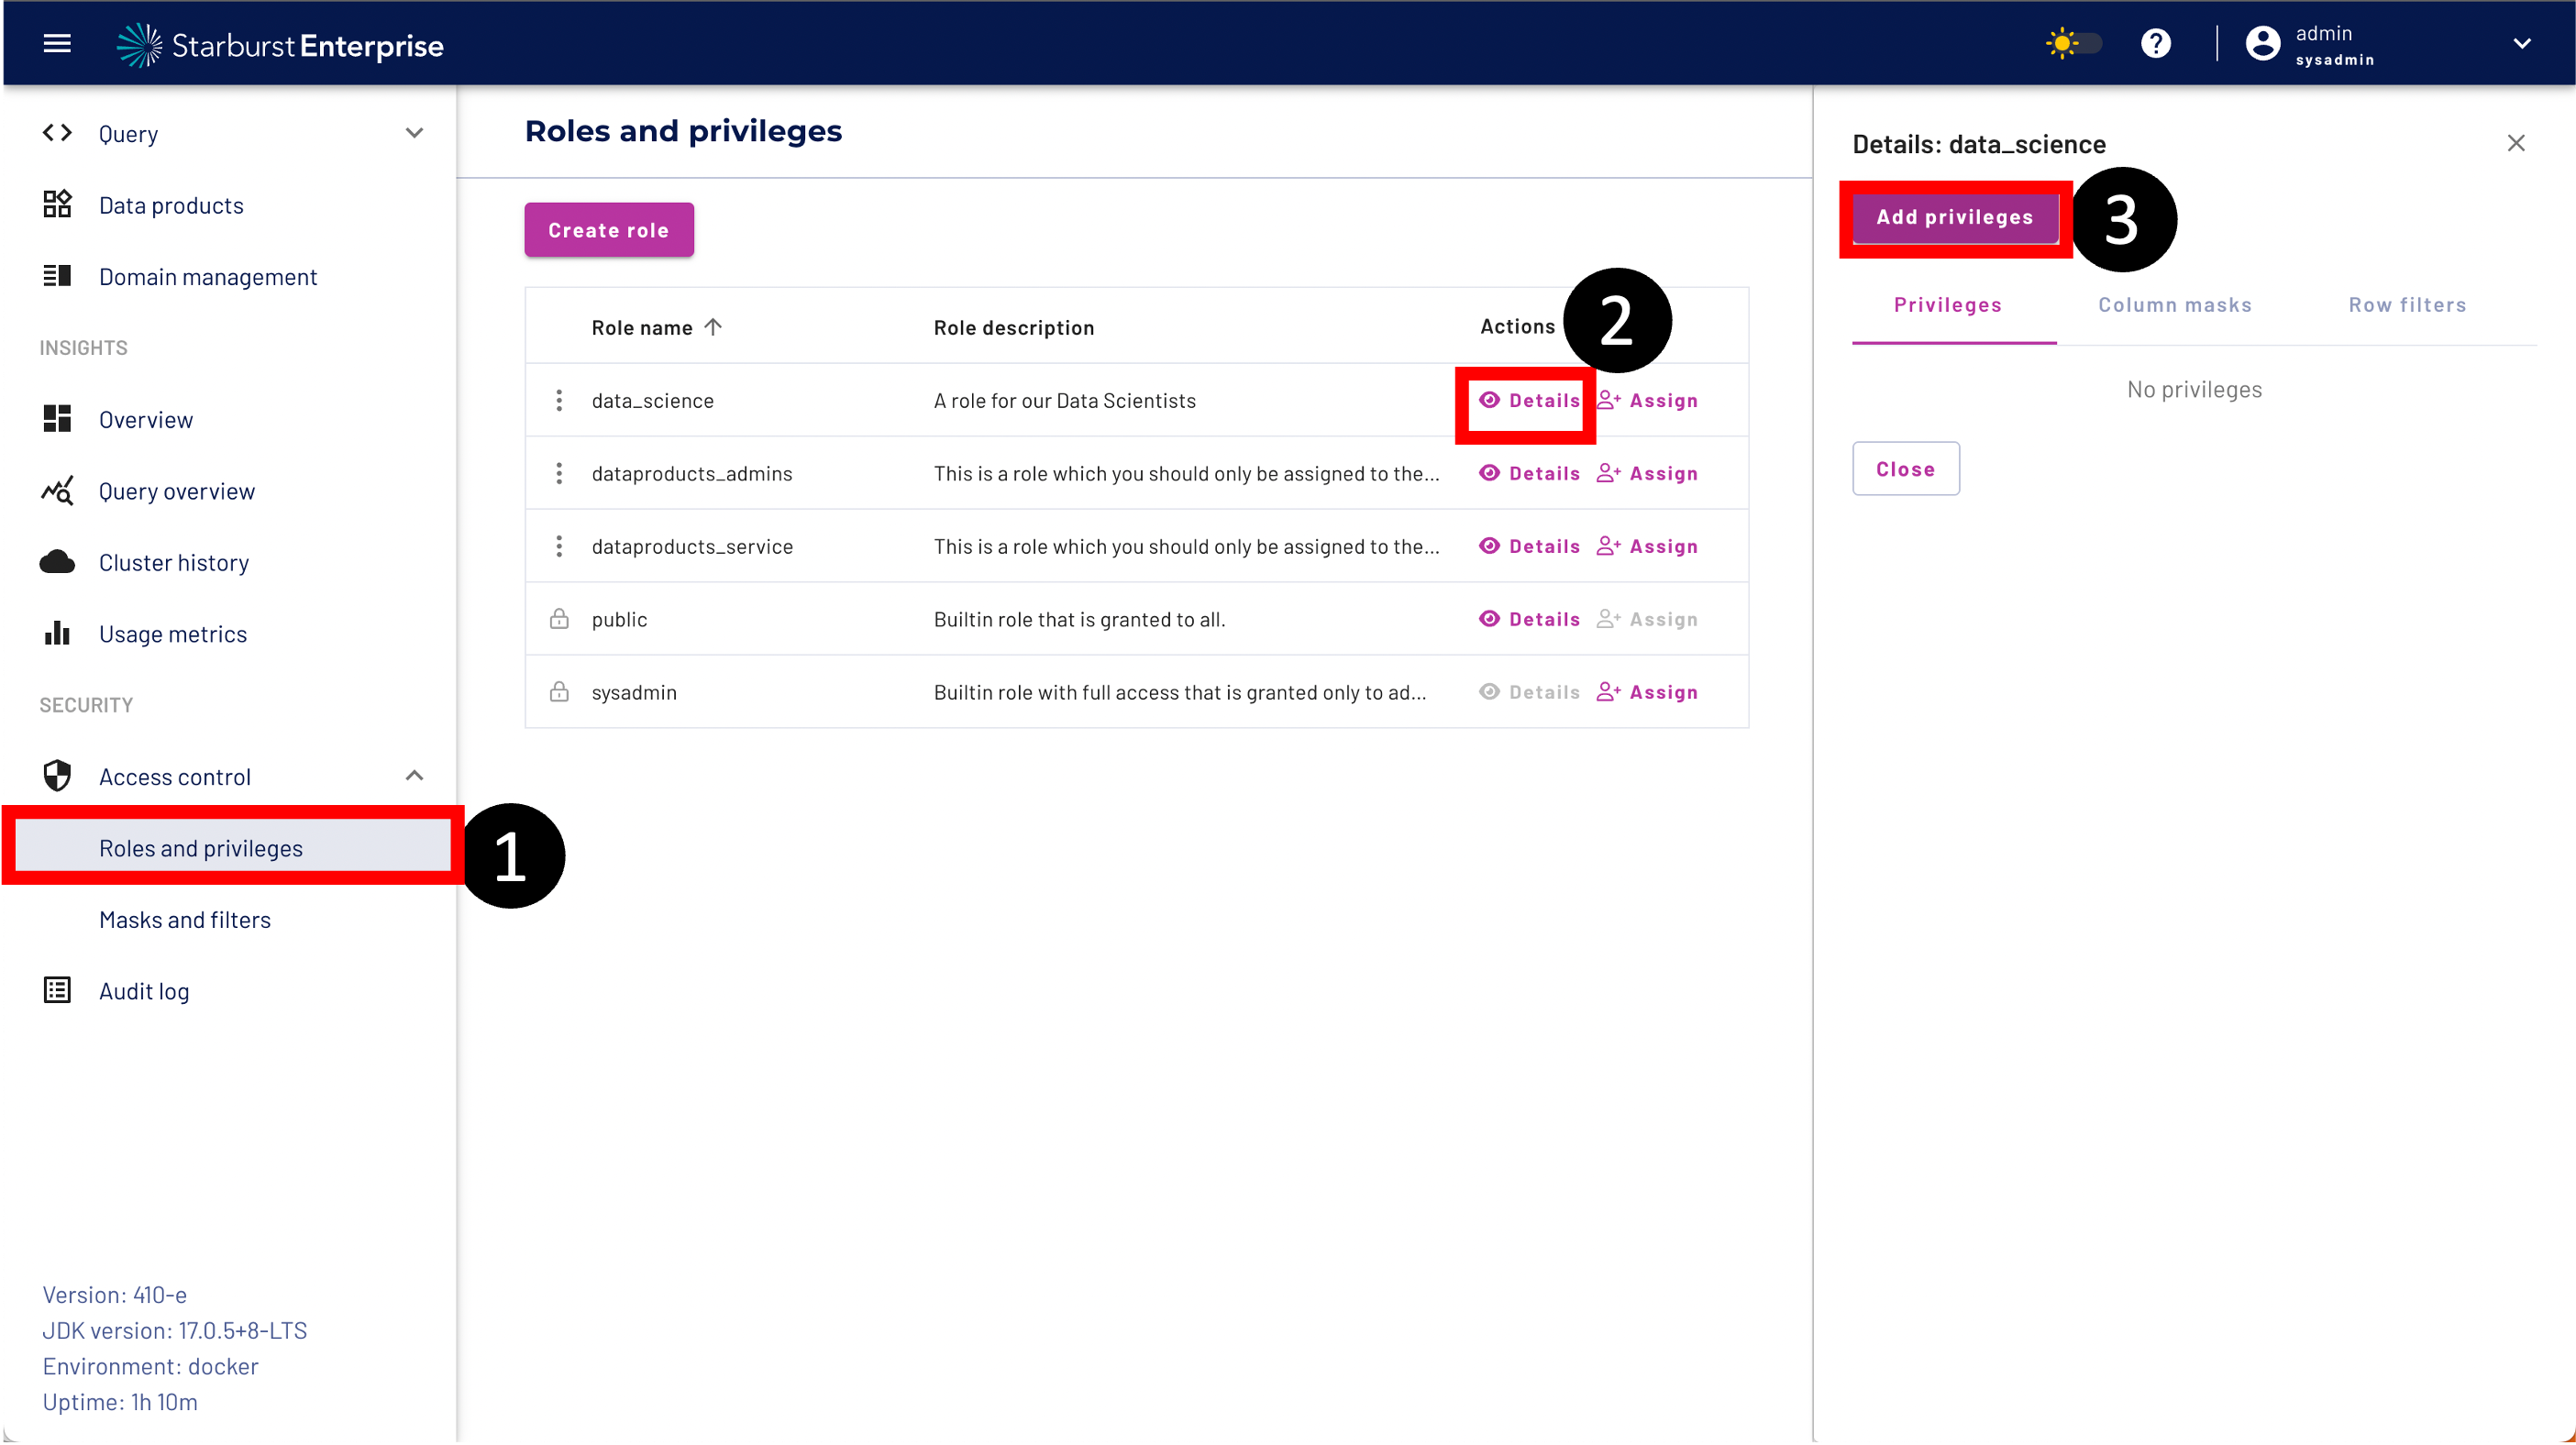
Step 1: Navigate to Roles and privileges
Step 2: Click the Details button on the data_science role
Step 3: Click the Add privileges button
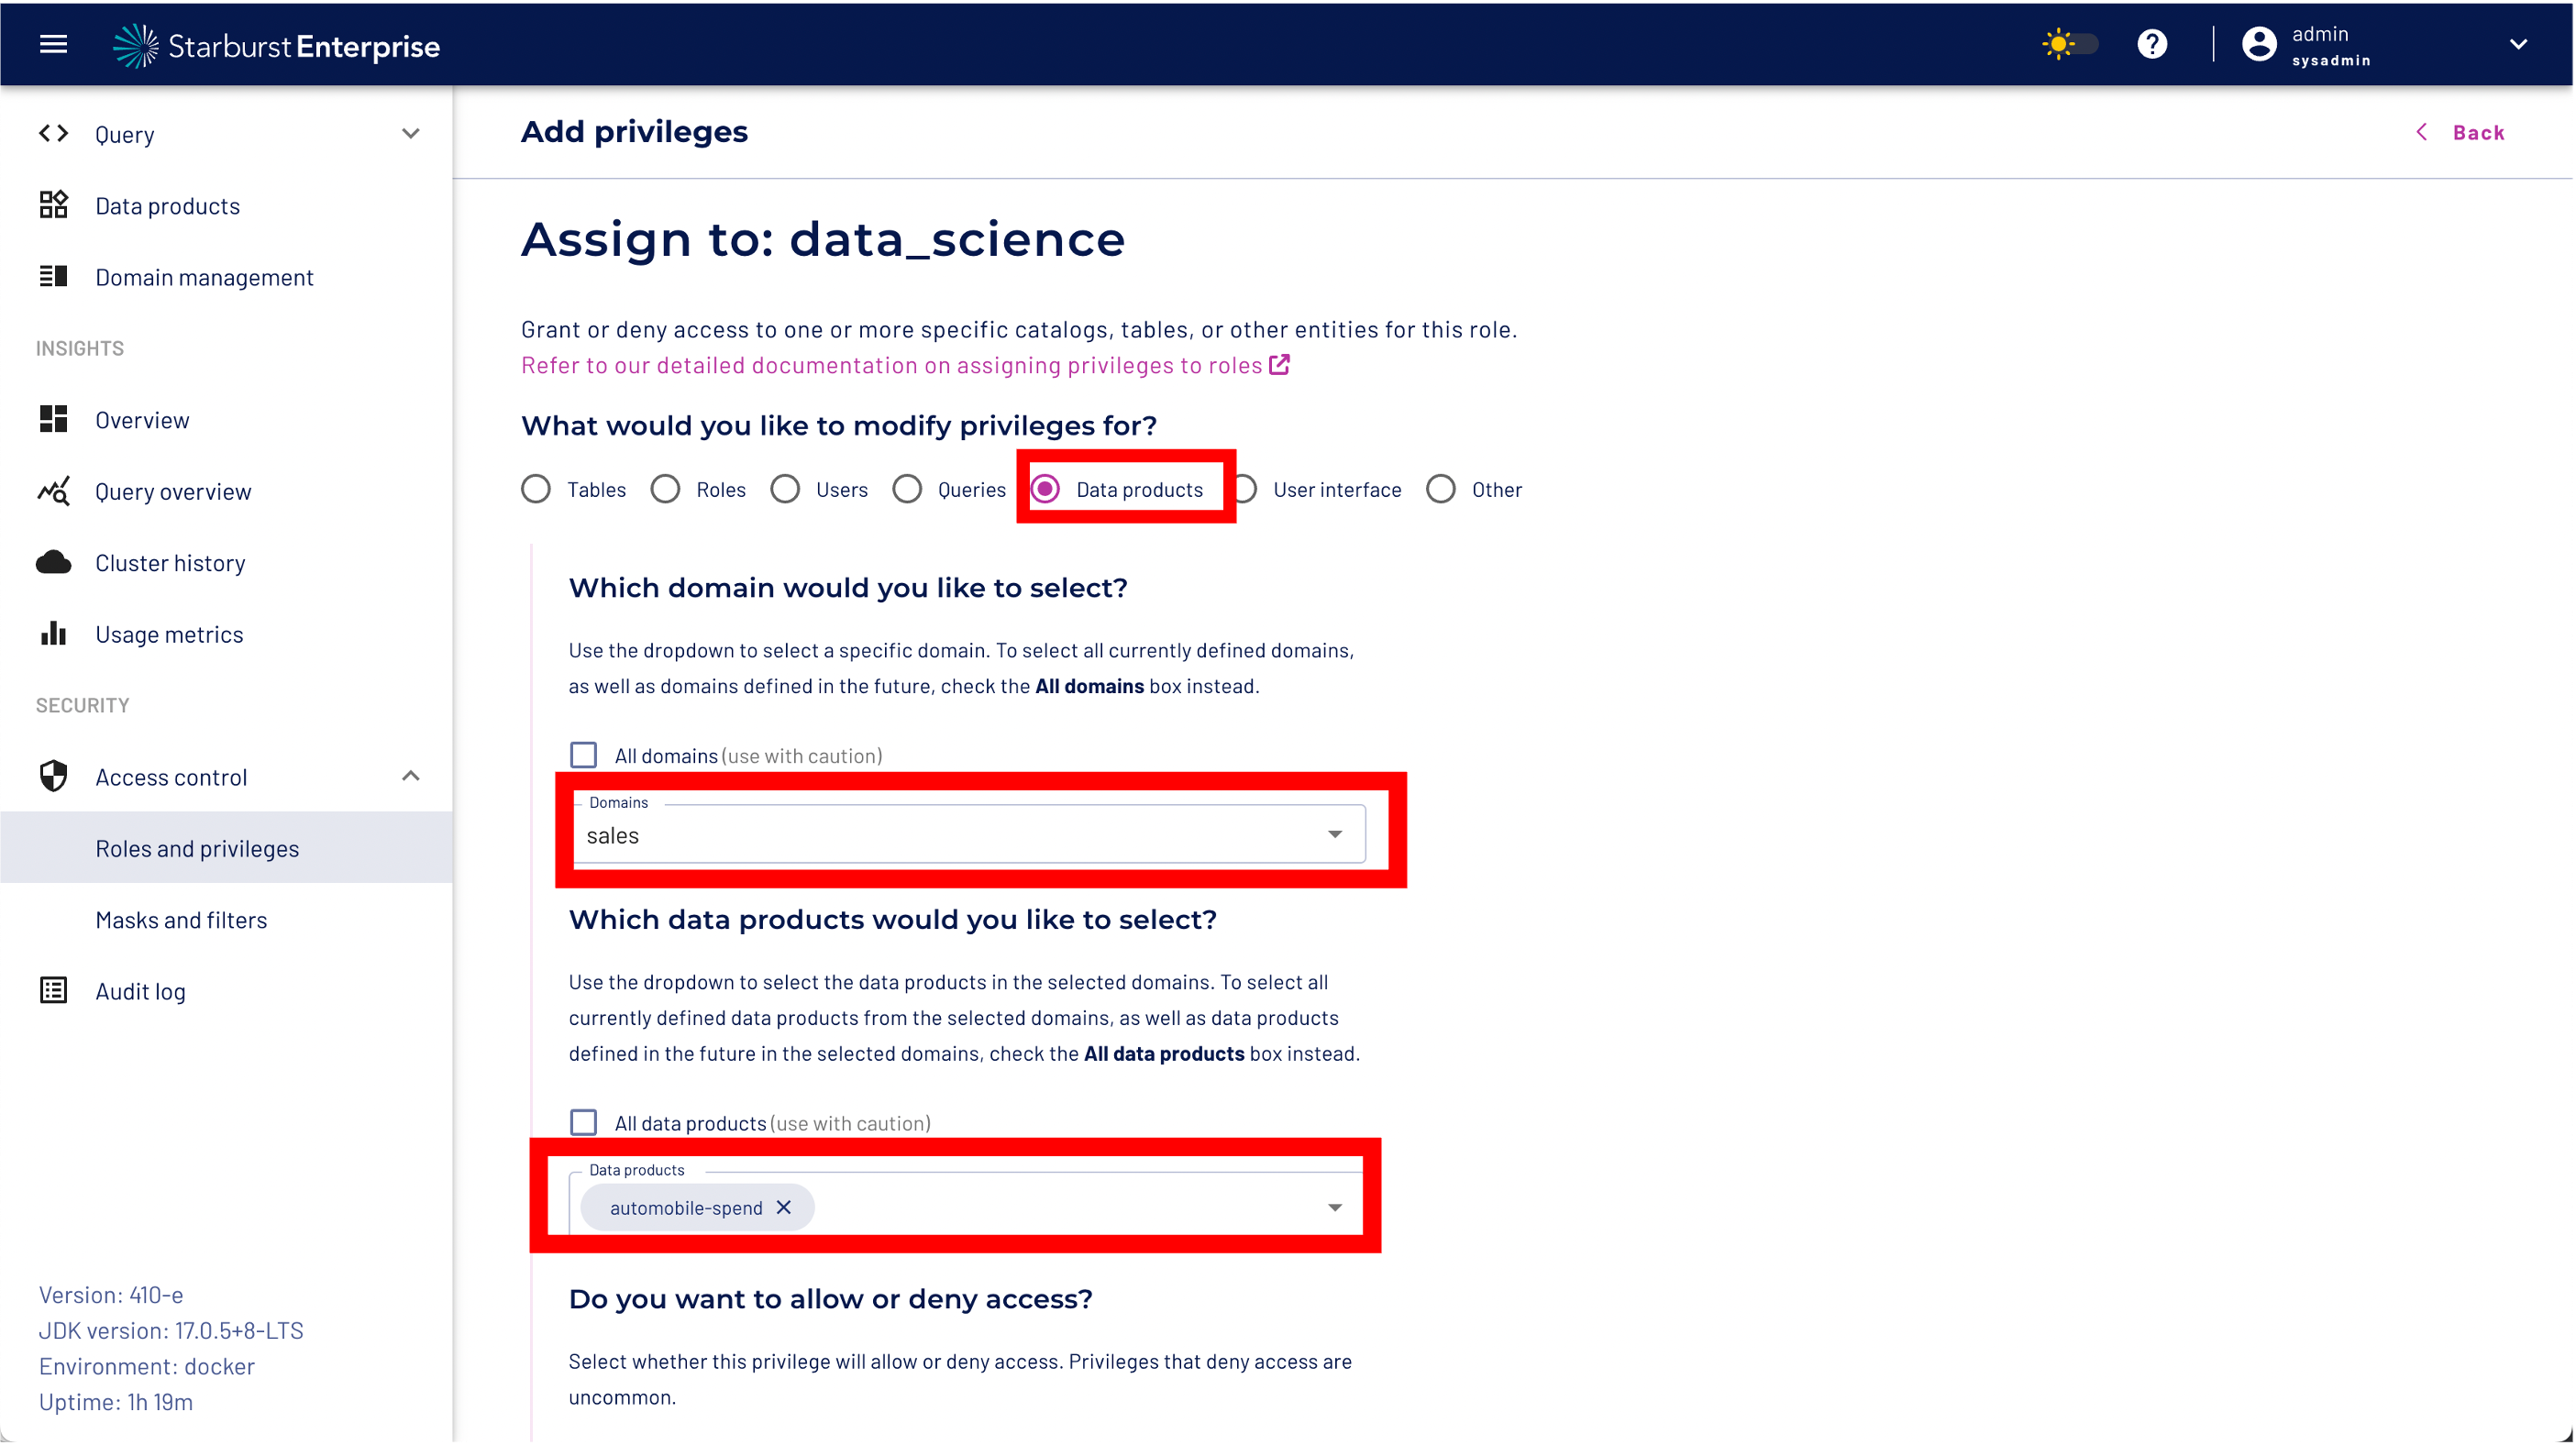
Step 1: Select Data Products
Step 2: Select the Sales domain
Step 3: Select the automobile-spend Data Product
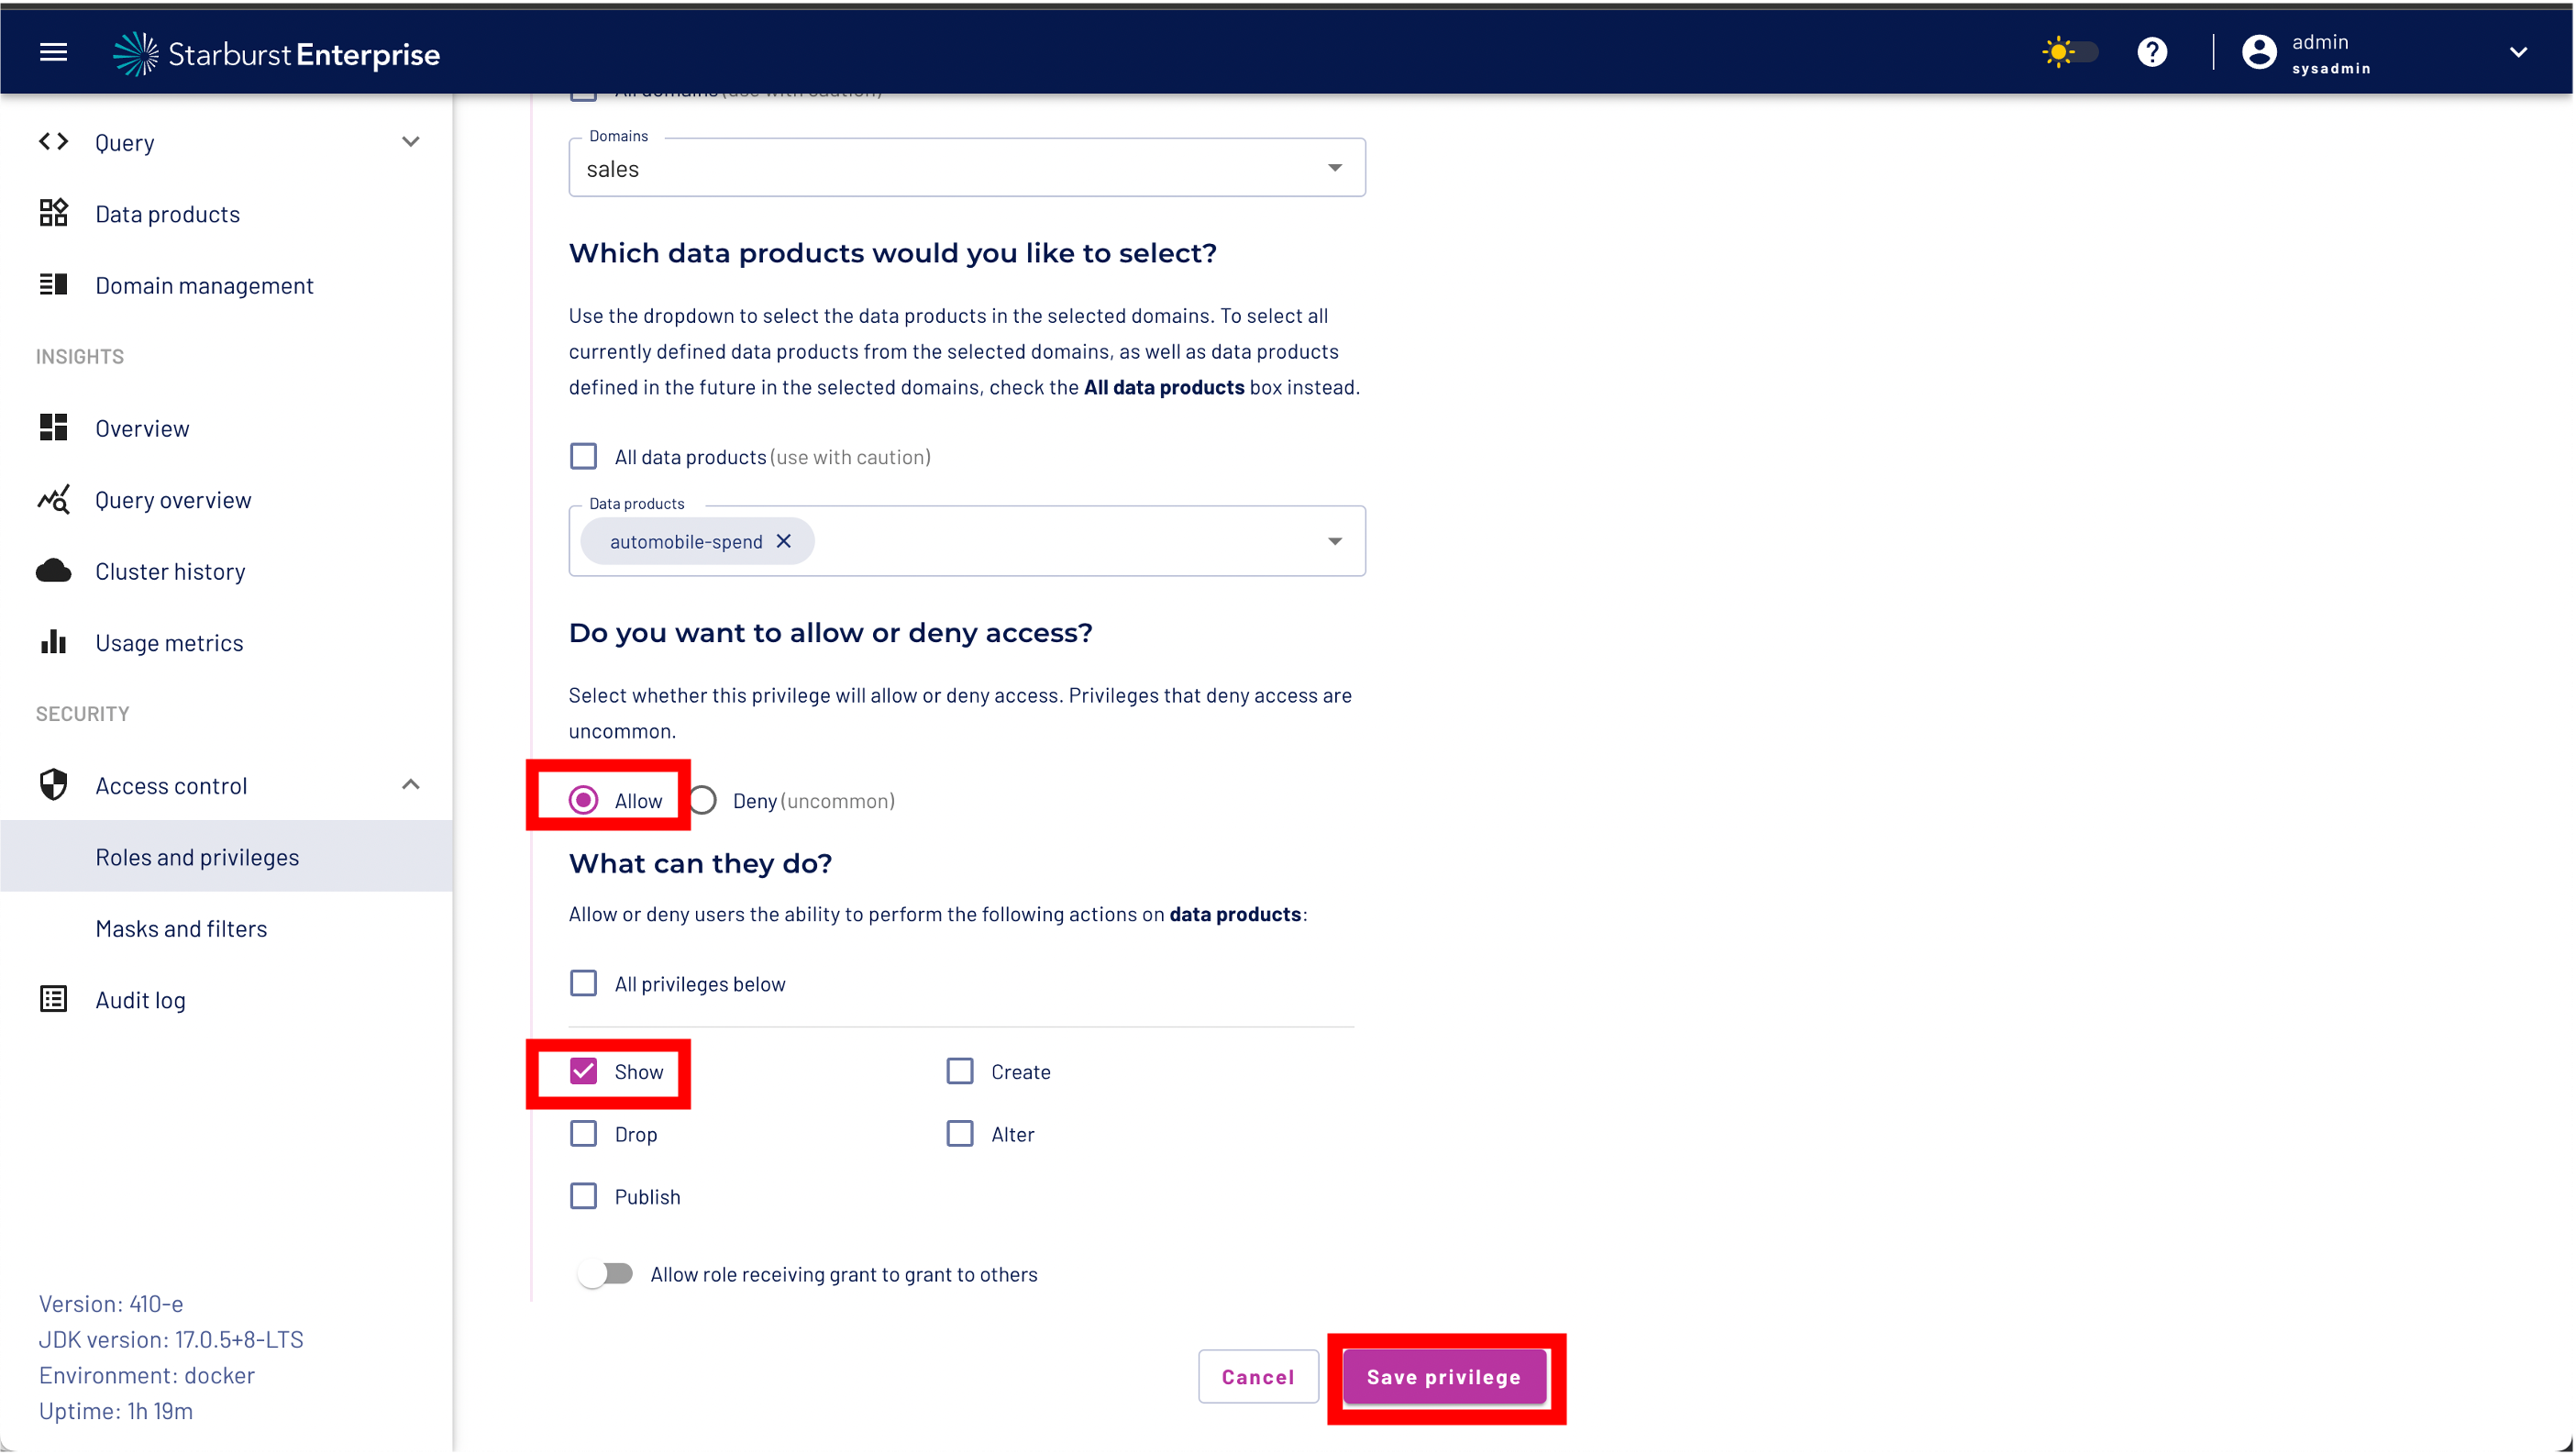
Step 5: Select "Allow"
Step 6: Select "Show" privileges only
Step 7: Click the "Save privileges button"
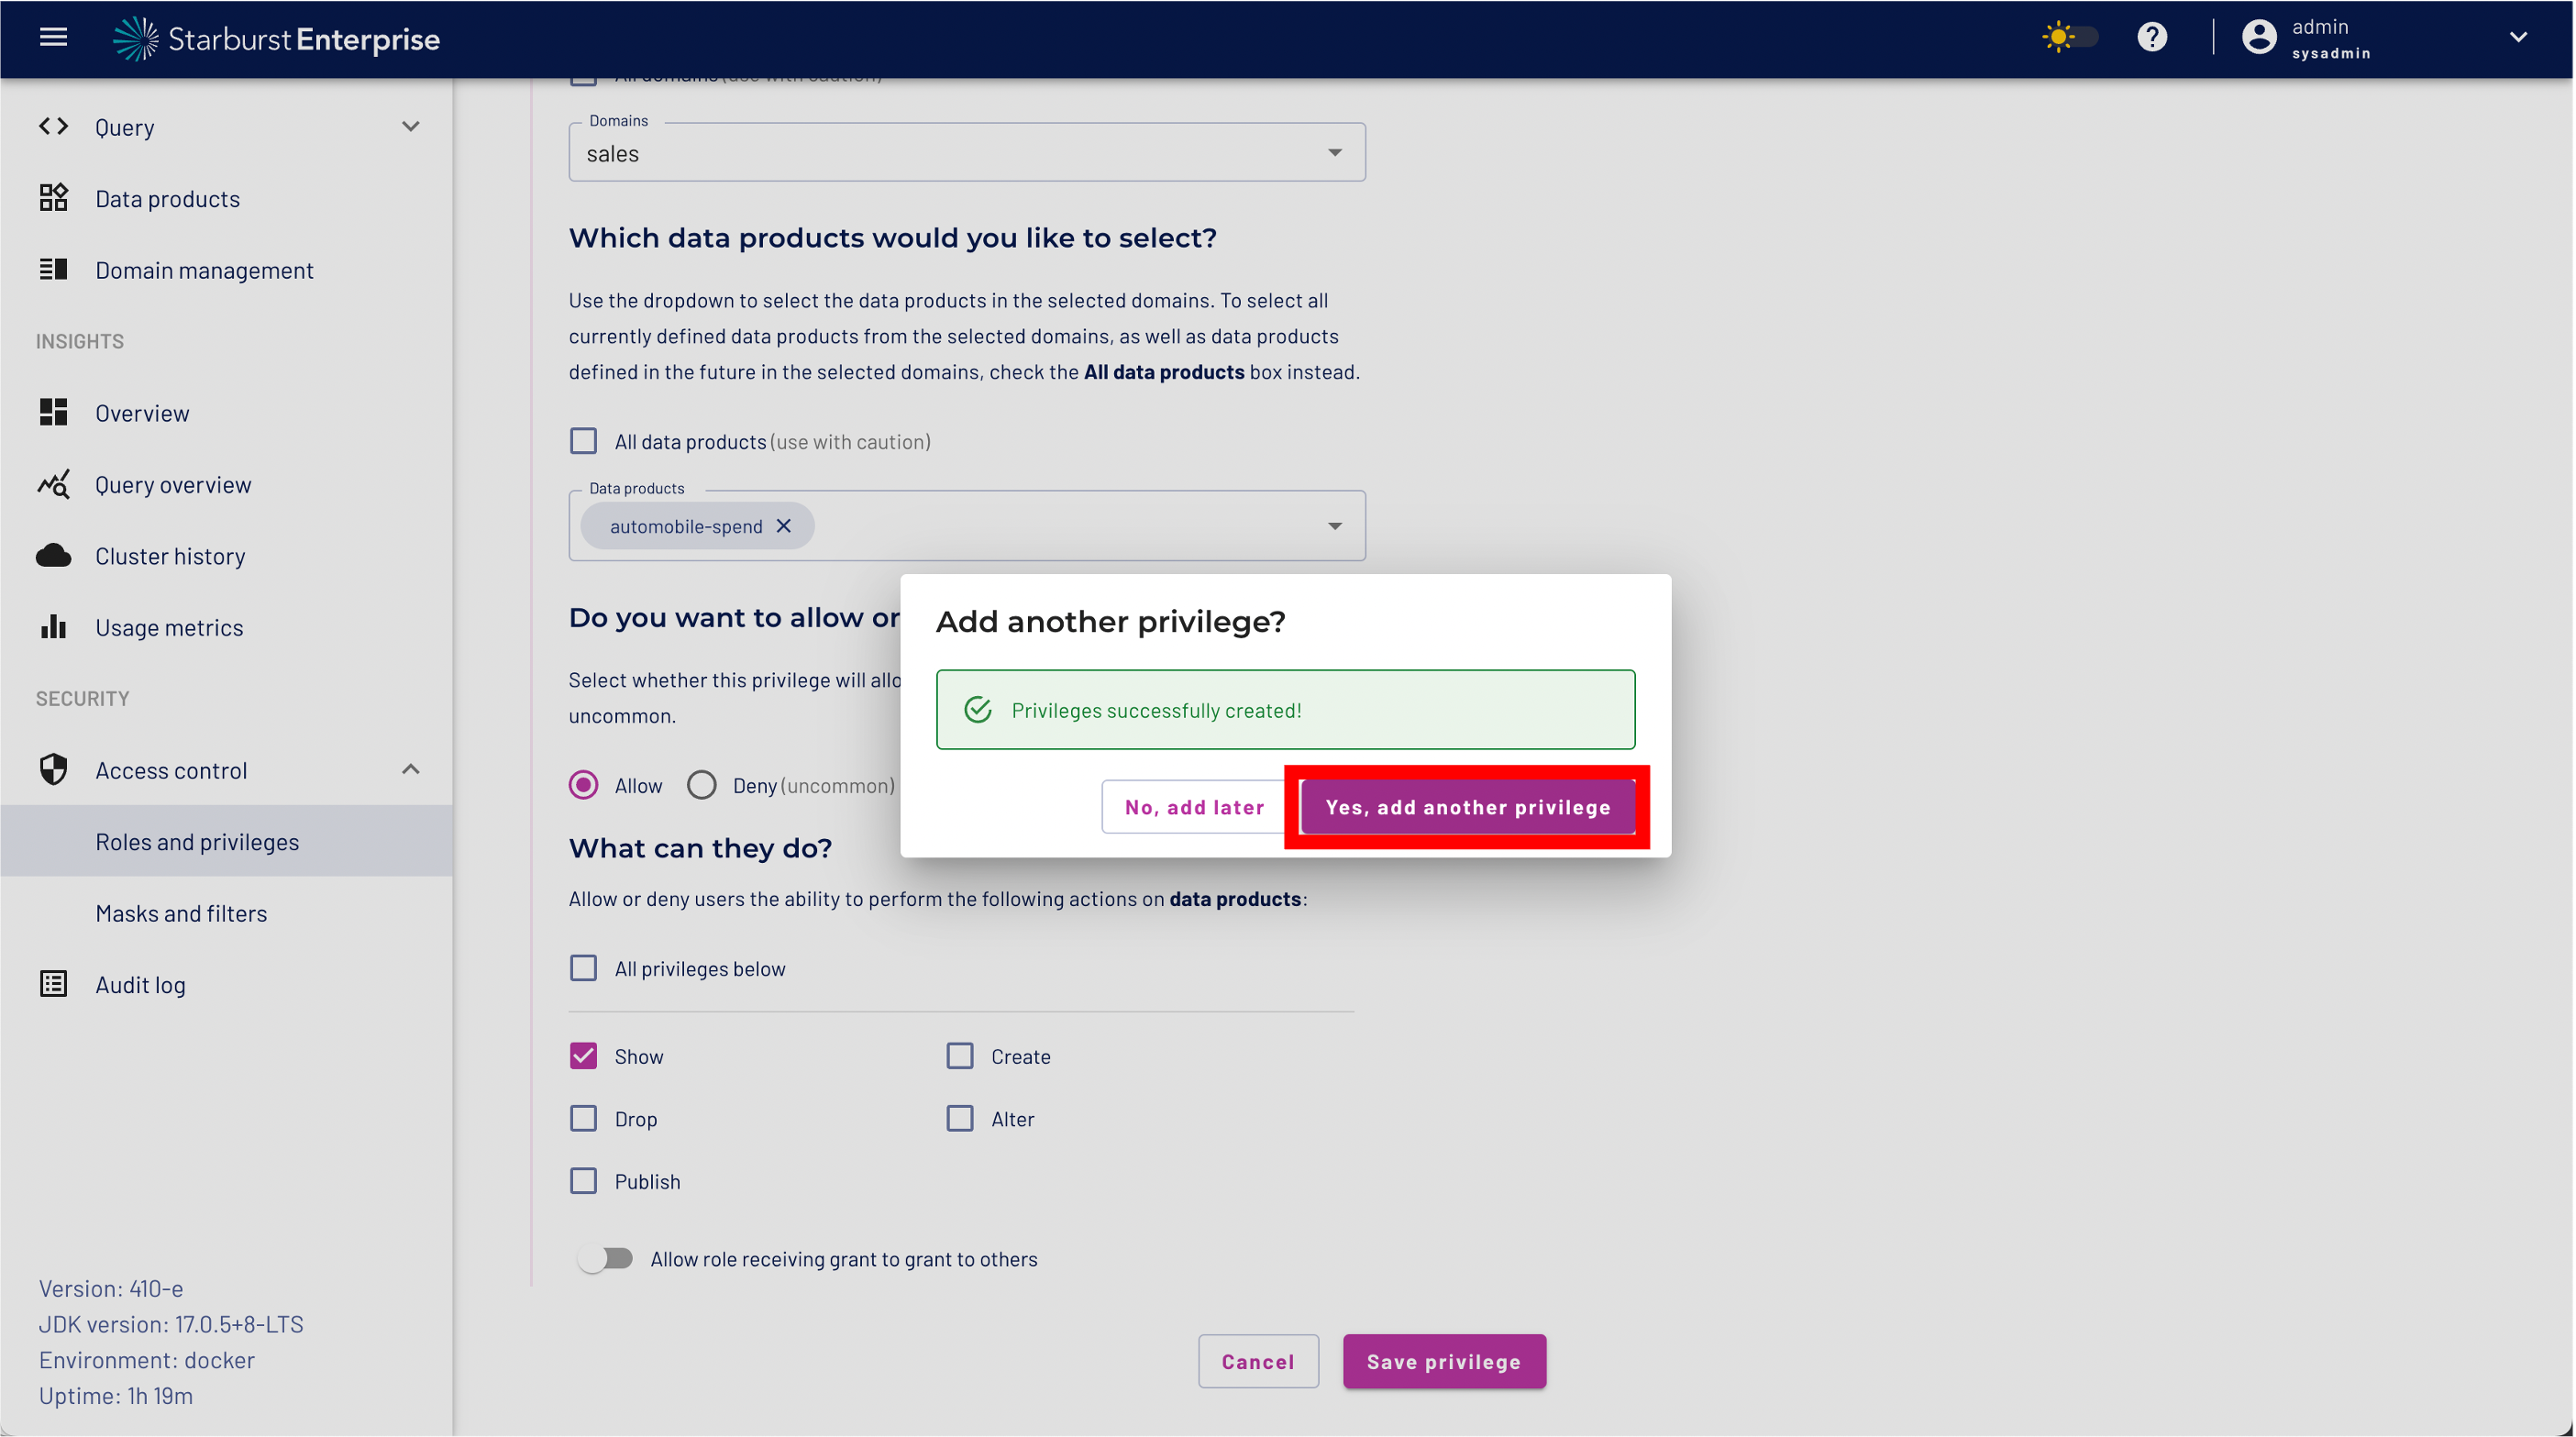
We want to define fine grained access controls to protect our dataset. The goal is to use data masking to mask sensitive data - in our case PII - and use a role level filter to restrict access only to a certain region using the nationkey. As a next step so Click the "Yes, add another privilege" button to continue.
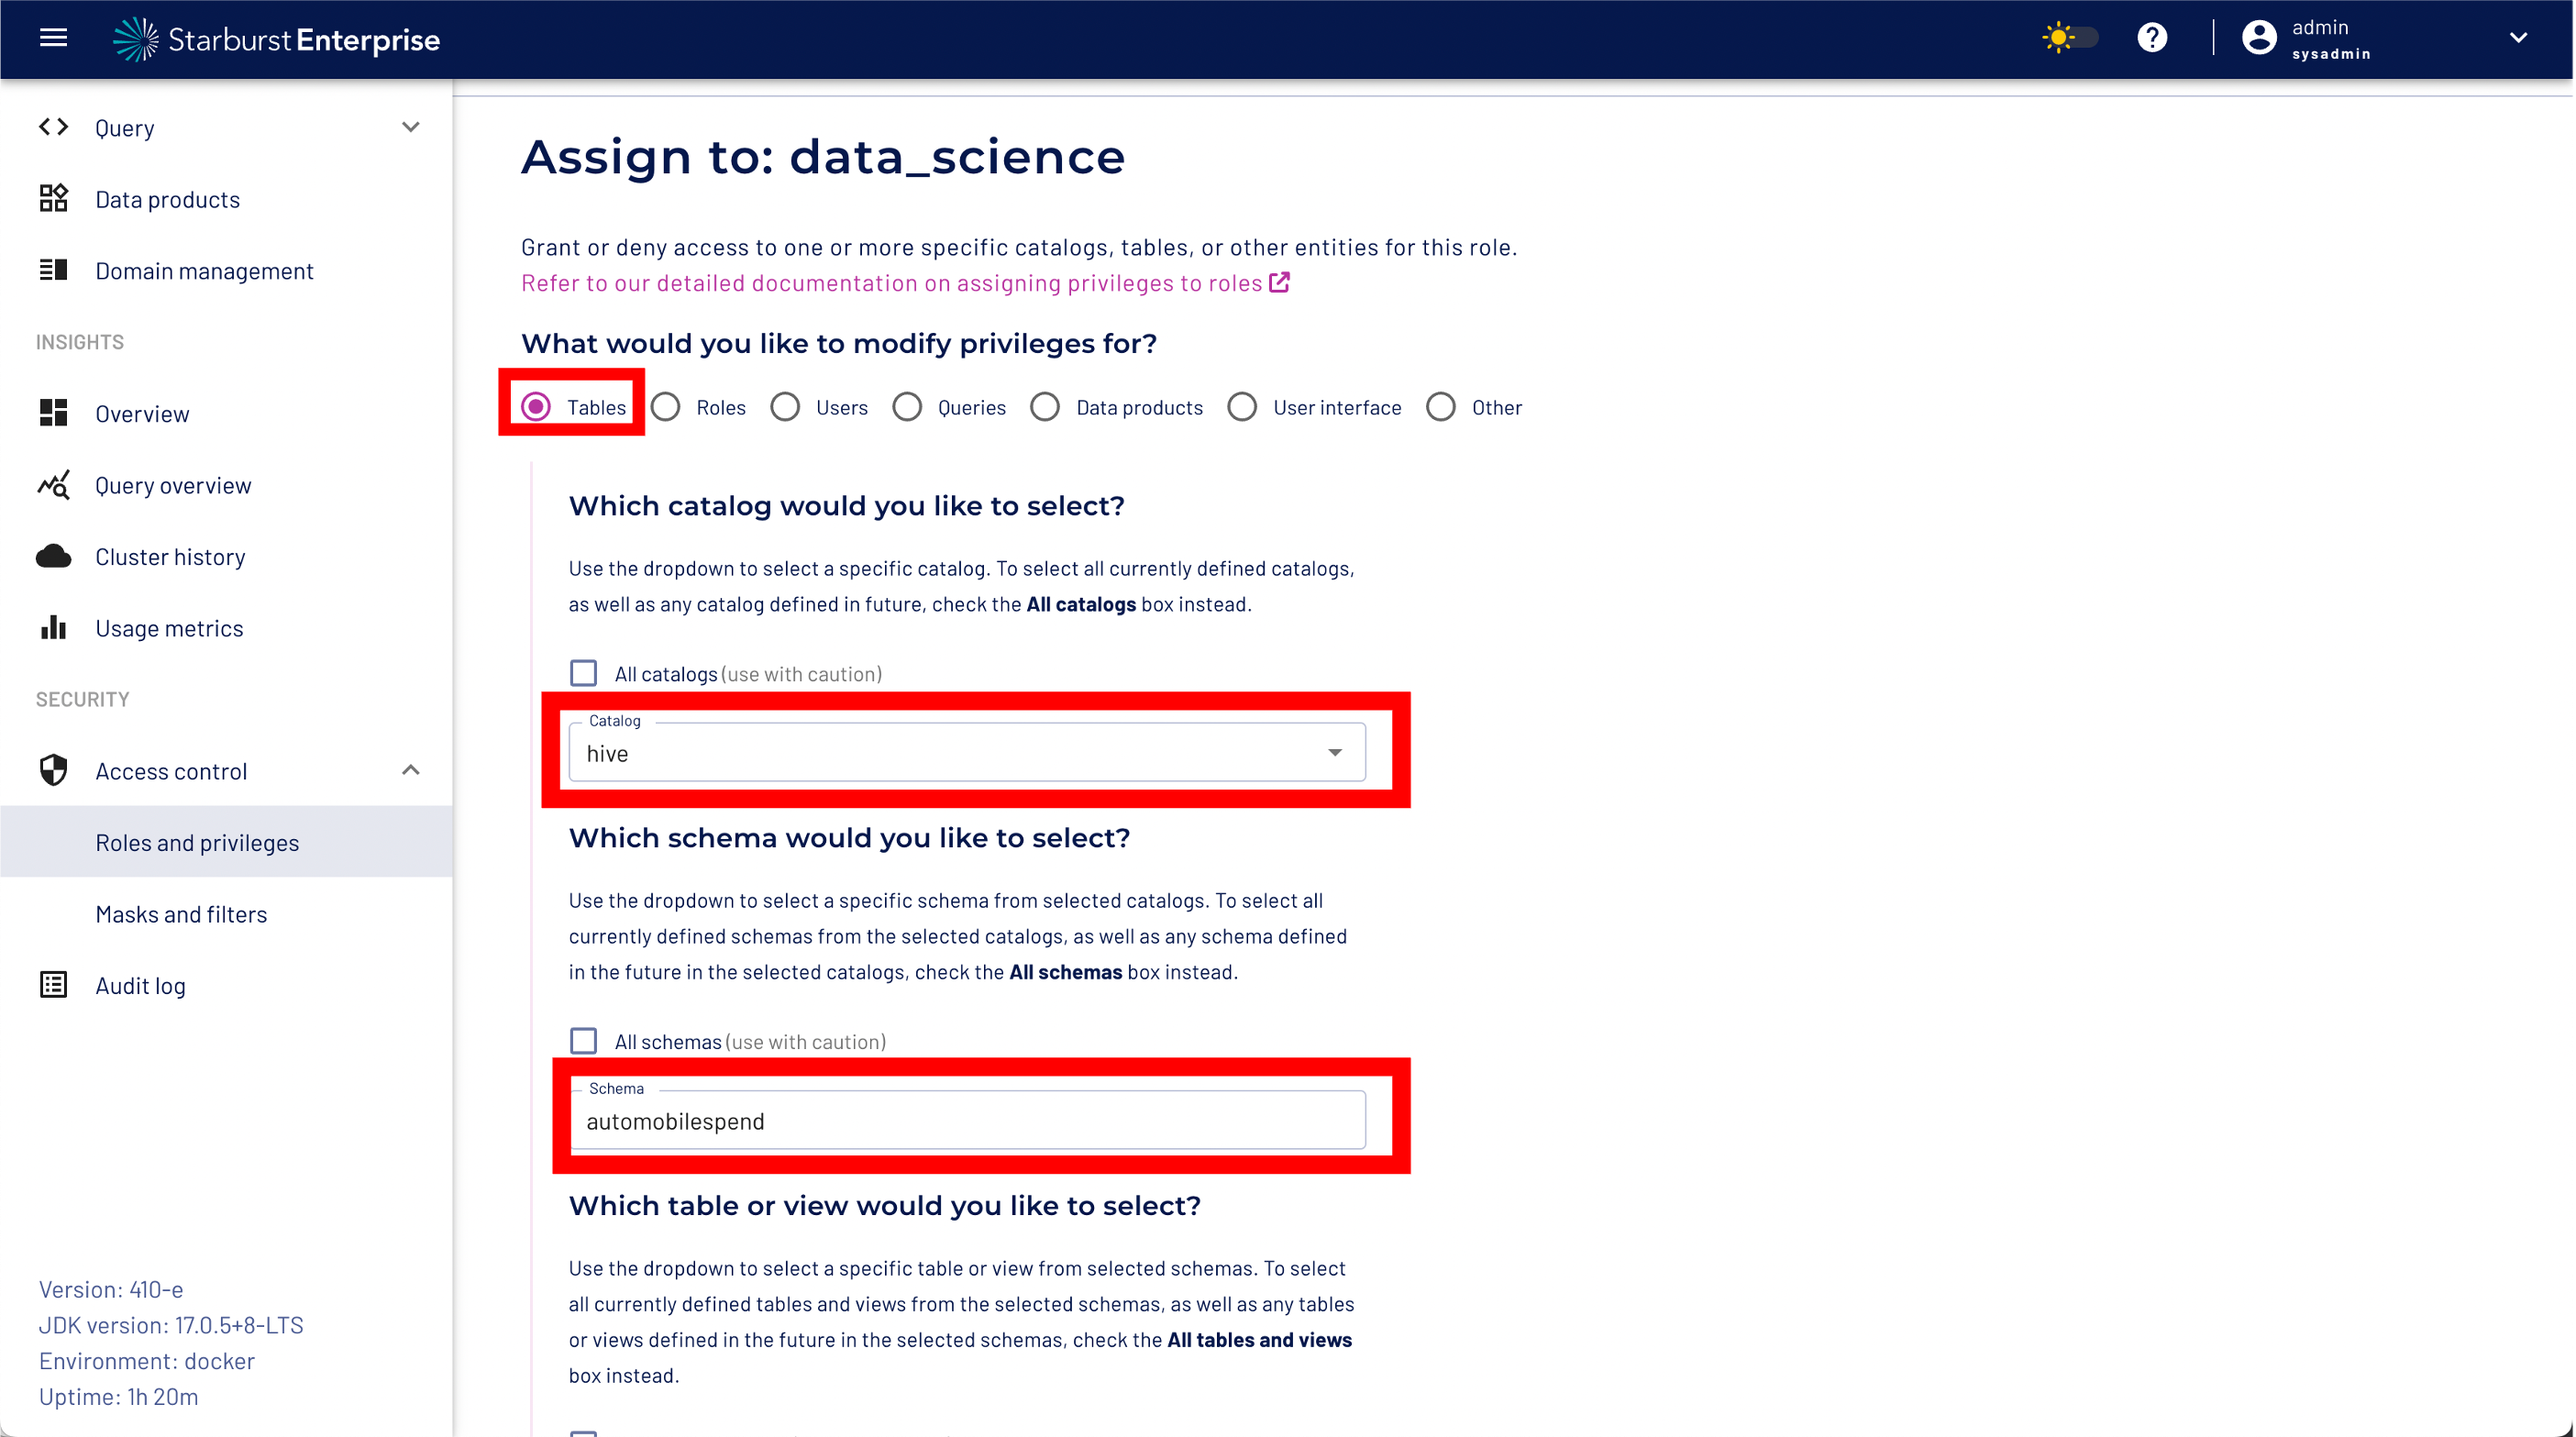
To protect our datasets we will now define fine grained access controls.
Step 1: Select "Tables"
Step 2: Select the "hive" catalog
Step 3: Select the dataproduct schema "automobilspend" from the drop down menu
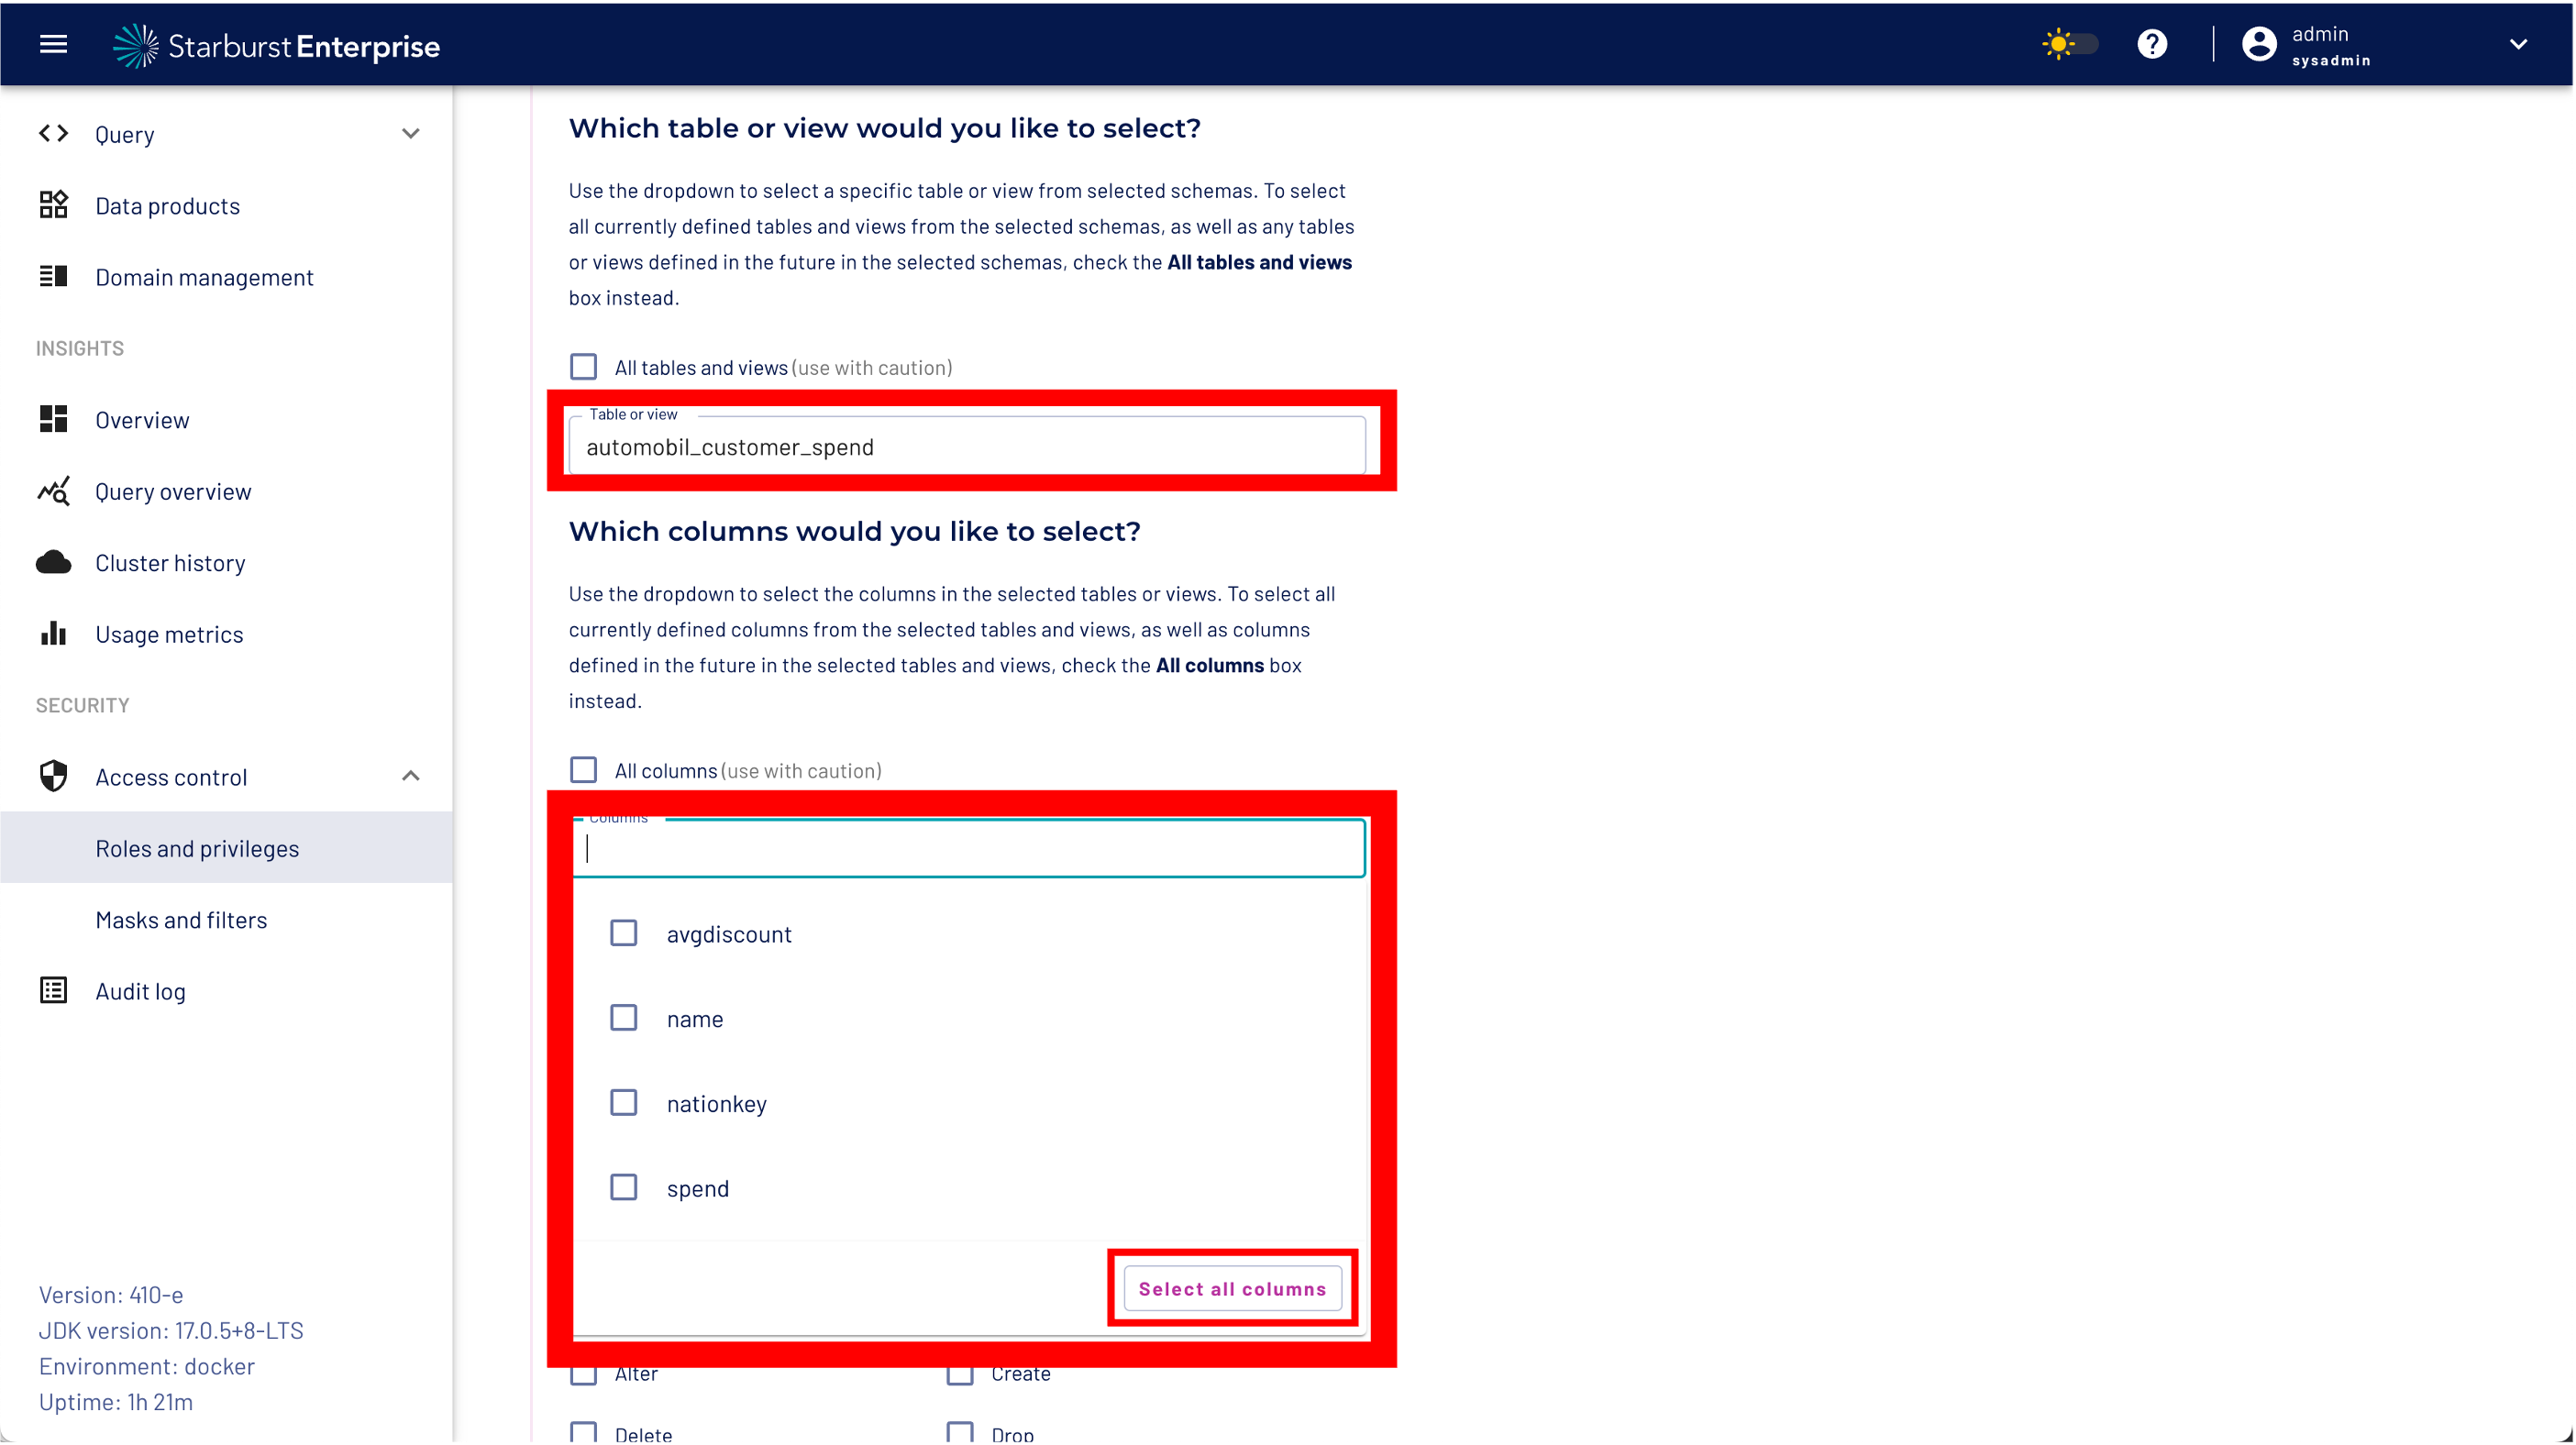
Step 4: Select the name of our data product dataset "automobil_customer_spend" from the table/view drop down list
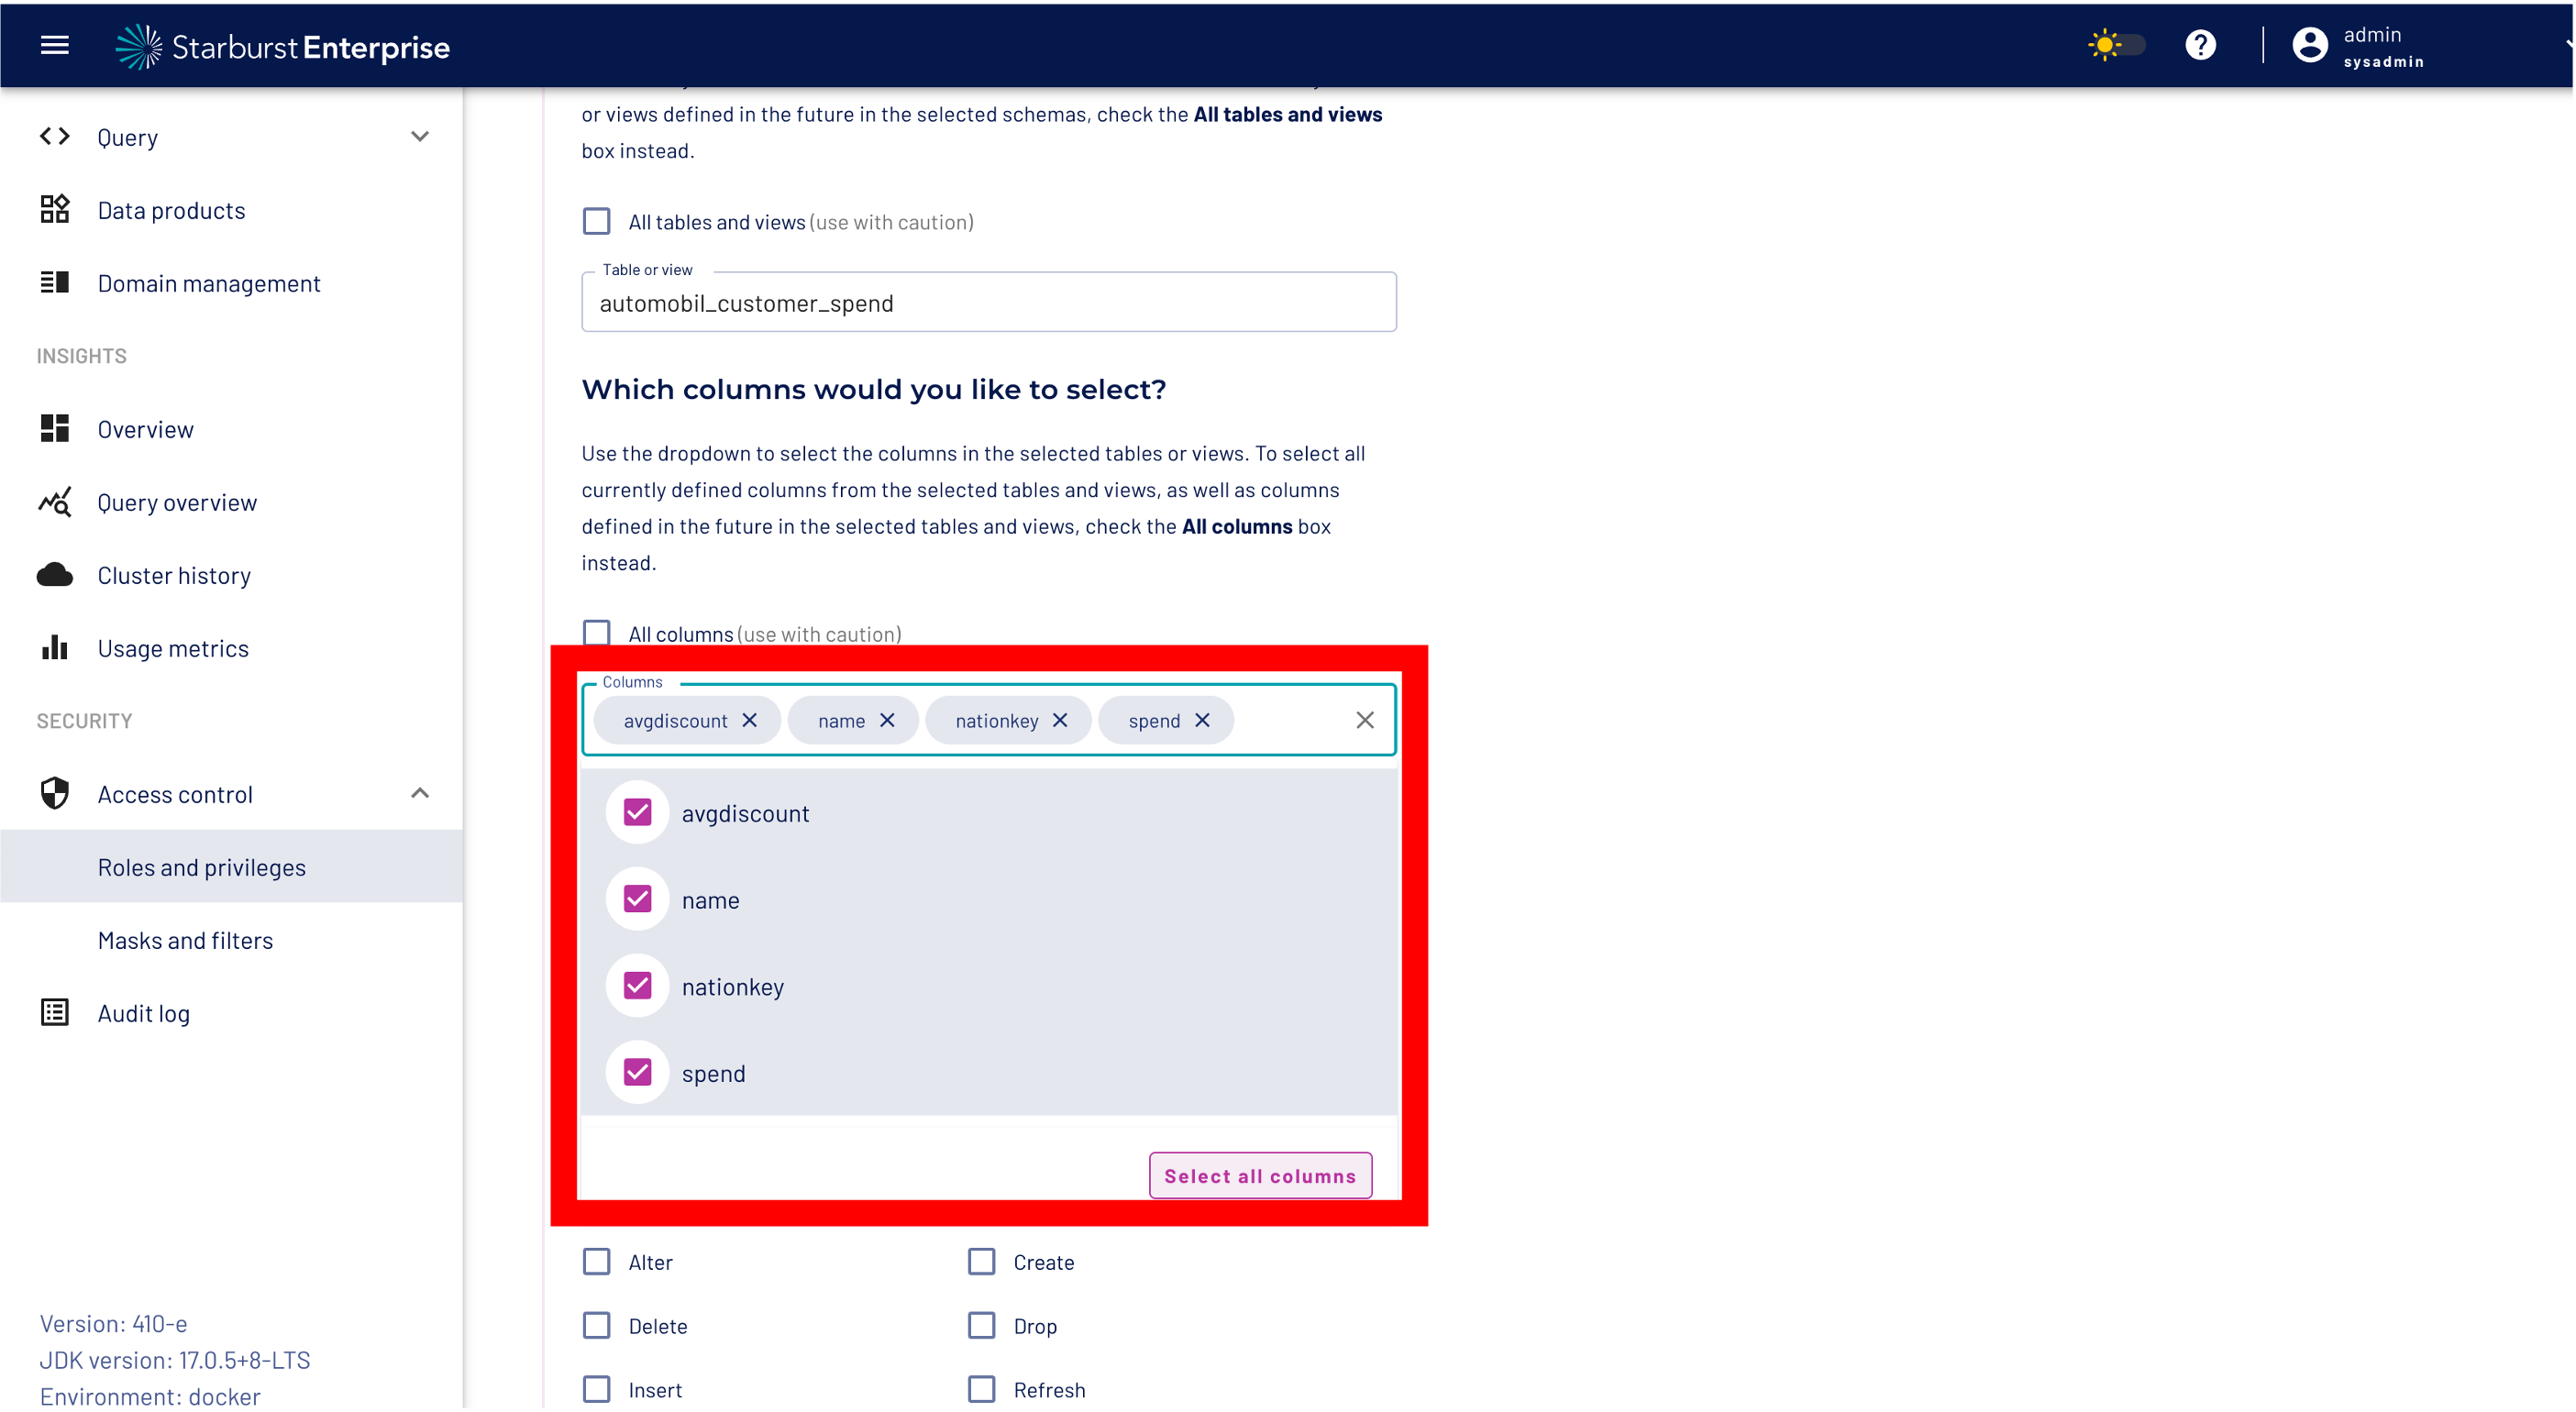
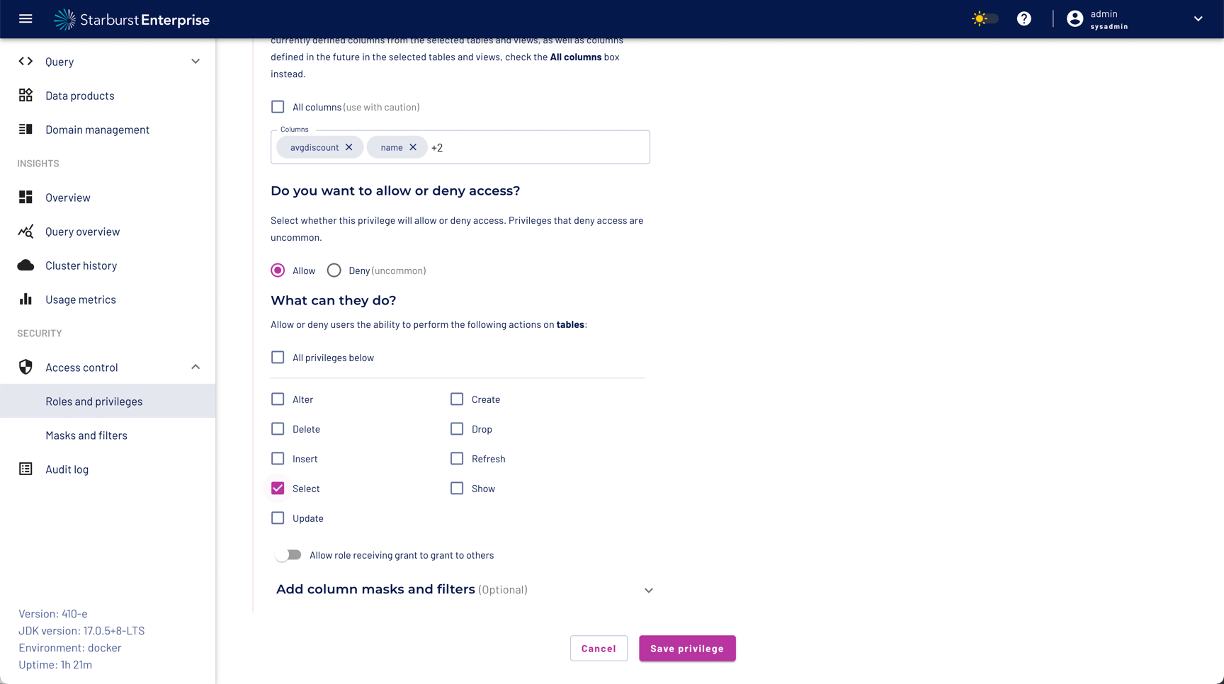
Step 5: Open the select column menu and select the all columns button!
Step 6: Select "Allow" access
Step 7: Check the "Select" privilege checkbox
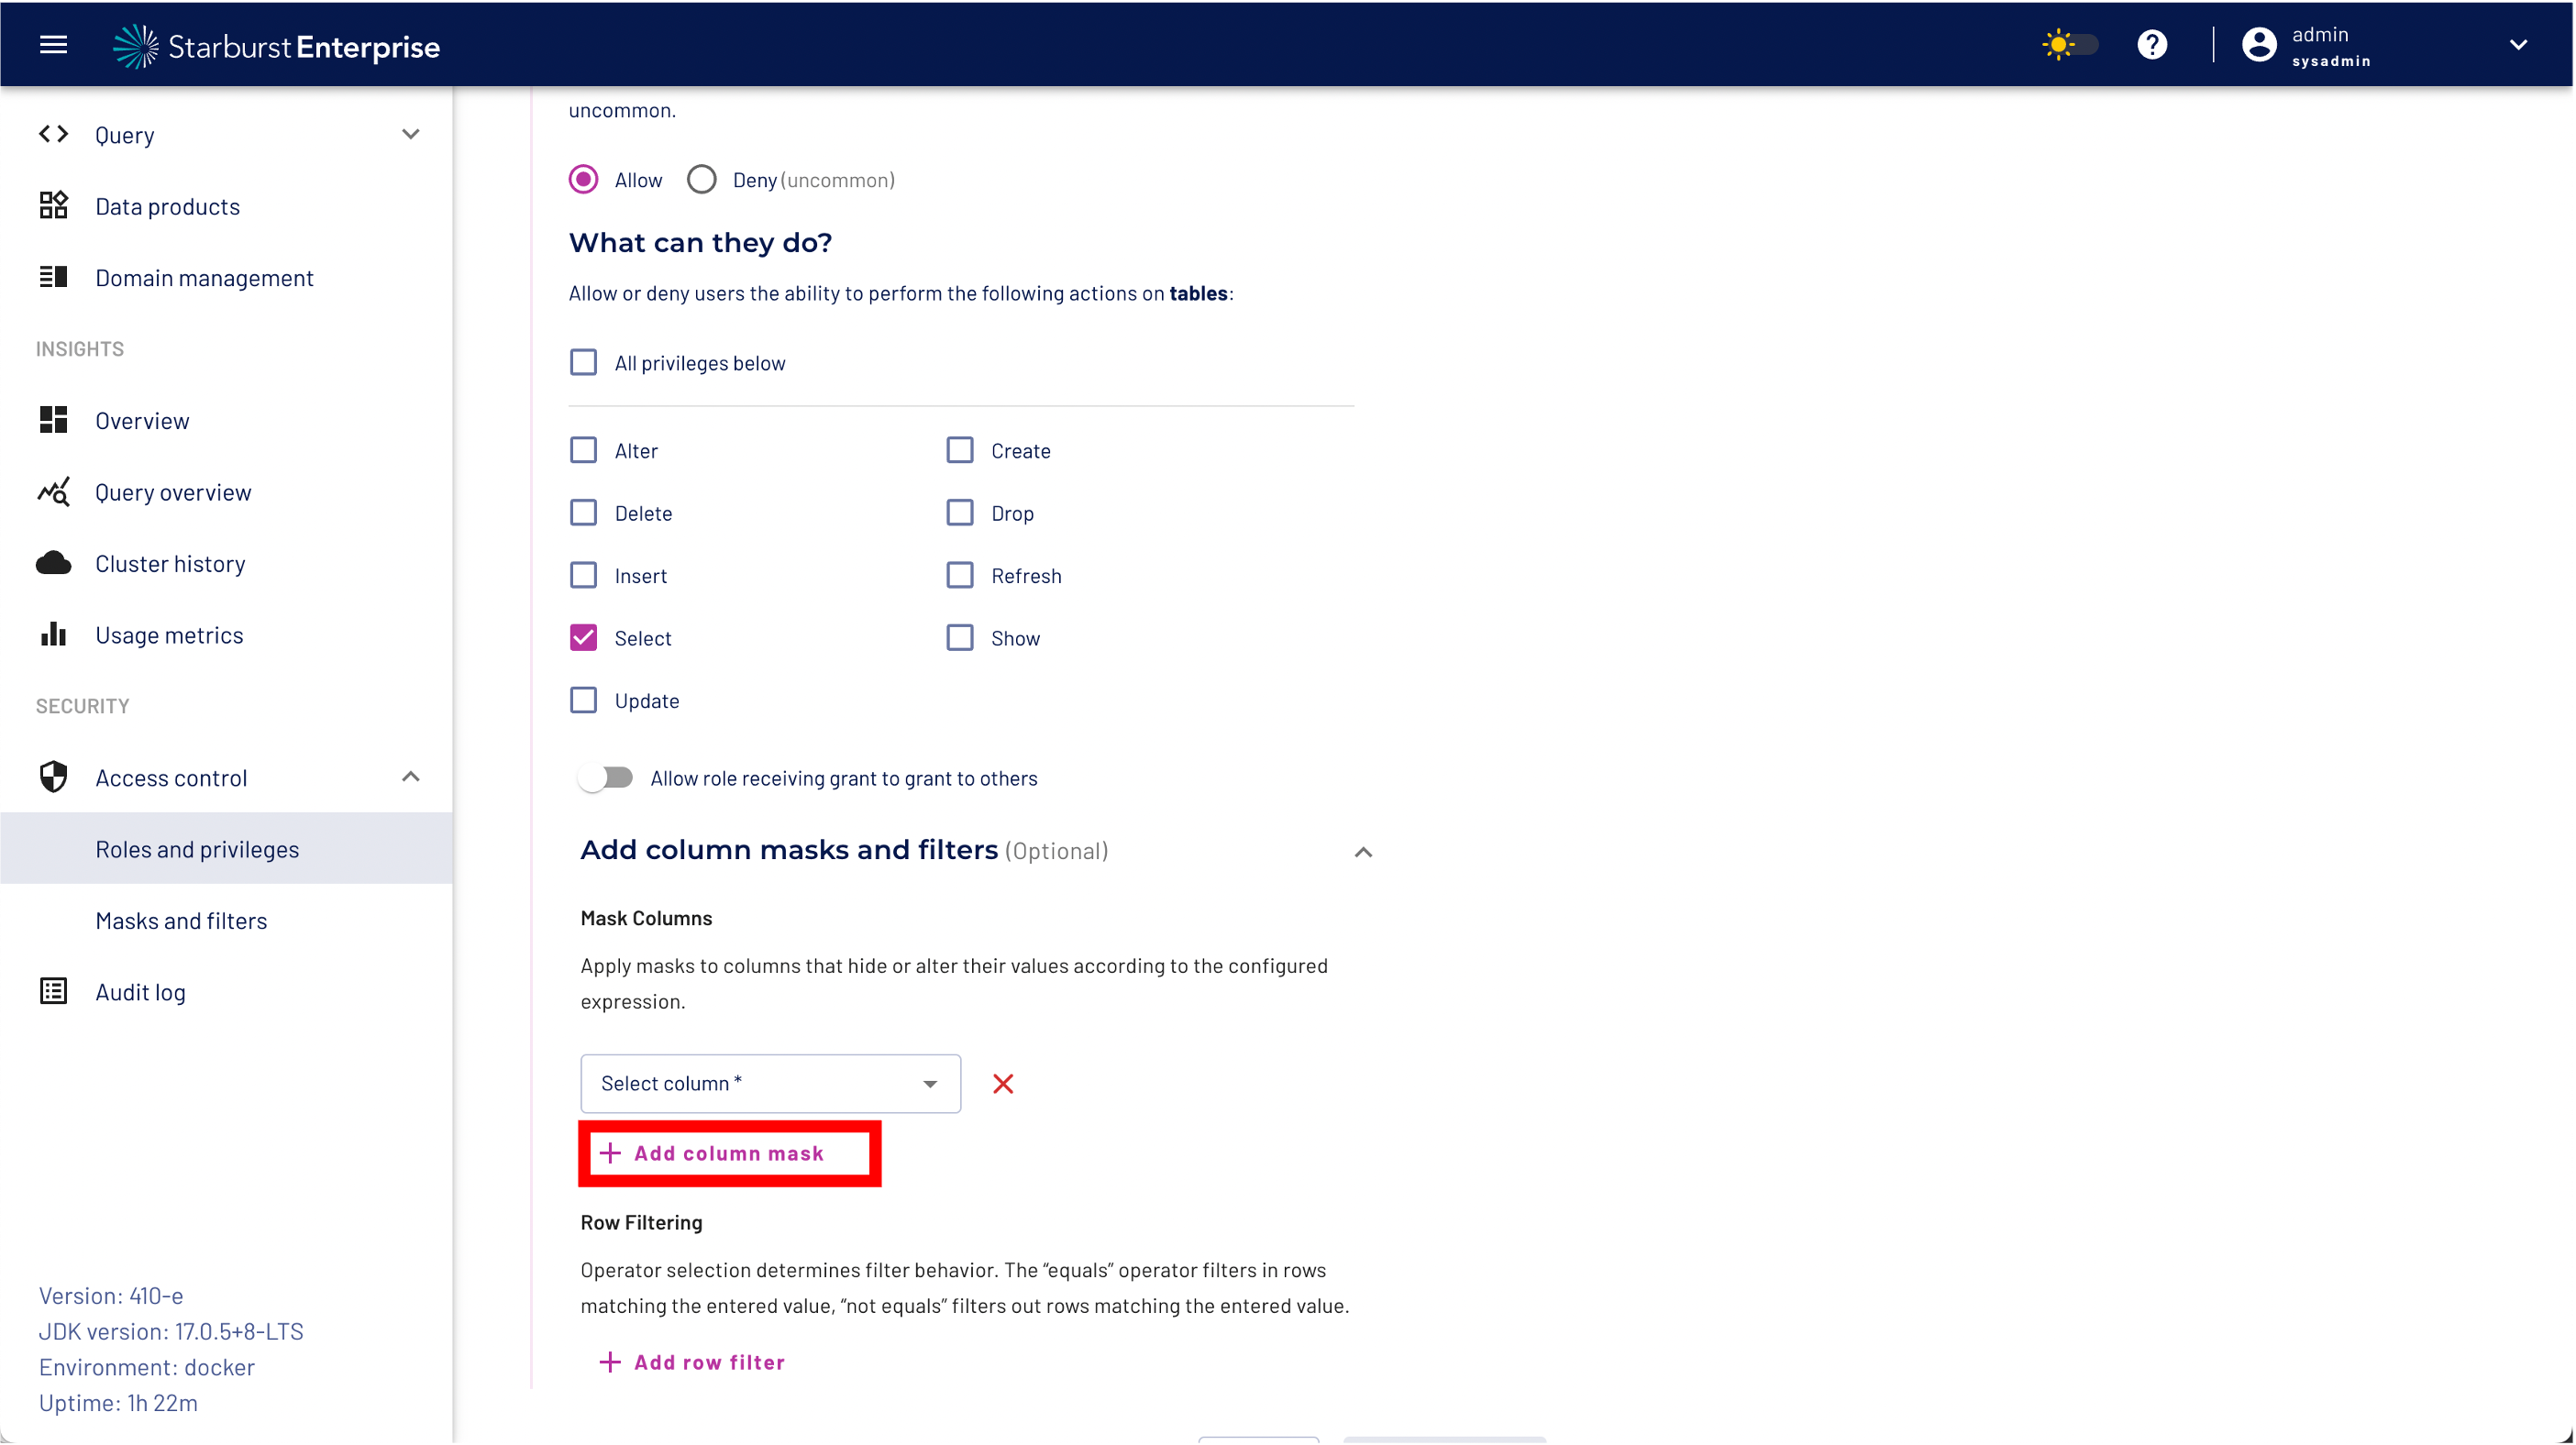
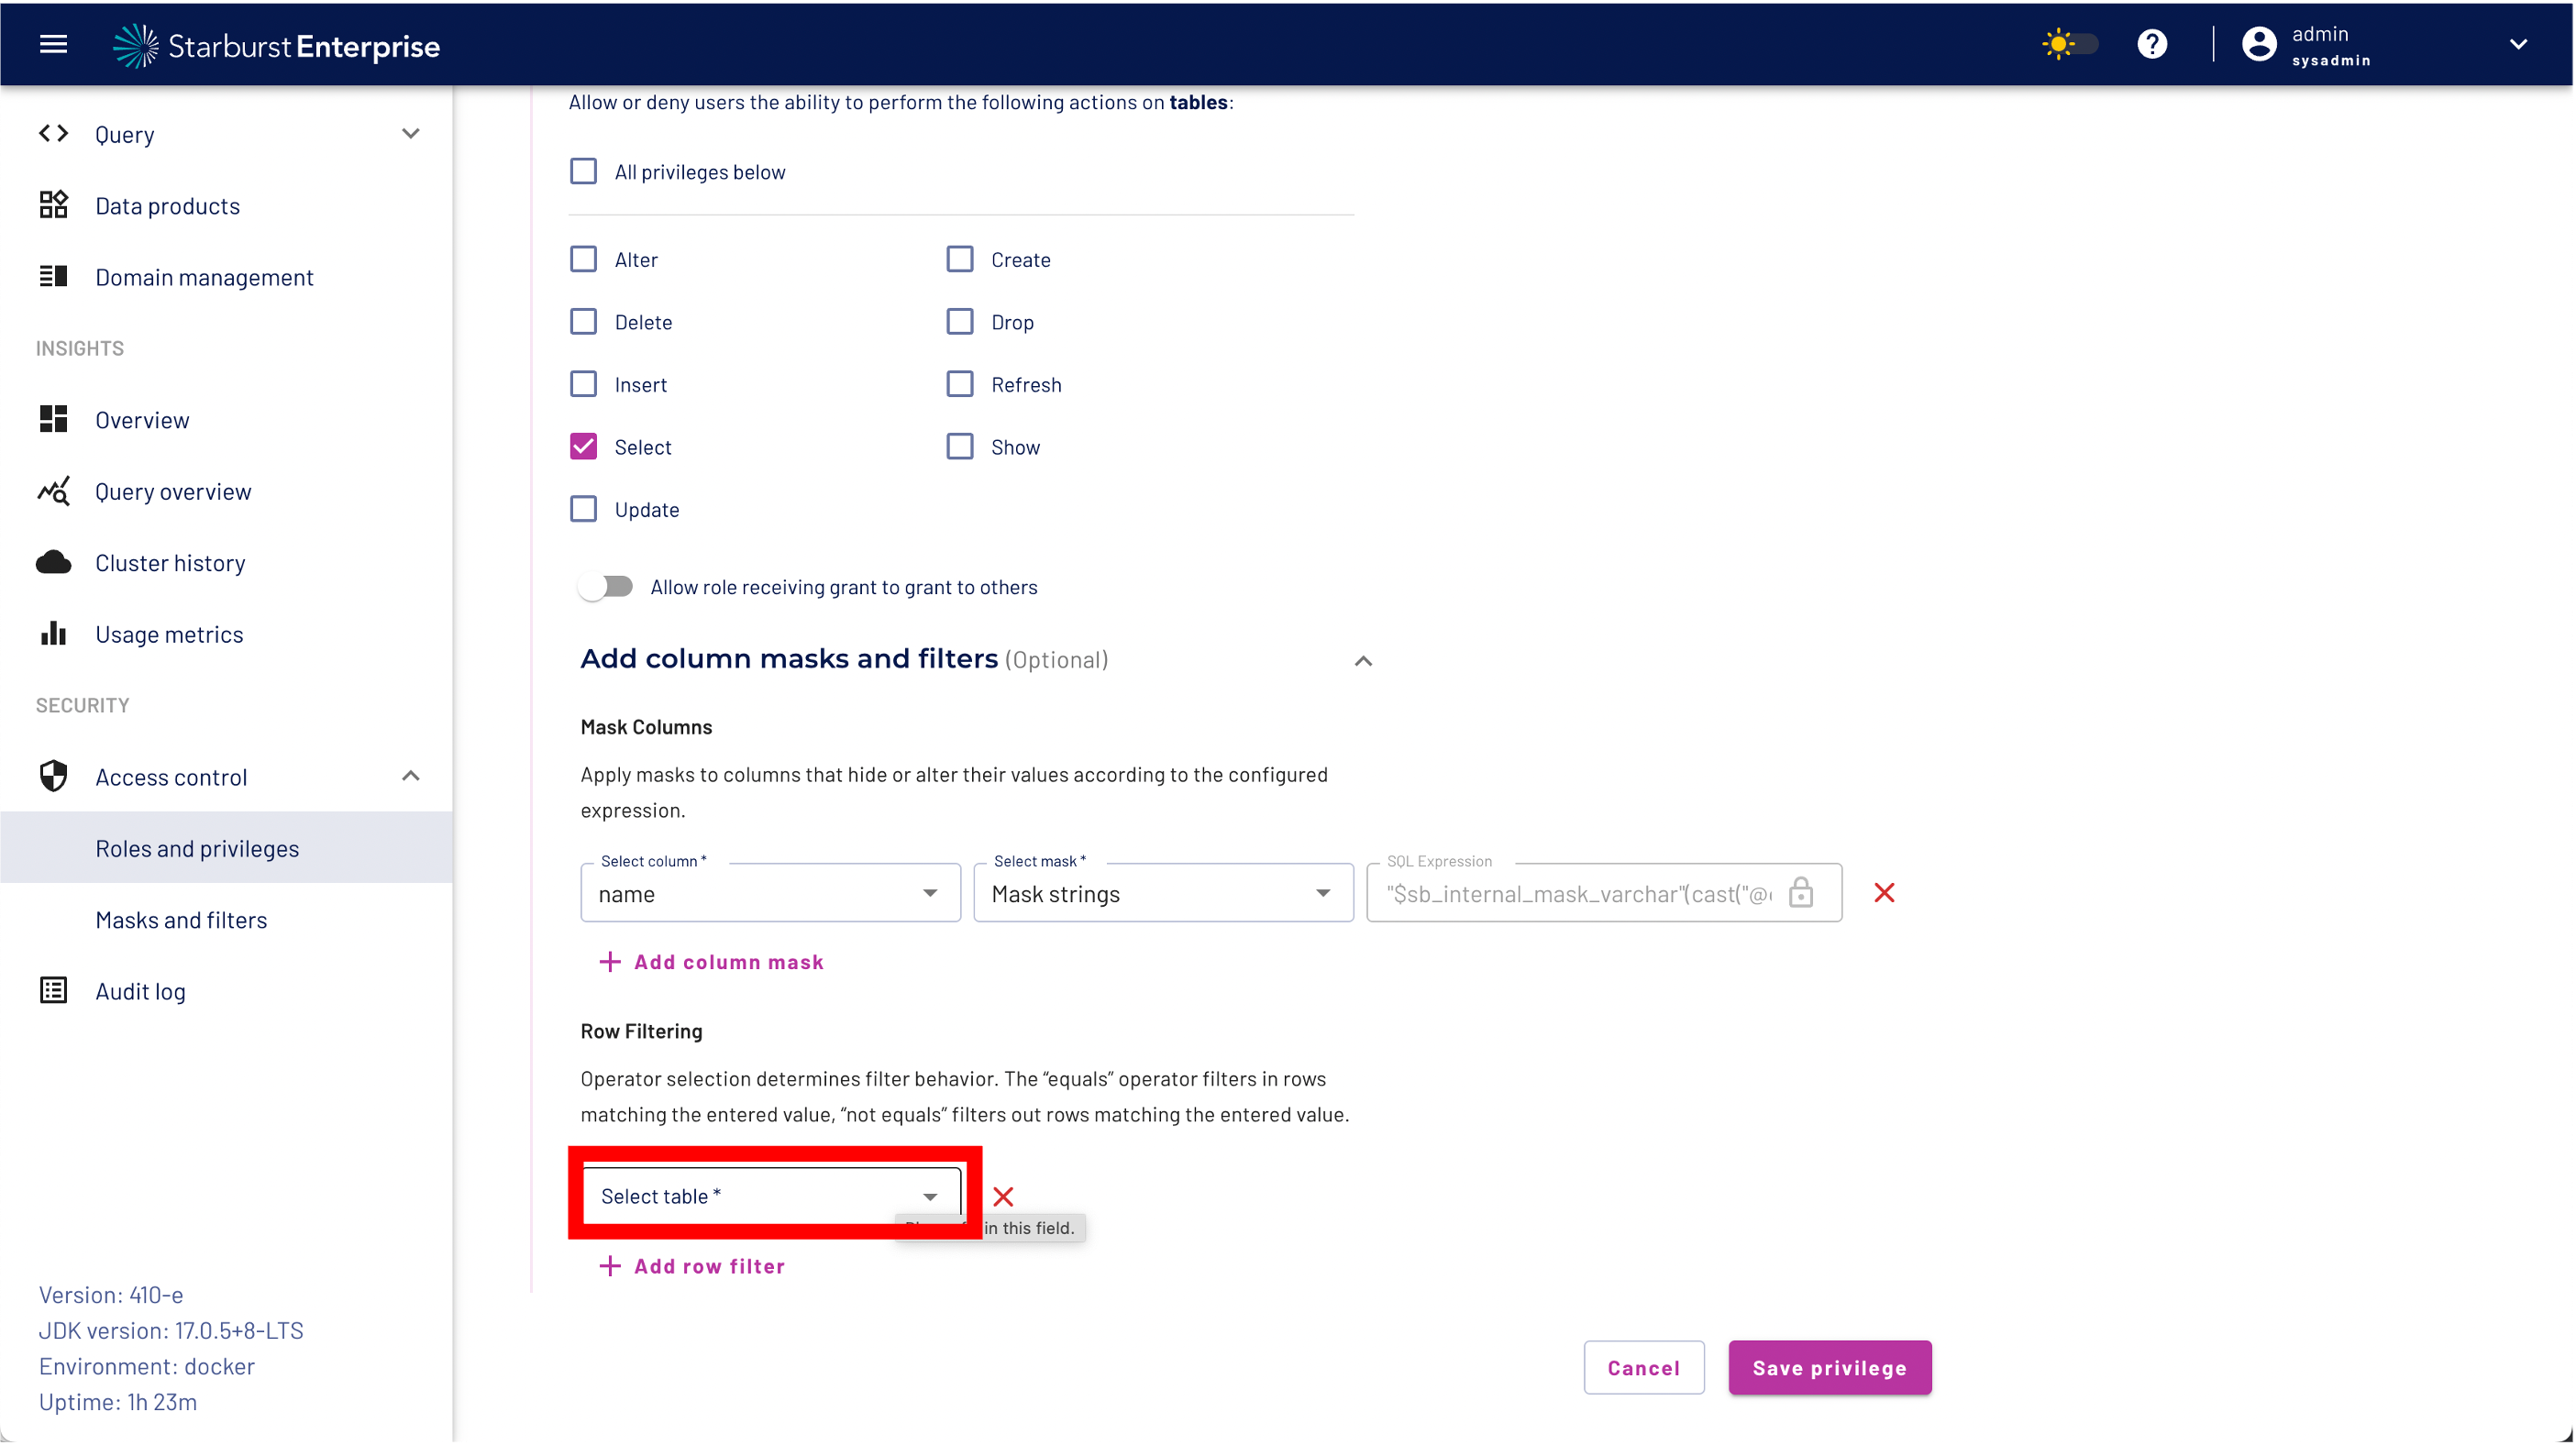
Step 8: Expand the "Add column masks and filters menu"
Step 9: Select the "Add column mask" button
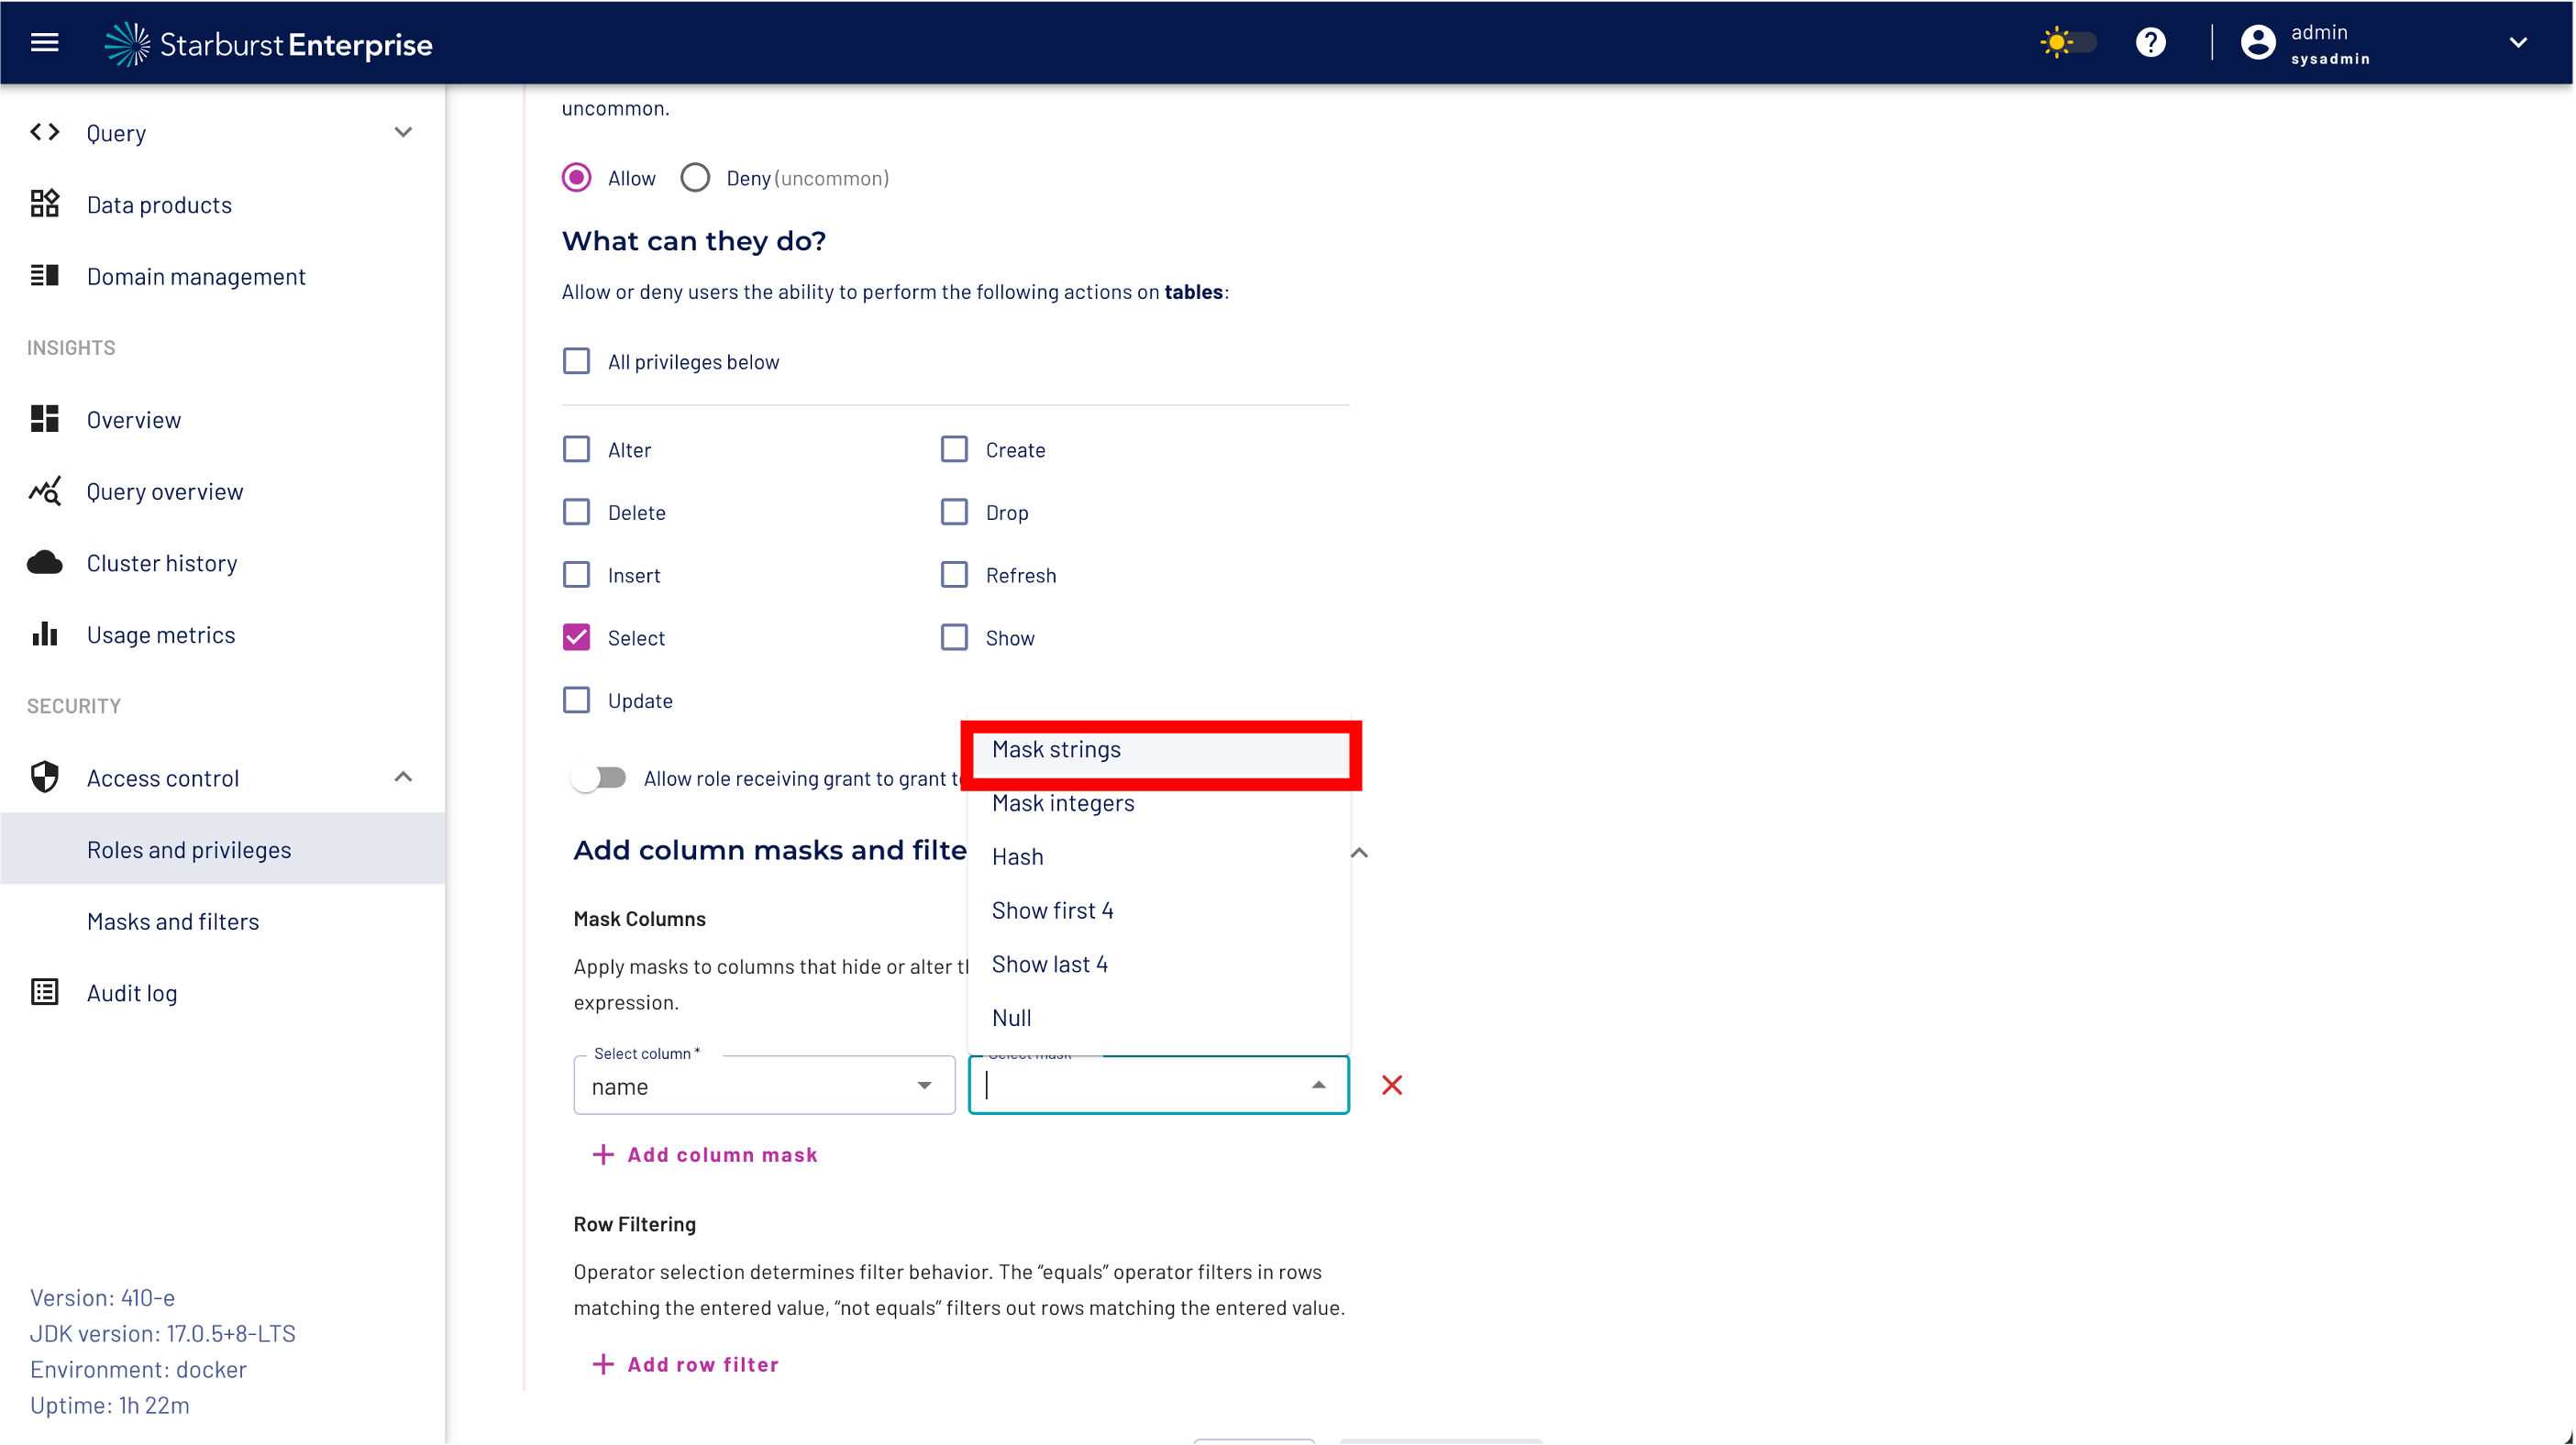
Step 10: select the name column and select the column mask strings
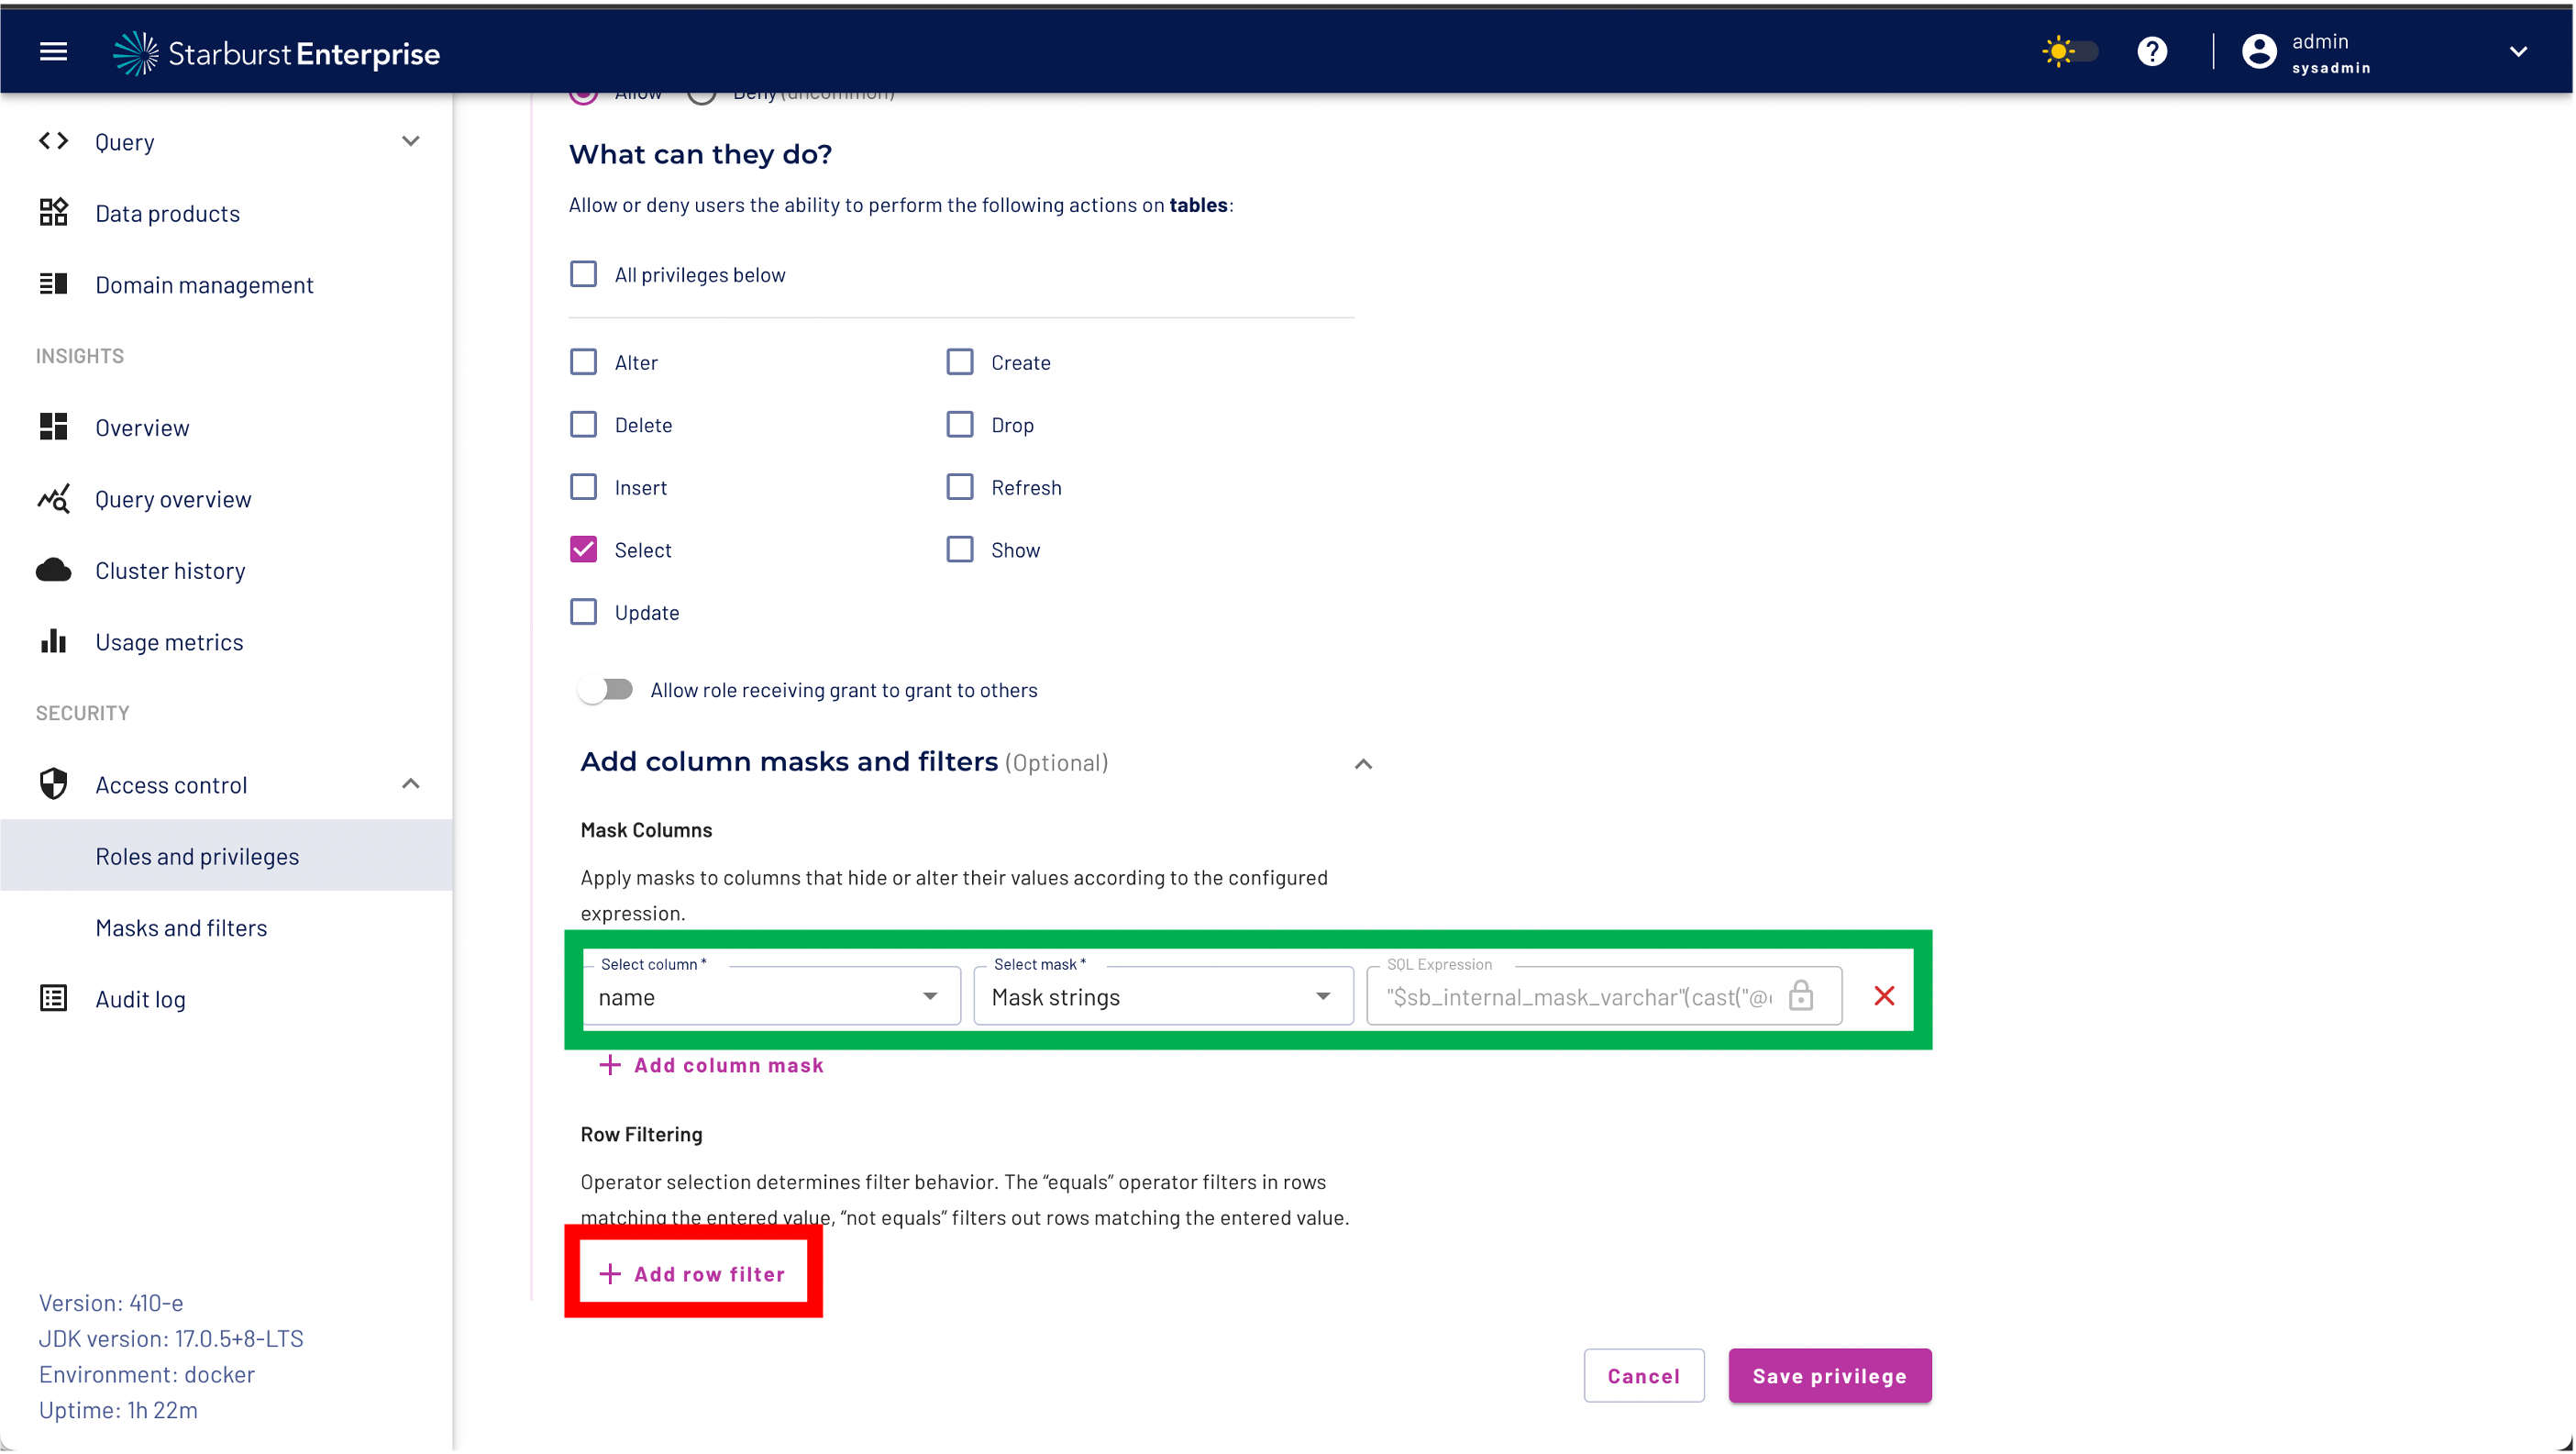
Step 11: validate that you have set the correct column mask.
Step 12: click the "Add row filter" button.
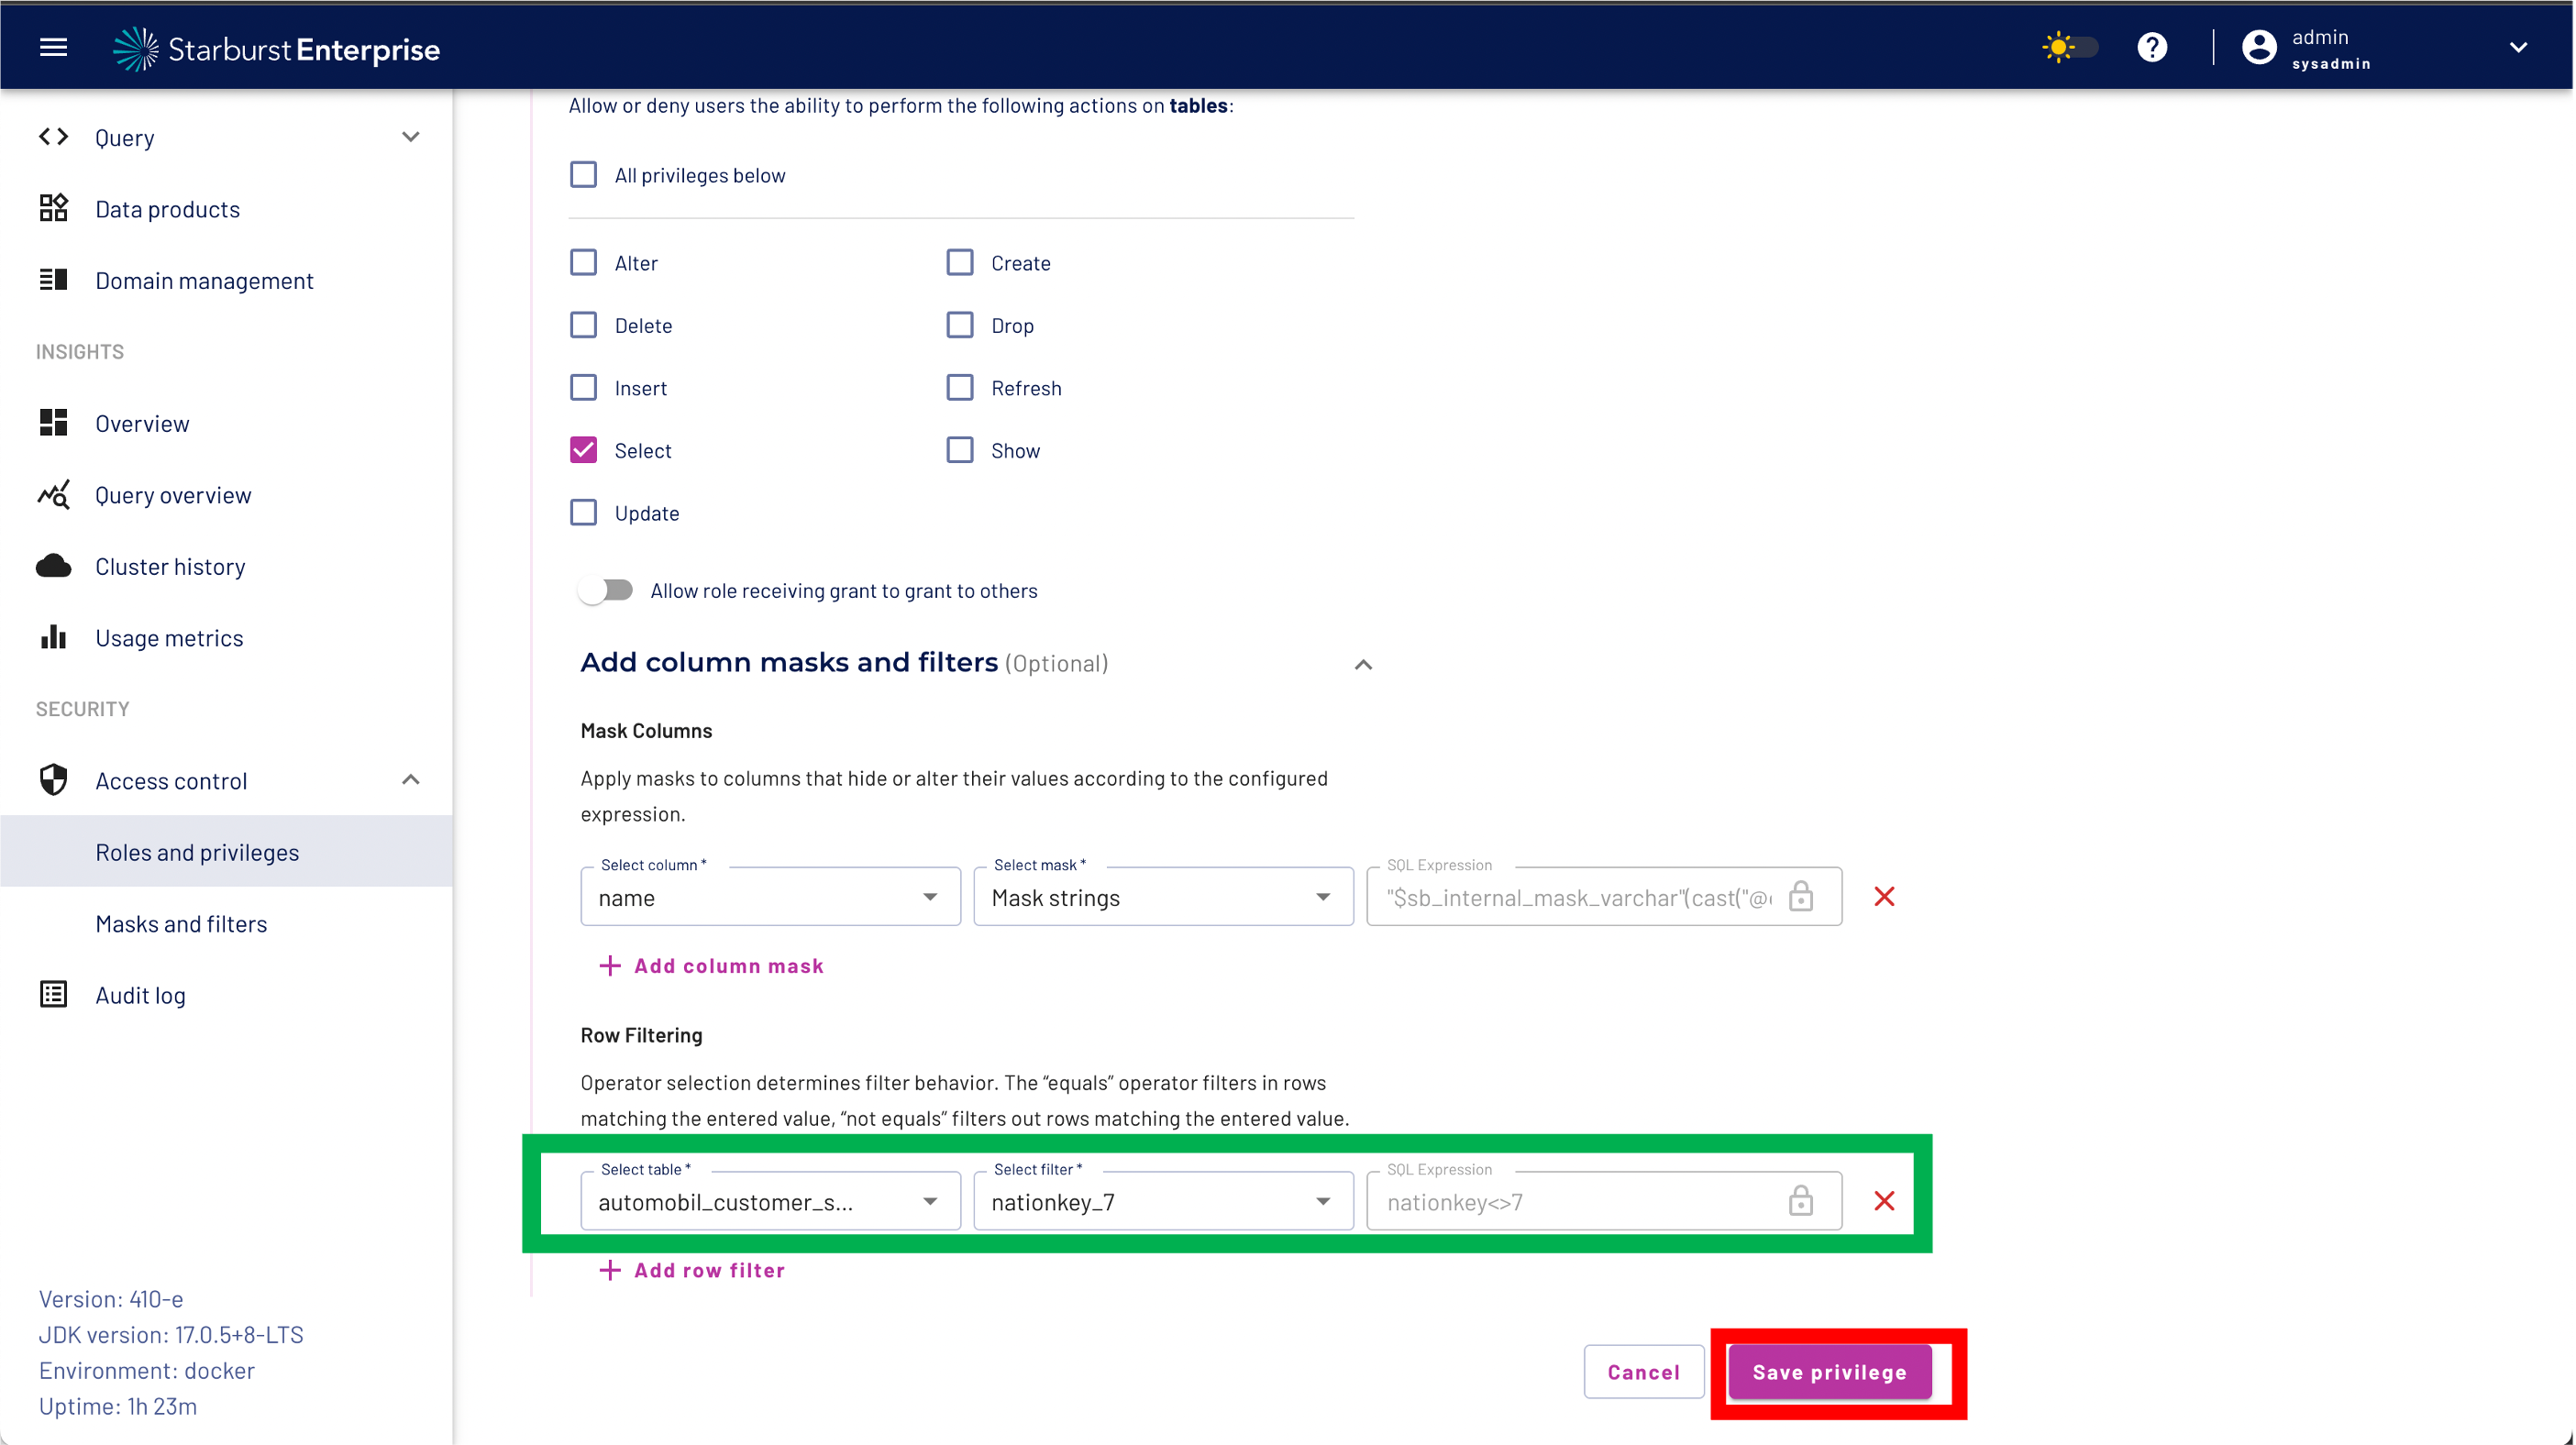
Step 13: Select the row filter nationkey_7 from the drop down menu
Step 14: Validate your row filter as shown below
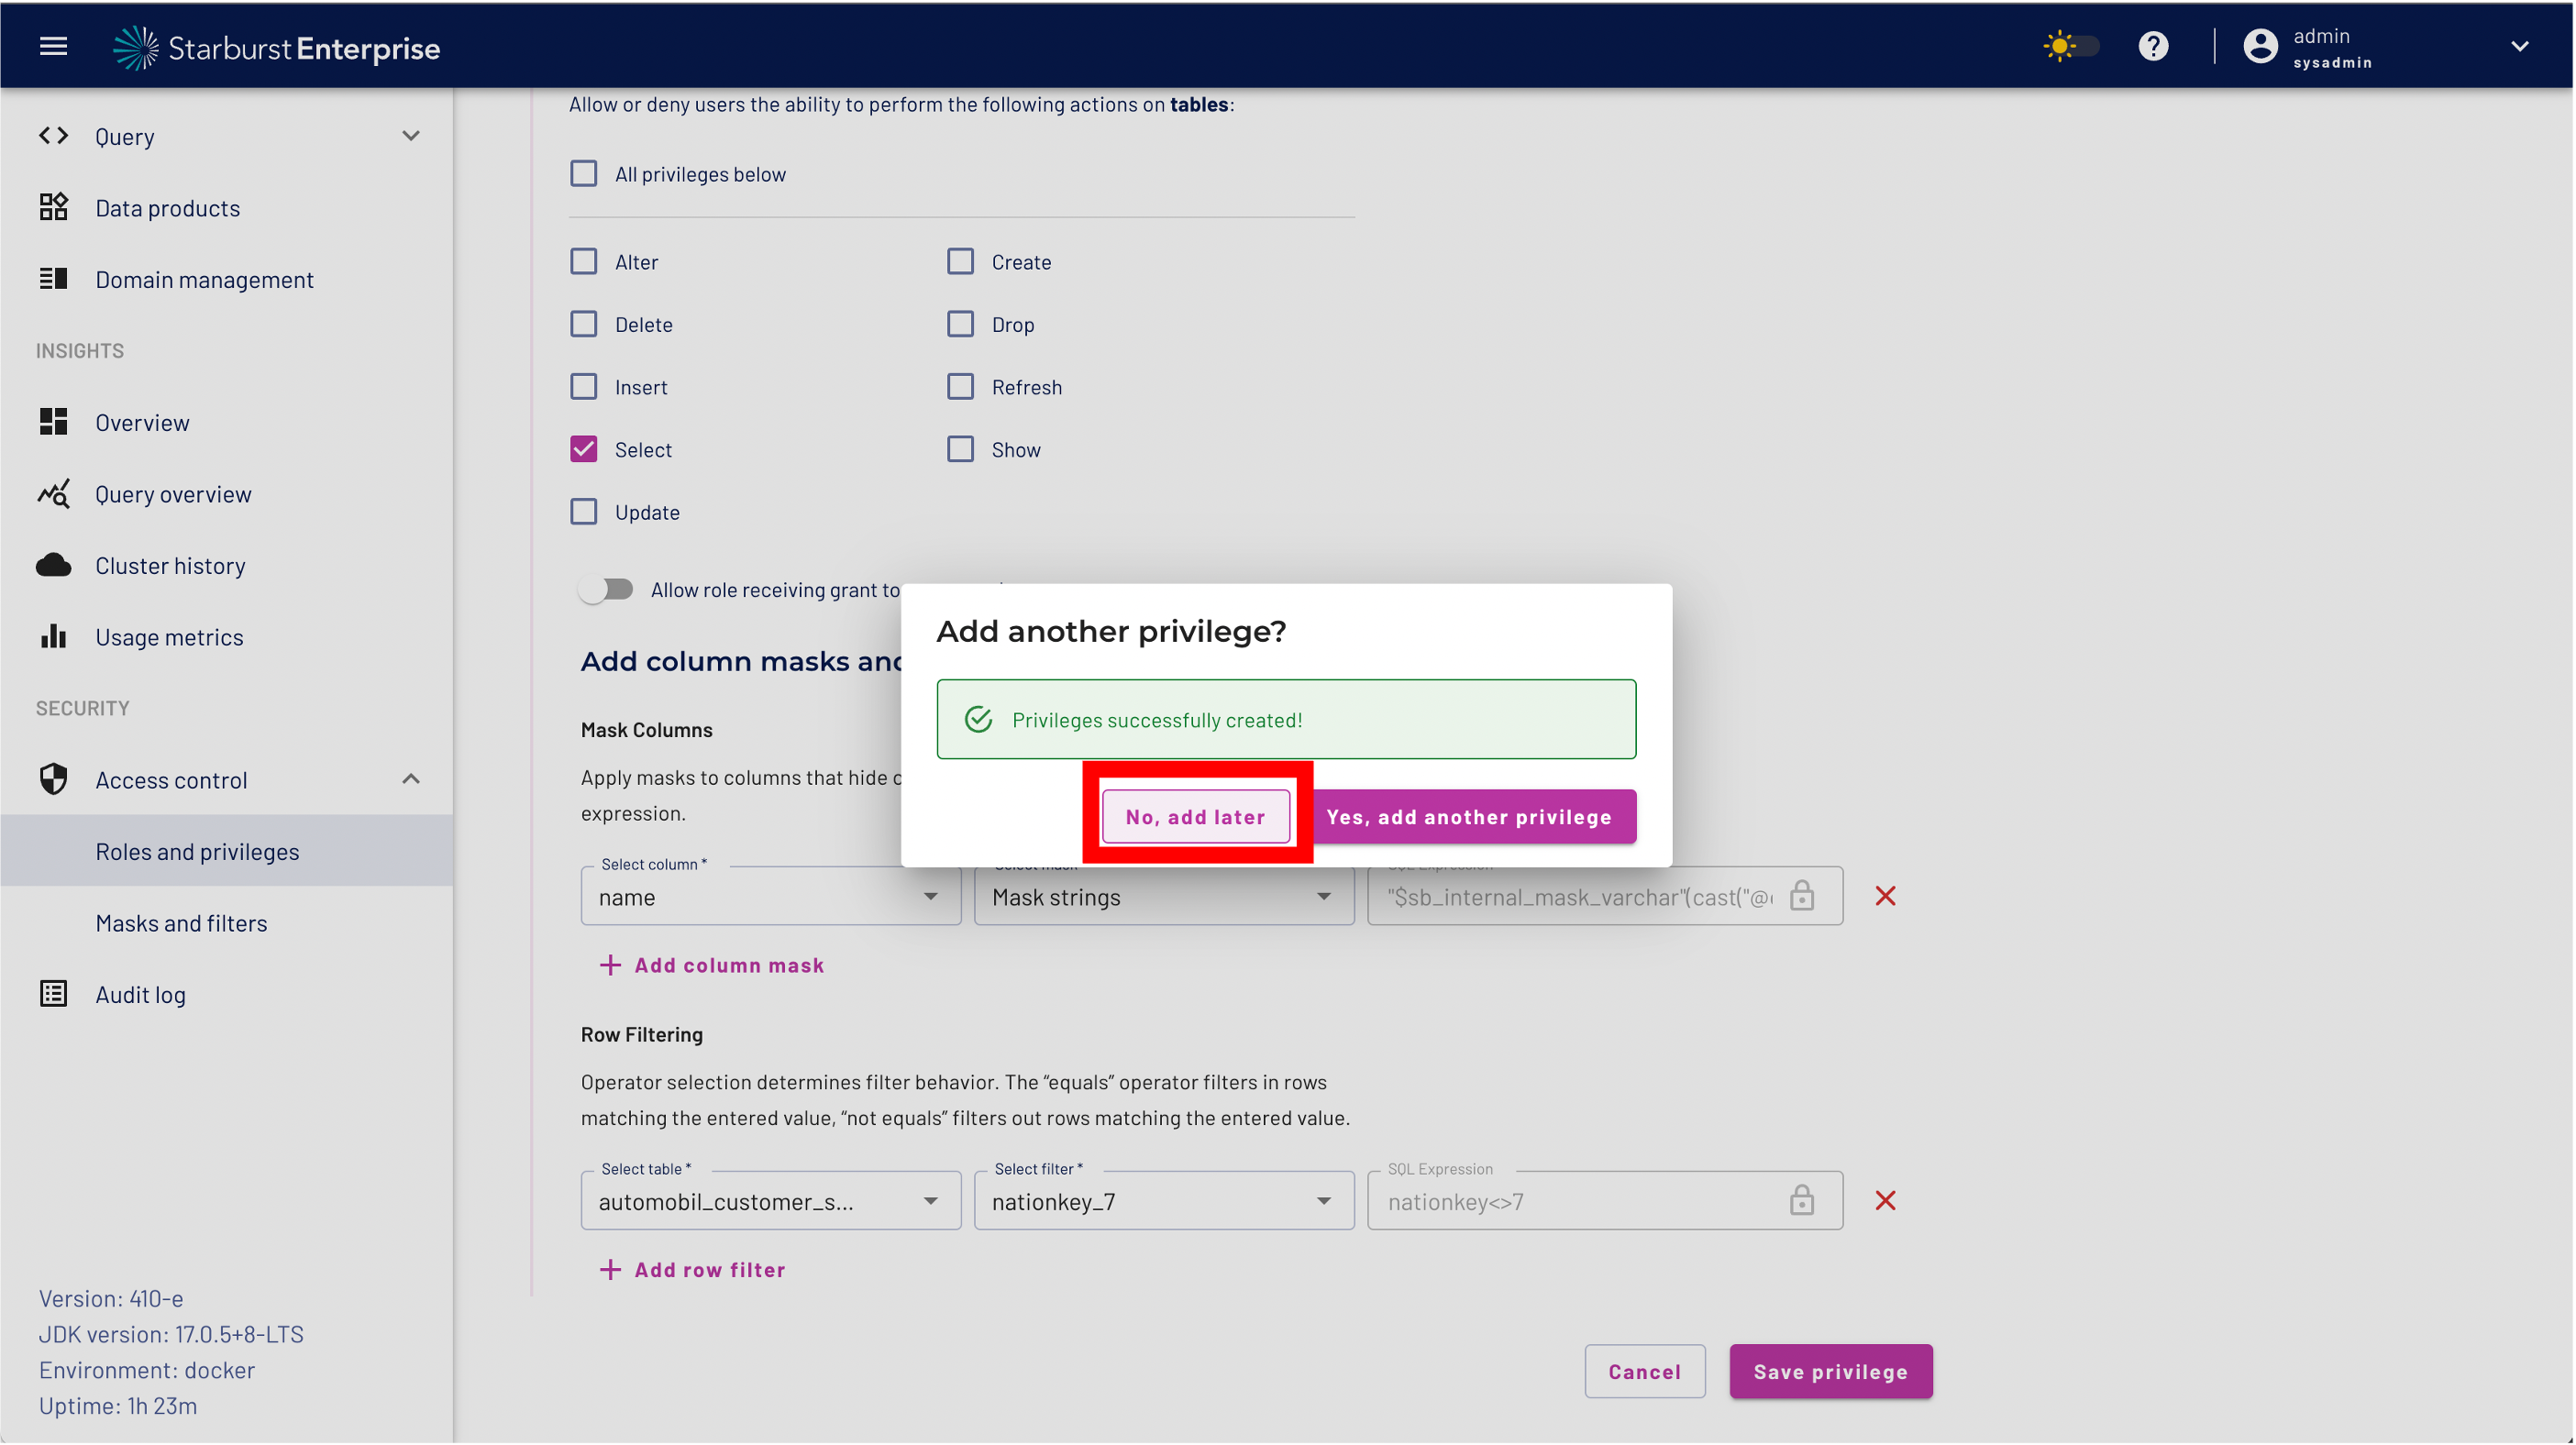
Step 15: We don't want to add another privilege so you can Click the "No, add later" button
To validate the permissions for our BIAC Roles and for our data product we would need another browser window for our datascience1 user.
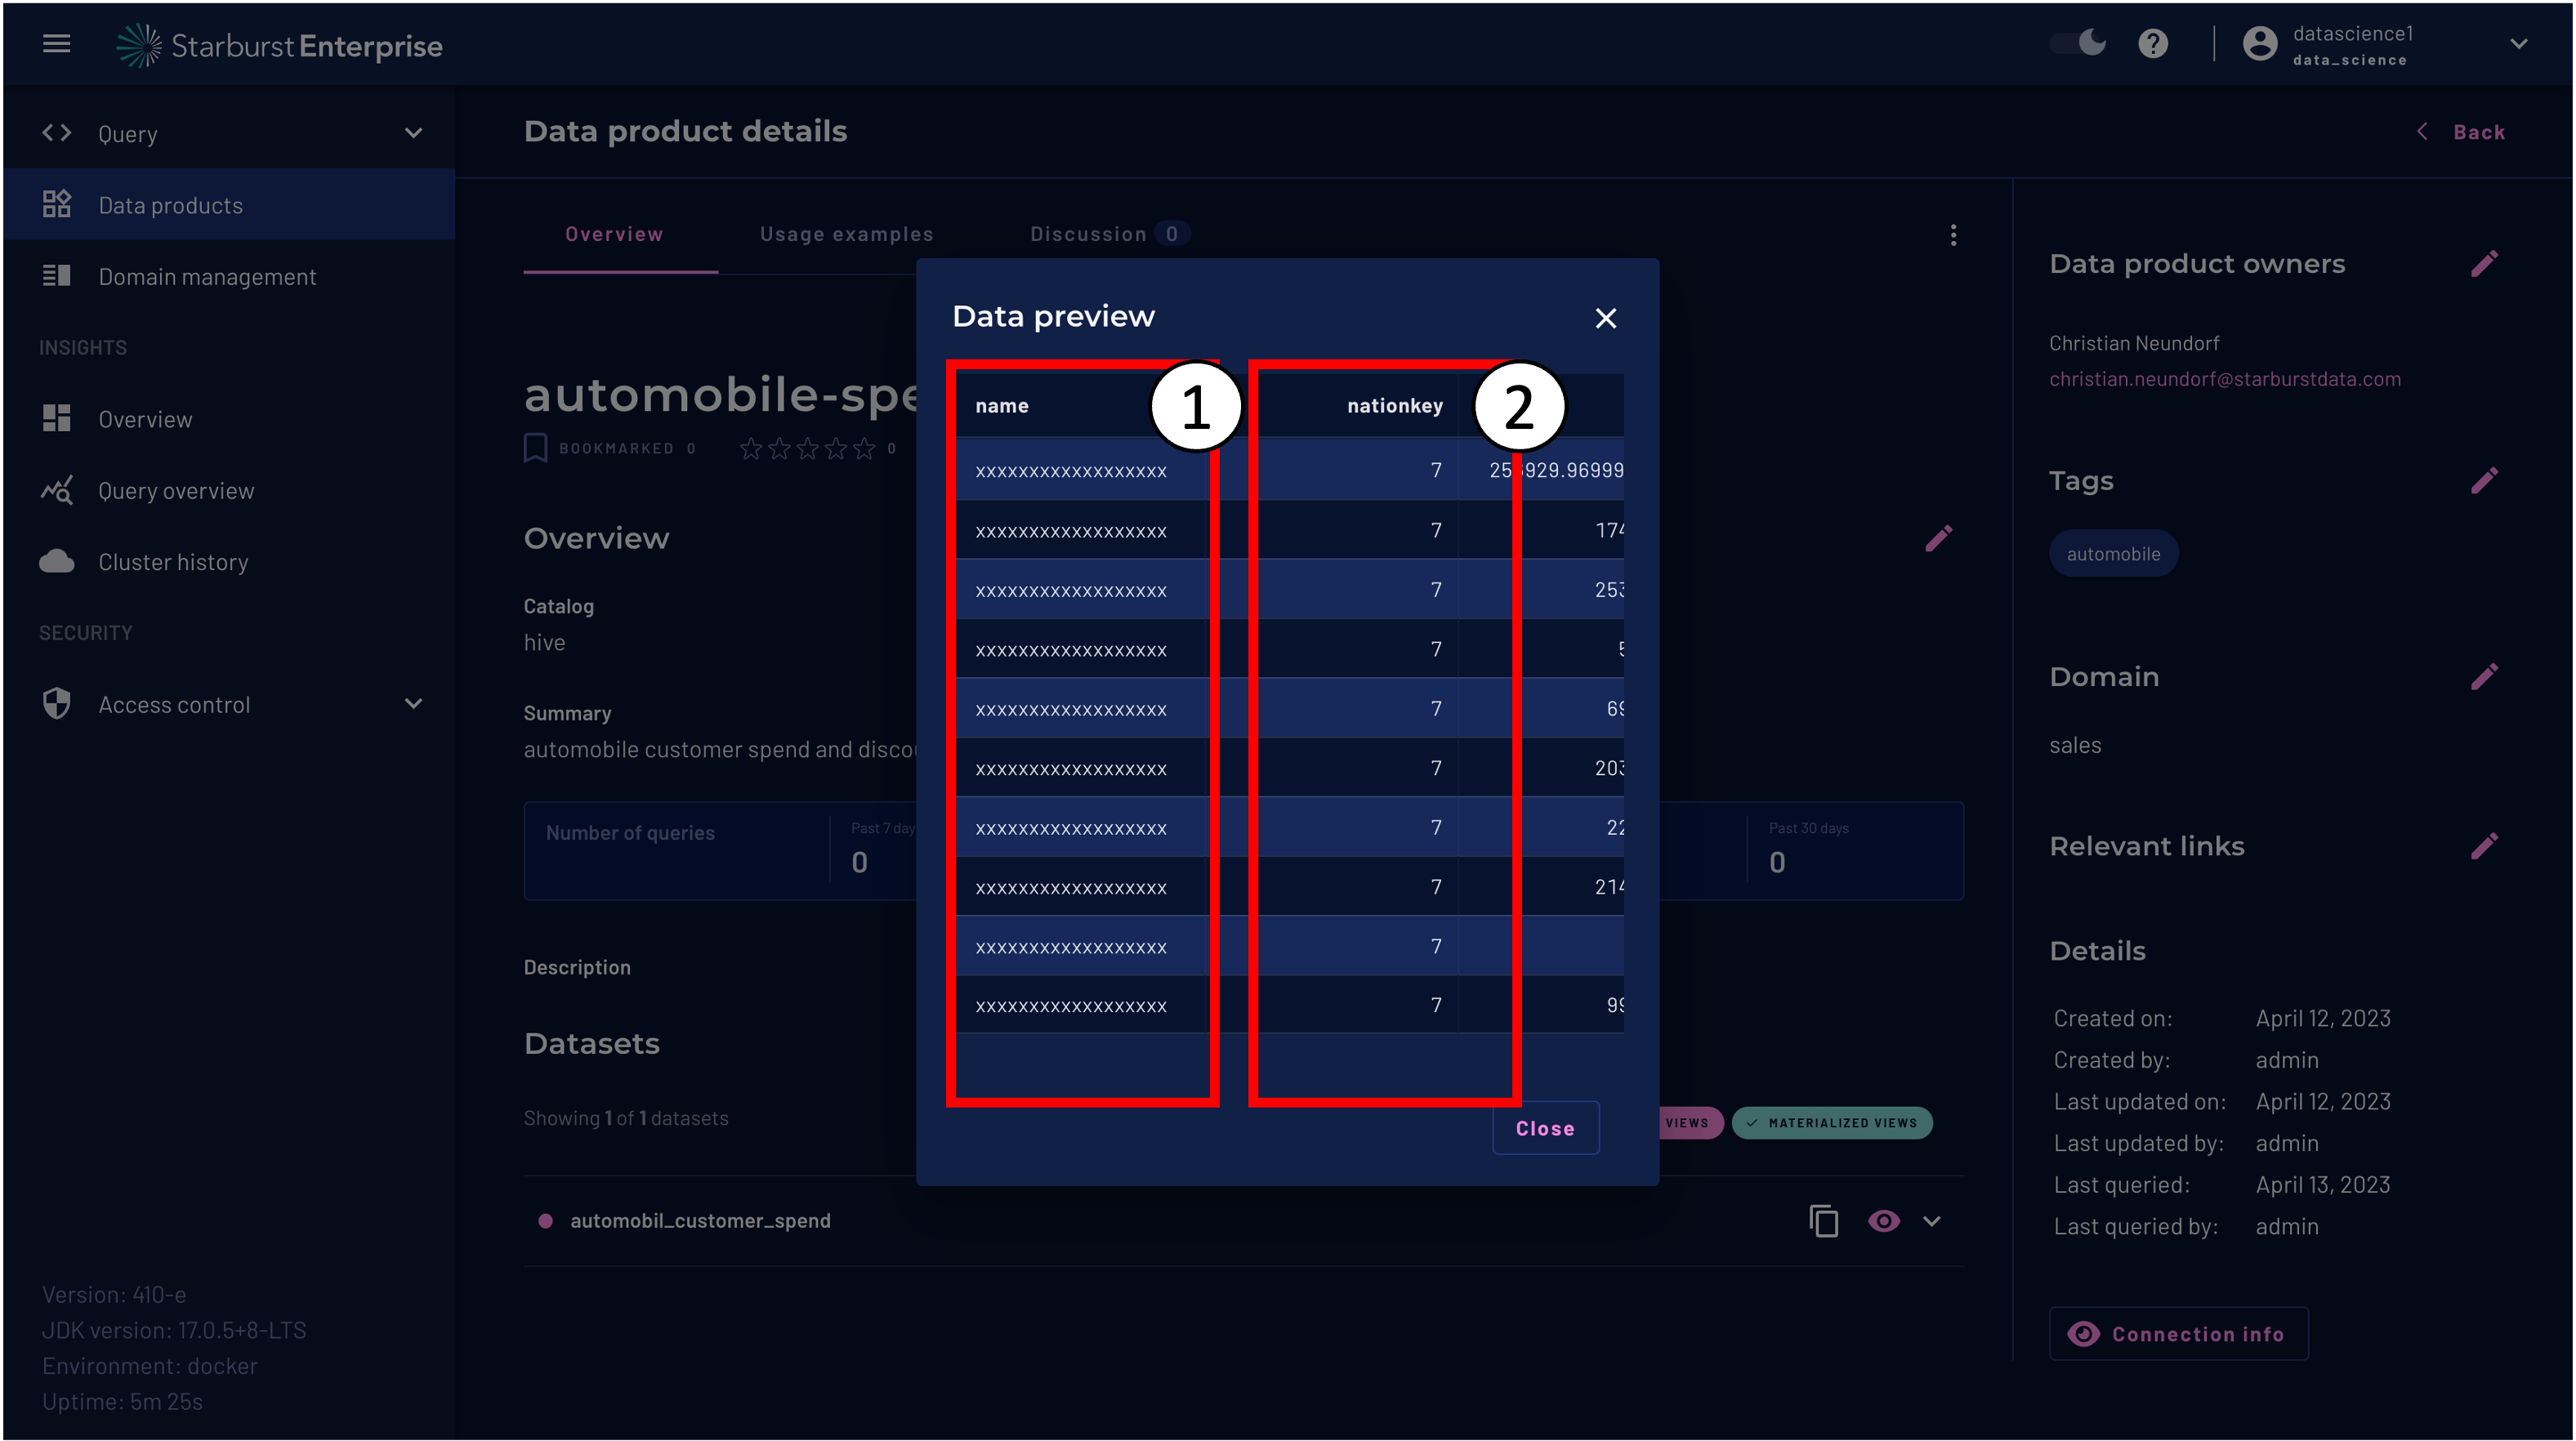
The datascience1 user is assigned to the data_science role. Our goal was to maks the name column and allow only rows with the nationkey = 7 for that user.
Now it is the time to validate.
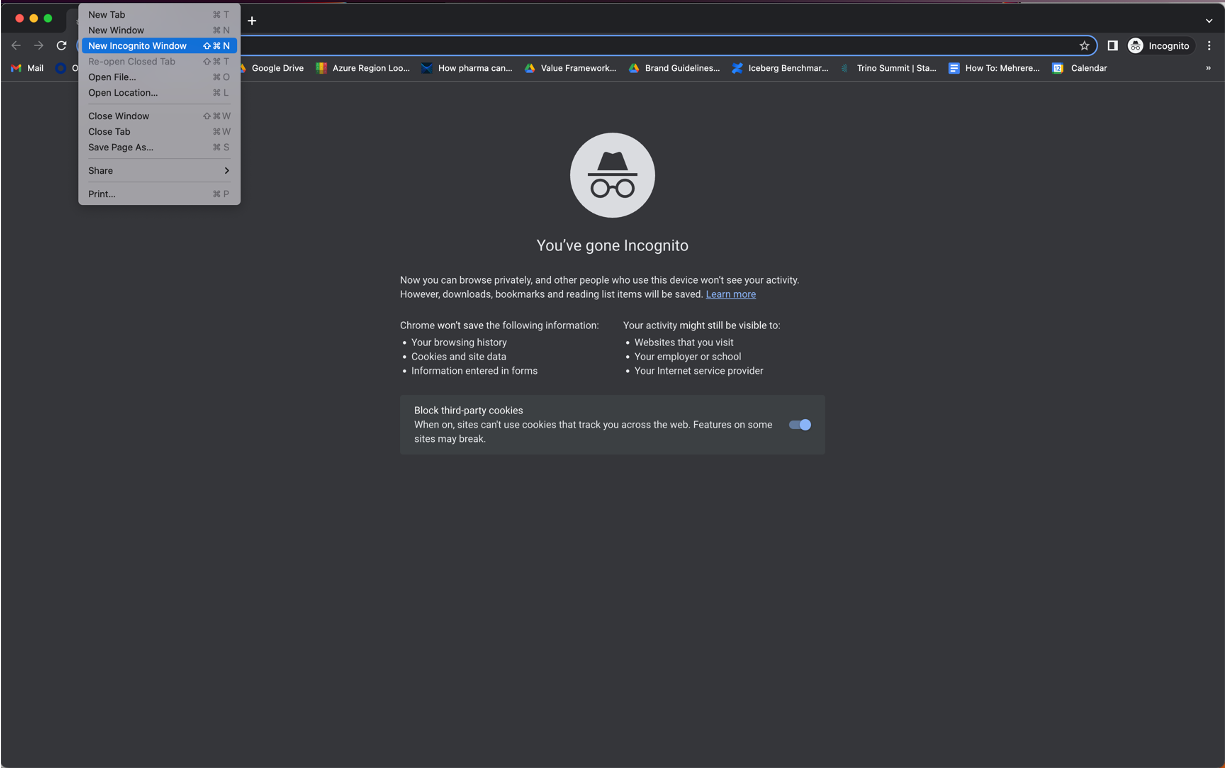
Step 16: Open Chrome and a new incognito window.
Step 17: Login with your datascience1 user.
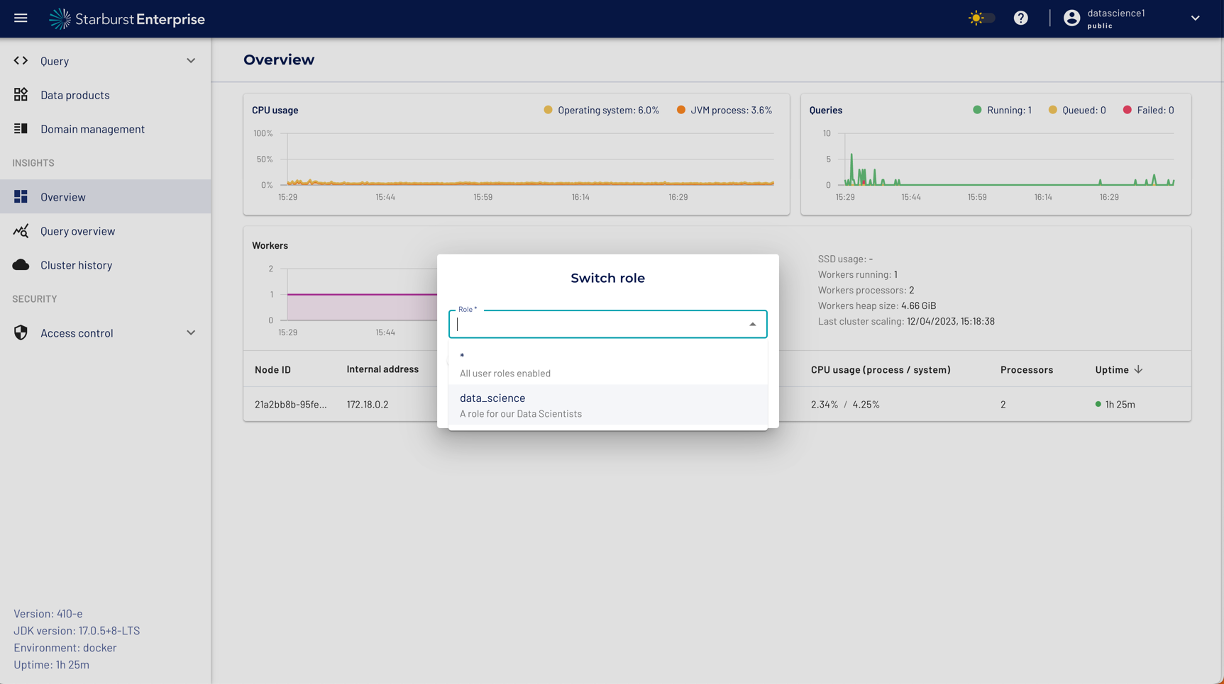
Step 18: Select the data_science role and click the rember selected role button.
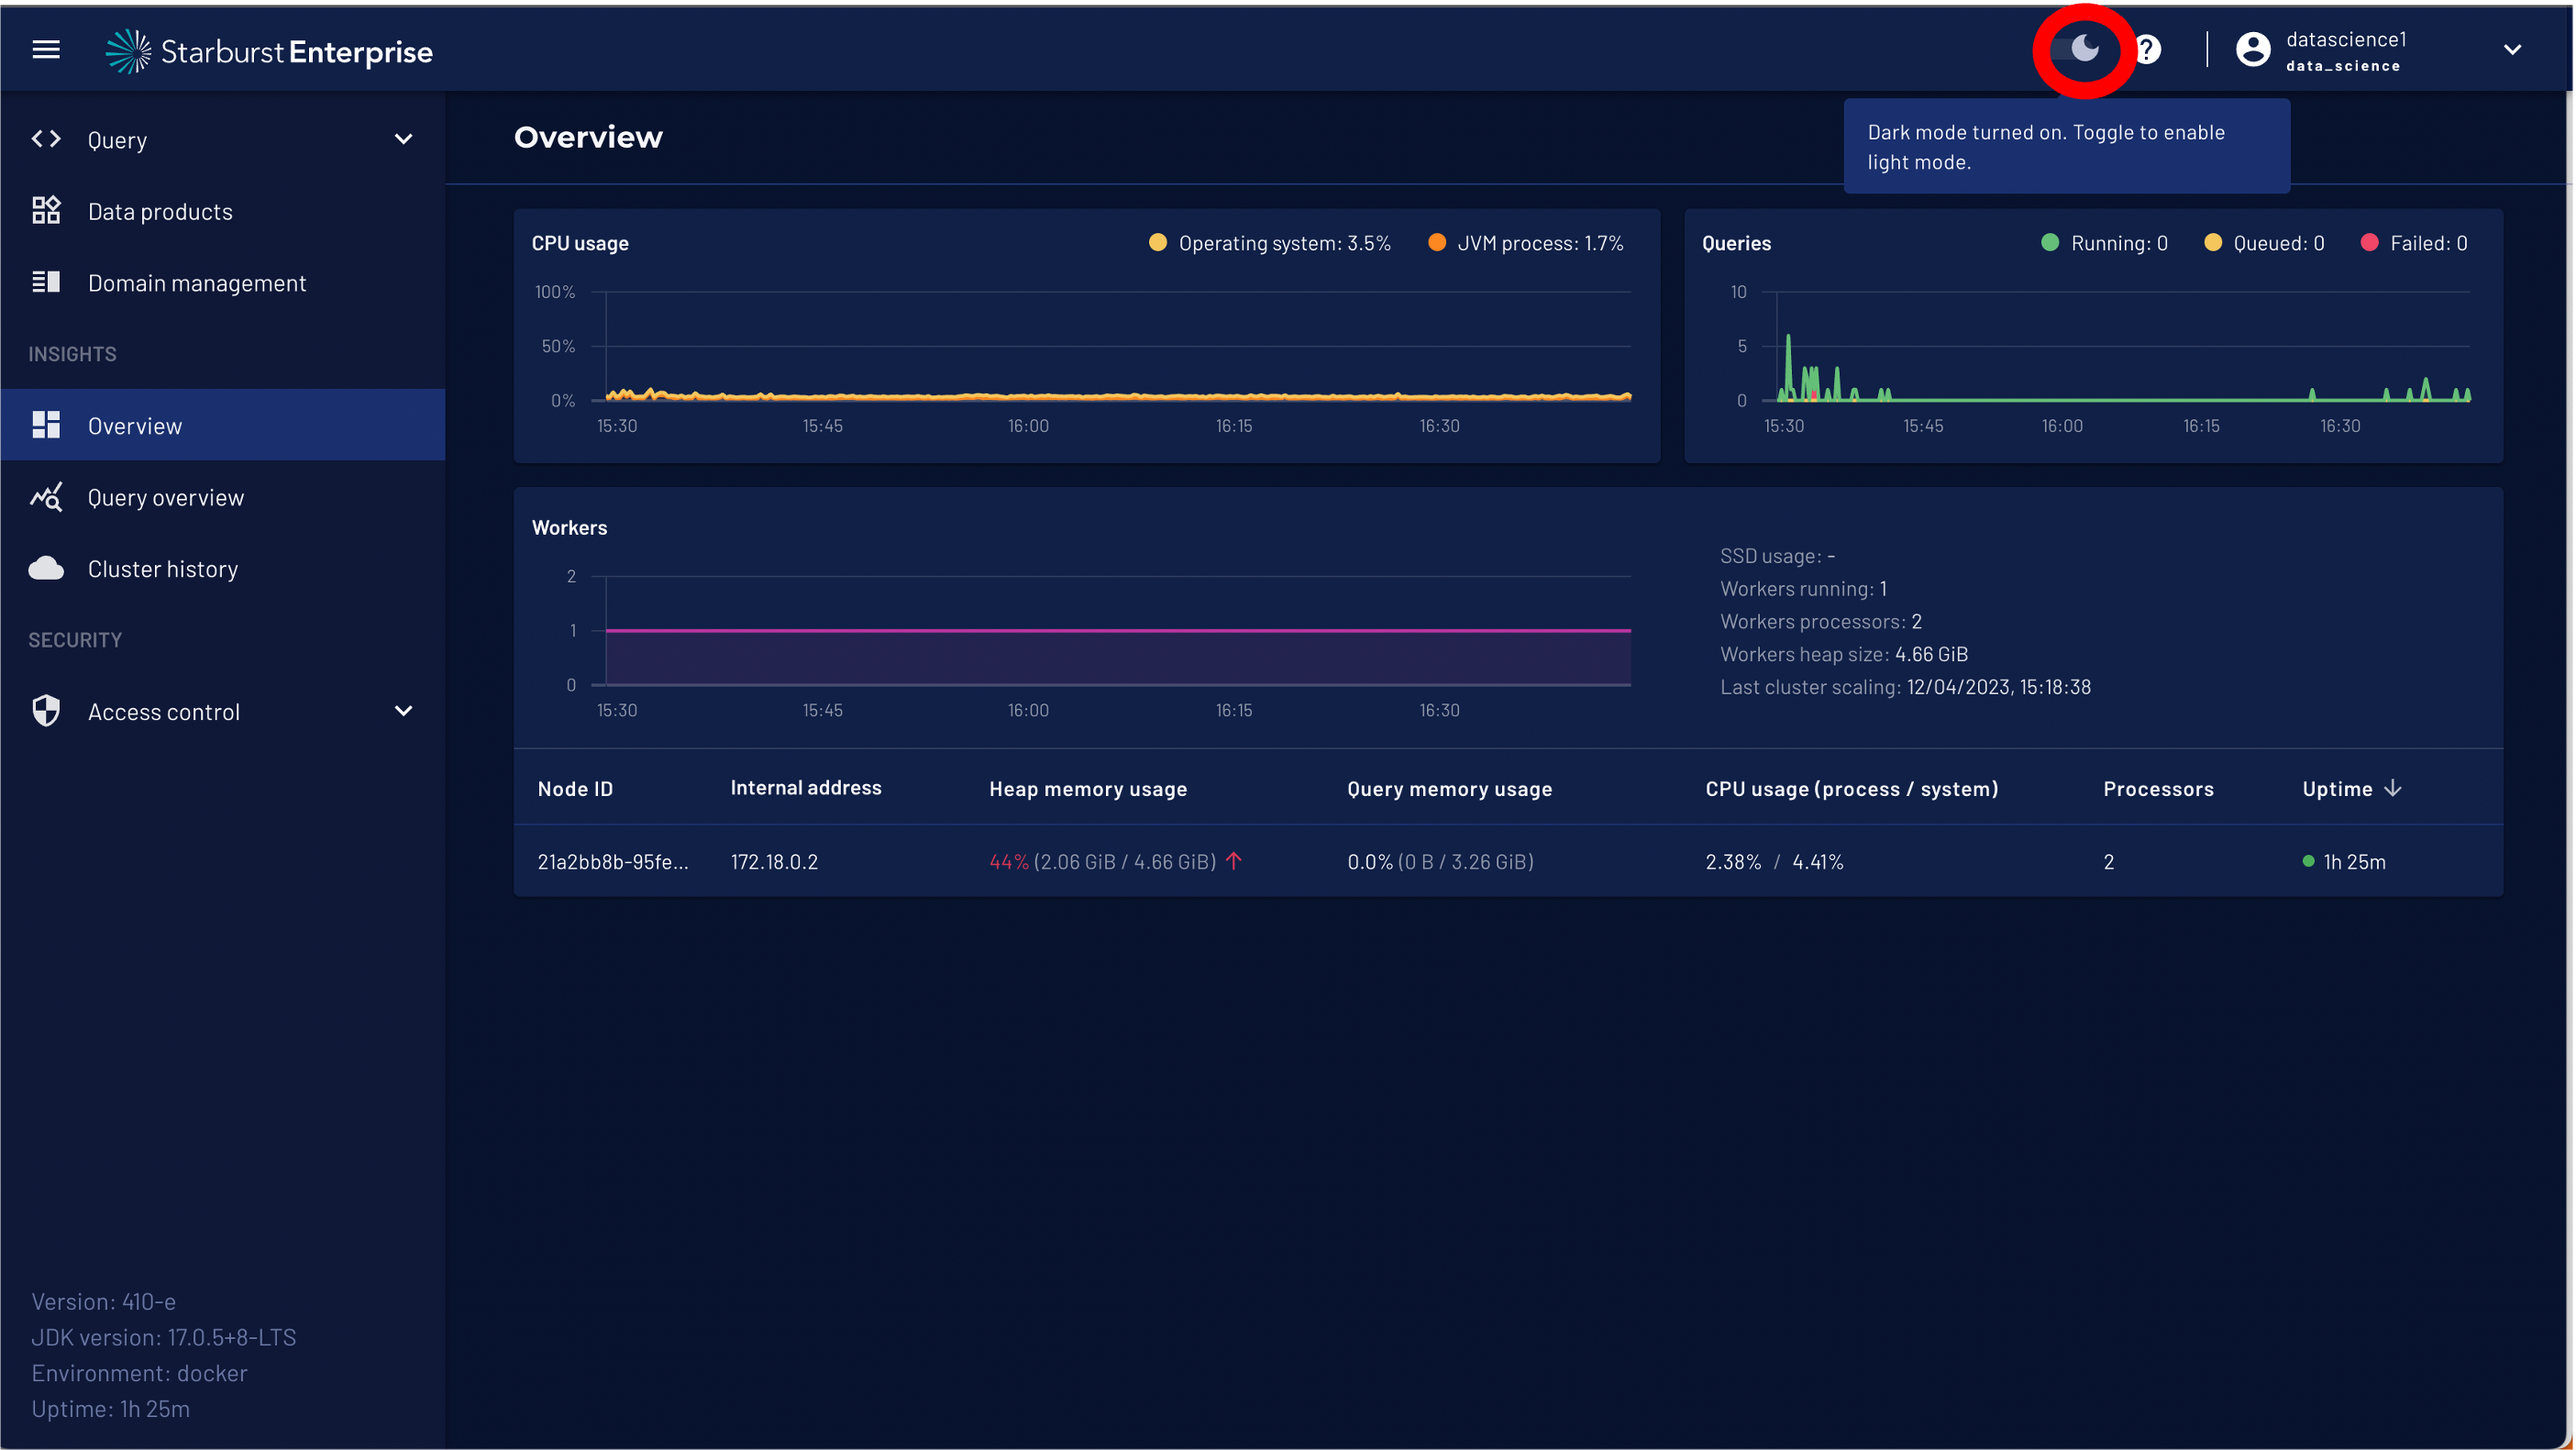
Step 19: As we will work and switch between different Users (admin and datascience1) we will enable dark mode for our datascience1 user.
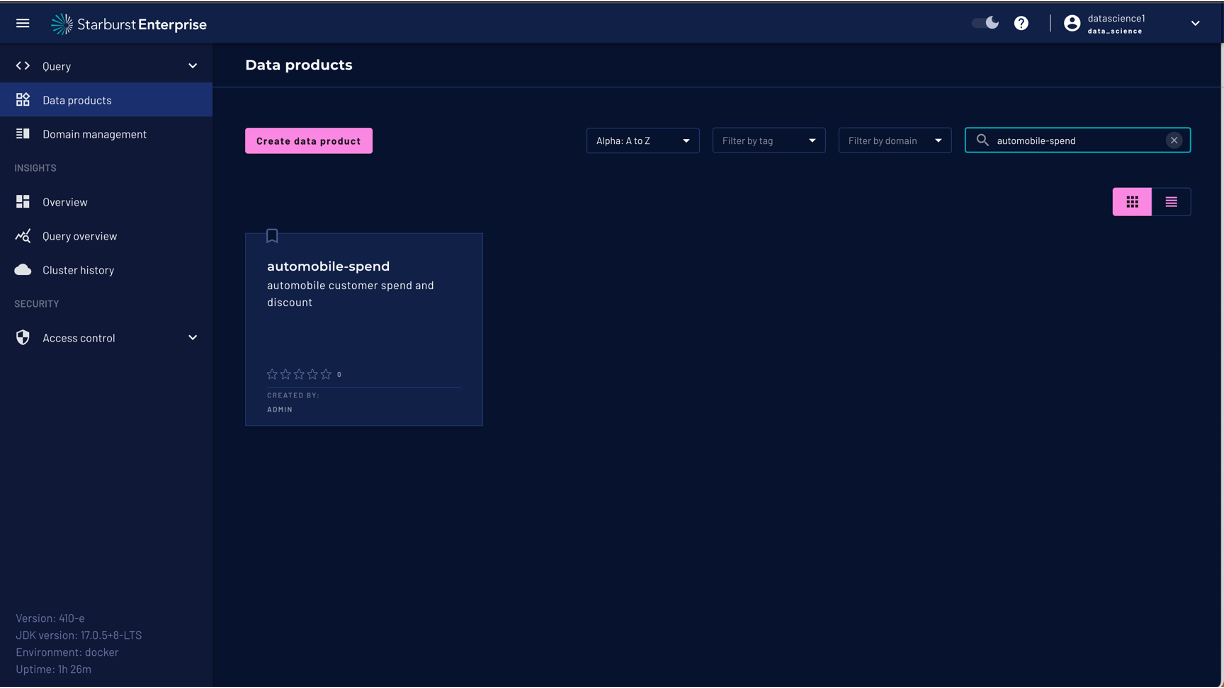
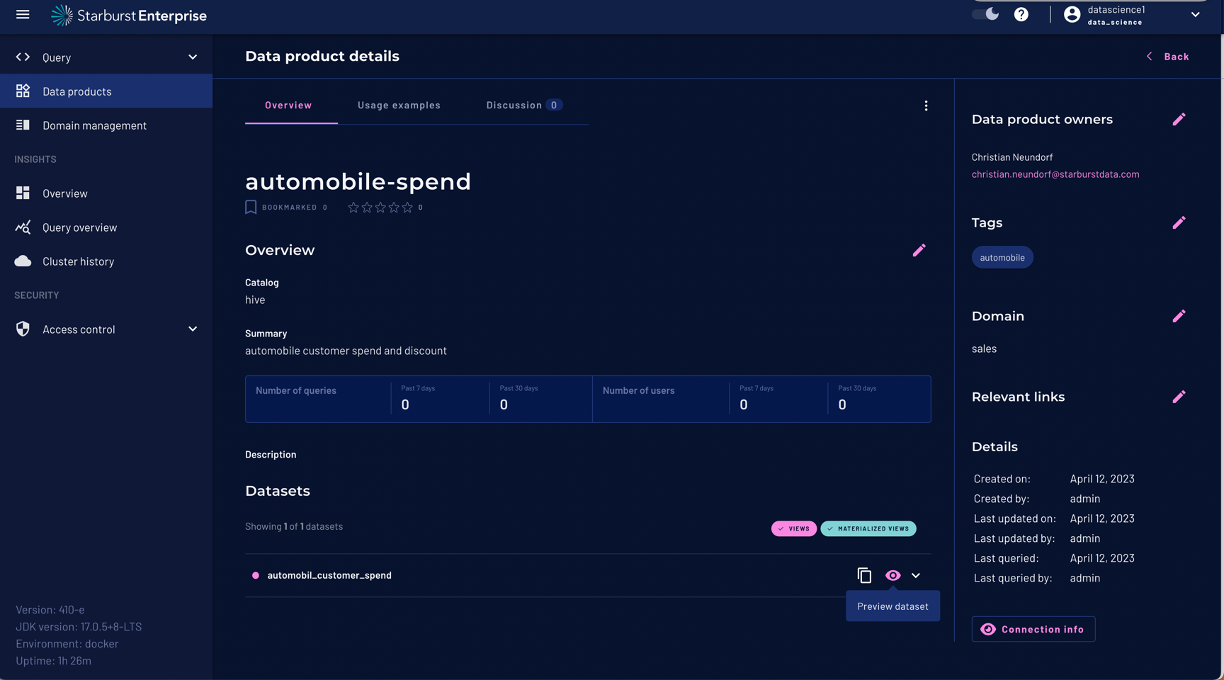
Naviagate to Data Products on the left menu and select the Data Product automobile-spend.
On the Data Product scroll down to the dataset automobil_customer_spend and click preview dataset.
You should see that the name column is masked and that only rows with the nationkey = 7 are available.
You can use the query editor to explore the dataset further or connect the data product to an external BI or DataScience tool of your choice. Summary:
- You can restrict the access to Data Products and to the Daset using Starburst BIAC
- Starburst can simplify the Governance accross different data silos and reduce time to insights for the data users.
- Starburst will not duplicate any data to enable data masking. Reduce uncessary copies and delays.
You can find additional documention on the Starburst docs: https://docs.starburst.io/latest/security/biac-overview.html

