NYCU (NCTU) 作業系統總整與實作 - 2021 Spring
| 學號 | GitHub 帳號 | 姓名 | |
|---|---|---|---|
309551004 |
aesophor |
王冠中 |
aesophor.cs09g@nctu.edu.tw |
Install Cross-Compilation Toolchains
Arch Linux
$ sudo pacman -S aarch64-linux-gnu-gcc \
                 aarch64-linux-gnu-gdb \
                 qemu-arch-extra
Build
$ git clone https://github.com/aesophor/valkyrie.git
$ cd valkyrie
$ make
The kernel image file kernel8.img can be located at build/kernel8.img.
Run (Normal)
This method allows you to interact with the kernel via stdin/stdout
$ make run
Run (Debugging with GDB)
This method should only be used if you want to debug this kernel with GDB.
$ make run-debug
Now, spawn another shell and run
$ make gdb
and the gdb will attach to the kernel we've just run.
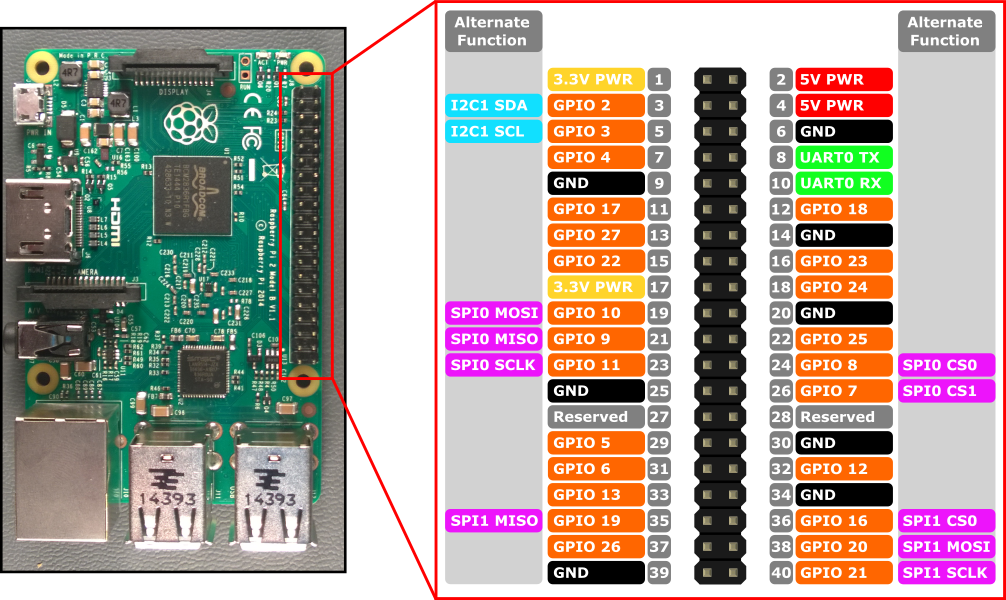
Set up the USB-TO-TTL (USB-TO-SERIAL) Converter
| RPI3 Pin | USB-TO-TTL Pin |
|---|---|
| GND | GND |
| UART0 TX | RXD |
| UART0 RX | TXD |
Manually Deploying the Kernel on a Real RPI3
- Flash a bootable image to the SD card.
- Mount the SD card and replace the
kernel8.imgon the SD card with the one we've just built. - Eject the SD card and plug it into RPI3.
- Plug in the USB-TO-TTL converter to your computer
- for macOS, run
screen /dev/tty.usbserial-0001 115200 - for linux, run
screen /dev/ttyUSB0 115200
- for macOS, run