Important
This repository is now archived in favor of https://github.com/Azure-Samples/rag-postgres-openai-python/ The new repo has the same features, plus support for deployment to Azure.
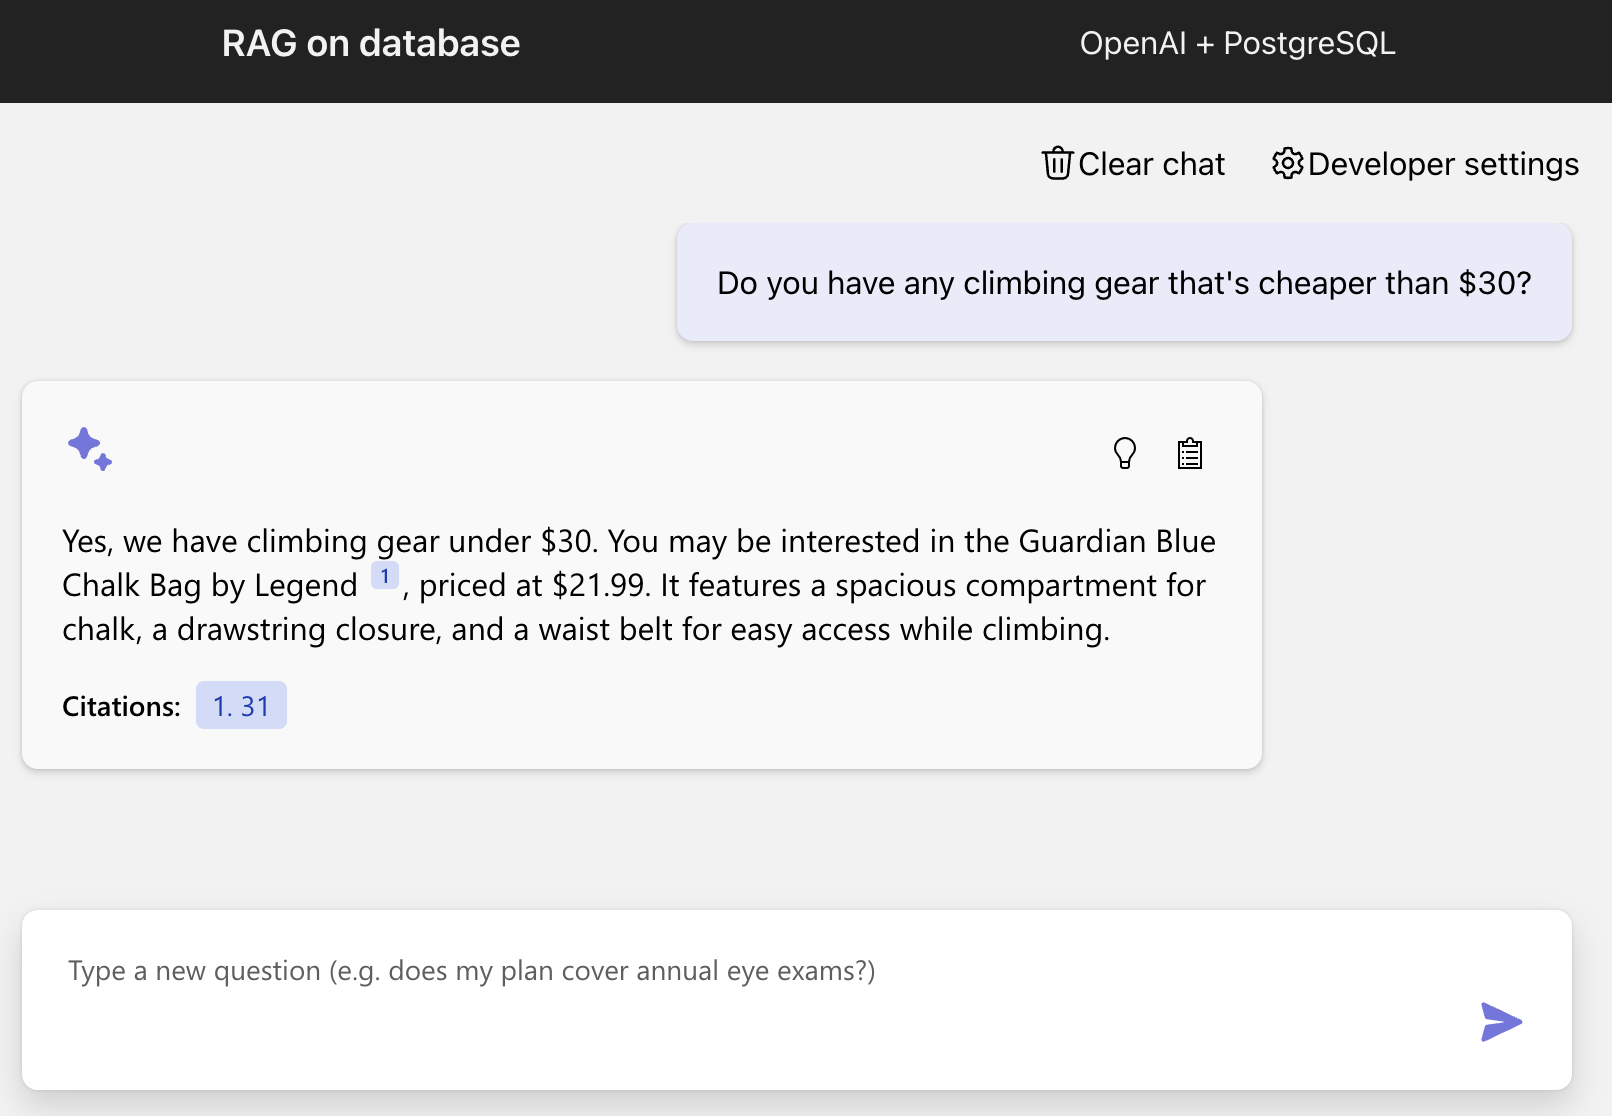
This project creates a web-based chat application with an API backend that can use OpenAI chat models to answer questions about the items in a PostgreSQL database table. The frontend is built with React and FluentUI, while the backend is written with Python and FastAPI.
This project is designed for deployment to Azure using the Azure Developer CLI, hosting the app on Azure Container Apps, the database in Azure PostgreSQL Flexible Server, and the models in Azure OpenAI.
This project provides the following features:
- Hybrid search on the PostgreSQL database table, using the pgvector extension for the vector search plus full text search, combining the results using RRF (Reciprocal Rank Fusion).
- OpenAI function calling to optionally convert user queries into query filter conditions, such as turning "Climbing gear cheaper than $30?" into "WHERE price < 30".
- Conversion of user queries into vectors using the OpenAI embedding API.
You have a few options for getting started with this template. The quickest way to get started is GitHub Codespaces, since it will setup all the tools for you, but you can also set it up locally.
You can run this template virtually by using GitHub Codespaces. The button will open a web-based VS Code instance in your browser:
-
Open the template (this may take several minutes):
-
Open a terminal window
-
Sign in to your Azure account:
azd auth login --use-device-code
-
Provision the resources and deploy the code:
azd up
This project uses gpt-3.5-turbo and text-embedding-ada-002 which may not be available in all Azure regions. Check for up-to-date region availability and select a region during deployment accordingly.
A related option is VS Code Dev Containers, which will open the project in your local VS Code using the Dev Containers extension:
-
Start Docker Desktop (install it if not already installed)
-
Open the project:
-
In the VS Code window that opens, once the project files show up (this may take several minutes), open a terminal window.
Install required packages:
pip install -r requirements-dev.txtOnce you've opened the project in Codespaces, Dev Containers, or locally, you can deploy it to Azure.
-
Sign in to your Azure account:
azd auth login
If you have any issues with that command, you may also want to try
azd auth login --use-device-code. -
Create a new azd environment:
azd env new
This will create a folder under
.azure/in your project to store the configuration for this deployment. You may have multiple azd environments if desired. -
Provision the resources and deploy the code:
azd up
This project uses gpt-3.5-turbo and text-embedding-ada-002 which may not be available in all Azure regions. Check for up-to-date region availability and select a region during deployment accordingly.
Since the local app uses OpenAI models, you should first deploy it for the optimal experience.
-
Copy
.env.sampleinto a.envfile. -
To use Azure OpenAI, fill in the values of
AZURE_OPENAI_ENDPOINTandAZURE_OPENAI_CHAT_DEPLOYMENTbased on the deployed values. You can display the values using this command:azd env get-values
-
To use OpenAI.com OpenAI, fill in the value for
OPENAICOM_KEY. -
To use Ollama, update the values for
OLLAMA_ENDPOINTandOLLAMA_CHAT_MODELto match your local setup and model. Note that you won't be able to use function calling or hybrid search with an Ollama model.
-
Run these commands to install the web app as a local package (named
fastapi_app), set up the local database, and seed it with test data:python3 -m pip install -e src python ./src/fastapi_app/setup_postgres_database.py python ./src/fastapi_app/setup_postgres_seeddata.p
If you opened the project in Codespaces or a Dev Container, these commands will already have been run for you.
-
Run the FastAPI backend:
fastapi dev src/api/main.py
Or you can run "Backend" in the VS Code Run & Debug menu.
-
Run the frontend:
cd src/frontend
npm run dev
Or you can run "Frontend" or "Frontend & Backend" in the VS Code Run & Debug menu.
-
Open the browser at
http://localhost:5173/and you will see the frontend.
Pricing may vary per region and usage. Exact costs cannot be estimated. You may try the Azure pricing calculator for the resources below:
- Azure Container Apps: Pay-as-you-go tier. Costs based on vCPU and memory used. Pricing
- Azure OpenAI: Standard tier, GPT and Ada models. Pricing per 1K tokens used, and at least 1K tokens are used per question. Pricing
- Azure Monitor: Pay-as-you-go tier. Costs based on data ingested. Pricing
This template uses Managed Identity for authenticating to the Azure services used (Azure OpenAI, Azure PostgreSQL Flexible Server).
Additionally, we have added a GitHub Action that scans the infrastructure-as-code files and generates a report containing any detected issues. To ensure continued best practices in your own repository, we recommend that anyone creating solutions based on our templates ensure that the Github secret scanning setting is enabled.

