This is a sample code to demonstrate how to deploy a simple static page to the EnSaaS 4.0.
Go to your workspace or namespace and download the config key required to manipulate your Kubernetes resources.
You will get prompted to download a config file which contains important credentials. Please make sure you secure this file and DO NOT LET ANYONE ELSE ACCESS YOUR CONFIG FILE. You may rename it to whatever you want, say wisepaas-config, and then save it to $HOME/.kube if you are using MacOS.
If you already have minikube installed on your local machine, you will have a file called config in the directory $HOME/.kube, which is the default file used by Kubernetes. After you start the minikube, you can type kubectl config view to see the information inside this config file.
You may overwrite the KUBECONFIG environment variable to direct Kubernetes to use the new one that you just downloaded, type export KUBECONFIG=$HOME/.kube/wisepaas-config. Again, you can name it accroding to personal preference. Just make sure that the envrironment variable matches your file name.
git clone git@github.com:allguitars/static-page-k8s.git
cd static-page-k8s/-
Specify a tag when building the image.
docker build -t <DockerHubAccount>/<ImageName>:<Tag> .
For example:
wise-paas/static-k8s:v1.0.0
-
Push the new image to your own Docker Repository.
docker push <DockerHubAccount>/<ImageName>:<Tag>
It requires some minimun effort to take this code and deploy it to the EnSaaS 4.0.
Modify the host attribute in ./k8s-config/ingress-service.yaml.
Format:
ApplicationName.Namespace.ClusterName.internal
Note that en.internal keyword is required at the end of the string.
Change the image attribute inside ./k8s-config/static-deployment.yaml file according to the image you just built. You may also leave this setting with the default value to use the image we have built and pushed to the EnSaaS official Docker Hub registry.
<DockerHubAccount>/<ImageName>:<Tag>
Here is the example in this code:
Modify the resources attribute inside ./k8s-config/static-deployment.yaml file. This example only uses 10m of the CPU because it is just a static webpage. However, you may try to minimize these values as possible as you can to optimiaze the resource utilization.
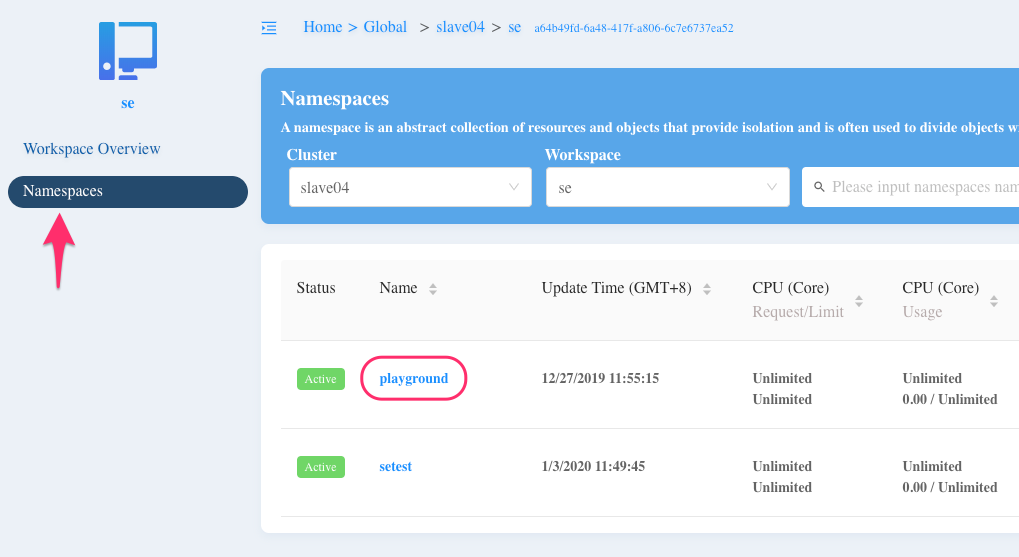
Note: Always remember to specify the namespace that you are working on while applying the Kubernetes configuration.
The following screenshot shows that the namespace is playgroud. Yours might be different.
Apply the Kubernetes configuration.
kubectl apply -f k8s-config/ --namespace <NameSpace>Check all resources (also with namespace):
kubectl get all --namespace playground

NAME                                     READY   STATUS    RESTARTS   AGE
pod/static-deployment-5d996d5d54-97zql   1/1     Running   0          124m

NAME                                TYPE        CLUSTER-IP    EXTERNAL-IP   PORT(S)    AGE
service/static-cluster-ip-service   ClusterIP   10.0.201.35   <none>        3000/TCP   124m

NAME                                READY   UP-TO-DATE   AVAILABLE   AGE
deployment.apps/static-deployment   1/1     1            1           124m

NAME                                           DESIRED   CURRENT   READY   AGE
replicaset.apps/static-deployment-5d996d5d54 1 1 1 124mIn the sample code, we set the host for the Ingress service.
host: staticpage.devspace.eks004.en.internalSo, to see the page, we need to go to the following URL:
http://staticpage-devspace-eks004.sa.wise-paas.com
Mapping rule -- host vs. URL
-
host
{AppName}.{Namespace}.{ClusterName}.en.internal -
External URL
{AppName}-{Namespace}-{Cluster}.sa.wise-paas.com
The page should look like:


