I shall be creating a multiple series of an example where I will help you to integrate with CleverTap SDK into your project. This project is the first example of that series. I will not take you through the flow of creating a new project in Android studio since the pre-requisite of this tutorial is that you already have your own project where you want to integrate CleverTap directly. Now please find the steps for integrating CleverTap with your project as follow
Step 1: Adding the Dependency
Add the following dependencies into your Gradle file. This will help you to get CleverTap SDK and Firebase Messaging SDK imported into your project.
dependencies {
    implementation 'com.clevertap.android:clevertap-android-sdk:+'
    implementation 'com.google.firebase:firebase-messaging:+'
    implementation 'com.google.android.gms:play-services-base:+'
    implementation 'com.android.support:support-v4:28.0.0'
}
// at the end of the build.gradle file
apply plugin: 'com.google.gms.google-services'
implementation 'com.clevertap.android:clevertap-android-sdk:+' : This will always import the latest version of CleverTap SDK into your project. Rest of the implementation is used for Push notifications. If you already are using Firebase as a push notification then firebase-messaging, play-service-base and support-v4 will already be there so no need to add them again.
Step 2: Adding CleverTap Details
Every CleverTap Application is provided with the Account ID and Token. You can find them under Settings > Accounts. For reference, please find the screenshot as follow
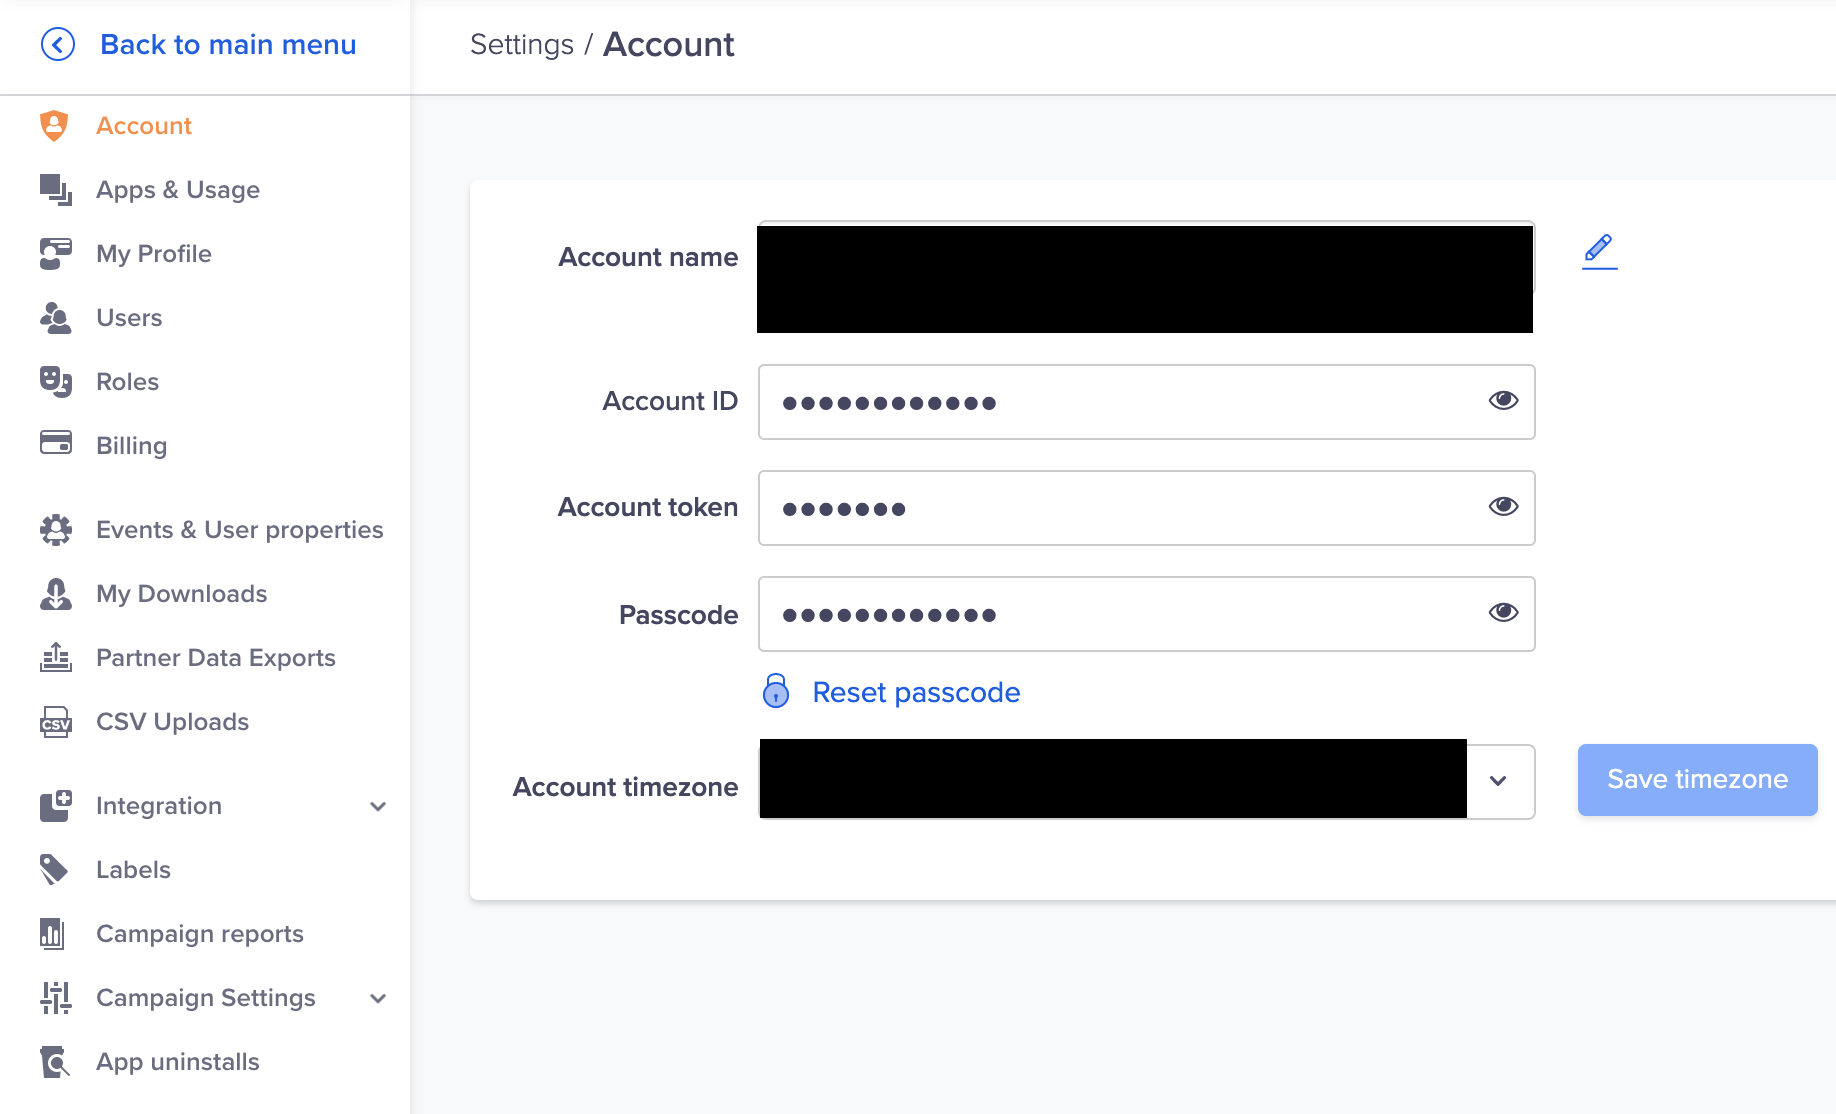
Add this Account Id and Token in your AndroidManifest file under tag. For reference, please find the source code as follow
<meta-data
    android:name="CLEVERTAP_ACCOUNT_ID"
    android:value="Your CleverTap Account ID"/>
<meta-data
    android:name="CLEVERTAP_TOKEN"
    android:value="Your CleverTap Account Token"/>
Step 3: Disabling GDPR
By default CleverTap SDK is GDPR compliant, if you wish to opt-out from GDPR compliance then add the following code into AndroidManifest file under tag
<meta-data
    android:name="CLEVERTAP_USE_GOOGLE_AD_ID"
    android:value="1"/>
To read more on GDPR compliance, please visit here
Step 4: Add Required Permission
For passing information such as events and user details to CleverTap, your application will require the internet and for that, you will need to take permission for the Internet. For reference, Add the following code in your Android Manifest.
<!-- Required to allow the app to send events and user profile information -->
<uses-permission android:name="android.permission.INTERNET"/>
<!-- Recommended so that CleverTap knows when to attempt a network call -->
<uses-permission android:name="android.permission.ACCESS_NETWORK_STATE"/>
Step 5: Enable Activity Life Cycle Callbacks Every Android Application has a lifecycle and lifecycle callbacks. Now to track events and attributes, SDK relies on these lifecycle callbacks. This also helps SDK to determine the best time to send back to CleverTap Servers without affecting the app's performance. Now for CleverTap, you can do this in three ways.
Way 1: If you don't have your application class file then define com.clevertap.android.sdk.Application in your application tag in Android Manifest. For reference, you can do this as follow
<application
    android:label="@string/app_name"
    android:icon="@drawable/ic_launcher"
    android:name="com.clevertap.android.sdk.Application">
Way 2: If you already have the application class file defined in your Android Manifest file then call ActivityLifecycleCallback.register(this); before super.onCreate() in your class. For reference, it will look like as follow
import android.app.Application;
import com.clevertap.android.sdk.ActivityLifecycleCallback;
import com.clevertap.android.sdk.CleverTapAPI;

public class MyApplication extends Application {
    @Override
    public void onCreate() {
        ActivityLifecycleCallback.register(this); // Must be called before super.onCreate()
        super.onCreate();
    }
}
Way 3: You already have your application Class file and in further you want to use your own activity lifecycle listener, please update it to incorporate the following code.
application.registerActivityLifecycleCallbacks(
        new android.app.Application.ActivityLifecycleCallbacks() {

            @Override
            public void onActivityCreated(Activity activity, Bundle bundle) {
                CleverTapAPI.setAppForeground(true);
                try {
                    CleverTapAPI.getDefaultInstance(application).pushNotificationEvent(activity.getIntent().getExtras());
                } catch (Throwable t) {
                    // Ignore
                }
                try {
                    Intent intent = activity.getIntent();
                    Uri data = intent.getData();
                    CleverTapAPI.getDefaultInstance(application).pushDeepLink(data);
                } catch (Throwable t) {
                    // Ignore
                }
            }

            @Override
            public void onActivityStarted(Activity activity) {
            }

            @Override
            public void onActivityResumed(Activity activity) {
                try {
                    CleverTapAPI.getDefaultInstance(application).onActivityResumed(activity);
                } catch (Throwable t) {
                    // Ignore
                }
            }

            @Override
            public void onActivityPaused(Activity activity) {
                try {
                    CleverTapAPI.getDefaultInstance(application).onActivityPaused();
                } catch (Throwable t) {
                    // Ignore
                }
            }

            @Override
            public void onActivityStopped(Activity activity) {
            }

            @Override
            public void onActivitySaveInstanceState(Activity activity, Bundle bundle) {
            }

            @Override
            public void onActivityDestroyed(Activity activity) {
            }
        }
);
For our approach, we shall be moving forward with Way 2.
Step 6: Initializing CleverTap Instance
To call any methods of CleverTap SDK, you need to create an instance which you can do it as follow:
CleverTapAPI clevertapDefaultInstance = CleverTapAPI.getDefaultInstance(getApplicationContext());Over here clevertapDefaultInstance is an instance object which can be used throughout the application, if you make it public and declare in your Application class file.
Step 7: Install Referral Broadcast receiver
CleverTap tracks organic install, for this you need to add a receiver in Android Manifest file which will be called whenever Google play services broadcast install referrer. Add the following receiver in your Android Manifest file.
<receiver
    android:name="com.clevertap.android.sdk.InstallReferrerBroadcastReceiver"
    android:exported="true">
        <intent-filter>
            <action android:name="com.android.vending.INSTALL_REFERRER"/>
        </intent-filter>
</receiver>
From CleverTap SDK 3.6.3 and onwards, since Google have deprecated install receiver, so to incorporate the same, please remove the above install receiver if it is there in your Android Manifest and then add the following dependency in your Gradle file. This will help you to capture UTM details, app-install time, referrer click time and other metrics provided by the Google Install Referrer Library.
implementation 'com.android.installreferrer:installreferrer:1.1'Step 8: Allowing CleverTap SDK to capture user IP address
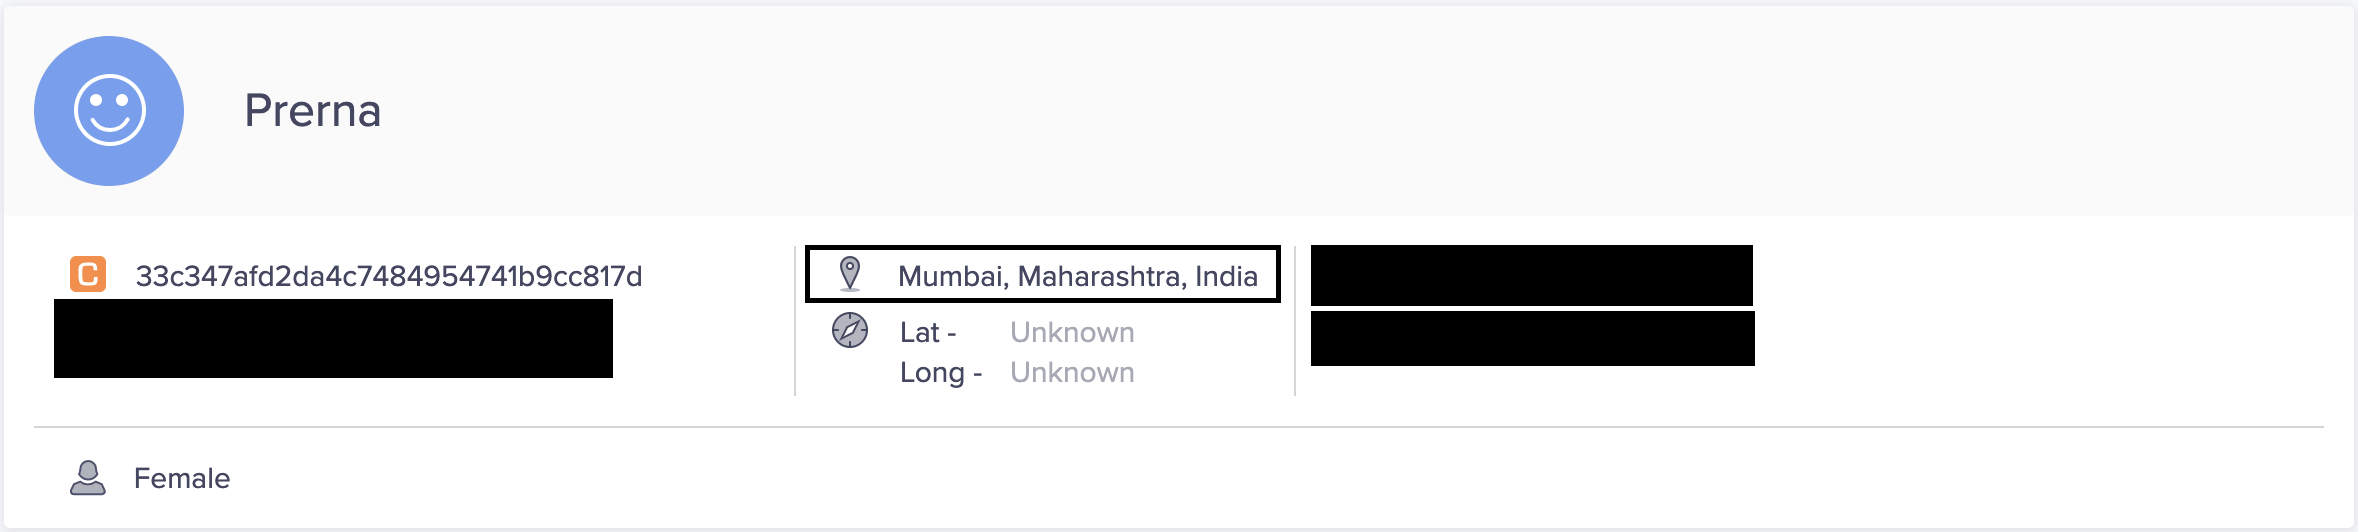
As we mentioned in step no 3, CleverTap SDK is a GDPR compliant and they by default don't capture IP address of the user. If you allow them to track the IP address of the user then CleverTap SDK will capture the IP address and send it with App Launched event(system event of CleverTap). Using this IP address, CleverTap do the reverse IP using the third party tool "MaxMind" and store the same for every user profile. It will look like as follow on the user profile in CleverTap Dashboard.
Add the following code in your application class file before you initialize the instance.
cleverTap.enableDeviceNetworkInfoReporting(true);This will also allow CleverTap SDK to capture other information like WiFi, Bluetooth and Network Information.
This will help you to complete your basic integration with CleverTap and once these steps are done, you will able to see your User profile in CleverTap Dashboard. Also, you will able to see some system events like App Installed and App Launched in your profile.
If you are facing some issue, You can download the project and compare it with your source code. If you still face the issue then do let me know. For Tutorial 2, will update the link over here in few days.