npm install -g bootprint
npm install -g bootprint-openapi

bootprint openapi api.yaml specWelcome to the SnapTrade developer hub. You'll find comprehensive documentation for all our endpoints, as well as detailed guides that will be added shortly.
If you need help or have any questions, send us an email at api@snaptrade.com.
NOTE:
In addition to this tutorial, you can also refer to our getting started demos written in Python and Node JS:
- Python getting started: https://github.com/passiv/snaptrade/tree/main/demos/getting-started/python
- Node JS getting started: https://github.com/passiv/snaptrade/tree/main/demos/getting-started/nodejs
Call the API Status endpoint to make sure the API is live and that you can make the most basic request. You should receive a response indicating the API status, current server timestamp, and internal API minor version number.
Example:
{ "version": 151, "timestamp": "2022-01-24T19:02:46.440074Z", "online": true }In order to make an authenticated request to the SnapTrade API, you will need to generate a signature for each request that proves you hold the consumer key that was created for you.
Steps to generate a signature:
- Prepare signed content (see SignedContent schema)
- Sign content prepared above with HMAC-SHA256 using the UTF-8 encoding
- Return base64 encoding of sign content along with headers
NOTE:
- Use the consumer key provided by SnapTrade to sign the request (not the example included here).
- You can use the Debug Signature endpoints to help test your signature algorithm.
Example code (Python):
import hmac
import json
from base64 import b64encode
from hashlib import sha256
from urllib.parse import urlencode
consumer_key = "YOUR_CONSUMER_KEY".encode()
request_data = {'userId': 'api@passiv.com', 'userSecret': 'CHRIS.P.BACON'}
request_path = "/api/v1/snapTrade/mockSignature"
request_query = "clientId=PASSIVTEST×tamp=1635790389"
sig_object = {"content": request_data, "path": request_path, "query": request_query}
sig_content = json.dumps(sig_object, separators=(",", ":"), sort_keys=True)
sig_digest = hmac.new(consumer_key, sig_content.encode(), sha256).digest()
signature = b64encode(sig_digest).decode()Example code (JS):
const crypto = require("crypto");
const consumerKey = encodeURI("YOUR_CONSUMER_KEY");
const requestData = { userId: "api@passiv.com", userSecret: "CHRIS.P.BACON" };
const requestPath = "/api/v1/snapTrade/mockSignature";
const requestQuery = "clientId=PASSIVTEST×tamp=1635790389";
const sigObject = {
content: requestData,
path: requestPath,
query: requestQuery,
};
const sigContent = JSON.stringify(sigObject);
const hmac = crypto.createHmac("sha256", consumerKey);
const signature = hmac.update(sigContent).digest("base64");To create a secure brokerage authorization, we first need to register a test user.
Call the Register user endpoint with a userId which can be any string as long as it's unique to a user. Upon receiving a 200 response, the user is registered successfully and you should receive a response with a user id and a randomly generated user id.
Example:
{ "userId": "USERID123", "userSecret": "AYSEY8726837292873" }SnapTrade partners need to generate a redirect URI for a user so they can securely log in to the SnapTrade Connection portal and connect their accounts.
The redirect URI can be generated by sending a POST request to the Login endpoint. userId and userSecret (previously generated through calling the registerUser endpoint) have to be in the body of the POST request.
The response would indicate a redirectURI to be used for login a user to the SnapTrade portal.
Example:
{
"redirectURI": "https://app.passiv.com/snapTrade/redeemToken?token=TOKEN&clientId=PASSIVTEST"
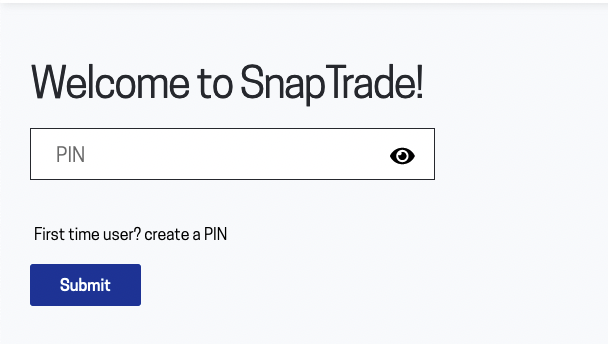
}NOTE: If trading is enabled for a partner, users also need to provide a PIN (or create one if a first-time user) before logging into the SnapTrade portal.
Once a user successfully logs into the SnapTrade portal, they can select their brokerage and go through the OAuth flow to connect their brokerage accounts.
A short video to show how connecting an account works for Questrade:
**_NOTE:_** For the initial connection, partners can pass in a broker name in the URI so users can go directly to the selected brokerage and make a connection.
Example: https://app.passiv.com/snapTrade/redeemToken?token=TOKEN&clientId=PASSIVTEST&broker=Questrade
In order to retrieve user holdings for a specific account, you can call the Holdings endpoint by passing the clientId, timestamp, userId and list of account numbers (accounts) to filter the holdings.
In the response, you should get an array of objects containing each account holdings data.
Example:
[
  {
    "account": {
      "id": "908192",
      "brokerage": "X",
      "number": "123456",
      "name": "Y"
    },
    "balances": [
      {
        "currency": {
          "id": "123",
          "code": "CA",
          "name": "Canadian dollar"
        },
        "cash": 1200
      }
    ],
    "positions": [
      {
        "symbol": {
          "symbol": "SYMBL",
          "name": "Symbol name",
          "currency": {
            "id": "123",
            "code": "CA",
            "name": "Canadian dollar"
          },
          "exchange": {
            "code": "123123",
            "name": "X"
          }
        },
        "units": "1",
        "price": 12
      }
    ]
  }
]To place an order through SnapTrade API, you need to go through the following two steps:
1- To receive information on how a specific order will impact an account, send a POST request to Trade Impact endpoint. The following example is how the body of the request should look like:
{
  "account_id": "123456",
  "universal_symbol_id": "78910",
  "order_type": "Limit",
  "time_in_force": "Day",
  "action": "BUY",
  "units": 1,
  "price": 12.9
}
Example of the response:
{
  "trade": {
    "id": "0987654321",
    "account": "ACCOUNTID",
    "order_type": "Limit",
    "time_in_force": "Day",
    "symbol": {
      "brokerage_symbol_id": "1234567",
      "universal_symbol_id": "8912345",
      "currency": {
        "id": "012345",
        "code": "USD"
      },
      "local_id": "121314",
      "description": "SYMBOL",
      "symbol": "SYMBL"
    },
    "action": "BUY",
    "units": 1,
    "price": 12.9
  },
  "trade_impacts": [
    {
      "account": "778899",
      "currency": "023901",
      "remaining_cash": -466.0569,
      "estimated_commissions": 0.0,
      "forex_fees": 0.0
    },
    {
      "account": "12132214",
      "currency": "f123123",
      "remaining_cash": 667.8219,
      "estimated_commissions": 0.0,
      "forex_fees": 0.0
    }
  ],
  "combined_remaining_balance": {
    "account": "99881882",
    "currency": "57fs1223",
    "cash": 64.5564
  }
}
NOTE:
An order impact request can fail with a 400 response code due to reasons such as Markets are not open, Not enough cash to place trades, Exchange does not support market orders, etc. The reason for a failed request would be in the body of the response.
Example of the response for a failed request:
{
  "detail": "Not enough cash to place trades",
  "status_code": 400,
  "code": "1068"
}
2- To place the order you need to send in the trade id (received through calling the Trade Impact endpoint) as a query parameter to the Execute Trade endpoint. The successful request would indicate the status of the order (EXECUTED, ACCEPTED, FAILED, REJECTED, PENDING, etc.) along with other information related to the order placed.
Example of the response:
{
  "brokerage_order_id": "123456",
  "status": "ACCEPTED",
  "symbol": "7891011",
  "universal_symbol": {
    "id": "123456",
    "symbol": "SYMBL",
    "description": "Symbol",
    "currency": {
      "id": "1021993",
      "code": "USD",
      "name": "US Dollar"
    },
    "currencies": [],
    "type": {
      "id": "ceb92399",
      "code": "code",
      "is_supported": true
    }
  },
  "action": "BUY",
  "total_quantity": "1.00000000",
  "open_quantity": "1.00000000",
  "canceled_quantity": "0.00000000",
  "filled_quantity": "0.00000000",
  "execution_price": "0.0000",
  "limit_price": "12.9000",
  "stop_price": null,
  "order_type": "Limit",
  "time_in_force": "Day",
  "time_placed": "2022-01-01T10:08:09.044000-05:00",
  "time_updated": "2022-01-01T10:08:09.113000-05:00",
  "expiry_date": null
}To cancel an open order, you need to POST to the Cancel Order endpoint with the account id in the query params and the brokerage order id in the body of the request.