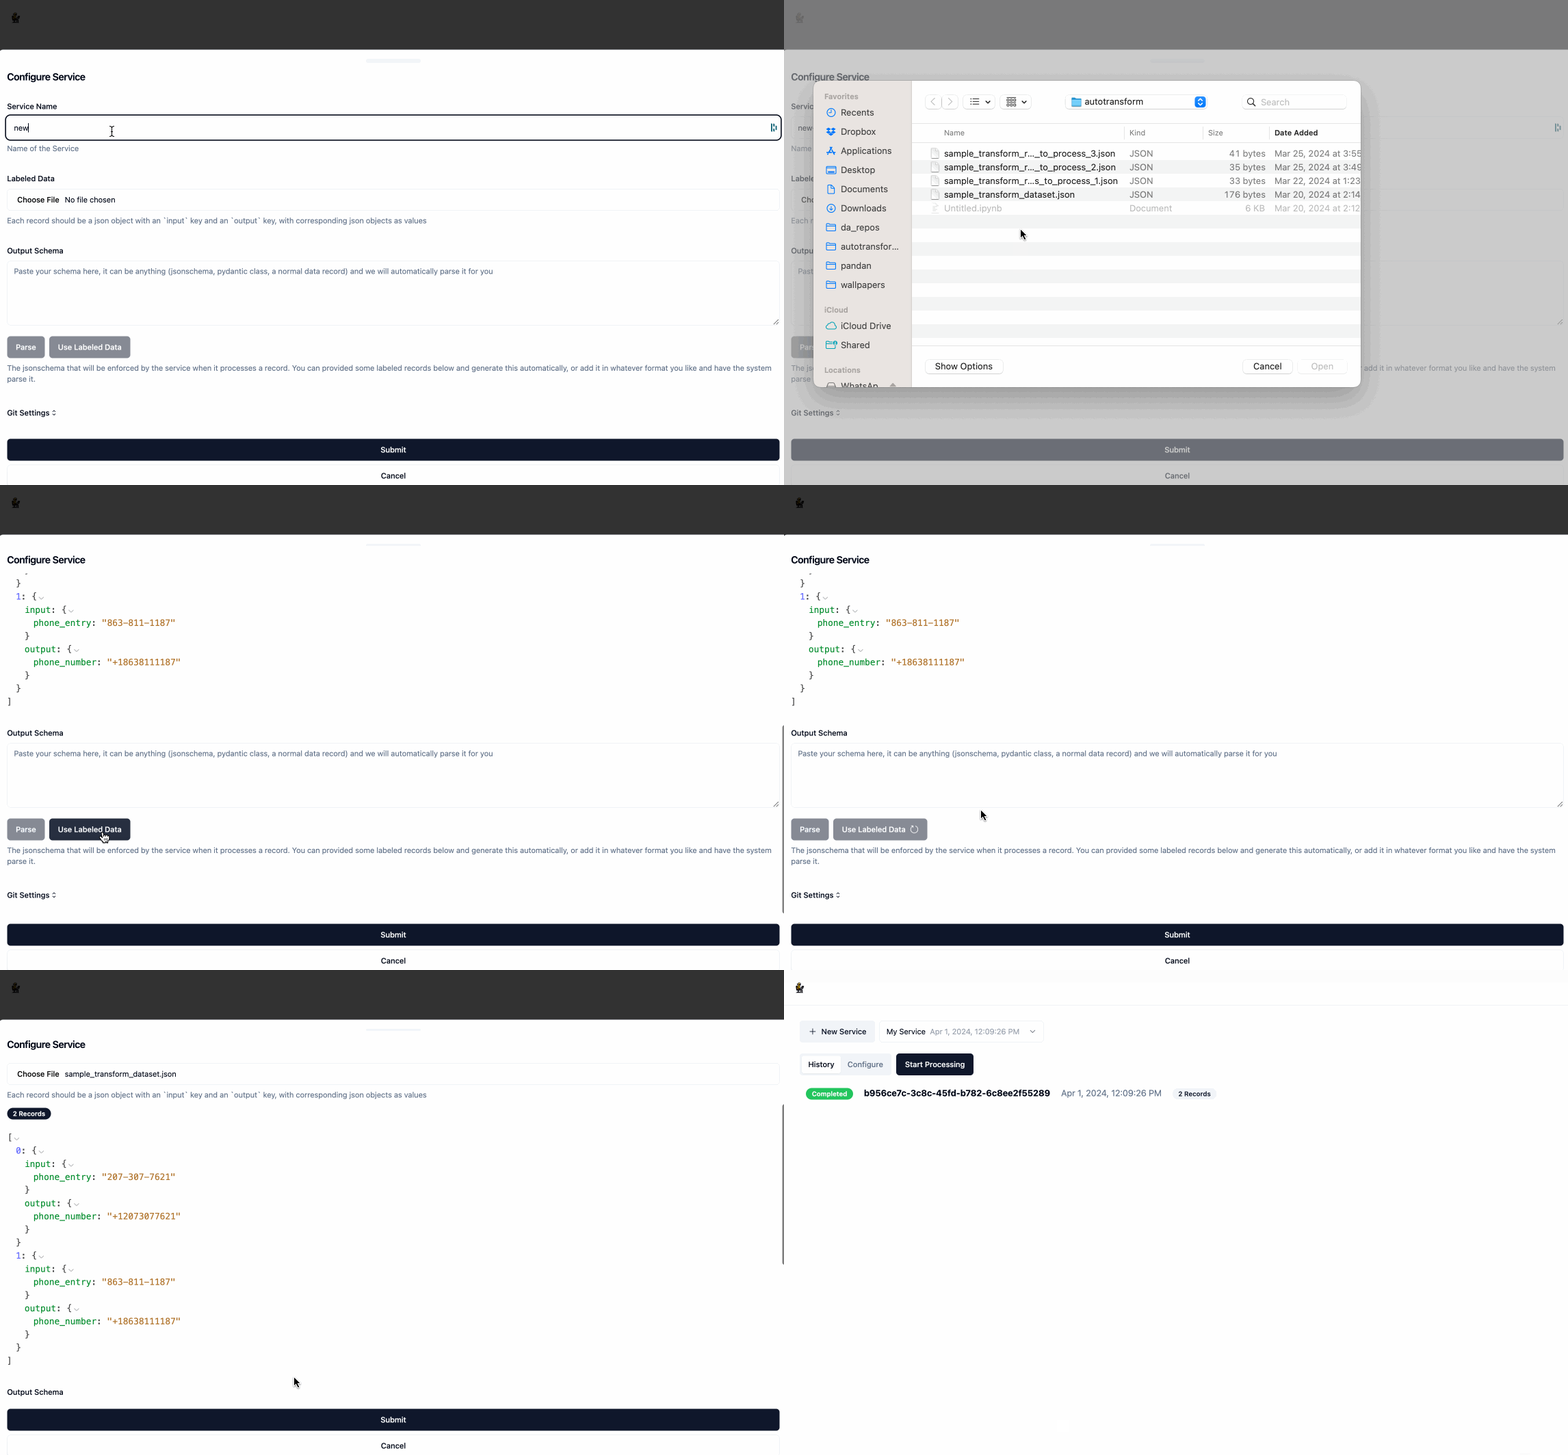
AutoTransform is a web application that uses LLMs to automatically handle and transform messy data. Instead of having to constantly monitor and update your code to handle data inputs that don't conform to a pre-defined input schema, AutoTransform will automatically update, test, and deploy your code to handle these constantly changing inputs. Simply define your desired output schema and provide some labeled data via the UI or REST API, and let AutoTransform handle the rest. If you want to be able to alter / review / approve the code changes before they are deployed, AutoTransform provides a git integration that handles the two-way syncing of your code and output schema.
Note: The provided render.yaml does not have a persistent disk attached, which means if the service is restarted and you are using the local file provider the input / output data for a given service will be lost. If you want to persist this data, you will need to upgrade the instance type and attach a persistent disk to the service.
-
Set Environment Variables
- Required:
OPENAI_API_KEY- Your OpenAI API key
- Required:
-
Start the application
docker compose -f docker-compose.prod.yaml up --build
The application is served on http://localhost:8000
-
Set Environment Variables
- Required:
OPENAI_API_KEY- Your OpenAI API key
- Required:
-
Start the backend
docker compose -f docker-compose.dev.yaml up --build
The backend is served on http://localhost:8000
- Install frontend packages (this only needs to be done once)
cd frontend; npm install
- Start the frontend
cd frontend; npm run start
The frontend is served on http://localhost:3000
-
Create a service by clicking the
New Servicebutton. As part of creating the service, you will need to provide:NameLabeled Datahelps the service undersand how you want the data transformed, the format should be an array of json objects where each object has aninputkey and anoutputkey, both of whose values are also json objects.Output Schemais a JSON Schema object that represents the structure of the data that will be returned by the service. You don't need to provide your output schema in the JSON Schema syntax, when you clickParsethe application will automatically convert it for you. You can also auto-generate the Output Schema from the labeled examples by clickingUse Labeled Data.
- Once you have created a service, click
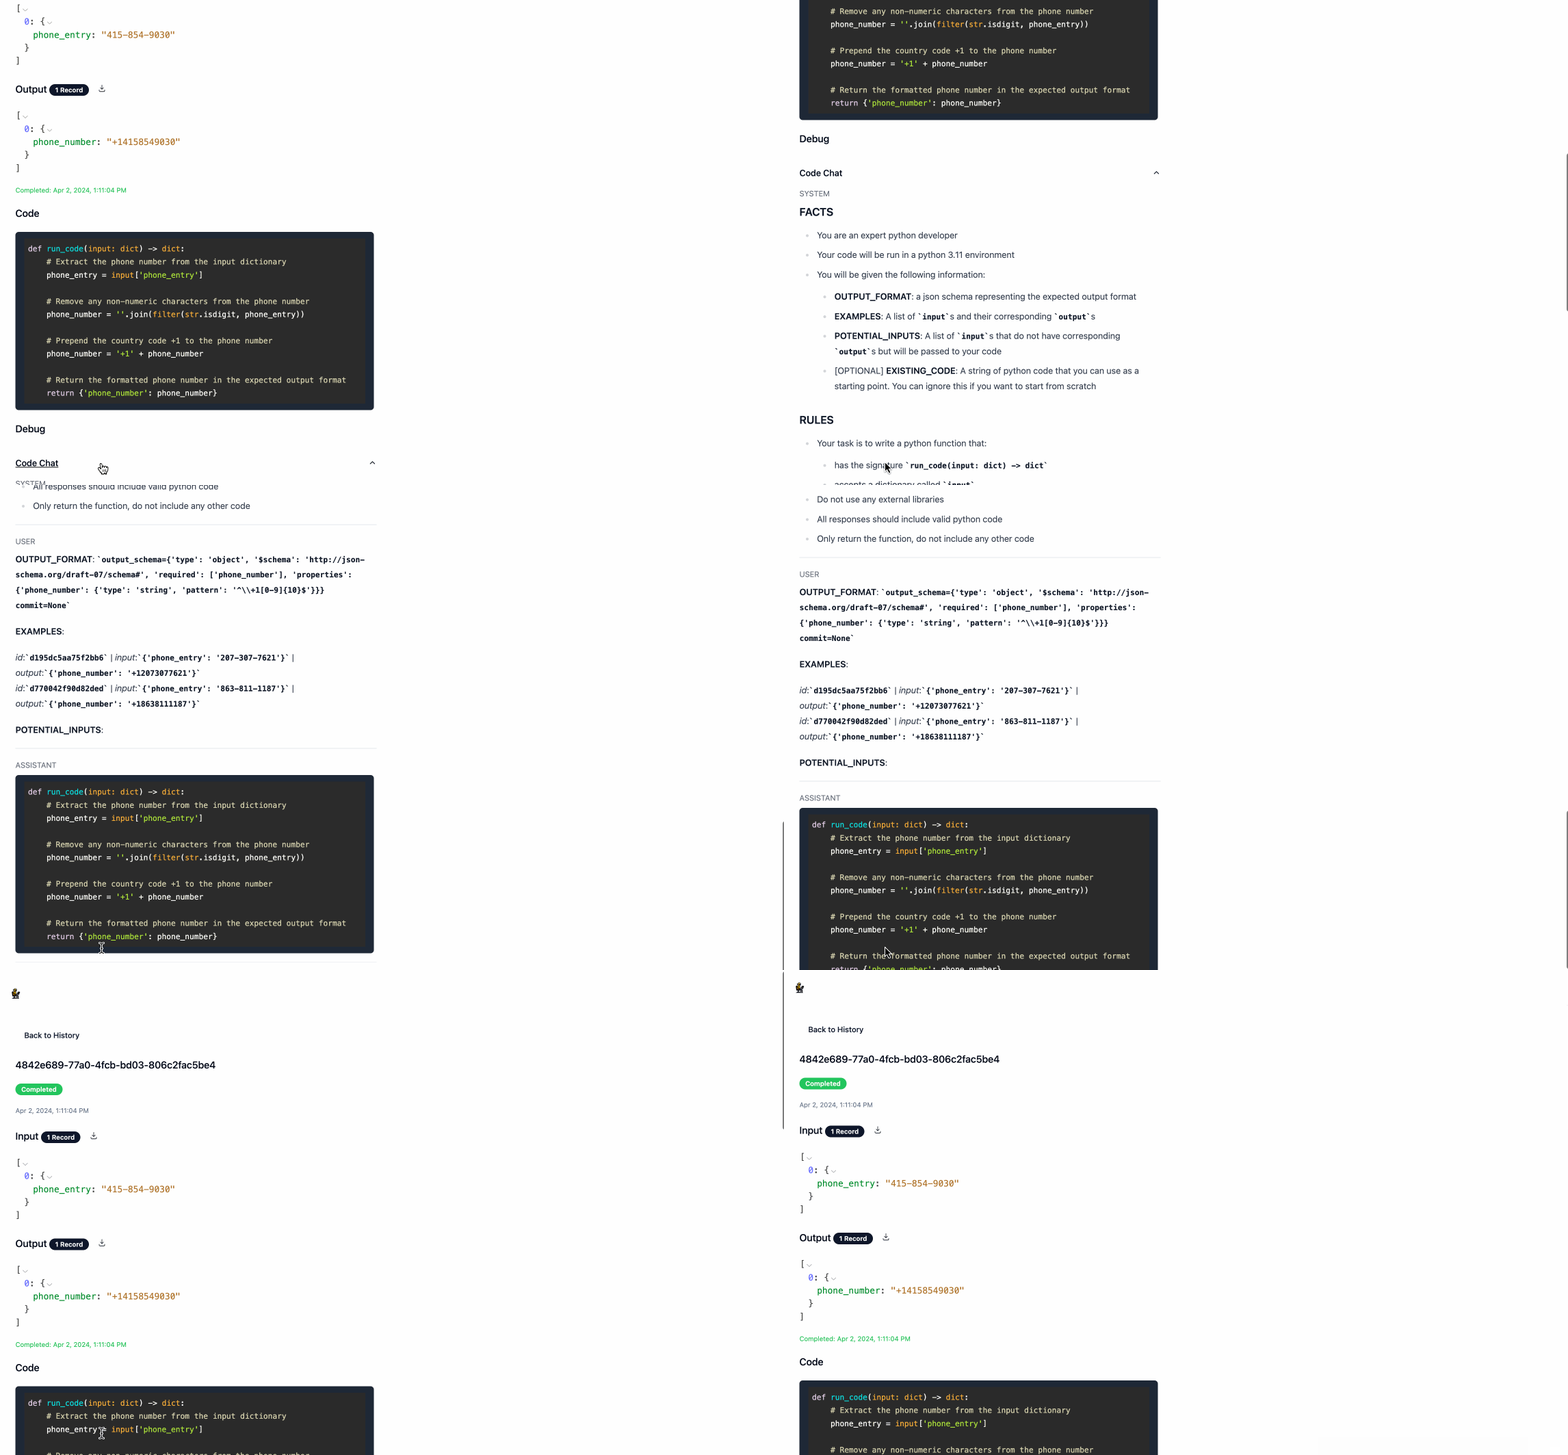
Start Processingand provide some input data, the format of which is just an array of json objects. This will redirect you to the the/runpage where you can see the model working in real time to generate the relevant code and output data. You can stop this process at any time by clickingStop.
- Once the processing is complete, you can download the output data by clicking the download icon next to
Output. Navigating back to the main page will show you a history of all processing executions and will allow you to update the service's configuration as you see fit.
AutoTransform provides a REST API for interacting with the application. The API is served on http://localhost:8000. You can view the api docs at http://localhost:8000/docs when running the application locally.
import httpx

response = httpx.post(
    "http://localhost:8000/api/v1/config/upsert",
    json={
        "name": "My Service",
        "user_provided_records": [
            {
                "input": {"phone_entry": "207-307-7621"},
                "output": {"phone_number": "+12073077621"}
            },
            {
                "input": {"phone_entry": "863-811-1187"},
                "output": {"phone_number": "+18638111187"}
            },
        ],
        "output_schema": {"type": "object", "required": ["phone_number"], "properties": {"phone_number": {"type":"string","pattern":"^\\+1[0-9]{10}$|^$"}}}
    }
)
config_id = response.json()["config_id"]
print(config_id)import httpx
response = httpx.post(
"http://localhost:8000/api/v1/process/start",
json={
"config_id": config_id,
"records": [{"phone_entry": "415-854-9030"}, {"phone_entry": "I don't have a phone"}],
}
)
run_id = response.json()["id"]
print(run_id)import httpx
from time import sleep
while True:
response = httpx.get(
f"http://localhost:8000/api/v1/process/status/{config_id}/{run_id}"
)
status = response.json()["status"]
print(status)
if status != "running":
break
else:
sleep(5)import httpx
import json
data = []
with httpx.stream(
"GET",
f"http://localhost:8000/api/v1/data/export/{config_id}/{run_id}/output"
) as r:
for line in r.iter_lines():
d = json.loads(line)
data.append(d)
print(len(data))
print(data[0])AutoTransform provides a git extension that allows you to store your services code and output schema in a git repository. You can even use the git repository to block output schema and code updates from being applied to your service without a human review. To use the git extension, you will need to provide the following environment variables:
- GIT_PROVIDER: The git provider you are using, currently only
githubis supported - GIT_PROVIDER_SECRET: A secret token that allows the application to access your git repository
github: this is your personal access token. It should have the following permissions:- metadata - read
- code - read and write
- pull requests - read and write
The git settings for individual services can be configured within the Git Settings portion of the service config.
You can add other git providers by:
- Adding a new class that inherits from GitClient. See github.py for an example.
- Updating the get_git_client function to return your new class when the
GIT_PROVIDERenvironment variable is set to the name of your new class. - Updating the GitProviderType enum to include your new provider
AutoTransform provides a file extension that allows you to store your files in the storage provider of your choice. To use the file extension, you will need to provide the following environment variables:
- FILE_PROVIDER: The file provider you are using, currently only
localis supported - FILE_PROVIDER_CONFIG: A string that contains the configuration for your file provider. The format of this object is specific to the provider you are using.
- For
localthe format is a json obejct with the following keys:- save_path: The path to the directory where you want to store your files
- For
You can add other file proviers by:
- Adding a new class that inherits from FileClient. See local.py for an example.
- Updating __init__.py to return your new class when the
FILE_PROVIDERenvironment variable is set to the name of your new class. - Updating the FileProviderType enum to include your new provider
AutoTransform will display the prompts used to generate the code and schema in the /run view, just make sure you have the PROCESSING_DEBUG environment variable set to true.


