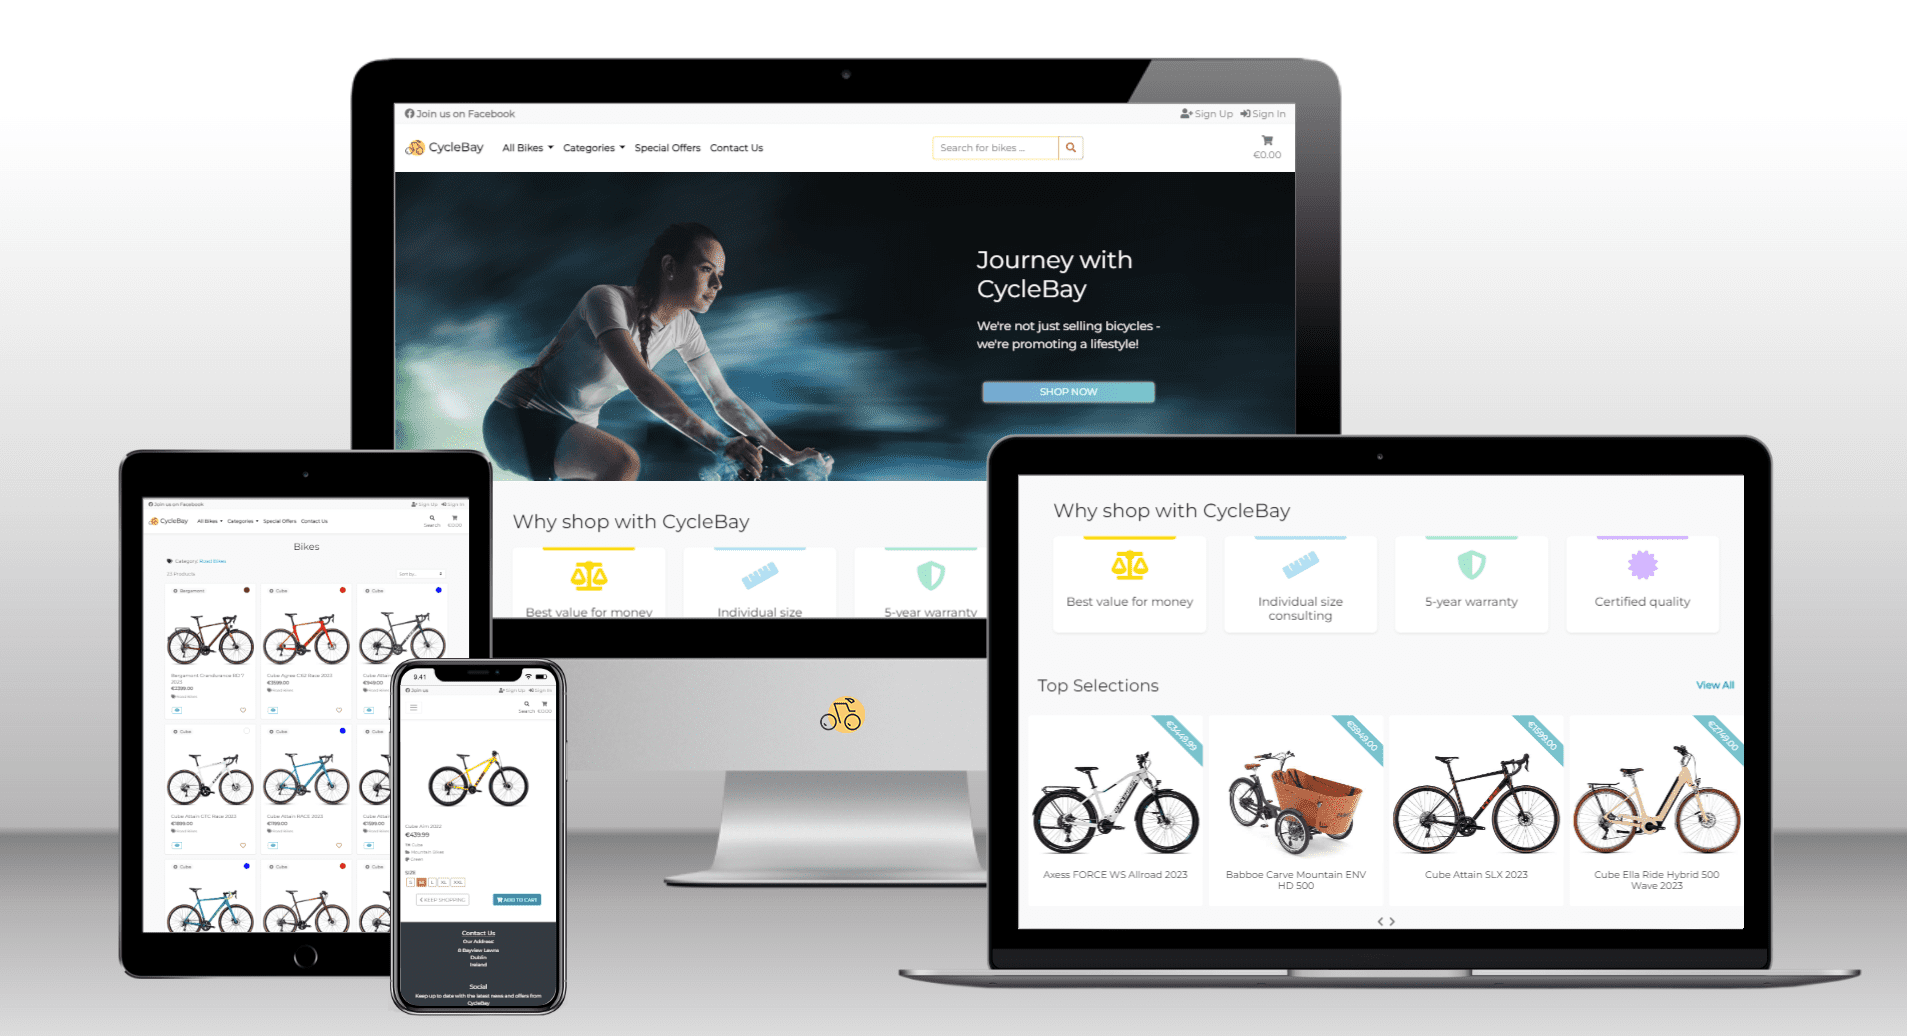
The CycleBay is a business to customer (B2C) e-commerce platform that allows customers to purchase bicycles online. The website is a full-stack application built using the Django framework and utilizes a PostgreSQL database to store and manage data. The app is deployed on the Heroku cloud platform and leverages AWS S3 cloud service for storing static and media files.
Additionally, it employs the Stripe payment system to process secure transactions. To test the payment system, see the Payment Intents Testing section.
Live Demo: https://cyclebay-bc1e75ddbf8e.herokuapp.com/
CycleBay provides a one-stop platform for cycling enthusiasts to explore, compare, and purchase bicycles from the comfort of their homes. The platform offers a variety of bicycles catering to diverse user preferences and needs. With a user-friendly design, secure payment gateway, and responsive design for optimal viewing on various devices, CycleBay offers an enhanced shopping experience to its customers.
- Cycling enthusiasts looking for a new bicycle.
- Individuals who prefer online shopping for its convenience.
- Those who are active on social media platforms and are influenced by digital promotions and offers.
- Platform Excellence: Develop a robust, user-friendly web platform that streamlines the online bicycle buying process.
- Audience Engagement: Target and cater to cycling enthusiasts, ensuring they find what they're seeking.
- Adaptive Design: Implement a design that provides a seamless experience across various devices.
- Transaction Security: Integrate a secure and reliable payment gateway, instilling customer trust.
- Dynamic Marketing: Craft and execute a potent marketing strategy that leverages digital platforms, especially social media, to enhance brand visibility and drive sales.
CycleBay's overarching goal is to substantially increase sales and revenue. To achieve this, we are prioritizing product visibility by showcasing our range on digital platforms. Expanding our digital footprint through the creation and active management of our Facebook page will facilitate direct engagement with our target audience. Additionally, our strategic push on social media aims to grow our brand awareness, ensuring that CycleBay becomes the go-to e-commerce platform for cycling enthusiasts.
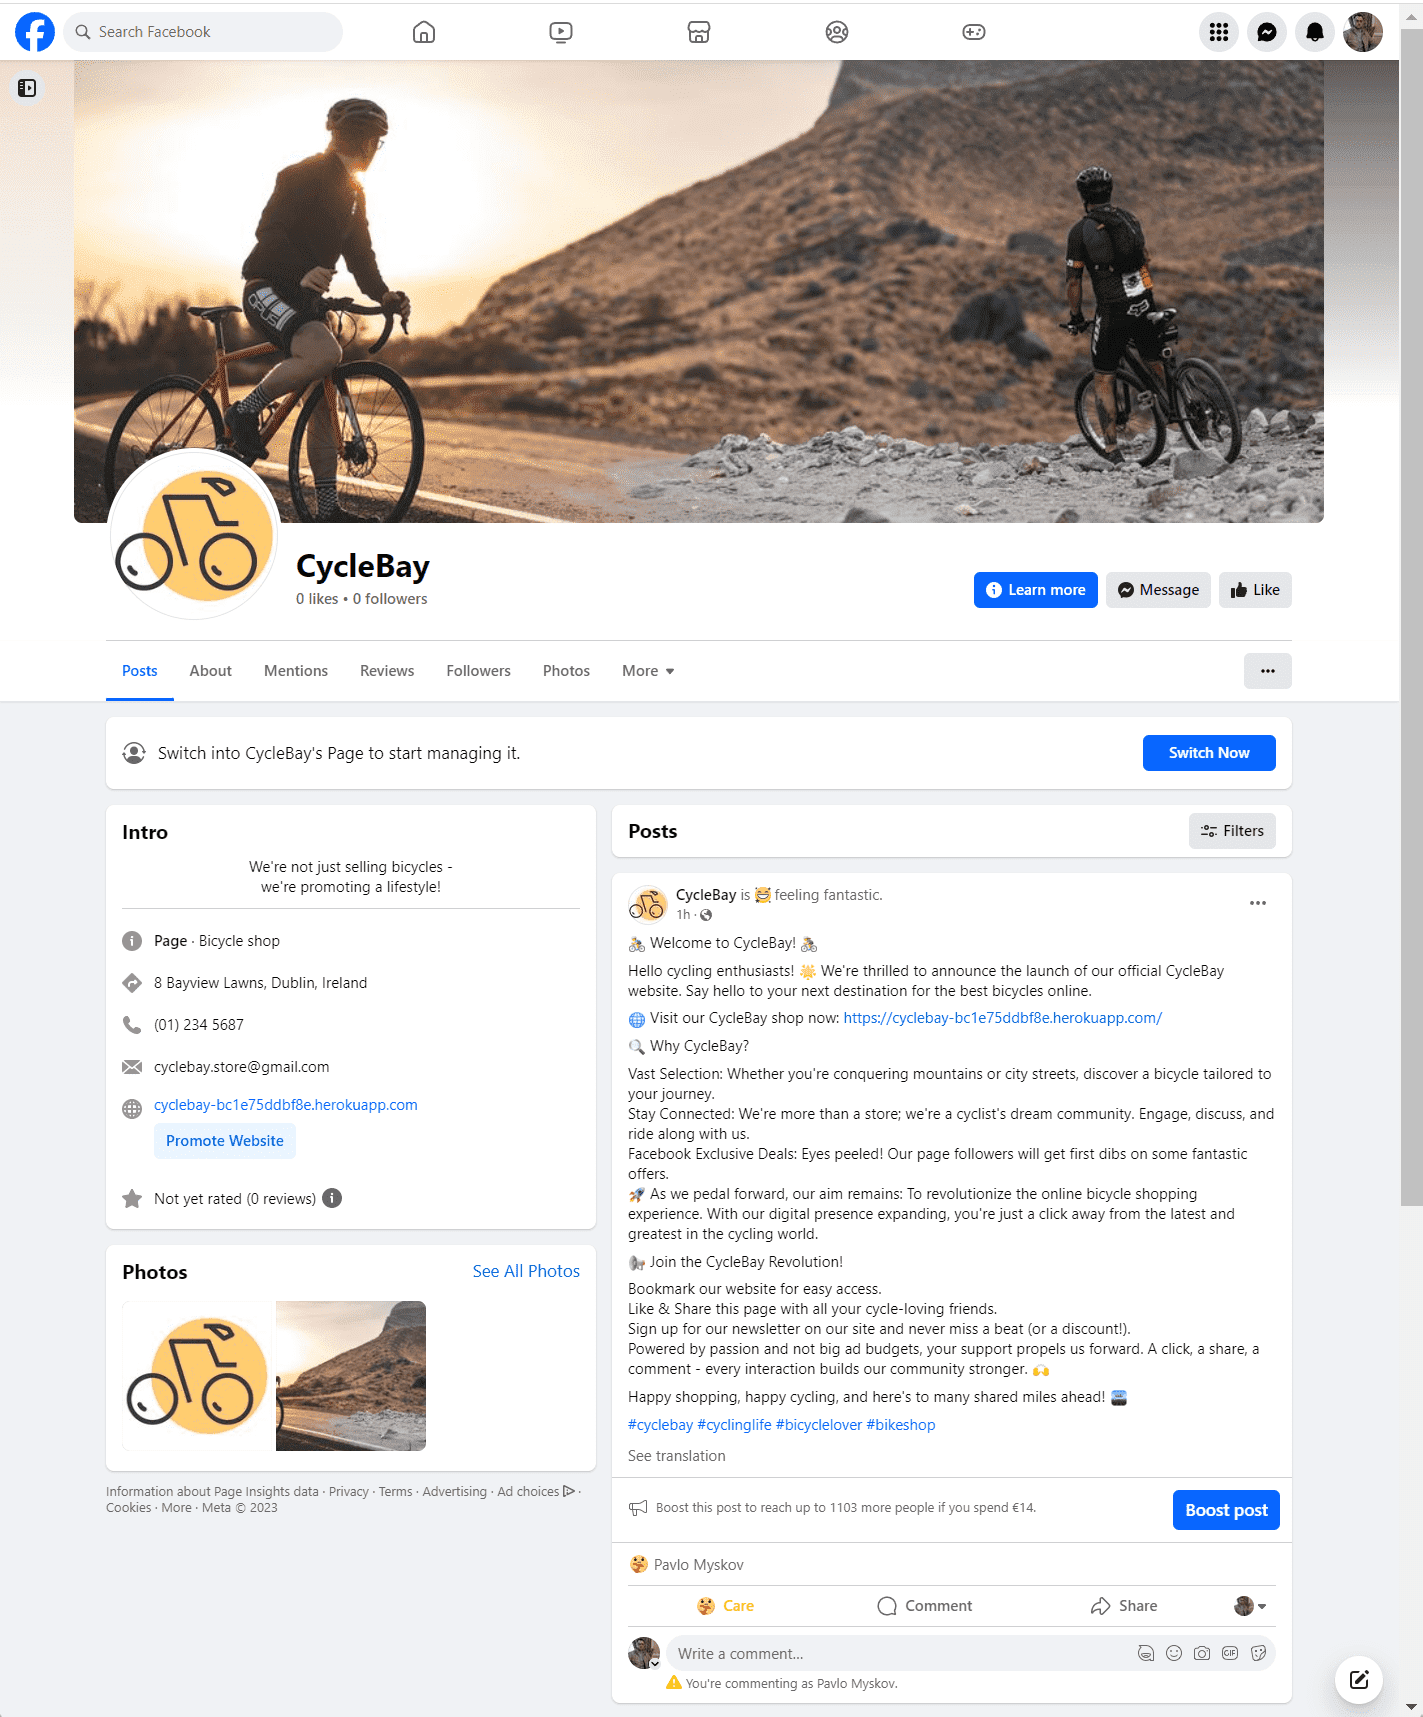
Our target audience consists of people who love cycling and are in search of a new bike. These individuals are typically very active on social media and are always on the lookout for new products and discounts. Consequently, I decided to leverage social media marketing and email marketing to promote the app. I've set up a Facebook Business Page and initiated a newsletter. The Facebook page will serve to promote the app, while the newsletters sent to subscribers will feature special offers and discounts. As the project doesn't have a budget for paid ads, I've opted for free marketing strategies.
I chose the Facebook Business Page because it's an excellent platform for promoting the store and engaging with customers. It provides an opportunity to create a community around the business and to establish lasting relationships with our clients. Furthermore, it offers the potential to create ads and reach a broader audience in the future. I've incorporated a link to the Facebook Business Page in the footer of the store, making it convenient for users to locate and follow the page.
Newsletters are effective tools for maintaining regular contact with customers and updating them about special offers and discounts. I used Mailchimp to create the newsletter. Mailchimp is a renowned email marketing service that facilitates communication with customers, clients, and other interested parties. It provides the means to curate a mailing list and dispatch newsletters to subscribers. I've set up a mailing list and embedded a subscription form in the web application. When users opt into the newsletter, their email addresses are added to the mailing list, enabling me to reach out to all subscribers. For instance, I can disseminate discount codes to entice them to finalize a purchase.
The main goal of the app is to deliver a solution that creates real value for the users and UX design and Agile Methodology are the best way to achieve this goal.
This project was developed with the Agile methodology which allowed me to develop the app iteratively and incrementally, and adapt changes with flexibility even in the late stages of development.
GitHub Issues and Projects are used to manage the development process.
The Project link: https://github.com/users/FlashDrag/projects/11
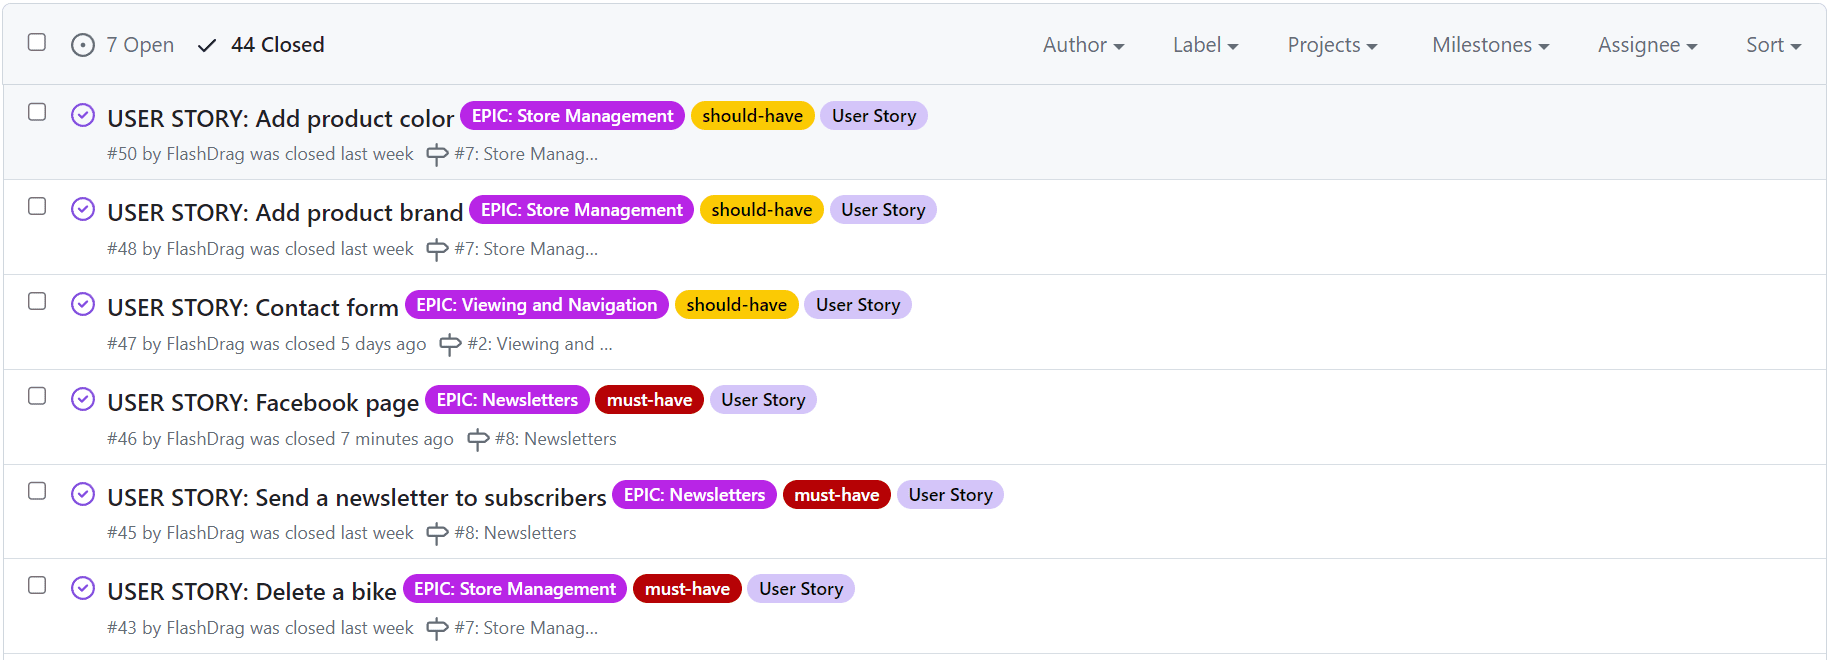
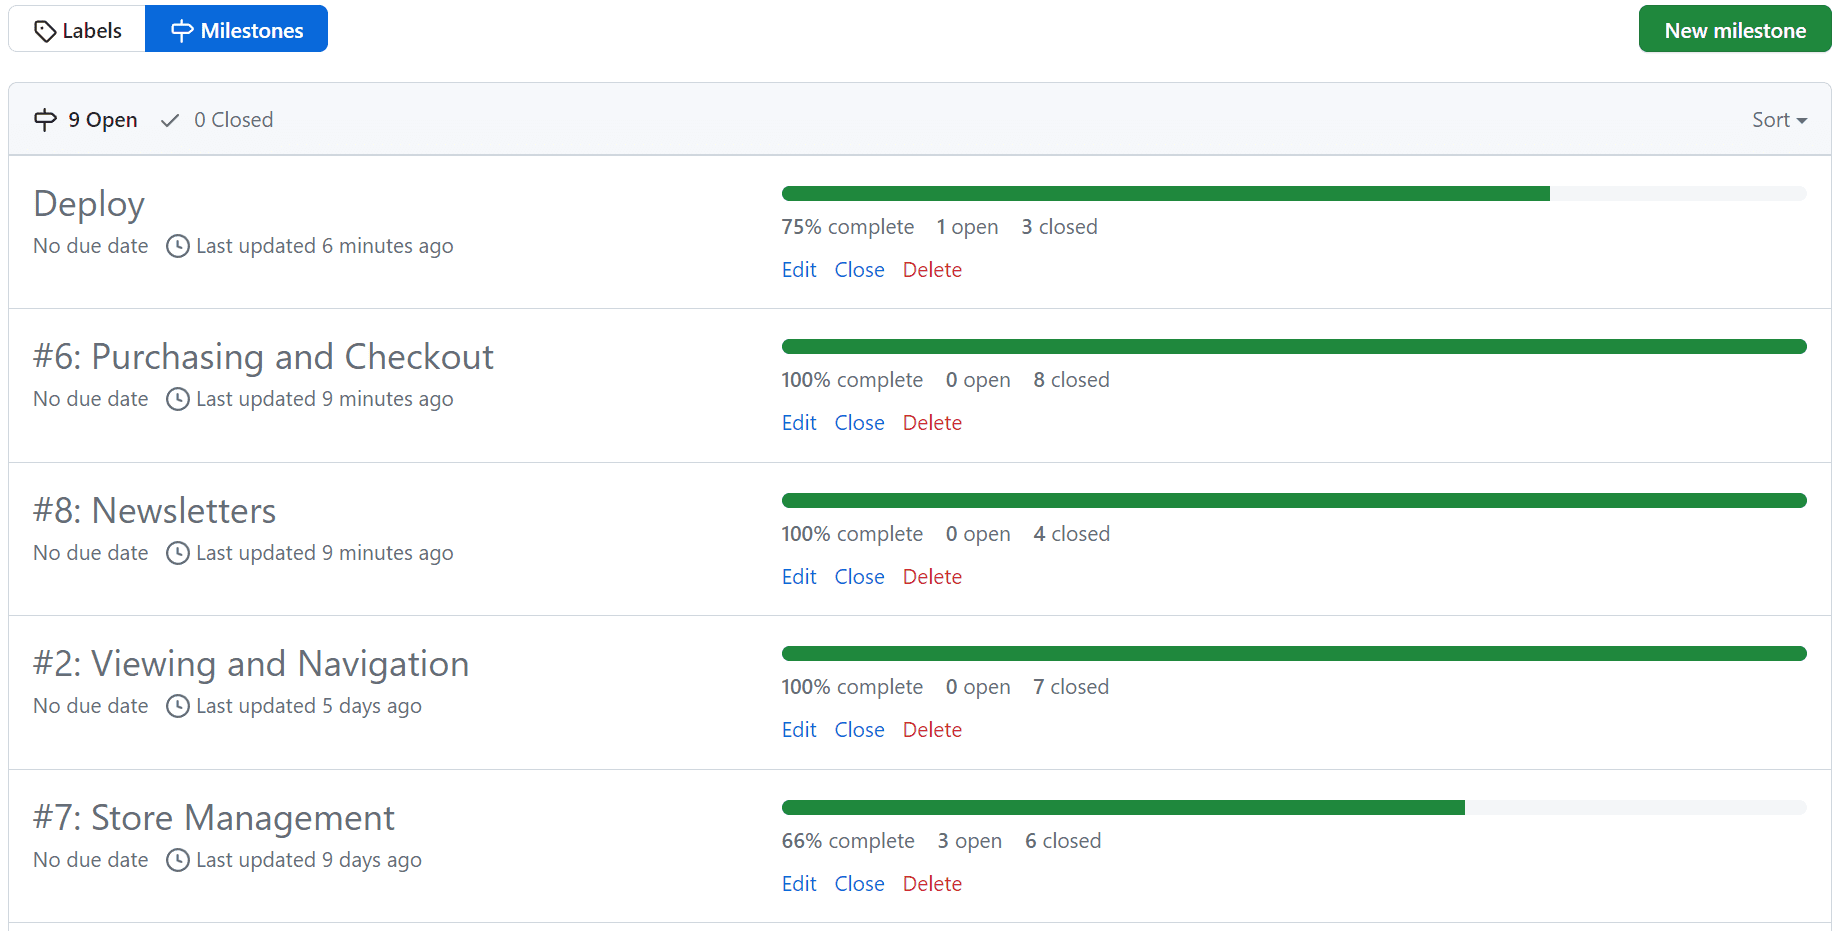
Each siqnificant feature is presented as an Epic and then broken down into smaller User Stories that are then added to the Project Backlog. Epics are marked with labels to indicate the feature. It allows me to filter the User Stories by feature and then allocate them to Milestones and prioritize them.
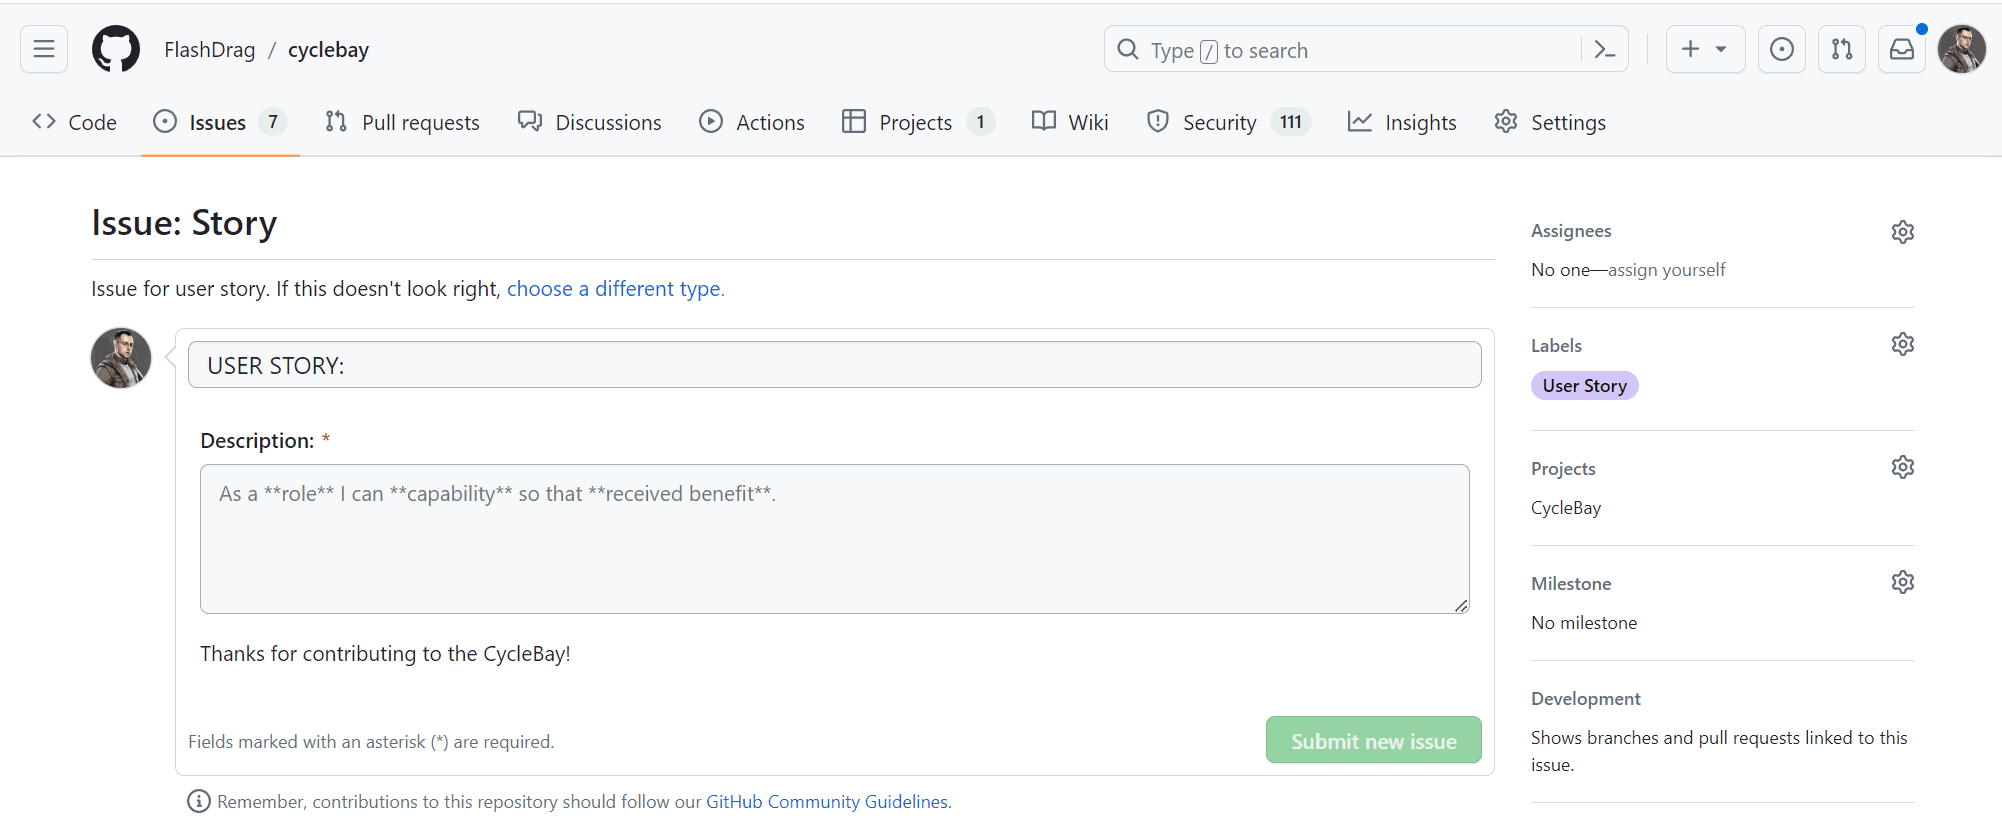
I created the following Issue Templates to ensure that all issues are created in a consistent manner:
- Bug - for reporting bugs
- Story - for creating new User Stories
- Task - for creating new tasks
- Technical Task - for creating new development tasks
I configured the Issue Templates by creating YAML forms. It allows me to create issues with pre-filled fields, placeholders and drop-down lists, as well as assign labels to the issues initially. Also I can add a description to each field to provide more information about the field.
The Issue Templates are available in the Issues tab. When the user clicks on the New Issue button, they will see the list of available templates. The user can select the appropriate template and fill in the form. The form will be validated on the client side and the user will see the error message if the form is invalid. Once the form is filled in correctly, the user can click the Submit new issue button to create the issue.
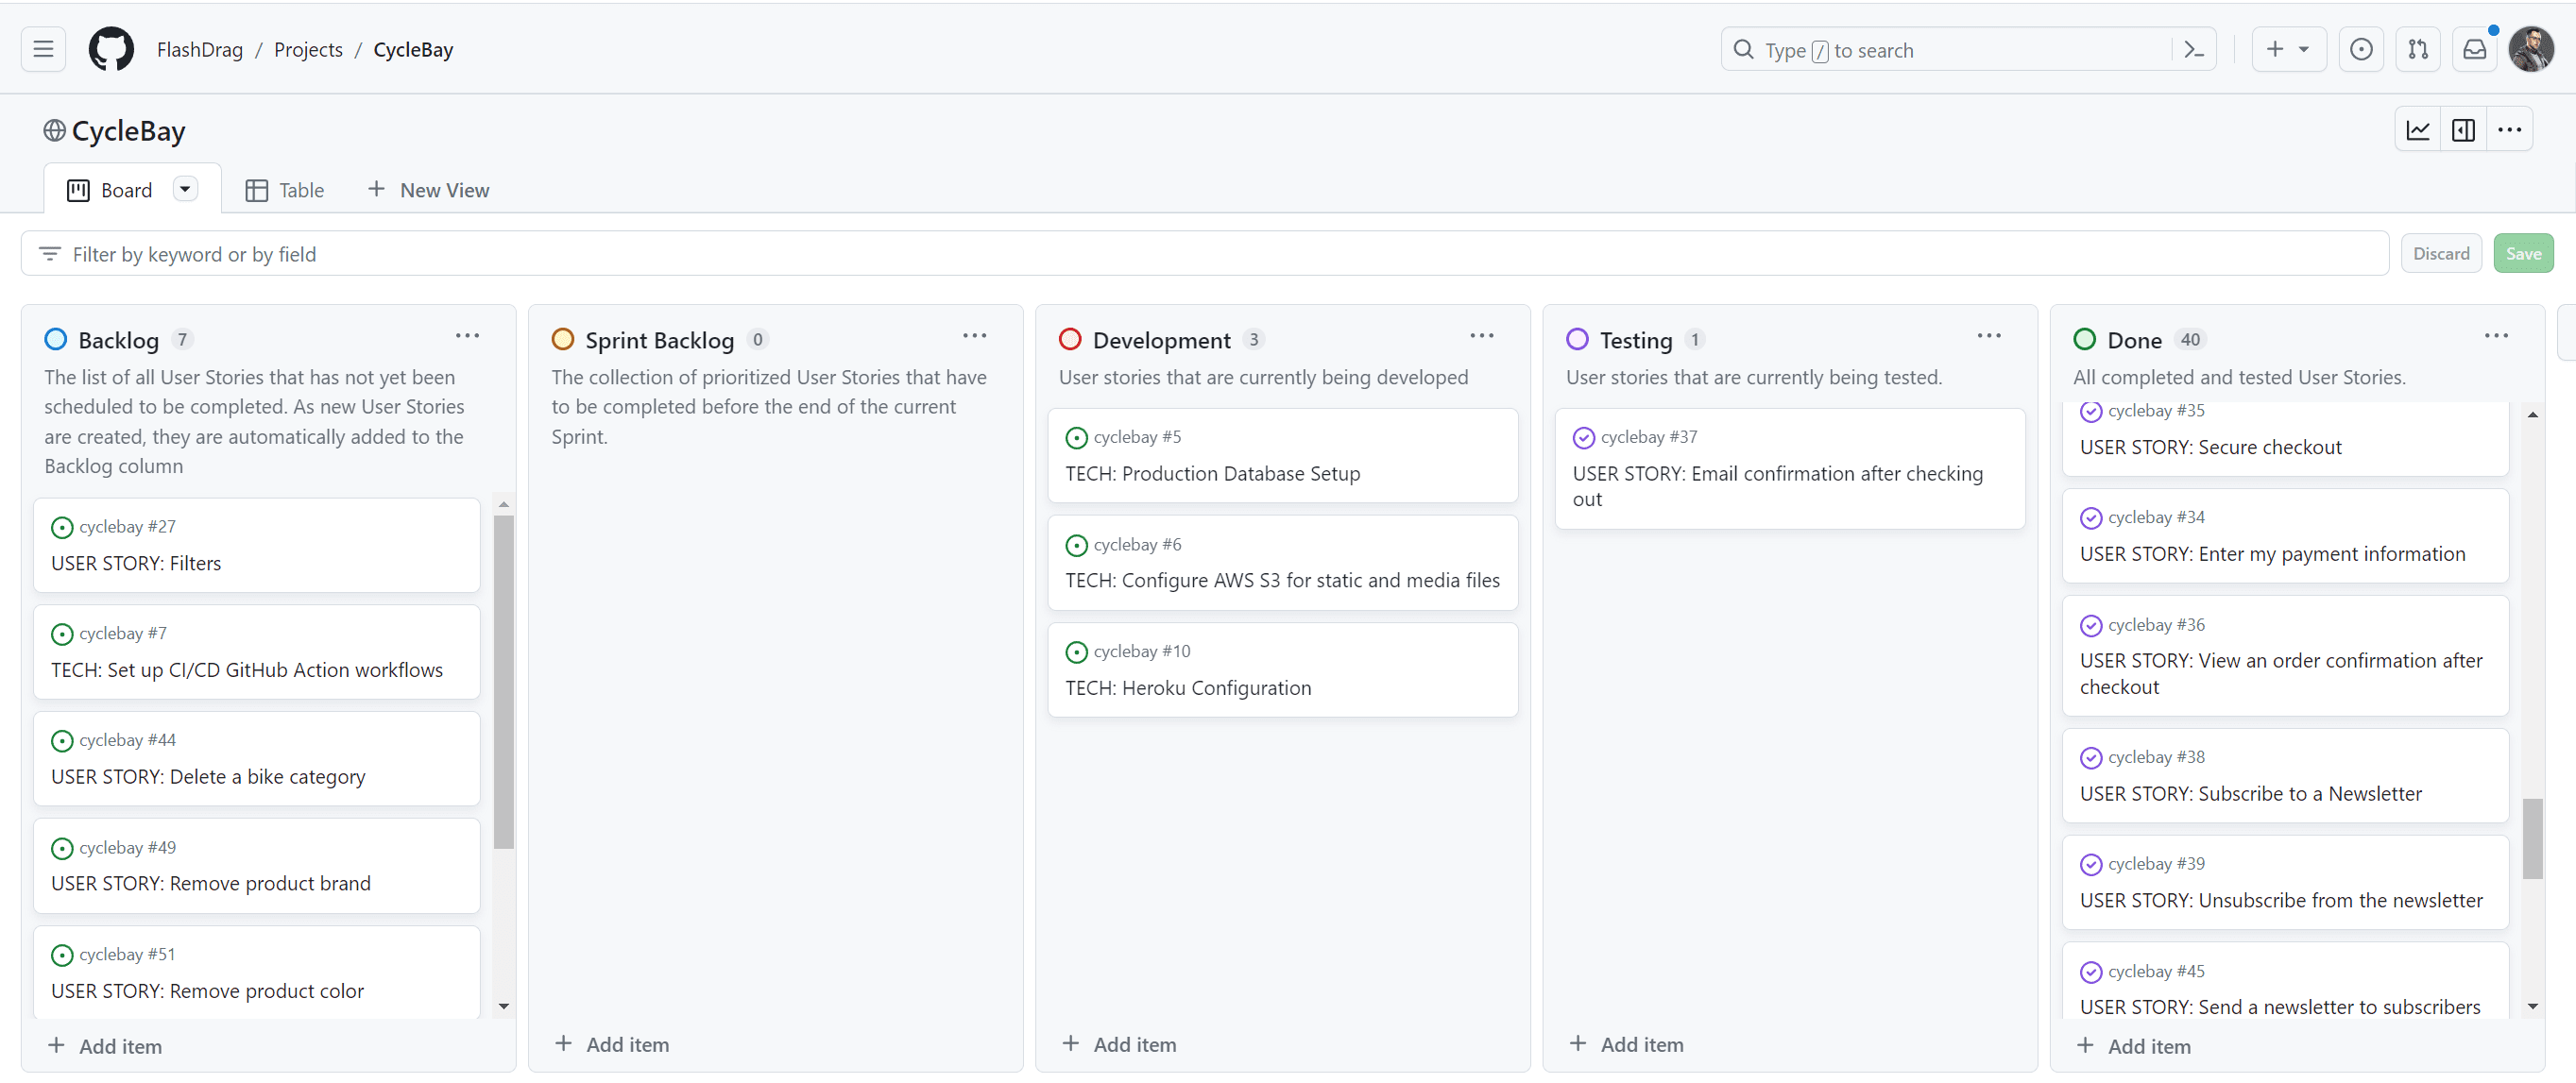
The GitHub_ Kanban_ board is used to manage the process and track the progress of the development. When User Story is created, it is automatically added to the Backlog column to be prioritized. The product Backlog is never complete, as it is a dynamic document to respond to changes effectively. As new features are identified, they are added to the product Backlog. As the product is released, the product Backlog is constantly updated to reflect changes in the product and changes in the market. The Kanban board includes the following columns:
- Backlog - the list of all _User Stories that have not yet been scheduled to be completed. As new User Stories are created, they are automatically added to the Backlog column.
- Sprint Backlog - the collection of prioritized User Stories that have been selected for the current Sprint.
- Development - the user stories that are currently being developed.
- Testing - user stories that are currently being tested.
- Done - all completed and tested User Stories.
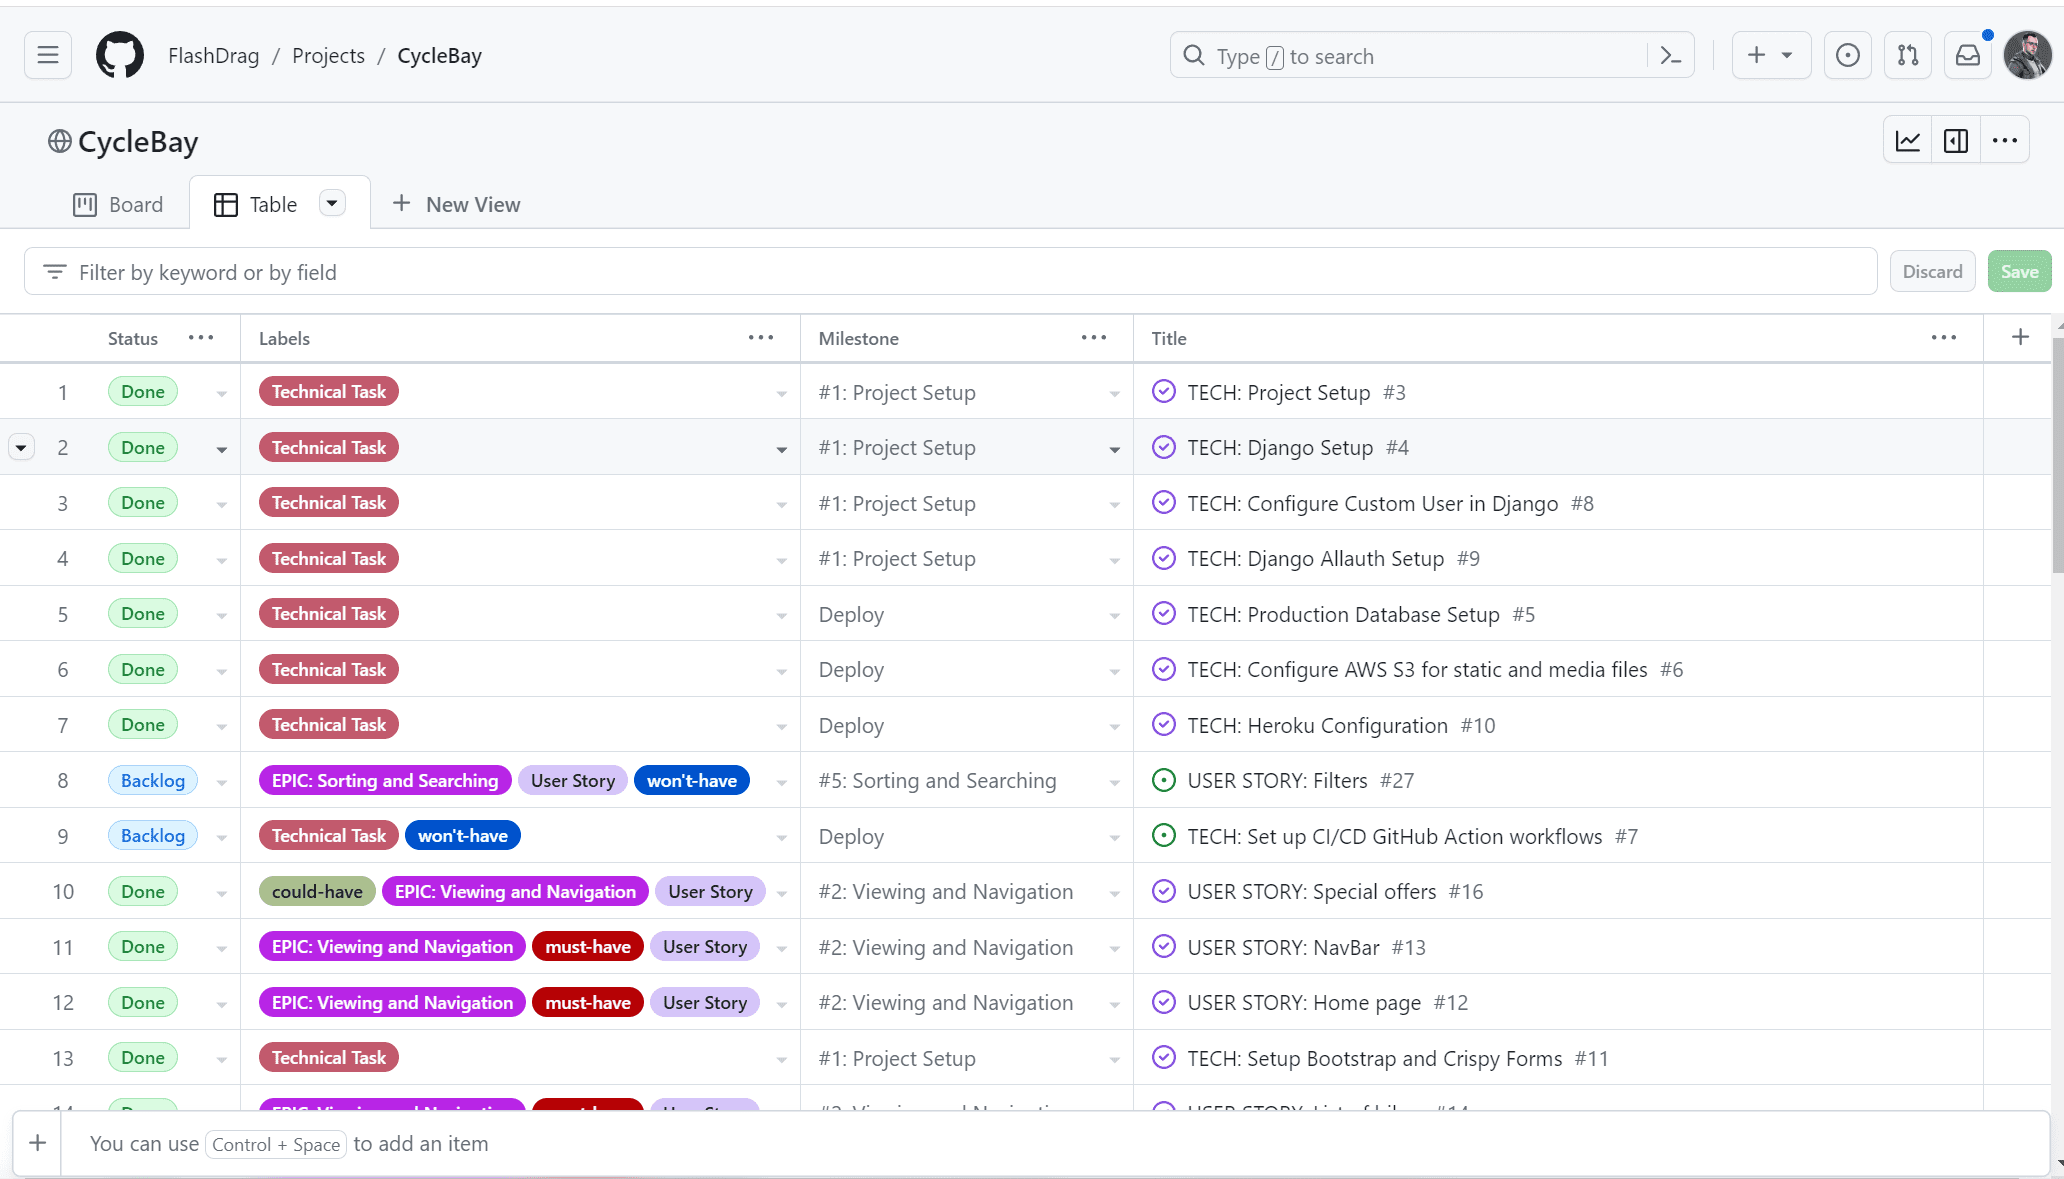
The Project Table is used to filter and then allocate User Stories to Milestones and prioritize them. At the start of each sprint, the User Stories_ are selected from the Backlog and added to the Sprint Backlog with attached priority labels. The User Stories prioritized using the MoSCoW method. The prioritization was based on the following criteria:
- Must Have - The User Story is crucial and add significant value to the product and must be delivered in the current iteration.
- Should Have - The User Story is important but not critical to the success. Simply delivery is not guaranteed within the current iteration.
- Could Have - The User Story is desirable and would only be delivered in their entirety in a best-case scenario. When a problem occurs and the deadline is at risk, one or more could-have items are dropped.
- Won't Have - The User Story will not be delivered in the current delivery timebox but may be considered for the future. The prioritization is based on the 60-20-20 rule where 60% of the effort is spent on the Must Have, 20% on the Should Have and the rest 20% on the Could Have. When the Sprint starts, the User Stories are moved to the Development column, where first the Must Have items. When the development of a particular User Story_ is completed, it is moved to the Testing column, tested and then moved to the Done column manually or using the commit message concerning the User Story ID. If the time is running out and the User Stories are not completed, the Could Have items are dropped back to the Backlog column for re-prioritization.
- As a Shopper, I want to be able to see a home page so that I can quickly understand the purpose of the site and learn more about the business
- As a Shopper, I want to be able to easily navigate throughout the site to find content so that I can find what I'm looking for efficiently
- As a Shopper, I want to be able to view a list of bikes so that I can select one to purchase
- As a Shopper, I want to be able to view the details of a bike so that I can identify the price, color, type, size and image
- As a Shopper, I want to be able to quickly identify special offers so that I can take advantage of special savings on products I'd like to purchase
- As a Shopper, I want to be able to easily view the total of my purchases at any time so that I can avoid spending too much
- As a Shopper, I want to be able to contact the store owner using the contact form so that I can ask any questions I may have
- As a Shopper, I want to be able to easily register for an account so that I can have a personal account and be able to view my profile
- As a Shopper, I want to be able to easily login or logout so that I can access my personal account information
- As a Shopper, I want to be able to easily recover my password in case I forget it so that I can recover access to my account
- As a Shopper, I want to be able to receive an email confirmation after registering so that I can verify that my account registration was successful
- As a Shopper, I want to be able to have a personalized user profile so that I can view my personal order history and order confirmations, and save my payment information
- As a Shopper, I want to be able to save the products I want to buy later so that I can keep track of them
- As a Shopper, I want to be able to view my wish list so that I can see what I want to buy later
- As a Site User, I want to be able to sort the list of available products so that I can easily identify the best-priced, categorically, brandly and colored products
- As a Shopper, I want to be able to sort a specific category of products so that I can find the best-priced product in a specific category or sort the products in that category by name
- As a Shopper, I want to be able to use filters so that I can sort multiple categories, brands, colors, price and sizes of products simultaneously
- As a Shopper, I want to be able to search for a product by name, brand or color so that I can find a specific product I'd like to purchase
- As a Shopper, I want to be able to easily see what I've searched for and the number of results so that I can quickly decide whether the product I want is available
- As a Shopper, I want to be able to easily select the size and quantity of a bike when purchasing it, so that I can ensure I don't accidentally select the wrong bike, size or quantity
- As a Shopper, I want to be able to view bikes in my bag to be purchased, so that I can identify the total cost of my purchase and all items I will receive
- As a Shopper, I want to be able to adjust the quantity of individual items in my bag, so that I can easily make changes to my purchase before checkout
- As a Shopper, I want to be able to remove a Bike from my bag, so that I can remove it if I change my mind
- As a Shopper, I want to be able to easily enter my payment information so that I can check out quickly and with no hassles
- As a Shopper, I want to be able to feel my personal and payment information is safe and secure so that I can confidently provide the needed information to make a purchase
- As a Shopper, I want to be able to view an order confirmation after checkout, so that I can verify I haven't made any mistakes
- As a Shopper, I want to be able to receive an email confirmation after checking out, so that I can keep the confirmation of what I've purchased for my records
- As a Shopper, I want to be able to subscribe to a Newsletter so that I can receive any discounts or special offers available.
- As a Store Owner, I want to be able to send a newsletter to subscribers, so that I can inform them about special offers or discounts.
- As a Store Owner, I need a Facebook page, so that I can promote my store on social media.
- As a Store Owner, I want to be able to add a product to the store, so that I can sell it to customers.
- As a Store Owner, I want to be able to edit/update a product, so that I can change the price, image or any other attributes of the product.
- As a Store Owner, I want to be able to delete a product, so that I can remove it from the store.
- As a Store Owner, I want to be able to add a product category, so that users can group products into categories.
- As a Store Owner, I want to be able to add a product brand, so that users can group products into brands.
- As a Store Owner, I want to be able to add a product color, so that users can group products into colors.
The CycleBay website is designed to be simple and easy to navigate. The site has a responsive design to provide an optimal viewing experience across a wide range of devices.
The website has 4 main pages with a clear and semantic structure, the information is well organized, every element is easy to find. The consistency and similarity of the structure is manifested on all pages and sections of the site and covers interactivity.
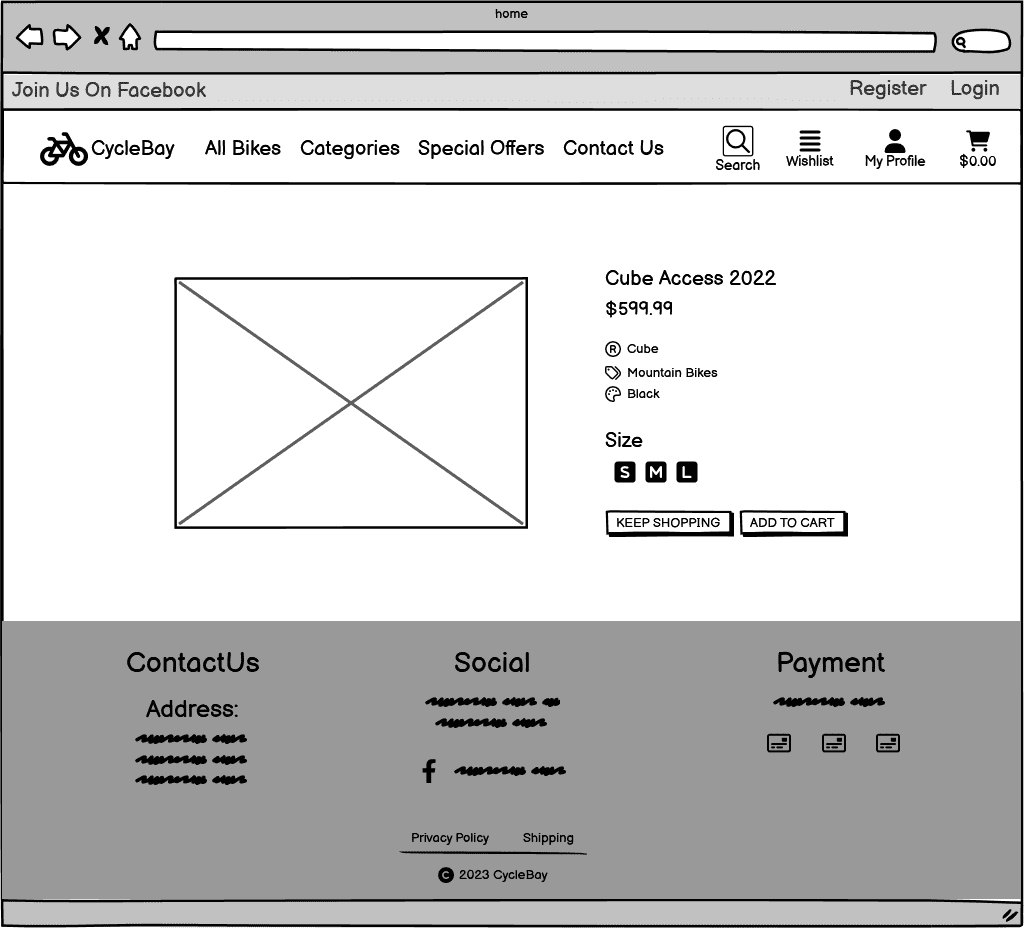
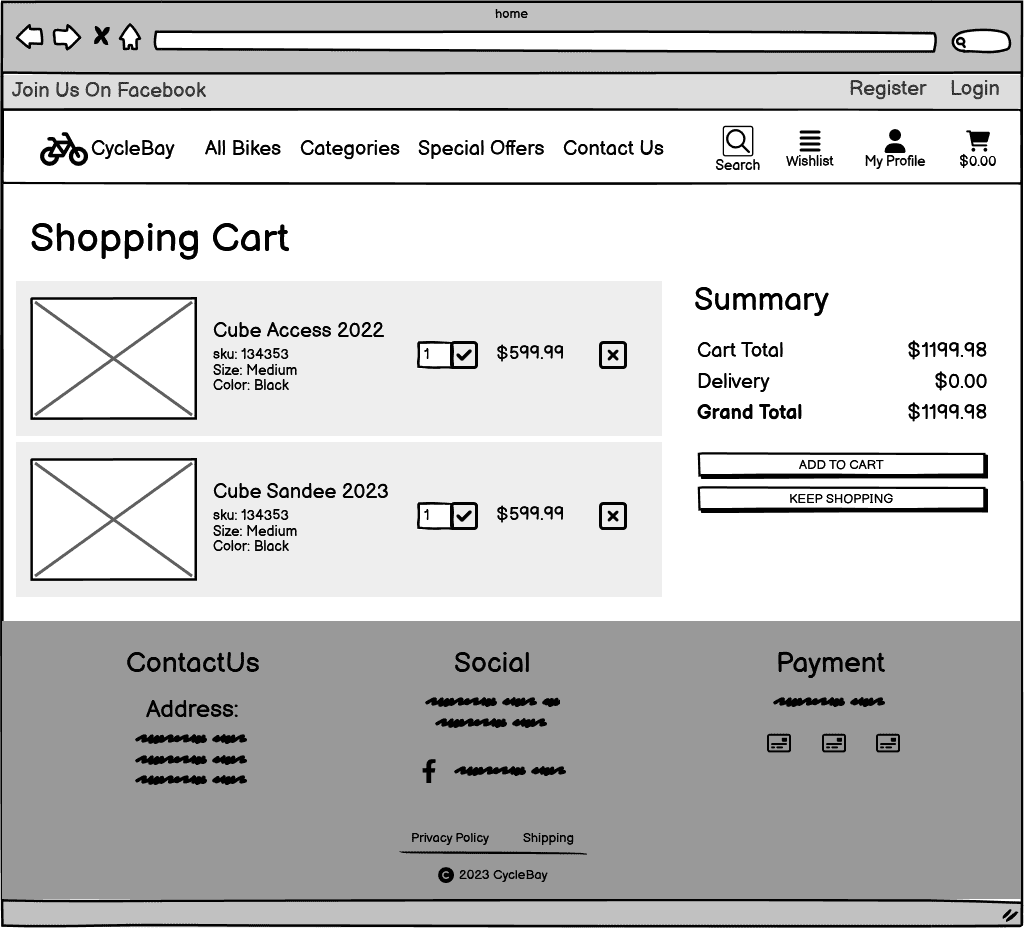
The wireframes were created using Balsamiq. Here are some initial wireframes created at the beginning of the project. The final design may differ from the initial wireframes.
Home Page
Products Page
Product Details Page
Shopping Bag Page
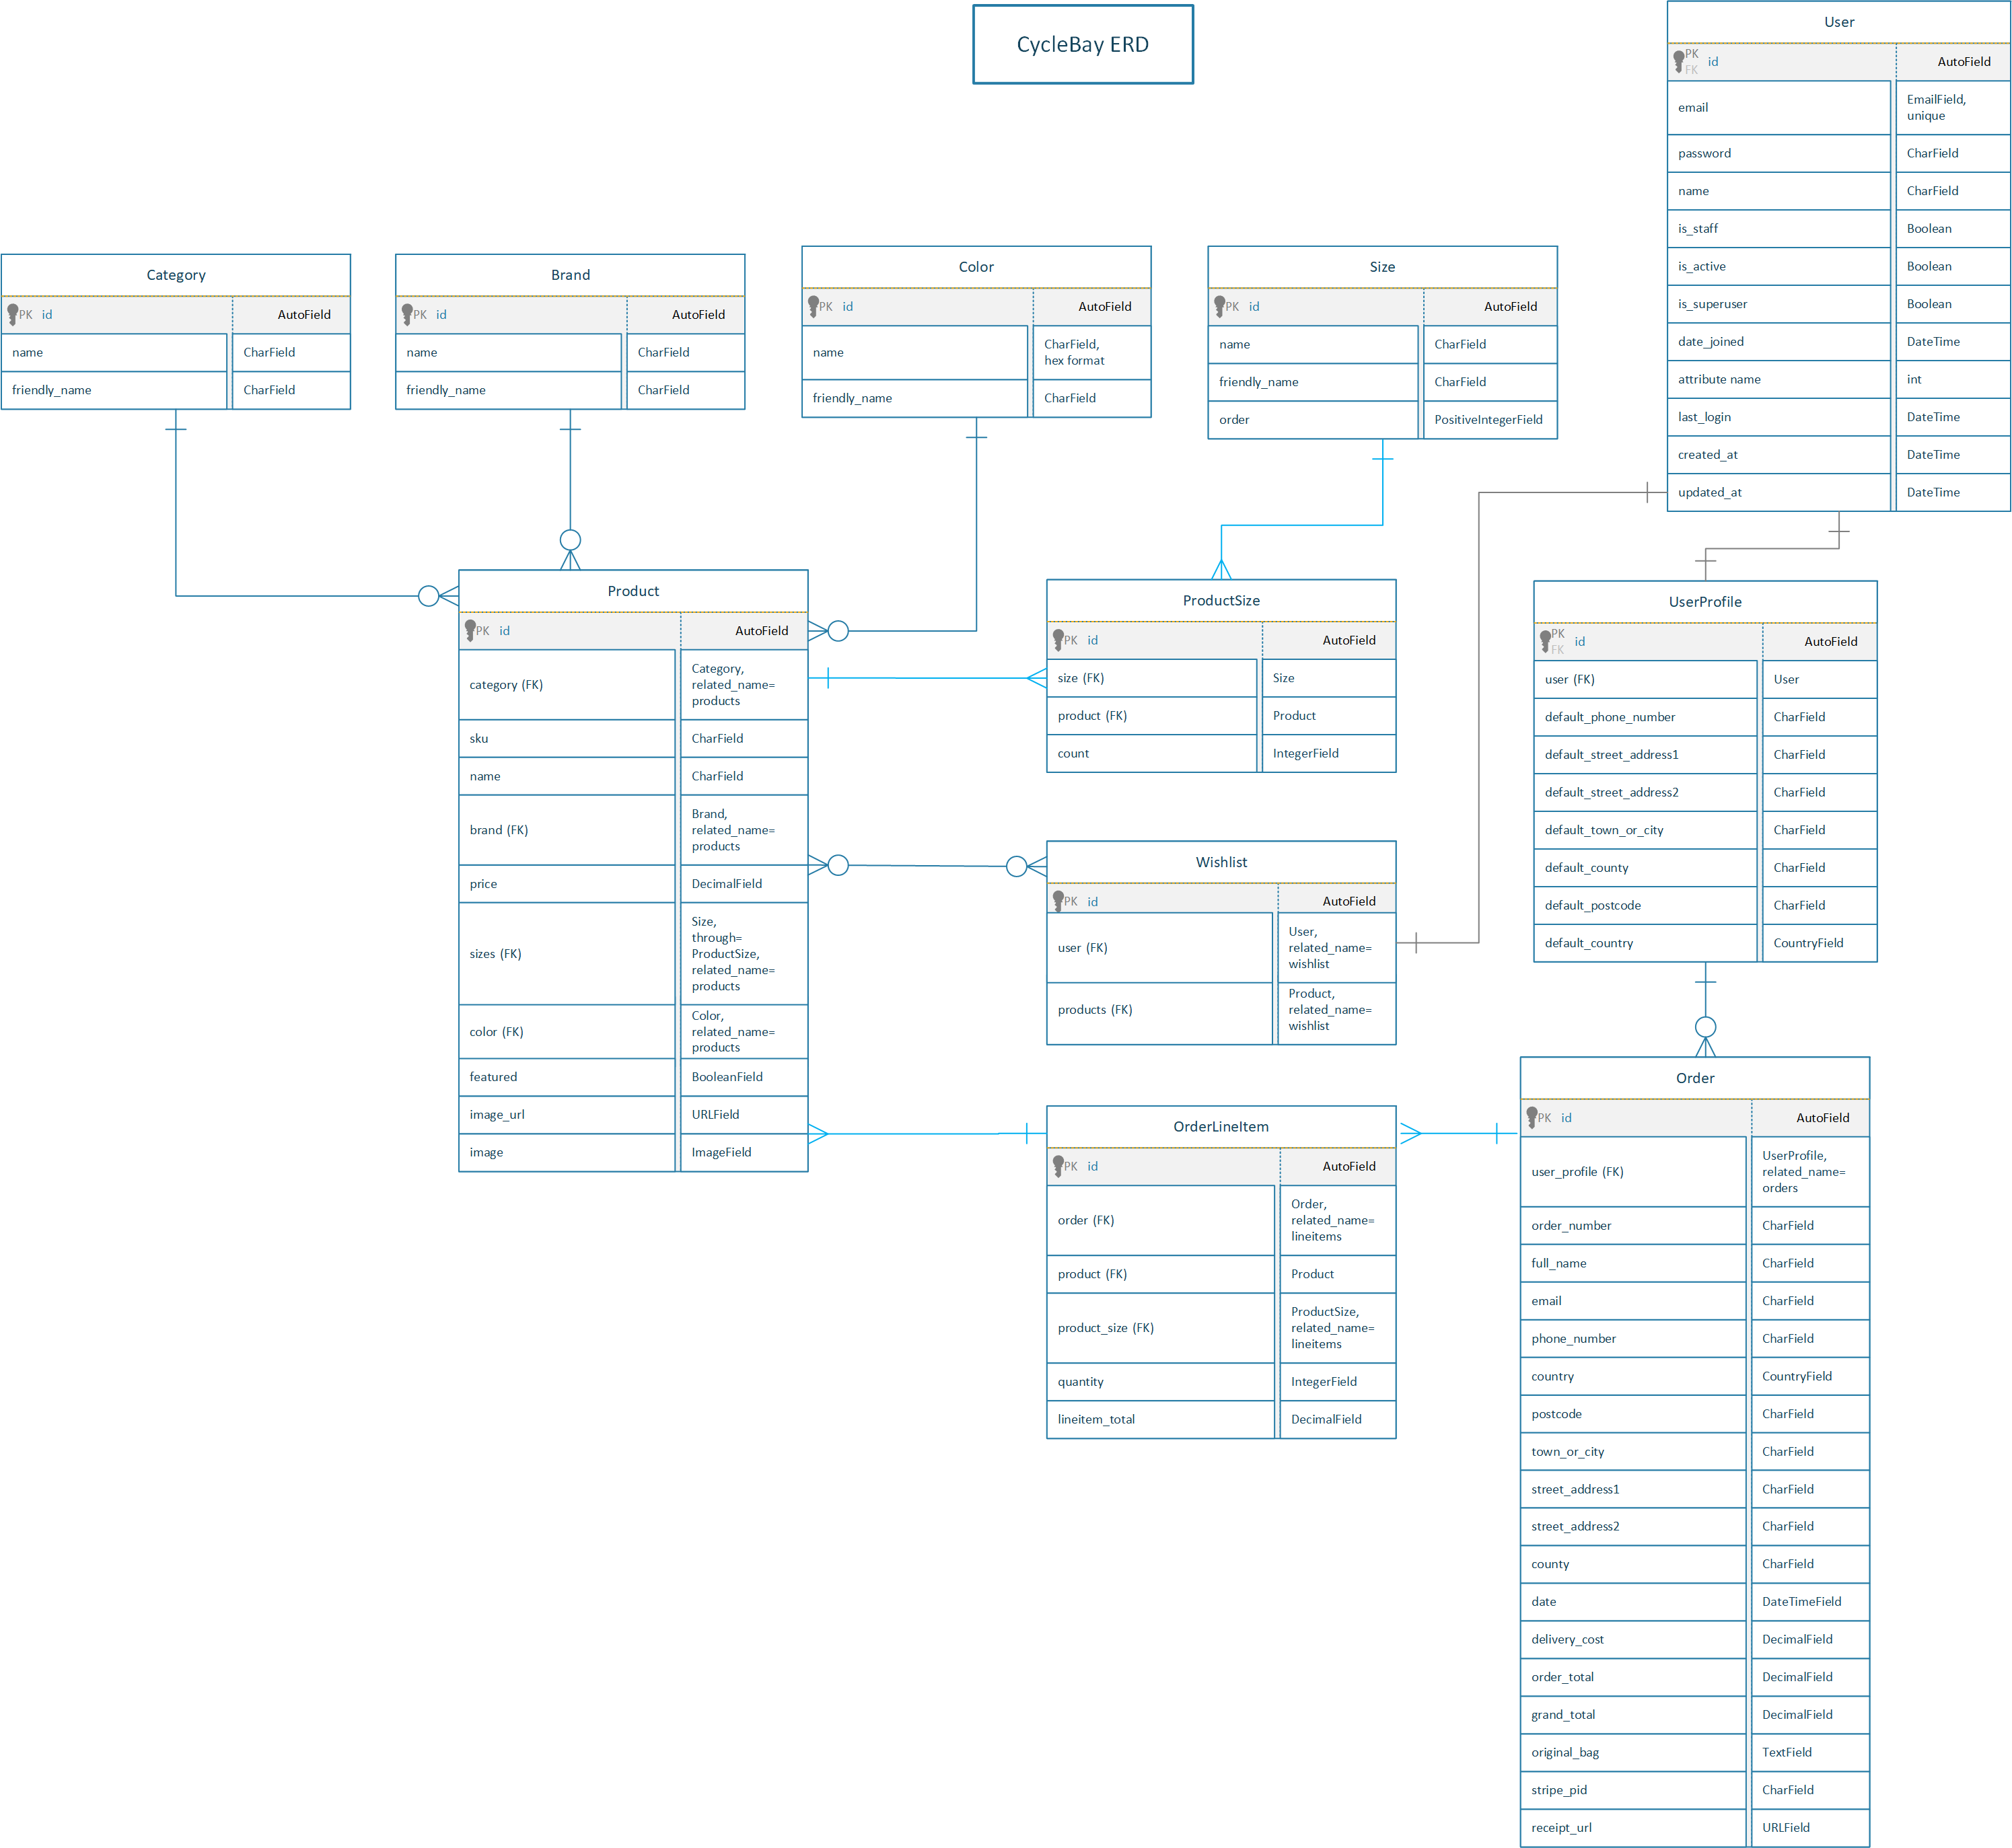
The Get Job platform uses a relational database to store and manage data. The RDBMS used for this project is PostgreSQL which is hosted on the cloud service ElephantSQL.
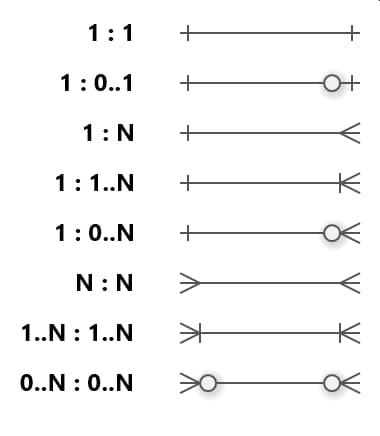
The Entity-Relationship Diagram below shows the structure of the database and the relationships between the tables. This diagram was created using Microsoft Visio. The relationships between the tables are represented by the Crow's Foot Notation.
There are the following relations:
- 1 : 1 - one-to-one relationship
- 1 : 0..1 - one-to-zero or one relationship
- 1 : N - one-to-many relationship
- 1 : 1..N - one-to-one and more relationship
- 1 : 0..N - one-to-zero and more relationship
- N : N - many-to-many relationship
- 1..N : 1..N - one or more to one or more relationship
- 0..N : 0..N - zero or more to zero or more relationship
The color theme of the website is inspired by the colors of the hero image "Teal and Orange". The hero image is a picture of a person riding a bicycle. The colors of the image background are cyan and black, and the color of the person's skin closes to warm orange. This combination of colors is very popular in the film industry and is used to create a cinematic look. This color contrast is also rooted in color theory, where the two colors are almost opposite on the color wheel, making them complementary. The teal and orange moslty used for interactive elements, such as buttons, links, and icons. The black, gray and white colors are used for text and backgrounds, to create a high contrast and ensure readability.
As a primary font, I have chosen to use the Montserrat font. It's a geometric sans-serif typeface that is easy to read and invokes a feeling of trust. Since it's designed for fast reading, it's good for product descriptions, and its aesthetic is appealing to the creatives, and businessmen alike.
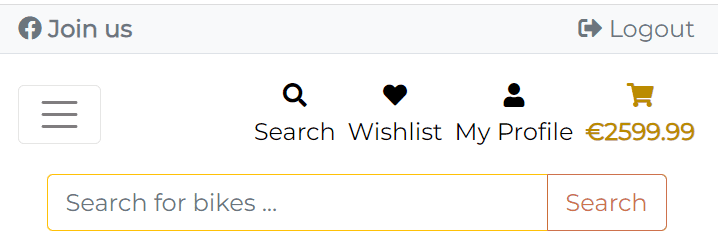
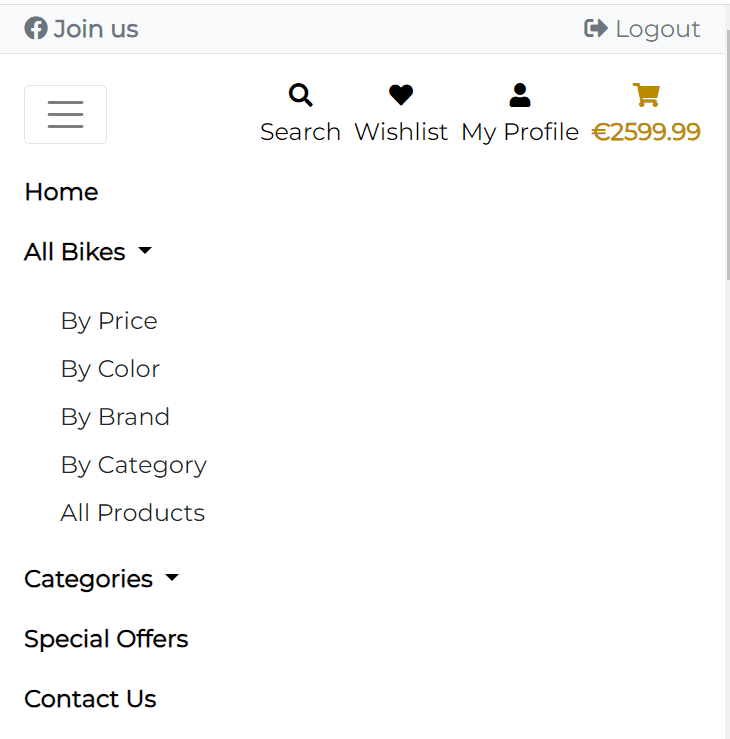
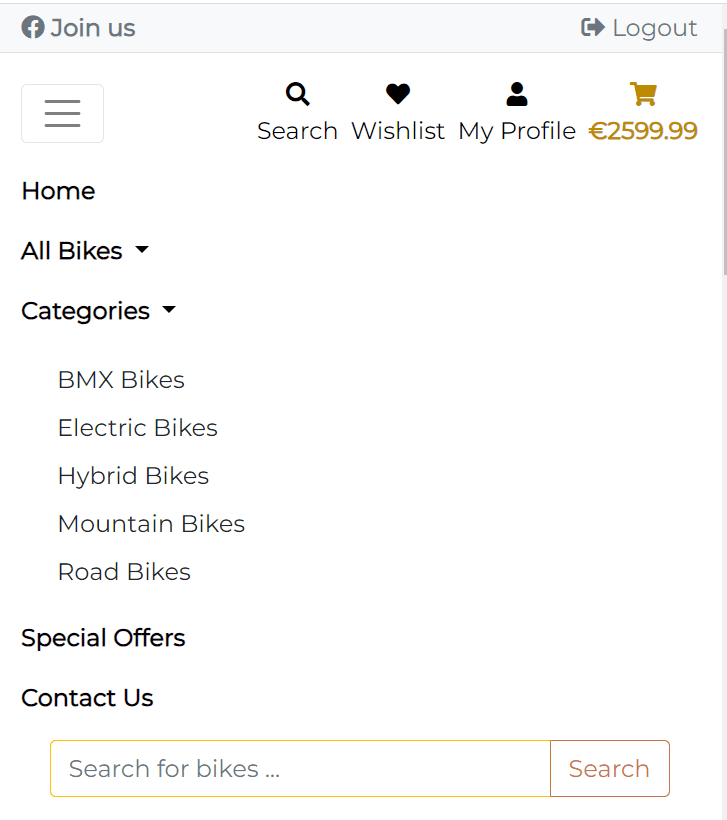
The navbar is fully responsive and collapses into a hamburger menu on smaller screens. The right side of the navbar is always visible on all screens, since it contains the most important links for the user. I didn't see the point to make the navbar sticky or fixed, since the page content is not too long, except the products page, but in this case the user can use the Back to top button. In some cases, the fixed navbar can be annoying and distract the user from the main goal.
The navbar consists of two horizontal sections:
-
The top section is narrow and contains on left side the Join us on Facebook link that opens the Facebook page in a new tab. On the right side, there are Login and Register links. If a user is authenticated, the Login and Register links are replaced with the Profile(for staff only) and Logout links.
-
The bottom section is main navbar and contains the CycleBay logo and the following links on the left side: Home, All Bikes dropdown menu with the list of sorting options, Categories dropdown menu, Special Offers and Contact Us links. On the right side, there are Search bar that folds into a search icon on smaller screens, Wishlist link, Profile(for customers only) and Add Item(for staff only) links, and Shopping Bag link with the total sum of the bag.
The search bar is visible only on extra large screens(1200px and up), and on smaller screens it collapsed into a search icon and can be expanded right under the navbar by clicking on icon. It also can be expanded even if the navbar is expanded as well.
The All Bikes dropdown menu contains the list of sorting options. It allows the user to sort the products by price, color, brand and category names in ascending order.
The Categories dropdown menu contains the list of all existing categories. The category list is dynamic and generated from the database. When a new category is added to the database, it will be automatically added to the navbar dropdown menu. The user can click on the category name to view all products related to this category.
| Navbar Mobile | Navbar Mobile Search Expanded |
|---|---|
 |
 |
| Navbar Mobile Expanded | Navbar Mobile Expanded & Search |
|---|---|
 |
 |
The footer consists of 5 sections:
- Contact Us The Contact Us header is a link to the contact page. The section also contains the physical address of the store.
- Social The Social section contains the link to the Facebook page and the Facebook icon.
- Payment The Payment section contains the Stripe logo with a link to the Stripe website and the icons of the payment methods accepted by the store, such as Visa, MasterCard, American Express.
- Privacy and Shipping Policy
- Developer Info
The footer is fully responsive and changes its layout from 3 columns to 1 column on smaller screens.
It also always stays at the bottom of the page, even if the page content is not long enough to fill the screen. This is achieved by using the d-flex flex-column vh-100 bootstrap classes on the body tag and flex-grow-1 bootstrap class on the child elements of the body tag on all pages where the content is long enough to fill the screen.
The Contact page is designed to provide the user with a convenient way to contact the store owner. The page can be accessed by clicking on the Contact Us link in the footer or from the navbar. The contact form contains name, email, phone number, subject and message fields. If the user authenticated, the name and email fields will be pre-filled with the user's name and email address. The form is built with Django forms and validated on the server side.
Once the user submits the form, they will be redirected to the Home page and will see the success message. The form data will be sent to the store owner's email address using the django.core.mail.send_mail method.
# home.views

def contact(request):
# ...
if form.is_valid():
    message = (
        f"Contact Form Message\n\n"
        f"Name: {form.cleaned_data['name']}\n"
        f"Phone: {form.cleaned_data['phone']}\n"
        f"From Email: {form.cleaned_data['email']}\n\n"
        f"{form.cleaned_data['message']}"
    )
    send_mail(
        subject=form.cleaned_data["subject"],
        message=message,
        from_email=form.cleaned_data["email"],
        recipient_list=[settings.DEFAULT_FROM_EMAIL],
        fail_silently=False,
    )
    messages.success(
        request,
        "Thank you for your message. We will get back to you soon.",
    )
    return redirect("home")
The user can register a new account by clicking on the Register link in the navbar. The user will be redirected to the registration page where they can fill in the registration form. I implemented the custom user model that allows to use email as a username, and removed the username field from the form, since the email address is unique and can be used as a username. The user can register with real email address only, since the email address will be used for the order confirmation and password reset.
The own account allows users to view the order history, save and edit the delivery information and save and view products in a wishlist.
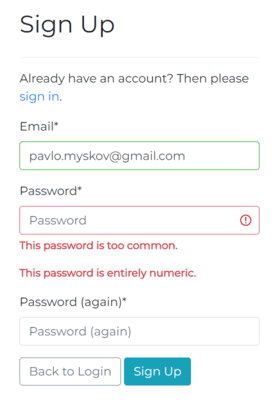
Django by default has a good set of password validators. The goal of the validators is to ensure that a password is not a simple set of characters that can be easily a victim of a brute-force or dictionary attack.
Django includes a set of built-in password validators that check for the following rules:
- Similarity of the password and username;
- Minimum length of the password;
- Password similar to common passwords (20.000 records);
- Password not entirely numeric;
The password validators are defined in the settings.py file:
AUTH_PASSWORD_VALIDATORS = [
    {
        "NAME": "django.contrib.auth.password_validation.UserAttributeSimilarityValidator",
    },
    {
        "NAME": "django.contrib.auth.password_validation.MinimumLengthValidator",
    },
    {
        "NAME": "django.contrib.auth.password_validation.CommonPasswordValidator",
    },
    {
        "NAME": "django.contrib.auth.password_validation.NumericPasswordValidator",
    },
]
If the password fails to meet any of the above requirements, the user will see the appropriate error message.
Additionally, I added a simple frontend validation to the registration form. The password must be at least 8 characters long and the second password field must match the first one. If the form is invalid, the invalid fields will be highlighted in red without reloading the page. In the future, I plan to make the client-side validation more advanced and add the password strength meter.
The jQuery password validation is implemented in the templates/account/signup.html template.
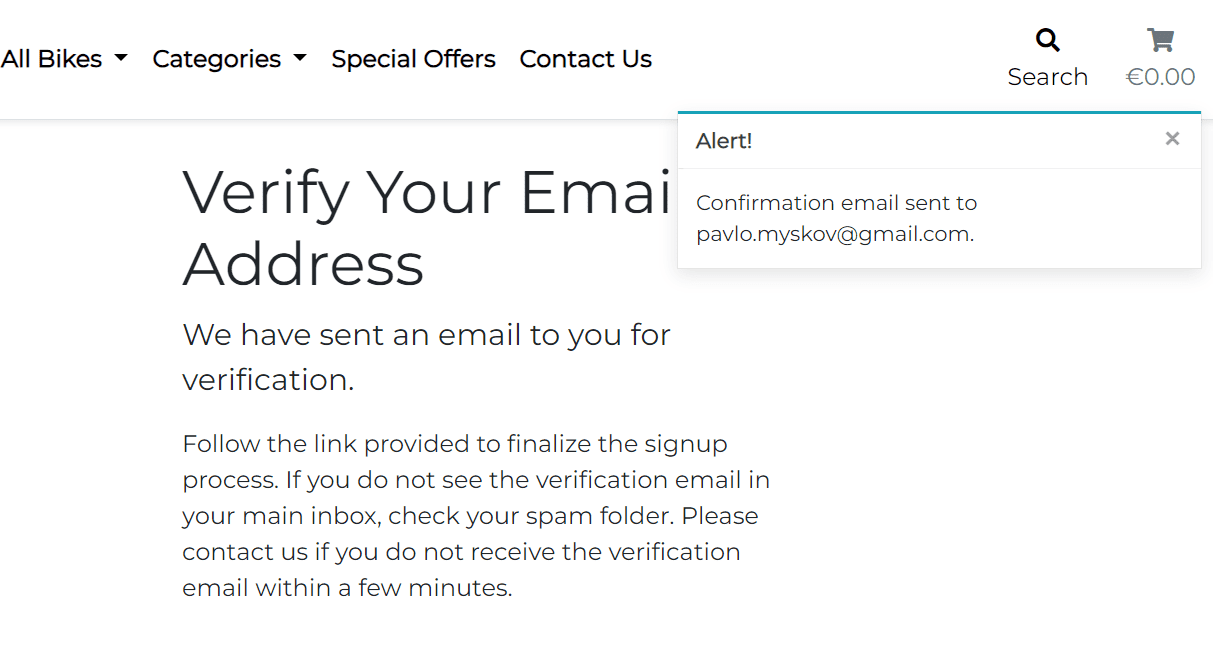
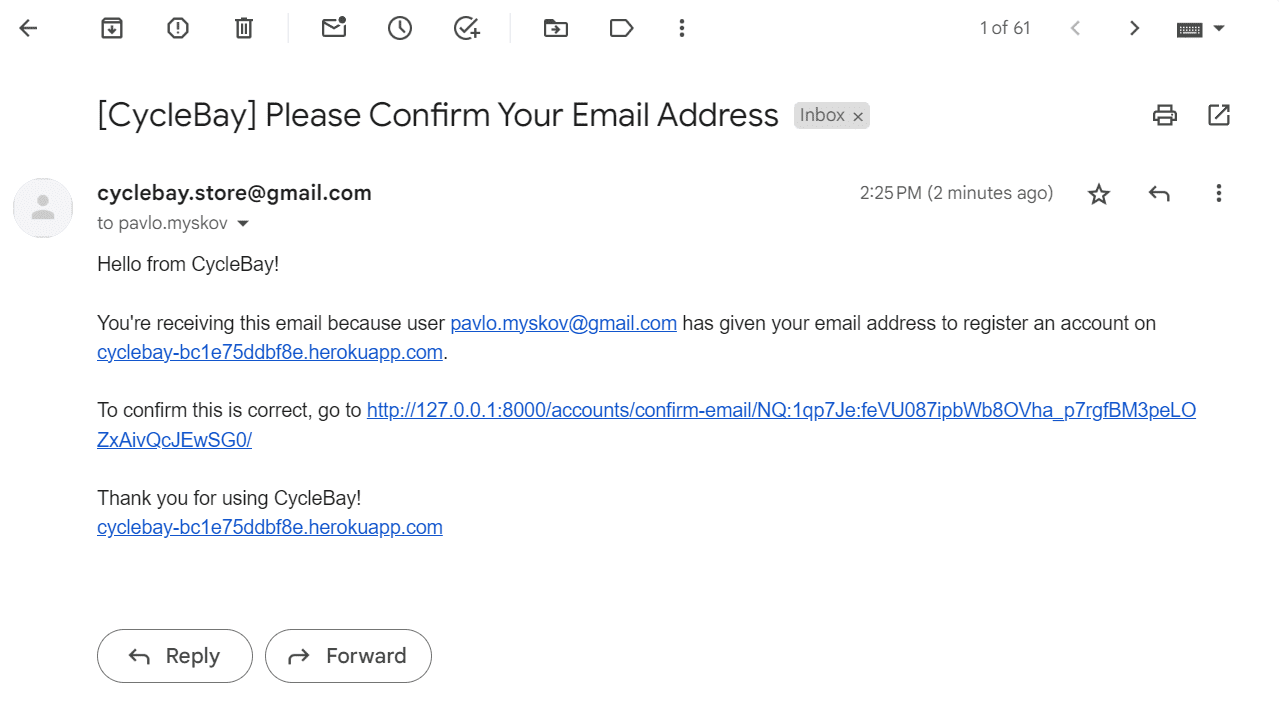
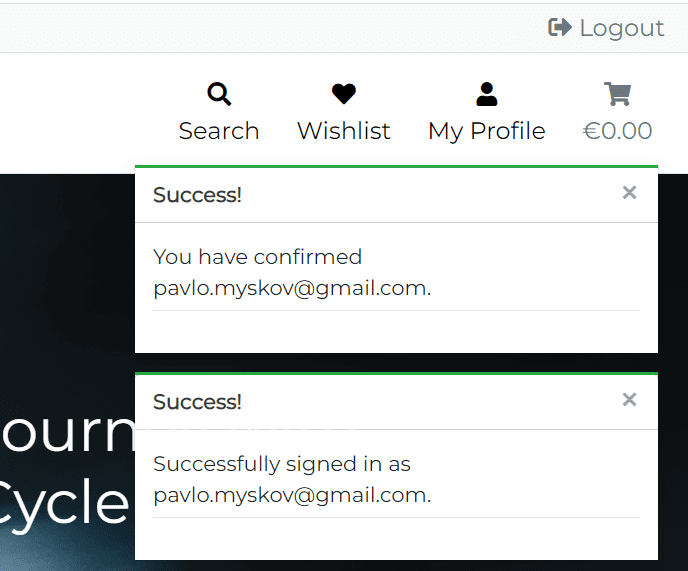
Once the all fields are filled in correctly, the user can click the Sign Up button to submit the form. They will be redirected to the Verification Sent page and will receive a confirmation email with a link to confirm the registration. Then the user click the link and will be redirected to the home page as authenticated user. So the user can start shopping right away, without the need to login again. This is achieved by using the ACCOUNT_LOGIN_ON_EMAIL_CONFIRMATION = True and ACCOUNT_CONFIRM_EMAIL_ON_GET = True setting in the settings.py file.
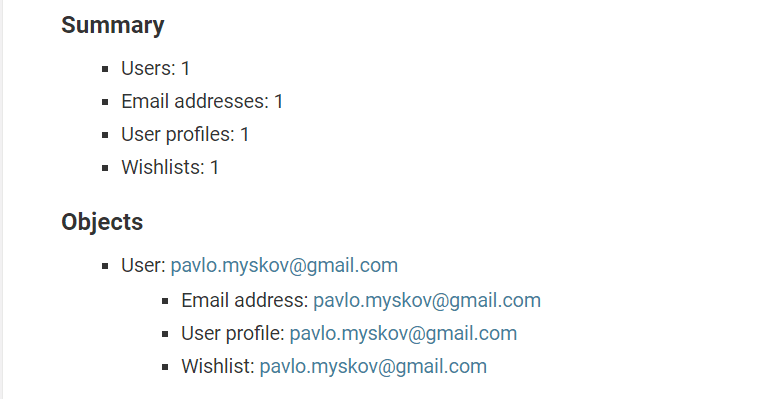
Once the user is successfully registered, the User Profile and WishList are created for this user automatically. This feature is implemented using the post_save signal. It allows to ensure that every user has a profile and a wishlist.
# wishlist/models.py

@receiver(post_save, sender=get_user_model())
def create_wishlist(sender, instance, created, **kwargs):
    if created:
        Wishlist.objects.create(user=instance)
The user can login by clicking on the Login link in the navbar. Then they will be redirected to the login page where they can fill in the login form. The user can also use the Remember Me checkbox to stay logged in even after closing the browser. This is achieved with the SESSION_COOKIE_AGE setting. By default it's 1209600 (2 weeks, in seconds).
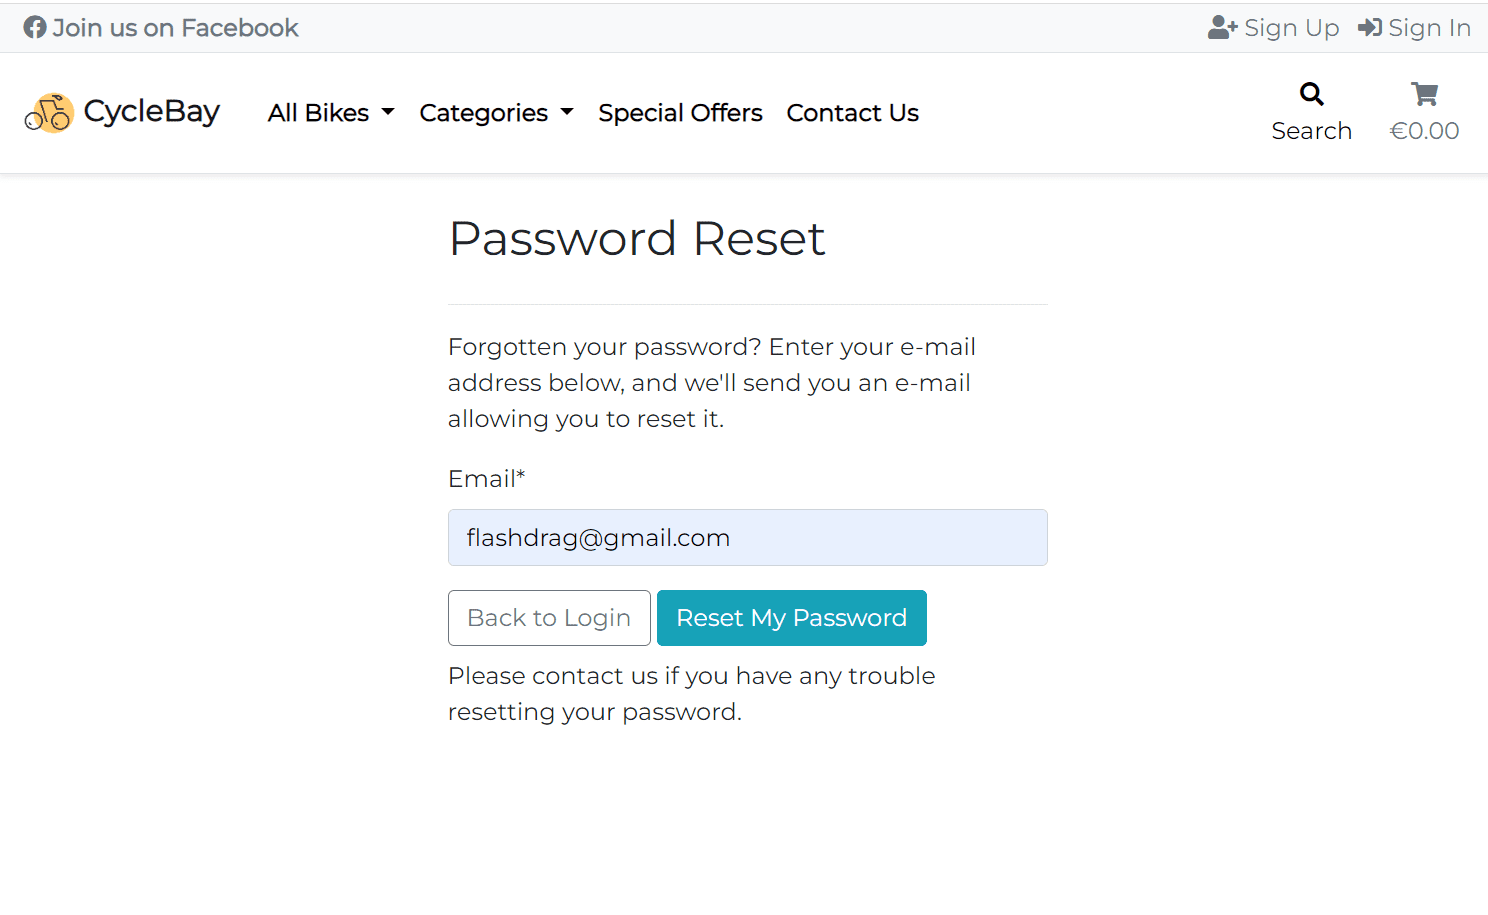
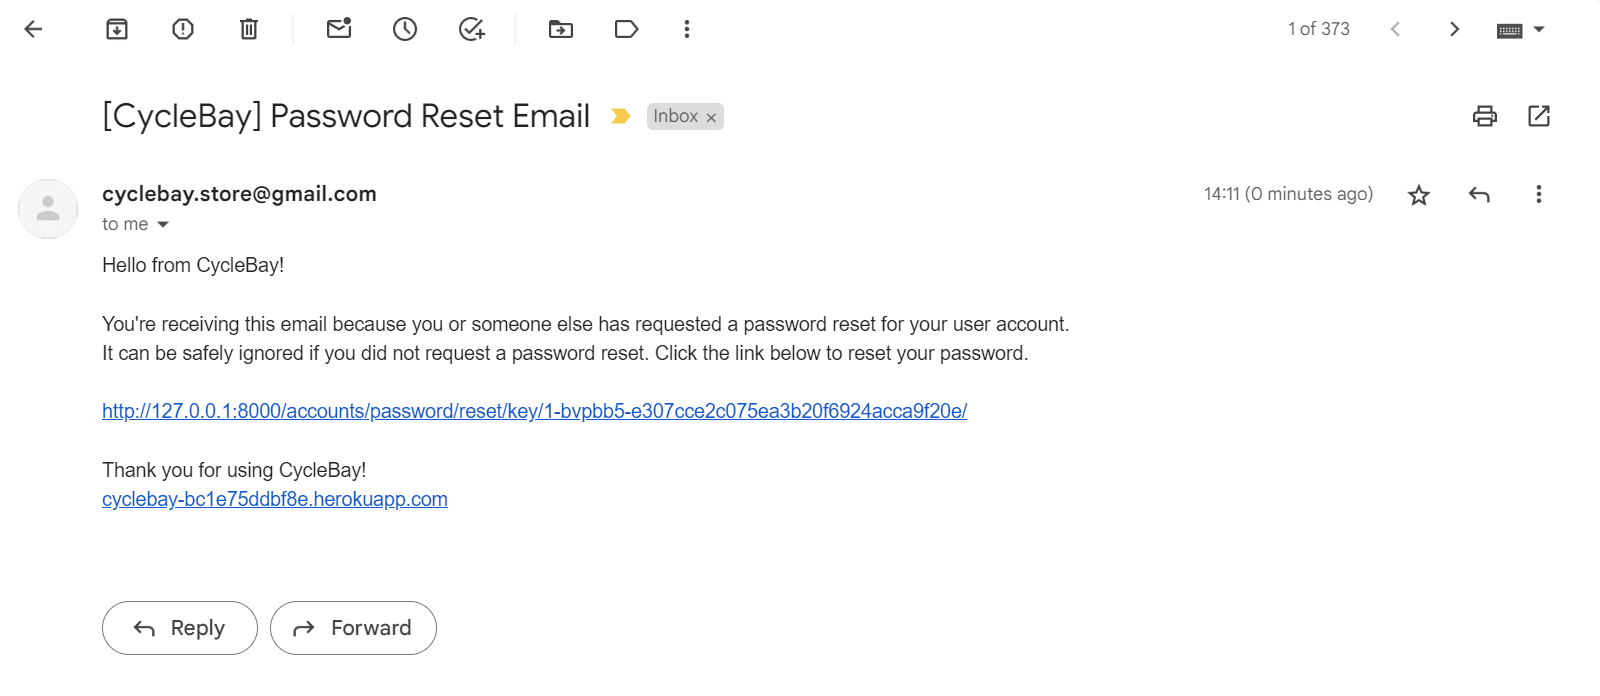
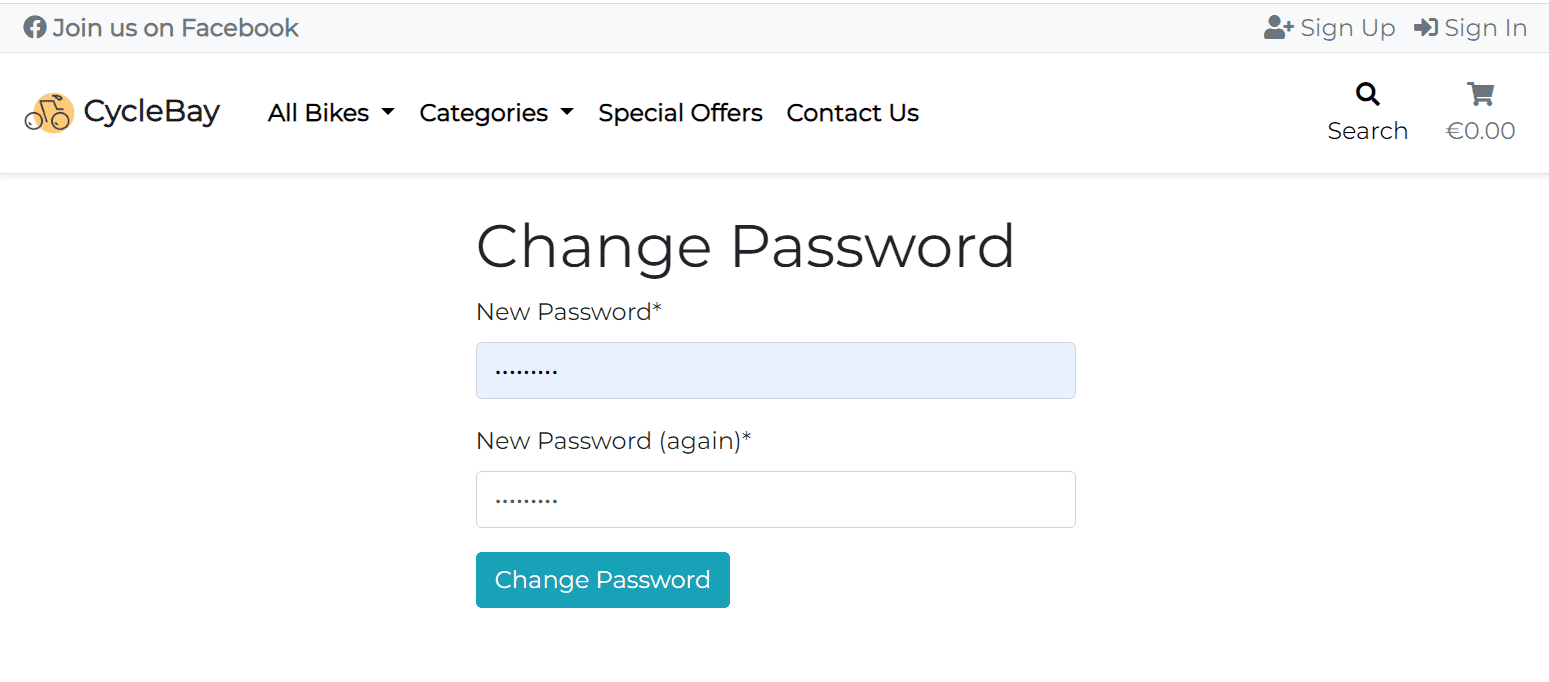
The user can also use the Forgot Password? link to reset the password. The user will receive an email with a link to reset the password. Once the user click the link, they will be redirected to the password reset page where they can enter a new password.
The Home page is the landing page of the website. It provides a brief overview of the store and showcases the featured products.
The callout section is a hero image with a call to action button. The image is a picture of a woman riding a bicycle. I edited the image in Photoshop to make it fit better on the site. Using the AI generative fill tool, I exended the height of the image background, since it has fixed position and doesn't scroll with the page, so the image should be long enough to fit on all screens. I also flipped the image horizontally so the cyclist is facing to the right, which is the direction of the call to action button. This is a common technique called "F-shaped pattern", that helps to guide the user's gaze through natural sight patterns. Also I blurred the background to make the cyclist dynamic and stand out from the background. The callout section is fully responsive and the image right side is cropped on smaller screens.
The Value Proposition section aims to highlight the primary benefits and unique selling points of shopping with CycleBay. It's designed to instill confidence in potential customers by emphasizing the superior value and assurance they get when choosing CycleBay. The section showcases four visually appealing cards, each signifying a unique value proposition.
- Best Value for Money - Emphasizes that the bicycles sold on CycleBay provide the utmost value, balancing both quality and cost
- Individual size consulting - Highlights the importance of choosing the right size of a bicycle and the fact that CycleBay offers a free size consultation to ensure the customer gets the right size
- 5-Year Warranty - Assures customers of a long-term warranty, signifying the durability and trustworthiness of our products.
- Certified Quality - Indicates that the products have undergone rigorous quality checks and have been certified by relevant authorities or institutions.
For each card, I used the Font Awesome icons to visually reinforce the value proposition mentioned in the corresponding text.
As for assistive technologies, the textual content ("Best value for money", "5-year warranty", etc.) itself is clear and descriptive enough for users to understand the value proposition without needing the icons. Therefore, I decided to hide the icons from screen readers by adding aria-hidden="true" to the <i> tags. This ensures that the icons are not read out by screen readers, thereby preventing any confusion.
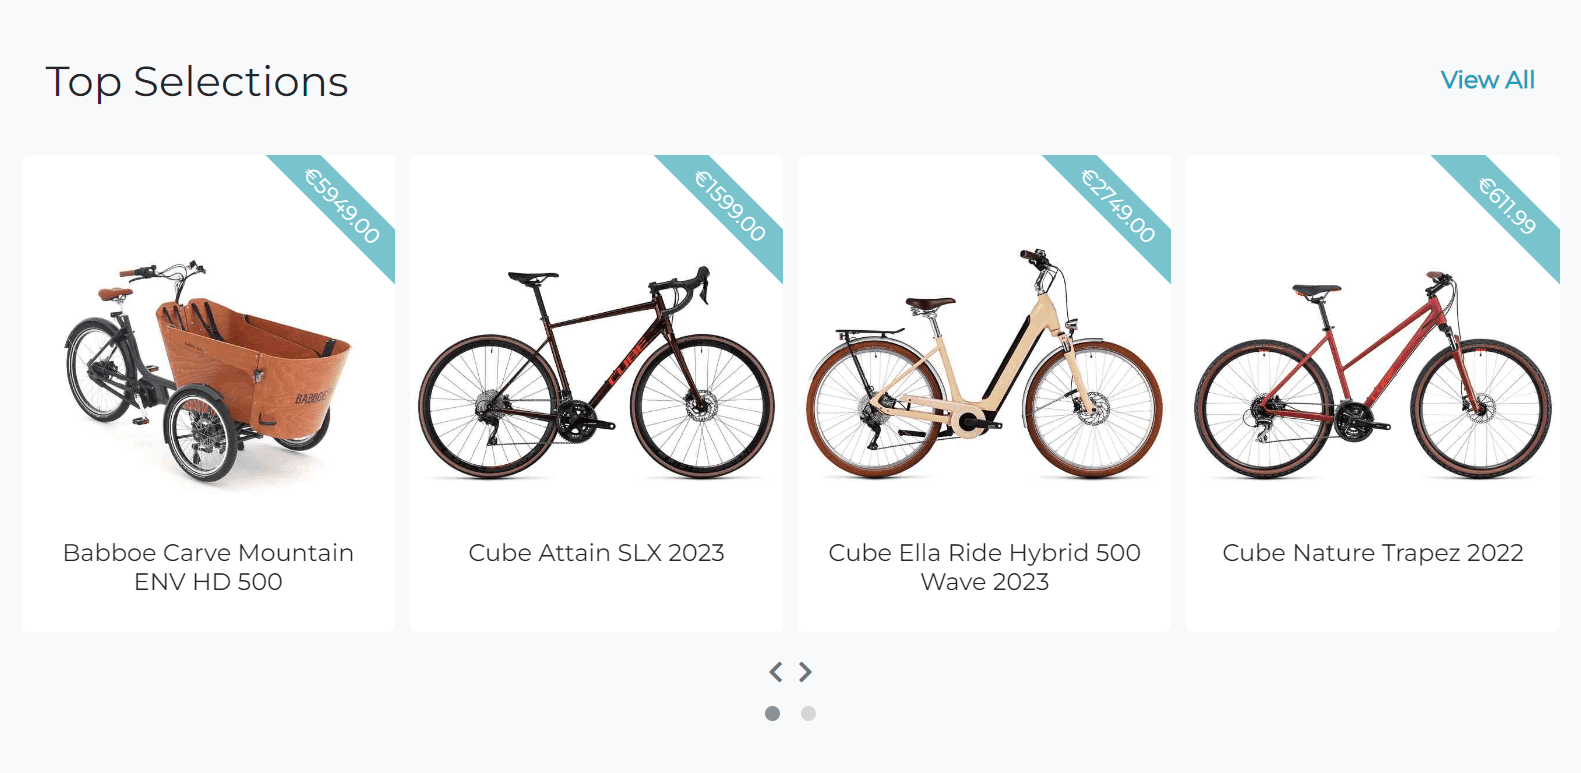
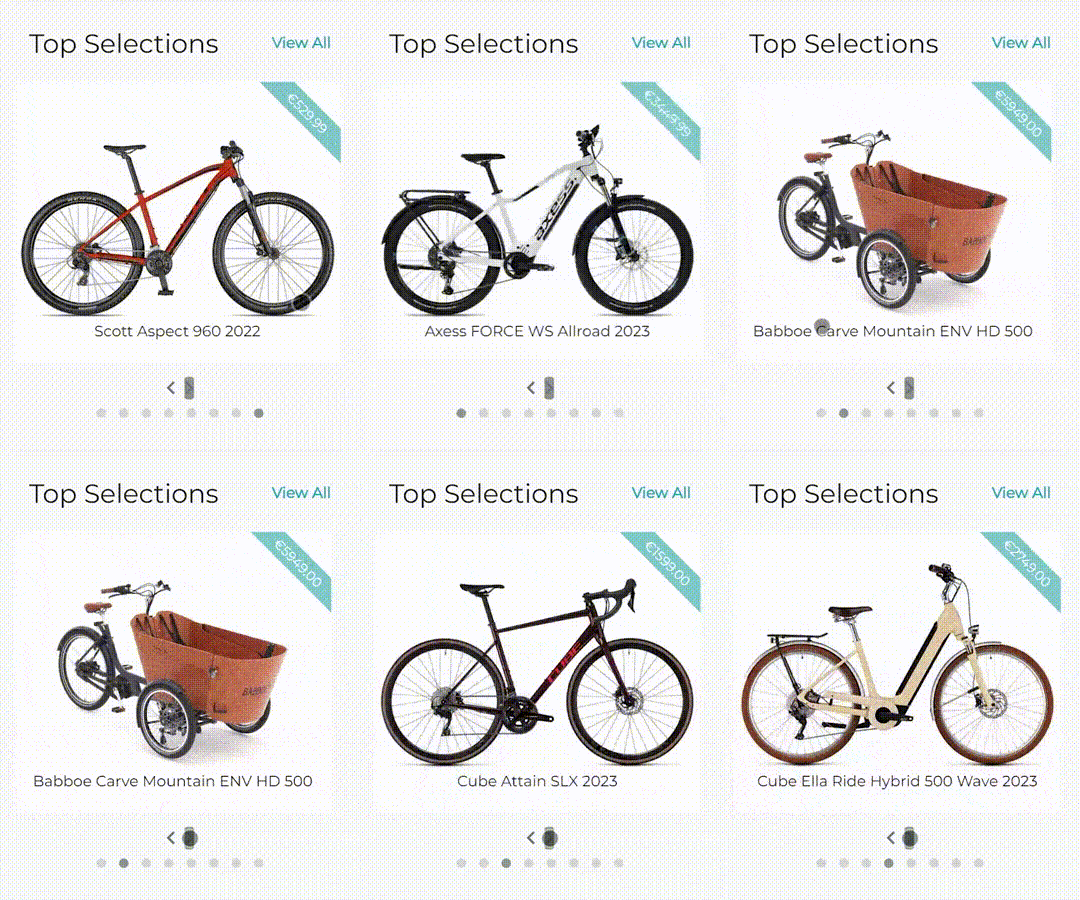
This section is designed to showcase a rotating carousel of featured products titled "Top Selections". The Featured Carousel aims to draw attention to a curated selection of standout products, enticing visitors to explore these highlighted items.
The main content consists of a carousel showcasing individual products. Each product card displays:
- A top corner ribbon indicating the product price.
- An image of the product. If no image is provided, a default placeholder image (noimage.png) is shown.
- Below the image, the product name is displayed centered on the card.
All cards are clickable and redirect the user to the product details page. Also I added the View All button that allows the user to view all featured products on the products page.
The carousel is fully responsive and collapses into a single element on smaller screens. The card sizes are adjusted to ensure that the cards are of equal height and width, thereby creating a uniform and visually appealing layout.
To implement the carousel, I used the Owl Carousel jQuery plugin. This plugin is deprecated, but it still provides the smooth and responsive carousel functionality that I was looking for. It's pretty easy to customize and has a lot of options to play with. I used the autoplay, autoplayHoverPause, loop, and responsive options to achieve the desired functionality. Also I used the animateOut option in combination with animate.css library to add the rotateOutDownRight animation to the cards which provides a nice transition effect when the card is removed from the carousel on smaller screens.
On the products page each featured product has a folded ribbon in the top right corner of a product image. The ribbon is a visual indicator that the product is featured.
The Newsletter section is designed to encourage visitors to subscribe to the newsletter. The section contains a brief description of the newsletter and a subscription form. The subscription form consists of a single input field for the email address and a Subscribe button. The form is validated using the Mailchimp API.
To learn more, please refer to the Email Marketing: Newsletter section.
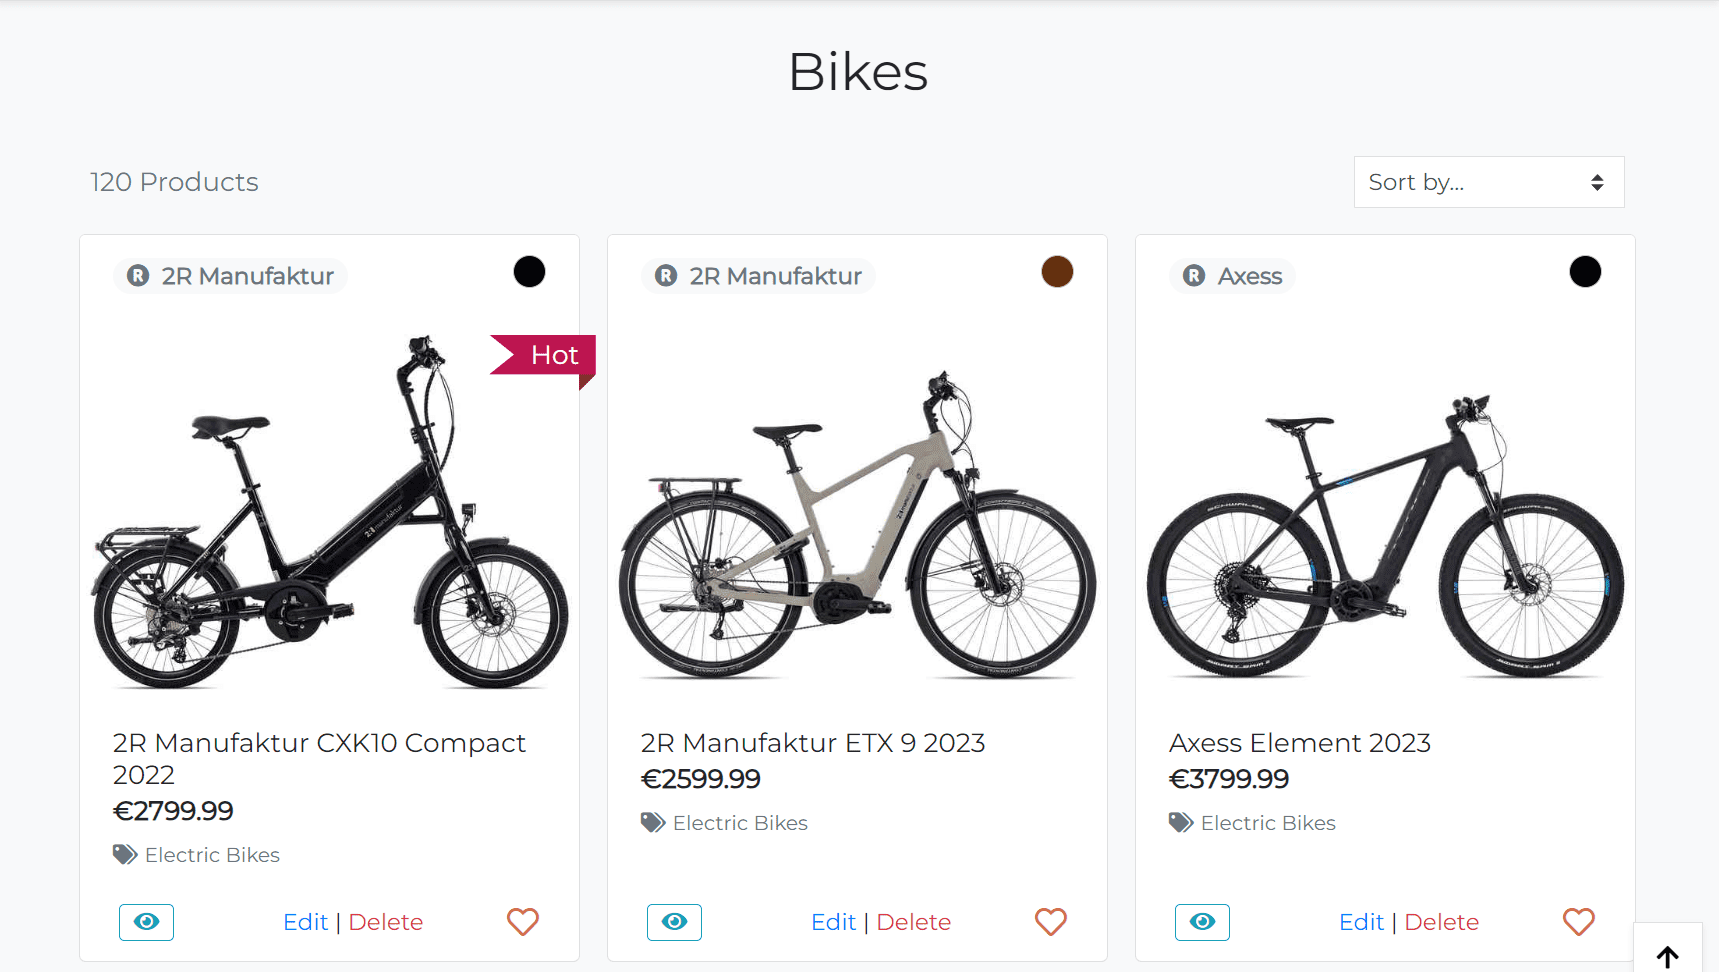
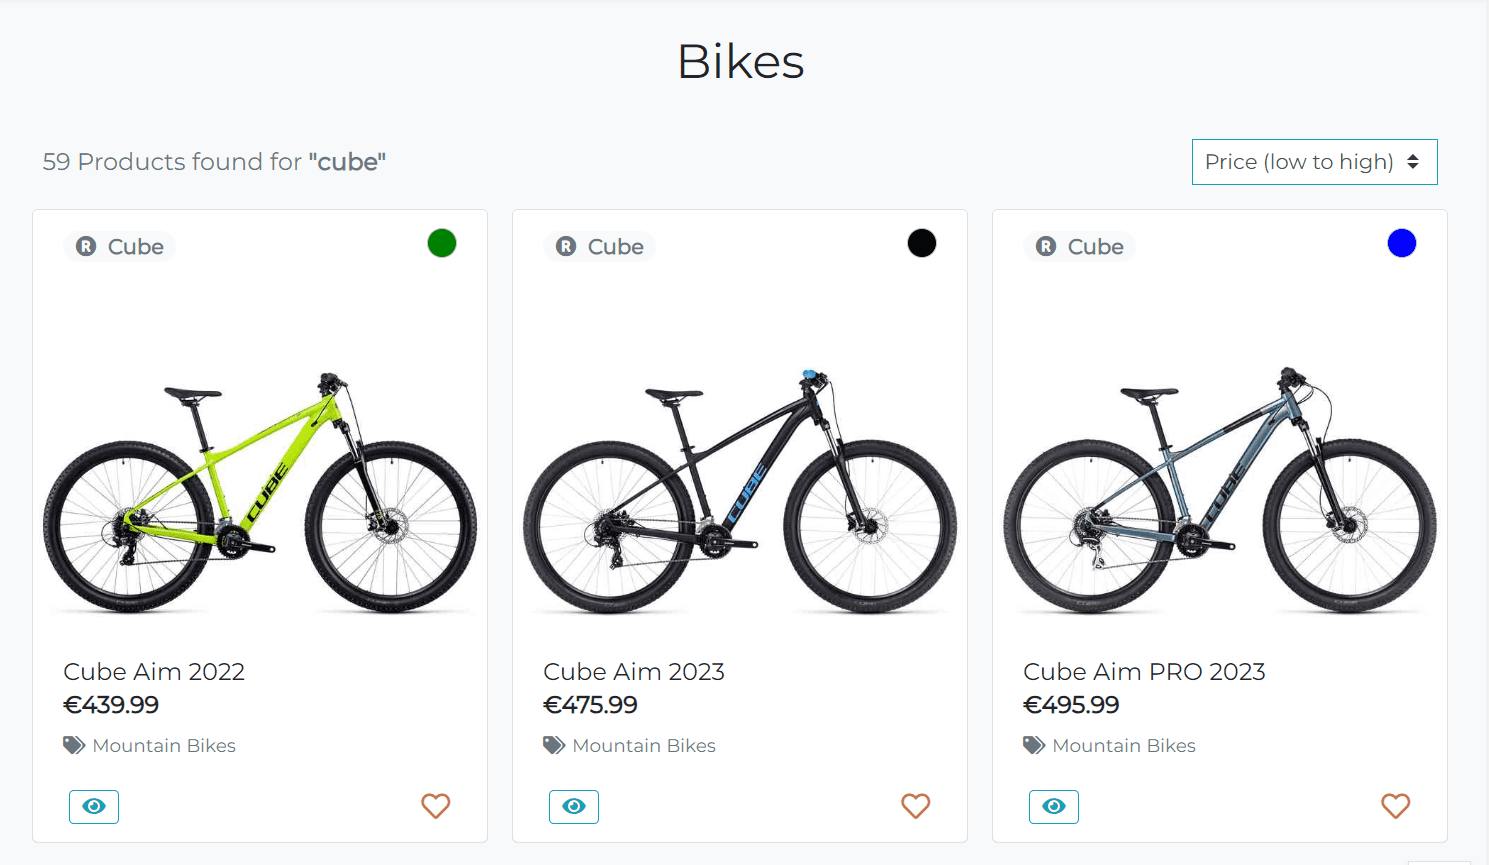
The Products page displays all bikes available in the store. The list of bikes is sorted by name in ascending order by default.
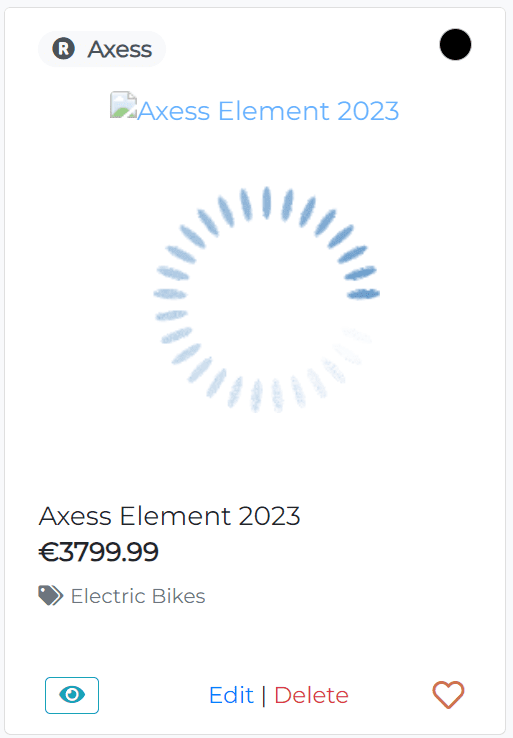
I implemented a lazy-loading feature for images using the Intersection Observer API.
This is designed to improve the performance of the application by deferring the loading of off-screen images until the user scrolls to them. It's an ideal feature for eCommerce applications with a large number of product images, as it allows the app to maintain high performance while supporting an extensive product catalog.
The JavaScript code initializes an Intersection Observer to monitor all elements with a lazy-load class. As the user scrolls through the page, the Intersection Observer detects when each image element comes into view and updates its src attribute to trigger the actual image loading.
This makes it much easier to add a large number of products without affecting the performance.
  $(document).ready(function() {
    // Initialize Intersection Observer
    const observer = new IntersectionObserver((entries, observer) => {
      entries.forEach(entry => {
        if (entry.isIntersecting) {
          let el = $(entry.target);
          el.attr('src', el.data('src'));
          el.removeClass('lazy-load'); // remove the class to avoid re-loading
          observer.unobserve(entry.target); // Stop observing this element
        }
      });
    }, {
      // Load images 100px before they appear on viewport.
      rootMargin: '100px'
    });

    // Observe each element with the 'lazy-load' class
    $('.lazy-load').each(function() {
      observer.observe(this);
    });
  });
The products header consists of 3 rows:
-
Bikes - heading
-
Current Category, Brand and Color
-
Products Count and Sorting.
This row is hidden if the user is on the All Bikes page. If the user is selected a category, brand or color, the Current Category, Brand and Color row will be displayed with appropriate values.
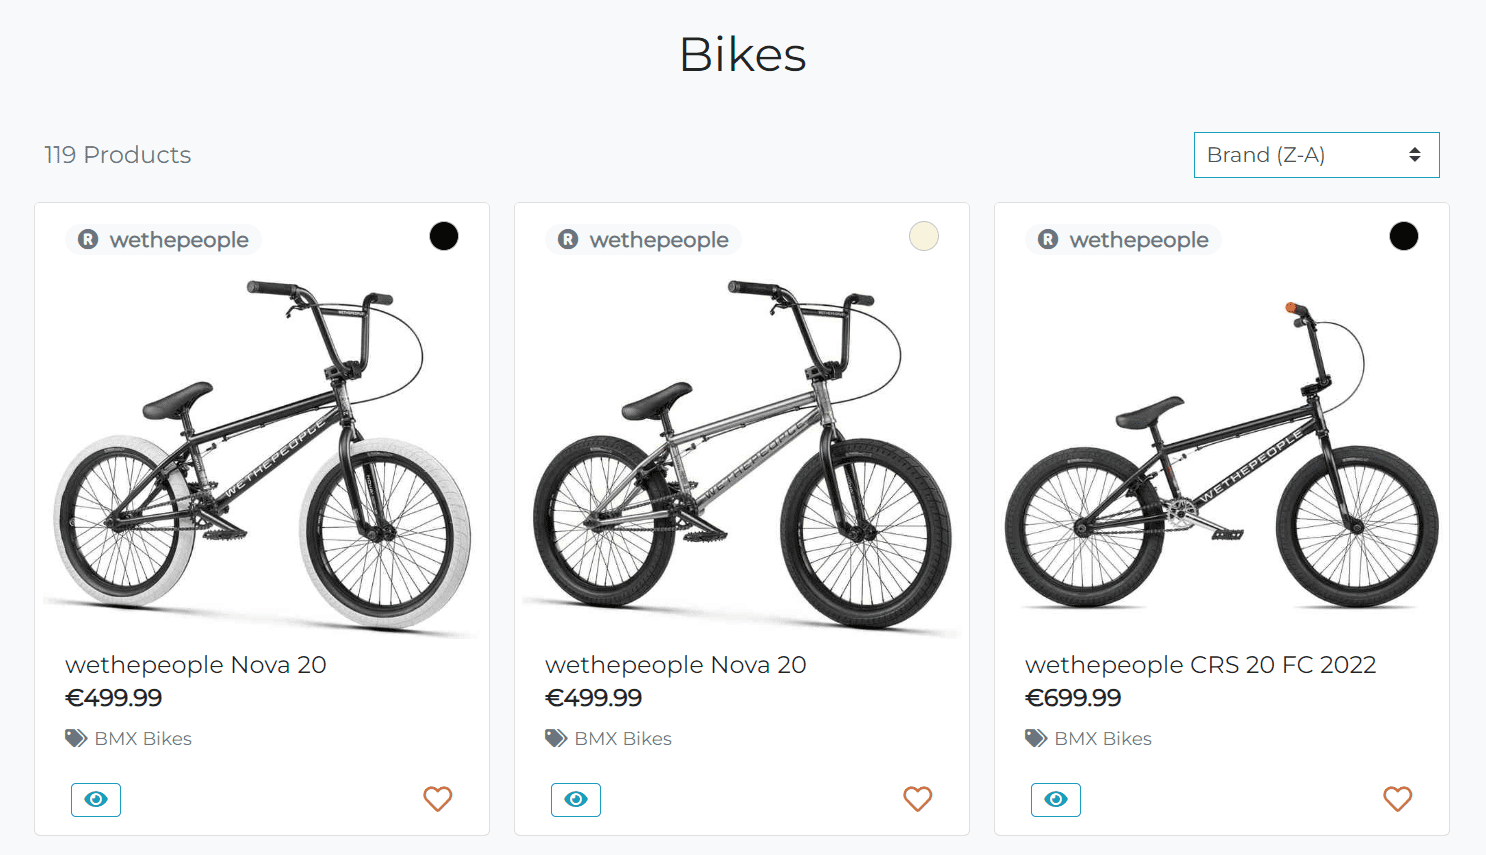
The sorting functionality allows users to sort the bikes by price, name, category, brand and color names in ascending and descending order. It implemented using the jQuery change event listener on client side and Django order_by method on server side in the products/views/all_products view. When the user selects the sorting option, jQuery builds the url with the selected sorting option and replaces the current url with the new one using window.location.replace. Then the Django all_products view processes the get request with the selected sorting option, sorts the bikes and renders the page with the results.
The search functionality allows users to search for a bike by name and brand. It implemented using the icontains lookup that performs a case-insensitive containment test. It's a good choice for searching for a nike by name and brand, since the user can enter the search query in any case and the search will still work.
# products/views/all_products view

if "q" in request.GET:
    # get the search query
    query = request.GET["q"]
    if not query.strip():
        messages.error(
            request, "You didn't enter any search criteria!"
        )
        return redirect(reverse("products"))
    # look for the query in the product name or brand name
    queries = (
        Q(name__icontains=query)
        | Q(brand__name__icontains=query)
    )
    products = products.filter(queries)
The search results are displayed on the products page. Additionally, the user can see the number of products found and the given search query. The search results are sorted by name in ascending order by default, but the user can change it using the sorting functionality.
If the search query is empty, the user will see the error message and all bikes will be displayed.
The product cards are displayed in a grid layout. The layout consists of 4 columns on extra large screens ( > 1200px), 3 columns on large screens ( > 992px), 2 columns on medium screens ( > 768px) and 1 column on small screens.
Each product card displays:
- Brand badge - clickable link that redirects the user to the products page with the selected brand.
- Color badge - clickable link that redirects the user to the products page with the selected color. Since the colors stored in the database as hex values, I created a JavaScript function that parses the hex value and replace
#with%23to pass hex color in url, since#is a special character in url and it will be ignored by the browser. It allows to sort the products by specific color. Also I added the tooltips with the color friendly name to make it more readable for the user. The tooltip appears on hover.
// ...
const parsedColor = color.startsWith('#') ? color.replace("#", "%23") : color;
The full script can be found in the products/templates/products/products.html template.
- Product image - clickable link that redirects the user to the product details page.
- Product name
- Product price
- Product Category - clickable link that redirects the user to the products page with the selected category.
- View Product icon - clickable button that redirects the user to the product details page. Since the button is not contain any text, I added the
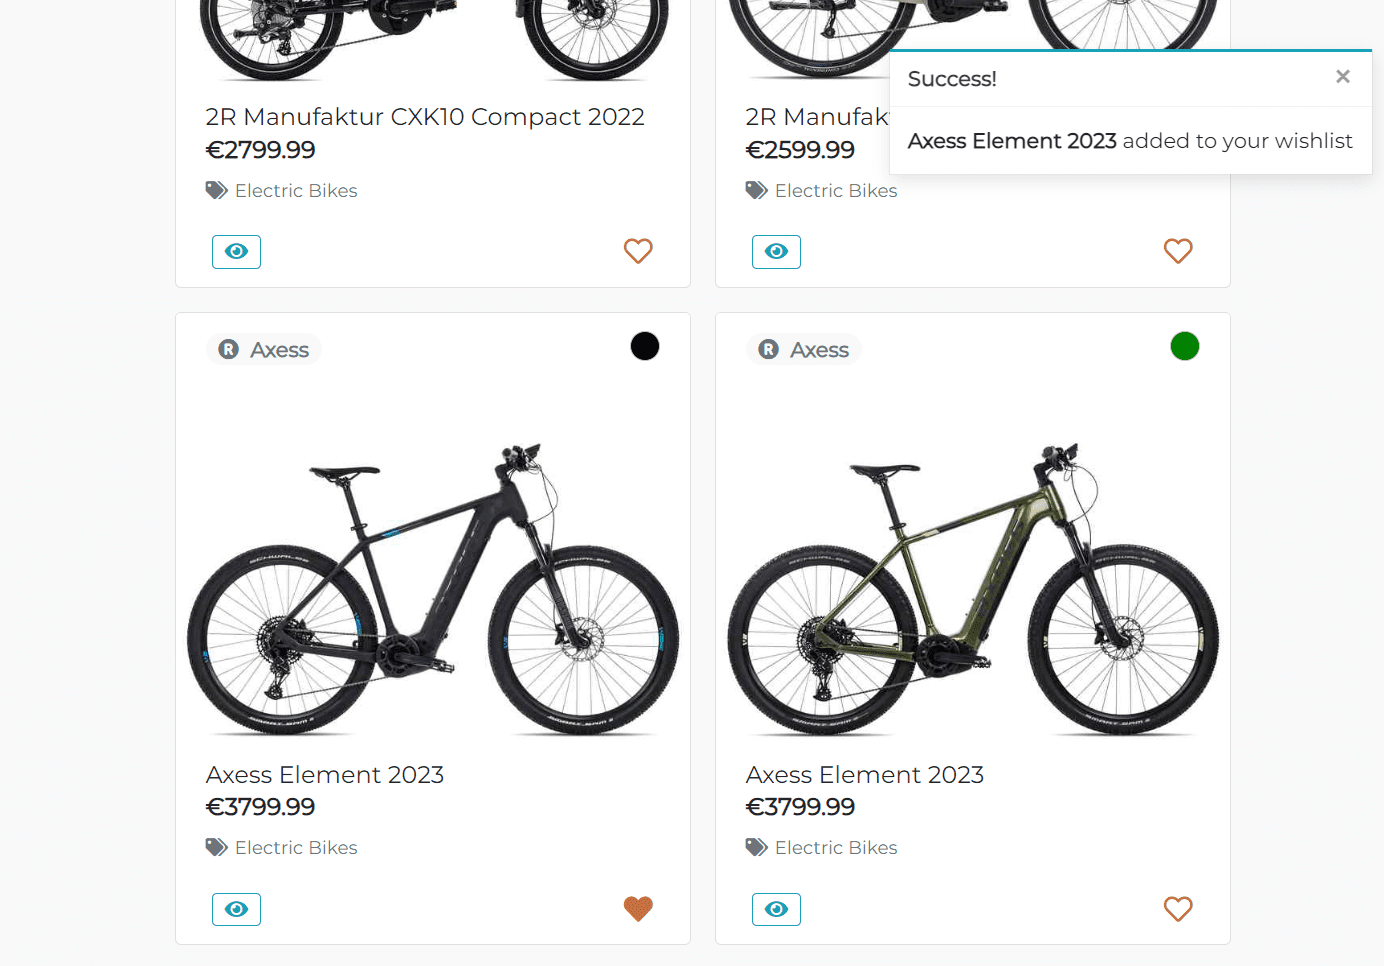
aria-labelattribute to make it accessible for screen readers. Also if the product is out of stock, the button will be replaced with the Out of Stock text. The functionality implemented using thetotal_countmethod in theProductmodel. So, if I need to check if the product is in stock, I just call thetotal_countmethod on the product object in the template. - Add to Wishlist icon - clickable button that adds the product to the wishlist. If the user is not authenticated, they will be redirected to the login page.
The Add to Wishlist functionality is implemented using the jQuery wishlist_toggler function. It allows the user to add or remove the product from the wishlist without reloading the page. The function sends the post request to the server with the product id and csrf token. Then the Django wishlist_toggler view processes the request and adds or removes the product from the wishlist. The view returns an is_in_wishlist boolean value that indicates if the product is in the wishlist or not. Then the jQuery function updates the wishlist icon and shows the appropriate message to the user.
The Wishlist Toggler can be found in the wishlist/static/wishlist/js/wishlist_toggler.js and wishlist/views.py files.
- Edit | Delete - clickable links that allow the staff to edit or delete the product. The links are visible only for staff users. If the user still tries to access the edit or delete page using the url, the error message will be displayed and the user will be redirected to the home page.
The delete functionality is implemented using Defensive Design. When the staff user tries to delete the product, the browser will display a modal window with a warning message. The staff user will have to confirm the deletion. This will prevent accidental deletion of the product.
The Product Details page provides detailed information about a specific product. It includes the product image, name, price, brand, category, color, sizes and controls.
- Image is clickable and opens the full size image in a new tab.
- Brand, category and color names are clickable and redirect the user to the products page with the selected brand, category or color.
- Edit | Delete - clickable links that allow the staff to edit or delete the product. The links are visible and available only for staff users.
The Delete functionality is implemented using Defensive Design.
The color is displayed as a friendly name, but passed to the link as a hex value. So, if the user clicks on the color name, the products page will be opened with the selected color. Since the colors stored in the database as hex values, I used urlencode template filter to pass hex color in url. The urlencode filter encodes the value to be used as a query parameter. For example, the color #ff0000 will be encoded to %23ff0000, that allows to pass hex color in url. Also the urlencode filter is used for the brand and category names, since they can contain spaces and special characters.
- Sizes
This functionality is based on complex many-to-many relationships between the
Product,SizeandProductSizemodels. TheProductSizemodel is an intermediate model that allows to store additional information about the product size, such as quantity. TheProductSizemodel has a foreign key to theProductandSizemodels. TheProductmodel has a many-to-many relationship with theSizemodel through theProductSizemodel. This allows to add multiple sizes to the product and store the quantity for each size.
class ProductSize(models.Model):
    size = models.ForeignKey(Size, on_delete=models.CASCADE)
    product = models.ForeignKey(Product, on_delete=models.CASCADE)
    count = models.IntegerField(
        default=0, validators=[MinValueValidator(0), MaxValueValidator(999)]
    )

    class Meta:
        # ensure that the combination of size and product is unique
        unique_together = ("size", "product")
        ordering = ["size"]

    def __str__(self) -> str:
        return f"{self.product.name} - {self.size.name}"
Also I added the total_count method to the Product model that returns the total count of all sizes of a specific product.
class Product(TimeStampModel):
# ...
    def total_count(self):
        return ProductSize.objects.filter(product=self).aggregate(
            total=models.Sum("count")
        )["total"]
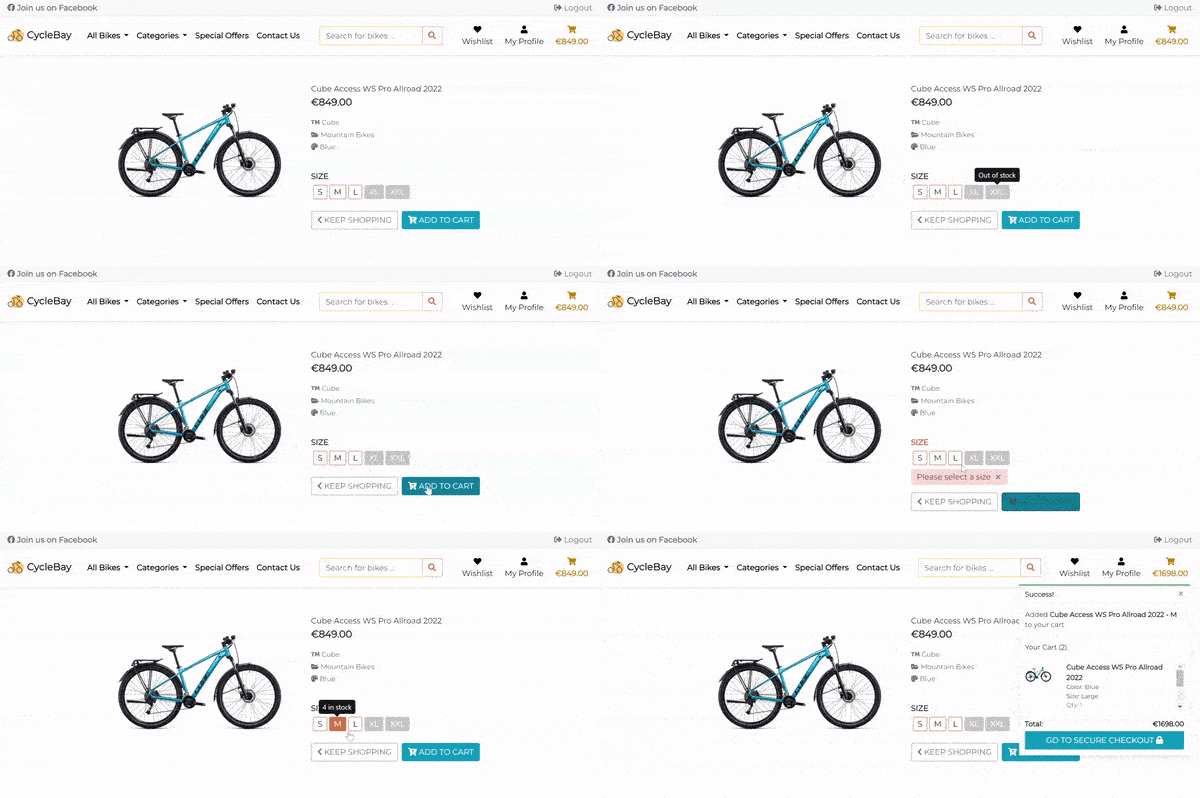
To display the sizes to the user, first the app checks if the total count of all sizes is greater than 0. If the total count is 0, the user will see the Out of Stock text and the Add to Bag button will be disabled.
If the total count is greater than 0, the app will display the existing sizes and the quantity for each size. If a particular size was added to the product by the staff with 0 count or the size stock was out, the appropriate size button will be disabled, and the user will see the tooltip with the Out of Stock text on hover. Otherwise, the user can see the quantity for each size on hover, and Add to Bag the product with the selected size.
If the user not selected the size, and clicks on the Add to Bag button, the app will display the error message Please select a size. The error message is displayed using the jQuery script, that allows to validate the form without reloading the page.
Once the user selects the size and clicks on the Add to Bag button, the app will send the post request to the server with the product id, size id and csrf token.
Since I implemented the stock management functionality, there are several possible scenarios when the user clicks on the Add to Bag button:
- If the product was last in stock, and another user bought it before the current user, the app will display the error message: Sorry, this product is out of stock. Please try again later..
- If the product was deleted by the staff the app will display the error message: Sorry, this product is no longer available. and redirect the user to all products page.
- If the product size was deleted by the staff the app will display the error message: Sorry, {product-name} is not available in {size-name}. Select another size or try again later.
- If the product size quantity in the shopping bag the same than in stock the app will display the error message: Sorry, only {product-size-quantity} {product-size-name} available. Please check your cart!
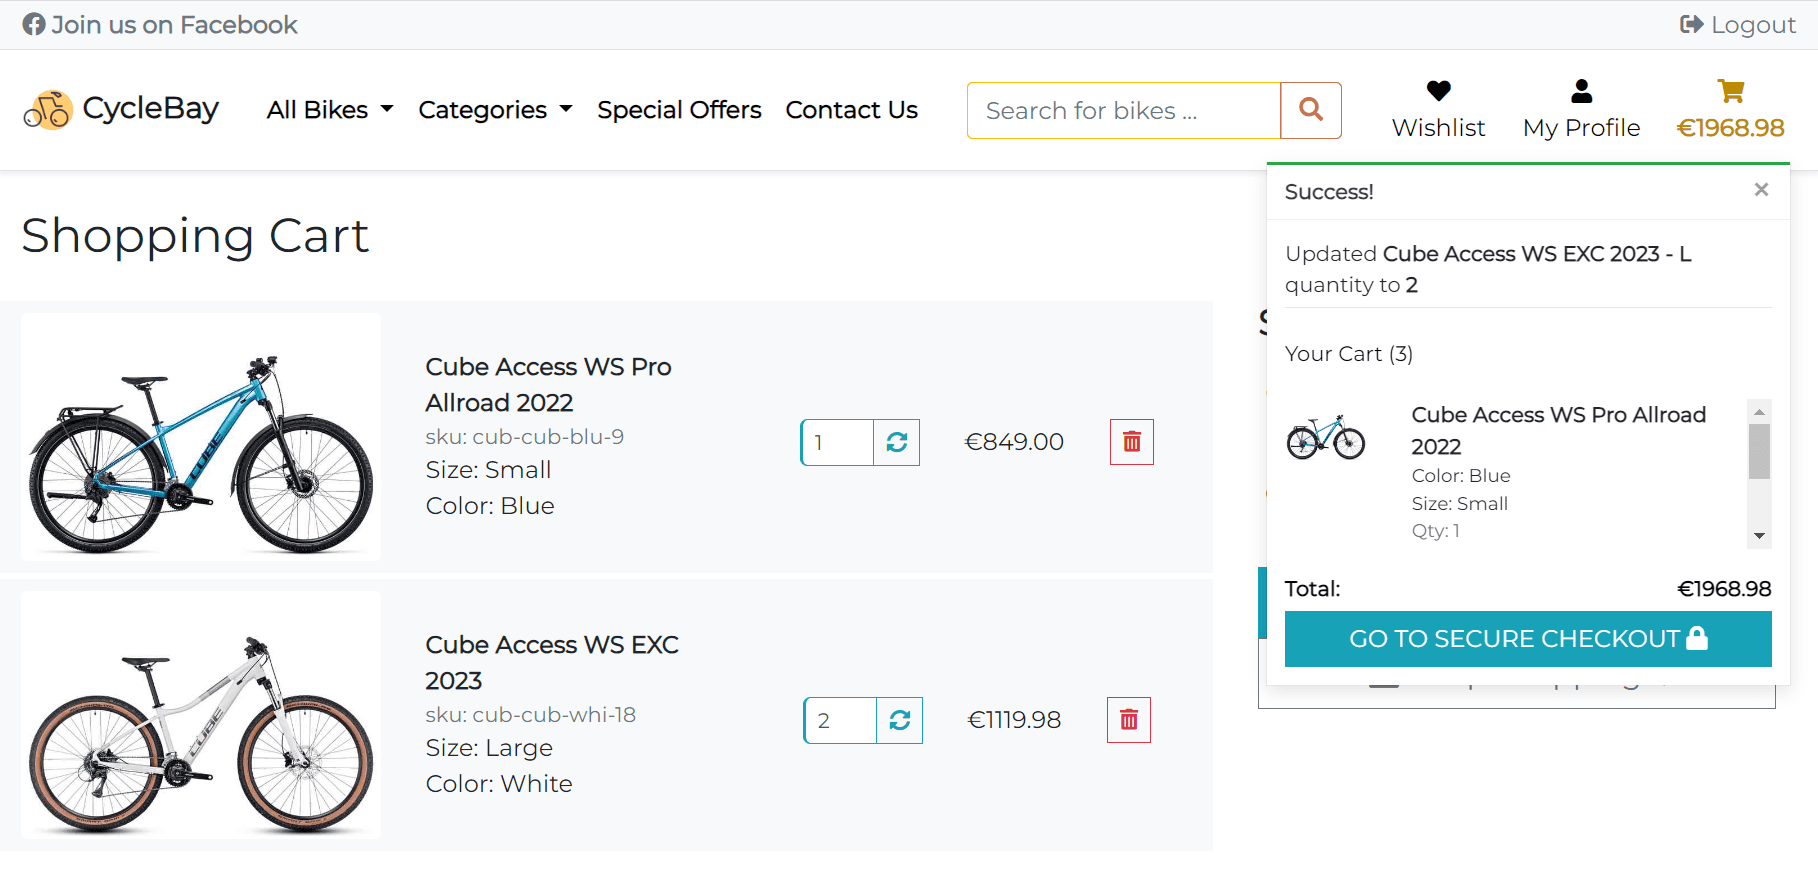
- If the product size already in the shopping bag, and the shopping bag quantity is less than the quantity available in stock the app will display the success message: Updated {product-size-name} quantity to {updated-quantity} and update the shopping bag quantity.
- If the product size is the first in the shopping bag, the app will display the success message: Added {product-size-name} to your cart and add the product to the shopping bag.
The stock quantity will be updated(decreased) only when the user completes the checkout process and the payment is successful. Otherwise, it still available for other users.
Initially, I implemented the stock management functionality that decreased the stock quantity and reserved the product quantity immediately after the user added a product to the bag. Then, using a Celery task and JS script, I set a countdown timer for 30 minutes. If the user didn't complete the checkout process within 30 minutes, the product would be returned to the stock. However, I decided to change this approach because users often add products to the bag for later, rather than using a wishlist.In the future, I still plan to implement the Celery task and Reservation functionality. However, instead of reserving the product quantity immediately after a user adds a product to the bag, I will reserve it only when the user is on the Checkout page. This change aims to prevent a situation where, while the first user is filling out the checkout form, another user buys the last available product before the first user can submit the form. It will improve the user experience and will ensure that the product is reserved for the user only when they are ready to complete the checkout process.
The Shopping Bag page displays the products added to the shopping bag and allows the user to adjust the quantity of each product and remove products from the bag. The shopping is stored in the session and is available throughout the full site by using the bag context processor.
The shopping bag page is fully responsive and changes its layout from 2 columns to 1 column on smaller screens.
- The left column displays the list of product added to the shopping bag.
- The right column displays the order summary and the Secure Checkout and Keep Shopping buttons.
The product card includes Product Image, Name, SKU, Size, Color, Quantity, Subtotal and Delete Button.
- Quantity Input
The quantity of each product can be adjusted using the arrows or by typing the quantity in the input field. The quantity is validated on the client and backend sides. The quantity must be greater than 0 and can't be greater than the quantity available in stock. The
maxattribute of the input field is set to the quantity available in stock, so the user can increase the quantity value with arrows until it reaches the maximum.
If the user tries to enter the quantity greater than the quantity available in stock, the app will display the error box: Only {quantity-available-in-stock} available.. To make it more clear to the user, I also added the tooltip with the quantity available in stock to the input box. The tooltip appears on hover.
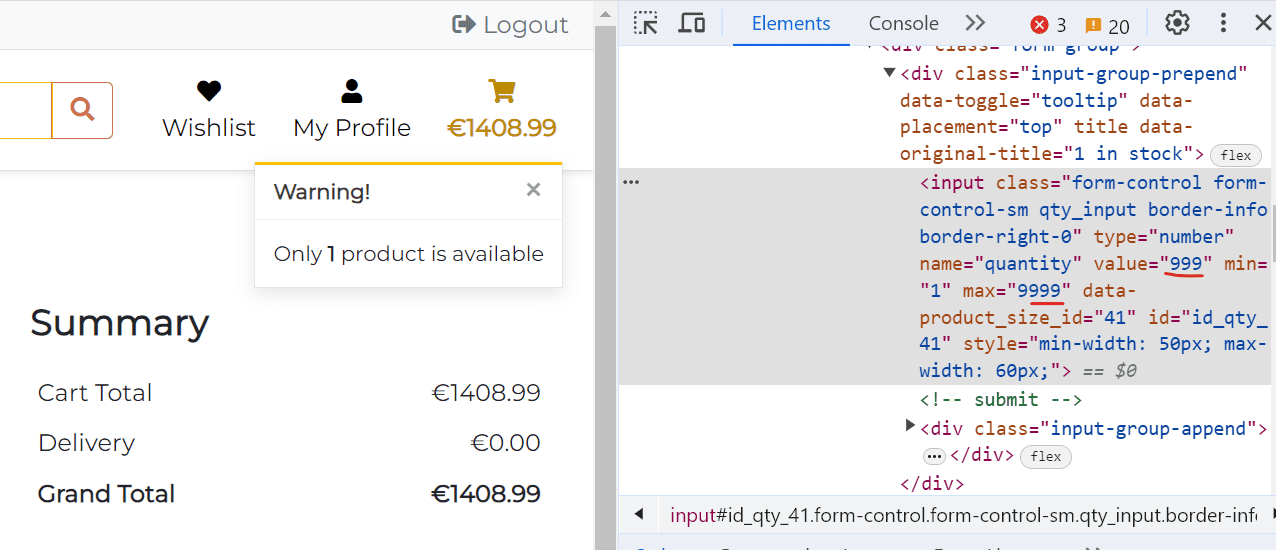
In case, where a malicious user tries to change the quantity value by unlocking the max value in the input field using the browser developer tools, the app adjust_bag view still validates the quantity and returns the warning message: Only {quantity-available-in-stock} product is available.
-
Subtotal The subtotal is calculated by multiplying the product price by the quantity. The subtotal is updated automatically when the user changes the quantity value and submits the form.
-
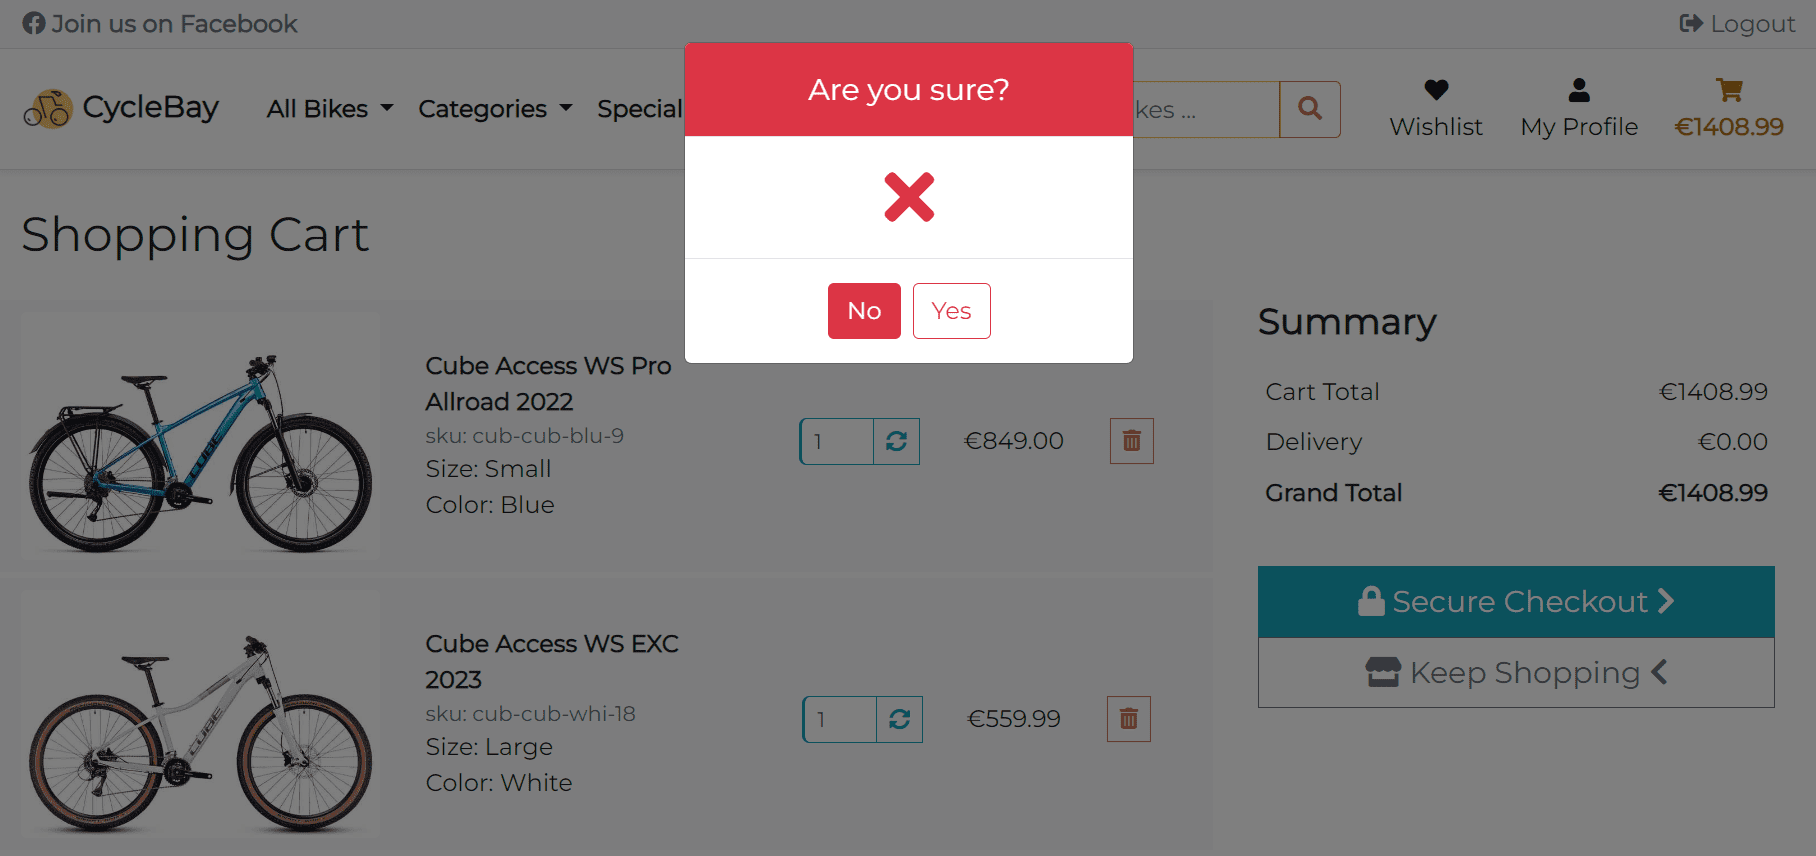
Delete Button The delete button allows the user to remove the product from the shopping bag. The functionality implemented using Defensive Design. When the user clicks on the Delete button, the browser will display a modal window with a warning message. The user will have to confirm the deletion. This will prevent accidental deletion of the product. Only post requests are accepted for deletion.
The summary section displays the cart total, delivery cost and grand total. The delivery cost is calculated based on the cart total and delivery threshold. The delivery threshold is set to 100, and the delivery cost is 10% of the cart total. It can be changed in the settings.py file.
If the cart total is greater than the delivery threshold, the delivery cost will be 0. The delivery cost is calculated in the bag/context.py file. The grand total is calculated by adding the cart total and delivery cost.
def bag_contents(request):
# ...
if total < settings.FREE_DELIVERY_THRESHOLD:
    delivery = total * Decimal(settings.STANDARD_DELIVERY_PERCENTAGE / 100)
    free_delivery_delta = settings.FREE_DELIVERY_THRESHOLD - total
else:
    delivery = 0
    free_delivery_delta = 0

grand_total = delivery + total
The checkout page is a crucial step in the purchasing process, enabling users to review their cart items, input their shipping and payment details, and finalize their purchase.
The checkout page consists of 2 columns on large screens (> 992px) and 1 column on smaller screens.
The delivery information section displays the delivery address form. The form is pre-populated with the user's saved delivery information if the user is authenticated. Otherwise, the user can fill in the form manually. If the user is authenticated, the delivery information will be added/updated, since the Save delivery information to profile checkbox is checked by default. The user can uncheck it if they don't want to save the delivery information to the profile.
The form is validated on the client and backend sides. The client-side validation is simple and checks if the required fields are not empty. Once the fields are filled in correctly, they will be highlighted in green. The backend validation is more complex and checks if the user is authenticated, if the user has saved delivery information in the profile, and if the form is valid using the OrderForm.
The order summary section displays the list of products added to the shopping bag with subtotal for each product, order total, delivery cost and grand total. Refer to the Shopping Bag Summary section for more details about the calculation of the order total, delivery cost and grand total.
The payment functionality is powered by Stripe. Stripe is a secure and reliable payment processing platform that allows users to make payments using their credit cards. The Stripe API is used to create a payment intent and process the payment. It allows to validate the payment on the client and backend sides.
The payment process begins when the user goes to the checkout page.
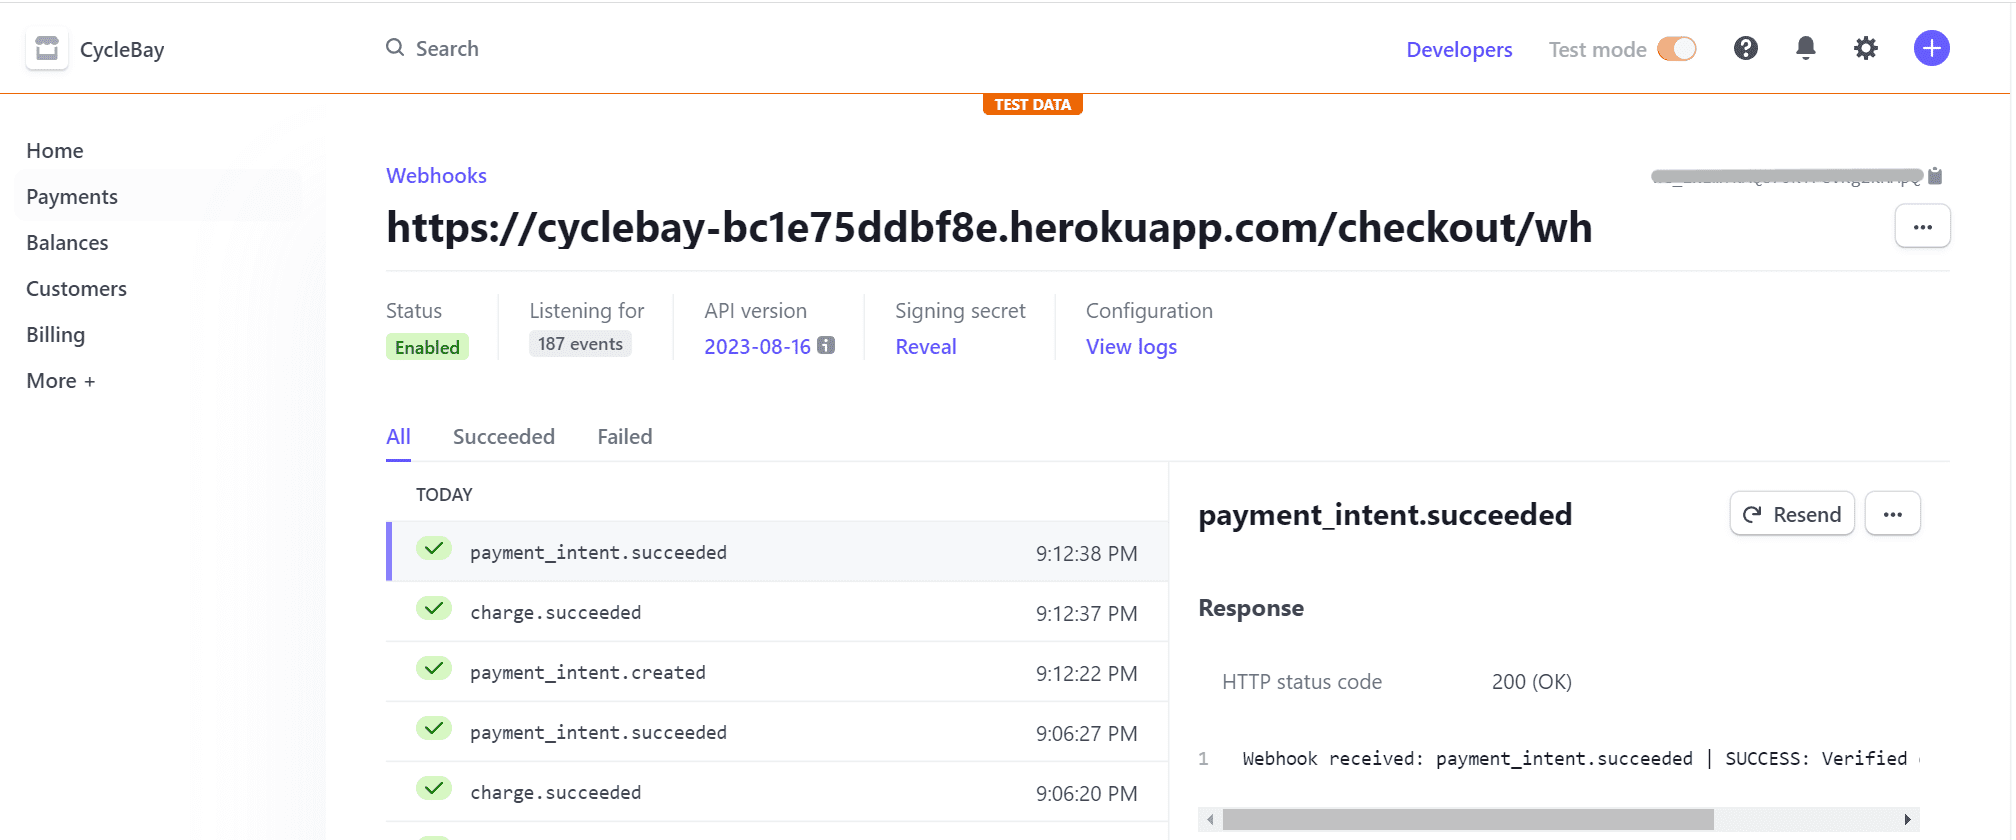
In the checkout view stripe creates a payment intent with the grand total and currency. Then when the user submits the checkout form, the js function handles the form submission, disables the card element and submit button and shows loading animation. Then the jQuery calls the post request to the cache_checkout_data view. The view verifies that the bag hasn't changed between the time the user started the checkout and when they submitted the form, cleans the bag with zero quantity items and saves the bag, total etc. to the payment intent metadata using the stripe.PaymentIntent.modify() method. If the payment intent was updated successfully, the view returns the Http response with the success status. Then the jQuery function handles the response and calls the stripe.confirmCardPayment() method to confirm the payment. If the payment is successful, jQuery submits the form.
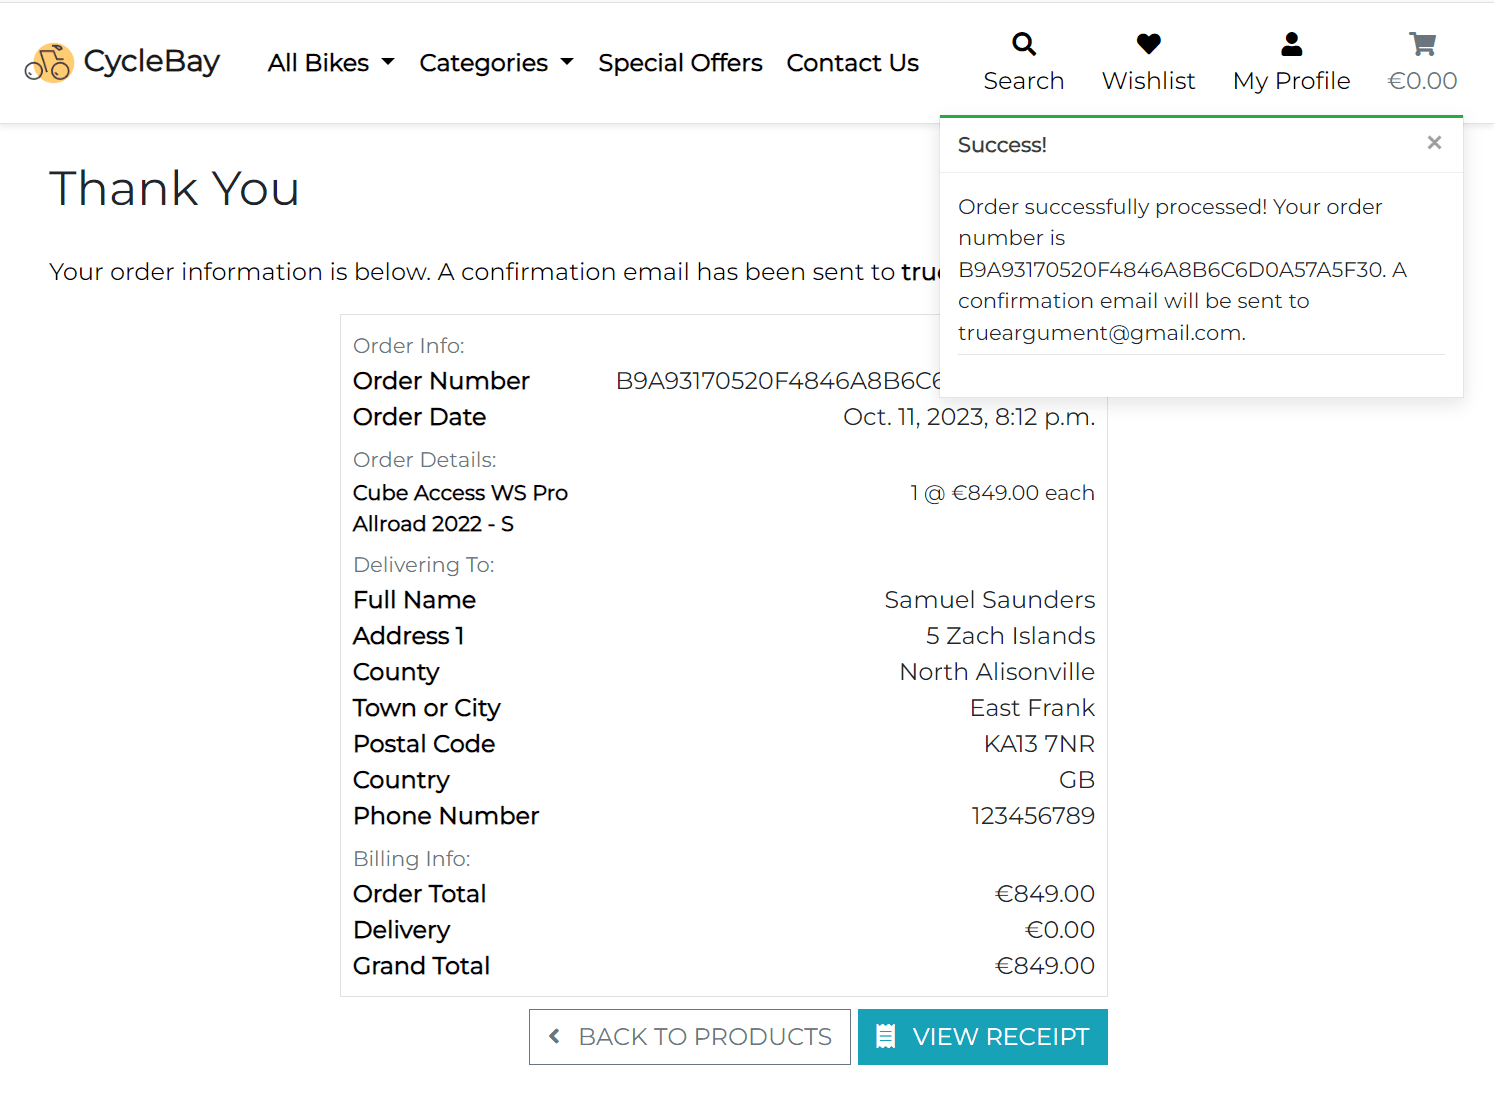
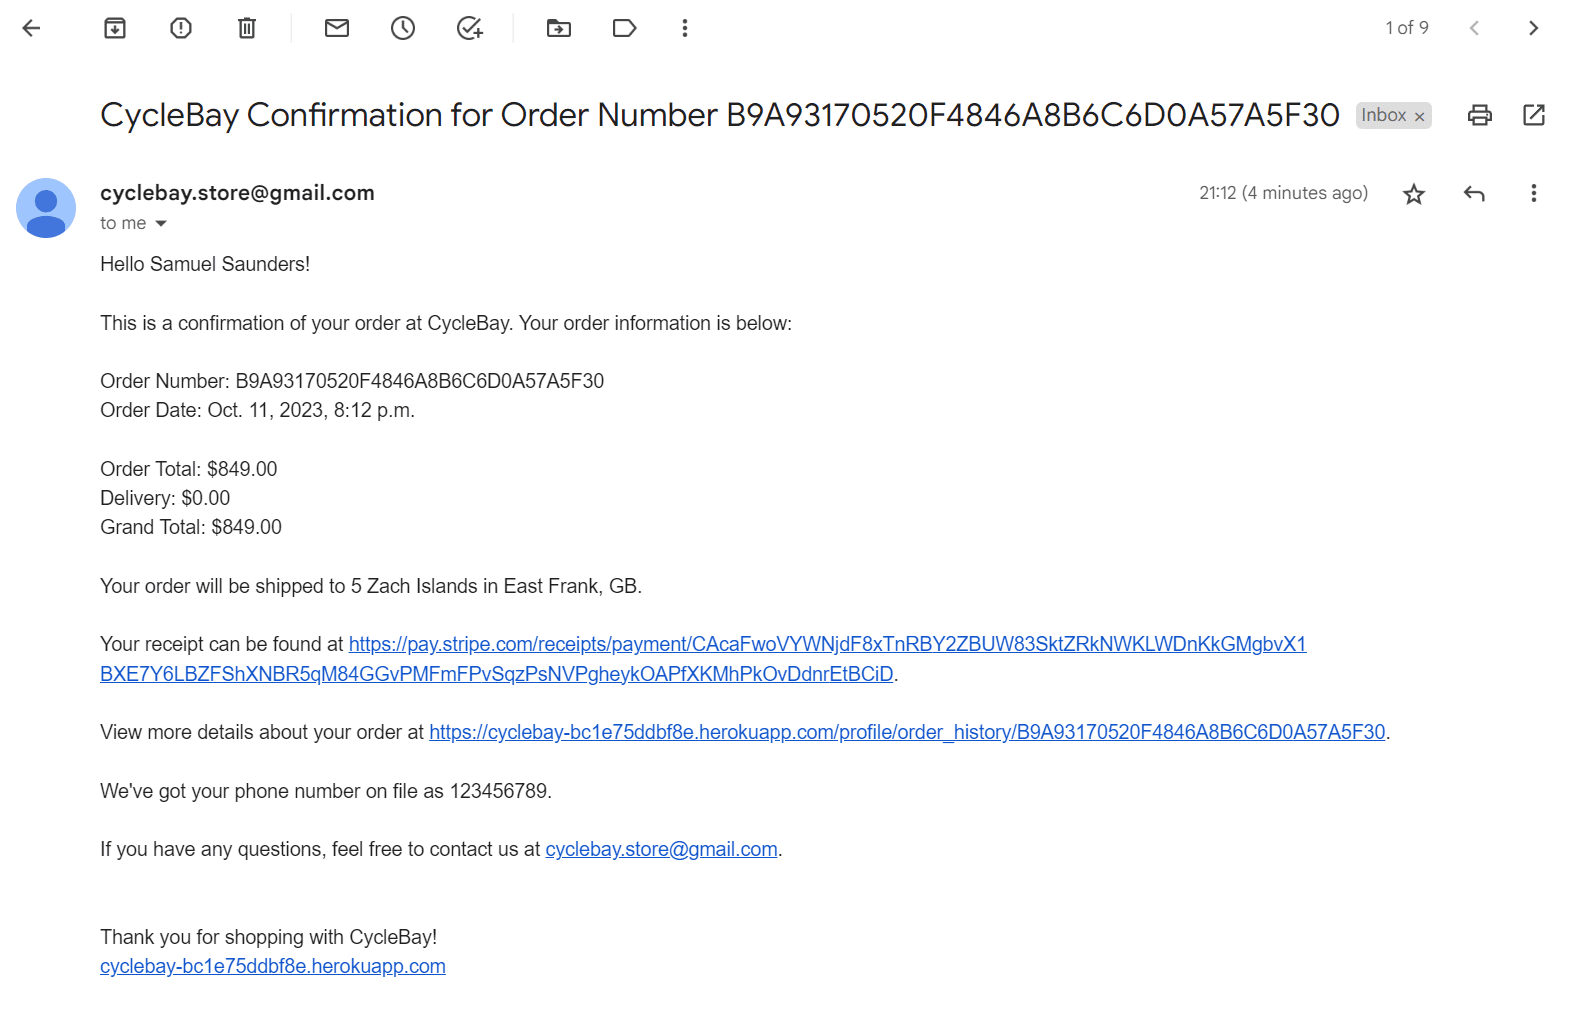
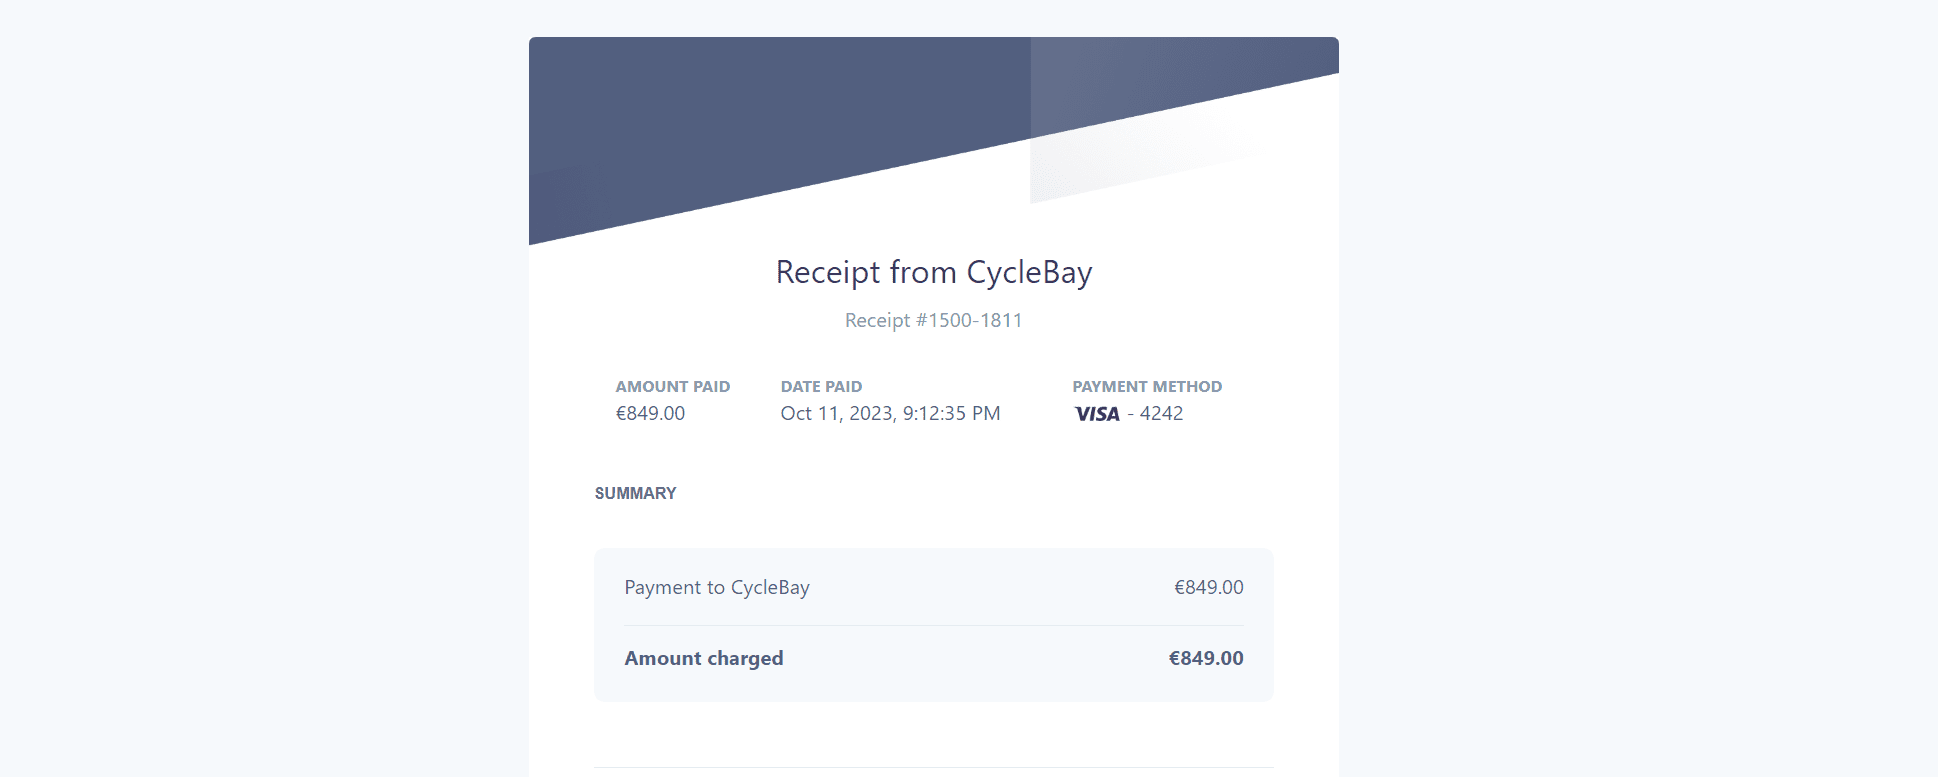
The checkout view creates the order and updates the stock quantity. If the user accidentally refreshes the page or closes the browser during the checkout process, the webhook_handler view still creates the order and updates the stock quantity. Also the webhook handler view sends the confirmation email to the user. If everything is ok, the checkout view redirects the user to the checkout success page, that saves the user's delivery information to the profile and displays the order details.
If not authenticated user made an order for existing email, the order will be added to the order history of the user with this email.
Checkout Success
 Stripe Events
 Hosted Endpoint
 Stripe Webhook events
 Email Confirmation
 Receipt
- Stock Update
As I'm dealing with stock quantities, I used transaction.atomic and select_for_update functionality to prevent race conditions and
ensure that the stock quantity is updated correctly. All ProductSize rows with select_for_update() method are fetched are locked for the duration of the transaction, which is in the transaction.atomic() block. Once the transaction is committed, the lock is released, and other transactions can access the locked rows. If an exception occurs within the transaction.atomic() block, the transaction will be rolled back, and the lock will also be released.
So, when user submits the checkout form, the app will check if the product quantity in the shopping bag not greater than the quantity available in stock or the product was deleted by the staff. If the quantity is correct and the payment is successful the app will update the stock quantity and create an order. Otherwise, the app will display the error message and redirect the user to the shopping bag page or products page if the bag is empty, since thel last product was bought by another user or deleted by the staff.
I added this functionality to the checkout/views.py and checkout/webhook_handler.py files to ensure that the stock quantity is updated correctly and the only one user can buy the last available product.
In the future, I plan to implement the Celery task and Reservation functionality to improve the user experience and ensure that the product is reserved for the user when they are ready to complete the checkout process. Refer to the Product Reservation section for more details.
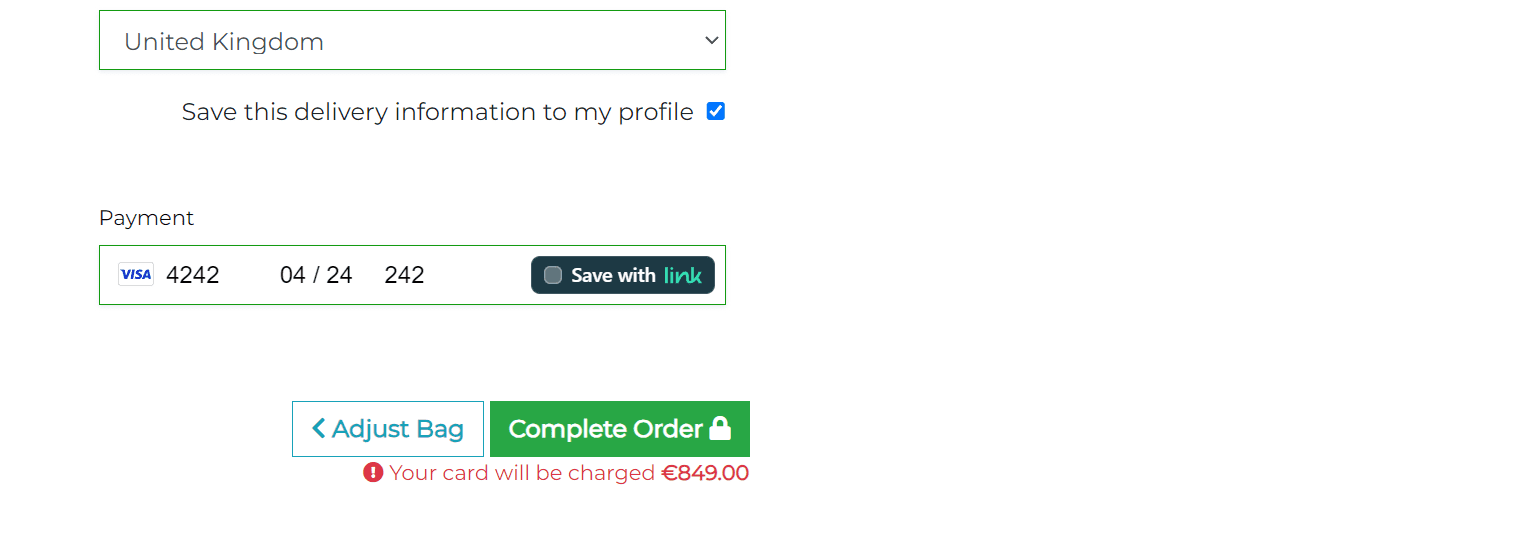
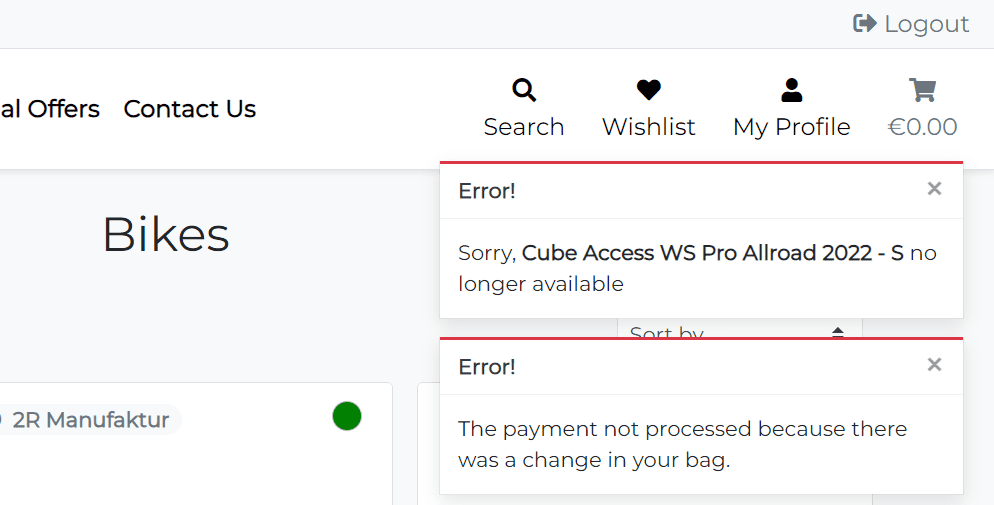
Here is the example screenshot of the error message when the user submits the checkout form, but the product was deleted by the staff while the user was filling out the form.
Atomic transaction code snippet
# checkout/views.py

def checkout(request):
# ...
if request.method == "POST":
    # ...
    if order_form.is_valid():
    # ...
    with transaction.atomic():
        savepoint = transaction.savepoint()
        for product_size_id, quantity in bag.items():
            try:
                product_size_obj = ProductSize.objects.select_for_update().get(
                    pk=product_size_id
                )
                order_line_item = OrderLineItem(
                    order=order,
                    product=product_size_obj.product,
                    product_size=product_size_obj,
                    quantity=quantity,
                )
                order_line_item.save()
                product_size_obj.count = F("count") - quantity
                product_size_obj.save()
            except Product.DoesNotExist:
                transaction.savepoint_rollback(savepoint)
                order.delete()
                messages.error(
                    request,
                    (
                        "One of the products in your bag wasn't"
                        " found in our database.\n"
                        "Please call us for assistance!"
                    ),
                )
                return redirect(reverse("view_bag"))
The Wishlist page displays all products added to the wishlist. The list of products is sorted by name in ascending order by default.
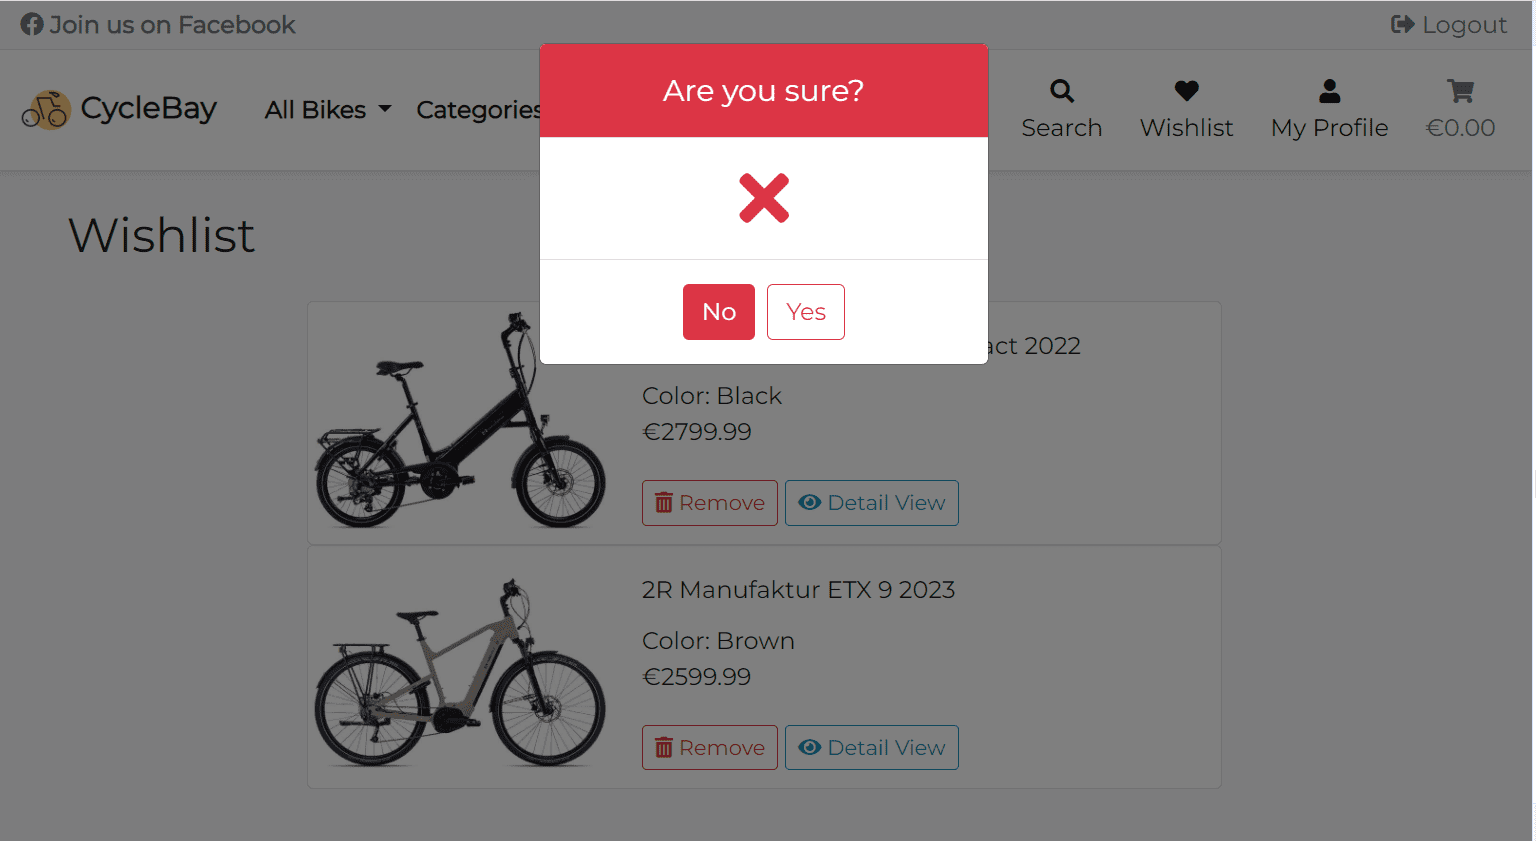
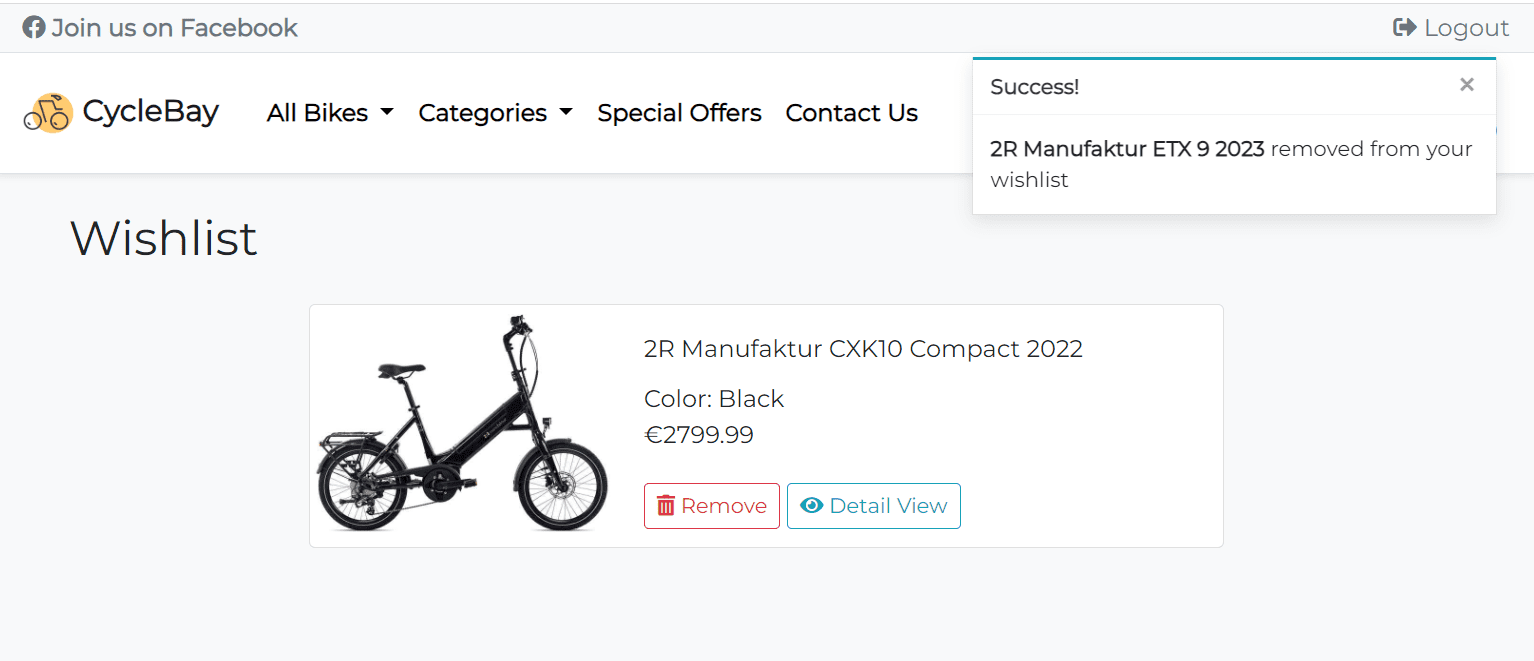
Each product card includes Product Image, Name, Color, Price and Control Buttons. The user can remove the product from the wishlist by clicking on the Remove button. This functionality is implemented with Defensive Design. It uses the jQuery wishlist_toggler function to remove the product from the wishlist without reloading the page. When the user clicks on the Remove button, the browser will display a modal window with a warning message. The user will have to confirm the deletion. This will prevent accidental deletion of the product. Only post requests are accepted for deletion, which is implemented by the @require_POST decorator and jquery ajax post method.
The Wishlist Toggler can be found in the wishlist/static/wishlist/js/wishlist_toggler.js and wishlist/views.py files.
The UserProfile model has a one-to-one relationship with the User model. When new User is created the app creates a new UserProfile object for this user using post_save signal. This allows to ensure that every user has a profile.
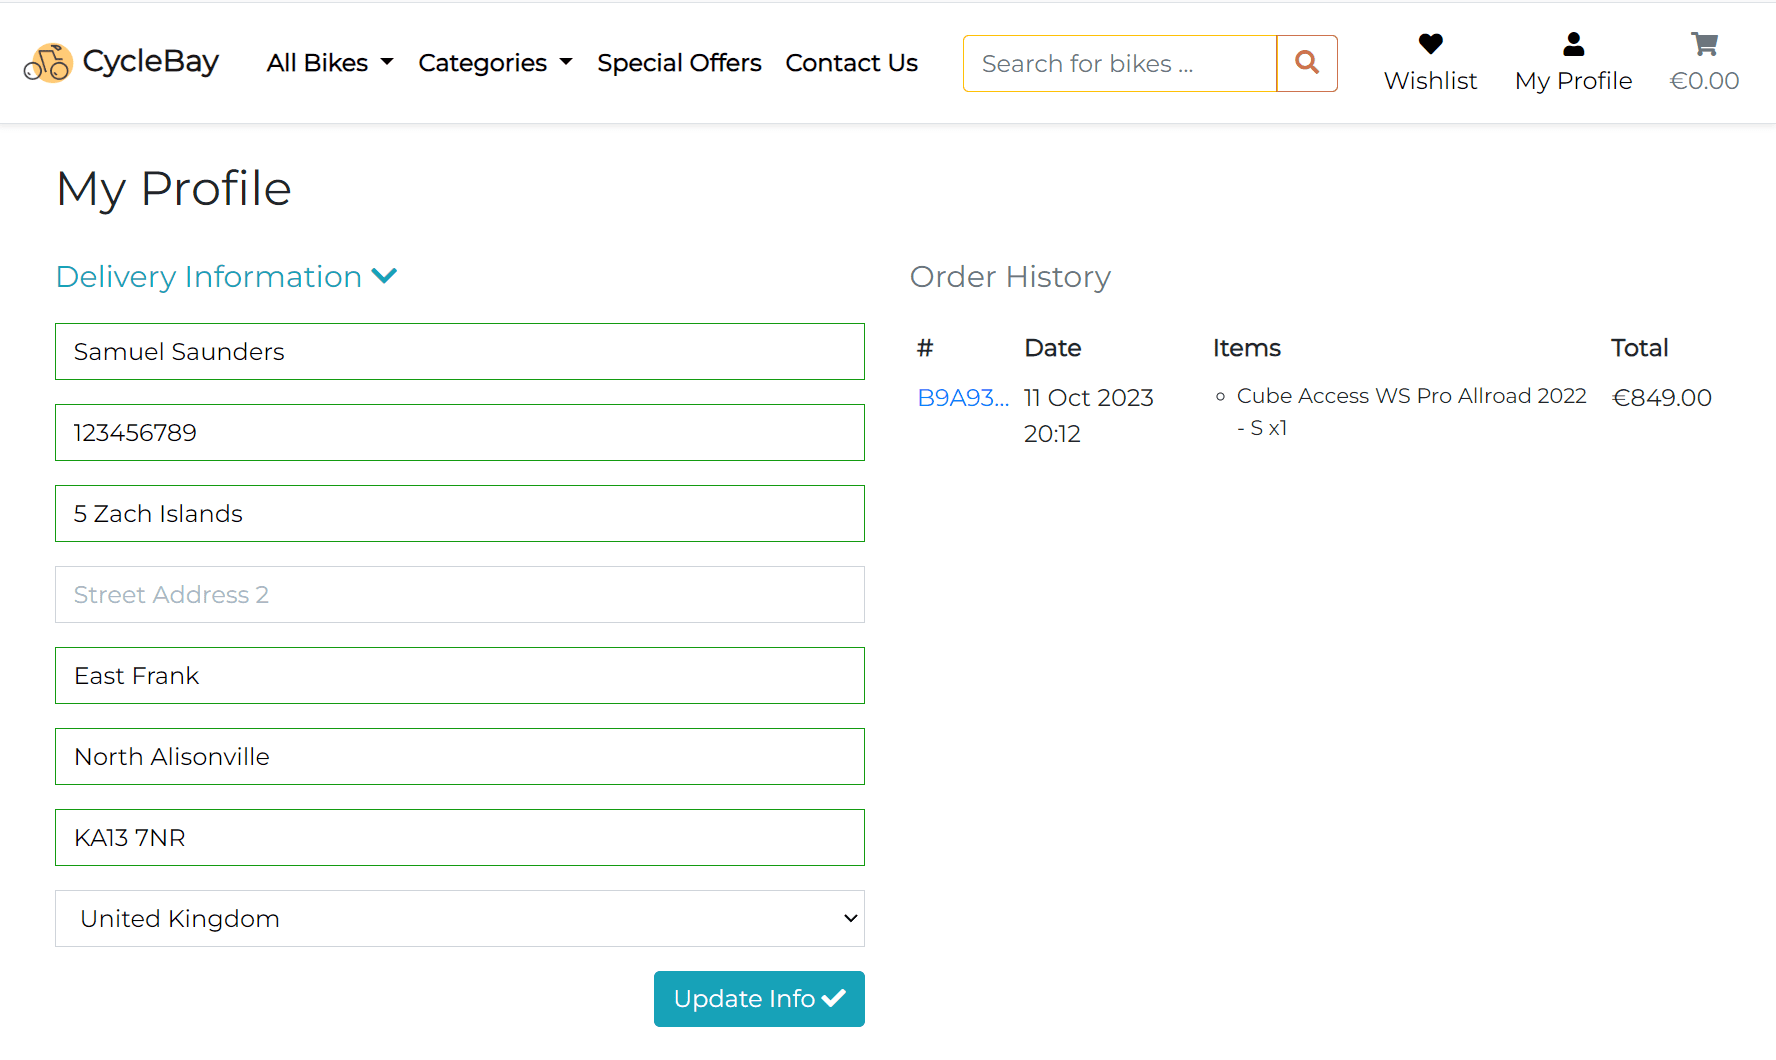
The user profile page is accessible from the navigation bar for authenticated users only. The profile page consists of 2 columns on large screens (> 992px) and 1 column on smaller screens. There are two sections on the profile page: Delivery Information and Order History.
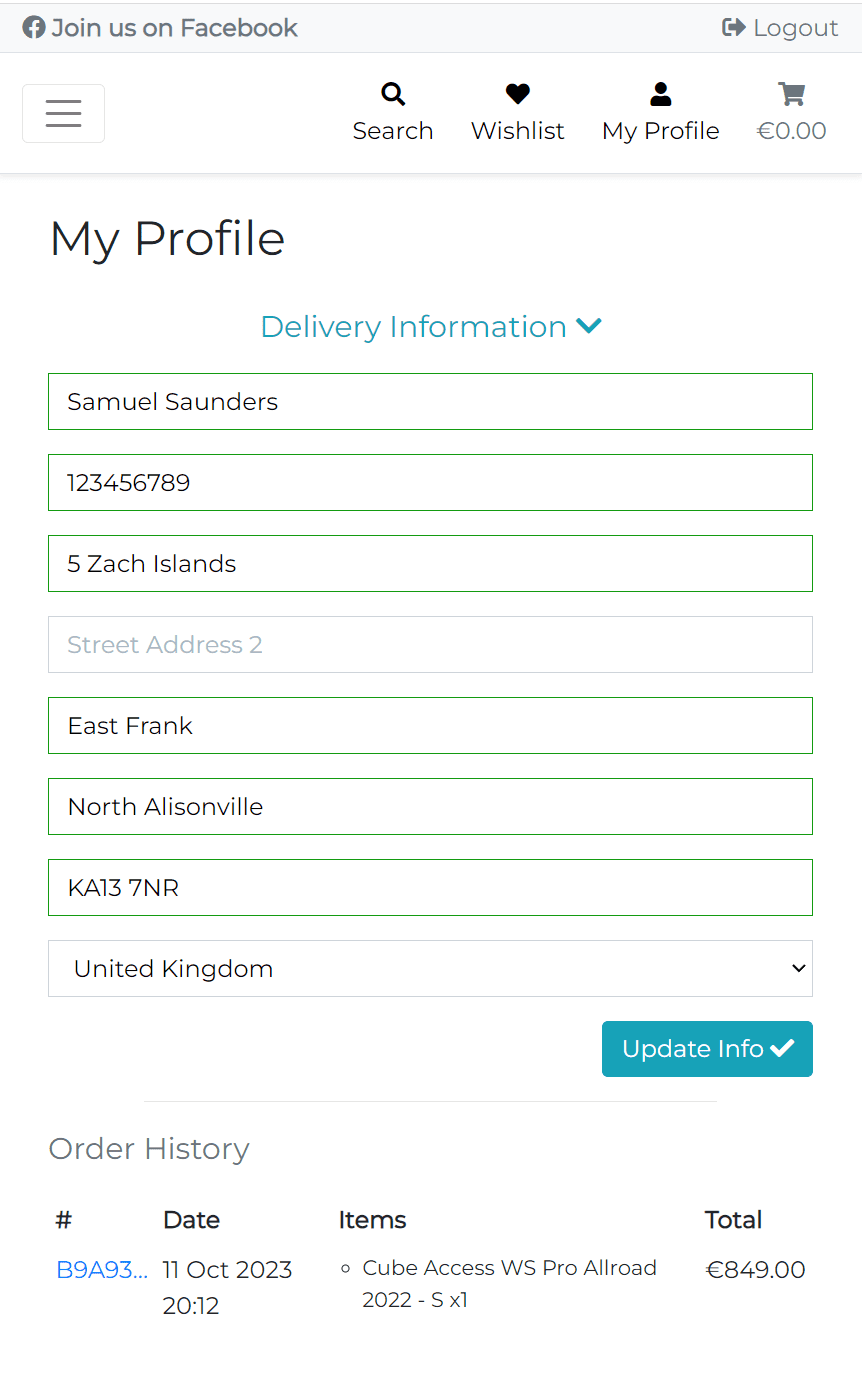
The delivery information section is the form that allows the user to add/update their delivery details. The form includes the user's full name that stored in the custom user model, phone number, street address, town or city, county, postcode and country that stored in the UserProfile model.
The form is pre-populated with the user's saved delivery information if the user saved it during the checkout process. Also the user can update the delivery information manually.
The country field is a dropdown list with all countries based on the CountryField from django_countries package. This field provides all ISO 3166-1 countries as choices.
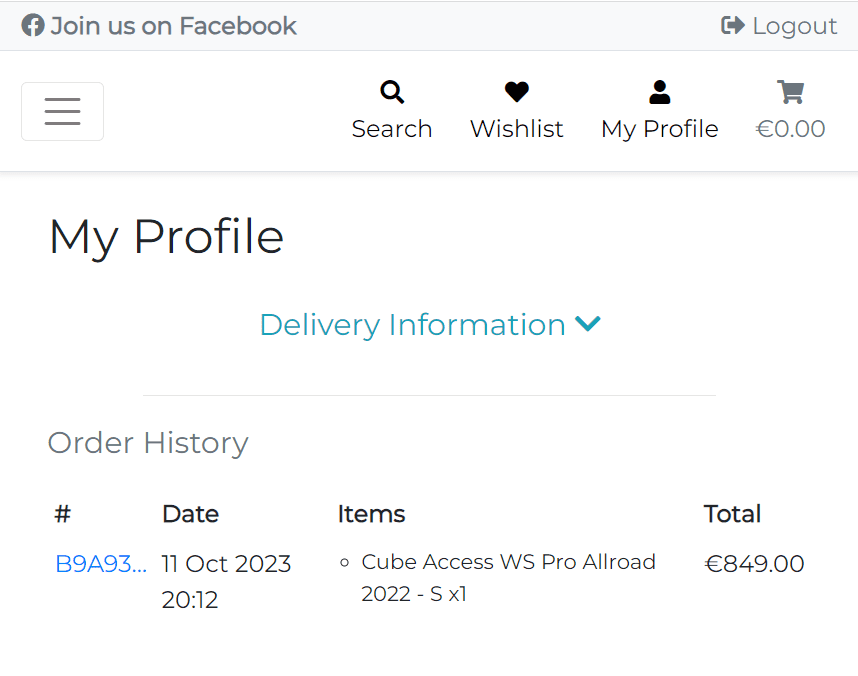
The delivery information section is responsive and collapsed by default into a button on smaller screens. It allows them to focus on the order history and view the delivery information form only when they need it.
| Delivery Collapsed | Delivery Expanded |
|---|---|
 |
 |
The order history section displays the list of orders placed by the user. The list is represented as a table with the following columns: Order Number, Date, Items and Total.
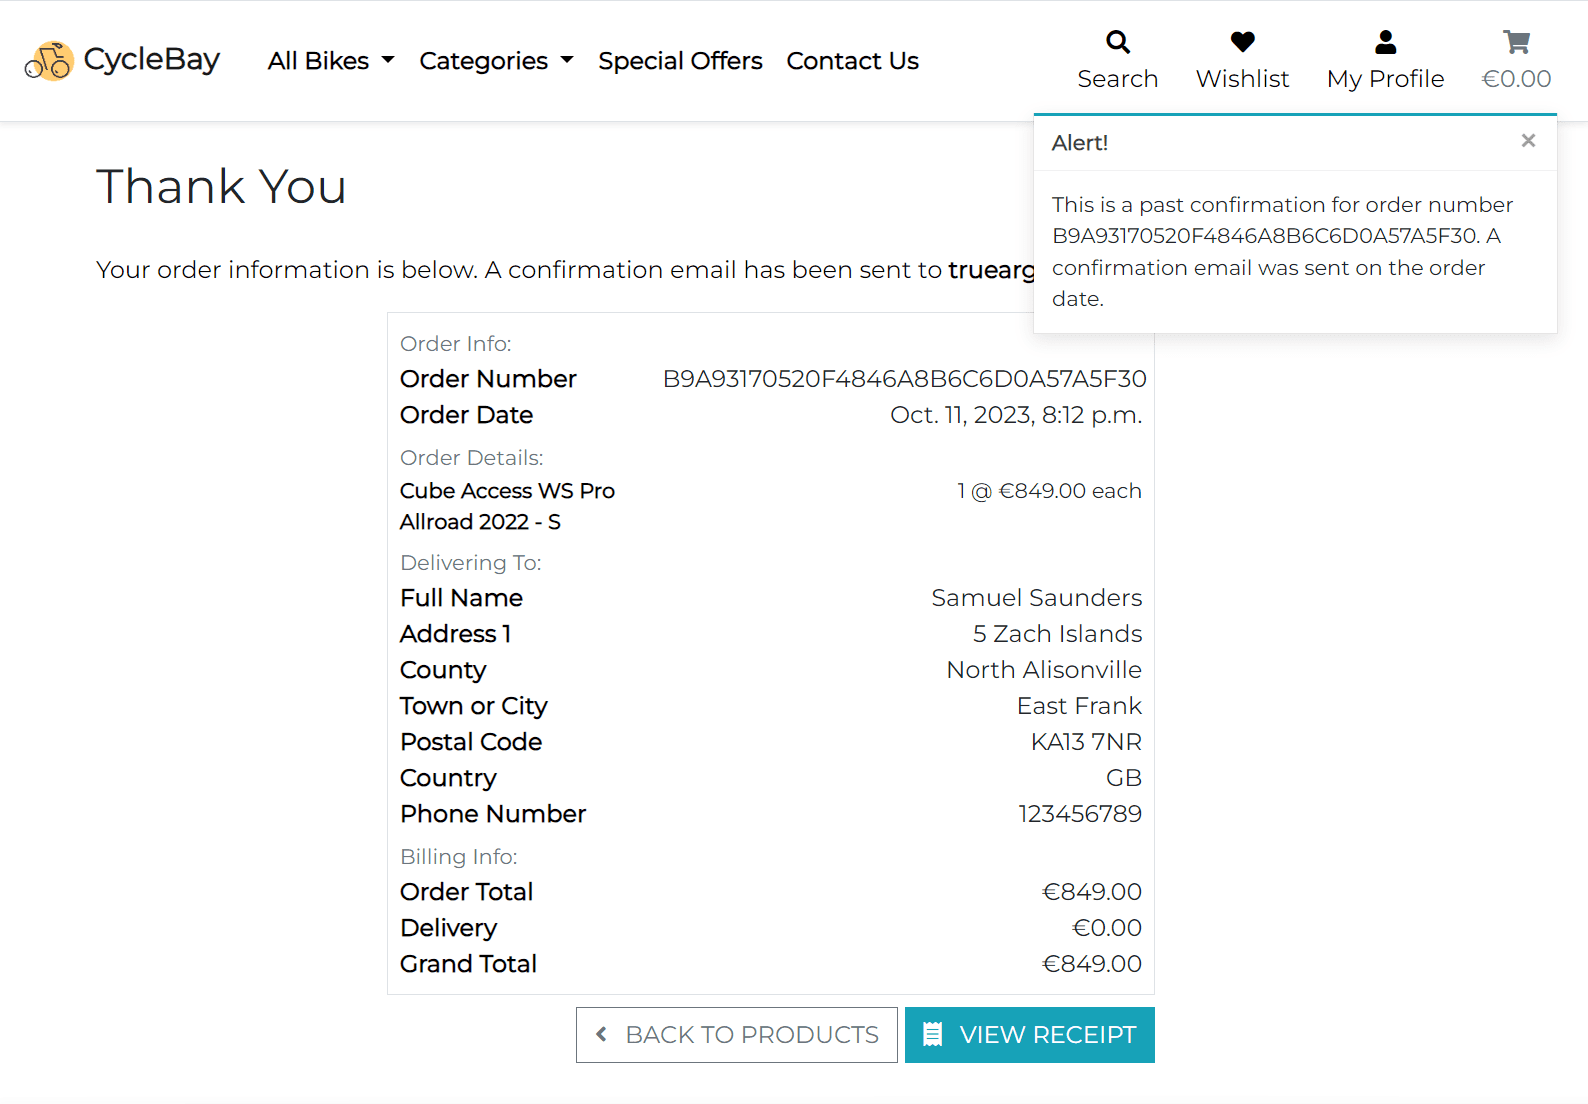
The order number is a clickable link that redirects the user to the order details page. This page is the same as the checkout success page, but with different toast message.
All ordered item details additionally stored in json format in the Order`` model in original_bag` field, as well as in the metadata of the payment intent.
This allows to display the items in the order history even without reference to the Product model. So, the user can see the ordered product details even if the product was deleted from the store. Its kind of a snapshot of the product at the time of purchase.
Here is the list of the saved product details in the original_bag field: product id, product name, product size id, size, quantity, price, color.
In the pursuit of enhancing the overall user experience and streamlining the product management process, I developed a user-friendly interface for store owners. This interface is a significant leap forward as it grants the owners the ability to manage products without having to navigate through the admin panel. It's here that store owners can seamlessly add new products, adjust quantities for different sizes, edit existing products, delete them, and manage a plethora of other product attributes.
A crucial part of this implementation is how store owner manages stock. The stock levels for the products are intrinsically linked to the ProductSize model. This design decision enables a more granular control over the inventory. This means each size of a bike has its own stock count. So, if a medium-sized bike is selling fast, we can easily adjust the stock for just that size. This helps the store run smoothly and makes sure customers know exactly what's available.
The store owner can add a new product using the Add Item button in the navigation bar. This button is only visible and available for staff users.
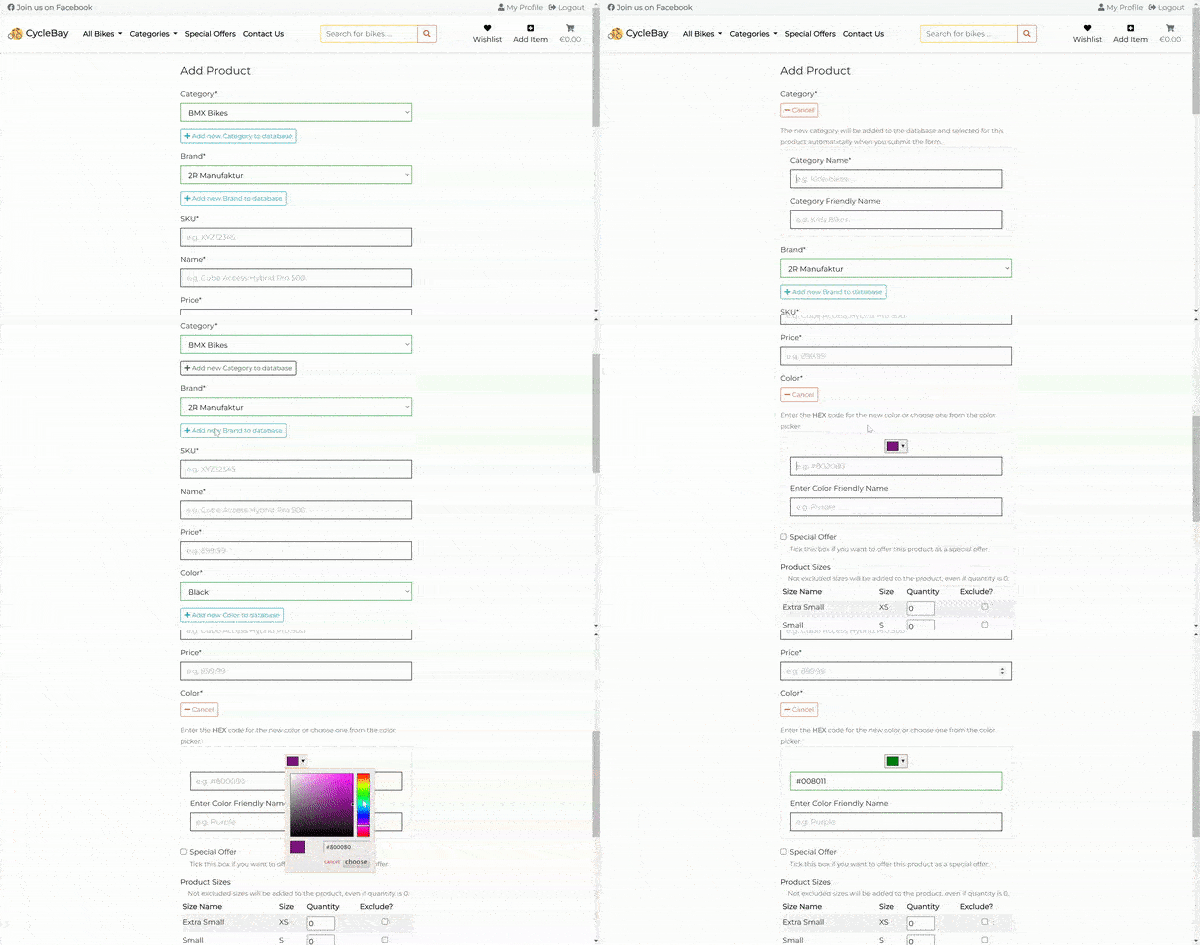
The Add Product form includes the following fields: Category, Brand, Name, SKU, Name, Price, Color, Special Offer, Product Sizes and Image.
- Category/Brand/Color
The Category, Brand and Color fields are dropdown lists with all available categories, brands and colors. Also the store owner can add a new category, brand or color to database by clicking on the Add new {category/brand/color} button. The button opens collapsible form with the input fields. The new category/brand/color will be added to the database and selected for the product when the store owner submits the add product form.
This functionality is implemented using the jQuery setUpCollapseHandlers function that is defined in the inventorize/static/inventorize/js/collapse_elements.js file.
The color field additionally has the color picker that allows the store owner to choose any color for the product. The color picker is powered by Spectrum library. Once the store owner selects the color from the color picker, the hex value will be added to the color field. The hex value will be stored to the database and displayed as a friendly name to the user.
- Product Sizes
The architecture of this feature is rooted in Django's inlineformset_factory, which has played a pivotal role in shaping the functionality. This tool allowed me to facilitate the creation of multiple forms for each size of a product, enabling the store owner to edit the quantity for each size individually without having to navigate to a separate page.
The essence of this feature is captured in the ProductSize intermediate model. Here, each product size is represented as a unique combination of the product and size, thereby allowing the store owner to allocate different quantities for different sizes of the same product. This mechanism is neatly encapsulated within two forms – ProductForm and ProductSizeForm. The ProductForm is tasked with managing the core attributes of the product, while ProductSizeForm handles the sizing details.
class ProductForm(forms.ModelForm):
    # ...

class ProductSizeForm(forms.ModelForm):
    class Meta:
        model = ProductSize
        fields = ("size", "count")
        widgets = {'size': forms.HiddenInput()}
        labels = {"count": "Quantity",}

def create_product_size_formset():
    return inlineformset_factory(
        Product,
        ProductSize,
        form=ProductSizeForm,
        extra=Size.objects.count(),
        can_delete=True,
    )
In the template, the formset is rendered as a table, where each row corresponds to a different size of the product. The user has the ability to set the quantity for each size, and optionally exclude sizes.
By incorporating these features, I believe I've managed to craft a seamless and intuitive experience for store owners. They can now effortlessly manage their products, allowing them to focus more on growing their business and less on navigating through cumbersome interfaces.
The edit and delete buttons are available on every product card and product details page for staff users only. The edit button redirects the user to the edit product page, which is the same as the add product page, but with pre-populated fields. The store owner can edit the product details and save the changes.
- Image
The image field is powered by Pillow library. It allows the store owner to upload the new image, replace existing image or delete the image. The uploaded image are stored in the AWS S3 bucket.
For delete functionality I implemented Defensive Design. When a store owner tries to delete a product, the browser will display a modal window with a warning message. The store owner will have to confirm the deletion. This will prevent accidental deletion of the product.
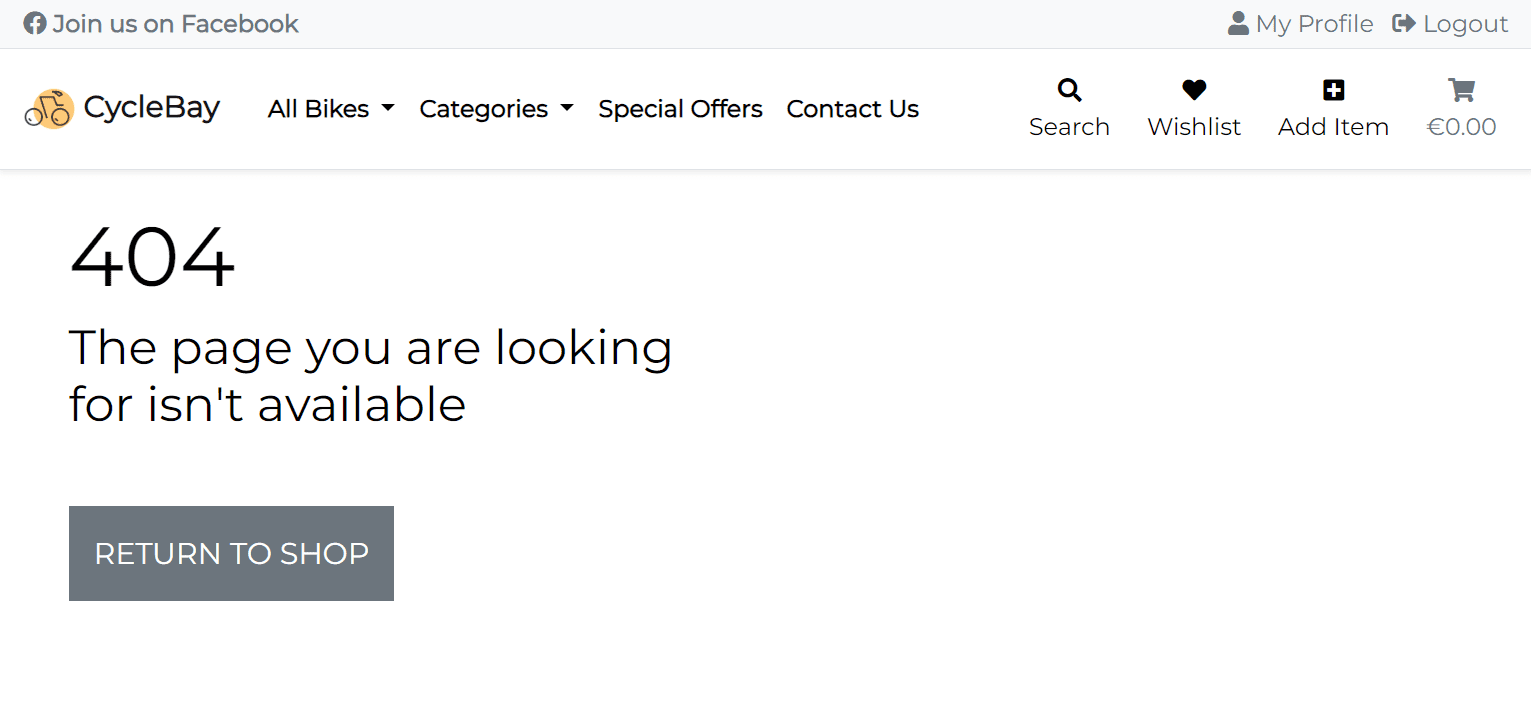
The custom error pages are implemented using the permission_denied, bad_request, page_not_found, server_errorviews andhandler400, handler403, handler404andhandler500handlers. The views are defined in thecyclebay/views.pyfile and handlers in thecyclebay/urls.py` file. Each view renders the appropriate template.
- Product description. The store owner can add the product description using the WYSIWYG editor.
- Product reviews and ratings. The user can add a review and rating to the bought product.
- Discount codes and coupons. The store owner can send the discount codes to the customers using the mailchimp integration. The customer can apply the discount code in the shopping bag page.
- Filters. Filtering sidebar allows users to filter products simultaneously by multiple categories, brands, colors and price range.
- Product quantity reservation for checkout process using Celery task. The product quantity will be reserved for 15 minutes, only when the user is on the checkout page.
- Select color of the product right on the product details page. Avoiding the duplication of the products with different colors.
- Add product to the wishlist from the product details page or shopping bag page.
- Pagination for products to improve the performance of the products page.
- Automated testing with Django test framework
- CI/CD with GitHub Actions and Heroku pipelines to automate the deployment and testing process
- Animate.css (included in the owlcarousel library)
- Bootstrap 4.6
- boto3
- Django 3.2
- dj-database-url
- Font Awesome
- gunicorn
- jQuery 3.6.4
- OwlCarousel2 2.3.4
- Pillow
- psycopg2
- pycodestyle
- python-dotenv
- Spectrum 1.8
- Stripe
- urllib3
- Adobe Photoshop
- AWS S3
- Balsamiq
- ezgif
- Git
- GitHub
- Google Fonts
- Heroku
- iLoveIMG
- Microsoft Visio
- VS Code
See TESTING.md for an overview of the app testing and debugging.
The Get Job platform is deployed on the Heroku cloud platform and can be accessed here https://cyclebay-bc1e75ddbf8e.herokuapp.com/
To run this project locally, you will need the following tools:
- Clone the repository to your local machine
git clone
- Create a virtual environment
# mkvirtualenv <name> <path_to_project>
$ mkvirtualenv cyclebay .
- Activate the virtual environment
$ workon cyclebay
- Install the project dependencies
pip install -r requirements.txt
-
Create a .env file in the root directory and add the environment variables from the .env_example file
-
Run the app
python manage.py runserver
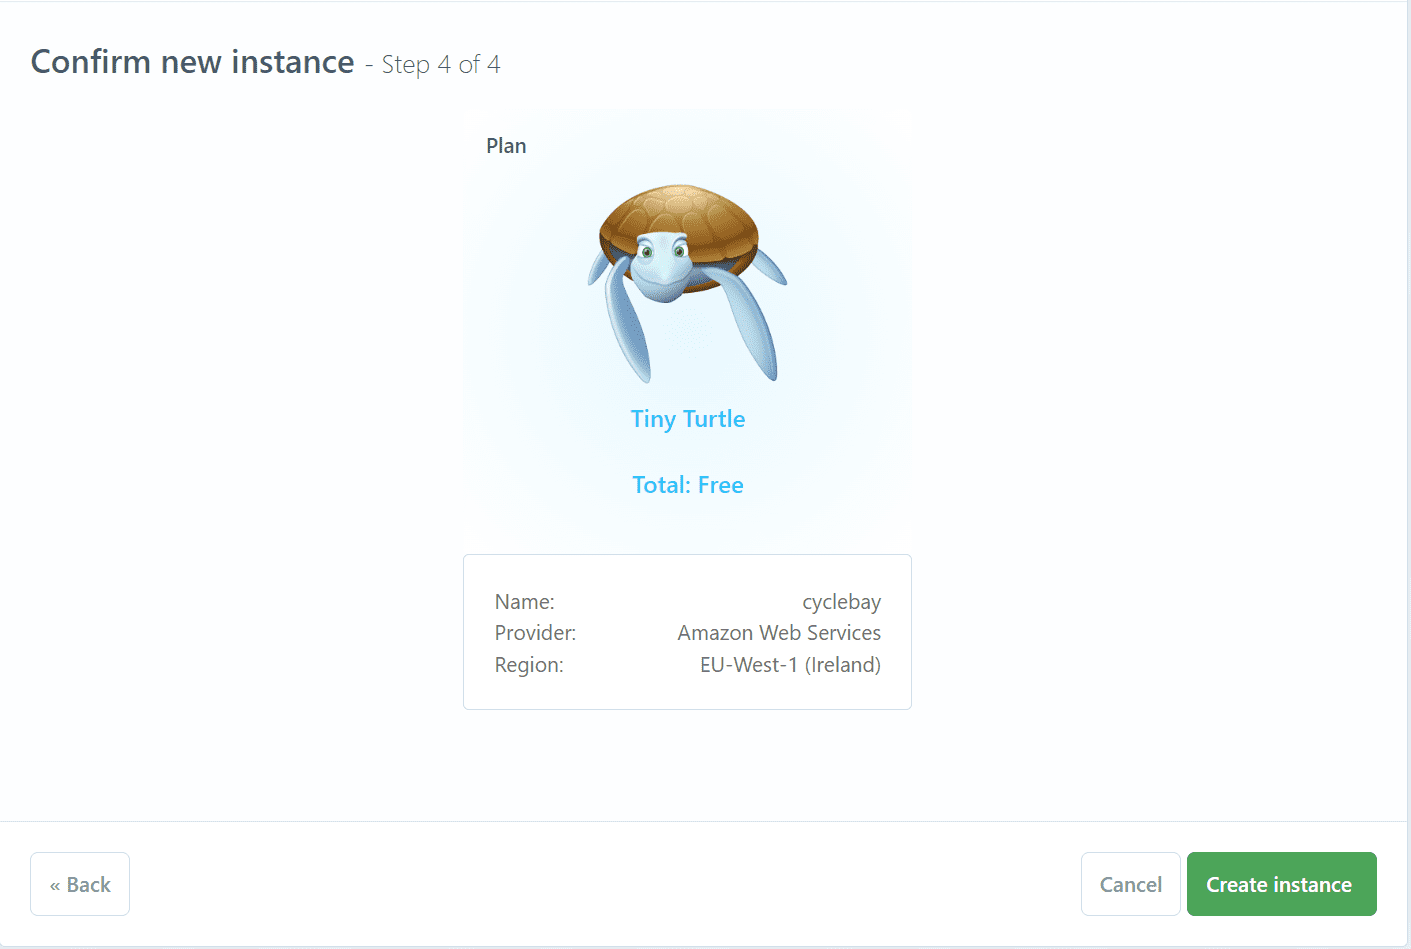
The app uses a relational database service ElephantSQL to store and manage data.
- Register or Login to your ElephantSQL account
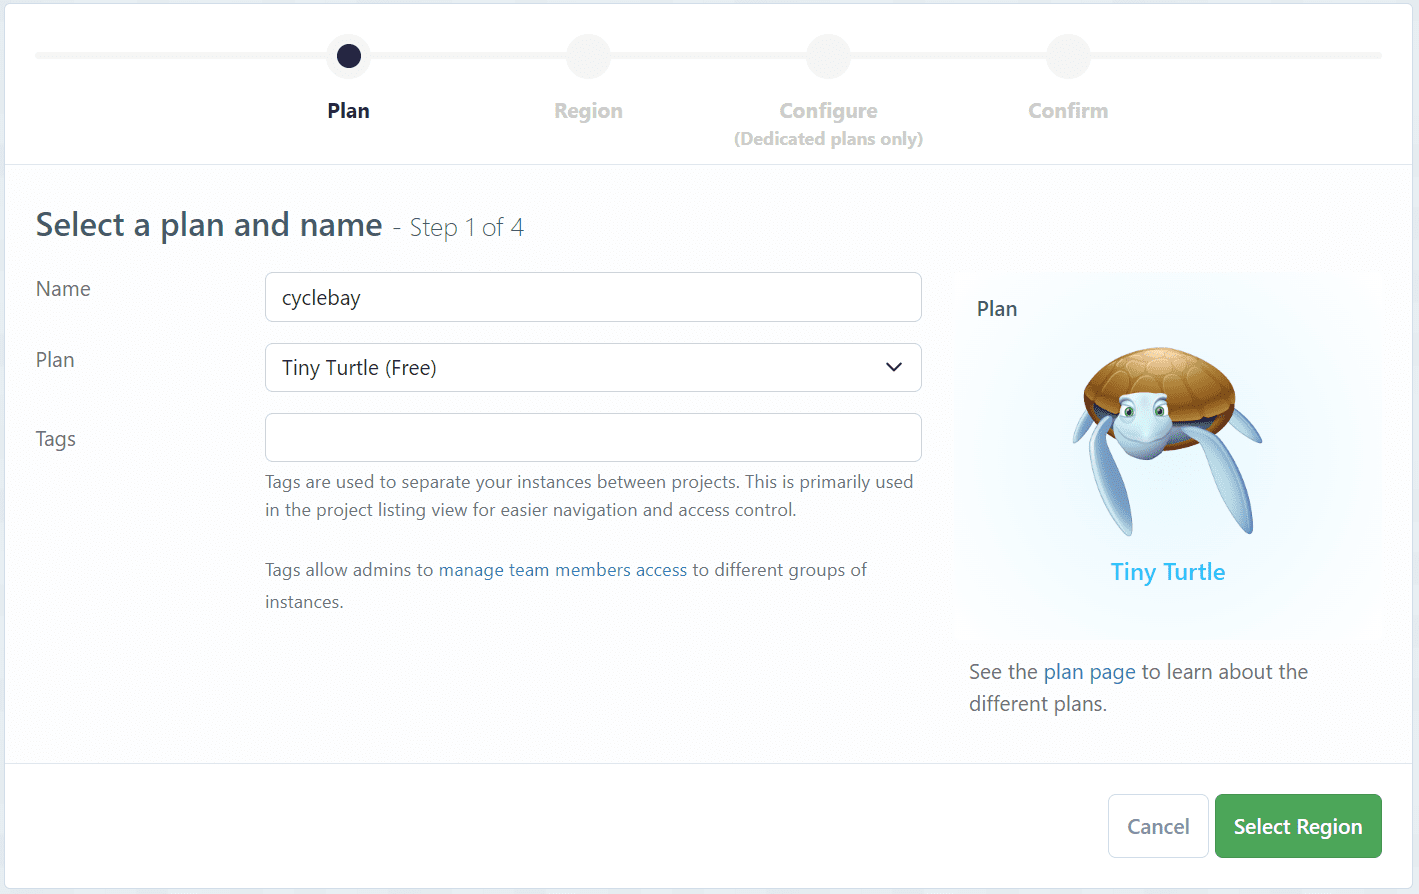
- Click on the Create New Instance button
- Select a plan and add a name for your instance(e.g. cyclebay)
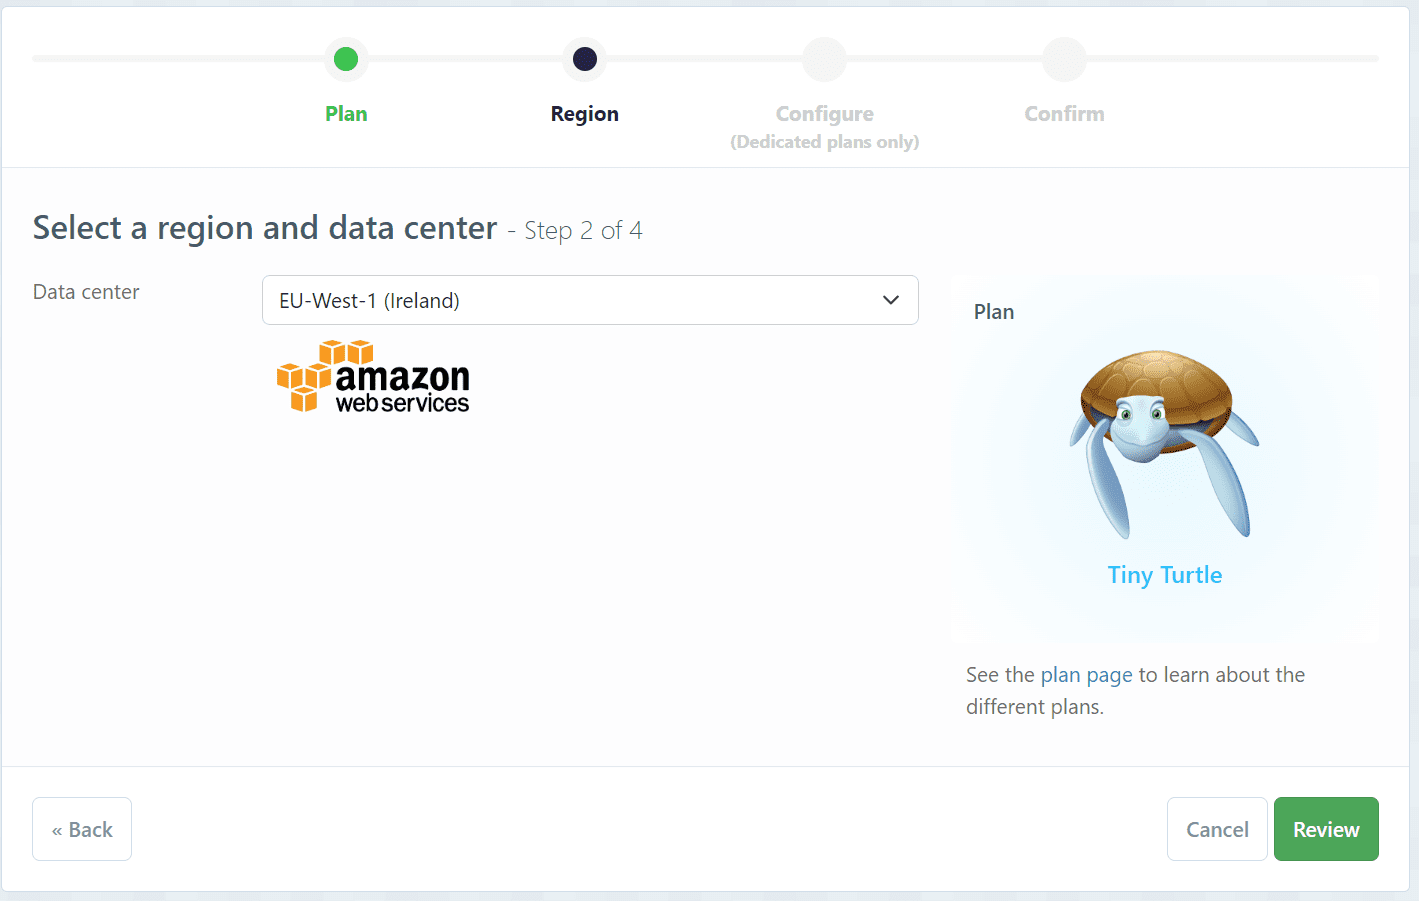
- Select a region and datacenter that is closest to you
- Confirm new instance
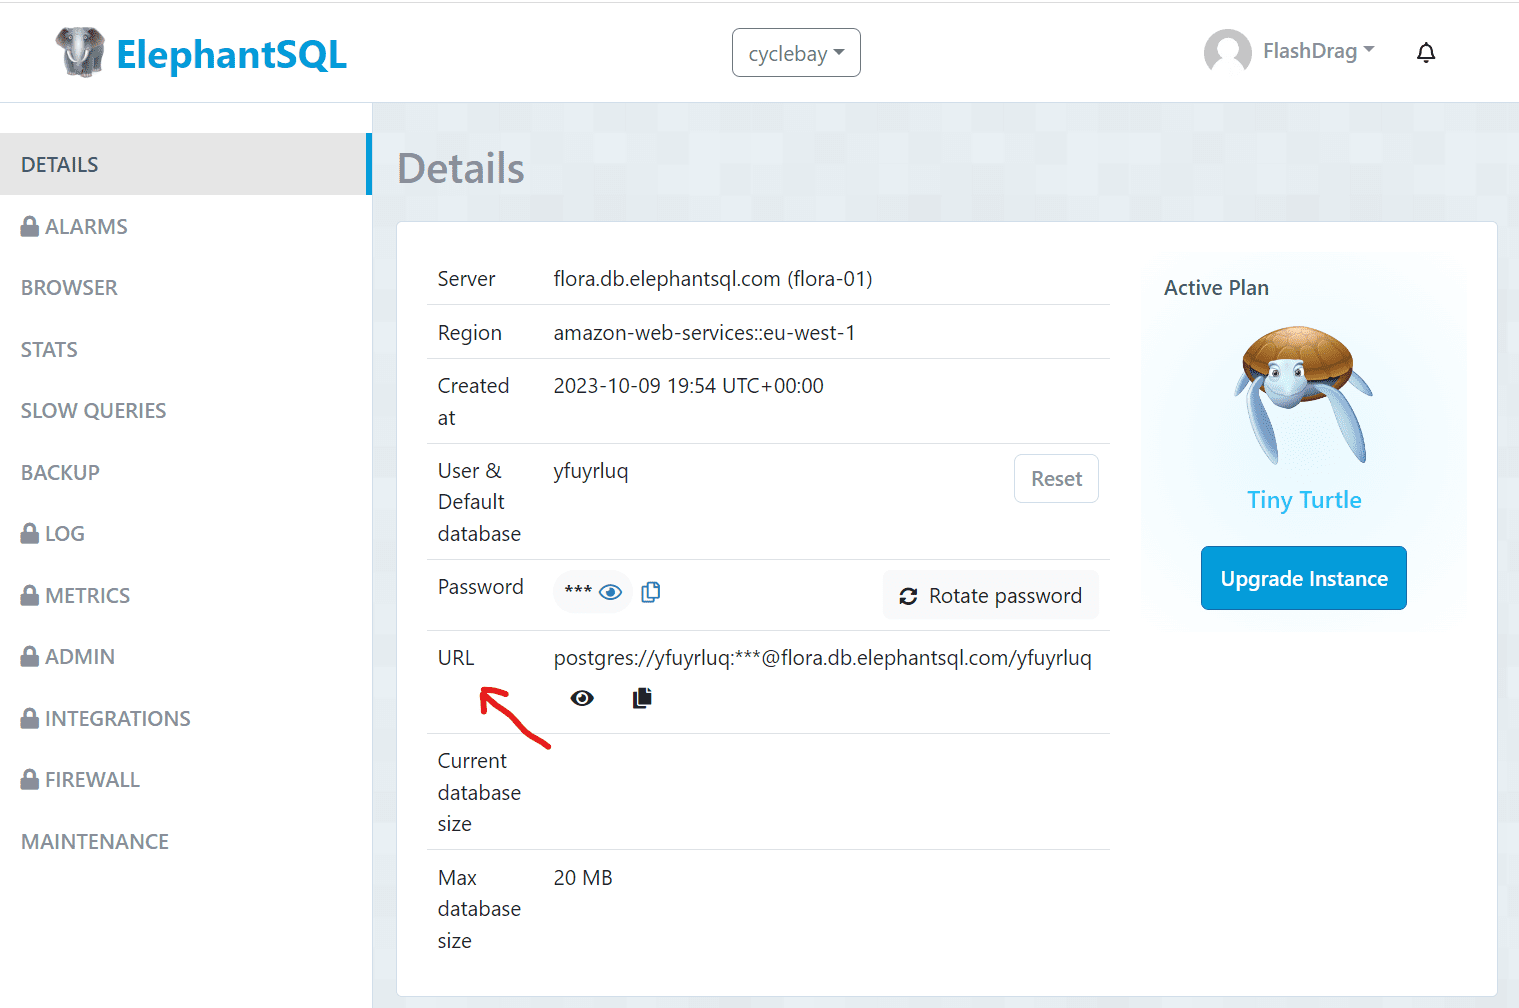
- Once the instance is created, open the instance details and copy the connection URL
- Install the
dj_database_urlandpsycopg2packages
$ pip install dj_database_url psycopg2
- Add the following code to the settings.py file
if DEVELOPMENT:
    DATABASES = {
        'default': {
            'ENGINE': 'django.db.backends.sqlite3',
            'NAME': BASE_DIR / 'db.sqlite3',
        }
    }
elif len(sys.argv) > 0 and sys.argv[1] != 'collectstatic':
    if os.getenv("DATABASE_URL", None) is None:
        raise Exception("DATABASE_URL environment variable not defined")

    # Parse database configuration from $DATABASE_URL
    import dj_database_url
    DATABASES = {
        'default': dj_database_url.config(
            default=os.getenv('DATABASE_URL')
        )
    }
-
Install the Heroku CLI: https://devcenter.heroku.com/articles/heroku-cli#install-the-heroku-cli
-
Login to your Heroku account
$ heroku login
- Create a new app
$ heroku create <app-name> --region eu
- Set the environment variables. See the list of required environment variables in the .env_example file in the root directory of the project.
$ heroku config:set <name of variable>=<value of variable>
Warning: Don't forget to set the DEVELOPMENT and DEBUG variables to False in the production environment or don't add them at all. So, they will be set to False by default.
Note: If the Heroku app is created from the Heroku dashboard, and you want use the Heroku CLI to manage the app, you will need to add the remote manually:
$ heroku git:remote -a <your-heroku-app-name>
Now you can interact with your app using $ heroku <django_command> instead of $ heroku <command> -a <your-heroku-app-name>. See more details here: https://devcenter.heroku.com/articles/git#creating-a-heroku-remote
- Create a Procfile in the root directory of the project
$ touch Procfile
$ echo web: gunicorn cyclebay.wsgi:application > Procfile
- Install packages
$ pip install gunicorn psycopg2 dj-database-url
- Create/Update a requirements.txt file
$ pip freeze > requirements.txt
- Add the hostname of your Heroku app to the ALLOWED_HOSTS list in the settings.py file
ALLOWED_HOSTS = [
    '<app-name>.herokuapp.com',
    "127.0.0.1",
    "localhost"
]
- Commit the changes and push to Heroku
$ git add .
$ git commit -m "Setup Heroku files for deployment"
$ git push heroku master
- Migrate the database
$ heroku run python manage.py migrate
- Create a superuser
$ heroku run python manage.py createsuperuser
- Load data from the fixtures (fixtures are located in the products/fixtures directory)
$ heroku run python manage.py loaddata <fixture-name>
Note: The fixtures should be loaded in the following order:
categories -> brands -> colors -> sizes -> products -> product_sizes
-
Create an AWS account (https://aws.amazon.com/)
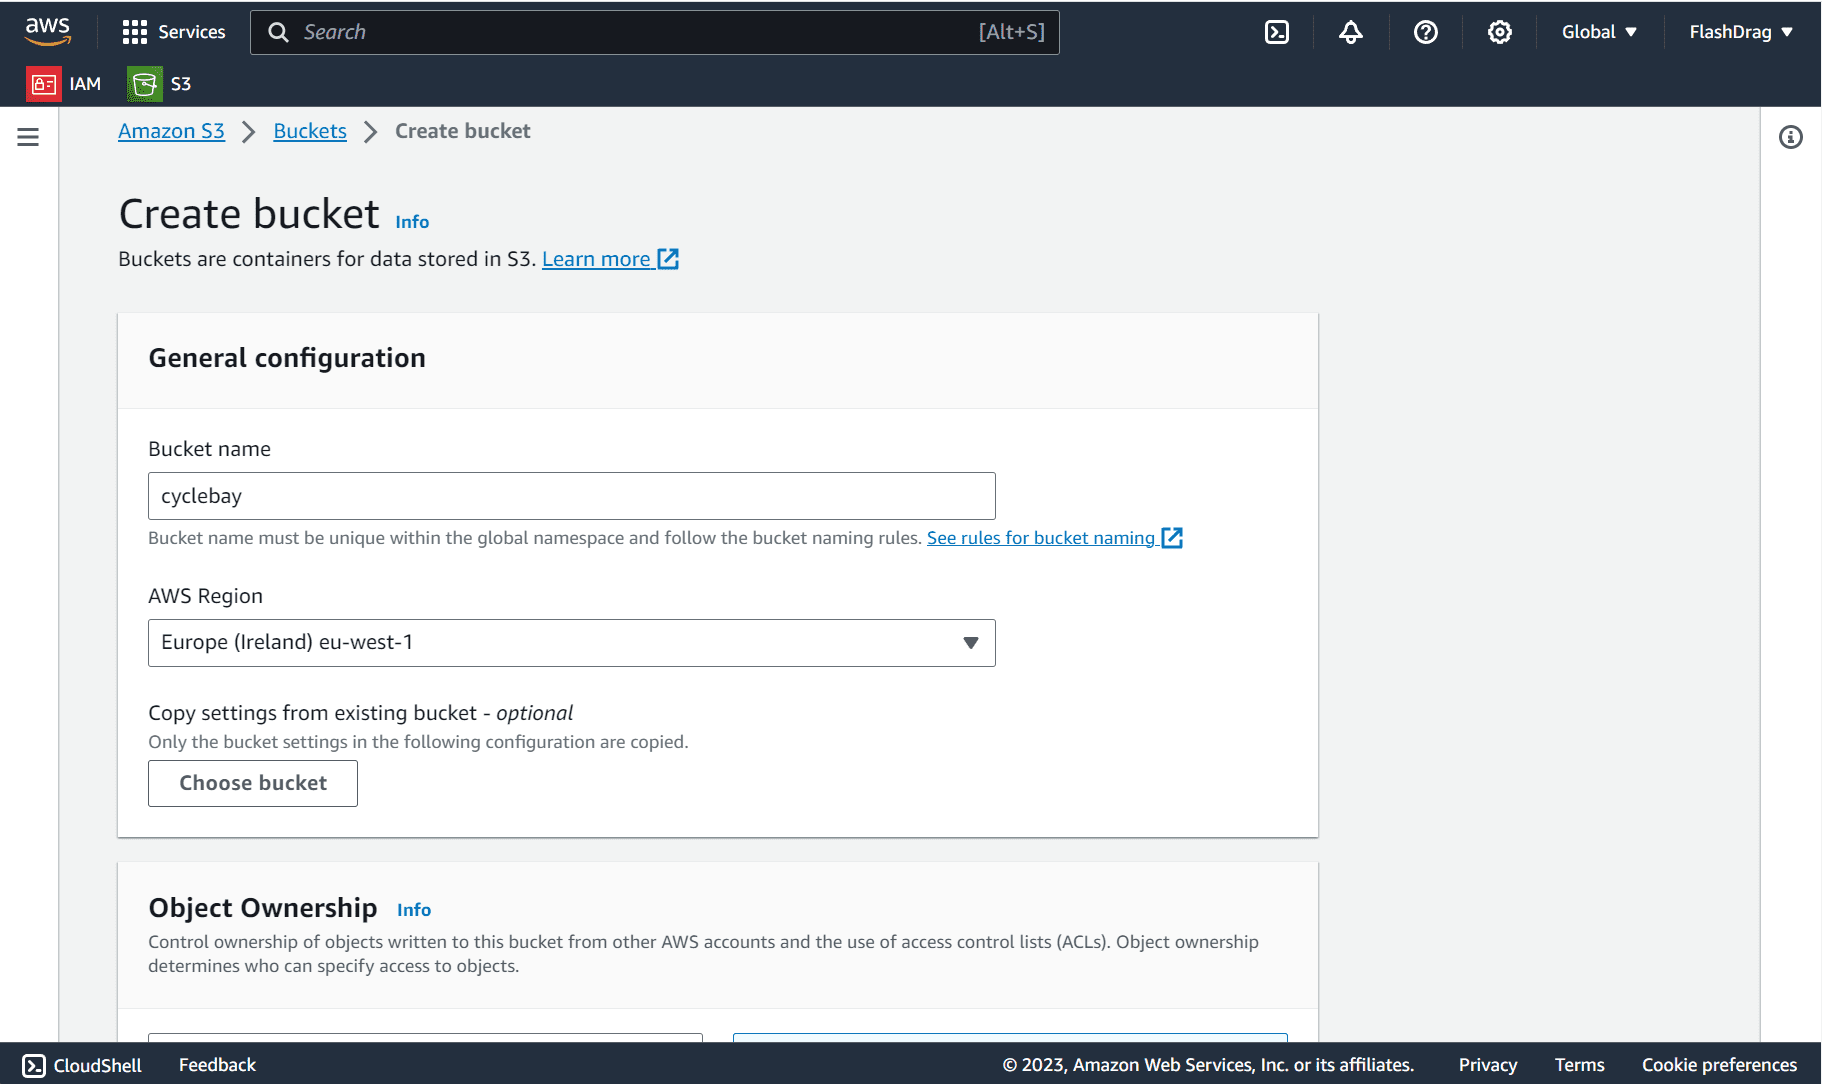
- Create a new bucket:
- Bucket name: cyclebay-bucket
- Region: Choose the region closest to you
- Object ownership:
- ACLs enabled
- Bucket owner preferred
- Uncheck Block all public access
- Check 'I acknowledge ... becoming public'.
- Create bucket
- Bucket settings:
- Properties:
- Static website hosting:
- Enable
- Index document: home.html
- Error document: error.html
- Static website hosting:
- Permissions:
- CORS configuration (Paste the following code):
[ { "AllowedHeaders": [ "Authorization" ], "AllowedMethods": [ "GET" ], "AllowedOrigins": [ "*" ], "ExposeHeaders": [] } ] - Bucket policy:
- Policy generator:
- Type of policy: S3 Bucket Policy
- Principal: *
- Actions: GetObject
- Amazon Resource Name (ARN):
Bucket ARN - Copy from the Bucket policy editor
arn:aws:s3:::cyclebay-bucket - Add statement
- Generate policy
- Copy the policy
- Paste the policy in the Bucket policy editor
- Add / to the end value of the Resource key in the statement*
- Save changes
- Policy generator:
- Access control list:
- Everyone:
- Check List
- Save changes
- Everyone:
- CORS configuration (Paste the following code):
- Properties:
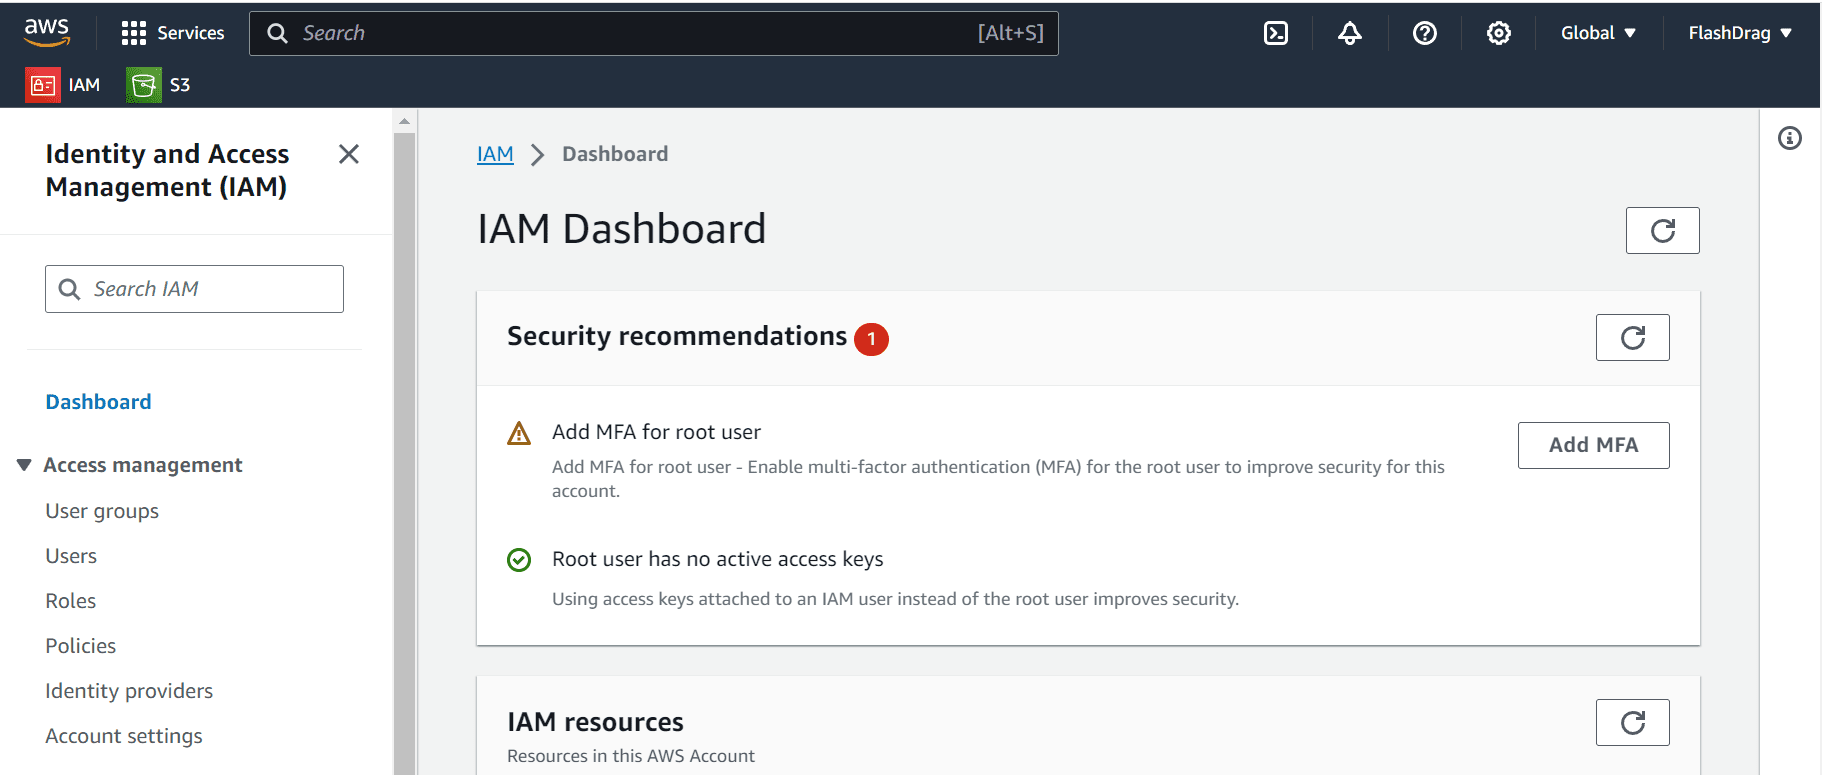
- Groups and policies
- Create a new group
manage-cyclebaywithout any policies attached to it yet. - Create a new policy:
-
Service: S3
-
Select JSON
-
Select Import policy from Actions dropdown
-
Find AmazonS3FullAccess typing S3 in the search bar
-
Select and import the policy
-
Go to S3 bucket settings (don't close the policy editor of the IAM group)
-
Copy the Bucket ARN from the Bucket policy editor
-
Paste the Bucket ARN in the Resource key of the policy. The policy should look like this:
{ "Version": "2012-10-17", "Statement": [ { "Sid": "Statement1", "Effect": "Allow", "Action": [ "s3:*", "s3-object-lambda:*" ], "Resource": [ "arn:aws:s3:::cyclebay-bucket", "arn:aws:s3:::cyclebay-bucket/*" ] } ] } -
Submit the form
-
Give the policy a name: cyclebay-policy
-
Add description: Access to cyclebay S3 bucket for static files
-
Create policy
-
- Attach the policy to the group
manage-cyclebay:- Go to the group > Permissions
- Click Attach policies from the Add permissions dropdown
- Search for the policy name: cyclebay-policy
- Attach policy
- Create a new group
- Users
- Create a new user:
- User name: cyclebay-staticfiles-user
- Access type: Programmatic access
- Click Next: Permissions options
- Select Add user to group in the Permissions options section.
- Select the manage-cyclebay group to add the user to.
- Create user
- Create a new user:
-
- Go to IAM and select 'Users'
- Select the cyclebay-staticfiles-user user
- Select the Security Credentials tab
- Scroll to Access Keys section and click Create access key
- Select Application running outside AWS, and click next
- Leave the Description tag value blank
- Create Access Key
- Click the Download .csv file button or copy the Access Key ID and Secret Access Key values into a secure location
- Install boto3 and django-storages using pip:
pip install boto3 django-storages - Freeze the requirements
pip freeze > requirements.txt - Add 'storages' to INSTALLED_APPS in settings.py
- Add AWS S3 settings to the settings.py file:
# Static files (CSS, JavaScript, Images)
# https://docs.djangoproject.com/en/3.2/howto/static-files/

if not DEVELOPMENT:
    # aws settings
    AWS_ACCESS_KEY_ID = os.getenv('AWS_ACCESS_KEY_ID')
    AWS_SECRET_ACCESS_KEY = os.getenv('AWS_SECRET_ACCESS_KEY')
    AWS_STORAGE_BUCKET_NAME = os.getenv('AWS_STORAGE_BUCKET_NAME')
    AWS_S3_REGION_NAME = 'eu-west-1'  # Ireland
    AWS_S3_CUSTOM_DOMAIN = f'{AWS_STORAGE_BUCKET_NAME}.s3.amazonaws.com'
    AWS_S3_OBJECT_PARAMETERS = {
        'Expires': 'Thu, 31 Dec 2099 20:00:00 GMT',
        'CacheControl': 'max-age=94608000',
    }

    # s3 static settings
    STATICFILES_LOCATION = 'static'
    # URL path for your static files where they will be served from
    STATIC_URL = f'https://{AWS_S3_CUSTOM_DOMAIN}/{STATICFILES_LOCATION}/'
    STATICFILES_STORAGE = 'cyclebay.custom_storages.StaticStorage'

    # s3 media settings
    MEDIAFILES_LOCATION = 'media'
    # URL path for media files where they will be served from
    MEDIA_URL = f'https://{AWS_S3_CUSTOM_DOMAIN}/{MEDIAFILES_LOCATION}/'
    DEFAULT_FILE_STORAGE = 'cyclebay.custom_storages.MediaStorage'
else:
    # URL path for your static files where they
    # will be served from during development
    STATIC_URL = '/static/'
    # Dir where static files will be collected using
    # python manage.py collectstatic
    STATIC_ROOT = os.path.join(BASE_DIR, 'staticfiles')

    # URL path for media files where they will be served from
    MEDIA_URL = '/media/'
    # Dir where media files are stored during development
    MEDIA_ROOT = os.path.join(BASE_DIR, 'media')

STATICFILES_DIRS = (os.path.join(BASE_DIR, 'static'),)
- Create a file called
custom_storages.pyin the root directory of the project:
from django.conf import settings
from storages.backends.s3boto3 import S3Boto3Storage

class StaticStorage(S3Boto3Storage):
    location = settings.STATICFILES_LOCATION

class MediaStorage(S3Boto3Storage):
    location = settings.MEDIAFILES_LOCATION
- Add access key credentials to Heroku Config Vars. See the
.env_examplefile in the root directory of the project.
-
Collect static files
-
Set
DISABLE_COLLECTSTATICto0in Heroku Config VarsIt automatically uploads all static files to S3 using
python3 manage.py collectstatic -
Deploy the app to Heroku
$ git push heroku master -
-
Upload media files
- Create a folder called
mediain the S3 bucket next to thestaticfolder - Manually upload all media files to the media folder in the S3 bucket
- Set Grand public-read access in the Access control list(ACL) of the Permissions section
- Click Upload
- Create a Stripe account (https://stripe.com/)
- Go to the Stripe dashboard and click on the Developers tab
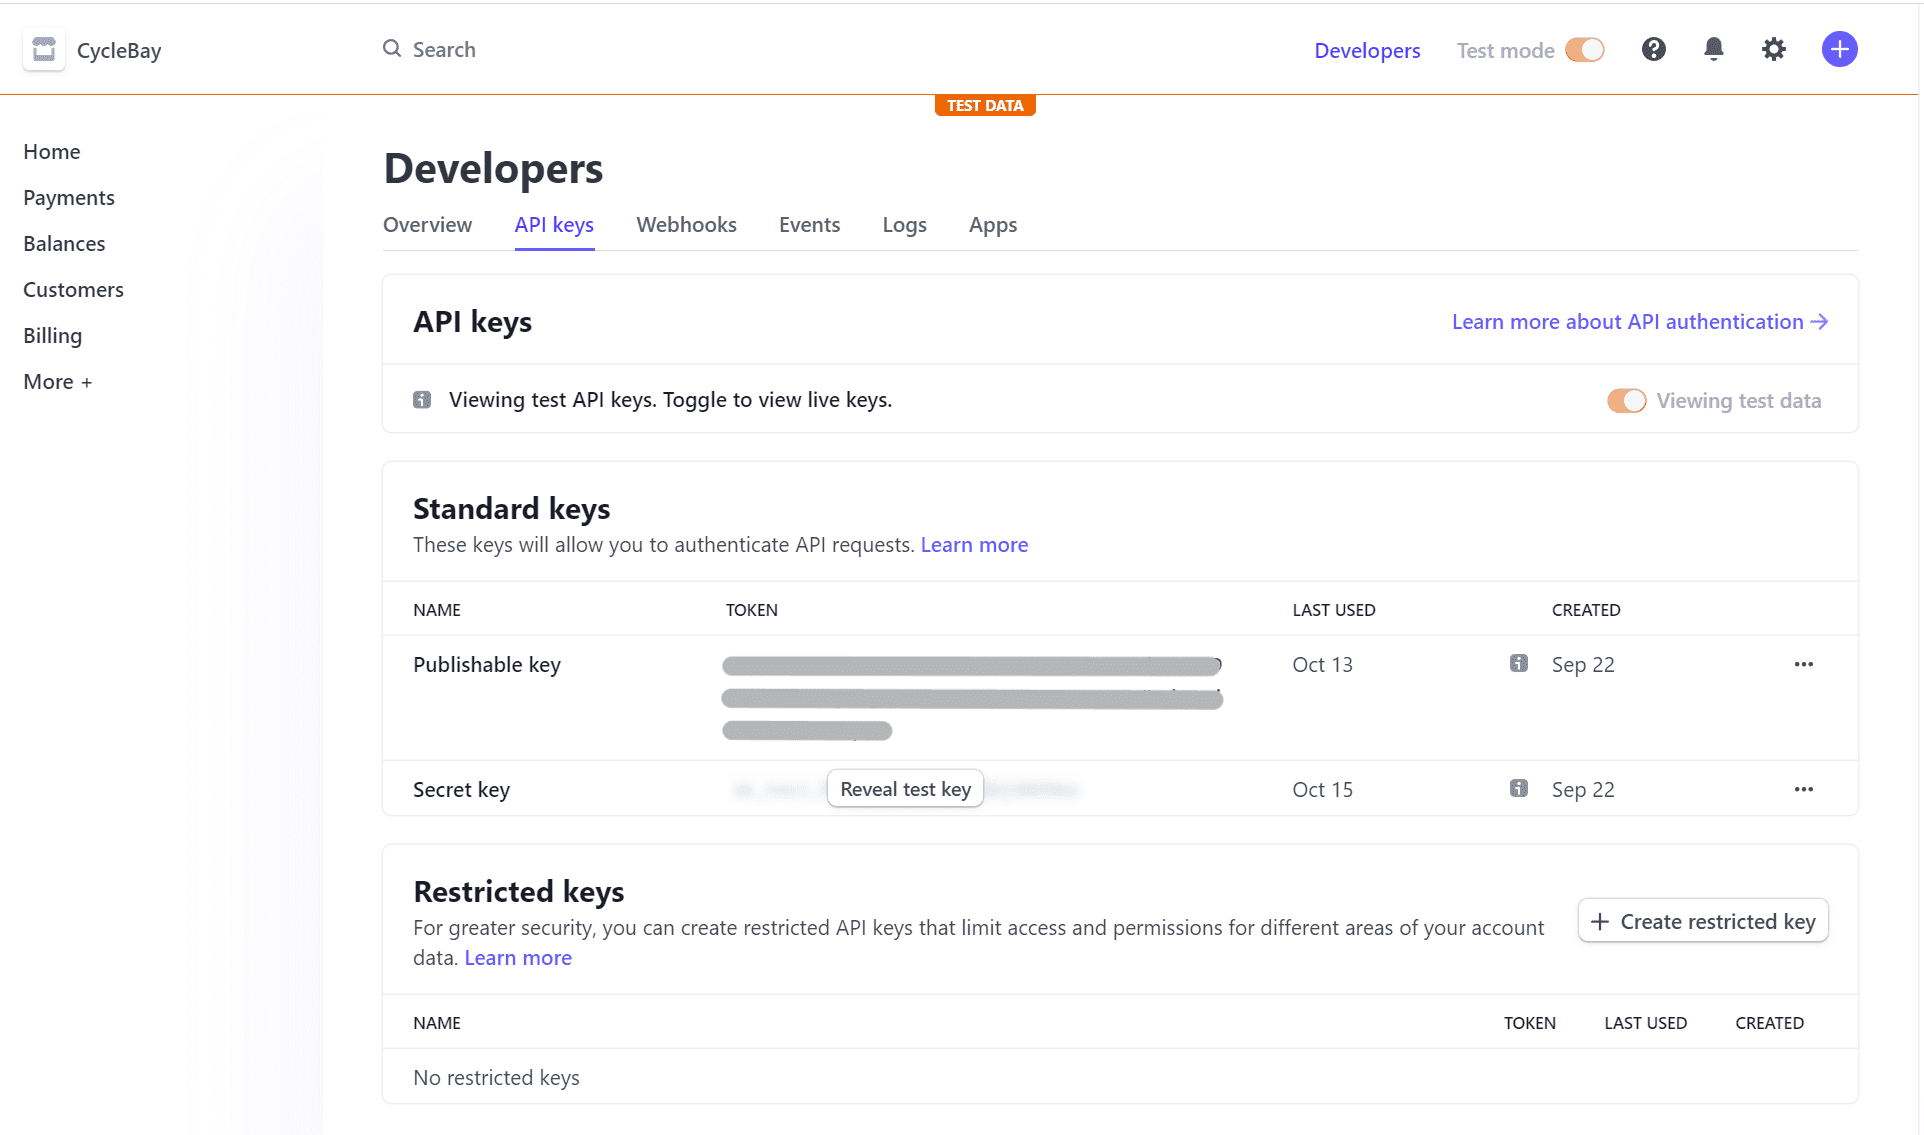
- Click on the API keys tab
- Copy the Publishable key and Secret key
- Add the Publishable key and Secret key to the Heroku Config Vars. See the
.env_examplefile in the root directory of the project.
- Go to Stripe Developer Dashboard -> Webhooks
- Add endpoint:
- Endpoint URL:
https://<your-heroku-app-name>.herokuapp.com/checkout/wh/ - Events to send: select all events
- Click Add endpoint
- Endpoint URL:
- Copy the Signing secret and add it to the Heroku Config Vars and .env file. The variable name should be
STRIPE_WH_SECRET
For testing purposes, you can use the following Stripe Test card numbers:
-
Successful payments
4242 4242 4242 4242- succeeds and immediately processes the payment.4000002500003155- 3D Secure 2 authentication is required.
-
Unsuccessful payments
4000000000000002- card declined4000000000009995- insufficient funds4000000000009987- lost card4000000000009979- stolen card
The expiration date, CVC and postal code can be any valid future date, 3 digits and 5 digits respectively.
The CycleBay web application is based on my implementation of code, applying what I learned in the Code Institute Diploma in Full-Stack Software Development course and other educational resources.
All code snippets taken from external sources are credited in the code comments.
- Riding Bicycle by SAurabh Narwade
- Man on BMX by Josh Hild
- Cycling icon created by amoghdesign - Flaticon
I would like to extend my deepest gratitude to:
-
Rory Patrick Sheridan, my dedicated mentor, for their invaluable guidance, patience, and unwavering support throughout this project.
-
The entire team at Code Institute, for providing an outstanding learning platform and resources that have immensely contributed to my growth as a developer.
Special thanks to everyone who provided feedback, shared insights, or pointed out issues during the development phase, as it has been essential in refining the project.
If you have any questions about the project, or you would like to contact me for any other reason, please feel free to contact me by email or via social media.
