This repository contains an example SageMaker Project template. Each folder in this repo contains a custom project template with details on what that template achieves and how to set it up. The generic instructions are shown below.
- MLOps template for model training and deployment with GitLab and GitLab Pipelines
- MLOps template for model training and deployment using encrypted buckets
- MLOps template for model training and deployment using multiple repo branches
- Asynchronous Inference Endpoint Deployment Pipeline
- Batch Inference Endpoint Deployment Pipeline
- Multi Model Endpoint Deployment Pipeline
- Amazon SageMaker Project with Terraform and GitHub
- Amazon SageMaker Project with Terraform and GitLab
In order to add your custom SageMaker Projects into SageMaker studio and deploy them, you will need to complete 3 steps:
-
Download the sagemaker-projects-portfolio.yaml CloudFormation template from the root of this repo to your local machine.
-
Open the CloudFormation console at https://console.aws.amazon.com/cloudformation
-
Choose on Create stack, then With new resources (standard).
-
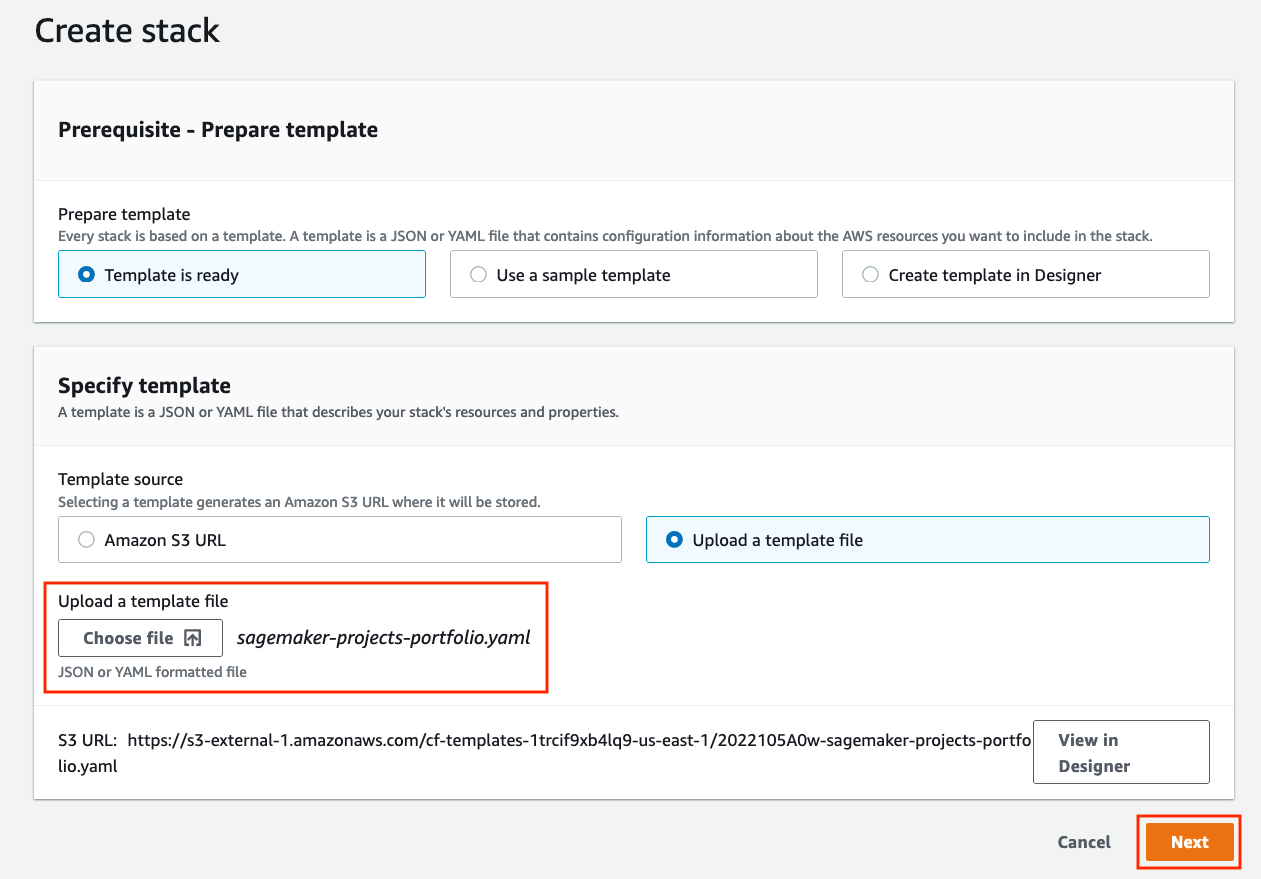
On the Create Stack screen, under Template source, choose Upload a template file.
-
Choose Choose file then select the sagemaker-projects-portfolio.yaml from your machine.
-
Choose Next
-
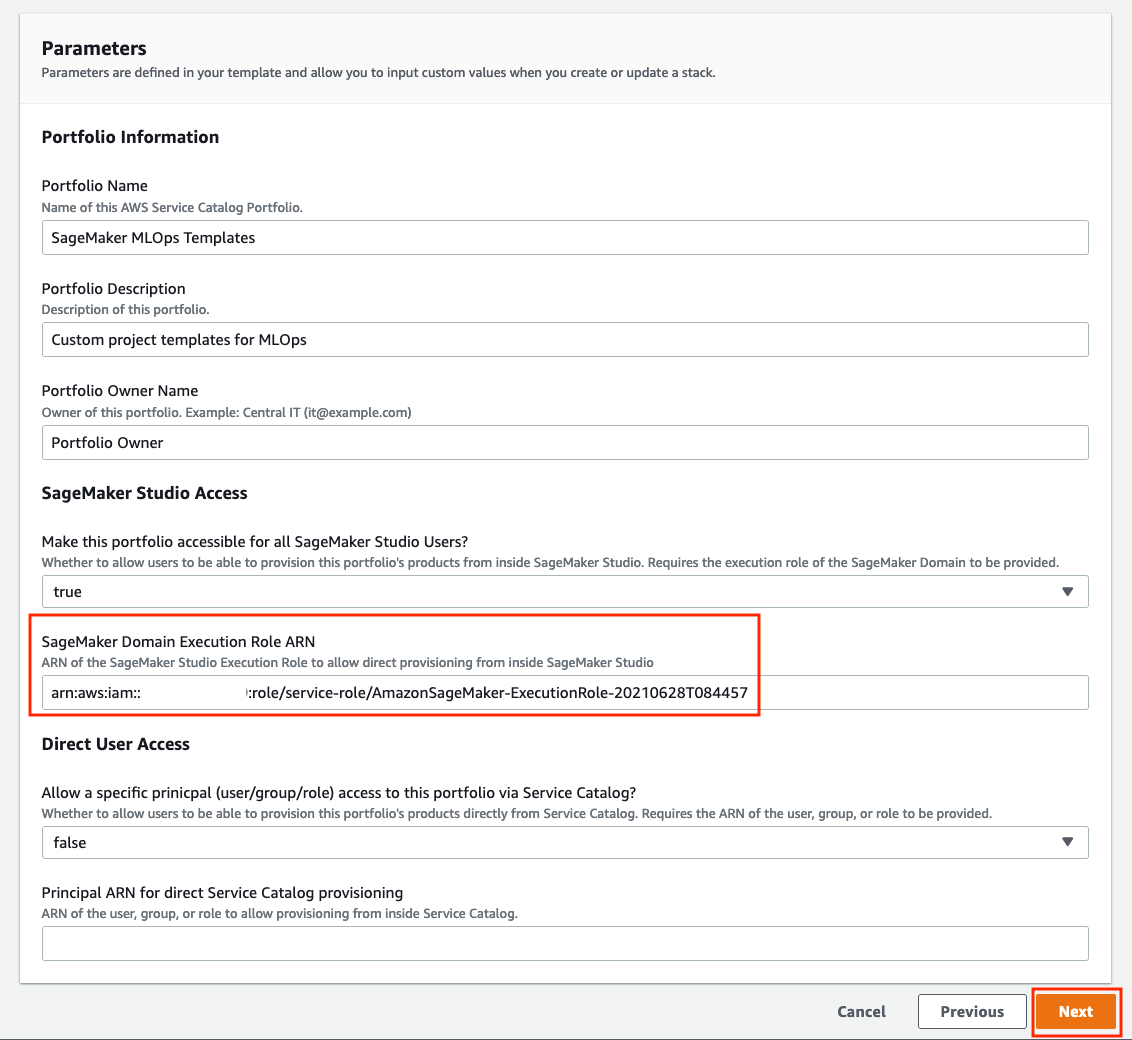
On the Parameters screen, under Stack Name, enter a unique name for this CloudFormation stack.
-
Next, you will need to enter either your SageMaker Domain Execution Role, or the Role that your Studio users are assuming if you have defined a custom one. You can find your SageMaker Domain Execution Role ARN in the Studio Dashboard: https://console.aws.amazon.com/sagemaker/home?#/studio under the Domain section, then Execution Role. Paste that value into the SageMaker Domain Execution Role ARN parameter.
-
Choose Next.
-
On the Configure stack options screen, no changes are necessary. Scroll to the bottom and choose Next.
-
On the Review screen, scroll to the bottom and choose Create Stack.
-
After a few seconds, the stack should move to a CREATE_COMPLETE stage, and will be ready to add products into.
-
In the project you wish to use in SageMaker studio, download the product CloudFormation template to your machine. There is a unique one in each project, and the filename ends in "-product.yaml"
-
Similar to the way you created the portfolio, open the CloudFormation console at https://console.aws.amazon.com/cloudformation, upload that template, fill in the necessary parameters, and create the stack. Each project may have different parameters, which will be outlined in their README.md files.
Every template will require your Service Catalog portfolio id, which can be found in the Outputs tab of your deployed portfolio stack or in the Service Catalog portfolio list: https://console.aws.amazon.com/servicecatalog/home?#/portfolios
-
Once your product stack is in a CREATE_COMPLETE stage, you can then go to SageMaker Studio for deployment.
-
Open SageMaker Studio and sign in to your user profile.
-
Choose the SageMaker components and registries icon on the left, and choose the Create project button.
-
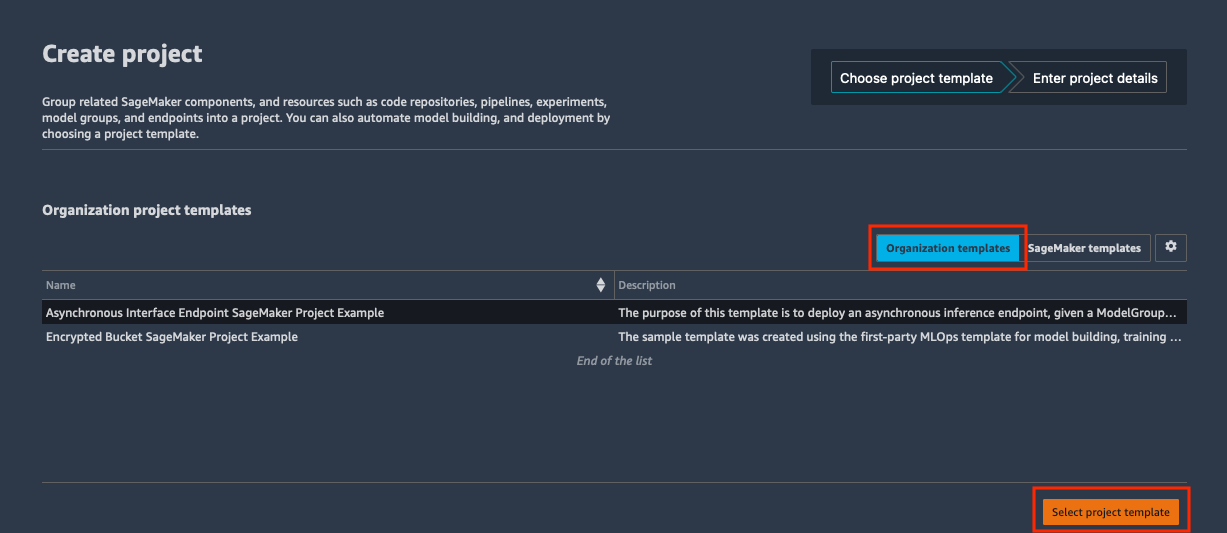
The default view displays SageMaker templates. Switch to the Organization templates tab to see custom project templates.
-
The template you created will be displayed in the template list. (If you do not see it yet, make sure the correct execution role is added to the product and the sagemaker:studio-visibility tag with a value of true is added to the Service Catalog product).
-
Choose the template and click Select project template.
-
Enter a name and optional description for the project. If additional parameters or tags are required, enter the appropriate values, and choose Create project.
You have now successfully created an MLOps template and a SageMaker Project using the custom template. Refer to encrypted-buckets for a sample implementation.


