- U-BOOT
- BACKUP
- BUILDING FIRMWARE
- SERIAL CONSOLE
- HTTP TROUBLESHOOT
- BLUETOOTH
- FIRMWARE UPDATES
- NIPCA
- PARTITIONS
- RTSP
- QA
- RESTORING ORIGINAL
- MISC
- CREDITS
These are notes describing how I changed my D-Link DCS-8000LH from a cloud camera to a locally managed IP camera, streaming H.264 MPEG-TS over HTTP and HTTPS. Some of the tools and ideas might work for other cameras too, given some model specific adaptation.
Complete defogging requires modifying one of the file systems in the camera. This implies a slight risk of ending up with a brick. You have now been warned...
This is tested and developed on firmware versions v2.01.03 and v2.02.02 only. The final complete procedure has only been tested with v2.02.02. It should work fine with v2.01.03 and other previous versions, in theory, but could fail like anything untested.
The v2.02.02 update is available from https://mydlinkmpfw.auto.mydlink.com/DCS-8000LH/DCS-8000LH_Ax_v2.02.02_3014.bin at the time of writing. But I assume this link will stop working soon, so you can also find it here at this repo.
- v0.01 (20190515) - initial published version
- v0.02 (20190515) - added RTSP support and information
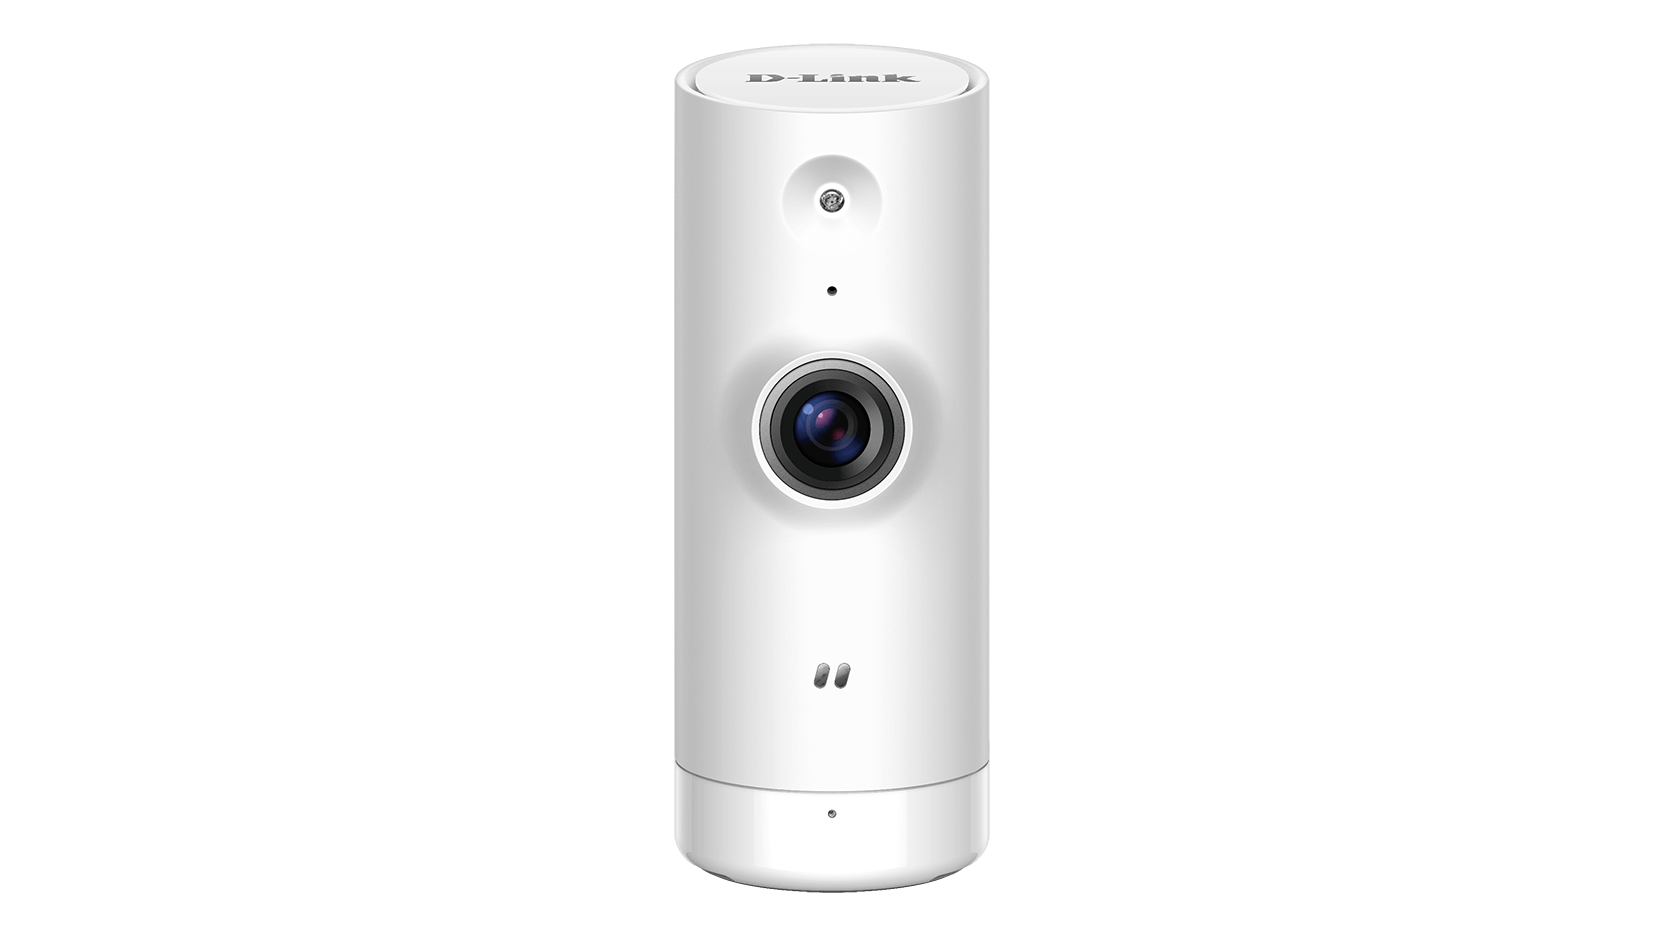
My D-Link DCS-8000LH came with firmware version 2.01.03 from factory. This firmware is locked to the mydlink app/cloud service. It does not provide a local NIPCA compatible HTTP API or similar, and it does not stream video over HTTP, HTTPS or RTSP.
Additionally, there is no way to downgrade the firmware. In fact, there is no documented way to install any firmware image at all, except trusting the "mydlink" cloud service to do it for you.
Update 2023: And now, D-Link has discontinued their Camera Cloud service, basically making all the DCS-8000LH around the world, bricks.
We got the solution to this.
- Configuration of network and admin password via Bluetooth LE, without registering with D-Link or using the mydlink app at all
- Streaming MPEG-TS directly from the camera over HTTP and HTTPS
- Direct RTSP streaming
- NIPCA API configuration over HTTP and HTTPS, supporting settings like LED, nightmode, etc
- Firmware upgrades and downgrades via HTTP
- Telnet server with a root account (admin/PIN Code)
- Easy access to serial console, using the same root account
- Running arbitrary commands on the camera using Bluetooth
- Linux PC with Bluetooth (Respberry Pi 3/4 is a great choice!)
- python3 with @IanHarvey's
bluepy
library (
pip3 install bluepybut this is Linux only!) - 2.4Ghz WiFi network with WPA2-PSK and a known password
mksquashfsfrom thesquashfs-toolspackage- A tftp server or web server accepting file uploads (if you're going for backups)
Most recent Linux distros will probably do. The bluepy library can be installed using pip if it is not available as a distro package. Other types of WiFi networks might work, but has not been tested with the provided tools. The squashfs-tools are only necessary if you want to rebuild the "mydlink" alternative file system. You can even run the tools without installing Linux, by using a Linux "Live" CD/DVD/USB stick.
If you're on a Mac, you can still do the process (including using mksquashfs by installing it with brew) but you won't be able to use the bluetooth script. Everything will need be done through the serial console manually. Including running the commands that would be run by the bluetooth script. You can check more info about this by looking at the serial console page.
The "mydlink" app uses Bluetooth LE for camera setup, authenticated by the camera pincode. This repo includes an alternative python script with a few extra goodies, but needing a better name: dcs8000lh-configure.py
The script does not support scanning for the simple reason that this
would require root access for no real gain. You have to provide the
PIN Code from the camera label anyway.
Reading the MAC ID as well is simple enough

The PIN Code and MAC is also printed on the code card that
came with the camera:
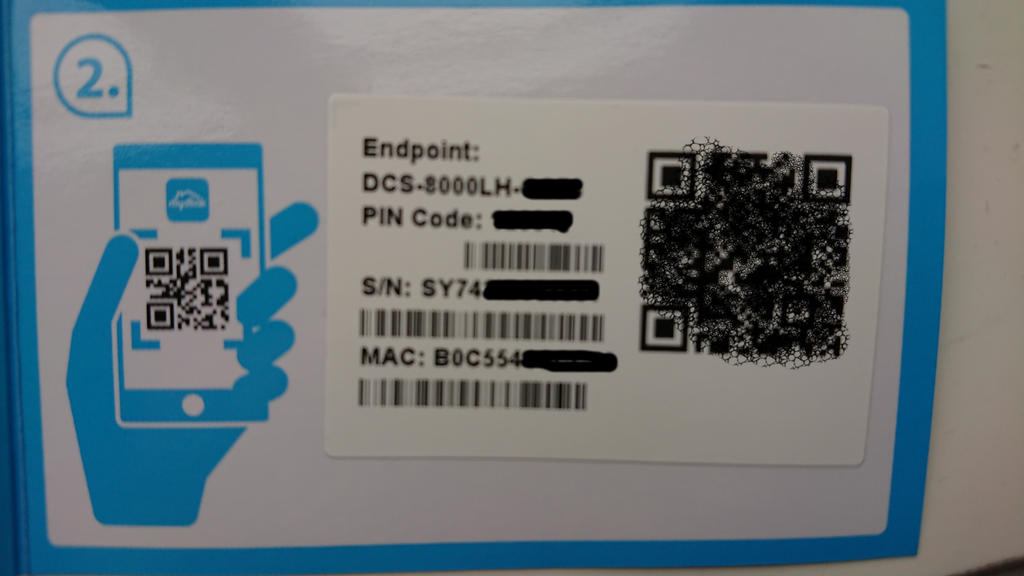
Note that the command line address paramenter must be formatted as 01:23:45:67:89:AB instead of the 0123456789AB format printed on the label.
Current script help text at the time of writing shows what the script can do:
$ ./dcs8000lh-configure.py -h
usage: dcs8000lh-configure.py [-h] [--essid ESSID] [--wifipw WIFIPW]
                              [--survey] [--netconf] [--sysinfo]
                              [--command COMMAND] [--telnetd] [--lighttpd]
                              [--rtsp] [--unsignedfw] [--attrs] [-V]
                              address pincode

IPCam Bluetooth configuration tool.

positional arguments:
  address            IPCam Bluetooth MAC address (01:23:45:67:89:AB)
  pincode            IPCam PIN Code (6 digits)

optional arguments:
  -h, --help         show this help message and exit
  --essid ESSID      Connect to this WiFi network
  --wifipw WIFIPW    Password for ESSID
  --survey           List WiFi networks seen by the IPCam
  --netconf          Print current network configuration
  --sysinfo          Dump system configuration
  --command COMMAND  Run command on IPCam
  --telnetd          Start telnet server on IPCam
  --lighttpd         Start web server on IPCam
  --rtsp             Enable access to RTSP server on IPCam
  --unsignedfw       Allow unsigned firmware
  --attrs            Dump IPCam GATT characteristics
  -V, --version      show program's version number and exit
- To avoid problems typing your MAC and pin every command, use the following commands in your console, to have them as temporary environment variables (you will need to re-do this if you close your console!):
export CAMERA_MAC=YO:UR:MA:CH:ER:Eexport CAMERA_PIN=YOURPIN- Start by making sure the camera can see our WiFi network. This also verifies that we can connect and authenticate against the Bluetooth LE IPCam service, without making any changes to any camera settings:
./dcs8000lh-configure.py $CAMERA_MAC $CAMERA_PIN --surveyExample output:
Connecting to B0:C5:54:AA:BB:CC...
Verifying IPCam service
Connected to 'DCS-8000LH-BBCC'
DCS-8000LH-BBCC is scanning for WiFi networks...
{'I': 'AirLink126FD4', 'M': '0', 'C': '11', 'S': '4', 'E': '2', 'P': '47'}
{'I': 'Antiboks', 'M': '0', 'C': '11', 'S': '4', 'E': '2', 'P': '73'}
{'I': 'ASV17', 'M': '0', 'C': '11', 'S': '4', 'E': '2', 'P': '47'}
{'I': 'ASV17-dlink', 'M': '0', 'C': '6', 'S': '4', 'E': '2', 'P': '57'}
{'I': 'DIRECT-33-HP%20ENVY%205000%20series', 'M': '0', 'C': '1', 'S': '4', 'E': '2', 'P': '46'}
{'I': 'fjorde123', 'M': '0', 'C': '1', 'S': '4', 'E': '2', 'P': '55'}
{'I': 'JOJ', 'M': '0', 'C': '11', 'S': '4', 'E': '2', 'P': '48'}
{'I': 'Kjellerbod', 'M': '0', 'C': '11', 'S': '4', 'E': '2', 'P': '75'}
{'I': 'Landskap_24', 'M': '0', 'C': '11', 'S': '4', 'E': '2', 'P': '46'}
{'I': 'mgmt', 'M': '0', 'C': '1', 'S': '4', 'E': '2', 'P': '72'}
{'I': 'Rindedal', 'M': '0', 'C': '11', 'S': '4', 'E': '2', 'P': '68'}
{'I': 'risikovirus', 'M': '0', 'C': '1', 'S': '4', 'E': '2', 'P': '45'}
{'I': 'risikovirus%20WIFI', 'M': '0', 'C': '11', 'S': '4', 'E': '2', 'P': '45'}
{'I': 'Stavik2014', 'M': '0', 'C': '6', 'S': '4', 'E': '2', 'P': '47'}
{'I': 'TomterNett1', 'M': '0', 'C': '6', 'S': '4', 'E': '2', 'P': '44'}
{'I': 'VIF', 'M': '0', 'C': '11', 'S': '4', 'E': '2', 'P': '47'}
Done.
- We're going to use the 'Kjellerbod' network, so that looks good. Select it and give the associated WiFi password to the camera:
./dcs8000lh-configure.py $CAMERA_MAC $CAMERA_PIN --essid Kjellerbod --wifipw the_password_hereExample output:
Connecting to B0:C5:54:AA:BB:CC...
Verifying IPCam service
Connected to 'DCS-8000LH-BBCC'
DCS-8000LH-BBCC is scanning for WiFi networks...
Will configure: M=0;I=Kjellerbod;S=4;E=2;K=the_password_here
Done.
- Verify that the camera connected to the Wifi network and got an address. If not, go back and try again, making sure you are using the correct WiFi password:
./dcs8000lh-configure.py $CAMERA_MAC $CAMERA_PIN --netconfExample output:
Connecting to B0:C5:54:AA:BB:CC...
Verifying IPCam service
Connected to 'DCS-8000LH-BBCC'
wifi link is Up
wifi config: {'M': '0', 'I': 'Kjellerbod', 'S': '4', 'E': '2'}
ip config: {'I': '192.168.2.37', 'N': '255.255.255.0', 'G': '192.168.2.1', 'D': '148.122.16.253'}
Done.
WARNING: You must make a backup of your device at this point if you haven't done so already. See the Backup section. I only skipped it in this example because I already had a complete backup of my camera.
- Disable firmware signature verification. Only firmwares signed by D-Link are accepted by default. This feature can be disabled by changing a variable in the "db" NVRAM partition:
./dcs8000lh-configure.py $CAMERA_MAC $CAMERA_PIN --unsignedfw Example output:
Connecting to B0:C5:54:AA:BB:CC...
Verifying IPCam service
Connected to 'DCS-8000LH-BBCC'
Attempting to run 'tdb set SecureFW _TrustLevel_byte=0' on DCS-8000LH-BBCC by abusing the 'set admin password' request
Done.
- We need HTTP NIPCA API for the remaining tasks, so temporarily start lighttpd on the camera:
./dcs8000lh-configure.py $CAMERA_MAC $CAMERA_PIN --lighttpdExample output:
Connecting to B0:C5:54:AA:BB:CC...
Verifying IPCam service
Connected to 'DCS-8000LH-BBCC'
Attempting to run '[ $(tdb get HTTPServer Enable_byte) -eq 1 ] || tdb set HTTPServer Enable_byte=1' on DCS-8000LH-BBCC by abusing the 'set admin password' request
Attempting to run '/etc/rc.d/init.d/extra_lighttpd.sh start' on DCS-8000LH-BBCC by abusing the 'set admin password' request
Done.
Note that this implicitly changes a couple of settings which are stored in the "db" NVRAM partition, and therefore will persist until the next factory reset:
- extra_lighttpd.sh will exit without doing anything unless HTTPServer Enable is set
- the admin password is set both because we're abusing that BLE request, and because we need it for the HTTP API access. The script only supports setting the password to the PIN Code.
This password restriction is because I'm lazy - there is nothing in the camera or protocol preventing the password from being set to something else. But the script would then need the new password as an additional input parameter for most commands
- The final step is the dangerous one. It replaces the file system on the userdata partition with our home cooked one. The D-Link firmware uses this partition exclusively for the "mydlink" cloud tools, which we don't need. The rest of the system is not touched by our firmware update. The camera will therefore run exactly the same kernel and rootfs as before the update, whatever version they were. I.e., the firmware version does not change - only the "mydlink" version.
NOTE: You need to build a fw.tar firmware update image first.
curl --http1.0 -u admin:$CAMERA_PIN --form upload=@fw.tar http://192.168.2.37/config/firmwareupgrade.cgiIt should return if successful:
upgrade=ok
See the section on error handling if the upgrade request returned anything else.
The camera will reboot automatically at this point, assuming the update was successful. From now both with telnetd and lighttpd running, and with external access to the RTSP server. All services will use the same admin:PIN Code account for authentication.
So we now have access to direct streaming over HTTP, HTTPS and RTSP without ever having been in contact with the mydlink service!
Which was the whole point of all this... We can now stream directly from the camera using for example:
vlc https://192.168.2.37/video/mpegts.cgi
vlc https://192.168.2.37/video/flv.cgi
Authenticate using the admin user with PIN Code as password
AFAICS, this camera does not support MJPEG encoding. But you can always use ffmpeg to transcode the H.264 anyway.
Check credits here.