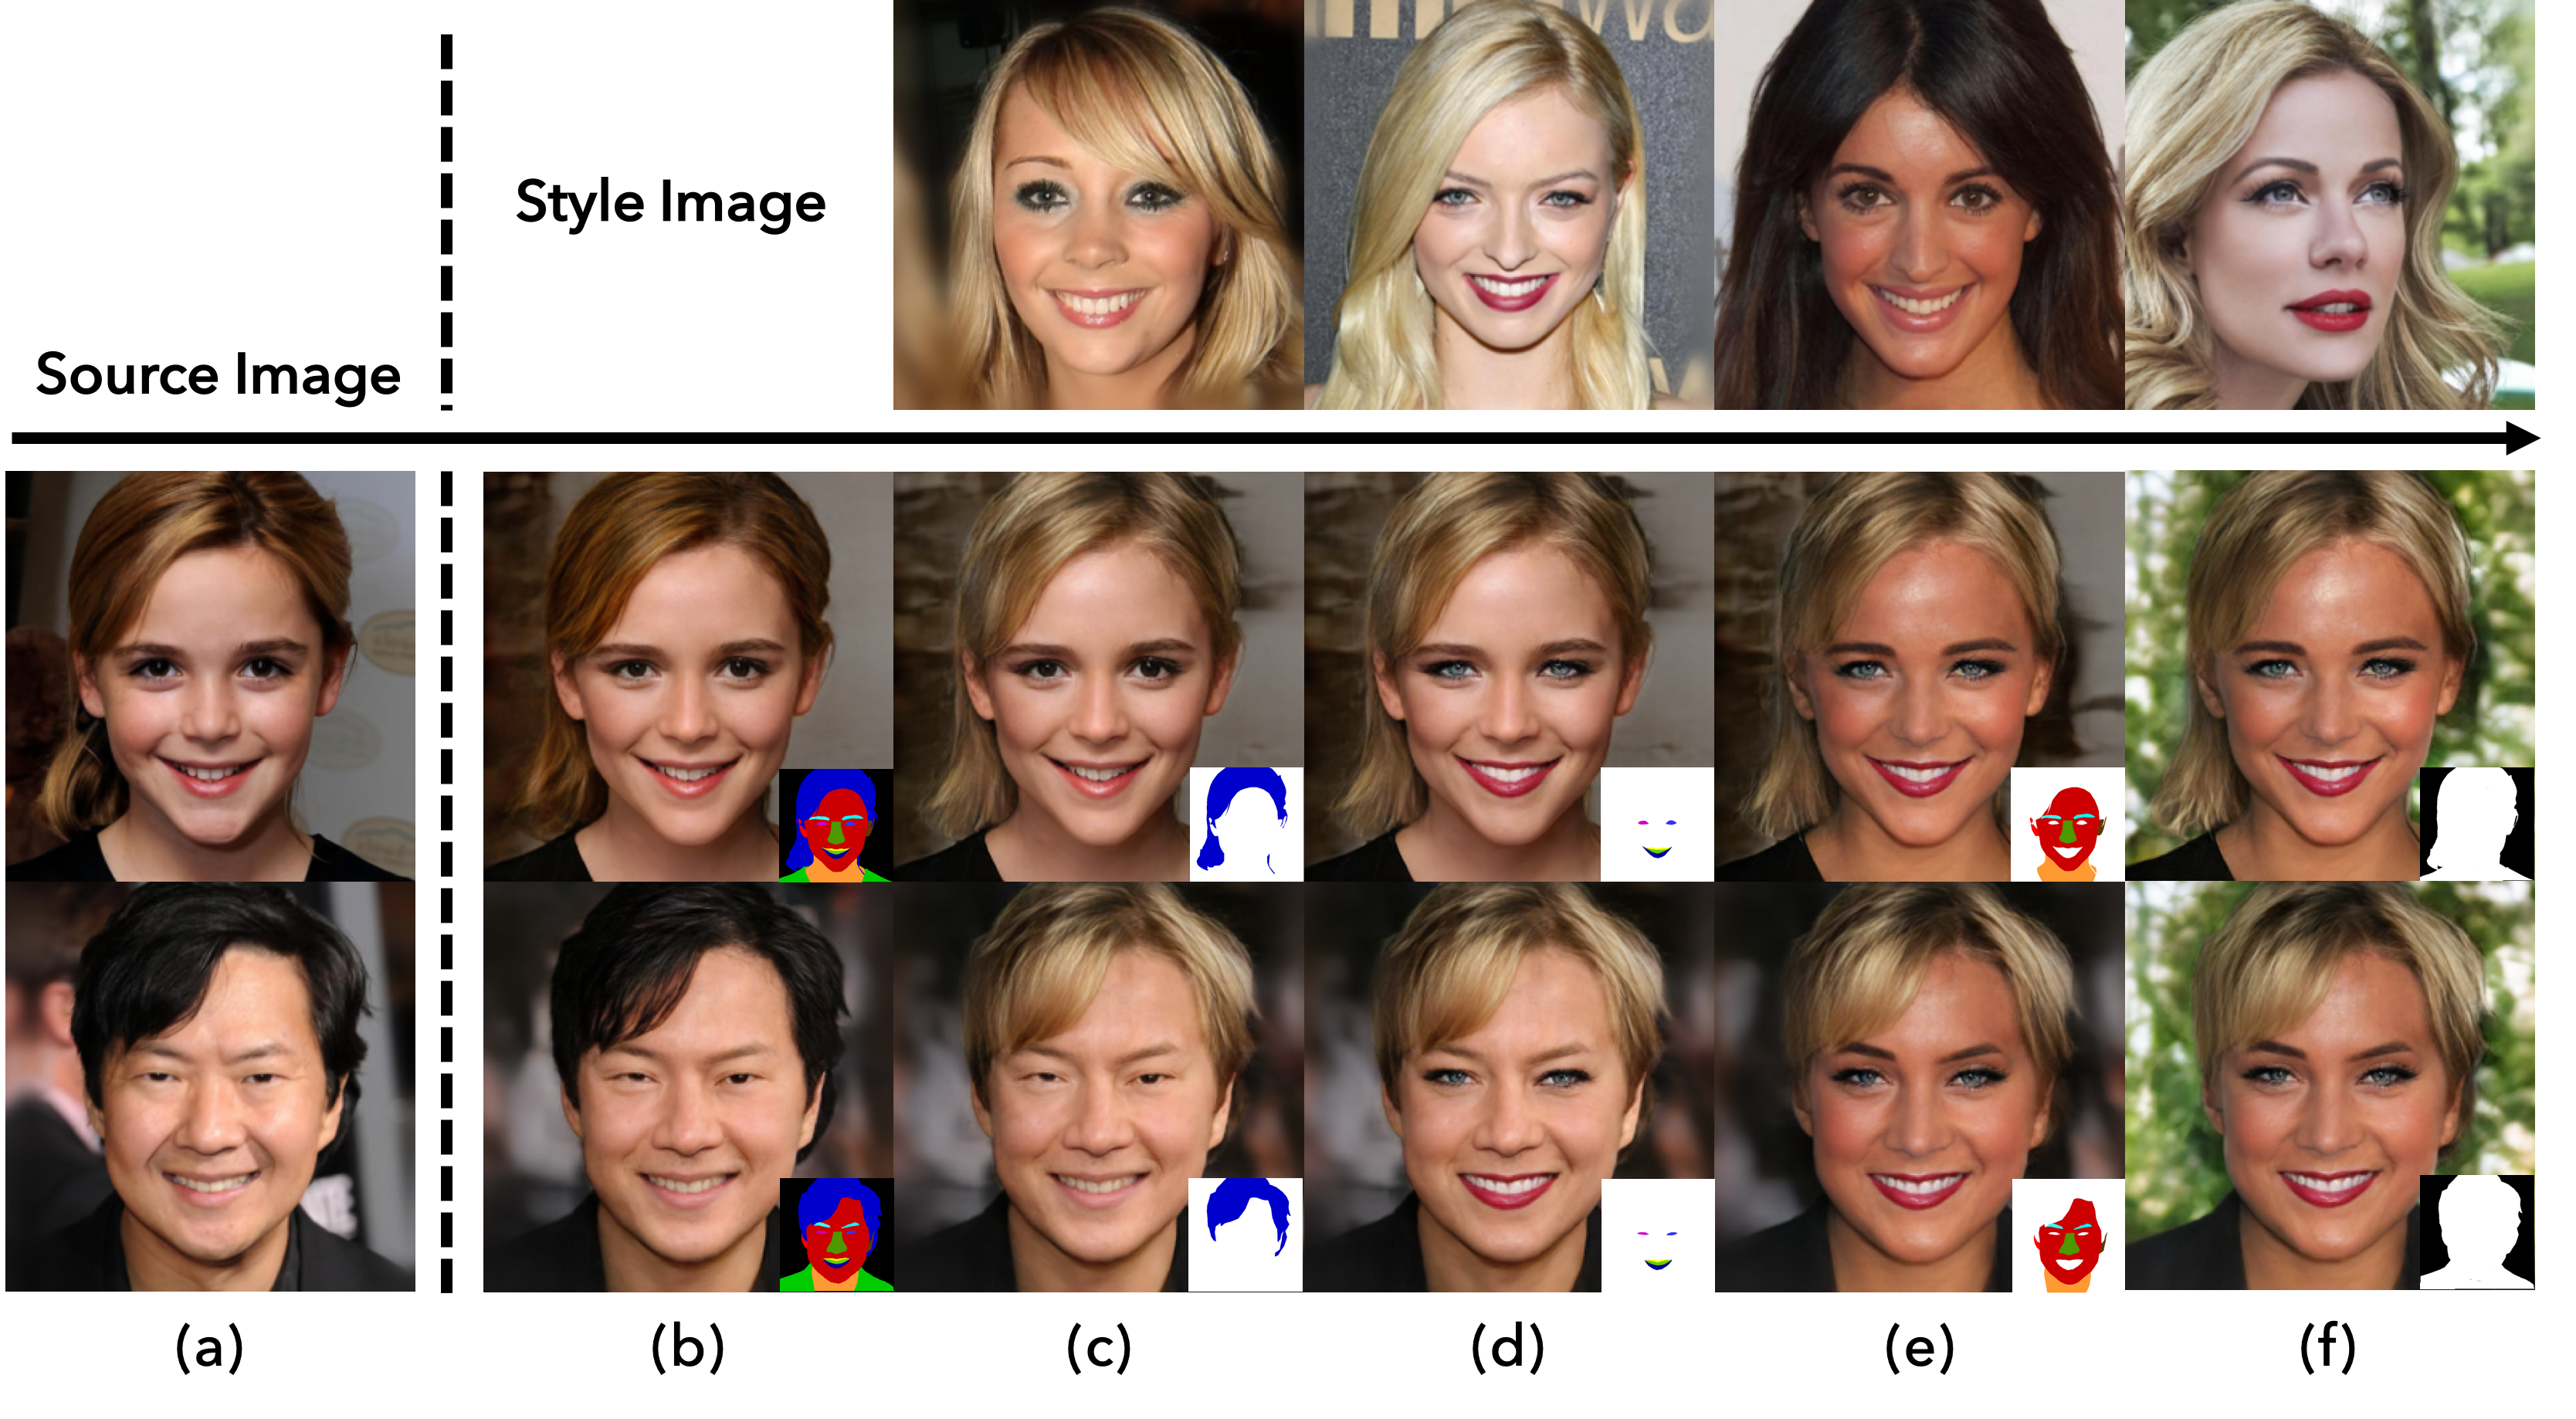
 Figure: Face image editing controlled via style images and segmentation masks with SEAN
We propose semantic region-adaptive normalization (SEAN), a simple but effective building block for Generative Adversarial Networks conditioned on segmentation masks that describe the semantic regions in the desired output image. Using SEAN normalization, we can build a network architecture that can control the style of each semantic region individually, e.g., we can specify one style reference image per region. SEAN is better suited to encode, transfer, and synthesize style than the best previous method in terms of reconstruction quality, variability, and visual quality. We evaluate SEAN on multiple datasets and report better quantitative metrics (e.g. FID, PSNR) than the current state of the art. SEAN also pushes the frontier of interactive image editing. We can interactively edit images by changing segmentation masks or the style for any given region. We can also interpolate styles from two reference images per region.
SEAN: Image Synthesis with Semantic Region-Adaptive Normalization
Peihao Zhu, Rameen Abdal, Yipeng Qin, Peter Wonka
Computer Vision and Pattern Recognition CVPR 2020, Oral
[Paper] [Project Page] [Demo]
Clone this repo.
git clone https://github.com/ZPdesu/SEAN.git
cd SEAN/
This code requires PyTorch, python 3+ and Pyqt5. Please install dependencies by
pip install -r requirements.txtThis model requires a lot of memory and time to train. To speed up the training, we recommend using 4 V100 GPUs
This code uses CelebA-HQ and CelebAMask-HQ dataset. The prepared dataset can be directly downloaded here. After unzipping, put the entire CelebA-HQ folder in the datasets folder. The complete directory should look like ./datasets/CelebA-HQ/train/ and ./datasets/CelebA-HQ/test/.
Once the dataset is prepared, the reconstruction results be got using pretrained models.
-
Create
./checkpoints/in the main folder and download the tar of the pretrained models from the Google Drive Folder. Save the tar in./checkpoints/, then runcd checkpoints tar CelebA-HQ_pretrained.tar.gz cd ../ -
Generate the reconstruction results using the pretrained model.
python test.py --name CelebA-HQ_pretrained --load_size 256 --crop_size 256 --dataset_mode custom --label_dir datasets/CelebA-HQ/test/labels --image_dir datasets/CelebA-HQ/test/images --label_nc 19 --no_instance --gpu_ids 0
-
The reconstruction images are saved at
./results/CelebA-HQ_pretrained/and the corresponding style codes are stored at./styles_test/style_codes/. -
Pre-calculate the mean style codes for the UI mode. The mean style codes can be found at
./styles_test/mean_style_code/.python calculate_mean_style_code.py
To train the new model, you need to specify the option --dataset_mode custom, along with --label_dir [path_to_labels] --image_dir [path_to_images]. You also need to specify options such as --label_nc for the number of label classes in the dataset, and --no_instance to denote the dataset doesn't have instance maps.
python train.py --name [experiment_name] --load_size 256 --crop_size 256 --dataset_mode custom --label_dir datasets/CelebA-HQ/train/labels --image_dir datasets/CelebA-HQ/train/images --label_nc 19 --no_instance --batchSize 32 --gpu_ids 0,1,2,3If you only have single GPU with small memory, please use --batchSize 2 --gpu_ids 0.
We provide a convenient UI for the users to do some extension works. To run the UI mode, you need to:
-
run the step Generating Images Using Pretrained Models to save the style codes of the test images and the mean style codes. Or you can directly download the style codes from here. (Note: if you directly use the downloaded style codes, you have to use the pretrained model.
-
Put the visualization images of the labels used for generating in
./imgs/colormaps/and the style images in./imgs/style_imgs_test/. Some example images are provided in these 2 folders. Note: the visualization image and the style image should be picked from./datasets/CelebAMask-HQ/test/vis/and./datasets/CelebAMask-HQ/test/labels/, because only the style codes of the test images are saved in./styles_test/style_codes/. If you want to use your own images, please prepare the images, labels and visualization of the labels in./datasets/CelebAMask-HQ/test/with the same format, and calculate the corresponding style codes. -
Run the UI mode
python run_UI.py --name CelebA-HQ_pretrained --load_size 256 --crop_size 256 --dataset_mode custom --label_dir datasets/CelebA-HQ/test/labels --image_dir datasets/CelebA-HQ/test/images --label_nc 19 --no_instance --gpu_ids 0
-
How to use the UI. Please check the detail usage of the UI from our Video.
Will be released soon.
All rights reserved. Licensed under the CC BY-NC-SA 4.0 (Attribution-NonCommercial-ShareAlike 4.0 International) The code is released for academic research use only.
If you use this code for your research, please cite our papers.
@misc{zhu2019sean,
    title={SEAN: Image Synthesis with Semantic Region-Adaptive Normalization},
    author={Peihao Zhu and Rameen Abdal and Yipeng Qin and Peter Wonka},
    year={2019},
    eprint={1911.12861},
    archivePrefix={arXiv},
    primaryClass={cs.CV}
}
We thank Wamiq Reyaz Para for helpful comments. This code borrows heavily from SPADE. We thank Taesung Park for sharing his codes. This work was supported by the KAUST Office of Sponsored Research (OSR) under AwardNo. OSR-CRG2018-3730.


