
IDURAR ERP CRM | Simple To Use
www.idurarapp.com/open-source-erp-crm/
IDURAR is Open "Fair-Code" Source ERP / CRM (Invoice / Inventory / Accounting / HR) Based on Advanced Mern Stack (Node.js / Express.js / MongoDb / React.js ) with Ant Design (AntD) and Redux
Live App Demo : https://idurarapp.com/demo/
🚀 Give a Star ⭐️ & Fork to this project ... Happy coding! 🤩

IDURAR is Open "Fair-Code" Source ERP / CRM (Invoice / Inventory / Accounting / HR) Based on Mern Stack (Node.js / Express.js / MongoDb / React.js ) with Ant Design (AntD) and Redux
Live App Demo : https://idurarapp.com/demo/
username : admin@demo.com password : admin123
git clone https://github.com/idurar/idurar-erp-crm.gitcd idurar-erp-crm-
Create your own MongoDB account by visiting the MongoDB website and signing up for a new account.
-
Create a new database or cluster by following the instructions provided in the MongoDB documentation. Remember to note down the "Connect to your application URI" for the database, as you will need it later. Also, make sure to change
<password>with your own password -
add your current IP address to the MongoDB database's IP whitelist to allow connections (this is needed whenever your ip changes)
-
Check a file named .env in the /backend directory.
This file will store environment variables for the project to run.
In the .env file, find the line that reads:
DATABASE="your-mongodb-uri"
Replace "your-mongodb-uri" with the actual URI of your MongoDB database.
In your terminal, navigate to the /backend directory of the project and run the following command to install the backend dependencies:
npm installThis command will install all the required packages specified in the package.json file.
While still in the /backend directory of the project, execute the following command to run the setup script:
node setup/setup.jsThis setup script may perform necessary database migrations or any other initialization tasks required for the project.
In the same terminal, run the following command to start the backend server:
npm run devThis command will start the backend server, and it will listen for incoming requests.
Open a new terminal window , and run the following command to install the frontend dependencies:
cd frontendnpm installThis command will navigate to the frontend directory within the project and install all the required packages for the frontend.
After installing the frontend dependencies, run the following command in the same terminal to start the frontend server:
npm run startThis command will start the frontend server, and you'll be able to access the website on localhost:3000 in your web browser.
❗ If you encounter an OpenSSL error while running the frontend server, follow these additional steps:
Reason behind error: This is caused by the node.js V17 compatible issues with OpenSSL, see this and this issue on GitHub.
Try one of these and error will be solved
-
Downgrade to Node.js v16.
-
Enable legacy OpenSSL provider
Here is how you can enable legacy OpenSSL provider
- On Unix-like (Linux, macOS, Git bash, etc.)
export NODE_OPTIONS=--openssl-legacy-provider- On Windows command prompt:
set NODE_OPTIONS=--openssl-legacy-provider- On PowerShell:
$env:NODE_OPTIONS = "--openssl-legacy-provider"Here is reference about enabling legacy OpenSSL provider
After trying above solutions, run below command
npm run startIf you still facing issue, then follow this stackoverflow thread. It has so many different types of opinions. You definitely have solution after going through the thread.
Once the website is up and running, you can log in using the following credentials:
username : admin@demo.com - password : admin123
Now you should be all set to run the project locally on your machine and explore its features.
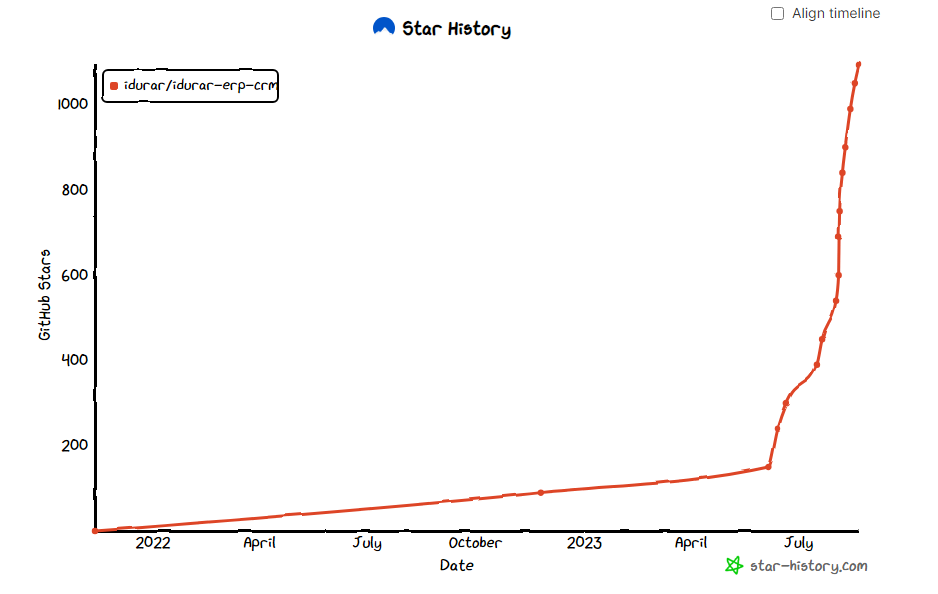
Here you can see the proxy of our growth on the platform and that we're only getting started.
But if you'd like to check it out more news and website you can always check it out on: https://www.idurarapp.com/.
IDURAR is fair-code distributed under the Developer Trial Use Licensee and the IDURAR Enterprise License.
Proprietary licenses are available for enterprise customers. Get in touch
Dont forget to give a ⭐️ to this project ... Happy coding!