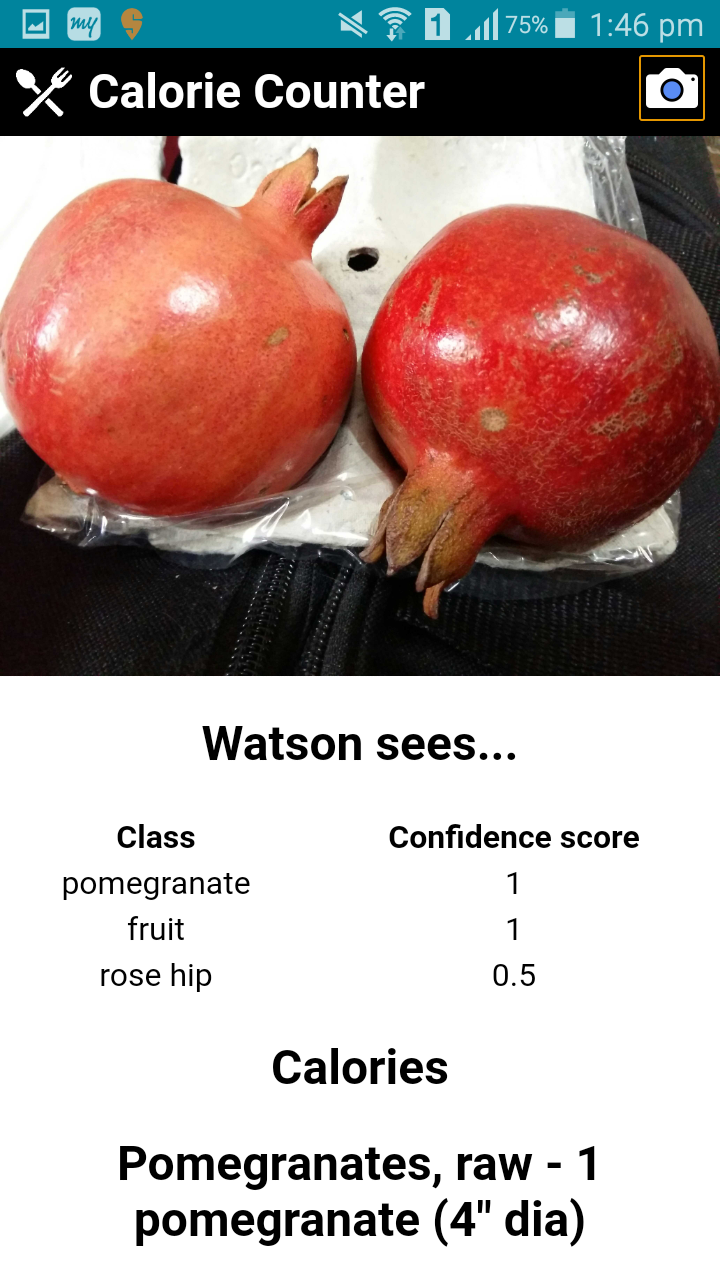
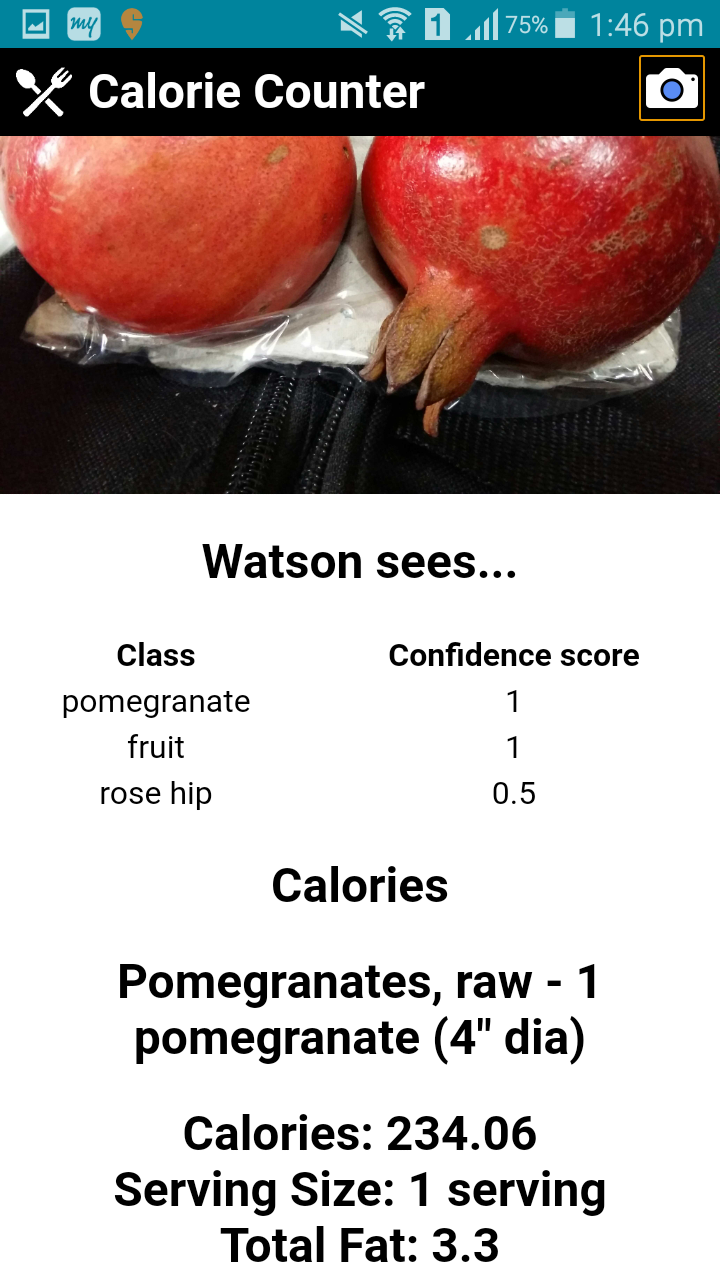
In this Code Pattern, we will create a calorie counter mobile app using Apache Cordova, Node.js and Watson Visual Recognition. This mobile app extracts nutritional information from captured images of food items.
Currently this mobile app only runs on Android, but can be easily ported to iOS.
- User interacts with the mobile app and captures an image.
- The image is passed to the server application which uses Watson Visual Recognition Service to analyze the images and Nutritionix API to provide nutritional information.
- Data is returned to the mobile app for display.
- Watson Visual Recognition: Visual Recognition understands the contents of images - visual concepts tag the image, find human faces, approximate age and gender, and find similar images in a collection.
- Mobile: Systems of engagement are increasingly using mobile technology as the platform for delivery.
- Nutritionix API: The largest verified database of nutrition information.
- Node.js: An asynchronous event driven JavaScript runtime, designed to build scalable applications.
NOTE: The Watson Visual Recognition service required for this patten only exists in the US-South/Dallas region (as of 11/30/18). You will only be able to deploy and/or use this code there.
This Code Pattern contains several pieces. The app server communicates with the Watson Visual Recognition service. The mobile application is built locally and run on the Android phone.
-
Press the above
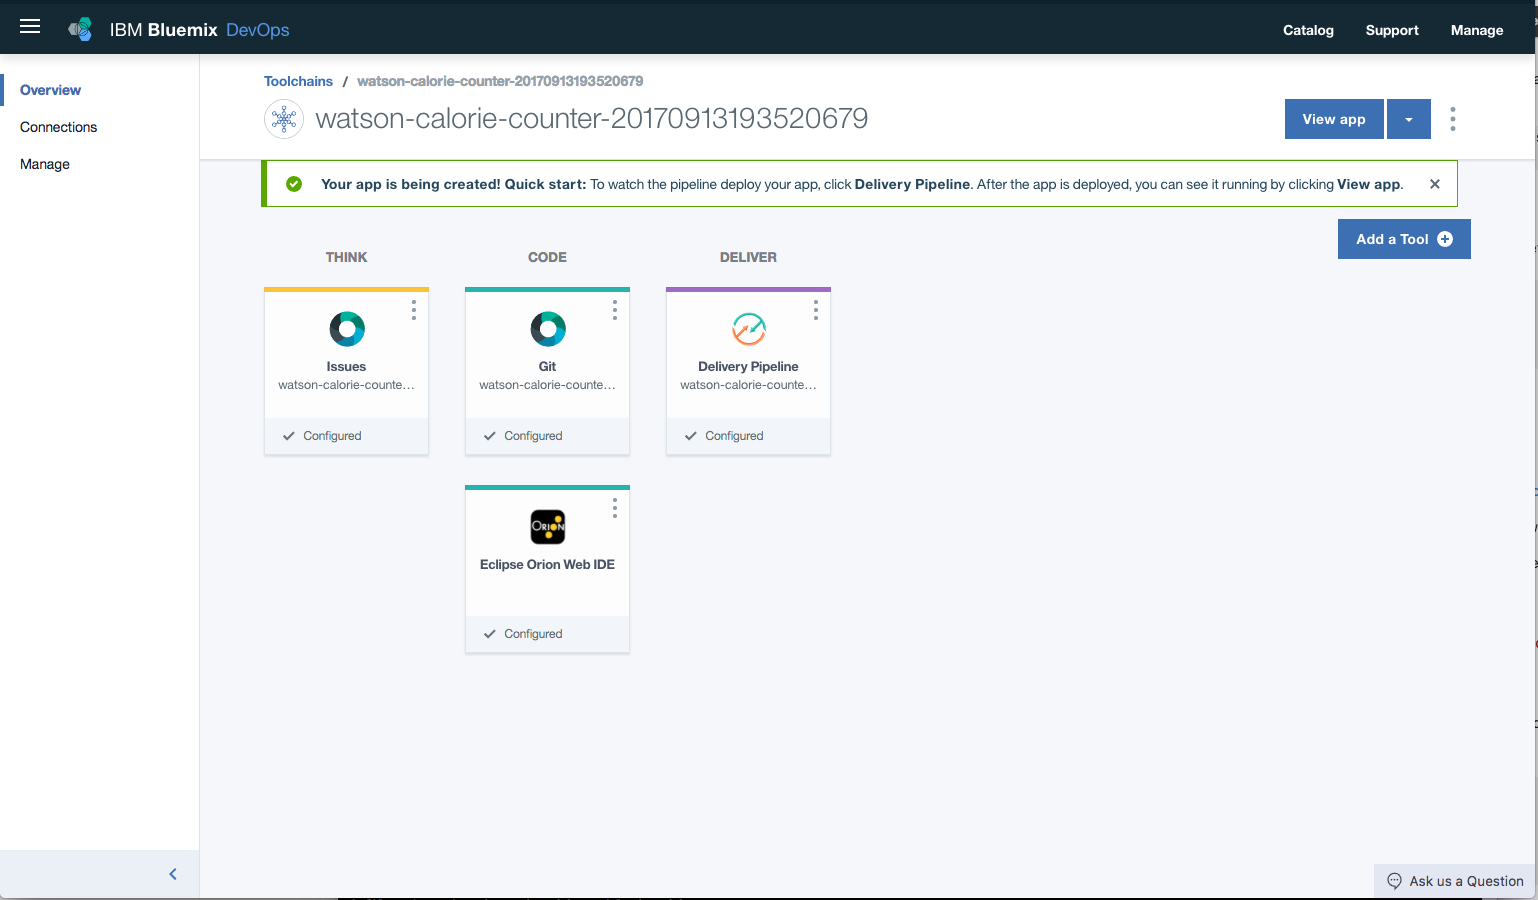
Deploy to IBM Cloudbutton and then click onDeploy. -
In
Toolchains, click onDelivery Pipelineto watch while the app is deployed.
- To see the app and services created and configured for this Code Pattern, use the IBM Cloud dashboard. The app is named
watson-calorie-counterwith a unique suffix. The following services are created and easily identified by thewcc-prefix:- wcc-visual-recognition
Note: Make note of the
watson-calorie-counterURL route - it will be required for later use in the mobile app.
To complete the installation, perform the following steps:
-
Perform either 4a or 4b.
Clone the watson-calorie-counter repo locally. In a terminal, run:
$ git clone https://github.com/IBM/watson-calorie-counter.git
$ cd watson-calorie-counter
Nutritionix data is used to gather nutritional information of an analyzed image. Instructions for obtaining a key can be found at Nutritionix.com.
Note: Make note of the API ID and key - they will be required for later use in the mobile app.
Edit mobile/www/config.json and update the setting with the values retrieved previously.
"BLUEMIX_SERVER_URL": "<add-bluemix-server-url>",
"NUTRITIONIX_APP_ID": "<add-nutritionix-app-id>",
"NUTRITIONIX_APP_KEY": "<add-nutritionix-app-key>"Building the mobile application requires a few dependencies that you can either manually install yourself, or you can use Docker by skipping to Run mobile application build in Docker container
For this Code Pattern, you'll need to install the prerequisites, by following their respective documentation:
- Java Development Kit (JDK)
- Node.js and npm (
npmversion 4.5.0 or higher) - Android Studio, which includes Android tools and gives you access to Android SDKs
- Cordova
- Gradle
You'll need to install the specific SDK appropriate for your mobile device. From Android Studio, download and install the desired API Level for the SDK. We are using Android API Level 23 as this is widely supported on most phones as of January, 2018. To do this:
- Launch
Android Studioand accept all defaults. - Click on the
SDK Managericon in the toolbar. - Navigate to
Appearance & Behavior->System Settings->Android SDK - Select Android API level of your choice (Recommended Android 6.0 (Marshmallow) (API Level 23) and above).
- Click apply to download and install.
Note: the
mobile/config.xmlis configured to build for Android API Level 23. Adjust this if you wish to build for a different API:
<preference name="android-targetSdkVersion" value="23" />
Once you have completed all of the required installs and setup, you should have the following environment variables set appropriately for your platform:
JAVA_HOMEANDROID_HOMEPATH
Note: For additonal help setting these environment variables, refer to the Troubleshooting section below.
If you are running Docker, build the mobile app in a Docker container.
Either download the image:
docker pull scottdangelo/cordova_build
Or build locally:
$ cd watson-calorie-counter/mobile
$ docker build -t cordova_build .
[truncated output]
Successfully built <image-id>
Now create the following alias for cordova and the commands for cordova will run inside the container. Use cordova_build in place of scottdangelo/cordova_build if you have built the container locally.
alias cordova='docker run -it --rm --privileged -v $PWD:/mobile scottdangelo:cordova_build cordova'
Note: the
mobile/config.xmlis configured to build for Android API Level 23. Adjust this if you wish to build for a different API:
<preference name="android-targetSdkVersion" value="23" />
Start by adding the Android platform as the target for your mobile app.
$ cd watson-calorie-counter/mobile
$ cordova platform add android
Ensure that everything has been installed correctly:
$ cordova requirements
Finally, install the plugins required by the application:
$ cordova plugin add cordova-plugin-camera
$ cordova plugin add cordova-plugin-file-transfer
In order to run the application on your Android device, you will need to be prepared to transfer the application's .apk file to your device (created in the next step). There are multiple ways for developers to achieve this.
Android Studio will handle the transfer for you if you tether your Android device to your computer, and enable both developer options and web debugging.
Note: Please refer to documentation on your specific phone to set these options.
For Mac users, Android File Transfer will facilitate simple file transfers between your computer and Android device.
$ cd watson-calorie-counter/mobile
$ cordova build android
An .apk file should appear at watson-calorie-counter/mobile/platforms/android/app/build/outputs/apk/debug/, which contains the Android application.
You can then either manually transfer the .apk to your device and run it yourself, or if your device is tethered (as described in the previous step), then you can run:
$ cordova run android
However, a Docker container does not have access to your host's USB devices, unless you explicitly allow them to be passed through. You can expose your device to the Docker container, and allow Cordova to do the transfer for you. To accomplish that, you'll need to know which USB device to pass through. Discover your USB devices on a Linux machine with lsusb.
For example, in this case, I know that my Android device is Bus 001, Device 002:
$ lsusb
Bus 002 Device 001: ID 1d6b:0003 Linux Foundation 3.0 root hub
Bus 001 Device 003: ID 046d:082d Logitech, Inc. HD Pro Webcam C920
Bus 001 Device 002: ID 18d1:4ee6 Google Inc.
Bus 001 Device 005: ID 046d:c085 Logitech, Inc.
Bus 001 Device 004: ID 045e:02e6 Microsoft Corp.
Bus 001 Device 001: ID 1d6b:0002 Linux Foundation 2.0 root hub
I can then pass my device through to the container using --device=/dev/bus/usb/<bus-number>/<device-number> and allow Cordova to access it. The new alias for the cordova command would then be:
alias cordova='docker run -it --rm --privileged --device=/dev/bus/usb/001/002 -v $PWD:/mobile scottdangelo:cordova_build cordova'
Then we can run:
cordova run android
At this point, the app named Calorie Counter should be on your mobile device. Use the camera icon to take a photo of a food item, and allow Watson to analyze the image and fetch the calorie results.
cordova run androiderror: Failure [INSTALL_FAILED_UPDATE_INCOMPATIBLE]
The
Calorie Counterapp is already installed on your phone and incompatible with the version you are now trying to run. Uninstall the current version and try again.
cordova run androiderror: No target specified and no devices found, deploying to emulator
Ensure that your phone is plugged into your computer and you can access it from the Android File Transfer utility (see Step #6 above).
- How to determine proper values for environment variables:
Open Android Studio and navigate to File -> Project Structure -> SDK Location. This location value will serve as the base for your environment variables. For example, if the location is /users/joe/Android/sdk, then:
$ export ANDROID_HOME=/users/joe/Android/sdk
$ export ANDROID_SDK_HOME=/users/joe/Android/sdk/platforms/android-<api-level>
$ export PATH=${PATH}:/users/joe/Android/sdk/platform-tools:/users/joe/Android/sdk/tools
- Error: Server error, status code: 502, error code: 10001, message: Service broker error: {"description"=>"Only one free key is allowed per organization. Contact your organization owner to obtain the key."}
Only one free key is allowed per organization. Binding the service to an application triggers a process that tries to allocate a new key, which will get rejected. If you already have an instance of Visual Recognition and an associated key, you can bind that instance to your application or update the API key in your server code to tell the app which key to use.
- When using Docker, first
cordovacommand fails with:
-bash: cordova: command not found
Test that you have the proper alias with:
alias |grep cordova
If you do not see the alias cordova=... output from 4b, re-execute the alias command above.
- Demo on Youtube: Watch the video.
- Watson Node.js SDK: : Visit the Node.js library to access IBM Watson services.
- Sample code: Identify objects in an image with the Watson Visual Recognition service.
- Artificial Intelligence Code Patterns: Enjoyed this Code Pattern? Check out our other AI Code Patterns.
- AI and Data Code Pattern Playlist: Bookmark our playlist with all of our Code Pattern videos
- With Watson: Want to take your Watson app to the next level? Looking to utilize Watson Brand assets? Join the With Watson program to leverage exclusive brand, marketing, and tech resources to amplify and accelerate your Watson embedded commercial solution.
This code pattern is licensed under the Apache Software License, Version 2. Separate third party code objects invoked within this code pattern are licensed by their respective providers pursuant to their own separate licenses. Contributions are subject to the Developer Certificate of Origin, Version 1.1 (DCO) and the Apache Software License, Version 2.


