This is the Hackathon Kit for the Geeny Hackathon. It's a simple NodeJS app that reads message-streams from Geeny. This sample is intended as initial Boilerplate template to easily get started hacking on the Geeny platform. This README is self-contained documentation about how to get started with this project. It tries to be as minimalistic as possible and avoid dependencies. Feel free to add your own dependencies and complicate this example as much as you want.
In order to be able to create and deploy an application on the Geeny platform, you need to register as a Geeny user. Use ONE user to setup the application (we call them formula) and connect the things (we call them elements). 0. Navigate to registration page, labs.geeny.io/register.
- In order to access the Geeny developer dashboard, you need to become a Geeny developer by clicking
Become a developeron your account page. Alternatively, follow this link https://labs.geeny.io/become-developer. Accept the Terms and Conditions by checkingI understandcheckbox and click onBecome a developerbutton.
Depending on your idea for the Hackaton, follow these guidelines to setup the skale kit, develco kit or both.
The Skale is a smart bluetooth enabled skale. With the skale you can:
- Measure weights form 0.1g to 2.0kg
- Tare (let current weight to 0) - left button and remote command
- Turn led display on/off - remote command
- Instruct the led display to show the weight - remote command
- Start/stop counter - right button
To connect to the skale you have to use the provided SkaleExample iOS application. 0. Run the SkaleExample application on the phone
- Login with your freshly created Geeny developer account
- Turn on the skale, hold left button
- Tap on the device named Skale with your label in the nearby things list on the iOS application. Use refresh button if you don't see it in the list.
- Register your skale on Geeny platform.
After this you should be able to see the message logs on your phone screen. For each sent/received message you will see a new entry. Make sure the skale is turned on and iOS application is running when reading/writing messages. Congratulations, you are now connected!!!
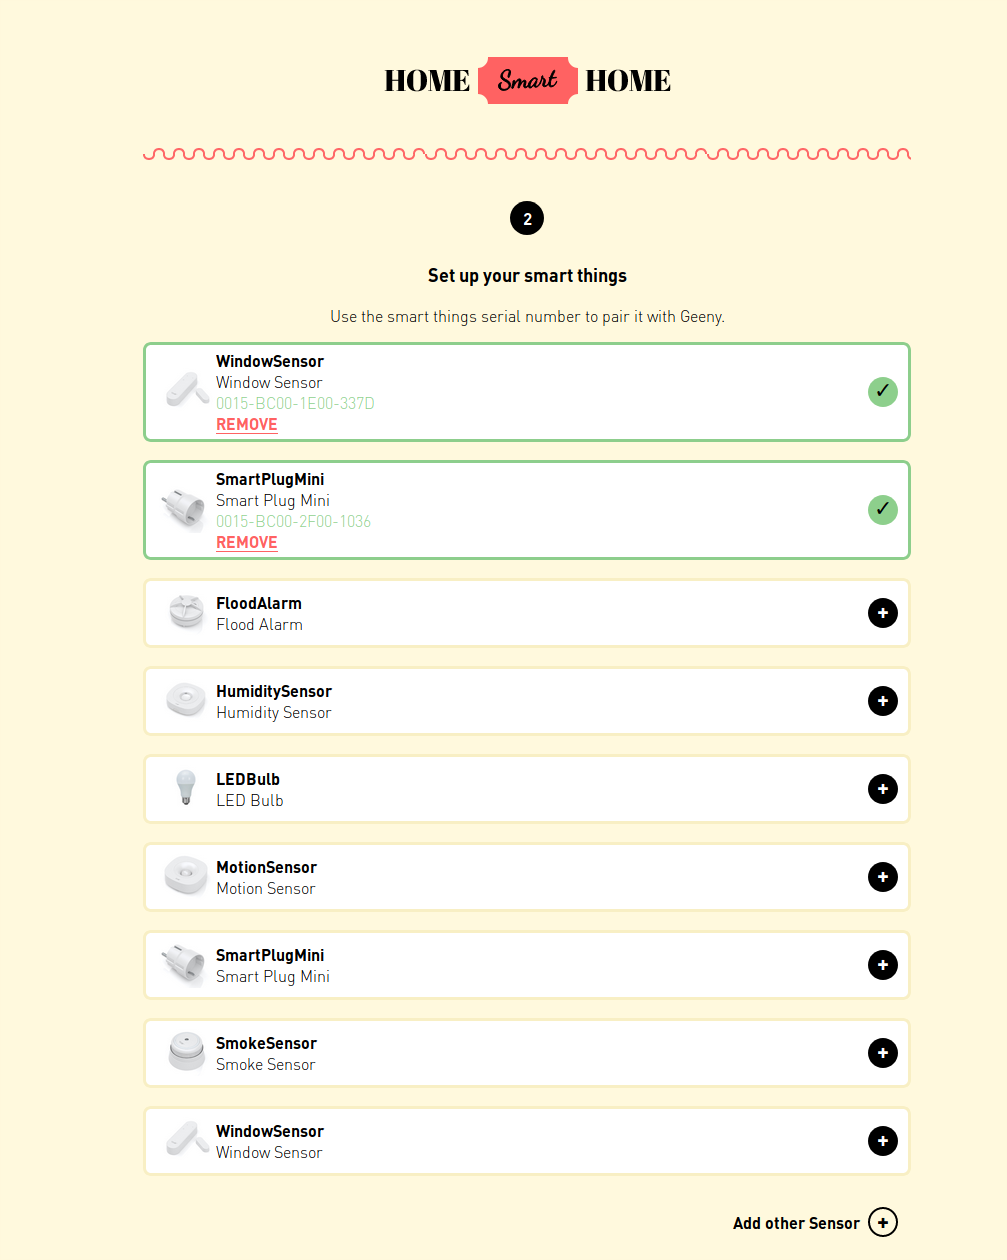
Develco is a set of smart home devices. For the hackaton we are providing: 0. Smart plug. Measures power consumption and receives on/off commands.
- Smart Led bulb. Receives on/off commands.
- Smart Motion sensor. Measures movement, illuminance, temperature.
- Smart Window sensor. Measures temperature and reports open/closed status.
Connecting the Develco devices is done by accessing the Develco Gateway.
0. Open browser and type [Your Gateway IP]:8000
- Press
Start Hereto Login with Geeny developer account - Press
Manage Smart Thingsto connect smart devices
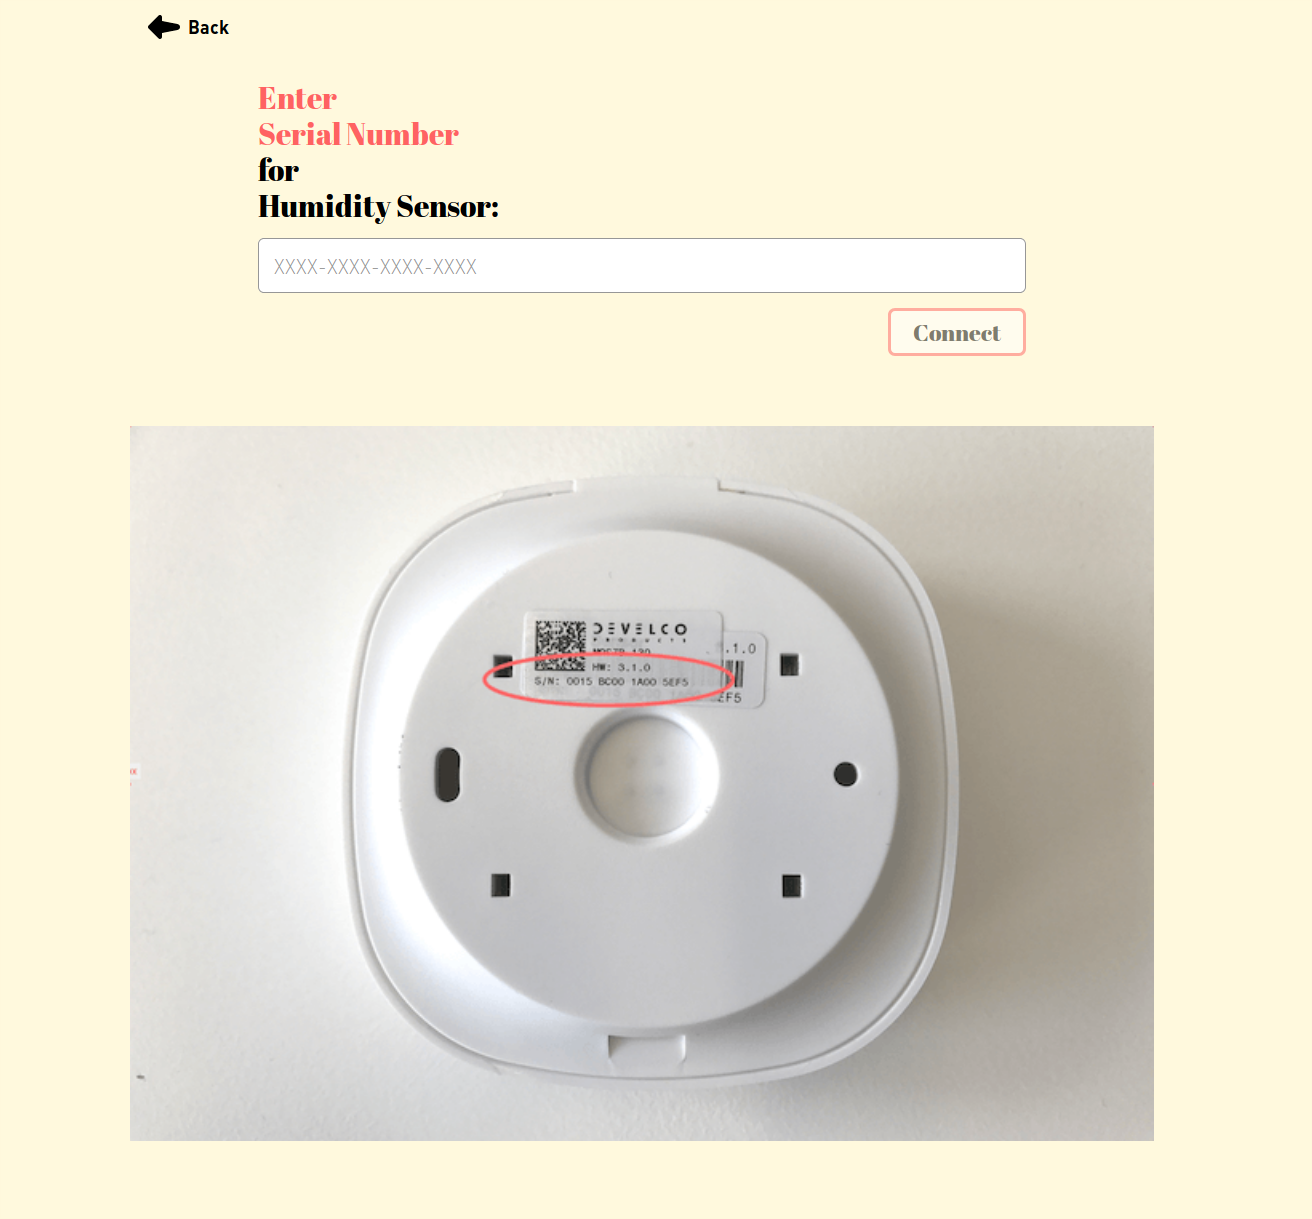
Click the [+] button for adding new devices. You'd need the serial number of your
device.

Remove batteries/Reset device to force restart of the sensor and get faster pairing.
Locate the reset button, hold the reset button until it blinks red once, than twice and release when starts to blink continuously. Smart bulb can be reset while plugging on/off 5 times in a row.
Follow the tutorial to deploy this repo as the sample application. Make sure you include Skale_Command, Skale_Measure, Skale_Button if you plan to use Skale device. For develco devices you need to add DevelcoTOCI and DevelcoTICO subscribeMessageTypes. Include all if you plan to use both skale and develco devices. https://docs.geeny.io/getting-started/formulas/
- Get your auth token Use swagger ui to login with your registered developer account. In response you should receive your auth token.
- Open
config.jsfile and setuserIdto your registered user id so the application is able to talk to your devices. You can retrieve the user id with this curl command:
curl --header 'authorization: JWT [YOUR_JWT_TOKEN]' 'https://connect.geeny.io/auth/me/'
- Decide what message types you will use for reading messages from connected devices.
In
config.jsthere is a map calledsubscribeMessageTypes. Here you should specify the messageTypeIds you already enabled when you deployed your application. - Decide to which devices you are going to send commands.
For each device that you intend to send commands, you need a field in
thingsobject fromconfig.js. To retrieve the details about your connected things, execute:
curl -X GET --header 'Accept: application/json' --header 'authorization: JWT [YOUR_JWT_TOKEN]' 'https://labs.geeny.io/things/api/v1/things'
Alternatively, use thing manager api. In response you should receive the list of your devices. It should look like:
{
  "id": "dc5eb2e9-3ae3-448d-8ced-80c23ae2b2cd",
  "name": "skale1",
  "serial_number": "E8196B03-5B06-4700-B6A7-460E1480C24F",
  "thing_type": "a4526b26-cc04-4205-a8d3-c4a8dab1389d",
  "created": "2017-12-13T10:22:16.715Z"
}
Reference the commented examples in config.js to configure your devices.
Ex:
skale_1: {
  thingId: 'here-comes-the-id-of-the-thing',
  messageTypeId: 'fc7a9697-f98e-4f51-8b23-fd1b8b8f02e1',
  cmd_led_on: 0xED,
  cmd_led_off: 0xEE,
  cmd_tare: 0x10,
  cmd_info: 0xEC
}
Use id as thingId in the config.js. Use Skale_Command mesage type id for skale and DevelcoTICO message type id for develco.
This is already configured, so basically, you need to update the thingId of your devices in config.js.
4. Build and push your docker image again and redeploy your application on developers dashboard. See deploy instructions described before.
Once Deployed you have two useful inspirational endpoints.
/msgs: Will render the messages you have got so far (F5/Refresh and you should see the new upcoming messages)/skale-buttons: Will render the messages related to buttons on the skale. (F5/Refresh and you should see the new upcoming messages)/develco-hub: Will render the messages related to develco devices. (F5/Refresh and you should see the new upcoming messages)/send-message?thing={thing_name}&cmd={command_name}: Calling this url will result in a command sent to thing as specified in query params. Ex:send-message?thing=skale_1&cmd=cmd_tarewill send tare command to skale_1 device. Checkconfig.jsfor available things and commands./weight: shows the current weight if you connected a skale device./smart-light: is a proof case for develco devices. It uses a bulb and motion sensor. The screen brightness is adjusted based on illumination value read from motion sensor and the bulg is swithced on/off when the screen is dark/bright.
{
  "MeasuredValue_Illuminance": "50 Lux",
  "MeasuredValue_Temperature": "25.8 C",
  "Occupancy": "occupied",
  "ZoneStatus": "alarmed"
}
{
  "CurrentSummationDelivered": "875 Wh",
  "InstantaneousDemand": "27 W",
  "OnOff": "On"
}
{
  OnOff": "On"
}
{
  "MeasuredValue_Temperature": "25.8 C",
  "ZoneStatus": "opened"
}