- Introduction
- Creating and configuring a Platform.sh project
- Project layout
- Exploring the current project
- Add your own microservice app!
This is a playground project to showcase some features of Platform.sh and demonstrate a microservices pattern.
The core of component of this project is controller_microservice, an app written in Golang to parse Markdown input and render it into HTML. It leverages https://github.com/gomarkdown/markdown, using it for its core functionality, plus some overrides.
Communication with other microservices is enabled by the PLATFORM_ROUTES variable, populated through the routes.yaml configuration file. On each request, the controller will look at PLATFORM_ROUTES and GET the /discover path of each route found there. That request should return something like
{
  "name": "pygments",
  "type": "*ast.CodeBlock",
  "attrs": {
    "language": "Info"
  },
  "flags": {
    "composable": false
  },
}The service name
The type of Markdown element that the service can process. See gomarkdown's AST documentation for a list.
The three example microservices implement *ast.CodeBlock, *ast.Text and *ast.Heading.
This represents the attributes of the Markdown element you would like to pass to this microservice.
In the example above, this means the contents of the Info field of CodeBlock objects will be passed to the microservice in the language field. The gomarkdown AST docs have all the details on what is available.
Static flags configuring this microservice. If a flag is absent, it is treated as false.
Currently only composable is implemented. This flag means that the service's rendered output is safe to feed into the next microservice (meaning it is likely plain text). Services that produce html shouldn't be flagged as composable, only those that output plain text should be (see the "redacted" service).
Now that you understand what we are building, you can follow the steps below to create a project on Platform.sh and build this project.
-
Create a free trial development account on Platform.sh. This development account will give you a project with all the features of a paid account, with the only limit being an inability to add a domain name to the project.
-
Check your email to validate your free trial. The validation link will bring you to your user dashboard.
-
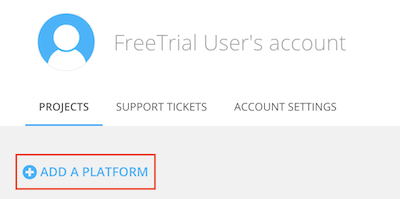
Click on "Add a Platform" to create a new project.
-
Select a "Development" plan, and click "Continue" at the bottom of the page.
-
Finally, choose a region and data center, then click "Create Free Project".
-
A new project will now be created for you to experiment with.
Now that your development project has been created, you need to add your code.
-
Give your new project a name, press "Next", and at the next prompt, select "Import your existing code".
-
At the next prompt, add your public SSH key to be able to upload your code. See our documentation on Using SSH Keys if you need help with this.
-
Before we can move on to the next step, you need to clone this repository to your local machine with
git clone https://github.com/platformsh/apidays2018-workshop.gitand change into the resulting directory atapidays2018-workshop. -
Back on the Platform.sh setup wizard, you will see two commands that you need to run to push this existing repository to the server. Copy and execute these two commands.
The first command adds your new project as a remote repository to git, and the second pushes the local Master branch to the server.
In the setup wizard, you will now see that you code is being imported.
In your terminal, you will see that after the code is pushed to the server, your new project is automatically being built and deployed on Platform.sh, for example:
Validating submodules

Validating configuration files

Processing activity: User pushed to Master
    Found 33 commits

    Building application 'controller_microservice' (runtime type: golang:1.11, tree: f6ec1f2)
      Generating runtime configuration.

      Executing build hook...

	  Executing pre-flight checks...

      Compressing application.
      Beaming package to its final destination.

	. . .

	Building application 'pygments_microservice' (runtime type: python:3.5, tree: 5326a9f)
      Generating runtime configuration.

	. . .

	Building application 'redacted_microservice' (runtime type: ruby:2.4, tree: 51345c1)
      Generating runtime configuration.

      Executing build hook...

	. . .

	Building application 'app' (runtime type: golang:1.11, tree: 21d670f)
      Generating runtime configuration.

	. . .

	Provisioning certificates
      Validating 5 new domains
      Provisioned new certificate for 5 domains of this environment

	. . .

	Creating environment abcd123-master-7rqtwti
      Environment configuration
        controller_microservice (type: golang:1.11, size: S, disk: 1024)
        pygments_microservice (type: python:3.5, size: S, disk: 1024)
        redacted_microservice (type: ruby:2.4, size: S, disk: 256)
        svg_microservice (type: nodejs:10, size: S, disk: 512)
        app (type: golang:1.11, size: S, disk: 1024)

    . . .

    Environment routes
      http://controller.master-7rqtwti-abcd123.us-2.platformsh.site/ redirects to https://controller.master-7rqtwti-abcd123.us-2.platformsh.site/
      http://master-7rqtwti-abcd123.us-2.platformsh.site/ redirects to https://master-7rqtwti-abcd123.us-2.platformsh.site/
As you can see in your terminal output, each application in your repository has been built and deployed to its own container within your project cluster, a sub-domain has been created for each container, and a free TLS certificate has been provisioned for each domain.
To access the application, visit the primary domain that has been provisioned for your project. This will be the provisioned domain that lacks a sub-domain and fits the pattern https://master-7rqtwti-YOURPROJECT.us-2.platformsh.site/. In a production environment, you would instead visit your app's registered domain name.
Play around with the "Microservice Markdown Magic" web application to get a feel for the project.
To better understand how this project functions, explore the repository in your local environment. This project is organized with a separate directory for each microservice:
-
The app that serves the frontend for the "Microservice Markdown Magic" web app.
-
The Golang-based backend application that accepts input from the
webappand sends it to the other microservices for further processing. -
A Python-based microservice which accepts a Markdown-formatted code block and returns parsed HTML with code highlighting.
As you can see in the application, specifying
jsafter the opening code fence results in HTML output with Javascript code highlighting. -
A Ruby-based microservice with accepts text and replaces "senstive" text with a series of black squares. The sensitive text is detected by using the
confidential_info_redactorGem. -
A Node-based microservice which accepts Markdown-formatted text and returns an SVG for each heading detected in the input.
As you can see, each directory contains a .platform.app.yaml that configures how the microservice is built and deployed. The presence of a .platform.app.yaml file in a directory tells your project that the directory contains an application, and configures things such as the app's name, its dependencies, and any commands that should be used to build and deploy the app.
Within the .platform/ directory, there are two files which configure the project at a higher level:
- The
.platform/services.yamlfile is where you would configure any additional services that Platform.sh supports, such as databases, search engines, and message queues. - The
.platform/routes.yamlfile is where domains are mapped to individual services. The information in this file is used bycontroller_microserviceto discover other apps in the project.
To access your project via SSH, hover over "Access site" near the top of the interface on your project dashboard, and copy the SSH command for the controller_microservice app, for example:
ssh PROJECTID-master-7rqtwti--controller_microservice@ssh.us-2.platform.shYou can also install the Platform.sh CLI and access the controller_microservice app with the command:
platform ssh --environment master --app controller_microserviceThe CLI allows you to quickly access different apps deployed in different development environments within a project without having to know the exact URL every time.
NOTE: The rest of this workshop will use the CLI for example commands.
After you've accessed the controller_microservice via SSH, you can explore the route relationships that it is using to communicate with other microservices. The base64-encoding $PLATFORM_ROUTES environment variable contains information about all the apps running in your project. Print it out (using the json.tool Python module to pretty-print the result):
echo $PLATFORM_ROUTES | base64 -d | python -m json.toolAccess one of the microservice apps via SSH to view logging as it processes input. For example,
platform ssh --environment master --app pygments_microservice
tail -f /var/log/app.log
When you make a change to the code block in the running web app, you will see the pygments_microservice add to its app.log.
Now that you understand the project in its current form and have an idea of how everything works, you can add your own service to the project. As a starting point, you can copy one of the app directories that already exists in the project, or you can copy one of our many templates from GitHub.
Begin by checking out a new local branch for you app, substituting YOUR-NEW-APP for the name of your choice:
git checkout -b YOUR-NEW-APPThe first step here is building a basic app that accepts a POST request such as the following and responds with text or HTML:
curl \
  -d "text=input_data_here&other_param=something_else" \
  -X POST https://YOUR-NEW-APP.master-PROJECTID-3iv7isefyglma.us-2.platformsh.site/
After you write the code for your new app, you'll need to configure the application in two places:
-
.platform.app.yaml- In the configuration file within the app's directory, you need to set a value for the app'sname. -
.platform/routes.yaml- You'll need to add a route to the app to make it discoverable by the controller, e.g."https://YOUR-NEW-APP.{default}/": type: upstream upstream: "YOUR-NEW-APP:http"
In the above block, you're pointing the
YOUR-NEW-APPsubdomain to the app with thenamevalueYOUR-NEW-APP. If you specify anhttpsURL, any traffic to itshttpequivalent will be automatically redirected.
Now you can commit your changes and push them:
platform pushBecause you've checked out a new branch for your new app, the Platform.sh CLI will ask if you want to activate your new development environment after pushing. Confirm that you do, then confirm that your parent environment is master.
As you can see from your terminal output, your new code is being pushed to your Platform.sh project, and the new application is being built. Your new development environment is a fully-functional copy of your production (master) environment, but with the new features of your branch included.
Now that your app has been deployed, you need to debug. Test it by sending a POST request with cURL and seeing if you receive the output you expect. Note that you will need to visit the "Access site" information box on the web interface to retrieve the URL for your new app on a new environment; that is, a new base URL is created for each development environment and will differ from those used in the master environment.
If not, you can access the app via SSH to debug it:
platform ssh --environment YOUR-NEW-APP --app YOUR-NEW-APPwhere the --environment flag specifies your branch/environment name, and the --app flag specifies which app container you would like to access.
Now that you app has been deployed and debugged, you can integrate it with the project's controller_microservice app. You will need to look at the gomarkdown docs to figure out which element you want your new microservice to act on.
You will then need to configure a /discover response. Look at how this is configured in the other microservices. Your new /discover endpoint will need to return configuration information as explained in the introduction, for example:
{
  "name": "pygments",
  "type": "*ast.CodeBlock",
  "attrs": {
    "language": "Info"
  },
  "flags": {
    "composable": false
  },
}
As you make your changes, periodically commit and deploy your code to your new branch and debug any issues that arise. When you are satisfied with your new app, you can merge your branch into master and redeploy your production environment!
Have some extra time? You could try to expand your project by adding a cache. Redis works nicely on Platform.sh and can be integrated into your project with relative ease.


