Rock-paper-scissors
Code for "Rock-paper-scissors" game used at Azure Custom Vision hands-on workshop
Prerequisites
- Azure Subscribtion
- Published Custom Vision iteration and access key
- NodeJS
Setup
Azure Subscription
Open Azure Portal - https://portal.azure.com
Create a new resource group
-
Open "Resource groups" module and add new resource group

-
Fill-in the form (Subscription - <your_subscription>, Resource group - "RPS_ResourceGroup", Region - "West Europe")

-
Click "Review + create"
-
Verify the values and click create

-
Wait until resource group is create and click "Go to resource group"


Create a new Custom Vision resource
-
Create new resource

-
Search for "Custom Vision" in the Marketplace and click on it

-
Click Create

-
Fill-in the form (Name - "RPSCustomVision", Subscription - <your_subscription>, Resource group - "RPS_ResourceGroup", Location - "West Europe", Pricing tiers for training and predition - "F0") and click create. Wait until resource is created


Create a new AppService resource
-
Open your resource group and verify that you now have two resources with "Cognitive Service" type and click "Add" to add another resource

-
Search for "Web App" in the Marketplace and click on it

-
Click Create
-
Fill-in the form (Subscription - <your_subscription>, Resource group name - "RPS_ResourceGroup", Name - <choose_unique_name>, Publish - "Code", "Runtime stack" - "Node 10.14", Operating system - "Windows", Region - "West Europe") and click "Change size" for App Service Plan

-
Select "Dev / Test" plan and "F1" pricing tier, then click "Apply"

-
Click "Review and create"

-
Verify values and click "Create"

-
Wait for Web App deployment

-
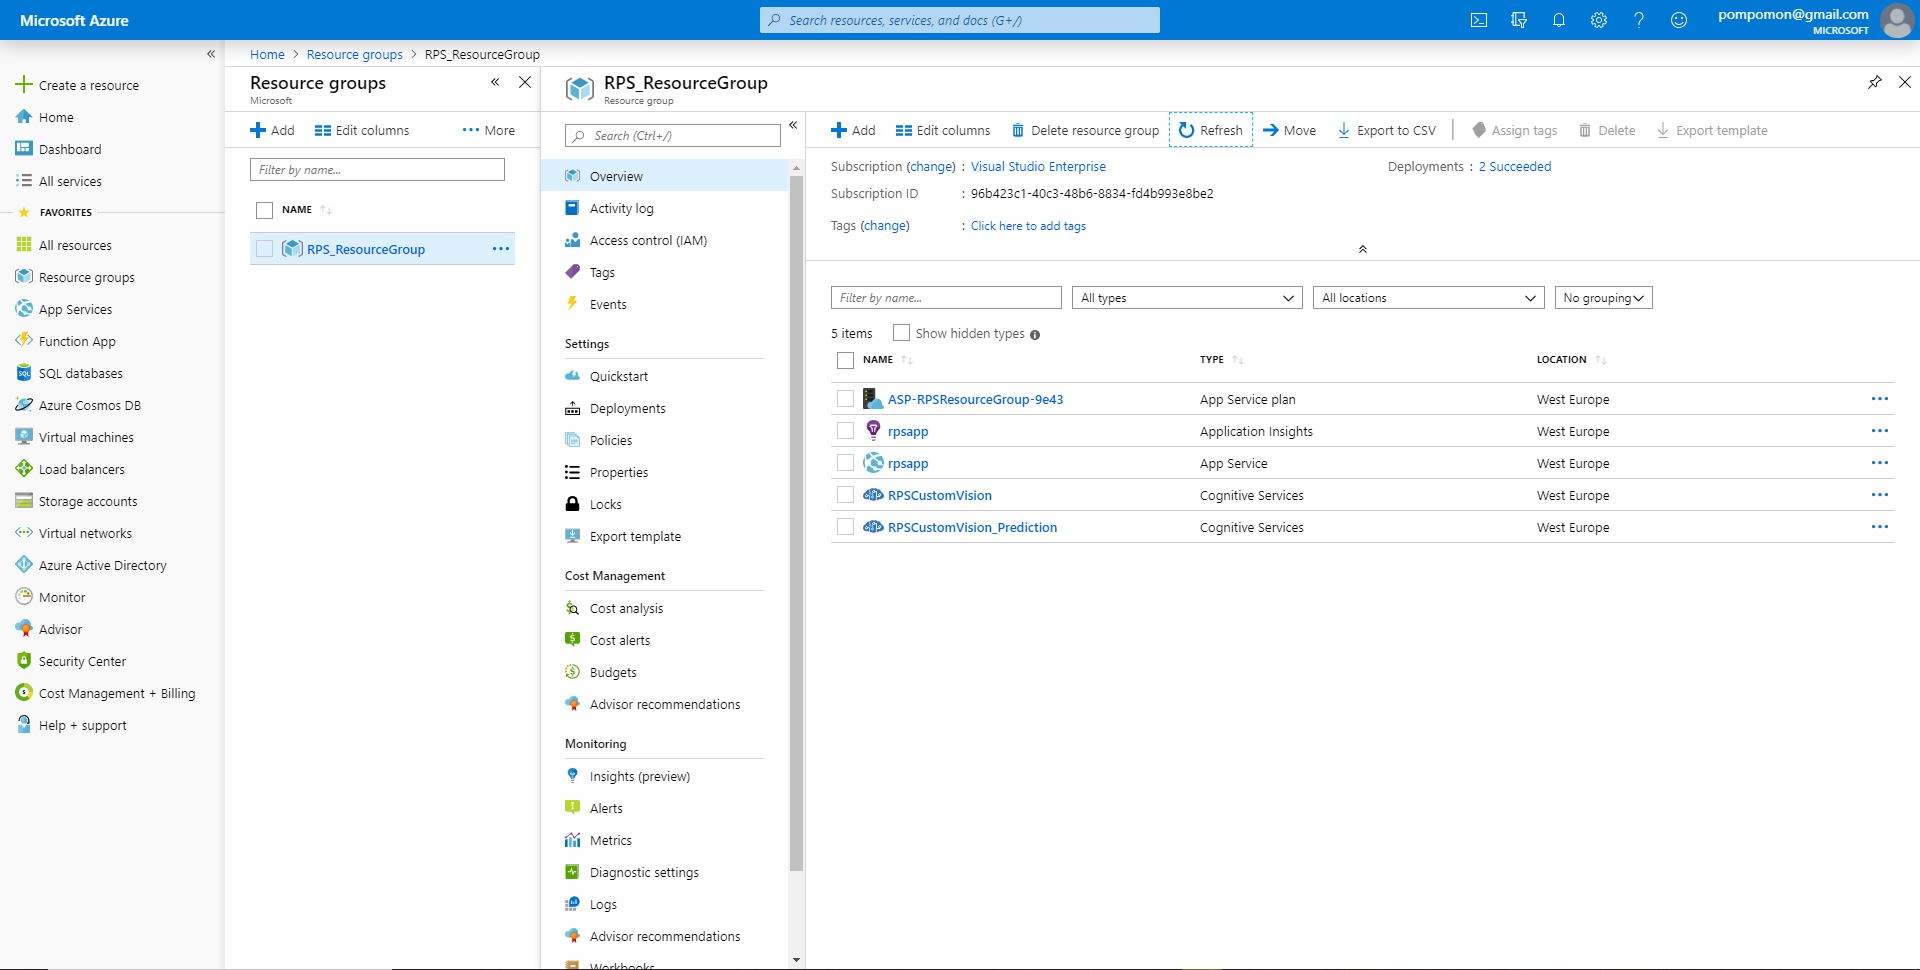
Open your resource group and verify that you have the following resources: App Service Plan, App Service and two Cognitive Services


Custom Vision
Sign in https://www.customvision.ai/ using created Azure account

Create a new Custom Vision project
- Click "New Project"

- Fill-in the form (Name - "RPS", Resource - "RPSCustomVision[F0]", Project Type - "Classification", Classification Types - "MMulticlass", Domains - "General") and click "Create project"

Upload and tag images
- In Custom Vision project click "Add images"

- Add images, select appropriate tag (e.g. paper) and click "Upload files"

- Wait until upload is finished


- Repeat for the other folders, wait until all images are uploaded
Train a model
- In Custom Vision project click "Train"

- Select "Fast Training" and click "Train"

- Wait for training to finish

Manual validation
- Click on "Quick Test"

- Upload test image

Prediction correction
- Click on "Predictions"

- Select incorrectly predicted image

- Assign correct tag and click "Save and close"

(Optional) Advanced training
- In Custom Vision project click "Train"
- Select "Advanced Training" for 1 hour and click "Train"

- Wait for training to finish
Publish iteration
- Open "Performance" tab, select finished iteration and click "Publish"

- Fill-in model name, select "RPSCustomVision_Prediction" as prediction resource and click "Publish"


- Click on "Prediction URL" to see your credentials

Web application code
Application based on code from NodeJS app on Azure example.
Structure
- index.js - server-side logic
- public/index.html - WebApp HTML template
- public/css/app.css - WebApp CSS styles
- public/js/app.js - WebApp Javascript logic
Local development
Local development is the same for all steps:
- Open "StepN" folder
- Run
npm install - Run
npm start - Open http://localhost:1337
Azure deployment
Azure dseployment is the same for all steps:
- Open "StepN" folder
- Run
npm install - Create zip archive with contents of "StepN" folder
- Open <choose_unique_name>.scm.azurewebsites.net
- navigate to Tools -> Zip Push Deploy
- Drag-and-drop zip archive to /wwwroot
- Open <choose_unique_name>.azurewebsites.net and verify that site is running
Code changes are described in respective steps: