Note: if you are looking for the newer, read-write version of this tool that supports non-public S3 buckets then please visit the S3 Explorer (v2 alpha) page.
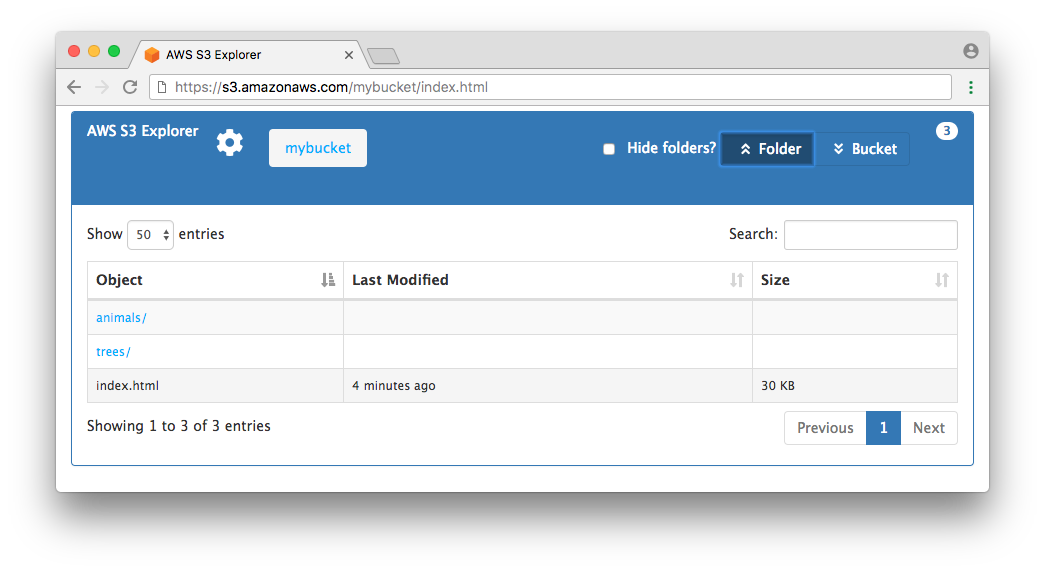
AWS JavaScript S3 Explorer is a JavaScript application that uses AWS's JavaScript SDK and S3 APIs to make the contents of an S3 bucket easy to browse via a web browser. We've created this to enable easier sharing of objects and data via Amazon S3.
The index.html file in this bucket contains the entire application. A visitor to the index.html page is prompted to enter the name of an Amazon S3 bucket. Upon adding the bucket name, the contents of the bucket will be rendered on the page.
In order for JavaScript to display the contents of an Amazon S3 bucket, the bucket must be readable by anyone and may need to have the proper Cross-Origin Resource Sharing (CORS) configuration. You can do this by going to the Amazon S3 console at https://console.aws.amazon.com/s3 and selecting your bucket.
To share the contents of an Amazon S3 bucket, you will need to create a policy that allows anyone to see and access the contents of your bucket. To do this, you need to update the bucket policy.
Using the AWS Console for S3, click your bucket name in the bucket list, then click the Permissions tab, then click Bucket Policy. The Bucket Policy Editor panel will open up with a textfield where you can enter a policy for your bucket. Enter the following policy, but replace BUCKET-NAME with the name of your bucket, then click Save:
{
  "Version": "2012-10-17",
  "Statement": [
    {
      "Sid": "PublicListGet",
      "Effect": "Allow",
      "Principal": "*",
      "Action": [
        "s3:List*",
        "s3:Get*"
      ],
      "Resource": [
        "arn:aws:s3:::BUCKET-NAME",
        "arn:aws:s3:::BUCKET-NAME/*"
      ]
    }
  ]
}
Note that this policy will allow anyone to list the contents of your bucket and to get any file from within the bucket. It will not allow them to upload, modify, or delete files in your bucket.
If you prefer to restrict the set of source IPs that can access the contents of your bucket then you can do this with an additional bucket policy condition on source IP address. Enter the following policy, but replace BUCKET-NAME with the name of your bucket and replace 203.0.113.0/24 with the relevant IP CIDR block, then click Save:
{
  "Version": "2012-10-17",
  "Statement": [
    {
      "Sid": "PrivateListGet",
      "Effect": "Allow",
      "Principal": "*",
      "Action": [
        "s3:List*",
        "s3:Get*"
      ],
      "Resource": [
        "arn:aws:s3:::BUCKET-NAME",
        "arn:aws:s3:::BUCKET-NAME/*"
      ],
      "Condition": {
          "IpAddress": {
              "aws:SourceIp": "203.0.113.0/24"
          }
      }
    }
  ]
}You may need to enable Cross-Origin Resource Sharing (CORS). CORS defines a way for client web applications that are loaded in one domain to interact with resources in a different domain.
There are two URLs you can typically use to access your index.html file:
- https://s3.amazonaws.com/BUCKET-NAME/index.html (path-style URL)
- https://BUCKET-NAME.s3.amazonaws.com/index.html (virtual-hosted-style URL)
If you decide to access your index.html file via a virtual-hosted-style URL (#2 above) then you should not need to enable CORS and you can skip this section. We recommend that you use this form of URL.
If you decide to access your index.html file via a path-style URL (#1 above) then you will need to enable CORS. This is because the web page is served up from s3.amazonaws.com but the AWS JavaScript SDK makes requests to BUCKET-NAME.s3.amazonaws.com.
For security reasons, browsers normally block requests by JavaScript code to access URLs that are unrelated to the source of the code (such as the contents of your bucket), but with CORS, we can configure your bucket to explicitly enable JavaScript to do this.
To configure your bucket to allow cross-origin requests, you create a CORS configuration, which is an XML document with rules that identify the origins that you will allow to access your bucket, the operations (HTTP methods) will support for each origin, and other operation-specific information.
To do this, click your bucket in the bucket list within the Amazon S3 Console and then click the Permissions tab. Click the CORS Configuration button. The CORS Configuration Editor panel will open up with a textfield where you can enter a CORS Configuration. Enter the following configuration:
<CORSConfiguration xmlns="http://s3.amazonaws.com/doc/2006-03-01/">
  <CORSRule>
    <AllowedOrigin>https://s3.amazonaws.com</AllowedOrigin>
    <AllowedMethod>HEAD</AllowedMethod>
    <AllowedMethod>GET</AllowedMethod>
    <AllowedHeader>*</AllowedHeader>
    <ExposeHeader>ETag</ExposeHeader>
    <ExposeHeader>x-amz-meta-custom-header</ExposeHeader>
  </CORSRule>
</CORSConfiguration>
Note that this does not authorize the user to perform any actions on the bucket, it simply enables the browser's security model to allow a request to S3. Actual permissions for the user must be configured either via bucket permissions, or IAM role level permissions.
If your S3 bucket is hosted outside of the US East (Northern Virginia) region (us-east-1) and you want to use path-style URLs to access the bucket's contents, then you should use a region-specific endpoint to access your bucket, for example https://s3-us-west-2.amazonaws.com/BUCKET_NAME/index.html.
To use path-style URLs, you should supplement your CORS configuration to include additional allowed origins representing the region-specific S3 endpoints, for example s3-us-west-2.amazonaws.com and s3.us-west-2.amazonaws.com, as follows:
    <AllowedOrigin>https://s3-us-west-2.amazonaws.com</AllowedOrigin>
<AllowedOrigin>https://s3.us-west-2.amazonaws.com</AllowedOrigin>Above, we indicated that users can access your index.html via one of two URLs:
- https://s3.amazonaws.com/BUCKET-NAME/index.html (path-style URL)
- https://BUCKET-NAME.s3.amazonaws.com/index.html (virtual-hosted-style URL)
You also have the option to enable 'Static Website Hosting' on your S3 bucket. If you do this with a bucket in the US East (N. Virginia) region then your user will additionally be able to use:
If you choose to do this, then you will also need to modify the CORS configuration above to include:
<AllowedOrigin>https://BUCKET-NAME.s3.amazonaws.com</AllowedOrigin>Or as follows, if in a bucket outside of US East (N. Virginia):
<AllowedOrigin>https://BUCKET-NAME.s3.us-west-2.amazonaws.com</AllowedOrigin>Note that when you configure a bucket for website hosting, the two general forms of an Amazon S3 website endpoint are as follows:
- bucket-name.s3-website-region.amazonaws.com
- bucket-name.s3-website.region.amazonaws.com
Note the dash (-) between s3-website and the region identifier. Which form is used for the endpoint depends on what Region the bucket is in. For a complete list, please see Amazon S3 Website Endpoints.
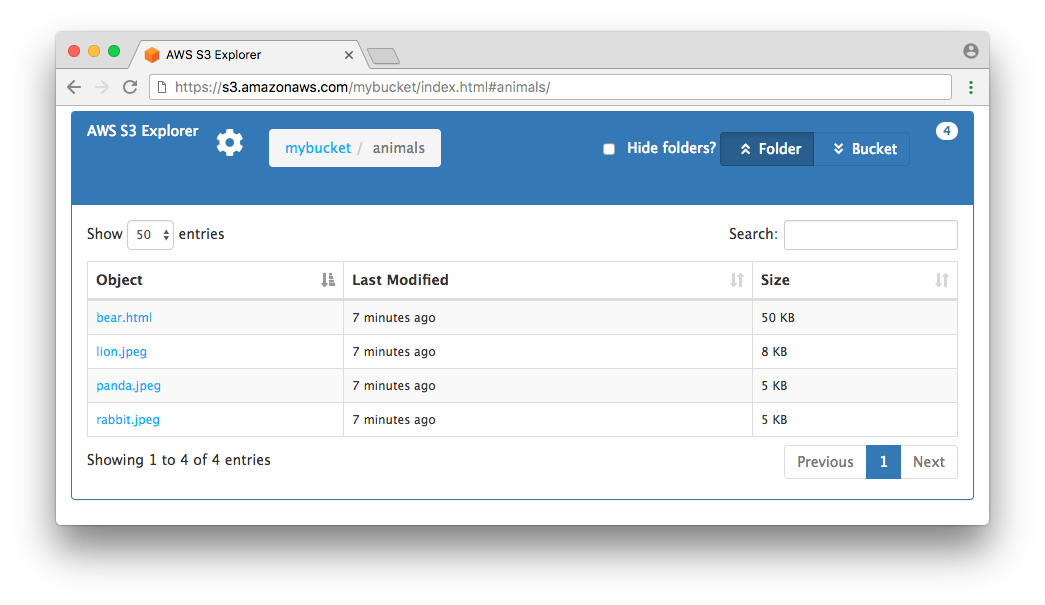
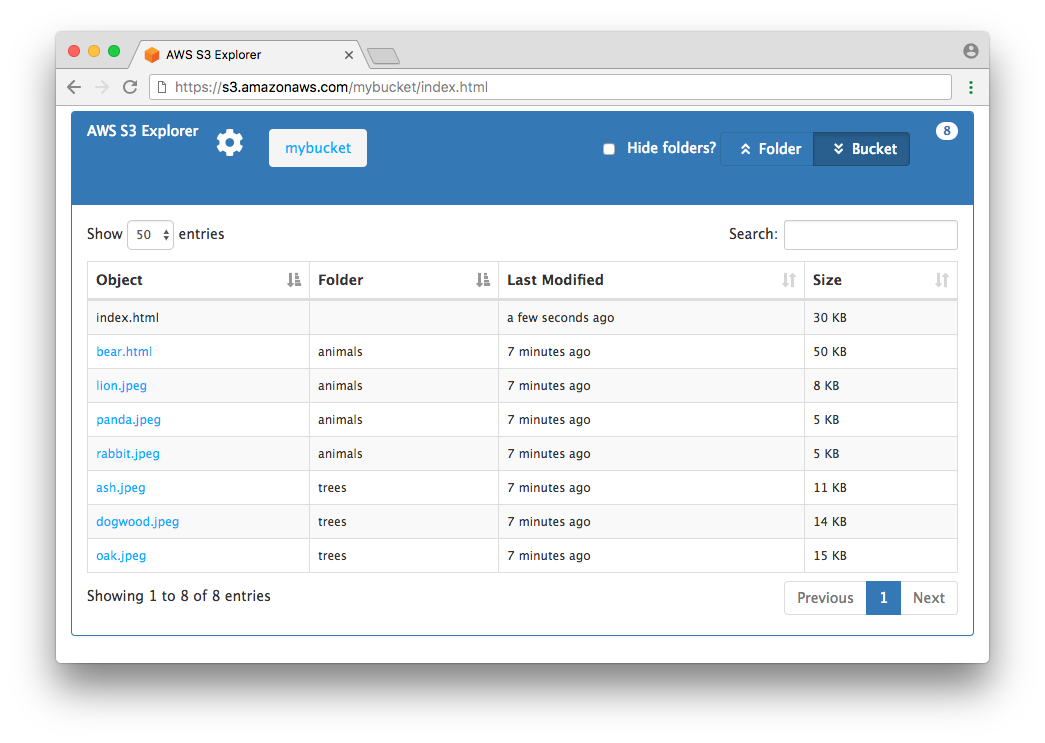
This application allows visitors to view the contents of a bucket via its folders or by listing out all objects in a bucket. The default view is by folder, but users can click on “Bucket” toward the top-right of the page to display all objects in the bucket. Note clicking on “Bucket” will load all objects in the bucket into the browser. If your bucket contains many objects, this could overwhelm the browser. We’ve successfully tested this application on a bucket with over 30,000 objects, but keep in mind that trying to load too many objects in a browser could lead to a poor user experience.


