https://github.com/prabhat-123/Attendance_System_Using_Face_Recognition.git
2. After downloading, you have to open Command prompt/Anaconda prompt/Visual studio terminal to run this project.
3. Before running any files, you have to set up virtual environment in the directory where the project is located and
install all the dependenices required for this project.
Creating virtual environment enable us to install the dependencies virtually for this project only without affecting the python dependencies on your computer.
A virtual environment is a tool that helps to keep dependencies required by different projects separate by creating isolated python virtual environments for them.
For installing virtual environment on command prompt and visual studio terminal:
For installation:
python -m pip install --user virtualenv
For installing virtual environment on Anaconda Prompt(Windows):
conda install -c anaconda virtualenv
py -m pip install --user virtualenv
ii) After installing virtual environment, you have to install all the dependencies required to run this project in your virtual environment. For doing so you have to follow the following steps:
First of all, you have to change your working directory to the location of this repository in your computer by using the following command:
    cd /*location to the repository */
    e.g cd E:/Attendance_system_using_face_recognition/ (location to the repository in local computer)
iii) After changing the working directory to the current repository/project create a virtual environment by using the following commands:
For Visual Studio Code Users

 python -m venv venv
Here venv is the name of the environment you like to choose.
 On Anaconda Prompt (Windows)

 conda create -n "your virtual environment name" python=3.6 (The code is tested and implemented in 3.6 so install python 3.6)
 e.g.

 conda create -n facialrecognition python=3.6
python3 -m venv venv
iv) After creating a virtual environment in a working directory, you need to activate the virtual environment:
On Visual Studio Code:

   venv\Scripts\activate
On Anaconda Prompt (Windows):
 conda activate "your virtual environment name"

 e.g

 conda activate facialrecognition
Note: The project will not work if the version of python is different. And try installing all the dependencies by following the above instructions if it does not work.
vi) After installation change the working directory to models/retinaface by using the following command:
       cd models/retinaface

       Then run the following commands to execute each script in the following                  order:

       python box_utils.py

       python config.py

       python mobilev1.py

       python prior_box.py

       python py_cpu_nms.py

       python retinaface.py

       And finally run the face detection model by running:

       python detect.py
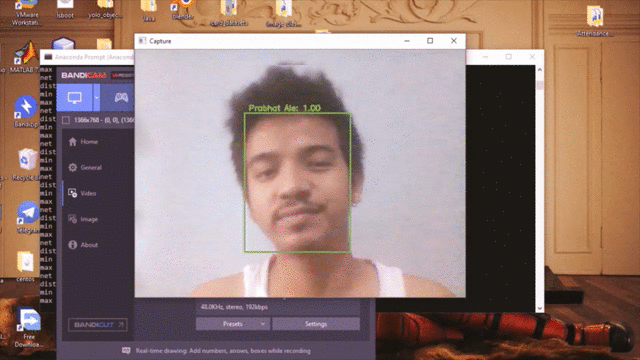
After running detect.py, the script will open the web camera and load the retinaface detector pretrained weights. The user is asked to input their name... Input your name and the script will capture your 100 images and store the images in dataset/name folder.
       cd ..
       (two times)
viii) Now after the face has been detected and the output has been stored in dataset/input_name folder now extract the embeddings for the face by running the following command:
python extractEmbeddings.py
python trainModel.py
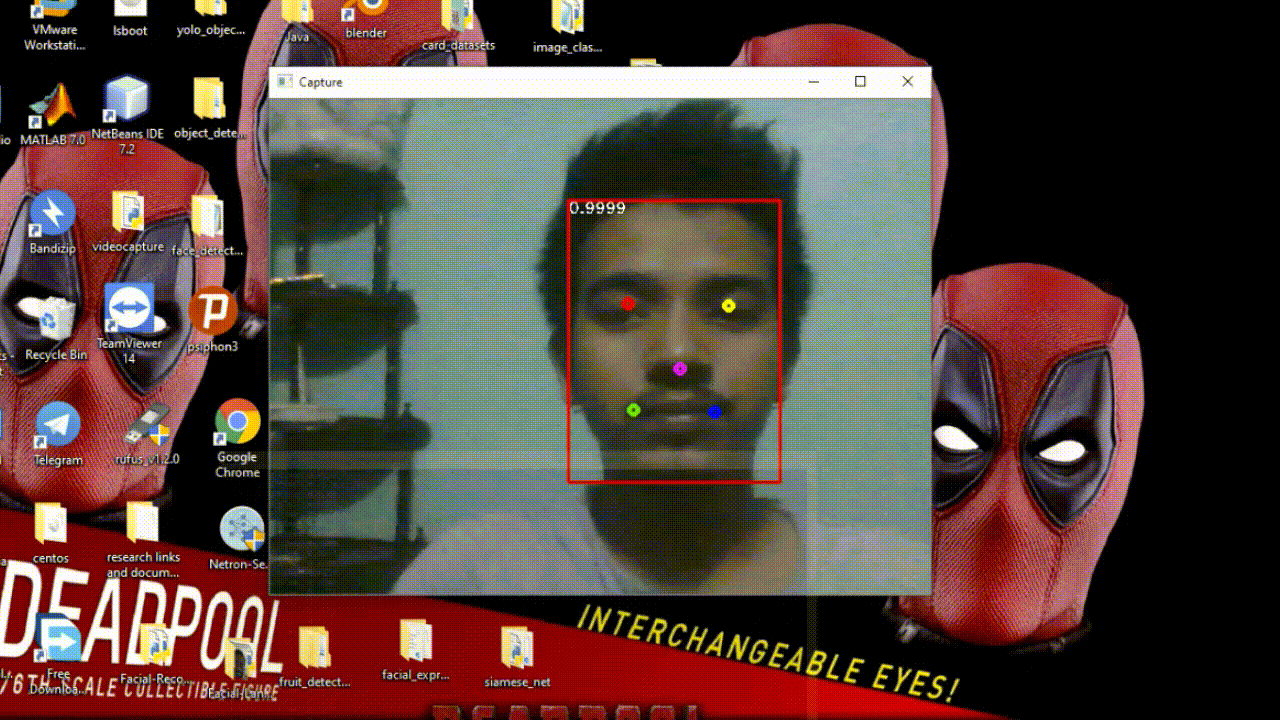
x) After training the model, finally use the trained models to recognize the face (who you are?) by running the command:
python recognize.py