Read CO2 concentration from mh-z19 sensor& and handle it.
Connect RPi & mh-z19 as:
- 5V on RPi and Vin on mh-z19
- GND(0v) on RPi and GND on mh-z19
- TxD and RxD are connect to cross between RPi and mh-z18
Followings are example of cabling, but you can free to use other 5v and 0v Pin on the RPi.
pi@raspberrypi:~/mh-z19 $ gpio readall
 +-----+-----+---------+------+---+---Pi B+--+---+------+---------+-----+-----+
 | BCM | wPi |   Name  | Mode | V | Physical | V | Mode | Name    | wPi | BCM |
 +-----+-----+---------+------+---+----++----+---+------+---------+-----+-----+
 |     |     |    3.3v |      |   |  1 || 2  |   |      | 5v      |     |     |
 |   2 |   8 |   SDA.1 |   IN | 1 |  3 || 4  |   |      | 5v      |     |     |  <---- Vin
 |   3 |   9 |   SCL.1 |   IN | 1 |  5 || 6  |   |      | 0v      |     |     |  <---- Gnd
 |   4 |   7 | GPIO. 7 |   IN | 1 |  7 || 8  | 1 | ALT0 | TxD     | 15  | 14  |  <---- RxD
 |     |     |      0v |      |   |  9 || 10 | 1 | ALT0 | RxD     | 16  | 15  |  <---- TxD
 |  17 |   0 | GPIO. 0 |   IN | 0 | 11 || 12 | 0 | IN   | GPIO. 1 | 1   | 18  |
 |  27 |   2 | GPIO. 2 |   IN | 0 | 13 || 14 |   |      | 0v      |     |     |
 |  22 |   3 | GPIO. 3 |   IN | 0 | 15 || 16 | 0 | IN   | GPIO. 4 | 4   | 23  |
 |     |     |    3.3v |      |   | 17 || 18 | 0 | IN   | GPIO. 5 | 5   | 24  |
 |  10 |  12 |    MOSI |   IN | 0 | 19 || 20 |   |      | 0v      |     |     |
 |   9 |  13 |    MISO |   IN | 0 | 21 || 22 | 0 | IN   | GPIO. 6 | 6   | 25  |
 |  11 |  14 |    SCLK |   IN | 0 | 23 || 24 | 1 | IN   | CE0     | 10  | 8   |
 |     |     |      0v |      |   | 25 || 26 | 1 | IN   | CE1     | 11  | 7   |
 |   0 |  30 |   SDA.0 |   IN | 1 | 27 || 28 | 1 | IN   | SCL.0   | 31  | 1   |
 |   5 |  21 | GPIO.21 |   IN | 1 | 29 || 30 |   |      | 0v      |     |     |
 |   6 |  22 | GPIO.22 |   IN | 1 | 31 || 32 | 0 | IN   | GPIO.26 | 26  | 12  |
 |  13 |  23 | GPIO.23 |   IN | 0 | 33 || 34 |   |      | 0v      |     |     |
 |  19 |  24 | GPIO.24 |   IN | 0 | 35 || 36 | 0 | IN   | GPIO.27 | 27  | 16  |
 |  26 |  25 | GPIO.25 |   IN | 0 | 37 || 38 | 0 | IN   | GPIO.28 | 28  | 20  |
 |     |     |      0v |      |   | 39 || 40 | 0 | IN   | GPIO.29 | 29  | 21  |
 +-----+-----+---------+------+---+----++----+---+------+---------+-----+-----+
 | BCM | wPi |   Name  | Mode | V | Physical | V | Mode | Name    | wPi | BCM |
 +-----+-----+---------+------+---+---Pi B+--+---+------+---------+-----+-----+
Full Set include followings:
- Setup script: Install & Setup following useful stuffs as:
- mh-z19: A python module to read mh-z19 sensor.
- PondSlider: A multipurpose versatile sensor handler for python, which read mh-z19 value and handle it.
- autostart.sh: Utility making mh-z19 as system service to act periodically.
Install Full Set, download from release
or
git clone https://github.com/UedaTakeyuki/mh-z19.git
Then, got to the folder and issue setup.sh*
./setup.sh
Necessary settings including serial port enabling are taken place in this script.
pip install pip install mh-z19
The differences of the interface between each Raspberry Pi modle are resolved inside this module. For example, serial device name is difference between Raspberry Pi 3 and older model, but mh-z19 module automatically detect the model and read from appropriate serial device.
To use mh-z19, once you need to set up enabling serial port device on the Raspbyerr Pi. Following Wiki page might be informative. Also, please refer PyPi top page for detail.
pi@raspberrypi:~ $ sudo python -m mh_z19
{'co2': 668}
As above, sudo might be necessary because mh-z19 sensor value is read through serial connection and it request root permission in general.
Handle sensor value by PondSlider multipurpose sensor handler.
The installed mh-z19 module is correspond the pondslider which is multiple & varsataile sensor handler to save, send and to do other necessary something with the sensor value.
As an example, we introduce following use case:
- How to save sensor value to SD card as .CSV file.
- How to send sensor value to free Remote Monitoring Service.
The pondslider read sensorvalue by sensor-handler specified, and pass the values to value-handlers* which do something with it.
Both sensor and valule handlers are python module. For more detail of handlers, please refer this.
This modlue correspond the pondslider which is multiple & varsataile sensor handler to save, send and to do other necessary something with the sensor value.
In case you choiced Full Install mentioned above, in other words, you've done setup.sh, the pondslider and there example handler's are already installed & setup.
You can do it with save2strage value handler which is in handlers/value/saver/save2strage, and configration file to read from mh-z19 sensor and save by save2strage is prepared as config.save.toml on the mh-z19 installed folder.
On the mh-z19 folder By calling pondslider as follows;
sudo python -m pondslider --config config.save.toml
Then, /home/pi/DATA/co2.csv shoud be created and new line will be added for each call.
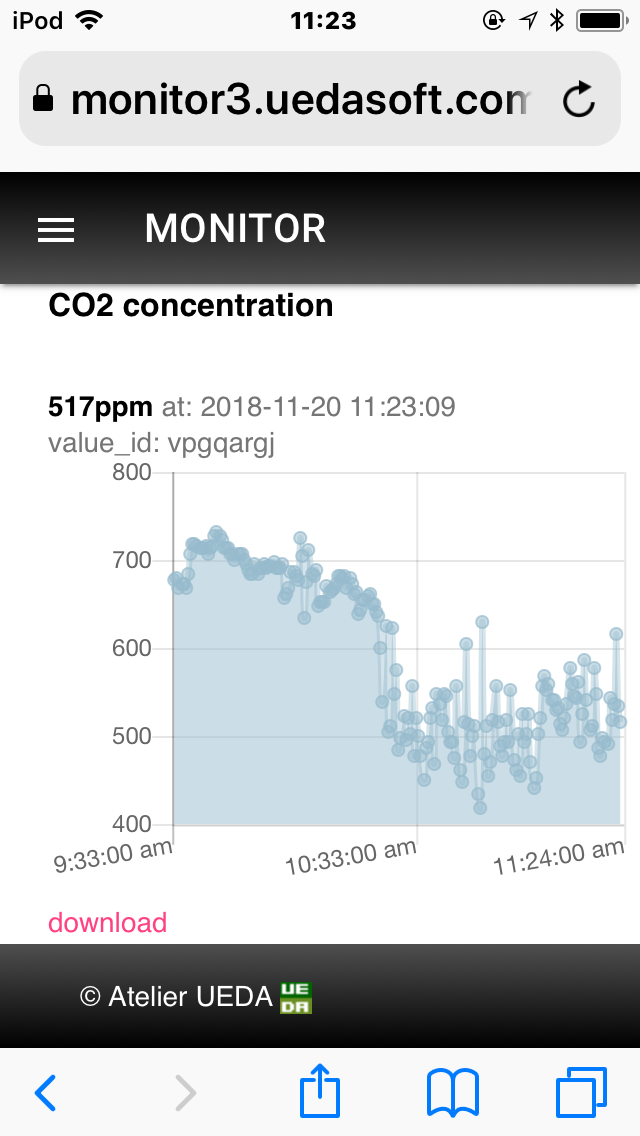
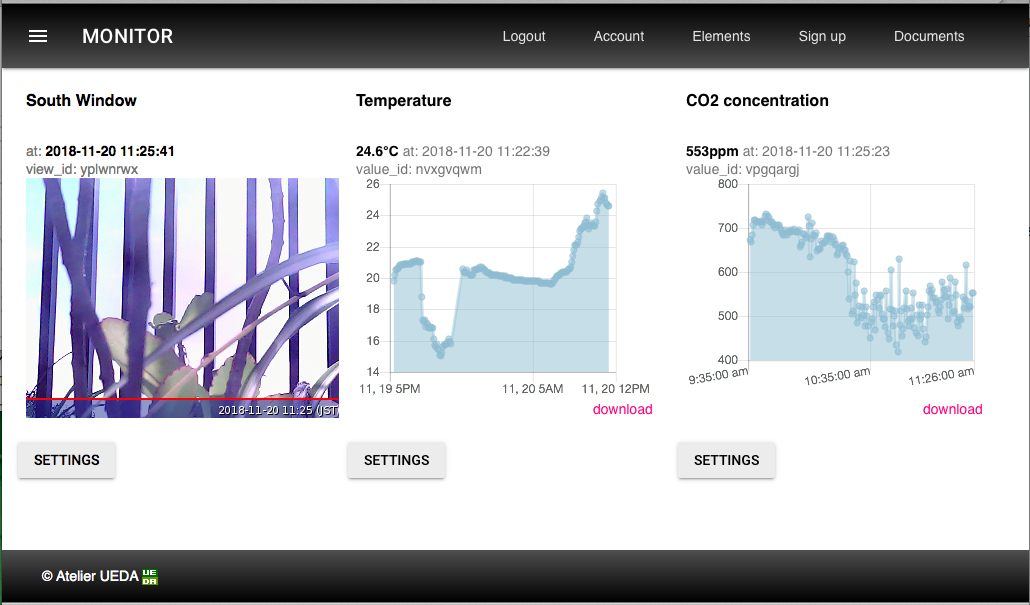
The MONITOR™ is a free Remote Monitoring Servcie to show latest data on the web.
Sign up as this, Activate View element and get a view_id as this.
Need to set view_id mentioned above as a destination. To do this, call setid.sh command in the mh_z19 installed directory. Let's say your view_id is vpgpargj, then issue setid.sh command as follows:
./setid.sh vpgpargj
Then, call "pondslider" python script as follows:
pi@raspberrypi:~/mh-z19 $ sudo python -m pondslider
{'co2': 742}
co2
{"ok":false,"reason":"ViewID not valid"}
Your time-series chart on the MONITOR™ display shoud be updated by the latest CO2 concentration value.
You can set it by autostart.sh command in the mh_z19 installed directory as follows:
./autostart.sh --on
You can tTurn off this as follows:
./autostart.sh --off
Also, You can check current status as follows:
./autostart.sh --status
For more detail, please refer this blog.
The Pondslider also support ATT M2X. For detail, please refer this document.
Features about calibration (both MH-Z19 & MH-Z19B) and detection range change (MH-Z19B) is implemented at version 0.2.1 or later.
I'm afraid I've just only implemented these without test due to lack necessary devices and apparatus for the test, fx: standard consentration CO2 GAS, also MH-Z19B module. If you have these devices or apparatus and try to use these functions generously, I'm really appreciate your issue report regardless result were positive or negative.
For detail prease refer this wiki.
Any questions, suggestions, reports are welcome! Please make issue without hesitation!
- 0.1.0 2018.09.13 first version self-forked from slider.
- 0.2.2 2018.11.19 introduce pondslider and separate this PyPi package.
- 2.0.0 2019.01.18 Add Calibration, ABC on/off requested by this issue. Please refer this wiki.
- 0.3.5 2019.01.22 Both Python2 & Python3 support

