Prereq's:
- Make sure to have node 8+ installed
- Make sure to have Java 8 and maven installed
This exercise will set up your local development environment to use the open-source Apache OpenWhisk project, or a free hosted instance of Apache OpenWhisk on IBM Cloud Functions. These steps are a prerequisite before you can start building serverless applications for our lab.
We suggest you do the hosted option (IBM Cloud Functions) as it will be easier and you will also be able to do web invocations
Once you have completed this exercise, you will have…
- Registered an IBM Cloud account.
- Installed and configured IBM Cloud CLI tools.
- Tested example IBM Cloud Functions action from the command-line.
Once this exercise is finished, we can start to develop serverless applications using IBM Cloud Functions!
- Register IBM Cloud Account
- Check Default Region (Lite Account Users)
- Install IBM Cloud CLI
- Log Into IBM Cloud CLI
- Install IBM Cloud Functions CLI plugin
- Test IBM Cloud Functions From The CLI
-
Open a browser window
-
KCDC Attendees Navigate to https://ibm.biz/Bd2wJD
-
Fill in registration form and follow link in the validation email when it arrives.
-
Login into IBM Cloud using the account credentials you have registered.
🚨🚨🚨 PLEASE READ THIS SECTION. We know it looks boring but trust us! People often skim this part and then complain they can't login into the CLI. These instructions will save you all that inevitable confusion... 🚨🚨🚨
New IBM Cloud accounts default to a new "lite" account version.
This account provides free access to a subset of IBM Cloud resources, including IBM Cloud Functions. Lite accounts do not need a credit-card to sign up or expire after a set time period, i.e. 30 days.
Developers using "Lite accounts" are restricted to development within a single region. Accounts are automatically assigned to either eu-gb or us-south regions depending on user profile location.
When setting up the IBM Cloud CLI, choose the API endpoint for the default account region.
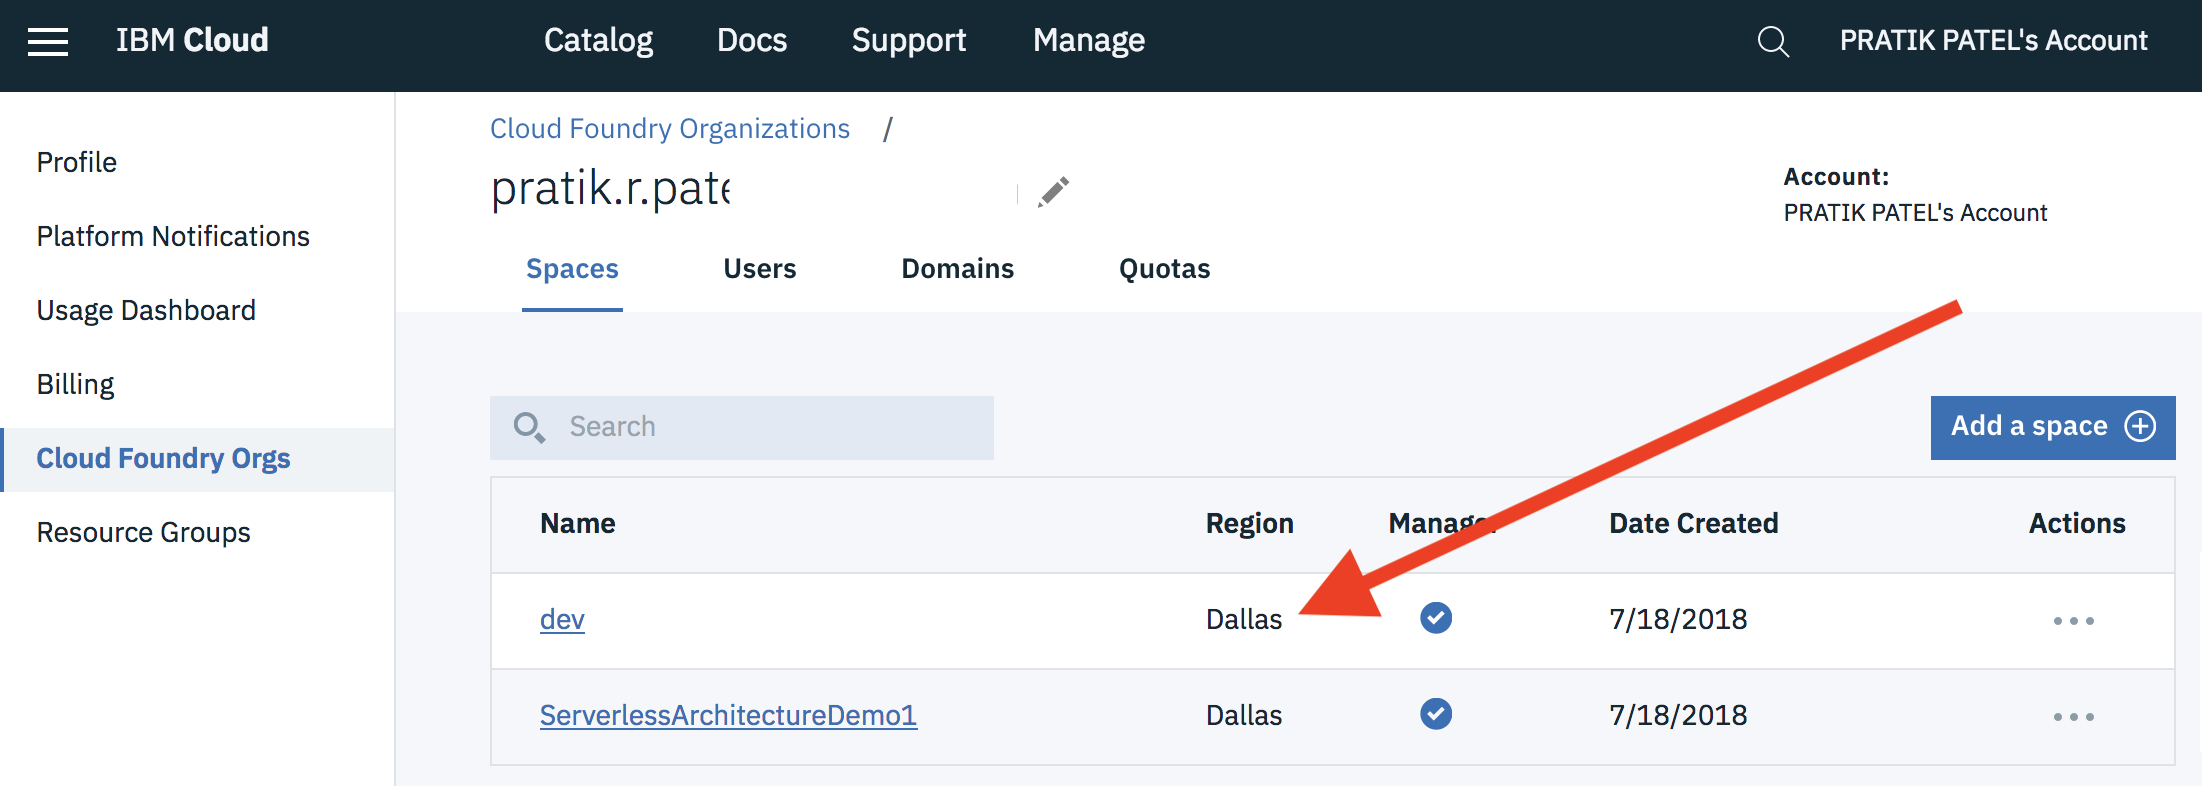
Follow these instructions to check which default region your lite account has been assigned.
- Open the IBM Cloud Functions homepage.
- Click the "Manage" menu from the page header.
- Click the "Account > Cloud Foundry Orgs" option from the drop-down menu.

- From the Cloud Foundry Organisations page, click the organisation name listed in the table.

- Check the "Region" value listed in the organisation details table.

Accounts which have been upgraded to "Pay-As-You-Go" or "Subscription" can choose any available region for IBM Cloud Functions.
🚨🚨🚨 DID YOU READ THIS SECTION? Good, just checking... 🚨🚨🚨
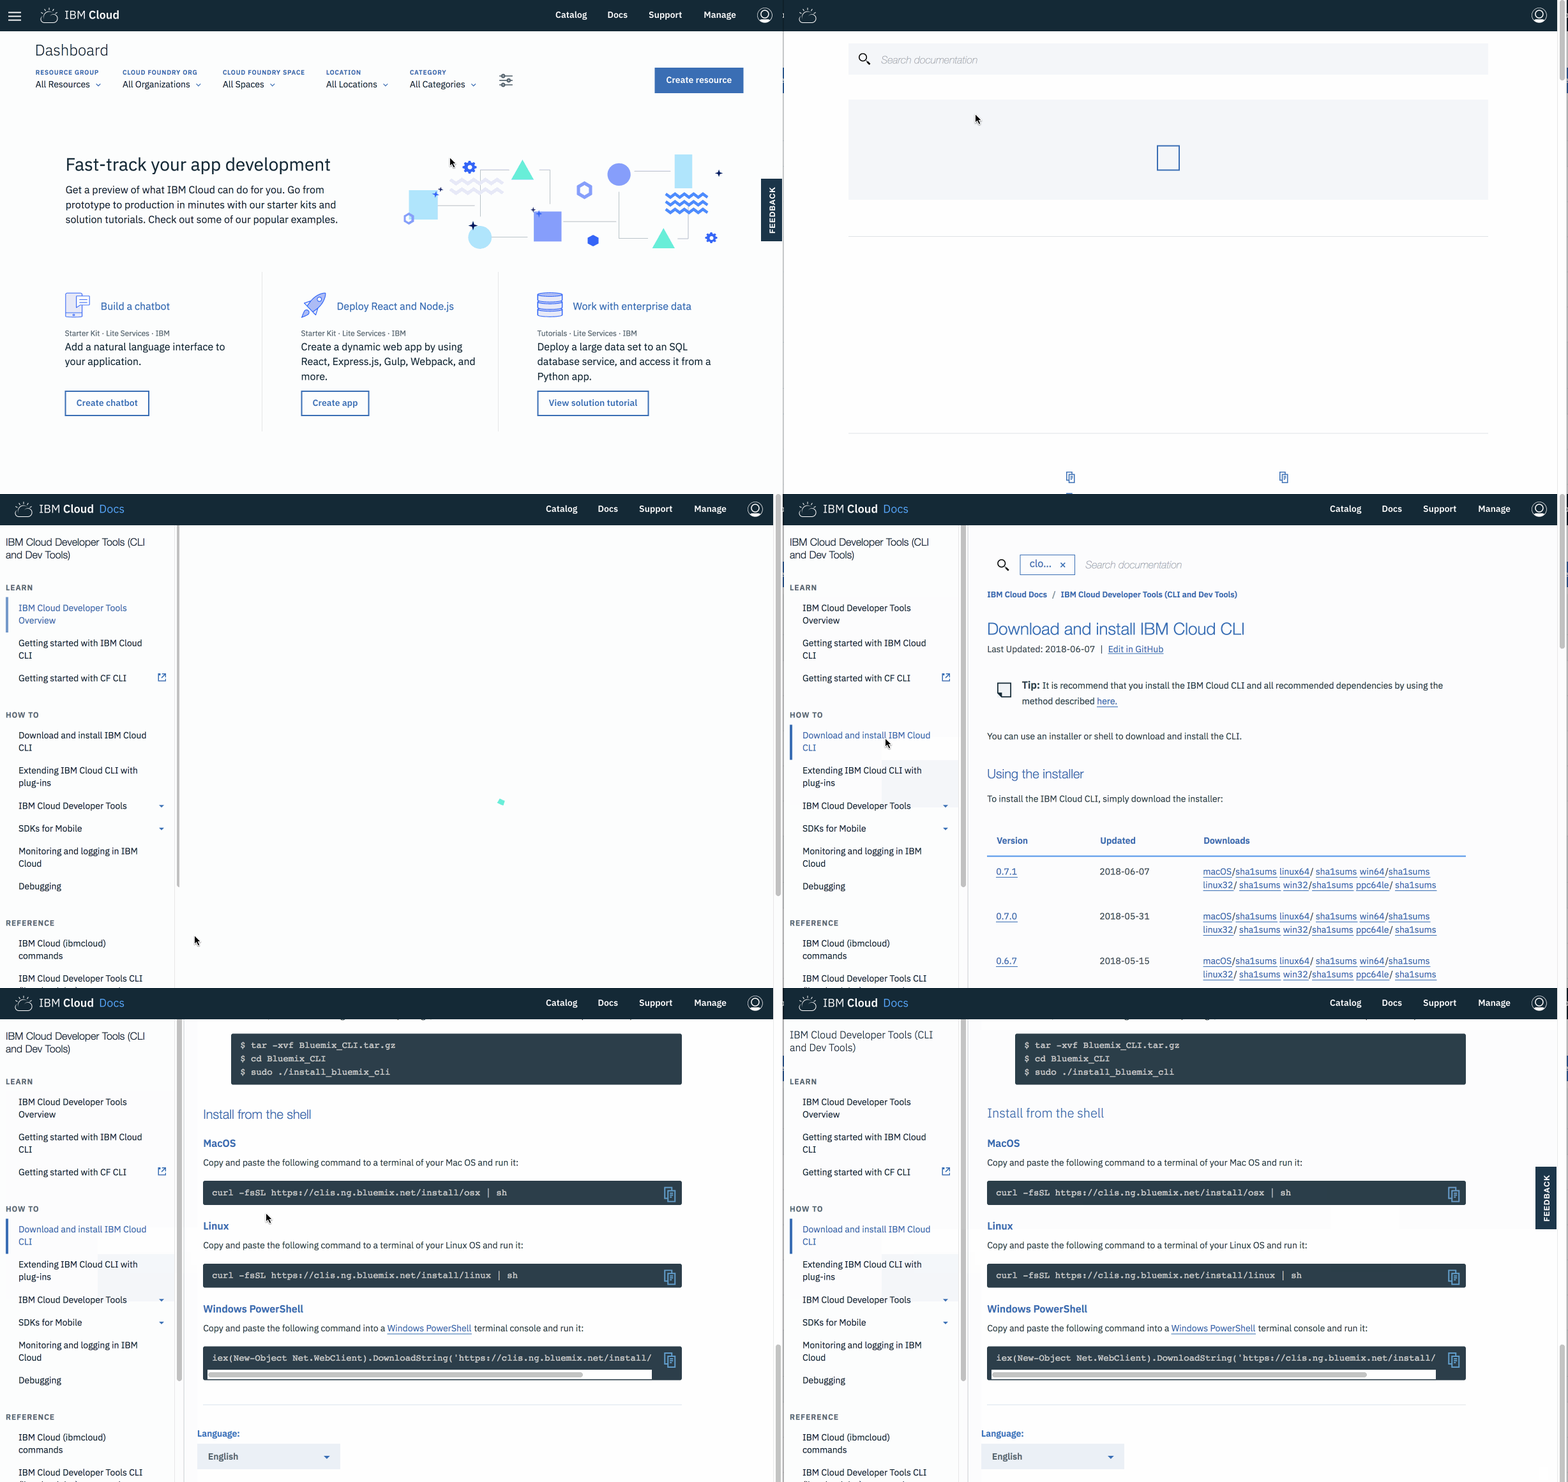
- Follow the steps listed under the "Install from shell" section to download and install the IBM Cloud CLI.
- MacOS:
curl -fsSL https://clis.ng.bluemix.net/install/osx | sh - Linux:
curl -fsSL https://clis.ng.bluemix.net/install/linux | sh - Windows (Powershell):
iex(New-Object Net.WebClient).DownloadString('https://clis.ng.bluemix.net/install/powershell')
-
Use this command to authenticate the IBM Cloud CLI with your account credentials.
$ ibmcloud login -
Choose an API endpoint from the list. IBM Cloud Functions is available in the following regions:
eu-de,eu-gbandus-south. Lite account users must choose their default account region.Select an API endpoint: 1. eu-de - https://api.eu-de.bluemix.net 2. au-syd - https://api.au-syd.bluemix.net 3. us-east - https://api.us-east.bluemix.net 4. us-south - https://api.ng.bluemix.net 5. eu-gb - https://api.eu-gb.bluemix.net 6. Enter a different API endpoint Enter a number> -
Enter account credentials for your IBM Cloud account.
Email> user@email.com Password> Authenticating... OK Select an account (or press enter to skip): 1. John Smith's Account (xxx) Enter a number> API endpoint: https://api.eu-gb.bluemix.net (API version: 2.92.0) Region: eu-gb User: user@email.com Account: No account targeted, use 'bx target -c ACCOUNT_ID' Resource group: No resource group targeted, use 'bx target -g RESOURCE_GROUP' Org: Space: -
Run the following command to configure the organisation and space the CLI is targeting.
$ ibmcloud target --cf
Targeted org user@email.com
Targeted space dev

API endpoint:     https://api.eu-gb.bluemix.net (API version: 2.92.0)
Region:           eu-gb
User:             user@email.com
Account:          No account targeted, use 'bx target -c ACCOUNT_ID'
Resource group:   No resource group targeted, use 'bx target -g RESOURCE_GROUP'
Org:              user@email.com
Space:            dev
-
Use this command to install the Cloud Functions plugin for the IBM Cloud CLI.
$ ibmcloud plugin install cloud-functions
Looking up 'cloud-functions' from repository 'Bluemix'...
Plug-in 'cloud-functions 1.0.7' found in repository 'Bluemix'
Attempting to download the binary file...
 11.13 MiB / 11.13 MiB [=================================================================================] 100.00% 9s
11665633 bytes downloaded
Installing binary...
OK
Plug-in 'cloud-functions 1.0.7' was successfully installed into /home/user/.bluemix/plugins/cloud-functions.
This plugin provides the Apache OpenWhisk CLI as a sub-command under the IBM Cloud CLI. Platform credentials are provided automatically by the IBM Cloud CLI.
-
Run the following command to invoke a test function from the command-line.
$ ibmcloud wsk action invoke whisk.system/utils/echo -p message hello --result
{
    "message": "hello"
}
If this command executes successfully, you have verified that the IBM Cloud CLI and Cloud Functions plugin have been installed and configured correctly. If this does not work, please contact the workshop organiser to provide assistance!
🎉🎉🎉 Congratulations, you've successfully registered an IBM Cloud account, configured the IBM Cloud CLI for Cloud Functions development and executed your first serverless function! Let's start using the platform to create our own serverless applications… 🎉🎉🎉
We recommend this excellent guide for getting OpenWhisk setup locally. It will take a while to setup, download and validate. Please be sure you are able to setup and deploy a test Cloud Function locally; setting up the IBM Cloud Functions as described in the previous section should take 5 minutes.
Setup Apache OpenWhisk locally
note: you may need to invoke openwhisk in insecure mode when running locally You can do this by passing the "-i" flag like so: wsk -i action create hello hello.js


