Display messages to a DOT Matrix LED Display. Message are sent to a MQTT server from any other application, the ESP8266 is subscribing to the channel and display messages depending on few parameters (animation, intensity, ...)
Displaying messages in the living room from my home automation solution (jeedom).
- ESP8266 (mine is Wemos D1 NodeMcu ESP12F)
- DOT Matrix based on MAX7219
- OLED display (SSD1306 and SH1106 based 128x64 pixel) - optional
- MQTT server somewhere - preferred on your LAN for privacy
- Temperature sensor DS18B20 - optional
- Light sensor GL5516 - optional
- Display message from a MQTT server
- NTP client for date and time
- Temperature measurement
- LED matrix dimming based on light sensor
- Read a file to display text (TODO)
- more to come
- Make sure your DotMatrix is properly configured according to MAX72xx (MAX72xx.h)
- Adapt the code (parameters, MQTT ipaddress)
- Drop the code to your ESP8266, third party libraries are included
- First time the ESP8266 should act as an access point (ESPxxxx), connect to it then go to http://192.168.4.1/ to configure your WIFI SSID/Password (STORE in EEPROM), then restart
- OLED should now display your IP on your network
- HTTP Command is available and describe at http://IP/command
ESP8266 is subscribing to topic "jeedom/message" and expect this json syntax
{
   "text": "My TEXT ",
   "priorite": 1,
   "lum": 15,
   "pos": 2,
   "eff_in": 1,
   "eff_out": 1,
   "speed": 25,
   "pause": 1000
}
-- text : the message to display -- priority : TODO -- lum : intensity of the LCD panel (1-15) -- pos : 0-LEFT, 1-Center, 2-RIGHT -- speed : speed of the animation (fps) -- pause : time between entry and exit effect -- eff_out : exit effect (same value as eff_in) -- eff_in : entry effect
- 0 : SCROLL RIGHT
- 1 : SCROLL LEFT
- 2 : SCROLL UP
- 3 : SCROLL DOWN
- 4 : OPENING CURSOR
- 5 : CLOSING CURSOR
- 6 : WIPE
- 7 : MESH
- 8 : FADE
- 9 : PRINT (fixed message)
- 10 : BLIND
- 11 : SCAN HORIZONTAL 0
- 12 : SCAN HORIZONTAL 1
- 13 : SCAN VERITICAL 0
- 14 : SCAN VERITICAL 1
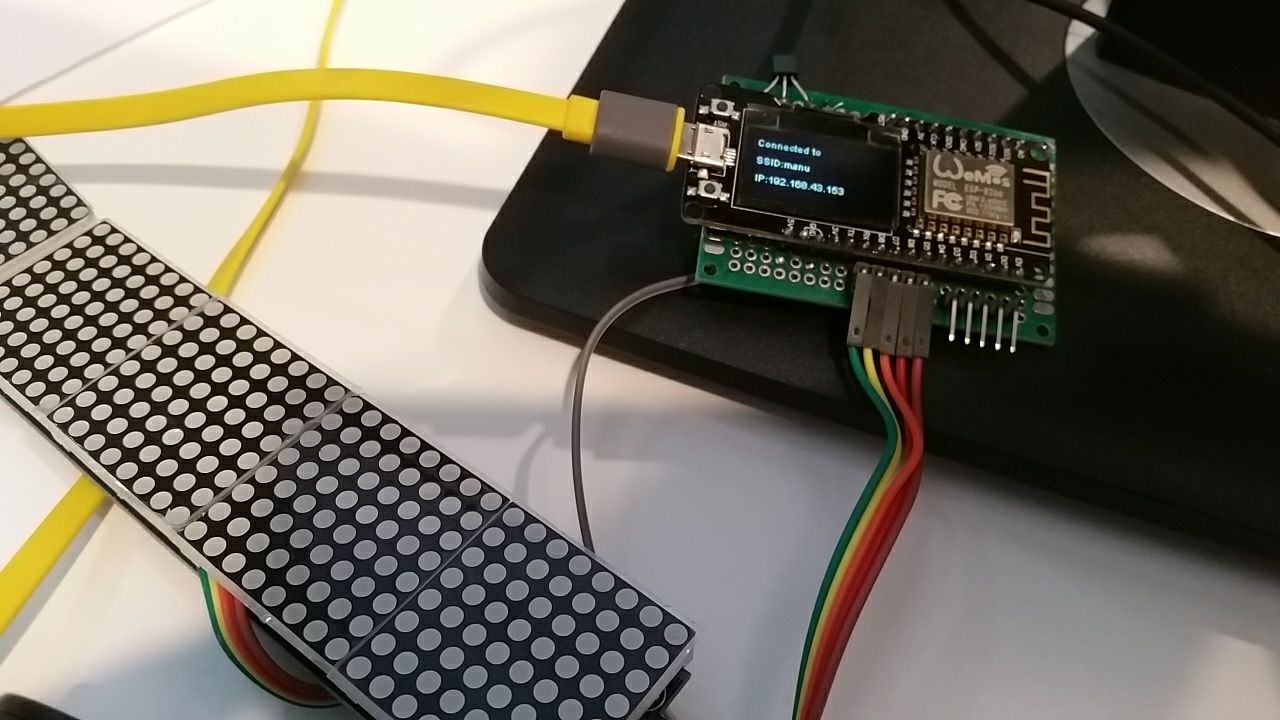
Prototype
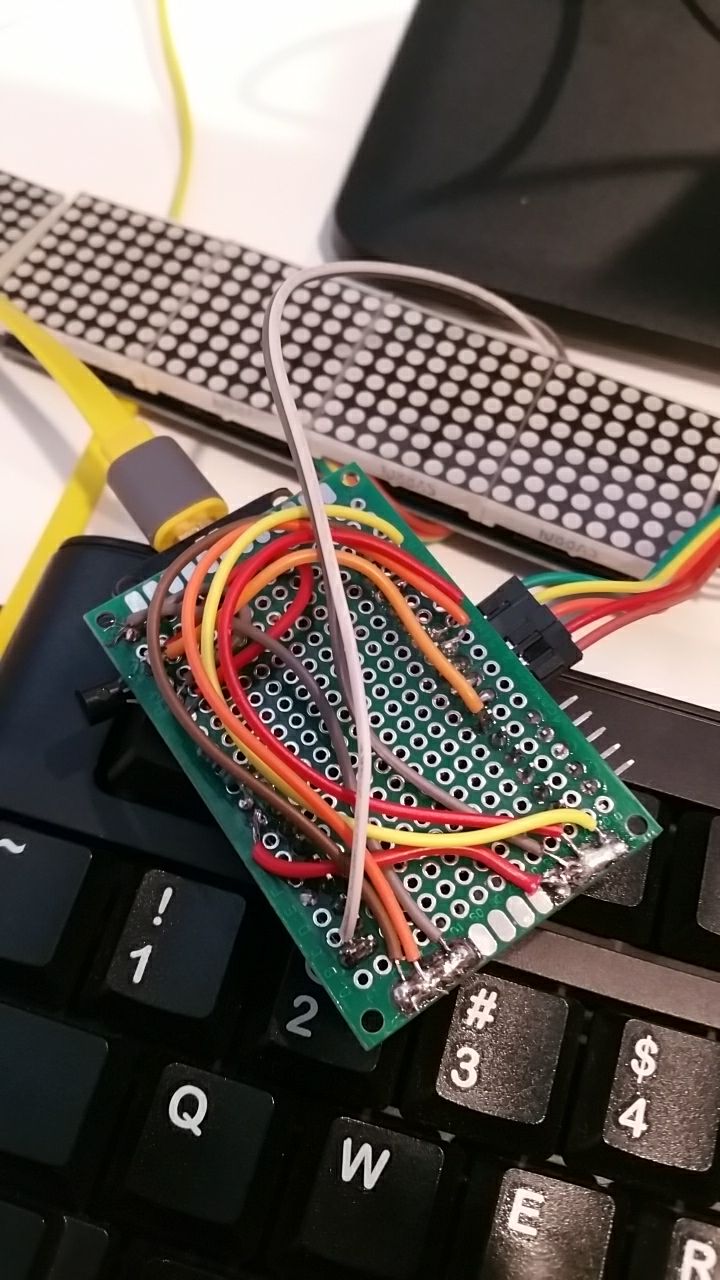
 Final and ugly soldering

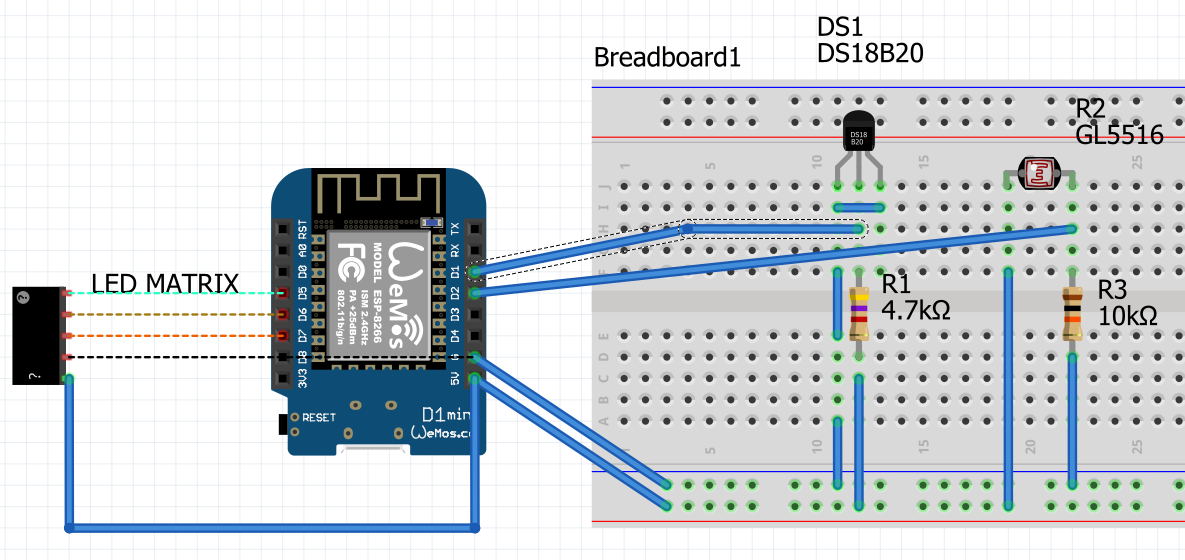
The sketch is not good for the DS18B20, so check on google on how connect properly the DS18B20. Also in the code the DS12B20 pin is set to D4 and on the image it's D1
This project is licensed under the GPL License
Thank you very much to DIYDave for his code and inspiration
Libraries used, thanks to their respectives authors
- MD_Parola DotMatrix management library
- MAX72xx Max7219 library
- WifiManager Wifi management
- SSD1306 OLED library