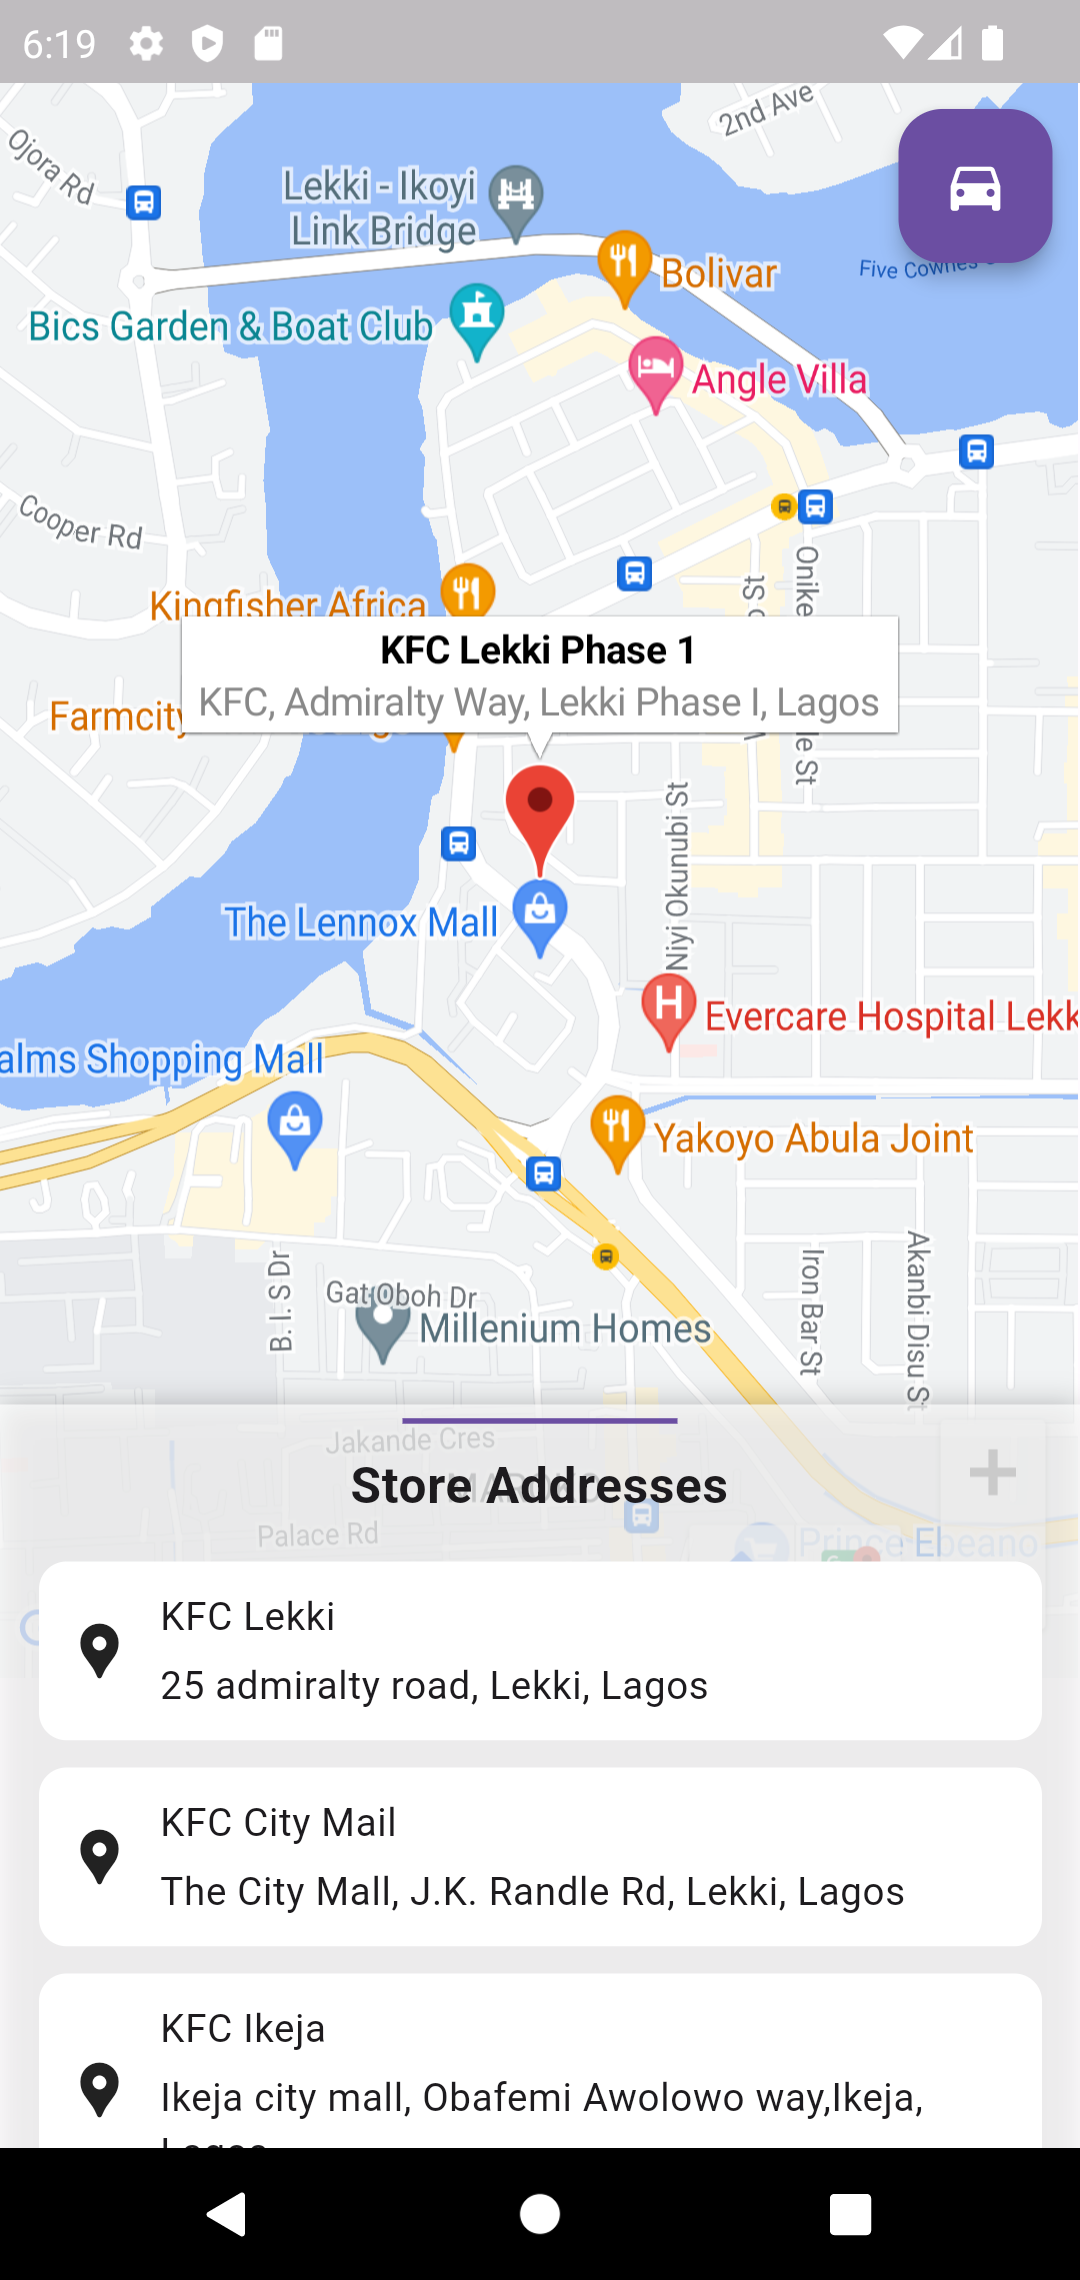
In our previous blog post, we discussed how to create a Store Locator API using Laravel and Swagger documentation. Now, it's time to build a Flutter app that leverages this API to display store locations on Google Maps. In this tutorial, we'll walk you through the steps to create a Store Locator app with Flutter.
Before we begin, make sure you have the following:
- Flutter development environment set up.
- The Store Locator API created in our previous blog post.
- Access to Google Maps API credentials.
Let's start by creating a new Flutter project:
flutter create store_locator_appcd store_locator_app- In your pubspec.yaml file, add the following dependencies:
dependencies:
  flutter:
    sdk: flutter
  google_maps_flutter: ^2.5.0
  http: ^1.1.0
  sliding_up_panel: ^2.0.0+1
  geolocator: ^8.0.1
url_launcher: ^6.1.6- Then, run flutter pub get to fetch the dependencies.
To display Google Maps in your app, you'll need to configure the Google Maps API. Follow the official documentation to obtain an API key: Google Maps Platform.
Once you have your API key, add it to your Android and iOS configuration files:
- Android: android/app/src/main/AndroidManifest.xml
- iOS: ios/Runner/Info.plist
In your lib directory, create a new Dart file, e.g., locator_screen.dart. This file will contain the code for your Store Locator screen.
Now, you can run your Flutter app using flutter run. You should see the Store Locator screen with Google Maps displaying the store locations obtained from your API.
