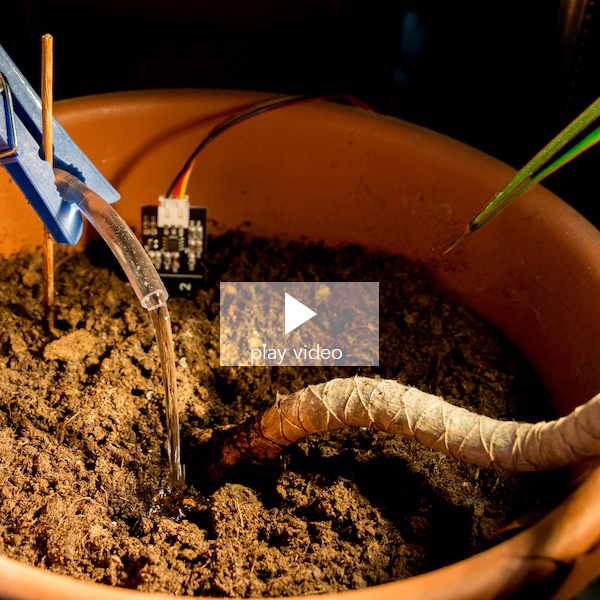
Automatic irrigation of plants on vacation.
For this self watering system you need an Arduino microcontroller, water pump, relay module and a capacitive soil moisture sensor. For example "WayinTop Automatische Bewässerung DIY Kit". It works with Arduino Nano and Arduino Yún.
Using Arduino Yún: Monitoring moisture is done and those log data are stored together with settings on a SD card. Those data (settings like threshold values and log files) will be pushed to a user defined server. An HTML file evaluates the log file/monitoring and shows graphically the moisture by remote on mobile phone or notebook.
This software supports:
- start pump when moisture of soil is too low
- start pump after time out (e.g. after one day)
- stop pump when moisture is high enough or after a timeout (e.g. at least after 20 seconds)
- interact via terminal (seriell monitor of arduino IDE):
- check sensor values
- start and stop pump manualy
- change values of variables during runtime (thresholds, time durations)
- activate debug mode: print sensor values continously and internal states of software.
- get log data (sensor data will be recorded every hour)
- start auto calibraton
- Internet of Things (IoT) with Arduino Yún:
- save log files and settings on SD card
- push files to a server
- evaluate log files and show graphically from remote
Connect digital outputs of arduino (microcontroller) with relay module inputs. Connect analog inputs of arduino with capacitive soil moisture sensors. Connect pumps with relay module switches and power supply. Make sure to use correct voltages for arduino board and pump.

Type 'h' to show help.
- v version: Show version of software
- d debug: Print continously debug informations
- s soft reset : reset timer and switch off pump
- r reset: hard reset all values, thresholds, timer values and switch off pump
- i short info: print value of sensors
- t terminal: interact with software and change threshold and timer values
- m manual mode: switch on and off each pump manually
- l read log: read log values of each channel
- p push: add log entry and push to server (IoT version)
- a auto calibration: wizard to set threshold values
- w write settings: write/save settings to SD card and push them to server
- k pump check: fast pump check (activate all pumps for a user defined time)
- b break: break system, i.e. deactivate thresholds by setting small and large values so pump will not go on
- c cancel: go back to main software functionality from each menu point
Hint: Connect reset pin with 10 k Ohm pull up resistor and 10 nF capacitor against ground to avoid reset when connecting computer via USB cable to running system. Otherwise internal log data will be cleared. When using Arduino Yún this is not necessary: log files will be stored on SD card and on server.
Type 't' and information of all channels is printed. Type channel number to edit values for the specific channel. To change threshold low for example type 'S1' and afterwards type new value. With 'c' the main program is continued. Type again 't' to check the values and 'c' to continue again.
Type 'a'. Afterwards type channel number. Make sure sensor is dry. Then type '1'. Pump is switched on. When watering is sufficient then type '0' to stop pump. The sensor values are taken to set the new threshold.
- Wait for three minutes to make sure linux system is ready (IoT version). LED is blinking in the first minute one time, in the second minute two times and in the third minute three times to signalize progress.
- Stay for two minutes in idle mode. No pump control during this mode. LED is signalizing progress. First 30 seconds blinking for one time, next 30 seconds blinking two times and so on. During idle mode key b can be pressed to set all threshold values to small/large value to avoid starting pump automatically. This is useful when setting up the system for the first time. Otherwise pump will start immediately and calibration cannot be done in an exact way because soil may be already wet. But when no key is pressed the system will run after idle mode automatically with predefined settings. This is necessary to bring up system in a stable mode after unexpected power cycle. And with pressing b you can avoid running system when required.

When using Arduino Yún the access to the Arduino board can be done in your WLAN environment. E.g. to setup the watering system like setting threshold values. Every hour log data are recorded and sent to a user defined server. So it is possible to check the watering system by remote using a mobile phone for example. The log data are stored in a human readable version and also a graphically evaluation can be shown on your mobile phone.
Here an example of an evaluation is shown (e.g. on your mobile phone during holiday, notebook, etc.). It shows that one plant (red line) was watered several times. Another plant (green line) only once. For two plants (blue and yellow line) the moisture was nearly constant in the shown time.
Screenshot of mobile phone.
")
Screenshot of evaluation.
")
This software supports following requirements:
- R1: If pump is activated (on) then after time T1 there shall be a moisture change (below threshold S3). Otherwise go to error state. And the minimum watering time is T1.
- R2: If moisture is lower than threshold S1 then pump has to be activated.
- R3: If moisture is higher than threshold S2 then pump has to stop.
- R4: Maximum time for activated pump time T2.
- R5: Wait at least time T3 before activating pump again.
- R6: If after time T4 soil is still too wet then start pump (maybe sensor is defect).
- R7: Leave error state after time T5 and go to ready state (new trial to water plants).
- R8: Requirements R1 - R7 works independent for each available pump.
States/Modes:
- M1: pump is ready
- M2: pump is on
- M3: pump is off
- M4: pump is in error state
A micro SD card is required for saving data and an FTP server access for pushing data to server and evaluation.
The location will be /mnt/sd/watering. Make sure this folder does exists.
Copy pushToServer.sh script to Linux system of Arduino Yún and modify it. (FTP server name with root path, user name and password). Upload evaluation.html to the server for evaluating data.
Here Arudino Yún. Arudino Uno can also be used but without internet access.

Arduino Yún with SD card:

Relay module with battery holder and D-SUB connector for easy setup.

Pump with hose and D-SUB connector.

Capacitive soil moisture sensor with connector.

With Arudino Yún settings and log data are pushed to an user defined server. So they can be read out remotly.
Here an example of settings:

Beside graphically visualisation log file can be read out as text:
