A smart but simple class which allows you to train your neural networks without writting many basic training codes. (Something like pytorch lightning, maybe...)
E.g., If you want to train a Bayesian neural network, you can just write:
from foxutils.trainerX import Trainer
import torch

class BNNTrainer(Trainer):

    def __init__(self) -> None:
        super().__init__()

    def set_configs_type(self):
        '''
        Add a new config item "KL_scaling" to the configs handler.
        You can use `show_config_options()` method to see the possible configs.
        '''
        super().set_configs_type()
        self.configs_handler.add_config_item("KL_scaling",value_type=float,default_value=0.01,description="The scaling factor of BNN training.")

    def train_step(self, network: torch.nn.Module, batched_data, idx_batch: int, num_batches: int, idx_epoch: int, num_epoch: int):
        '''
        Train the BNNs.
        Don't worry if you are not familiar with BNNs. Basically we are just using a new loss function.
        '''
        inputs = batched_data[0].to(device=self.configs.device)
        targets = batched_data[1].to(device=self.configs.device)
        prediction = network(inputs, torch.ones(size=(targets.shape[0],), device=self.configs.device)*200, None)
        mseloss=torch.nn.functional.mse_loss(prediction, targets)
        klloss=get_kl_loss(network)*((2**(num_batches-(idx_batch+1)))/(2**num_batches-1))
        '''
        You can use the recorder to record the loss and other metrics.
        The recorder is a tensorboard.SummaryWriter object.
        '''
        self.recorder.add_scalar("Seprate_train_loss/mse",mseloss.item(),(idx_epoch-1)*num_batches+idx_batch)
        self.recorder.add_scalar("Seprate_train_loss/kl_loss",klloss.item(),(idx_epoch-1)*num_batches+idx_batch)
        return mseloss+klloss*self.configs.KL_scaling

trainer=BNNTrainer()
network=MyBayesianNetwork()
train_dataset=MyTrainDataset()
vali_dataset=MyValiDataset()
'''
Use train_from_scratch() method to train the network from scratch.
The training congifurations can be set either by the configs file or keyword arguments in the method.
You can also use train_from_checkpoint() method to continue training from a checkpoint.
'''
trainer.train_from_scratch(network,train_dataset,vali_dataset,
                           path_config_file="./training_configs.yaml",
                           name="my_BNN_projected",
                           path_save_dir="./my_training_project")
A trained project is a folder like this:
my_training_project    # specify by 'path_config_file'
--- my_BNN_projected    # specify by 'name'
------ 2023-12-31_23_59_59    # training start time
--------- checkpoints    # checkpoints saving folder
------------ checkpoint_1000.pt
------------ checkpoint_2000.pt
------------ ......
--------- records    # tensorboard records saving folder, can be loaded by `tensorboard --logdir=records`
--------- config.yaml    # training config file, can be loaded again by trainer
--------- network_structure.pt   # network structure
--------- trained_network_weights.pt    # final network weights
--------- training_event.log    # training log
You can directly access these training files or use TrainedProject to organize them.
from foxutils.trainerX import TrainedProject
trained_project=TrainedProject("./my_training_project/my_BNN_projected")
weights_1000=trained_project.get_checkpoints(1000)
train_configs=trained_project.get_configs()
network=trained_project.get_network_structure()
training_records=trained_project.get_records()
trained_network=trained_project.get_saved_network()A general data class which store data as the class attributes:
from foxutils.helper.coding import GeneralDataClass

configs=GeneralDataClass(name="foxutils",version="0.0.1",author="Fox",description="A set of useful tools for deep learning.")
configs.version="0.0.2"
configs.version
'0.0.2'
A class that handles configurations for a specific application or module.
The TrainerX.Trainer and network.unets.UNet are two examples of using ConfigurationsHandler.
Here, we give a simple example of using ConfigurationsHandler:
from foxutils.helper.coding import ConfigurationsHandler

class Student():

    def __init__(
            self,
            path_config_file:str="",**kwargs
        ):
            super().__init__()
            if not hasattr(self,"configs_handler"):
                self.configs_handler=ConfigurationsHandler()
            # set configs options:
            self.configs_handler.add_config_item("name",value_type=str,mandatory=True,description="The name of the class.")
            self.configs_handler.add_config_item("gender",value_type=str,mandatory=True,option=["male","female"],description="Gender of the student.")
            self.configs_handler.add_config_item("age",value_type=int,mandatory=True,description="Age of the student.")
            self.configs_handler.add_config_item("graduate age",value_type=int,default_value_func=lambda configs:configs.age+4,description="The age when the student graduate. Default value is age+4.")
            # read configs from file and set configs from kwargs:
            if path_config_file!="":
                self.configs_handler.set_config_items_from_yaml(path_config_file)
            self.configs_handler.set_config_items(**kwargs)
            self.configs=self.configs_handler.configs()

    def show_config_options(self):
        self.configs_handler.show_config_features()

    def show_configs(self):
        self.configs_handler.show_config_items()

foxutils=Student(name="foxutils",gender="male",age=18)
foxutils.show_config_options()
print()
foxutils.show_configs()
Mandatory Configuration:
name (str): The name of the class.
gender (str, possible option: ['male', 'female']): Gender of the student.
age (int): Age of the student.
Optional Configuration:
graduate age (int): The age when the student graduate. Default value is age+4.
name: foxutils
gender: male
age: 18
graduate age: 22
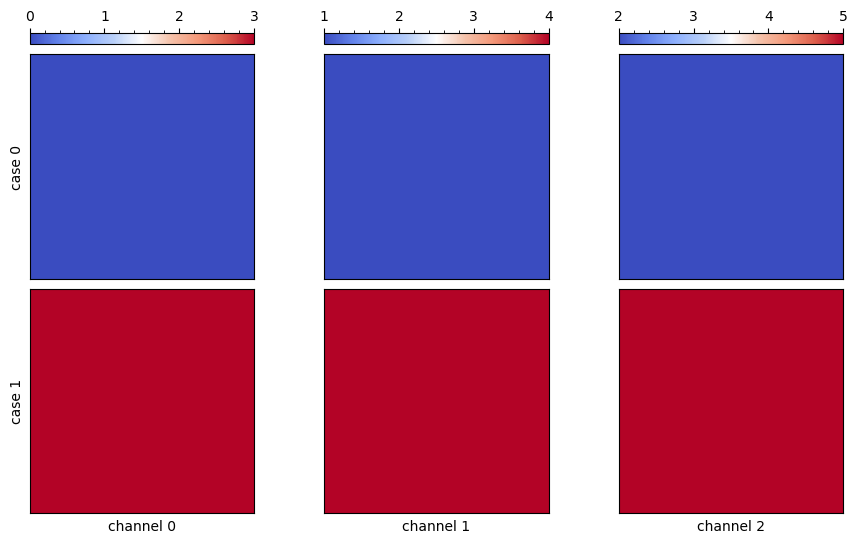
A plot function to show each channel of a pyTorch tensor/numpy array:
from foxutils.plotter.field import show_each_channel
import numpy as np
import torch
case1=np.stack([np.ones((100,100))*i for i in range(3)],axis=0)
case2=np.stack([np.ones((100,100))*(i+3) for i in range(3)],axis=0)
show_each_channel([case1,case2])
#show_each_channel([torch.tensor(case1),torch.tensor(case2)])
#show_each_channel(np.stack([case1,case2],axis=0))One of the important feature is that it uses symetric color map to show the positive and negative values.
That is, the color map is centered at 0. A symetric color map can be generated by the sym_colormap function.
You can also specify other color maps by cmap argument.
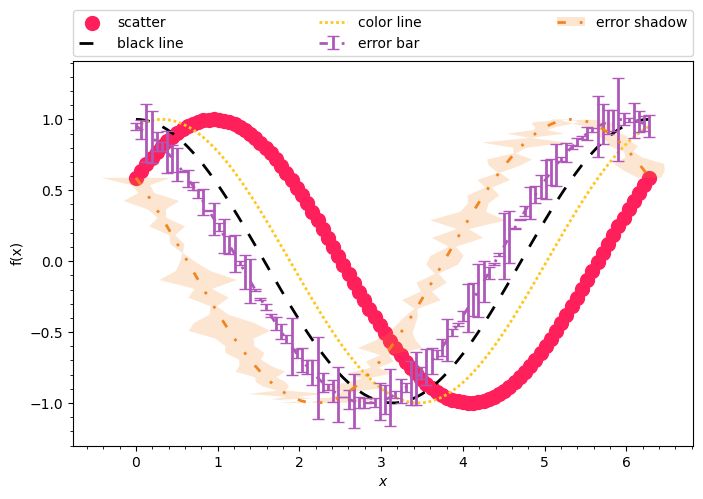
A (faster?) plotter to plot lines with given formats.
The color and dash types used can be found in plotter.style.
from foxutils.plotter.line import line_plotter
# line_plotter is an instance of foxutils.plotter.line.FormatLinePlotter. You can also create your own instance.
import numpy as np
x=np.linspace(0,1,100)*np.pi*2
line_plotter.clear_all()
line_plotter.scatter(x,np.sin(x+0.2*np.pi),label="scatter")
line_plotter.black_line(x,np.cos(x),label="black line")
line_plotter.color_line(x,np.sin(x+0.4*np.pi),label="color line")
line_plotter.color_line_errorbar(x,np.sin(x+0.6*np.pi),y_error=np.abs(np.random.randn(100)*0.1),label="error bar")
line_plotter.color_line_errorshadow(x,np.sin(x+0.8*np.pi),x_error=np.abs(np.random.randn(100)*0.5),label="error shadow")
line_plotter.legend_y(1.03)
line_plotter.ylabel("f(x)")
line_plotter.plot()python3 setup.py sdist bdist_wheel
cd dist
pip install foxutils-*.whlDiffusion-based-Flow-Prediction: Diffusion-based flow prediction (DBFP) with uncertainty for airfoils


