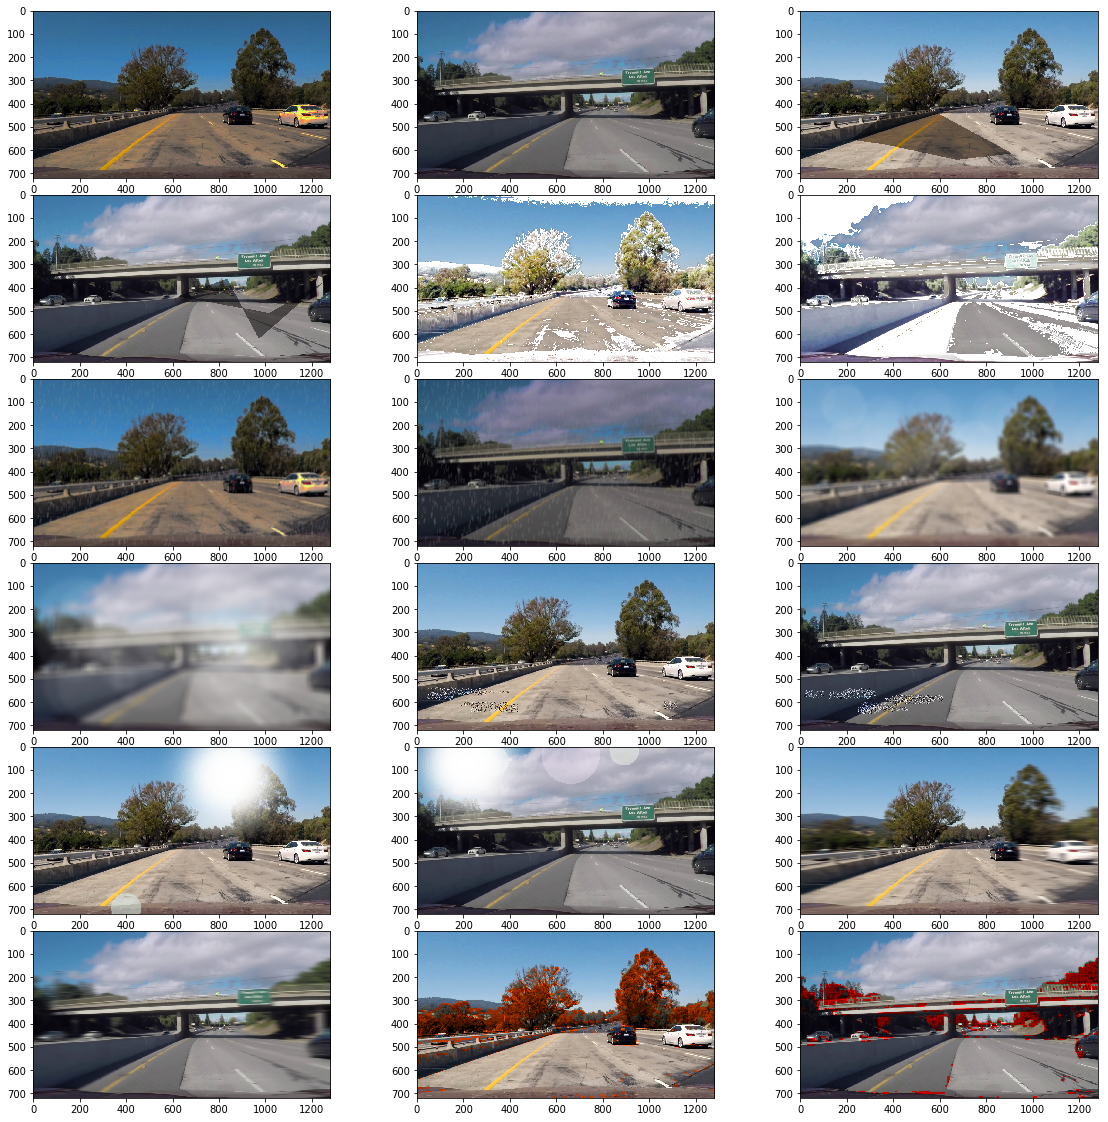
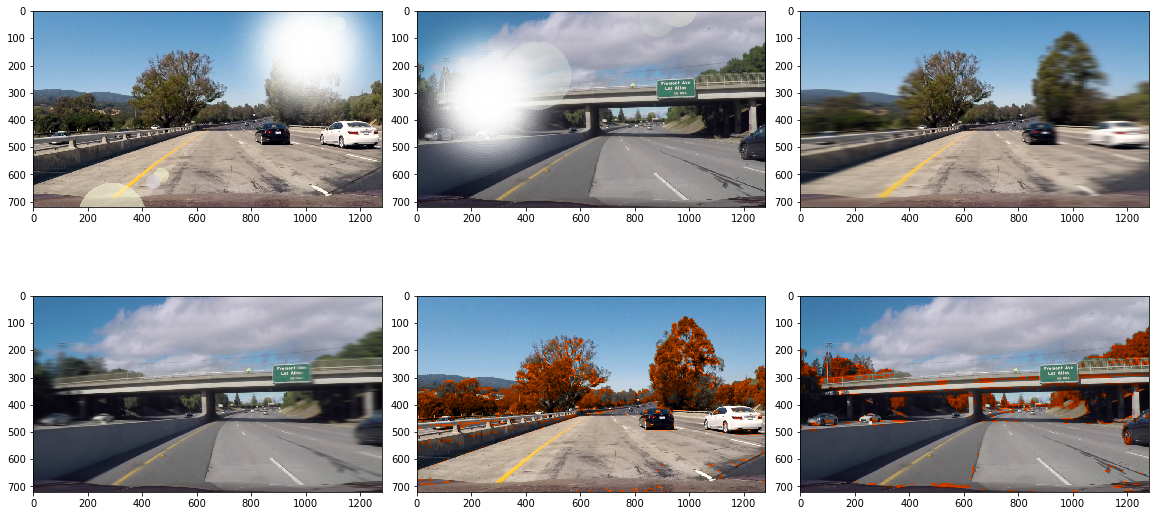
There are various types of image augmentations done to increase the image corpus for training neural networks. However for training CNNs to drive some special road conditions are required. These can be random gravels of the road or maybe snow. Rain and fog also reduce the visibility to a great extent. Automold helps in addressing these challenges and augments road images to have various weather and road conditions.
import Automold as am
import Helpers as hppath='./test_augmentation/*.jpg'
images= hp.load_images(path)hp.visualize(images, column=3, fig_size=(20,10))parameters
image: image or image list
brightness_coeff amount of brightness (0<=brightness_coeff<=1), default: random
bright_images= am.brighten(images[0:3]) ## if brightness_coeff is undefined brightness is random in each image
hp.visualize(bright_images, column=3)bright_images= am.brighten(images[0:3], brightness_coeff=0.7) ## brightness_coeff is between 0.0 and 1.0
hp.visualize(bright_images, column=3)parameters
image: image or image list
darkness_coeff amount of darkness (0<=darkness_coeff<=1), default: random
dark_images= am.darken(images[0:3]) ## if darkness_coeff is undefined darkness is random in each image
hp.visualize(dark_images, column=3)dark_images= am.darken(images[0:3], darkness_coeff=0.7) ## darkness_coeff is between 0.0 and 1.0
hp.visualize(dark_images, column=3)But what if you just want some random brightness or darkness in the images. Well try out the random_brightness function which receives an image or an image array
parameters
image: image or image list
dark_bright_images= am.random_brightness(images[4:7])
hp.visualize(dark_bright_images, column=3)Parameters
image: image or image list
no_of_shadows: no. of shadows, default: 1
rectangular_roi: (top-left x, top-left y, bottom-right x, bottom right y), default: lower half of image
shadow_dimension: no. of sides of the shadows (3<=shadow_dimension<=10), default: random
shadowy_images= am.add_shadow(images[4:7])
hp.visualize(shadowy_images, column=3)shadowy_images= am.add_shadow(images[4:7], no_of_shadows=2, shadow_dimension=8)
hp.visualize(shadowy_images, column=3)parameters
image: image or image list
snow_coeff: amount of snow (0<=snow_coeff<=1), default: random
snowy_images= am.add_snow(images[4:7]) ##randomly add snow
hp.visualize(snowy_images, column=3)snowy_images= am.add_snow(images[4:7], snow_coeff=0.3)
hp.visualize(snowy_images, column=3)snowy_images= am.add_snow(images[4:7], snow_coeff=0.8)
hp.visualize(snowy_images, column=3)parameters
image: image or image list
slant: deviation of rain from normal (-20<=slant<=20), default: random
drop_length: length of the drop (0<=drop_length<=100), default: 20 (pixels)
drop_width: width of the drop (1<=drop_width<=5), default: 1
drop_color: color of droplets, default: (200,200,200)
rain_type: values in 'drizzle','heavy','torrential', default: 'None'
rainy_images= am.add_rain(images[4:7])
hp.visualize(rainy_images, column=3)rainy_images= am.add_rain(images[4:7], rain_type='heavy', slant=20)
hp.visualize(rainy_images, column=3)rainy_images= am.add_rain(images[4:7], rain_type='torrential')
hp.visualize(rainy_images, column=3)Note: drop_length and drop_width values are overriden when rain_type is not None
parameters
image: image or image list
fog_coeff: amount of fog (0<=fog_coeff<=1), default: random
foggy_images= am.add_fog(images[4:7])
hp.visualize(foggy_images, column=3)foggy_images= am.add_fog(images[4:7], fog_coeff=0.4)
hp.visualize(foggy_images, column=3)foggy_images= am.add_fog(images[4:7], fog_coeff=0.9)
hp.visualize(foggy_images, column=3)parameters
image: image or image list
rectangular_roi: (top-left x, top-left y, bottom-right x, bottom right y), default: lower 3/4th of image
no_of_patches: no. of gravel patches required, default: 8
bad_road_images= am.add_gravel(images[4:7])
hp.visualize(bad_road_images, column=3)bad_road_images= am.add_gravel(images[4:7], rectangular_roi=(700,550,1280,720),no_of_patches=20) ##too much gravels on right
hp.visualize(bad_road_images, column=3)parameters
image: image or image list
flare_center: center coordinates (x,y) of the source, default: random
angle: angle of flare in randians, default: random
no_of_flare_circles: no. of secondary flare circles (0<=no_of_flare_circles<=20), default: 8
src_radius: radius of the primary flare source, default: 400 (pixels)
src_color: rgb color of the flare source and secondary circles, default: (255,255,255))
flare_images= am.add_sun_flare(images[4:7])
hp.visualize(flare_images, column=3)
import math
flare_images= am.add_sun_flare(images[4:7], flare_center=(100,100), angle=-math.pi/4) ## fixed src center
hp.visualize(flare_images, column=3)parameters
image: image or image list
speed_coeff: amount of speed (0<=speed_coeff<=1), default: random
speedy_images= am.add_speed(images[1:4]) ##random speed
hp.visualize(speedy_images, column=3)speedy_images= am.add_speed(images[1:4], speed_coeff=0.9) ##random speed
hp.visualize(speedy_images, column=3)parameters
image: image or image list
fall_images= am.add_autumn(images[0:3])
hp.visualize(fall_images, column=3)image: image or image list
aug_types: list of Automold functions, eg: ['add_snow','add_rain'], default: all aug functions are executed
volume: 'same' or 'expand', default: expand
        same: keeps the volume of corpus unchanged, applies random aug_types on images

        expand: applies all aug_types on all images and expands output corpus
aug_images= am.augment_random(images[4:6], volume='same')  ##2 random augmentations applied on both images
hp.visualize(aug_images,column=3,fig_size=(20,20))aug_images= am.augment_random(images[4:6], volume='expand') ##all aug_types are applied in both images
hp.visualize(aug_images,column=3,fig_size=(20,20))aug_images= am.augment_random(images[4:6], aug_types=['add_sun_flare','add_speed','add_autumn'], volume='expand') ##all aug_types are applied in both images
hp.visualize(aug_images,column=3,fig_size=(20,10))aug_images= am.augment_random(images[4:6], aug_types=['add_sun_flare','add_speed','add_autumn'], volume='same') ##2 random aug_types are applied in both images
hp.visualize(aug_images,column=3,fig_size=(20,10))aug_types=["random_brightness","add_shadow","add_snow","add_rain","add_fog","add_gravel","add_sun_flare","add_speed","add_autumn"]
dict_time={}
import time
for aug_type in aug_types:
t=time.time()
command='am.'+aug_type+'(images)'
result=eval(command)
dict_time[aug_type]=time.time()-t
t=time.time()
print('Average Time taken per augmentaion function to process 1 image:')
tot=0
for key, value in dict_time.items():
tot+=value
print(key, '{0:.2f}s'.format(value/len(images)))
print('-----------------------')
print('Total no. of augmented images created:', len(aug_types)*len(images))
print('-----------------------')
print('Total time taken to create ',len(aug_types)*len(images),' augmented images:', '{0:.2f}s'.format(tot))Average Time taken per augmentaion function to process 1 image:
add_fog 0.28s
add_gravel 0.03s
random_brightness 0.05s
add_autumn 0.22s
add_speed 0.15s
add_snow 0.05s
add_sun_flare 0.08s
add_shadow 0.01s
add_rain 0.03s
-----------------------
Total no. of augmented images created: 81
-----------------------
Total time taken to create 81 augmented images: 8.04s
Note: The load_images helper function resizes all images to 1280x720 and thus all returned images have the same dimensions. If original image dimensions are required please write a new load function
Some more helpful functions are in pipeline and will get added to the library asap. Thanx
MIT License
Copyright (c) 2018 Ujjwal Saxena
Permission is hereby granted, free of charge, to any person obtaining a copy of this software and associated documentation files (the "Software"), to deal in the Software without restriction, including without limitation the rights to use, copy, modify, merge, publish, distribute, sublicense, and/or sell copies of the Software, and to permit persons to whom the Software is furnished to do so, subject to the following conditions:
The above copyright notice and this permission notice shall be included in all copies or substantial portions of the Software.
THE SOFTWARE IS PROVIDED "AS IS", WITHOUT WARRANTY OF ANY KIND, EXPRESS OR IMPLIED, INCLUDING BUT NOT LIMITED TO THE WARRANTIES OF MERCHANTABILITY, FITNESS FOR A PARTICULAR PURPOSE AND NONINFRINGEMENT. IN NO EVENT SHALL THE AUTHORS OR COPYRIGHT HOLDERS BE LIABLE FOR ANY CLAIM, DAMAGES OR OTHER LIABILITY, WHETHER IN AN ACTION OF CONTRACT, TORT OR OTHERWISE, ARISING FROM, OUT OF OR IN CONNECTION WITH THE SOFTWARE OR THE USE OR OTHER DEALINGS IN THE SOFTWARE.


