Image from @ashleymcnamara's gopher artwork - license
If you ever used kubectl, Helm, Draft or even the Kubernetes UI Dashboard and wanted yourself to create a tool for Kubernetes, you've come to the right place.
This is a toolkit for creating gRPC-based CLI and web tools for Kubernetes, and it should be used as a starting point in new awesome tools for Kubernetes, written in Go.
Here's a quick introduction of kube-toolkit to SIG-Apps:
client- local CLI client that deploys theserverand thedashboardto your Kubernetes cluster and interacts through gRPC with the server via a Kuberentes tunnels tolocalhostserver- gRPC server that is deployed on your Kubernetes cluster and responds to requests coming from the clientsdashboard- web application that communicates with theserverthrough a gRPC-gateway
The kube-toolkit client interacts with the server-side component using the Kubernetes API to create authenticated tunnels back to the cluster, using gRPC as the underlying communication protocol. The server and dashboard components run in the same Kubernetes pod.
In order to communicate with the cluster you need to pass the kubeconfig file, and the tool will start a tunnel to the cluster for each command you execute, then will tear it down so there are no open connections to the cluster when no command is executed.
Before you get started, make sure to:
- have Go installed (everything has been tested with Golang 1.9.2)
- install the protobuf compiler and the Go bingings
- install the gRPC-gateway proxy and swagger generators
You can find the prerequisites for building the project in a container in prerequisites.sh, or in the CircleCI configuration file
Assuming you have your environment correctly setup, you can clone this repository (recursively, as there is a git submodule, more on this later), we can simple make client.
If you take a look at the the first line of the Makefile, you can change the name of the built binaries - by default, the names are
ktkfor the client,ktkdfor the server andgatewayfor the gateway and dashboard -thektkname comes fromkube-toolkit.
If you change a binary name, make sure to also change it in the associated Dockerfile!
Next, you need to setup an environment variable that points to your Kubernetes config file:
On Linux / macOS:
export KUBECONFIG=<path-to-kubeconfig-file>
On Windows:
$Env:KUBECONFIG=<path-to-kubeconfig-file>
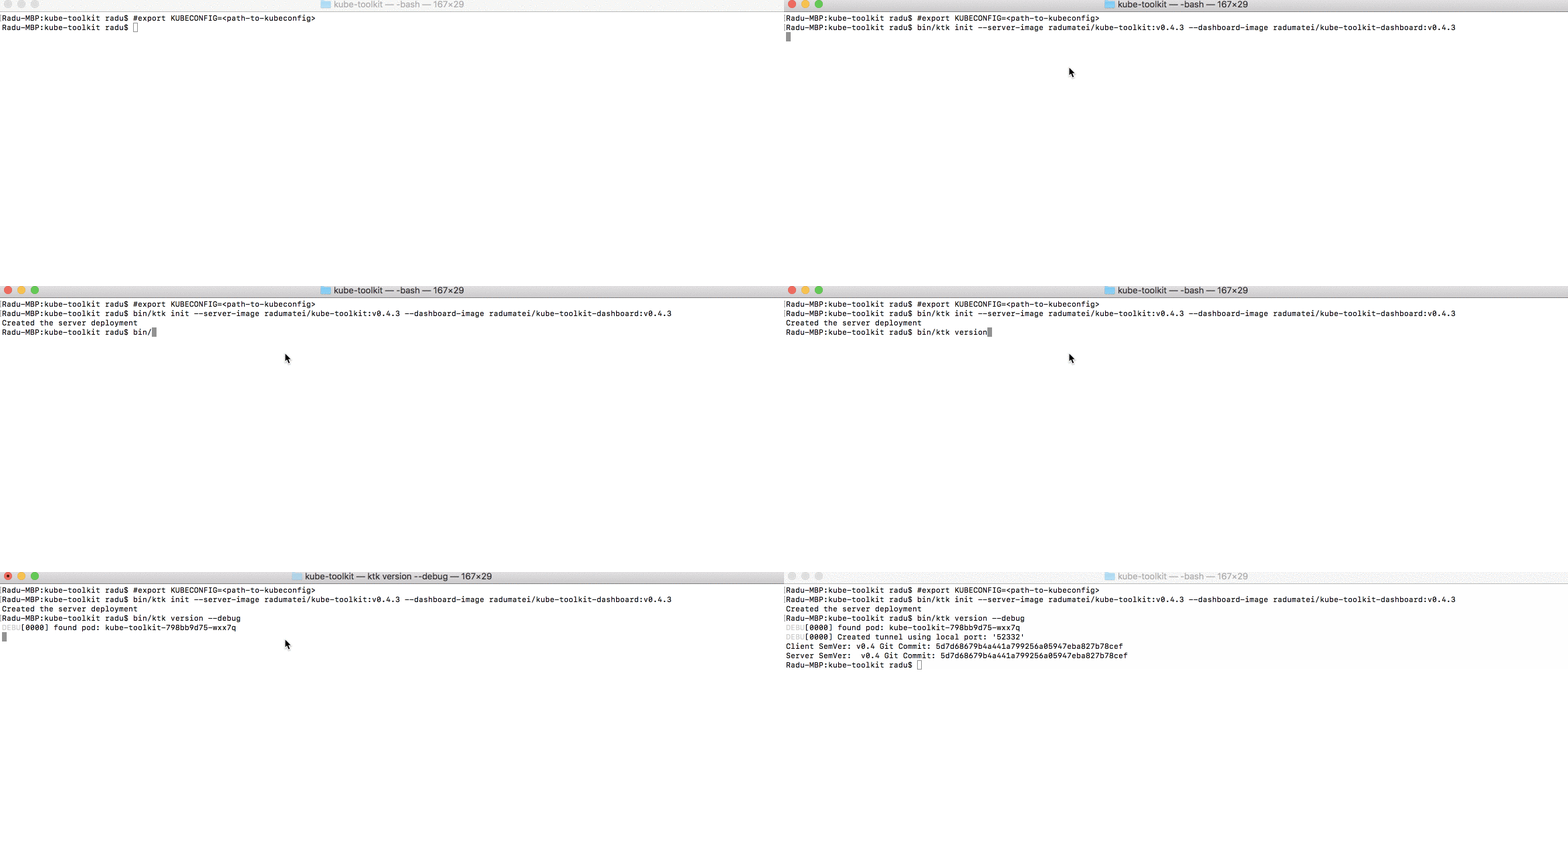
Then, you need to execute the init command - the client can automatically deploy to your cluster the server-side and web components, using the Kuberentes Go Client - you need to specify the Docker image for the gRPC server - server-image and for the web dashboard - dashboard-image. At the moment of writing this article, the latest pushed version is v0.4.3. If you use the client from that revision and the Docker images below, things should work properly.
bin/ktk init --server-image radumatei/kube-toolkit:latest --dashboard-image radumatei/kube-toolkit-dashboard:v0.4.3
If you want to clone the
masterbranch, there is no guarantee that things will work correctly!
After the deployment, you should be able to execute commands:
bin/ktk version --debug
Let's see it in action:
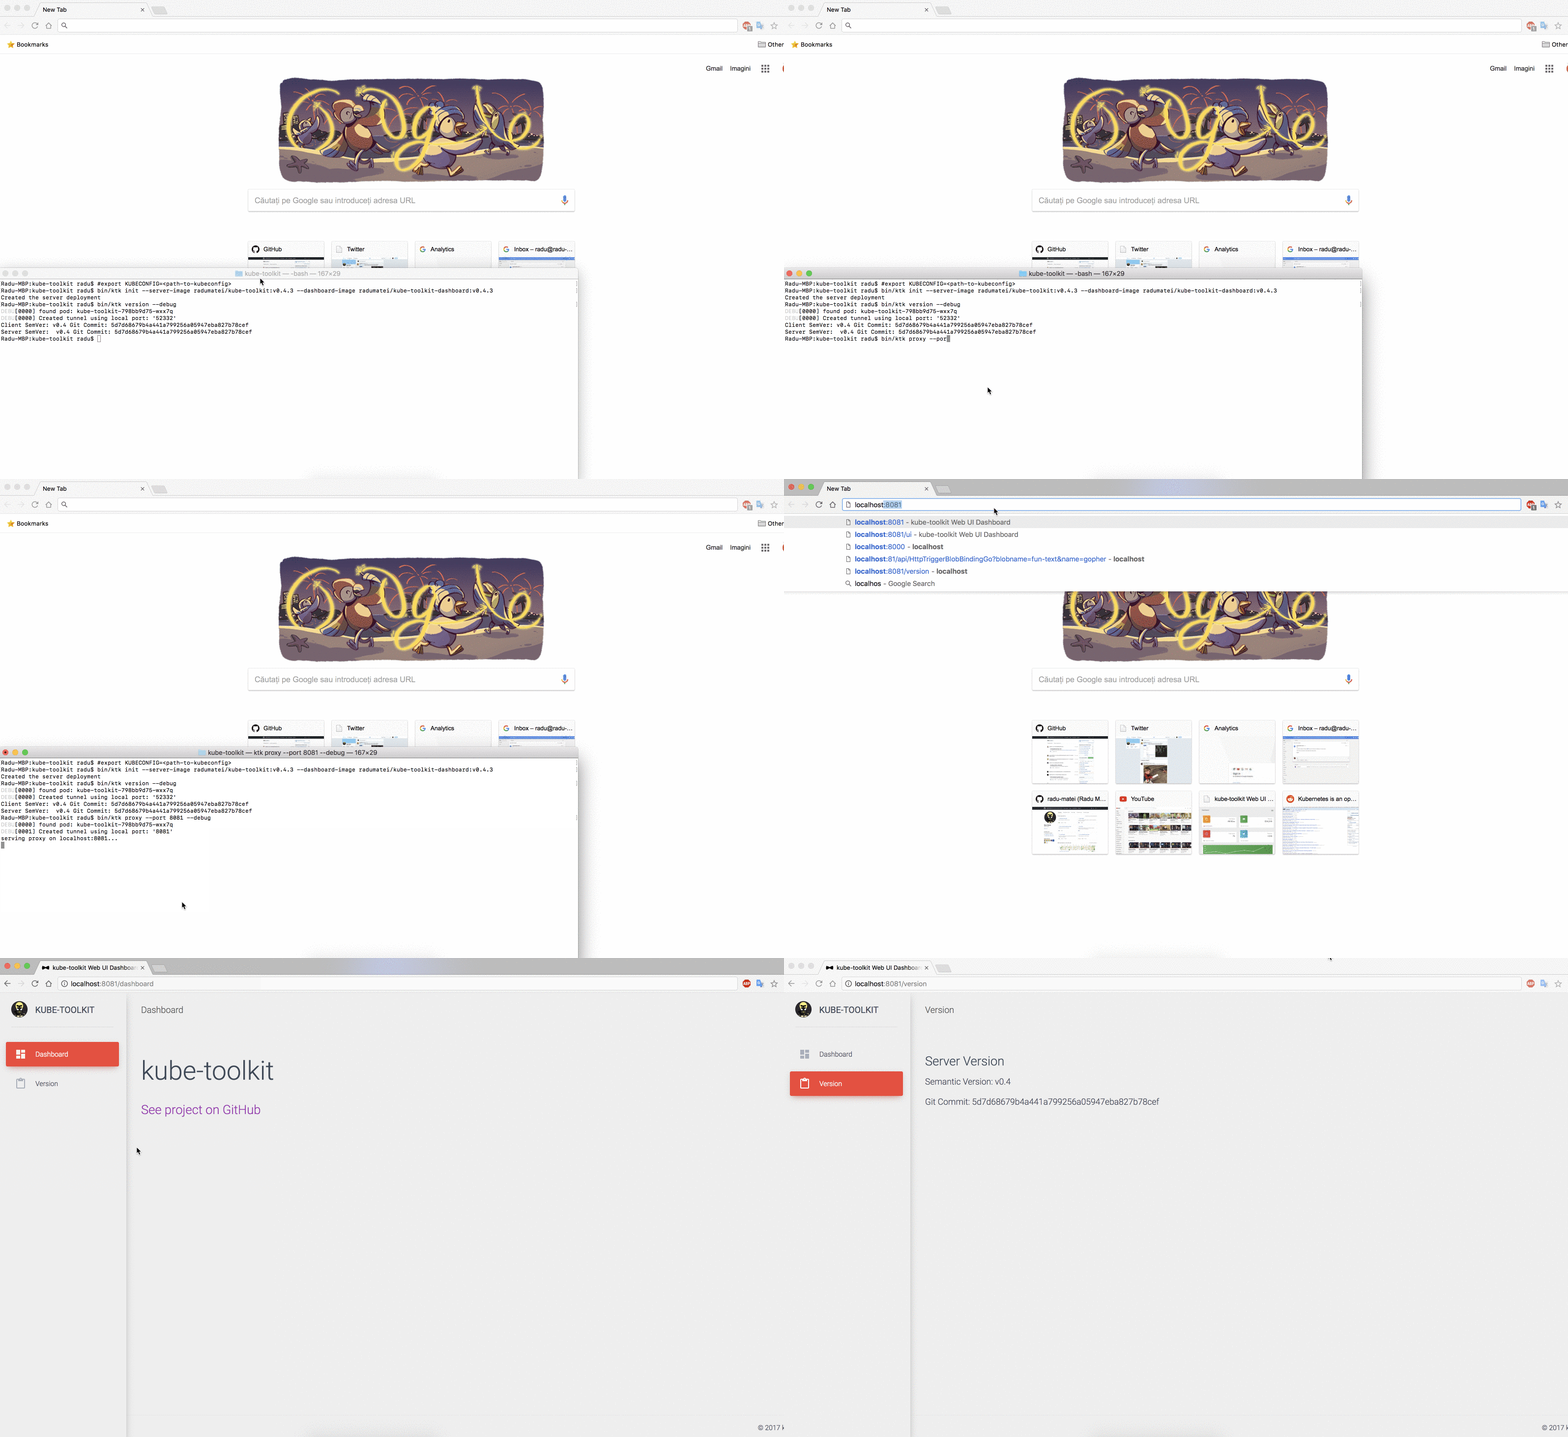
Now let's see the dashboard! Before we can access the dashboard, we need to create a tunnel to the cluster - much like in the case of the Kubnernetes UI dashboard, we first need a proxy to the cluster:
bin/ktk proxy --port 8081 --debug
Once you terminate the proxy command, the tunnel will close and you won't have access to the dashboard anymore
Once you are done with the tool, want to delete the server or just want to init with a newer version, there's a reset command that will delete the deployment from the cluster:
bin/ktk reset
On its own, kube-toolkit only represents the starting point for your next awesome Kubernetes tool - this means you need to extend it with your own functionality, and while this is not a complete tutorial (yet) on how to do it, here's the basics:
- first, you need to update the
.protodefinition of your gRPC service. The definition is inpkg/rpc/rpc.protothis is the interesting part:
service GRPC {
	rpc GetVersion(google.protobuf.Empty) returns (Version){
		option (google.api.http) = {
            get: "/api/version"
          };
	}
	rpc ServerStream(google.protobuf.Empty) returns(stream Message){}
}
The main service name is GRPC, and we will look at the GetVersion method we explored from the CLI and the web dashboard. Essentially, the option part comes from gRPC-gateway and maps the GetVersion gRPC method to a REST api GET method, on /api/version.
We will use the .proto file to automatically generate the gRPC client, server, swagger definition and HTTP gateway that will serve HTTP clients to the gRPC server - if you take a look at the Makefile at the rpc target:
protoc
	--go_out=plugins=grpc:pkg/rpc pkg/rpc/*.proto
	--grpc-gateway_out=logtostderr=true:pkg/rpc
	--swagger_out=logtostderr=true:gateway/web
The protoc compiler will generate the Go gRPC client and server, as well as the gRPC-gateway (HTTP web server implementation that handles requests to REST API paths and maps them to gRPC requests) and the swagger definition that we will use to automatically generate a TypeScript client to use in the web application:
cd gateway/web && \
rm -rf src/generated-client && mkdir src/generated-client && \

docker run --rm -v ${PWD}/gateway/web:/local swaggerapi/swagger-codegen-cli generate && \
    -i /local/rpc.swagger.json && \
    -l typescript-angular && \
    -c /local/swagger.config.json && \
    -o /local/src/generated-client
For this task we use the container-packaged swagger-codegen-cli and output the client in the web dashboard/web/src/generated-client directory.
Note that the swagger generator creates everything we need to start calling the API from our web application right away, including classes for the gRPC messages defined in the .proto. So everytime you add methods to your gRPC server, you automatically get the server, client and web APIs required to start using it.
Please note that while it is possible to create streaming methods and use HTTP, the most straightforward way of using the gRPC gateway is to have the non-streaming methods mapped in your REST API.
- after you update the
.protoand generate the code, you have to implement the desired server functionality (that is inserver.go- note that if you add methods in the.protoand don't implement them, the server will fail at compile-time), add the client functionality (inclient.go) and implement a new CLI command that uses it - if you base on theversionandstreamcommands, you should understand how everything fits together.
The client is simply a Cobra-based CLI.
- now for the dashboard - this is an Angular 4 application, and all you need to do is add a new component, register its route and module and use the auto-generated API client to implement the functionality.
Step-by-step tutorial on how to extend the project coming soon.
At this point, you need to:
-
make client -
docker build -t <your-username>/kube-toolkit .- create container image with new server -
docker build -t <your-username>/kube-toolkit-dashboard -f Dockerfile.gateway .- create container image with new dashboard -
docker push <server, dashboard> -
bin/ktk resetandbin/ktk init <using-new-images>
The process is rather complicated at the moment and could be drastically improve by Draft
- state management using
etcd- work to start soon - RBAC and SSL support - help wanted
- testing and documentation - help wanted, good first issues
Any idea (here, on Twitter - @Matei_Radu), issue or pull request is highly appreciated. Contribution guidelines will follow once there is a structure to this project.
This is not an official Microsoft project, and it is based on the works of people building Helm, Draft, gRPC-gateway, Kubernetes and many others.


