This file will guide the user through the steps to set up the Epsilon Exchange Platform.
- Step 1: Install Truffle Framework
npm install -g truffle
- Step 2: Navigate to the Smart Contract Directory (smart-contract/eps-token) and install the requirements
npm install
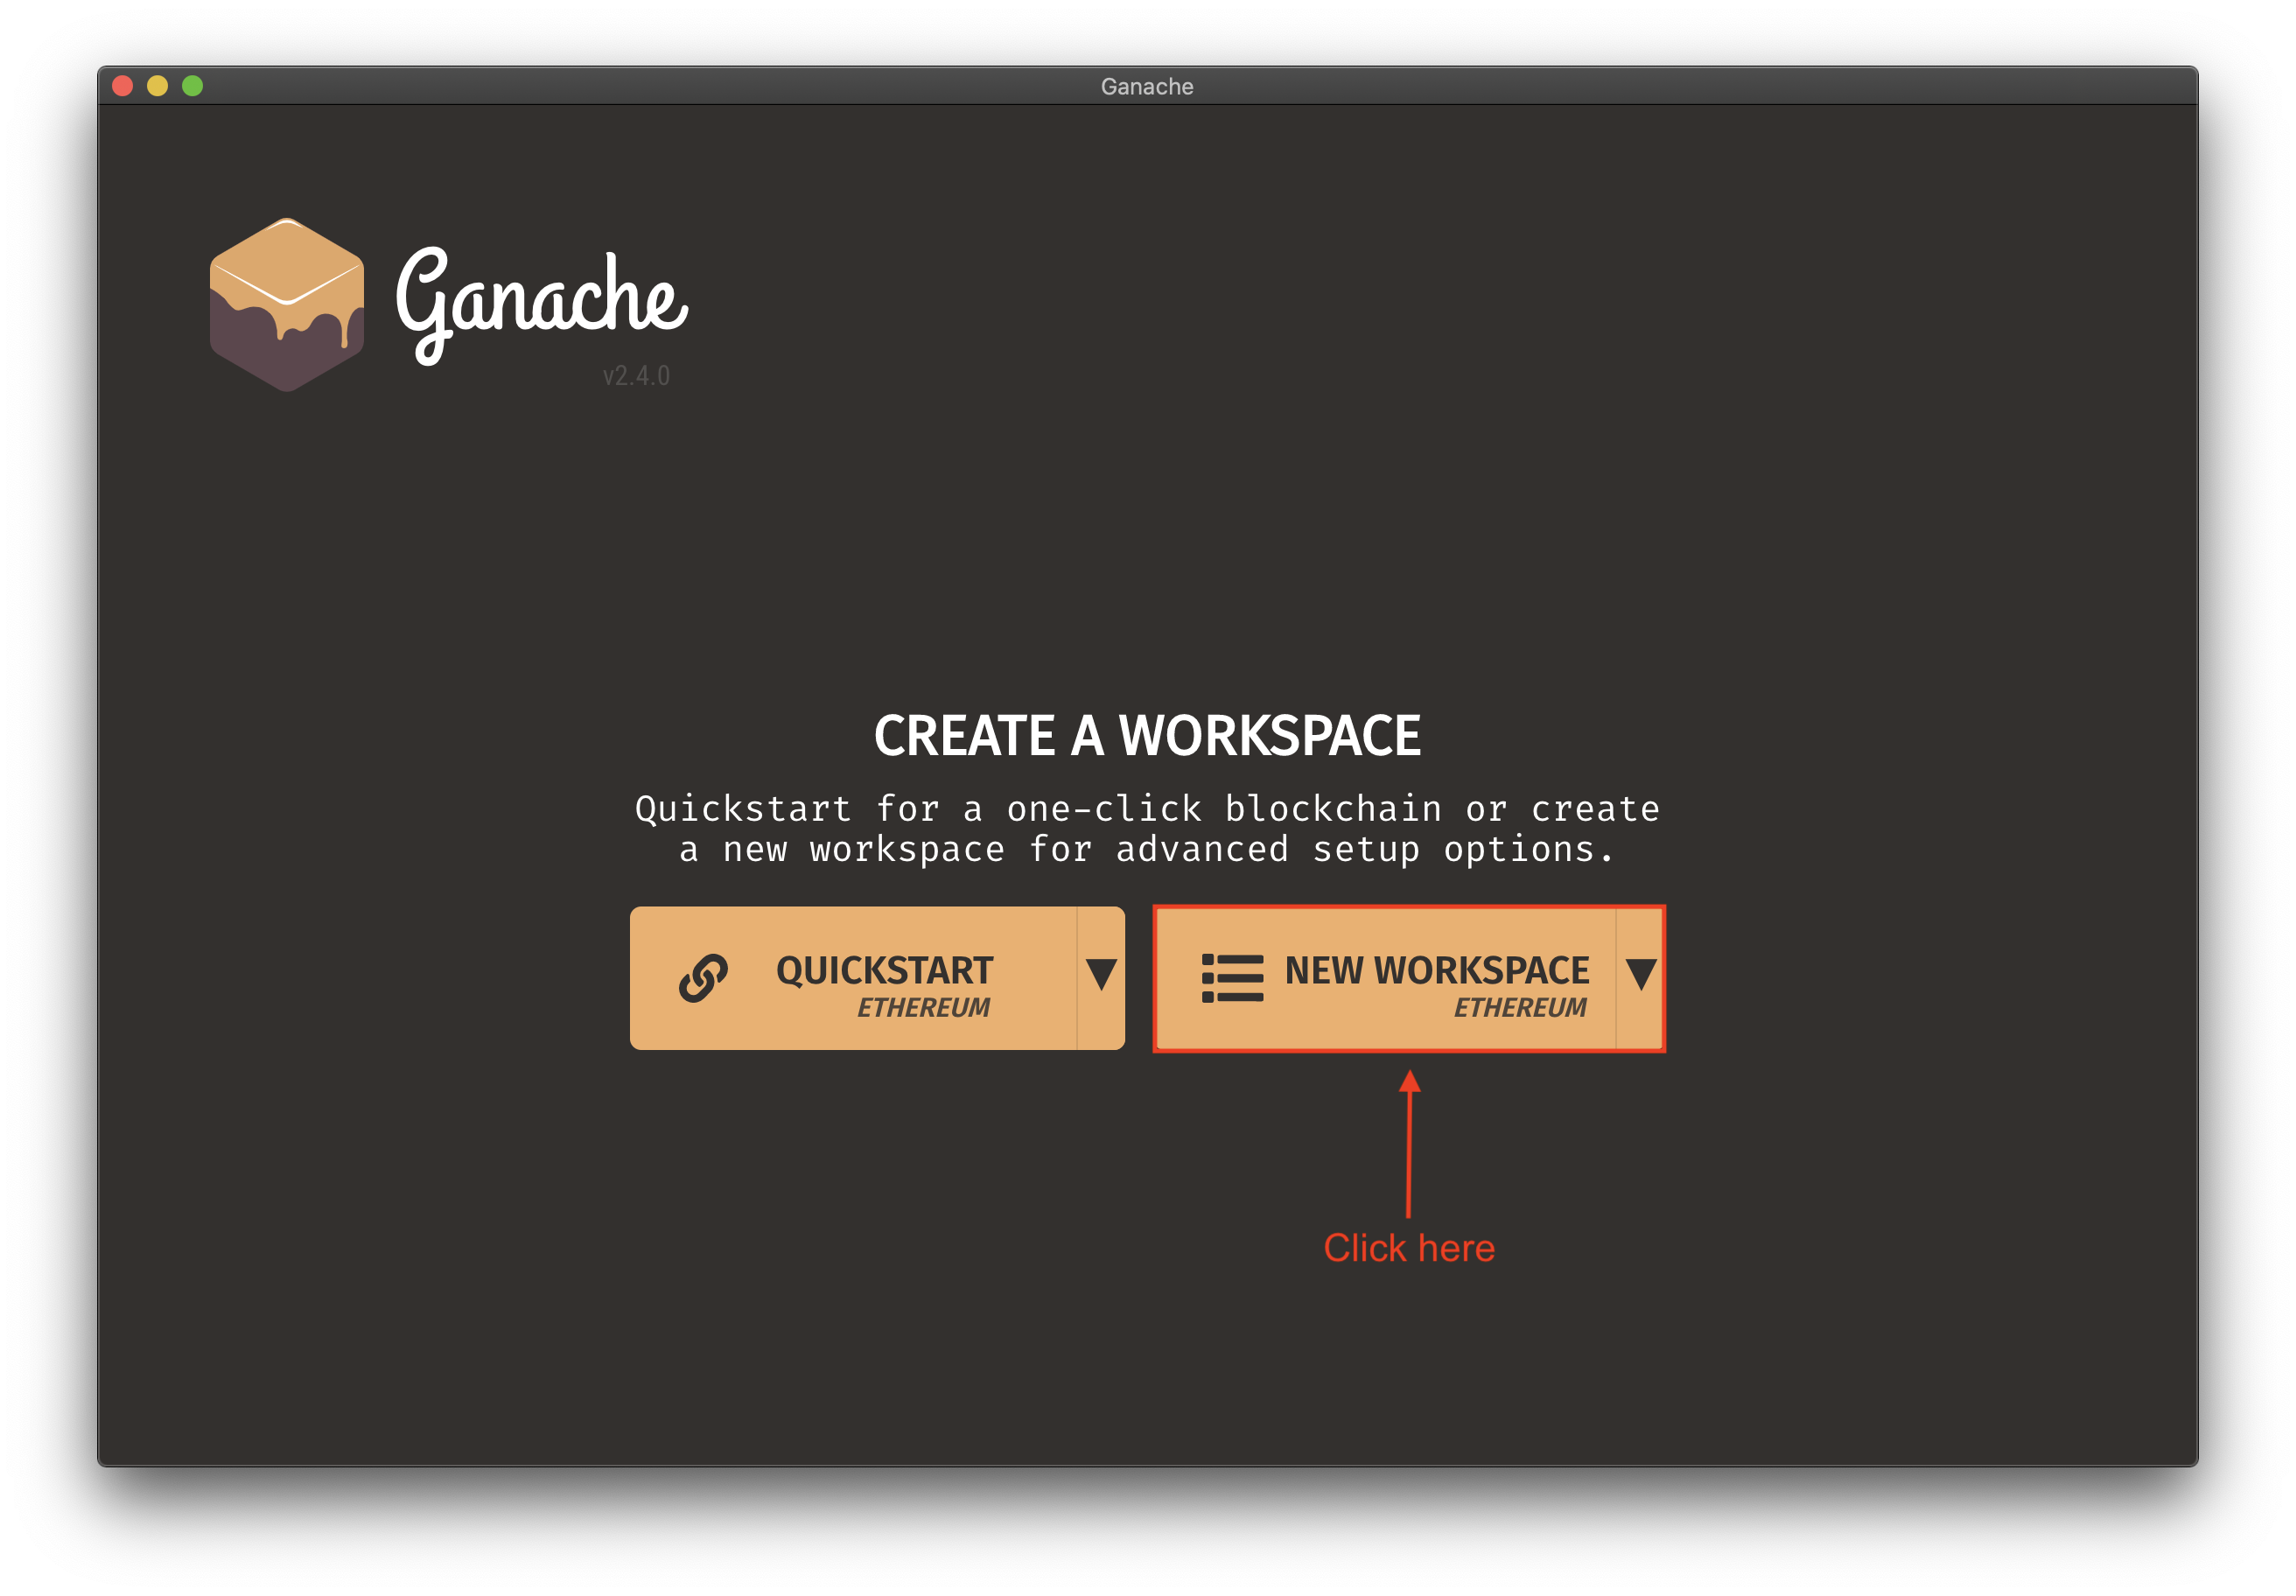
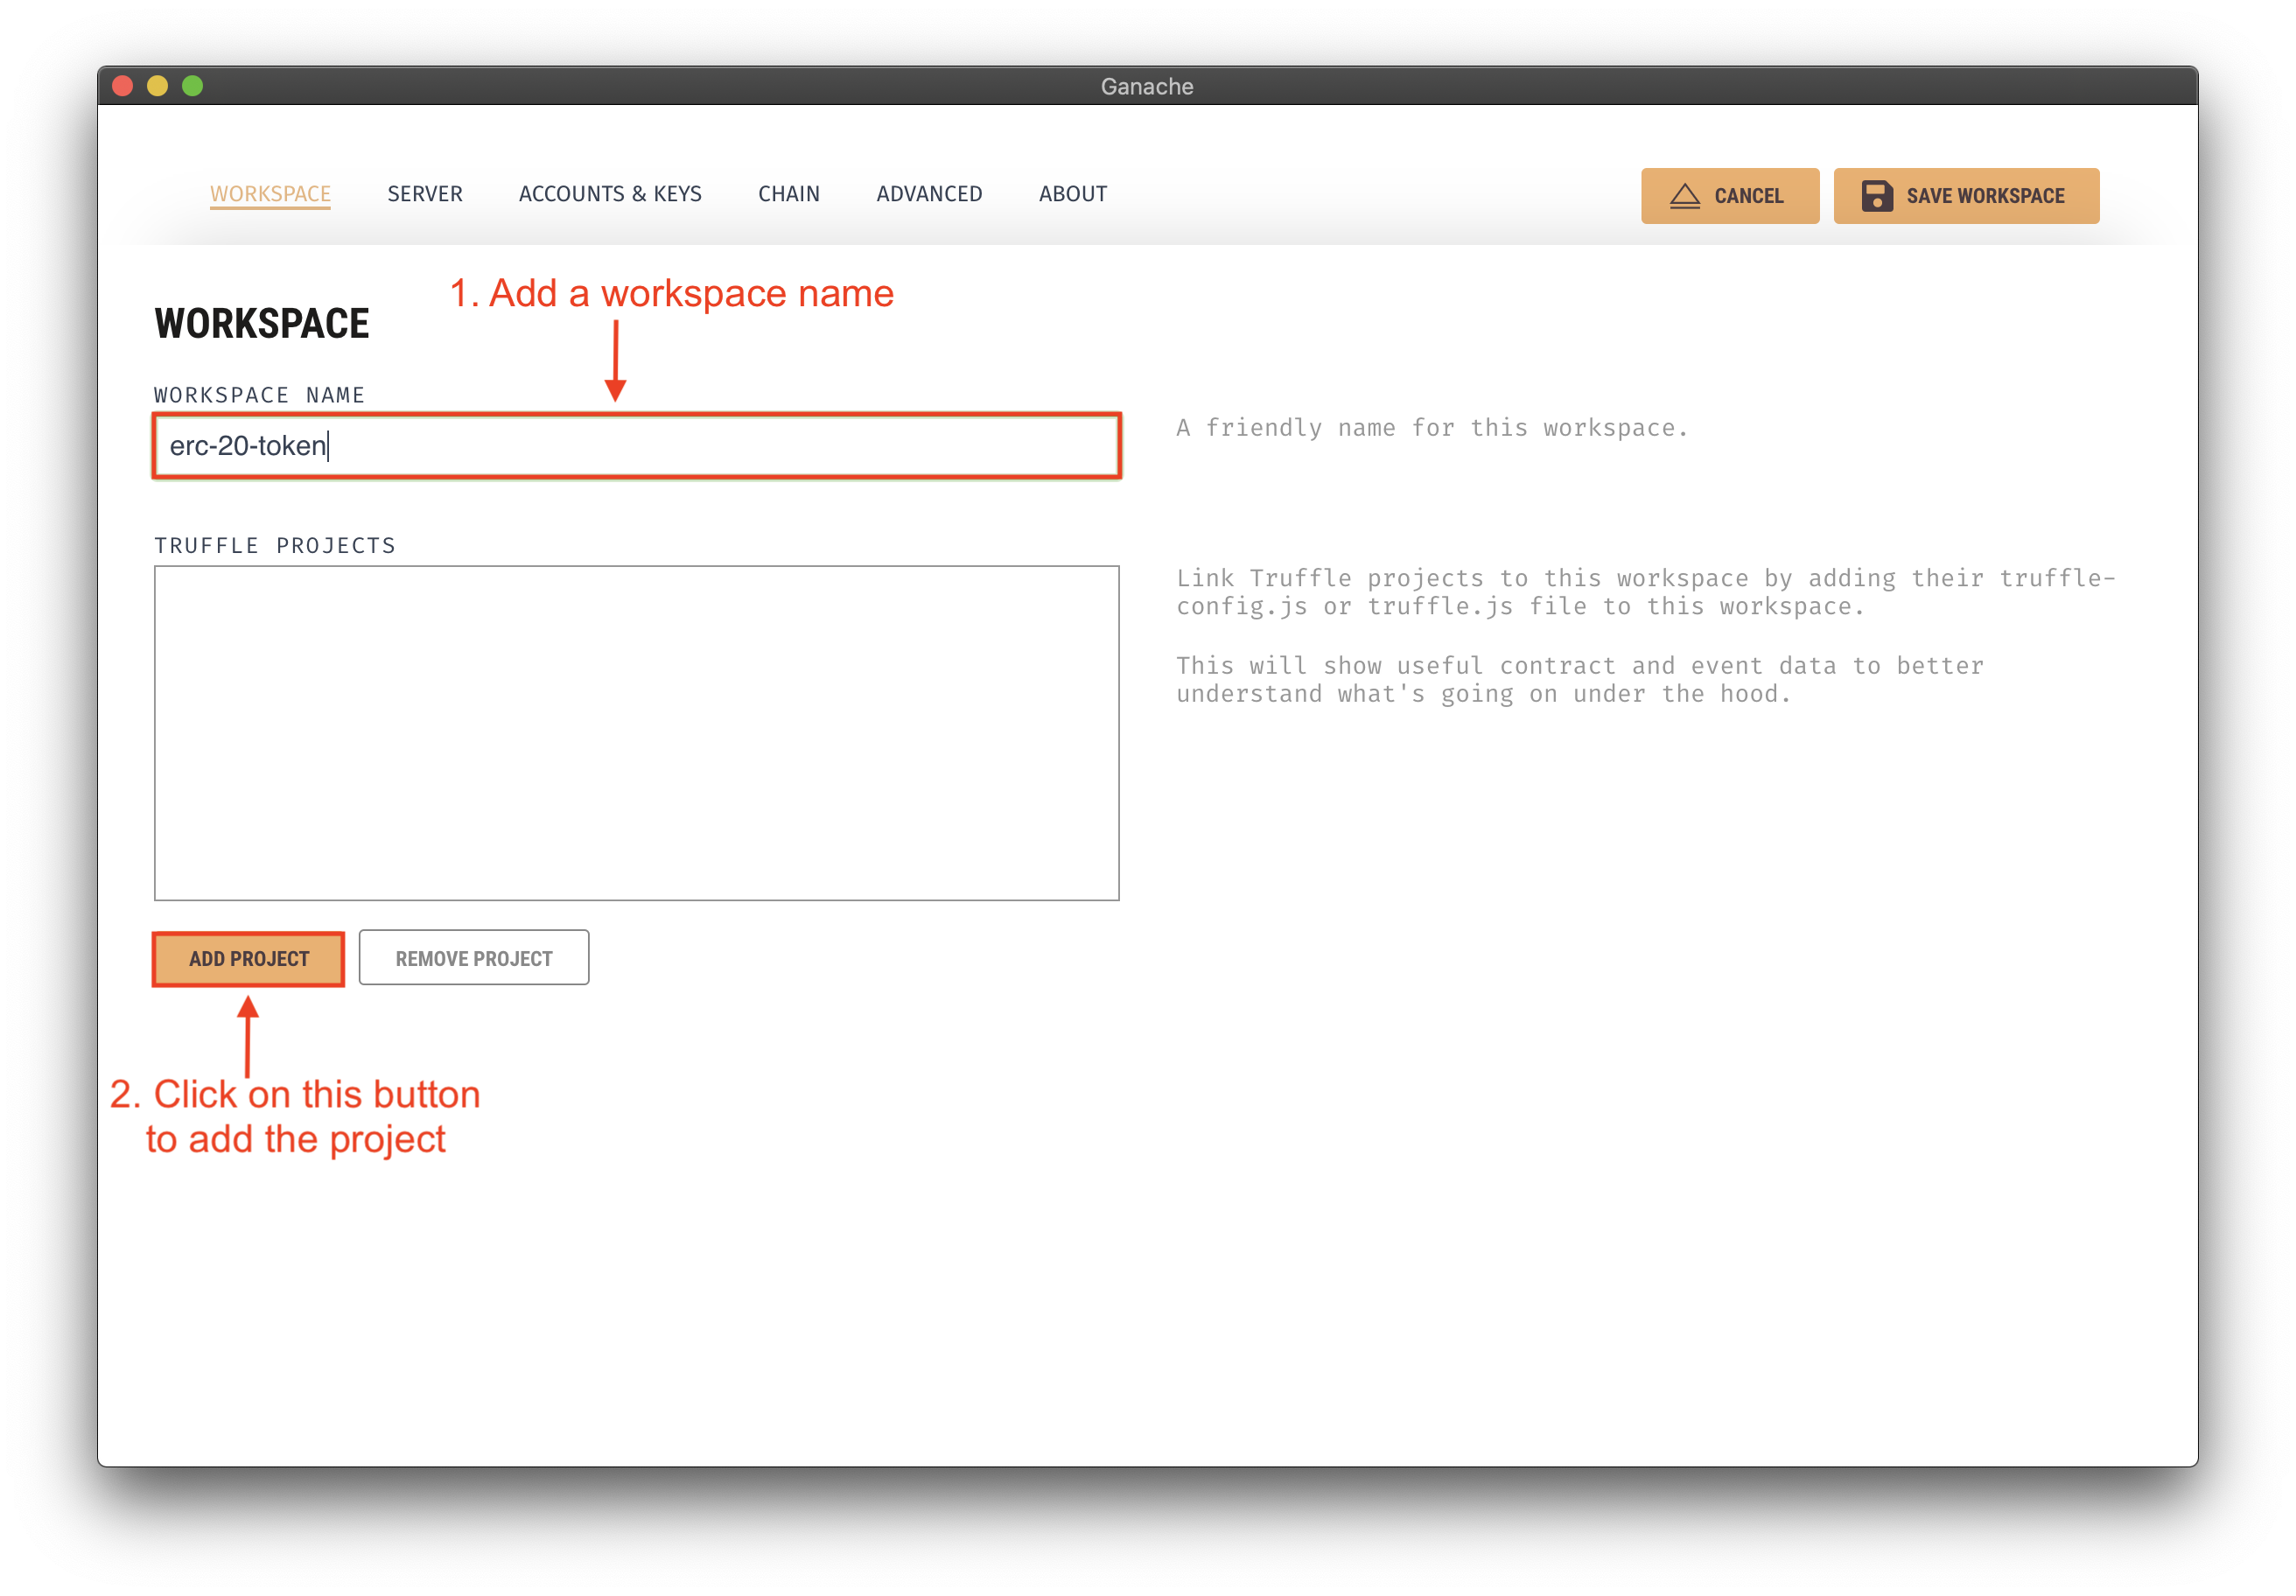
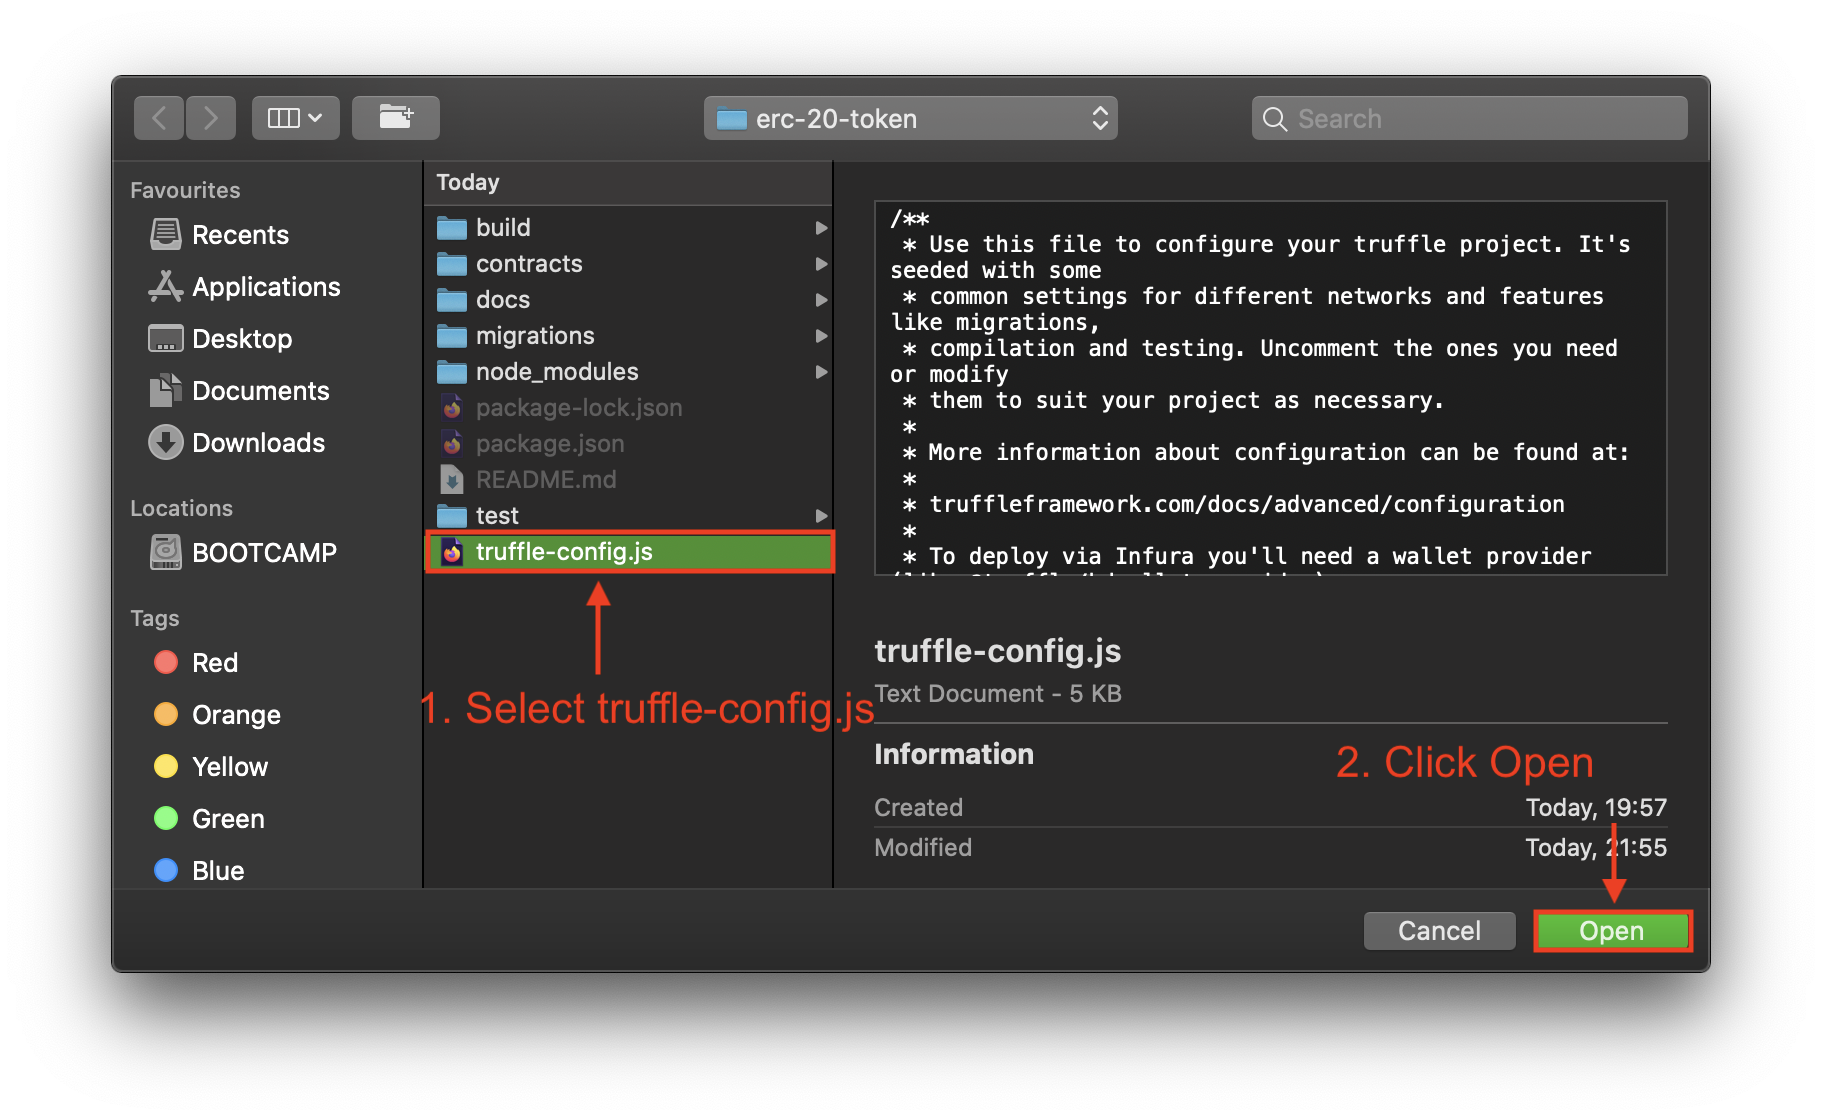
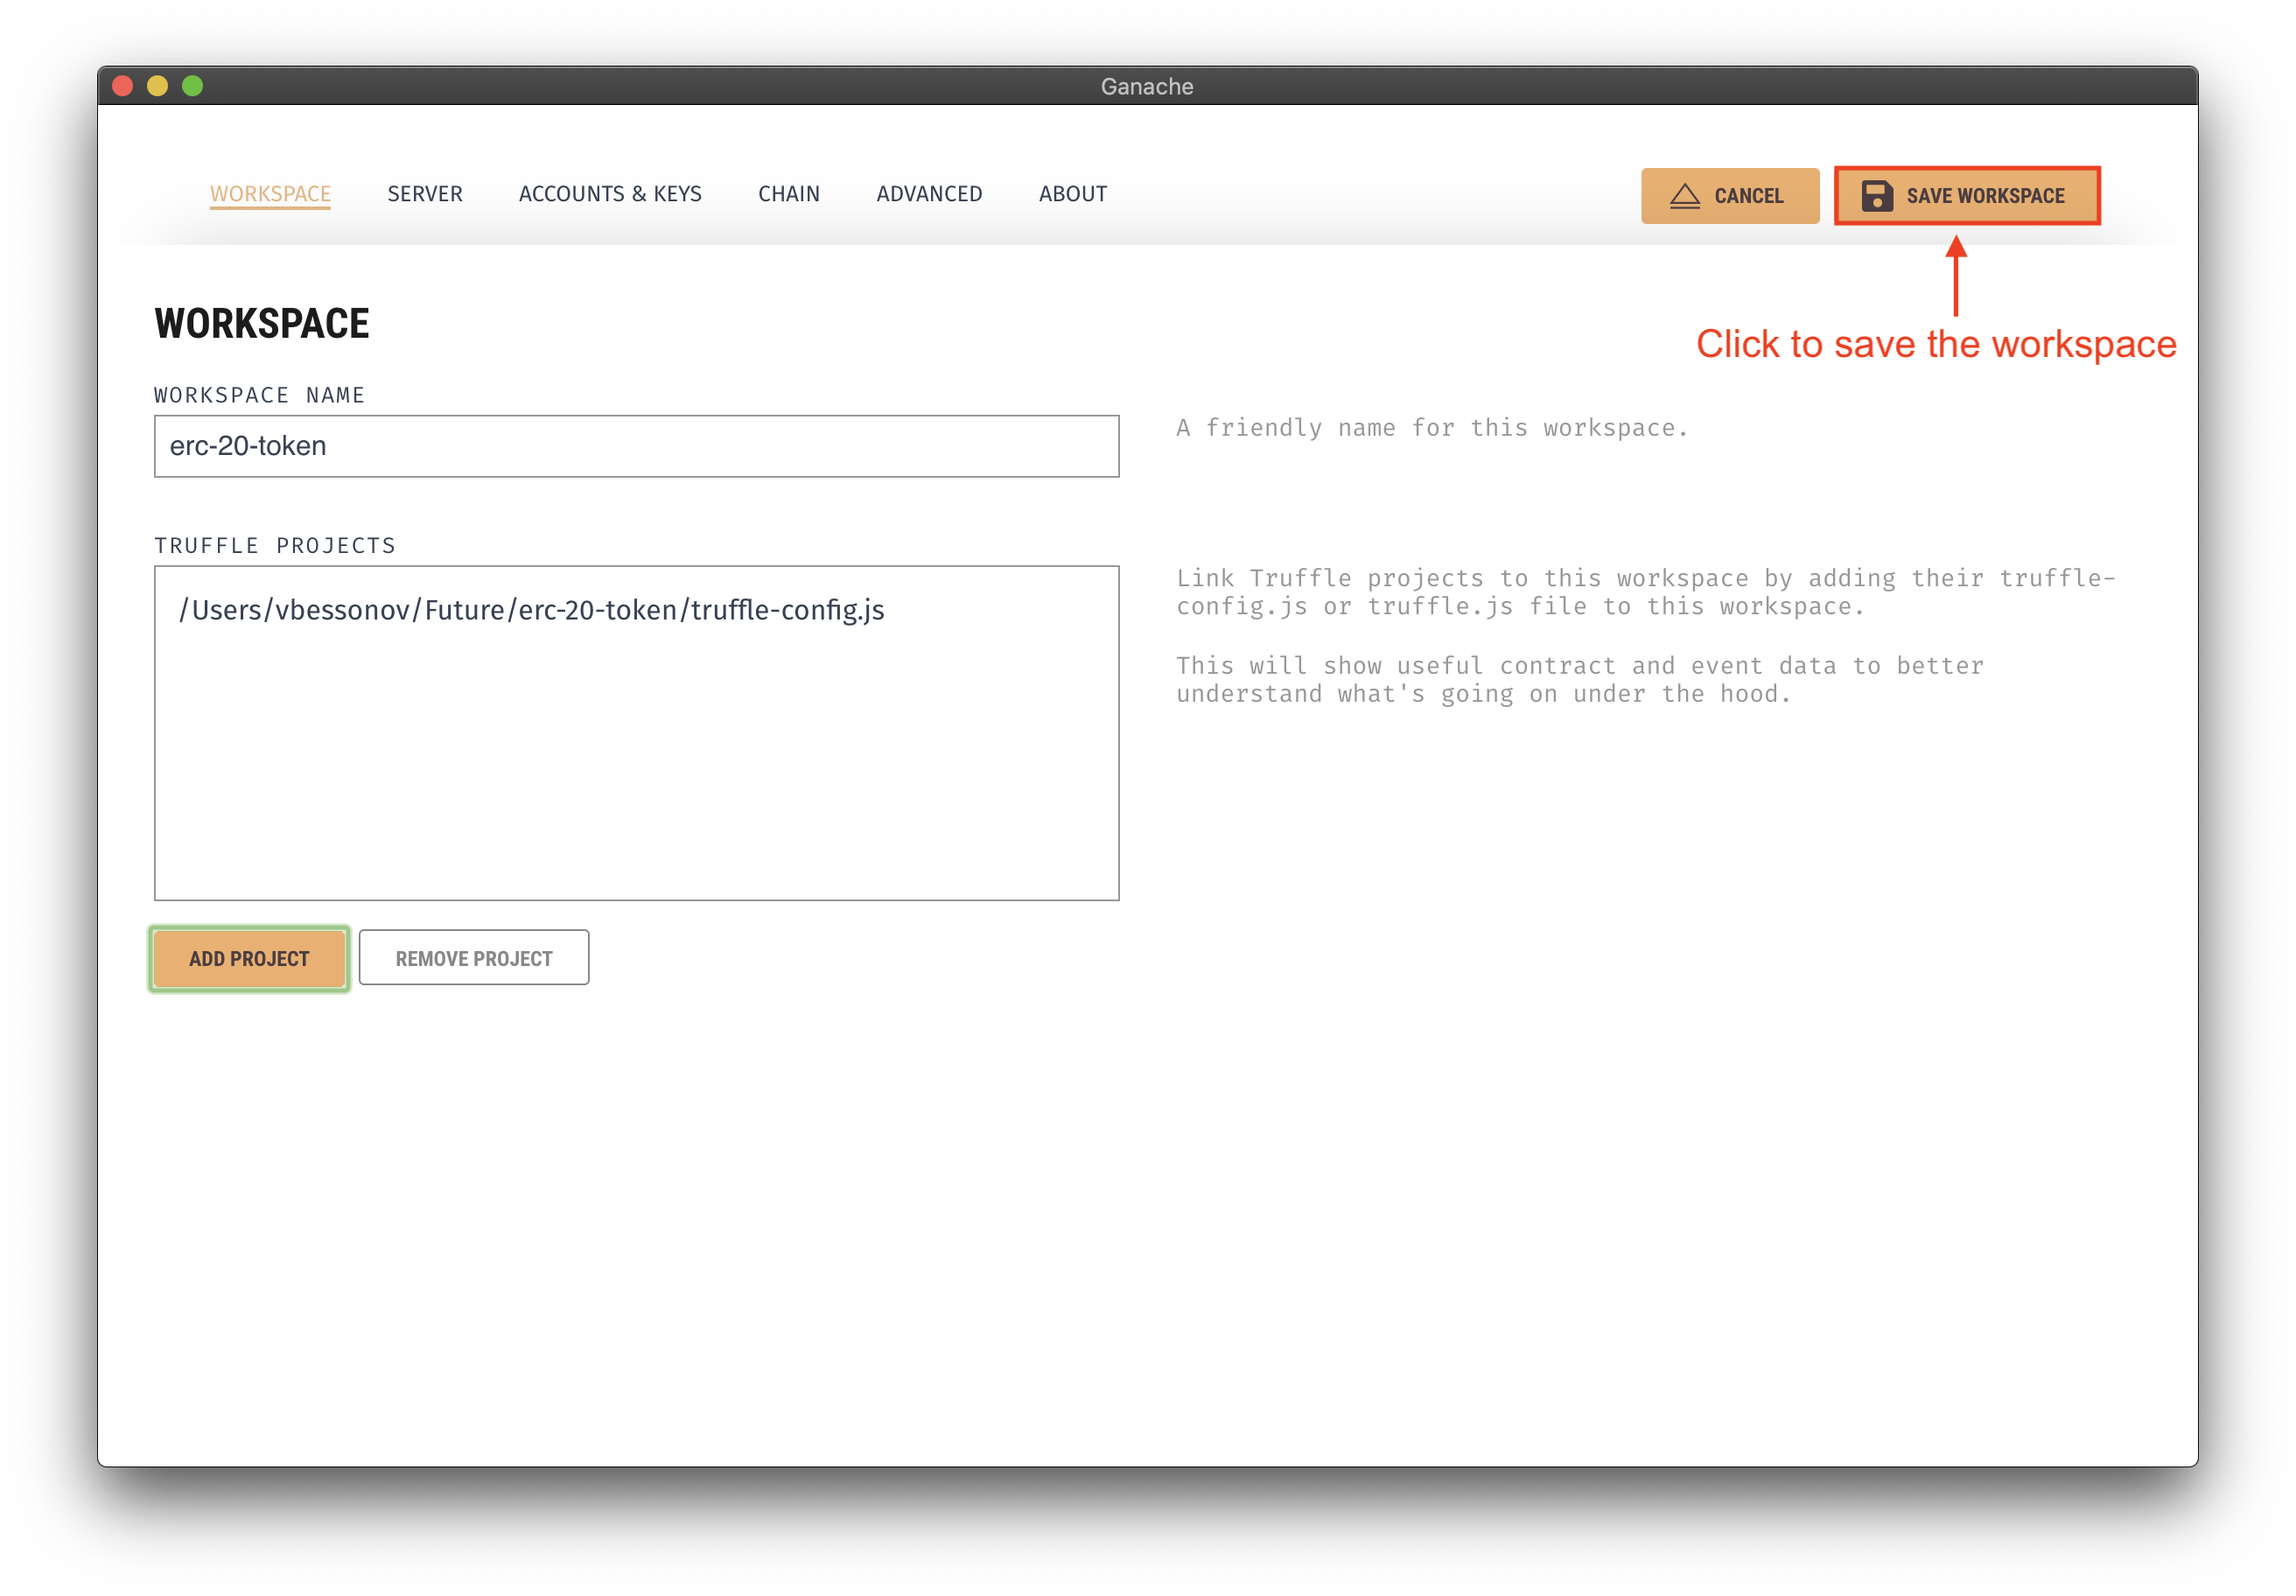
- Step 3: Open Ganache and set-up a new workspace, specify the
truffle-config.jsfile to create a new workspace.
- Step 3: Inside smart contract file
contracts/EpsToken.sol, update your wallet address in Line 31. You can use the address of the first account from the Ganache interface.
treasury = address(0xc86448c09B84C6b62656c42048952e5612Db542D);
- Step 4: Deploy the smart contract
truffle deploy
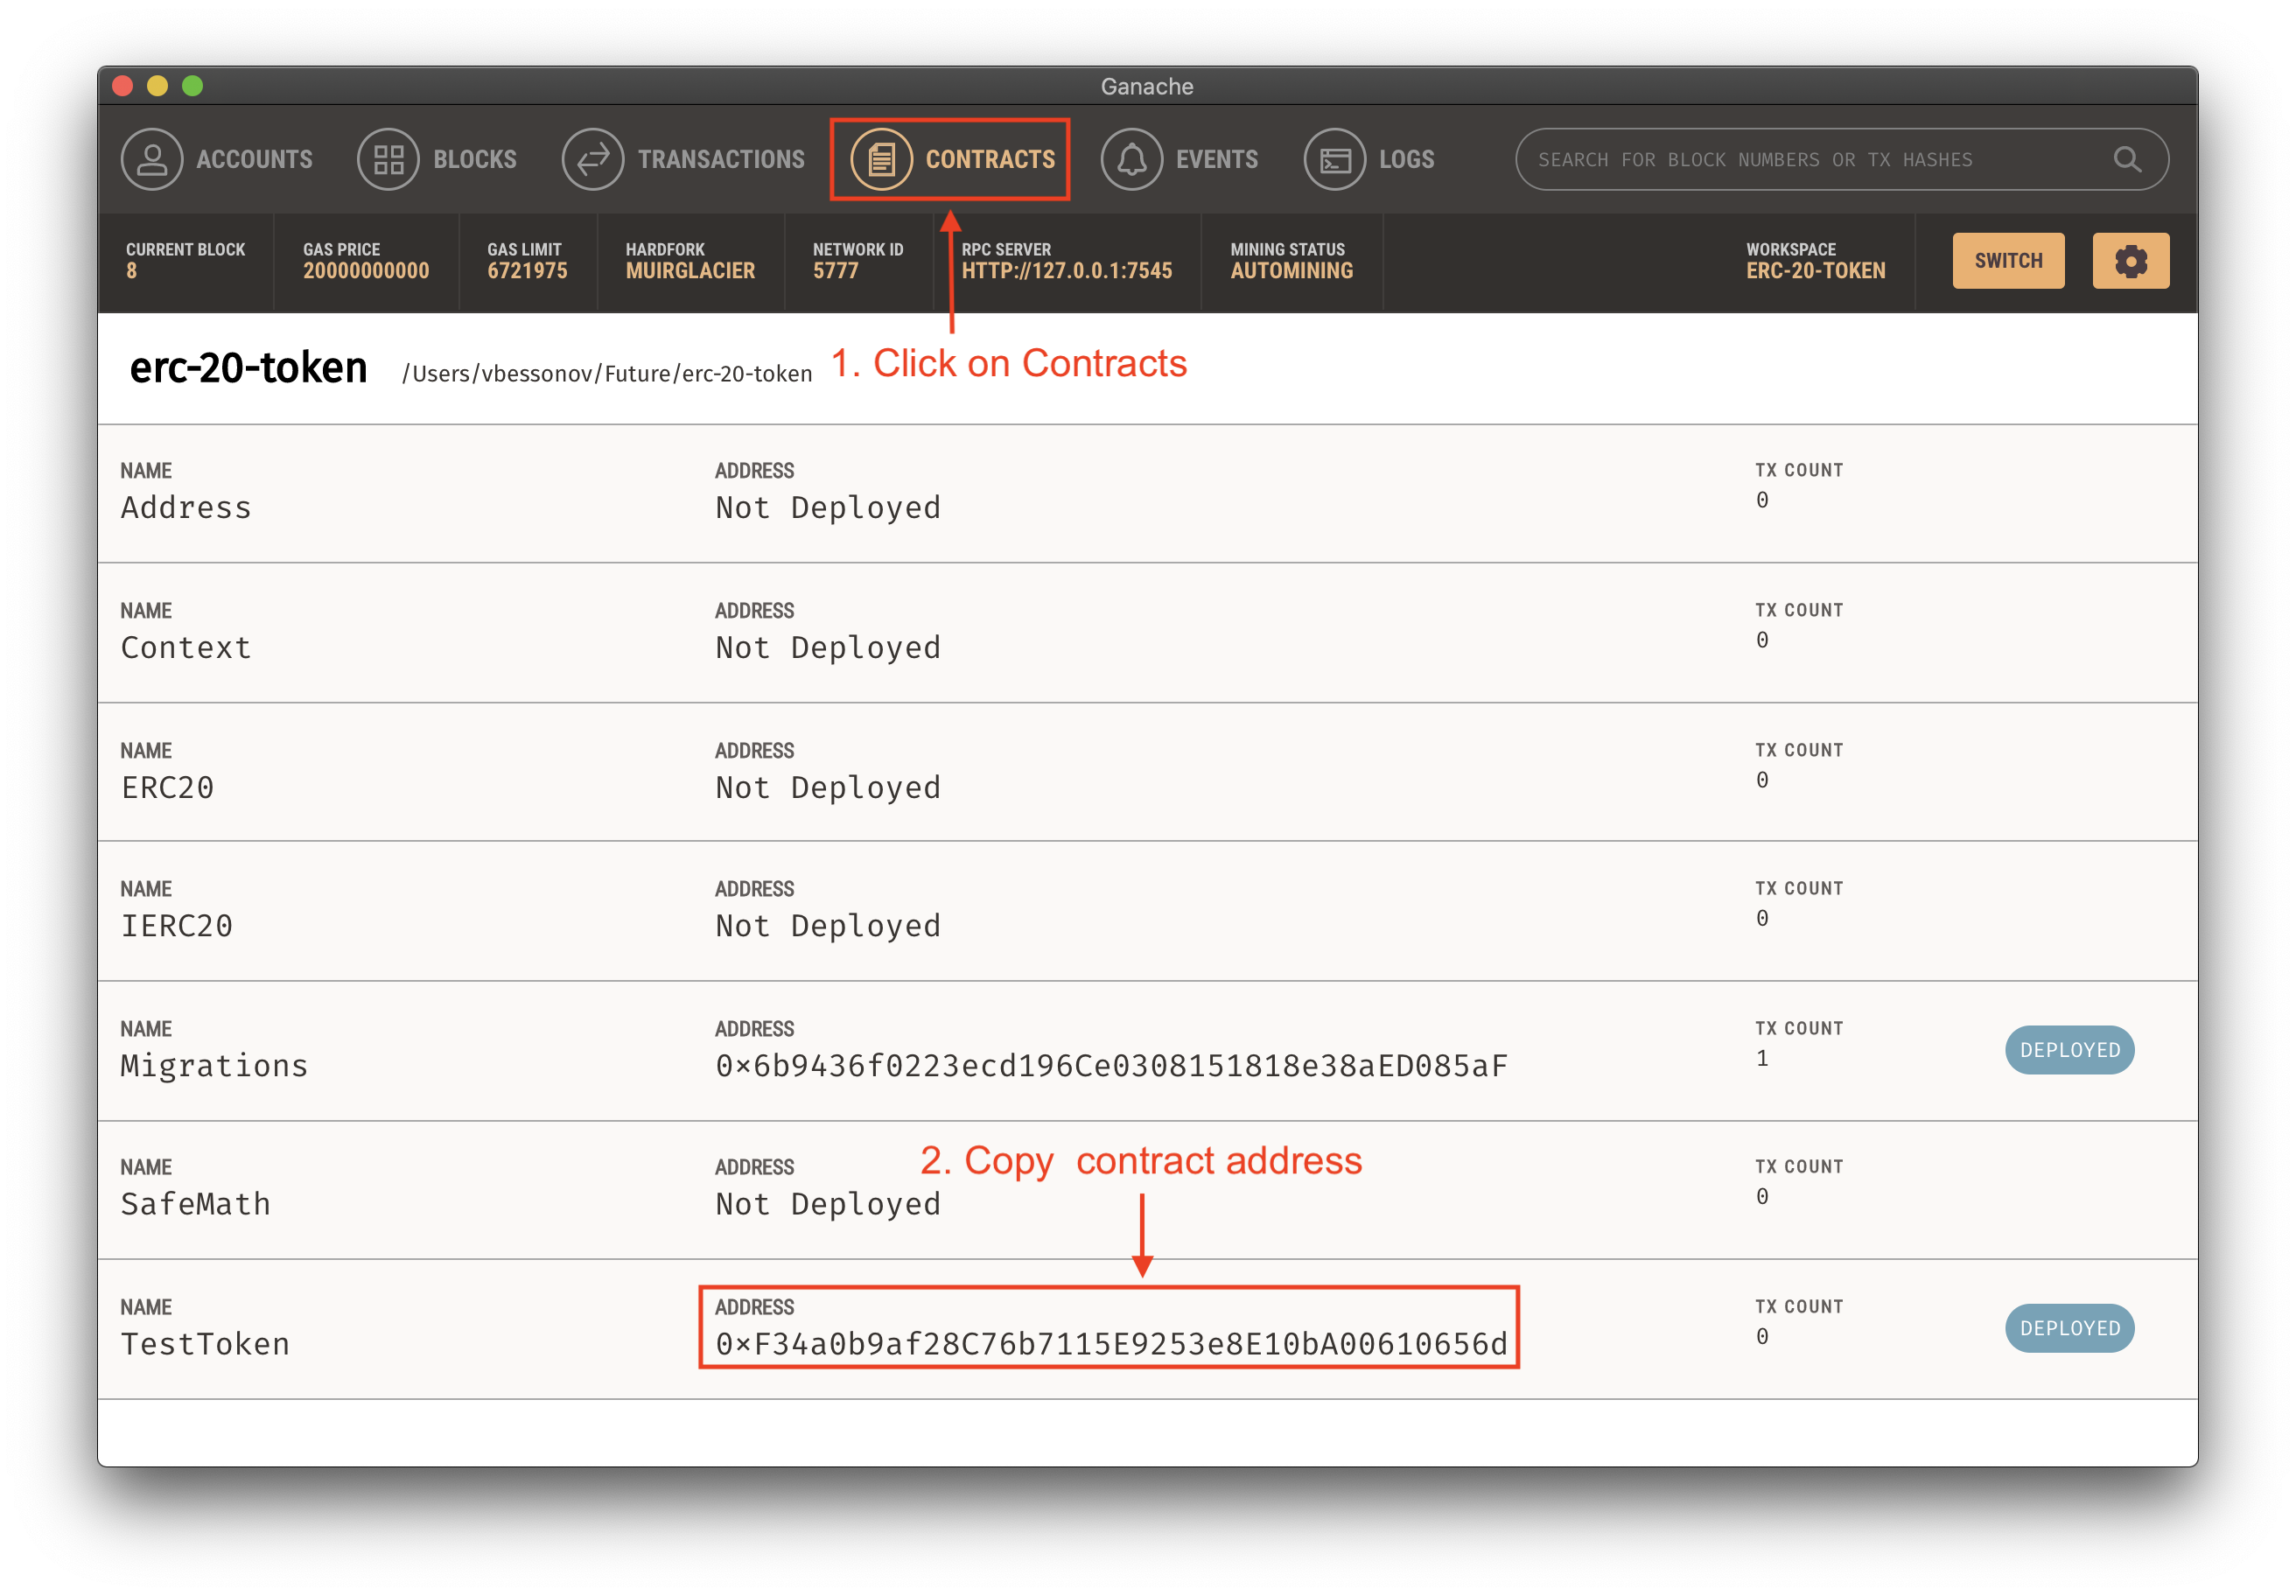
Once the smart contract has been deployed, you will be able to see the token in the truffle interface under the contracts tab. Copy the contract address as it will be used later.
- Open chrome and start the MetaMask extension.
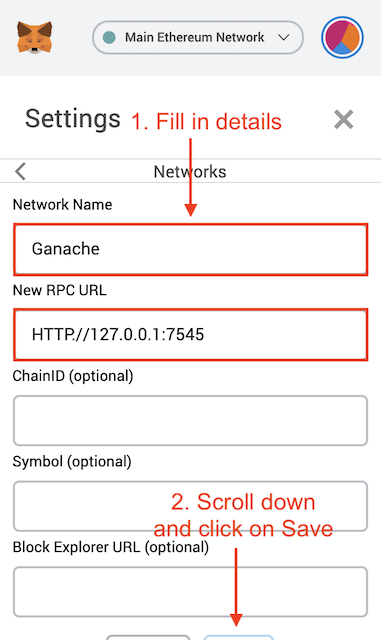
- Choose the set-up custom network option.
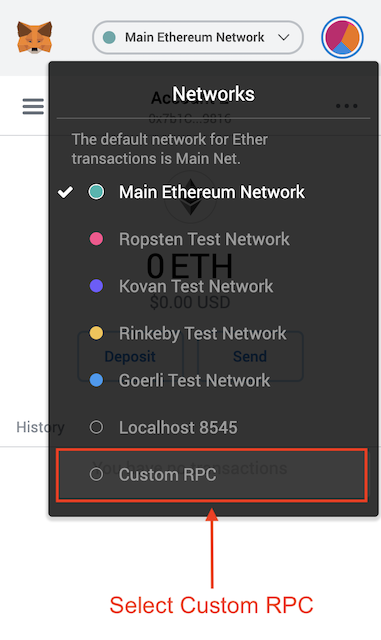
- Fill in the network details:
-
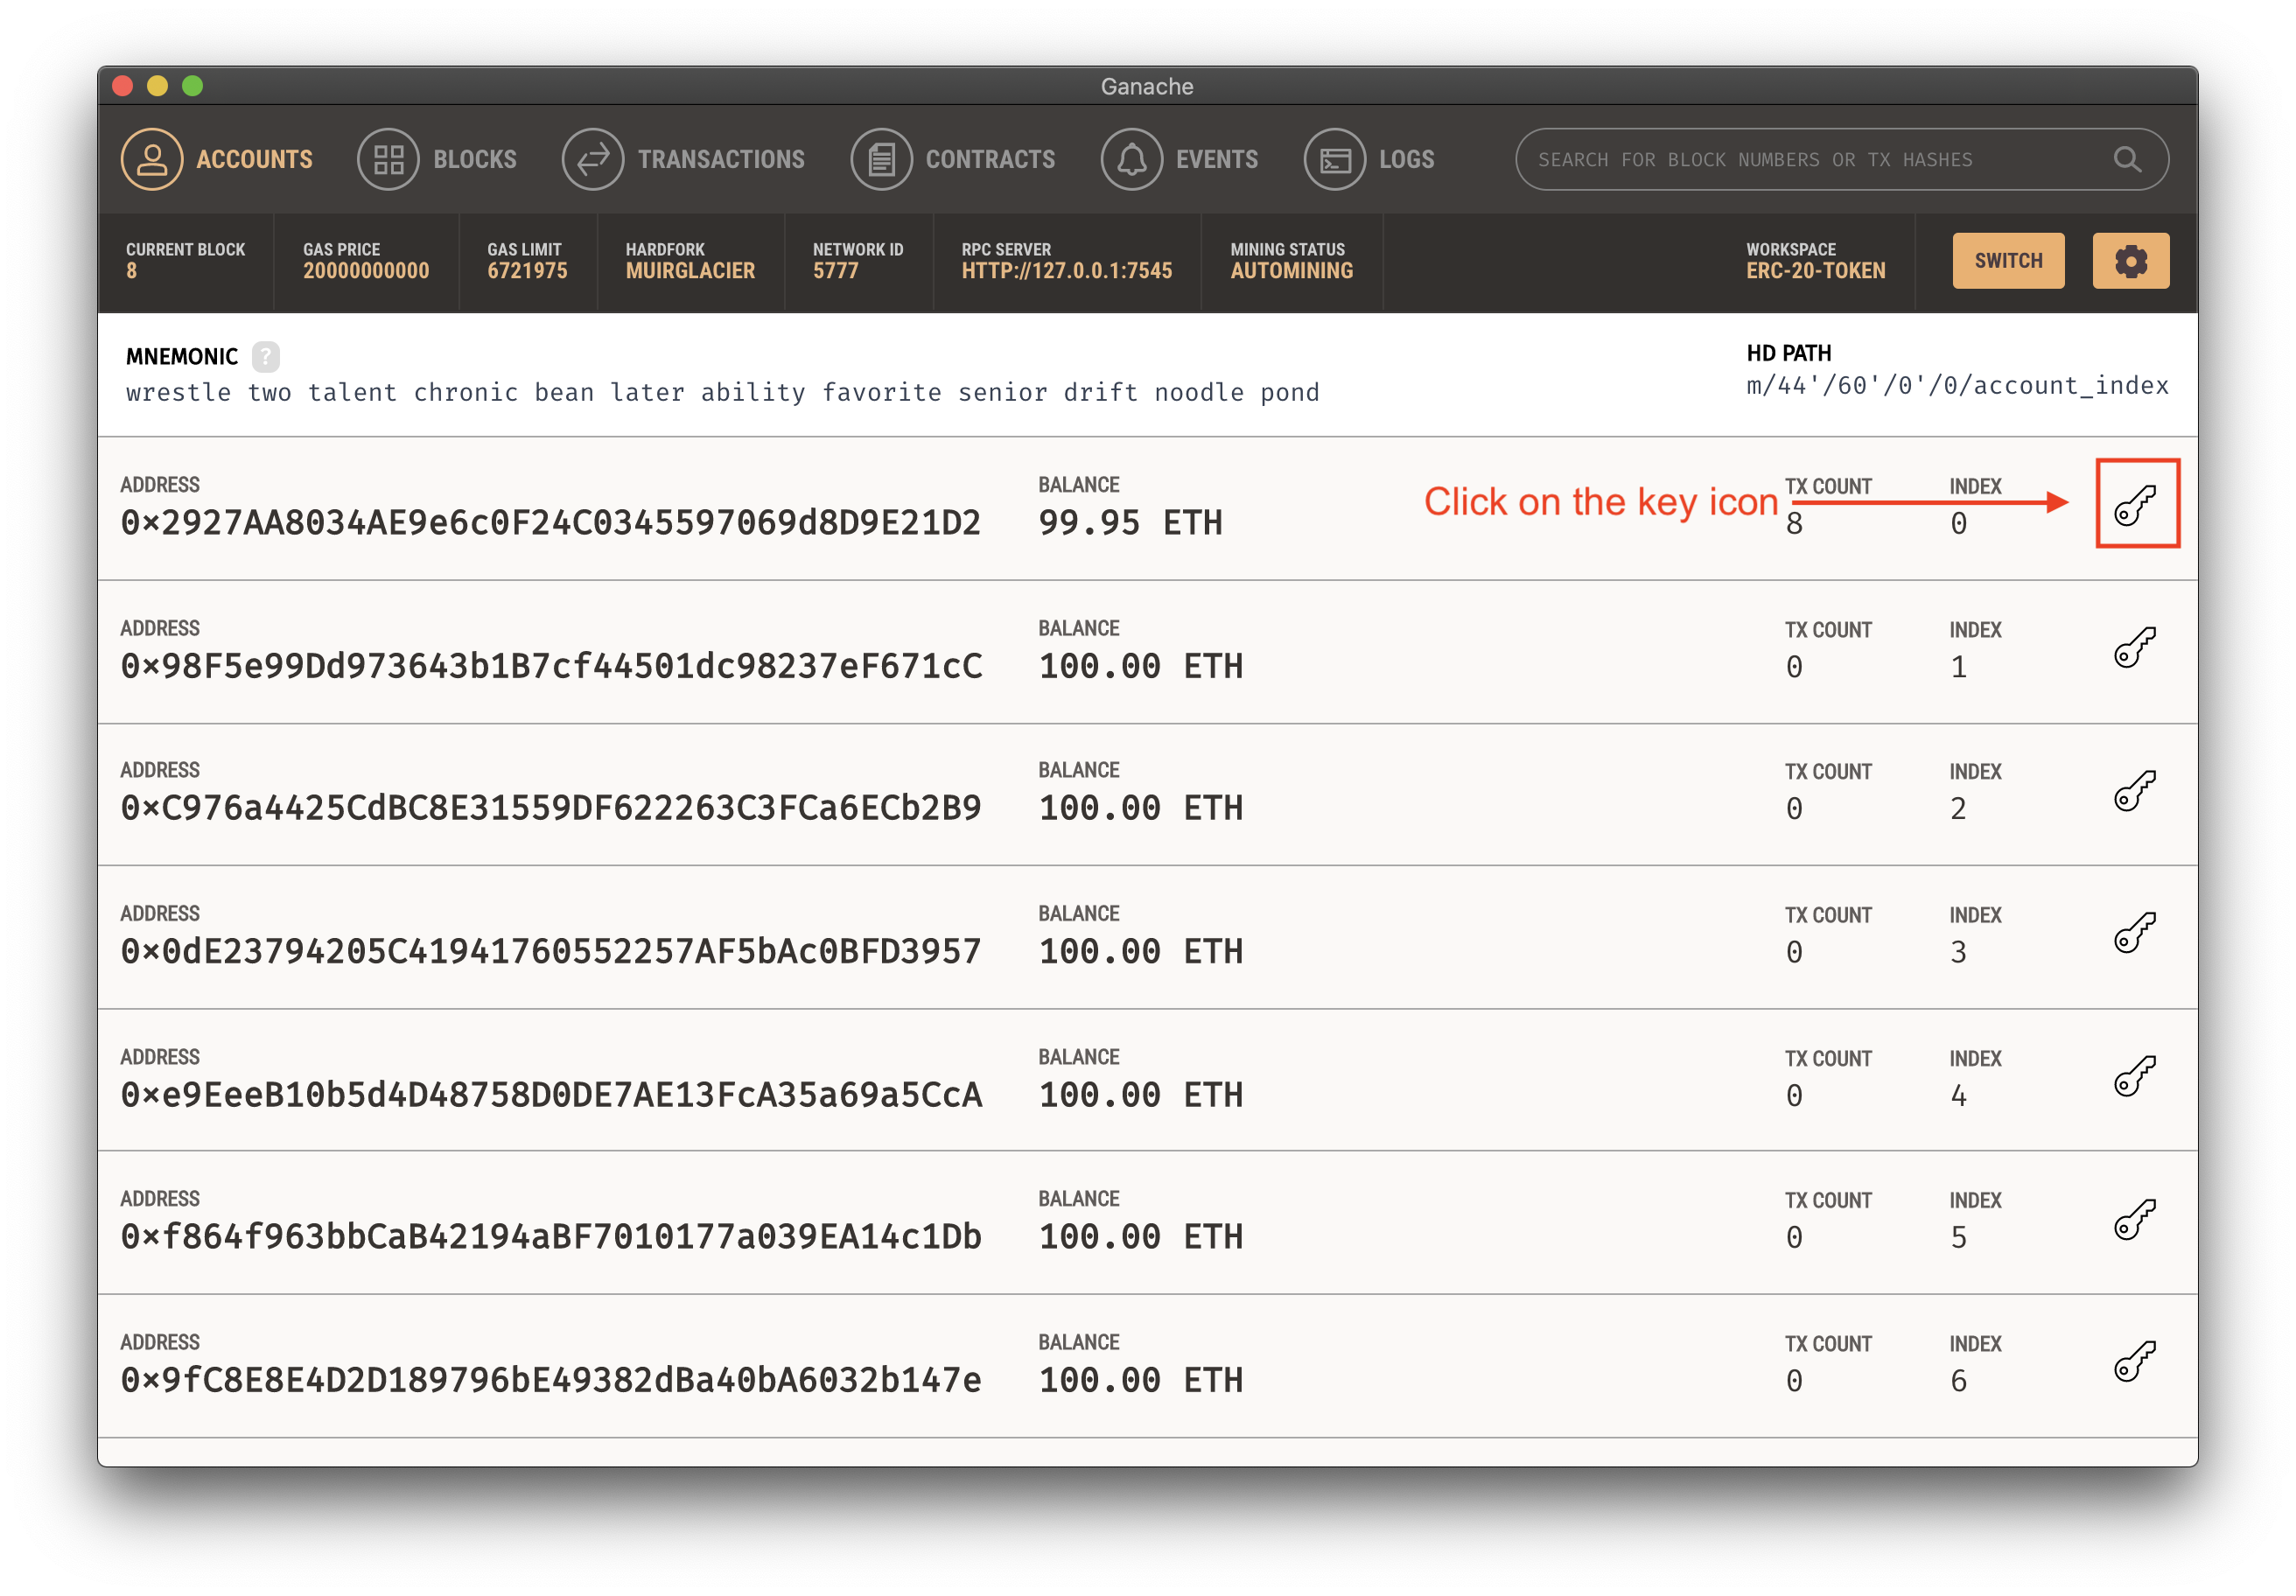
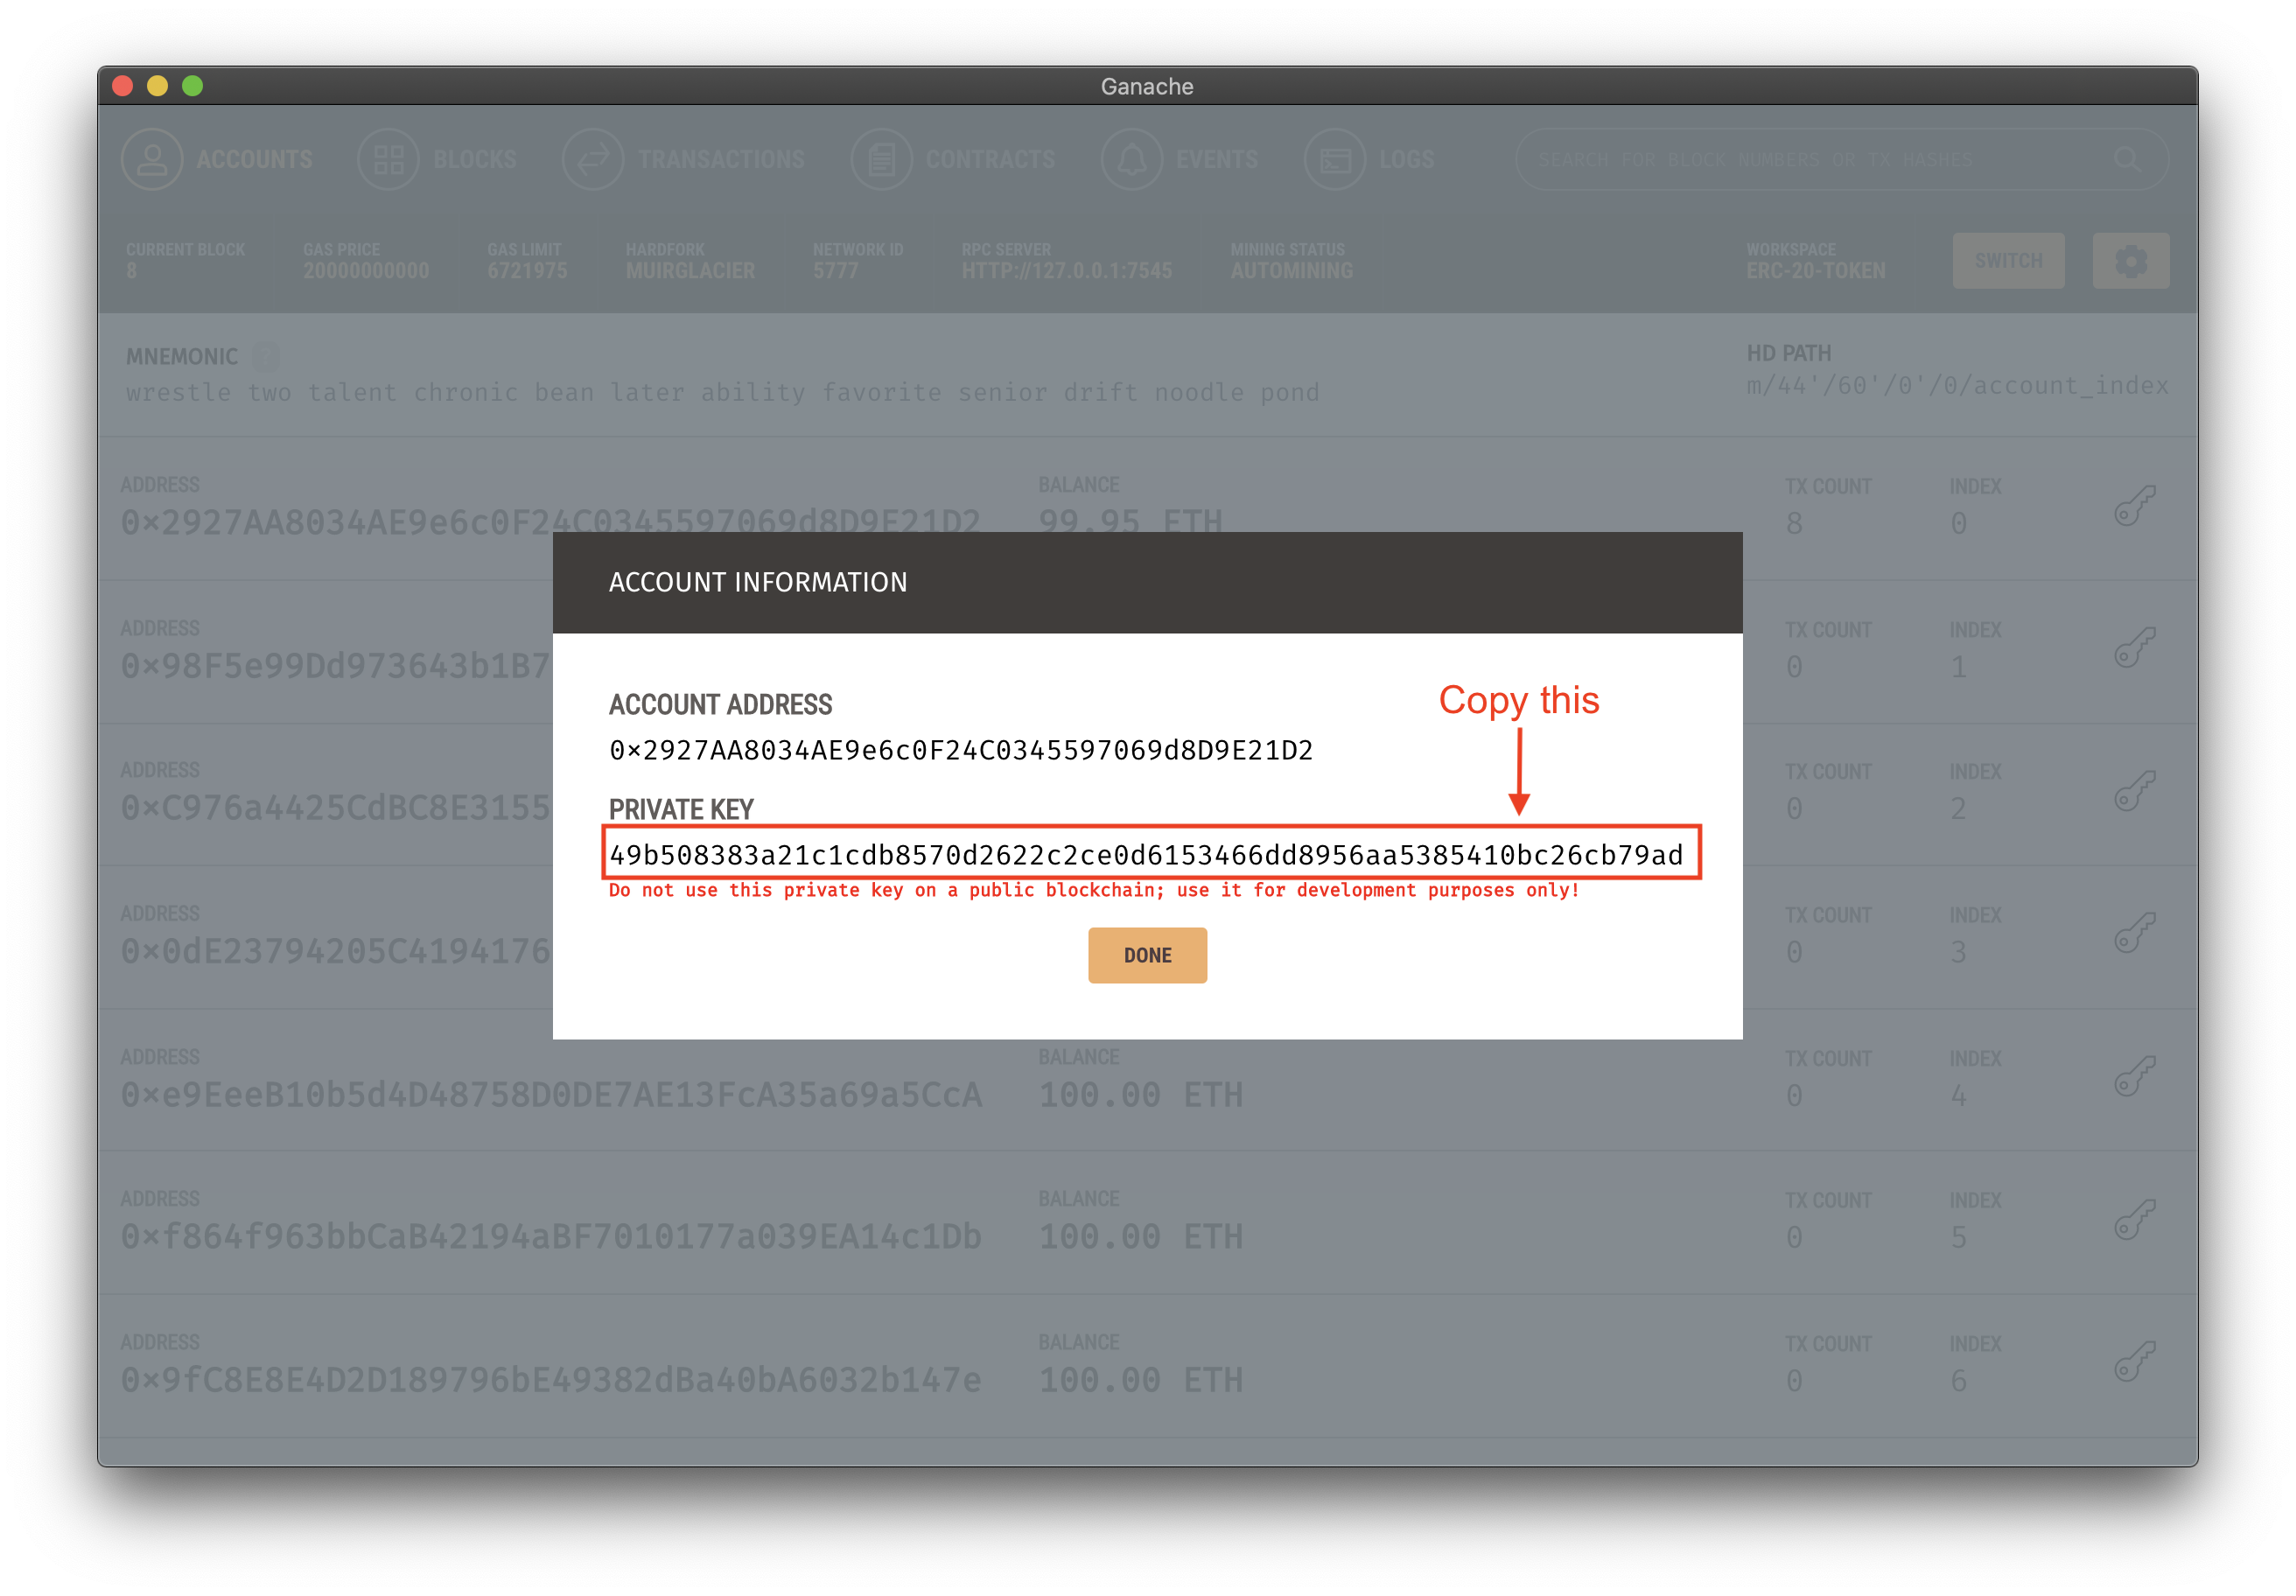
Copy deployment account's private key from Ganache:
-
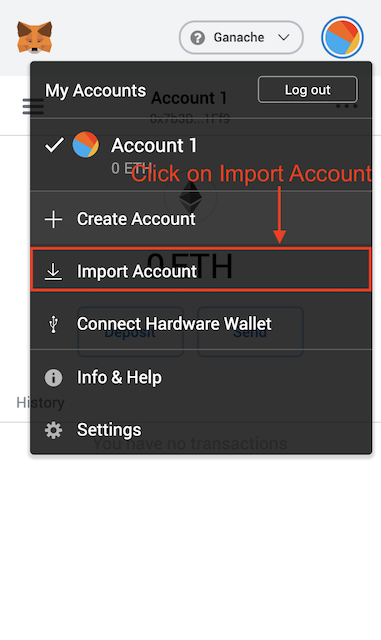
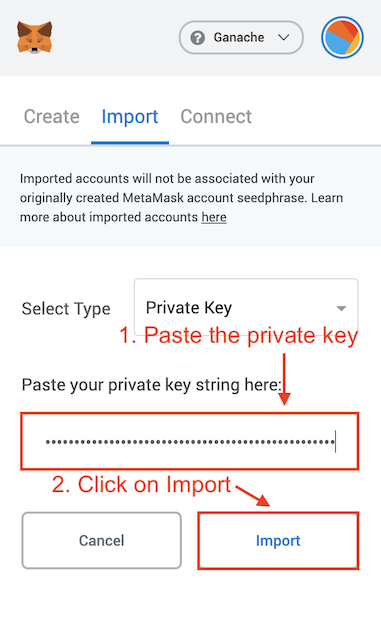
Import a new account into Metamask:
-
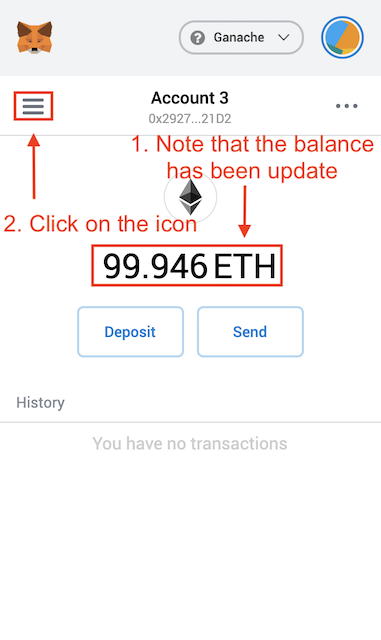
Fill in account's details:
-
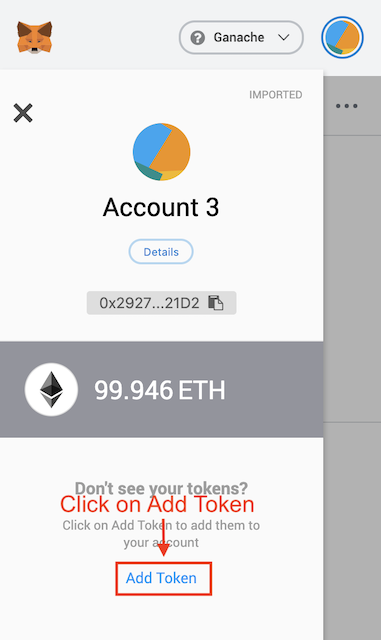
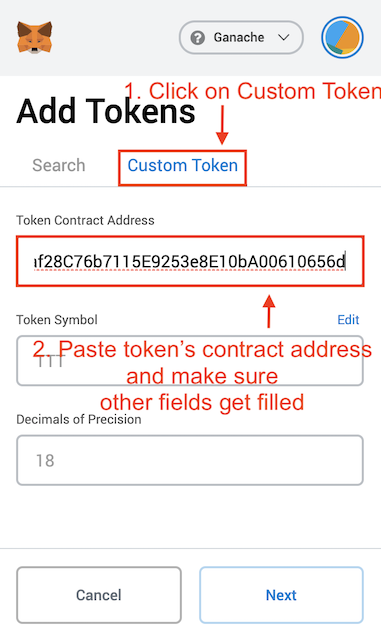
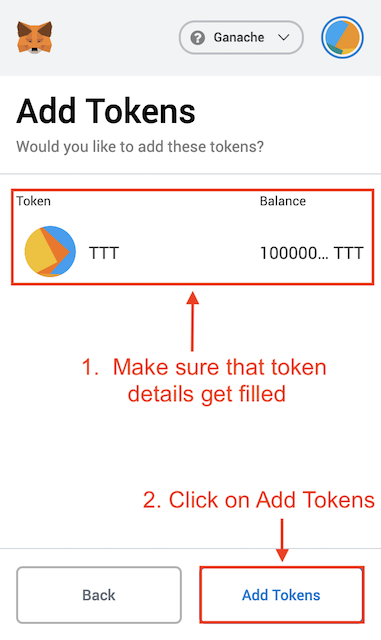
Add token contract:
-
Add token contract:
-
Fill in token contract's details in Metamask:
- Navigate to the directory
cd exchange-backend
- Install the required packages
npm install
- Update the
./src/config.jsfile:
- ethNetwork is the Ganache Network Address (same as RPC)
- myAddress is the wallet address for the account containing all the tokens.
- privateKey is the private key of the account containing all the tokens (available in Ganache).
- contractAddress is the address of the newly deployed smart contract available in Contracts tab in Ganache.
- stripeKey is the private stripeKey of the stripe account where money will be transferred.
    ethNetwork: "http://127.0.0.1:7545/",
    myAddress: "0xc86448c09B84C6b62656c42048952e5612Db542D",
    contractAddress: '0x9667aef4B026432acbFD07b50dD3Ae3d495B8B44',
    privateKey: new Buffer('8cf5ac3dz2d853dfe02a771bd711ca7de44b82d789d4fa7606c5621dde377a39', 'hex')
- Start the server -> The server should start on port 5000.
npm start
- Navigate to frontend server directory
cd exchange-frontend
- Build using docker
docker build website -t exchange-frontend
- Run docker image
docker run -d -p 8080:80 exchange-frontend
- Access server using the url
localhost:8080in the browser. - Enter the details of purchase:
- Card Information: 4242 4242 4242 4242 4242 + Any values for remaining fields & 5 Digit pincode.
- You can use another account from Ganache and copy it's address for testing.
- You can add the same account to MetaMask and the token address to check if the tokens have been transferred!
