Make a Slack Bot!
Are you ready to invent the next AI? Any self-respecting bot needs to be able to communicate via Slack. The bot will be able to do things like respond to messages and message users as they join your Slack team. It will be a simple Node.js and Express.js app and run on Heroku. Don't worry if you haven't used these technologies before — all will be explained!
As a general introduction to this guide, we'll be using the command line interface (CLI) a lot. Things that require use of the CLI will be formatted as code. Furthermore, the bear 🐻 you see here calls attention to action items. Do these things!
Slack Bot Basics
In Slack, bot users are similar to human users in that they have names, profile pictures, exist as part of the team, can post messages, invited to channels, and more. The main difference is that bots are controlled programmatically via an API that Slack provides. We'll be building a custom bot that listens to certain events, like a message or a new member joining your team, and responds accordingly.
APIs
🚩Application Program Interfaces (APIs) are sets of methods and protocols by which programs talk to each other.
We'll be talking a lot more about this when we start designing our own! But for now we'll use Slack's API to communicate with Slack's servers.
Setup
Some of the technologies we'll be using are Slack, Github, Heroku, and Node.js. You're already familiar with Slack and Github, but Heroku and Node might be new. Node is runtime environment used for developing server-side web applications and Heroku is a Platform-as-a-Service which runs our Node application. Let's walk through these basic setup steps together.
- GitHub
🐻Fork this repository!
- Slack
🐻From the Slack desktop app, click on the team name in the top-left and then go to "Apps & Integrations." Search for "bot" and click the top result, "Bots." Click "Add Configuration". Choose a name for your bot and fill in the details for the bot. Take note of the API Token, we'll use it later.

- Setup Local Environment
🚩Your app will need to know about the API token. This token allows you to talk to Slack's servers in an authenticated way.  API keys can be thought of as authentication for programs.

You'll need to have the API token as a local environment variable. This way you can run and test your Node app locally and you don't have to put your secret API key into your code — which would be a security risk as then potentially it could be used by anybody if your code was public.

You can set an environment variable with `export  <name>="XXXX"` and view it with `echo $<name>`.

```bash
export SLACK_BOT_TOKEN="TOKEN_YOU_SAVED_EARLIER"
echo $SLACK_BOT_TOKEN
```

Note: on Windows try `set SLACK_BOT_TOKEN "TOKEN_YOU_SAVED_EARLIER"`.

In our app we will be able to access this in javascript with `process.env.SLACK_BOT_TOKEN`.

🚩 The above export only sets the variable for our currently running shell.  To save on OS X or Linux something akin to: `echo 'export SLACK_BOT_TOKEN="TOKEN_YOU_SAVED_EARLIER"' >> ~/.profile`  should do the trick, but this differs a lot by shell and operating system.
- Node.js and Node Package Manager (npm)
🐻First, let's install [Node.js](https://nodejs.org/en/).

macOS:
```bash
brew install node
```

Windows:
download the installer from: [Node.js](https://nodejs.org/en/)

Node's package manager, npm, is installed automatically with Node. It lets you install packages with`npm install <package> --save`

which both installs and **saves** the package as a dependency in the `package.json file`, explained below.

🐻 Open your project in Atom `atom .` and edit your `package.json` file, give your bot a name and add yourself as author:

Note that some stuff is already set up for you here.  This is a very basic template that includes support for es6.  We'll go through everything in here in more detail later.

🐻Notice that there are several dependencies already set up for your project.  Whenever you start working on a Node.js project that comes with a `package.json` file you should install them.

```bash
cd slackattack  #make sure you are in the cloned project
npm install  #installs all the dependencies in node_modules
```

🚩Note that `node_modules` is in the `.gitignore` file. This is because there is no reason to version control these dependencies, as they are easily reinstalled.
- Express
[Express](http://expressjs.com/) is a web framework for Node.
This can be useful if we need to control our app remotely, for now we'll leave this set up.

🐻Open `app/server.js`.  This is the main file that launches your bot.
- Run Dev Mode
You can now start your app in dev mode.

🚩In the `package.json` there is a section named `scripts`.  This happens to have a few handy things already defined for you.  In particular the dev command which you can run with `npm run dev`.

This will launch your bot in development mode!  Node will watch for any file changes and relaunch itself as needed.

```bash
➜ npm run dev

> example_express_with_es6@1.0.0 dev
> nodemon app/server.js --exec babel-node
[nodemon] 1.9.2
[nodemon] to restart at any time, enter `rs`
[nodemon] watching: *.*
[nodemon] starting `babel-node app/server.js`
listening on: 9090
```
Your First Bot Words
Ok so now you have a little server running, but how does it talk to Slack?
- 🐻Let's add a little library to do that. In a new Terminal window (cool thing about how we're running node in dev mode is that we can change things will it is still running):
cd slackattack #make sure you are in your project direct
npm install --save botkit
We are going to use botkit. Which is a cool library that for making conversation bots.
🚩Note how as soon as that finishes running your nodemon restarts.
- Import the library.
🐻in app/server.js add:
import botkit from 'botkit';
// this is es6 syntax for importing libraries
// in older js this would be: var botkit = require('botkit')- Setup Bot Controller
🐻After we create the express app, lets set up botkit.
// botkit controller
const controller = Botkit.slackbot({
  debug: false,
});

// initialize slackbot
const slackbot = controller.spawn({
  token: process.env.SLACK_BOT_TOKEN,
  // this grabs the slack token we exported earlier
}).startRTM(err => {
  // start the real time message client
  if (err) { throw new Error(err); }
});

// prepare webhook
// for now we won't use this but feel free to look up slack webhooks
controller.setupWebserver(process.env.PORT || 3001, (err, webserver) => {
  controller.createWebhookEndpoints(webserver, slackbot, () => {
    if (err) { throw new Error(err); }
  });
});
If you notice an error: Error: not_authed this is because you forgot to export/set the environment variable for the SLACK_BOT_TOKEN.
🚩If you have trouble setting up your environment you can use a .env file with the dotenv node package.
- Lets Say Hi!
// example hello response
controller.hears(['hello', 'hi', 'howdy'], ['direct_message', 'direct_mention', 'mention'], (bot, message) => {
  bot.reply(message, 'Hello there!');
});
Give it a shot, try direct messaging your bot in Slack!
- What about names?
Want the bot to respond to the user by name?
Well we have full access to Slacks web api. Lets look up the users name.
bot.api.users.info({ user: message.user }, (err, res) => {
  if (res) {
    bot.reply(message, `Hello, ${res.user.name}!`);
  } else {
    bot.reply(message, 'Hello there!');
  }
});
You would do this inside of the callback to controller.hears.
Now for the Real Stuff!
Ok now your Bot knows how to say hi. But lets make it do some useful stuff!
The rest of this assignment is more hands-off. We'll provide some direction and resources but you'll be looking up API docs and adding more cool stuff to your bot.
So far we've been using Botkit. Botkit has support for more complex conversations. This might come in handy.
The Botkit library provides us with a convenient wrapper around Slack's API. Our bot connects to Slack's RTM API and opens a WebSocket connection with Slack. If you set debug=true in the botkit initialization you can see how it polls the Slack servers.
Events
The Slack server issues events that are then consumed by clients. These are things like messages and team join events. Botkit can hook up to any of Slack's events. .hears is a fancier way of listenining to message events.
🐻Botkit slack event integration.
For instance:
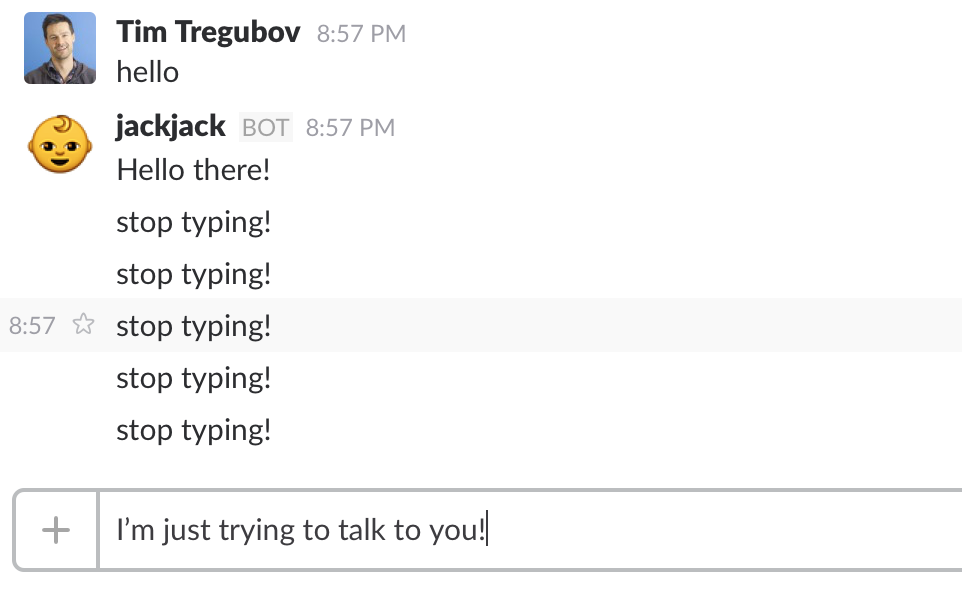
controller.on('user_typing', (bot, message) => {
  bot.reply(message, 'stop typing!');
});
will make your bot a jerk! 😡
The format of the message object is defined on the Slack documentation for message events.
Make Your Bot Do More
At this point you've achieved a general understanding of what goes into making a Slack bot and have implemented some functionalities. Now, go and see what else you can do with your Slack bot. Brainstorm, read documentation, and experiment. Make your bot the best that it can be!
Wait But Food
Except first, lets make your bot actually helpful. I am hungry, and I want your bot to suggest places to eat.
🐻Add in Yelp API for node.
🐻You'll need to sign up and generate API keys, similar to what you had to do for Slack.
Tip: Yelp results come back looking something like:
{ region:
   { span:
      { latitude_delta: 0.718768709999992,
        longitude_delta: 1.2334175700000003 },
     center: { latitude: 43.667689249999995, longitude: -72.23498615 } },
  total: 293,
  businesses:
   [ { is_claimed: true,
       rating: 3.5,
       mobile_url: 'http://m.yelp.com/biz/lui-lui-west-lebanon?utm_campaign=yelp_api&utm_medium=api_v2_search&utm_source=SP9uRBTuVFlkyH53y2dRbw',
       rating_img_url: 'https://s3-media1.fl.yelpcdn.com/assets/2/www/img/5ef3eb3cb162/ico/stars/v1/stars_3_half.png',
       review_count: 107,
       name: 'Lui Lui',
       rating_img_url_small: 'https://s3-media1.fl.yelpcdn.com/assets/2/www/img/2e909d5d3536/ico/stars/v1/stars_small_3_half.png',
       url: 'http://www.yelp.com/biz/lui-lui-west-lebanon?utm_campaign=yelp_api&utm_medium=api_v2_search&utm_source=SP9uRBTuVFlkyH53y2dRbw',
       categories: [Object],
       phone: '6032987070',
       snippet_text: 'Still in heaven over how good the food was. We stopped in Lui Lui while looking for a quick dinner spot. While we couldn\'t sit due to the wait, I ordered...',
       image_url: 'https://s3-media2.fl.yelpcdn.com/bphoto/-yb1mjp8cvQwXqCnUUUNrw/ms.jpg',
       snippet_image_url: 'http://s3-media3.fl.yelpcdn.com/photo/m6vlPsVGi9ln0hQM0LGylw/ms.jpg',
       display_phone: '+1-603-298-7070',
       rating_img_url_large: 'https://s3-media3.fl.yelpcdn.com/assets/2/www/img/bd9b7a815d1b/ico/stars/v1/stars_large_3_half.png',
       id: 'lui-lui-west-lebanon',
       is_closed: false,
       location: [Object] },
     }
   },
 ...]
}
So you'll need to process those to filter out results you find useful.
Try something like:
data.businesses.forEach(business => {
  // do something with business
});
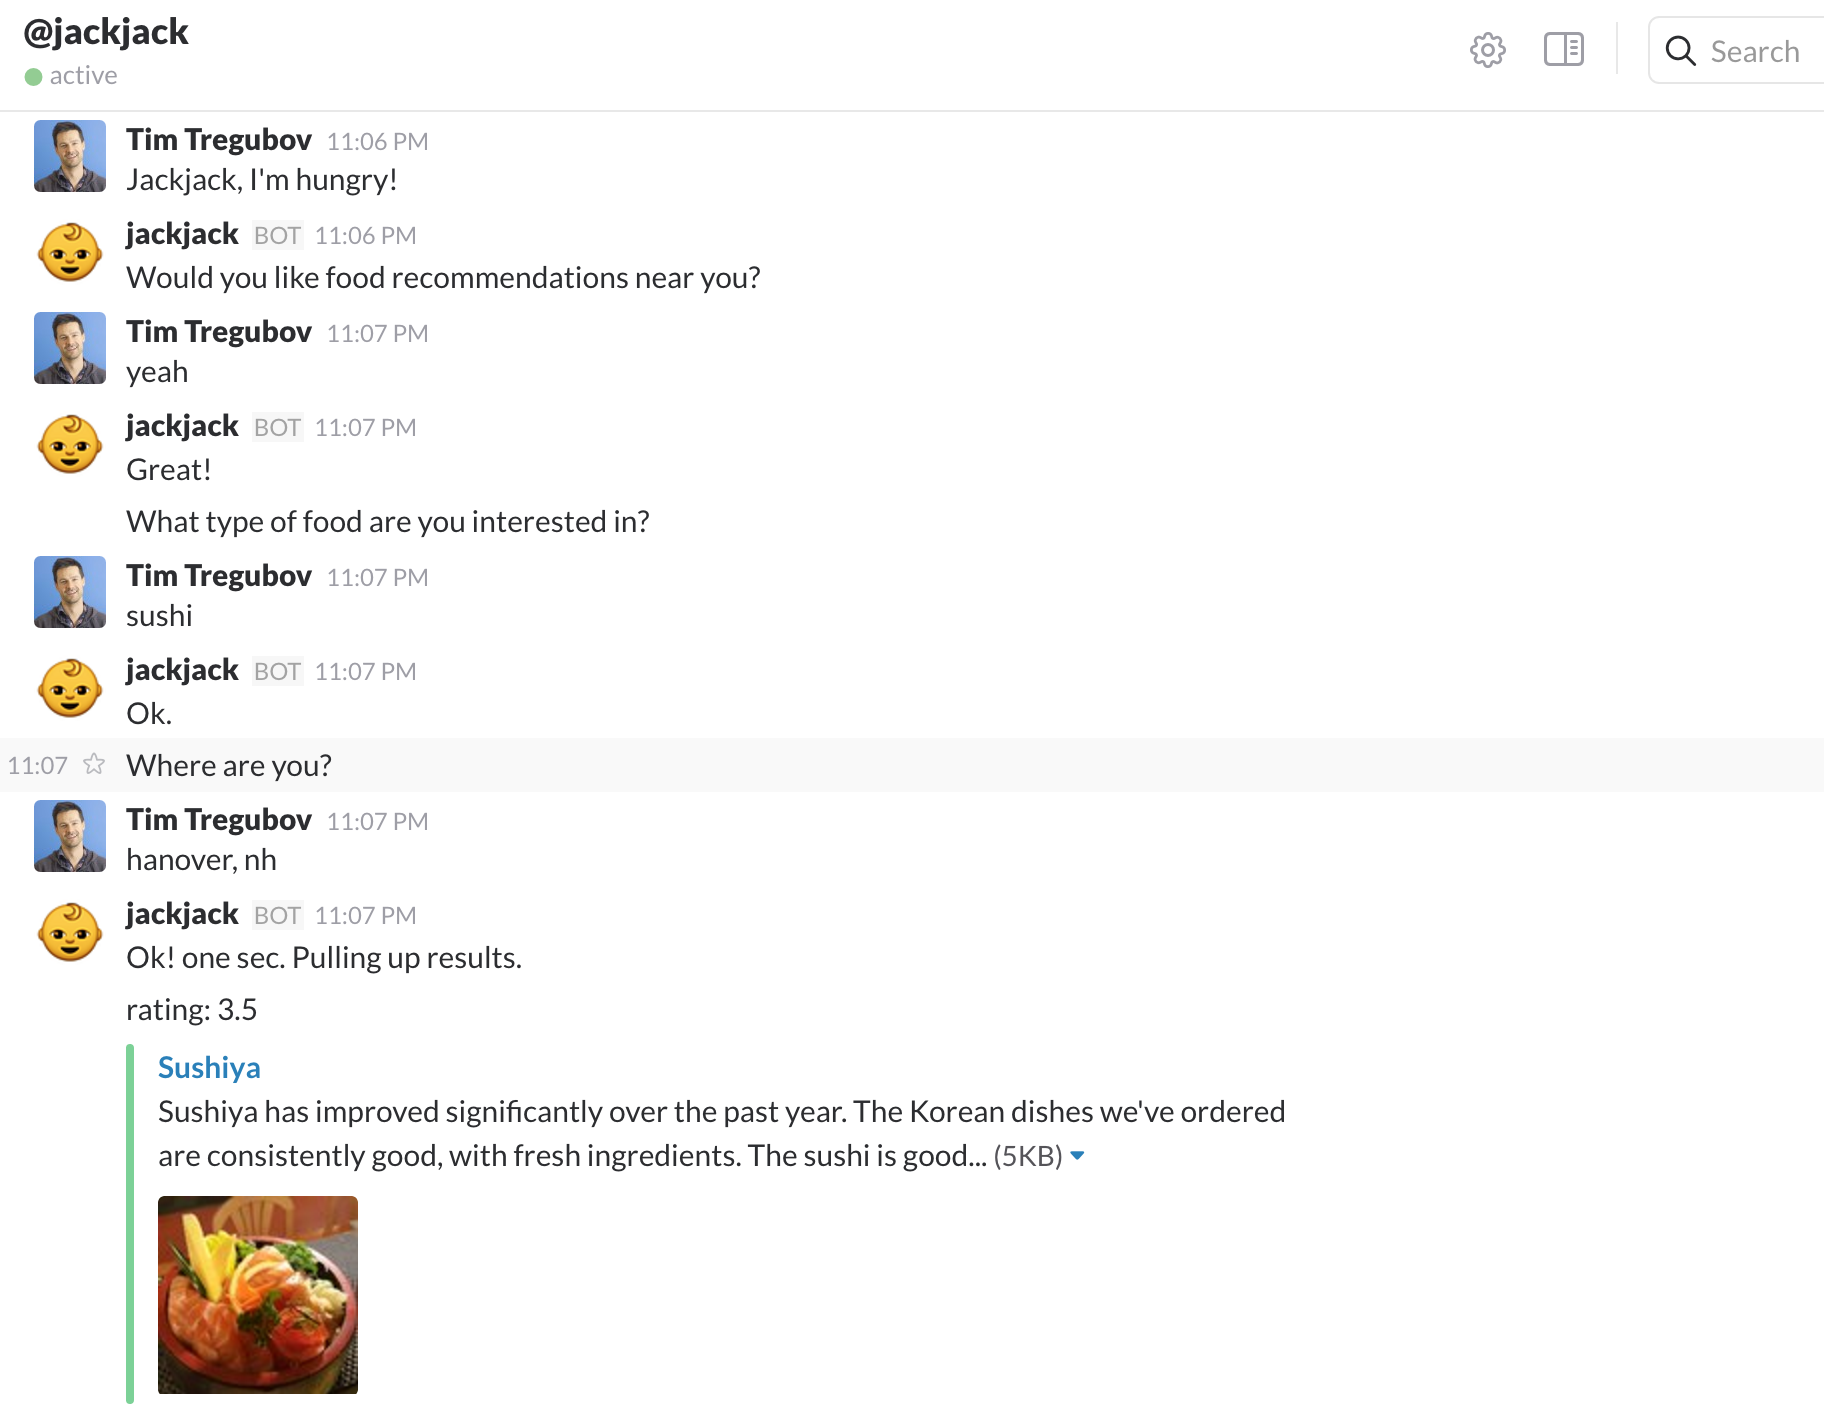
Here's some sample output that your bot too can return. Just slack jackjack and tell him you are hungry.
Data Stores
We're not covering the datastores here. So your bot will forget conversations it has had. Botkit does provide a storage api.
If you want to try setting that up, its extra credit to have a convo that isn't only in memory. Heroku has free Mongo addons so that might be a direction to take.
Deploy On Heroku
Ok the last step is to deploy your bot to Heroku!
-
🐻Head over to Heroku and login/sign up. Then, make a new app. In the "Deploy" tab, set the deployment method to Github and connect to the repo you made. Head over to "Settings" and add a Config Variable
SLACK_BOT_TOKENwith value set to the API token of the Slack bot you made in step 1. You probably also need to add all your YELP keys, and any other API's you used. -
Follow the steps under "Deploy Using Heroku Git".
🚩You may have noticed a file named Procfile in the project. This tells Heroku what commands to run in its dynos. Our Procfile is just one line, web: npm run prod, where web defines the dyno type (this one receives HTTP traffic), npm run prod is the command defined in package.js that we want to run.
To Turn In:
- github url to your bots repo (must be readable by staff, can be public)
- screen caps of some conversations that test your bot's functionality
- when we talk to your bot, it should be able to:
- respond to hi
- return results for a restaurant query
- carry on at least one conversation
- send back an attachment message in response to something.
- /invite your bot to the Slack #bots channel
- your heroku URL. This is so we can wake up your bot if heroku sleeps your dyno. Alternatively you could add an Outgoing Webhook that would wake up your bot for extra credit.
Extra Credit
- So many options. Be creative!
- Maps?
- Driving directions?
- MongoDB Botkit Storage setup on Heroku.
- Outgoing Webhook that would wake up your bot when it hears its name in the #bots channel. hint: `controller.on('outgoing_webhook', (bot, message) => { bot.replyPublic(message, 'yeah yeah'); });


