cli IO utilities
The following assumes you have installed cli-ux to your project with npm install cli-ux or yarn add cli-ux and have it required in your script (TypeScript example):
import cli from 'cli-ux'
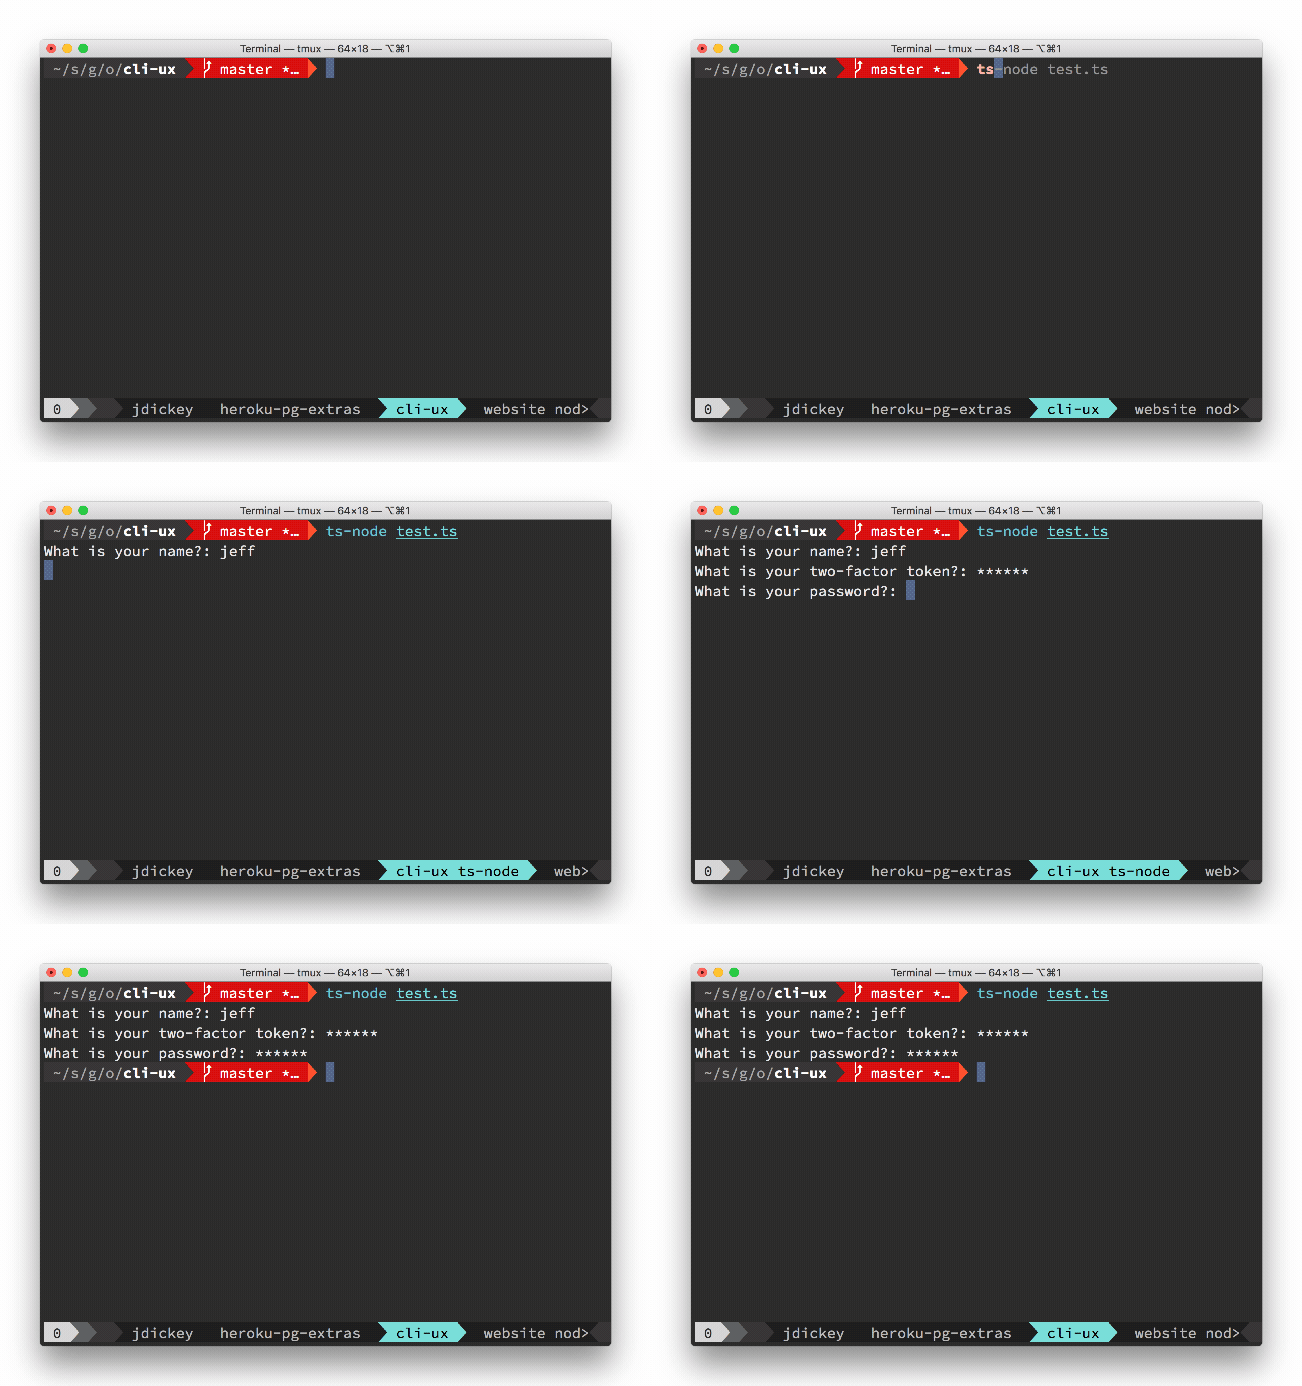
cli.prompt('What is your name?')
JavaScript:
const {cli} = require('cli-ux')

cli.prompt('What is your name?')Prompt for user input.
// just prompt for input
await cli.prompt('What is your name?')

// mask input after enter is pressed
await cli.prompt('What is your two-factor token?', {type: 'mask'})

// mask input on keypress (before enter is pressed)
await cli.prompt('What is your password?', {type: 'hide'})

// yes/no confirmation
await cli.confirm('Continue?')

// "press any key to continue"
await cli.anykey()Create a hyperlink (if supported in the terminal)
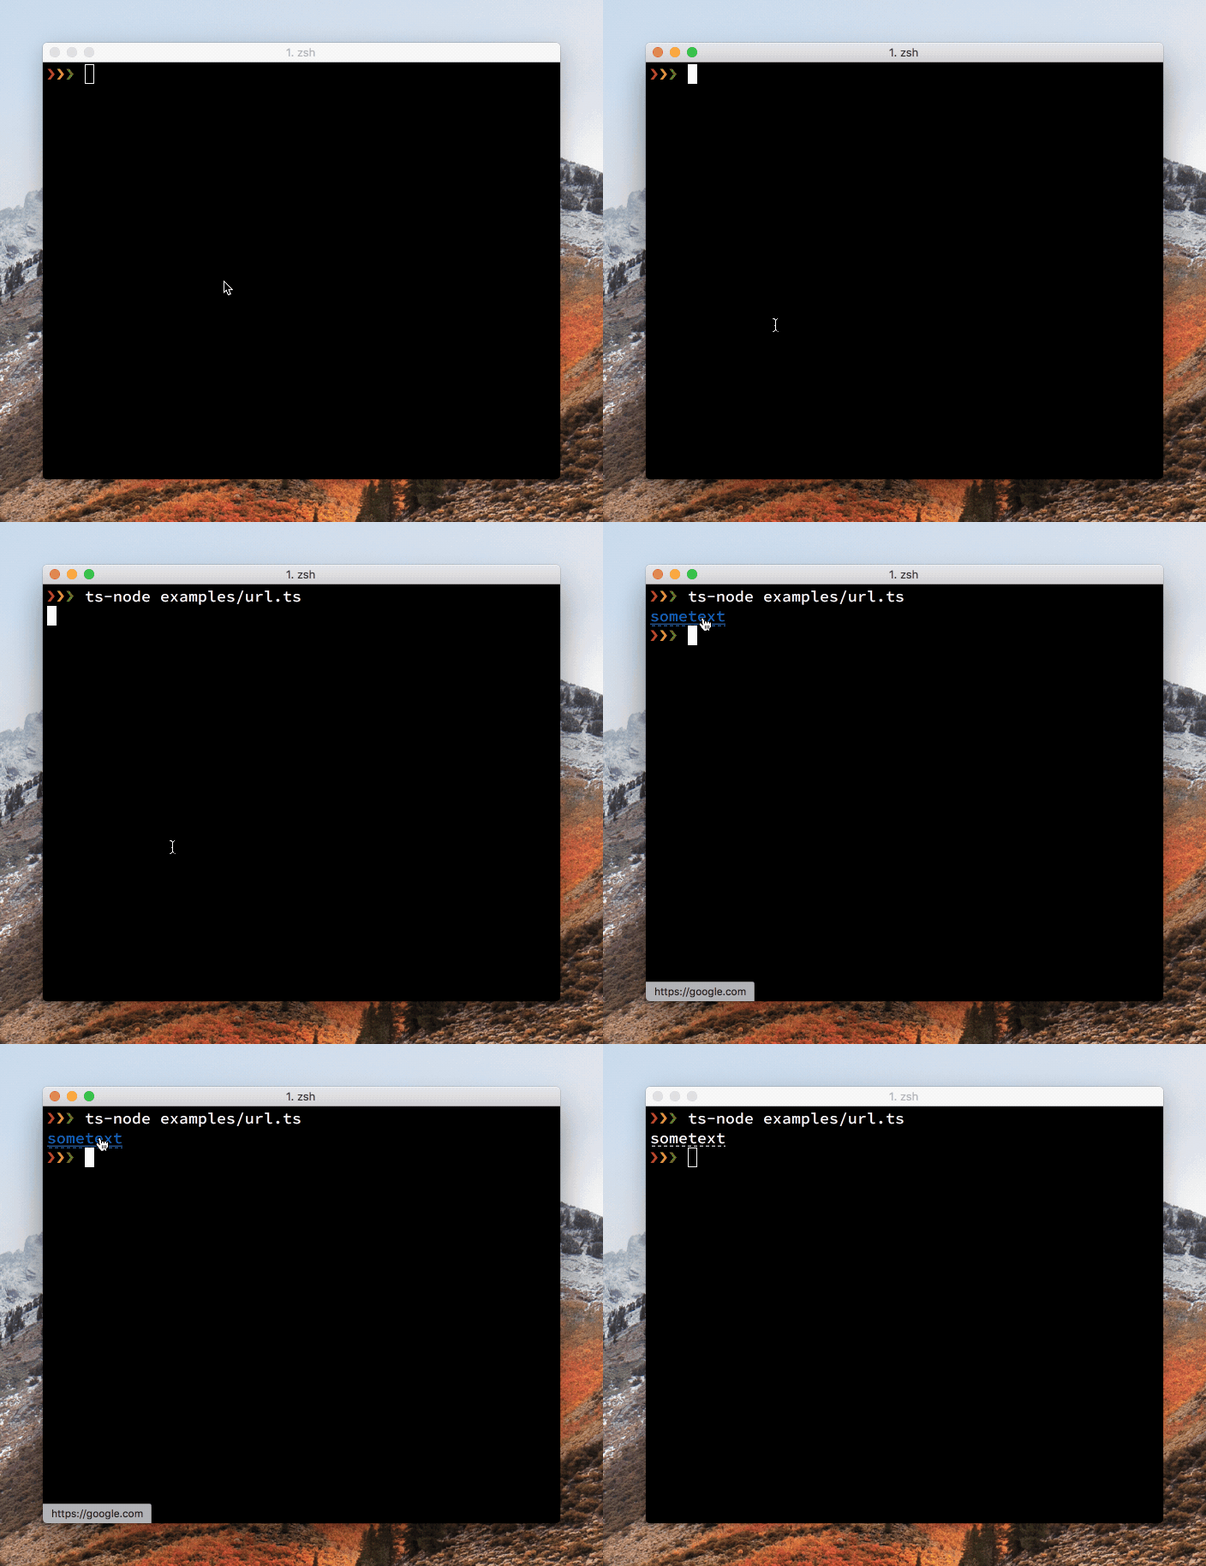
await cli.url('sometext', 'https://google.com')
// shows sometext as a hyperlink in supported terminals
// shows https://google.com in unsupported terminalsOpen a url in the browser
await cli.open('https://oclif.io')Shows a spinner
// start the spinner
cli.action.start('starting a process')
// show on stdout instead of stderr
cli.action.start('starting a process', {stdout: true})

// stop the spinner
cli.action.stop() // shows 'starting a process... done'
cli.action.stop('custom message') // shows 'starting a process... custom message'
This degrades gracefully when not connected to a TTY. It queues up any writes to stdout/stderr so they are displayed above the spinner.
Shows an iterm annotation
// start the spinner
cli.annotation('sometest', 'annotated with this text')Waits for 1 second or given milliseconds
await cli.wait()
await cli.wait(3000)Displays tabular data
cli.table(data, columns, options)Where:
data: array of data objects to displaycolumns: Table.Columnsoptions: Table.Options
cli.table.flags() returns an object containing all the table flags to include in your command.
{
  columns: Flags.string({exclusive: ['additional'], description: 'only show provided columns (comma-seperated)'}),
  sort: Flags.string({description: 'property to sort by (prepend '-' for descending)'}),
  filter: Flags.string({description: 'filter property by partial string matching, ex: name=foo'}),
  csv: Flags.boolean({exclusive: ['no-truncate'], description: 'output is csv format'}),
  extended: Flags.boolean({char: 'x', description: 'show extra columns'}),
  'no-truncate': Flags.boolean({exclusive: ['csv'], description: 'do not truncate output to fit screen'}),
  'no-header': Flags.boolean({exclusive: ['csv'], description: 'hide table header from output'}),
}
Passing {only: ['columns']} or {except: ['columns']} as an argument into cli.table.flags() will whitelist/blacklist those flags from the returned object.
Table.Columns defines the table columns and their display options.
const columns: Table.Columns = {
  // where `.name` is a property of a data object
  name: {}, // "Name" inferred as the column header
  id: {
    header: 'ID', // override column header
    minWidth: '10', // column must display at this width or greater
    extended: true, // only display this column when the --extended flag is present
    get: row => `US-O1-${row.id}`, // custom getter for data row object
  },
}
Table.Options defines the table options, most of which are the parsed flags from the user for display customization, all of which are optional.
const options: Table.Options = {
  printLine: myLogger, // custom logger
  columns: flags.columns,
  sort: flags.sort,
  filter: flags.filter,
  csv: flags.csv,
  extended: flags.extended,
  'no-truncate': flags['no-truncate'],
  'no-header': flags['no-header'],
}
Example class:
import {Command} from '@oclif/command'
import {cli} from 'cli-ux'
import axios from 'axios'

export default class Users extends Command {
  static flags = {
    ...cli.table.flags()
  }

  async run() {
    const {flags} = this.parse(Users)
    const {data: users} = await axios.get('https://jsonplaceholder.typicode.com/users')

    cli.table(users, {
      name: {
        minWidth: 7,
      },
      company: {
        get: row => row.company && row.company.name
      },
      id: {
        header: 'ID',
        extended: true
      }
    }, {
      printLine: this.log,
      ...flags, // parsed flags
    })
  }
}
Displays:
$ example-cli users
Name   Team
Jordan Sales
Jamie  Engineering

$ example-cli users --extended
Name   Team        ID
Jordan Sales       100
Jamie  Engineering 200

$ example-cli users --columns=name
Name
Jordan
Jamie

$ example-cli users --filter="team=sales"
Name   Team        ID
Jordan Sales       100

$ example-cli users --sort=team
Name   Team        ID
Jamie  Engineering 200
Jordan Sales 100Generate a tree and display it
let tree = cli.tree()
tree.insert('foo')
tree.insert('bar')

let subtree = cli.tree()
subtree.insert('qux')
tree.nodes.bar.insert('baz', subtree)

tree.display()
Outputs:
├─ foo
└─ bar
   └─ baz
      └─ qux


