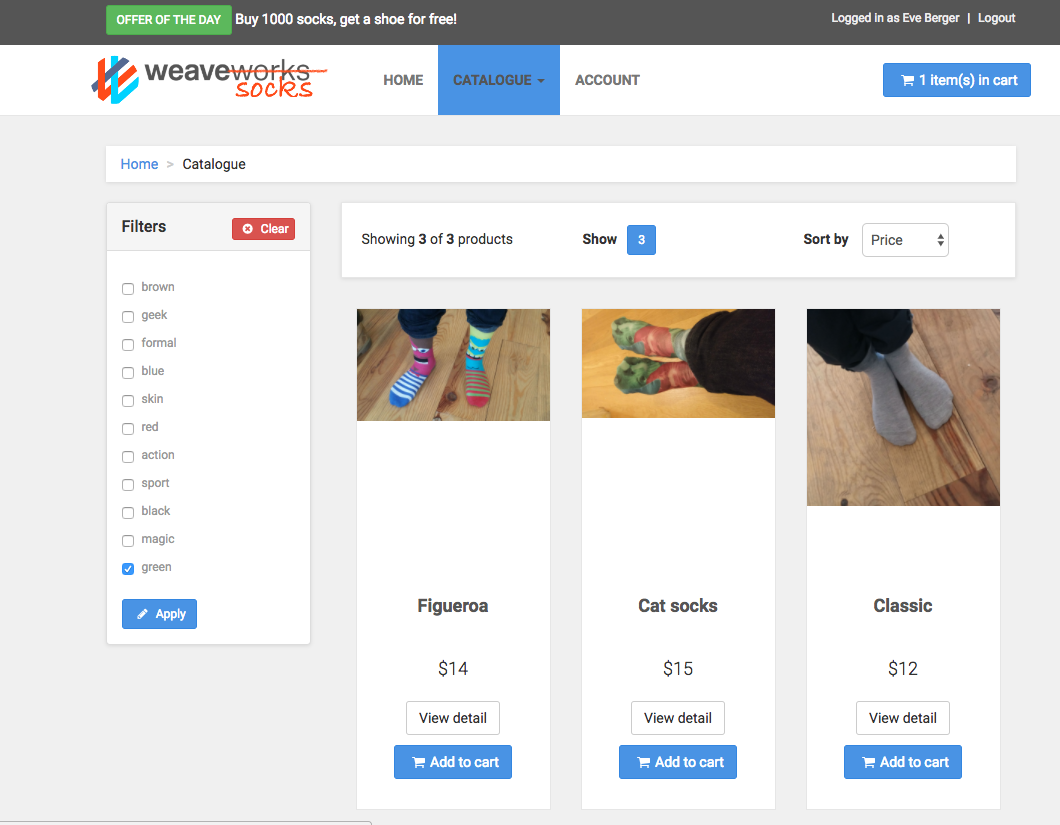
The Sock Shop Microservices Demo consists of 13 microservices which provide the customer-facing part of an e-commerce application. These services are written in several languages, including node.js, Java, and Go, and use RabbitMQ, 1 MySQL and 3 MongoDB databases. The demo is deployable on many platforms including Docker, Kubernetes, Amazon ECS, Mesos, Apcera, and Nomad.
You can learn more about the demo at the Sock Shop website which also includes links to all the source code and Docker images used by the demo.
The instructions below describe how you can deploy the Sock Shop microservices to AWS using Nomad, Consul, and Vault. Additionally, Packer is used to build the AWS AMI, Terraform is used to provision the AWS infrastructure, a local Vault server is used to dynamically provision AWS credentials to Terraform, and a Vagrant VM is launched on your laptop to run the local software.
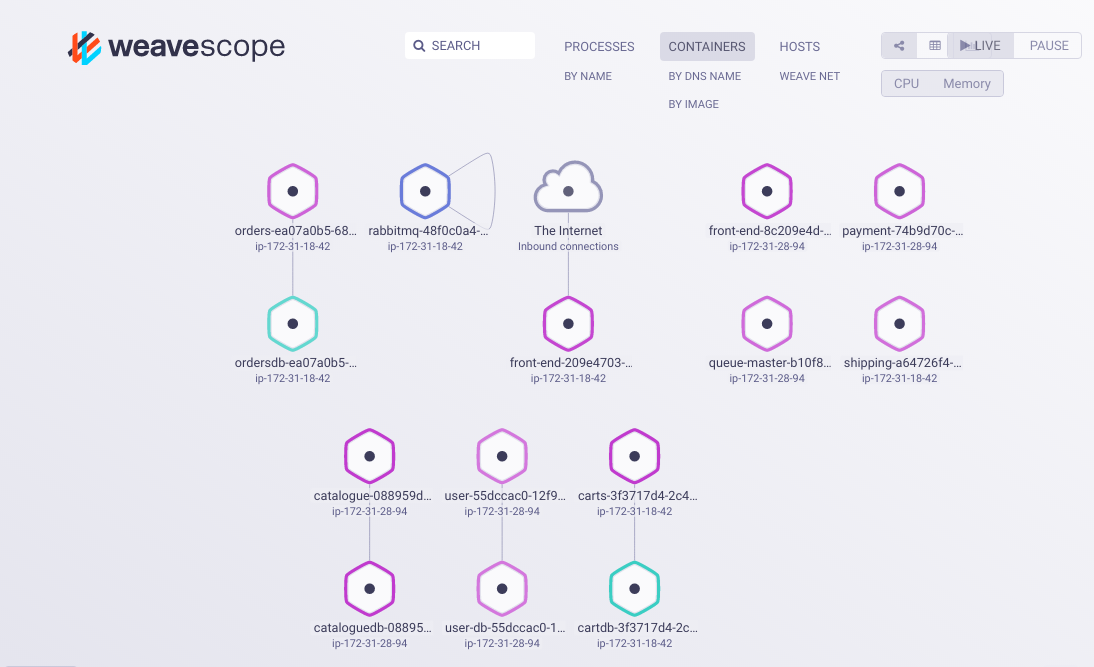
In our case, all the Sock Shop microservices will be launched in Docker containers, using Nomad's Docker Driver. Consul will be used for service discovery. We are also using Weave Net as a Docker overlay network so that microservices can communicate across multiple EC2 instances. And we've deployed Weave Scope to help us visualize the Docker containers.
In order to deploy the Sock Shop demo to AWS, you will need an AWS account. You will also need to know your AWS access and secret access keys. You'll also need a key pair from your AWS account. Of course, you'll also want to clone or download this repository to your laptop. In a terminal session, you would use git clone https://github.com/rberlind/hashicorp-demo.git.
A Vagrantfile is included so that you can install and launch Packer, Terraform, and Vault in a single VM, making the usage of the demo more predictable for all users.
To launch the Vagrant VM, open a Terminal shell, navigate to the aws directory and run vagrant up. Don't worry about a lot of ugly-looking text including some that is red that scrolls by; that is mostly just software being downloaded with curl.
Once the Vagrant VM is created, run vagrant ssh to connect to it. Note that your prompt should change to something like "vagrant@vagrant-ubuntu-trusty-64:~$".
You now want to initialize the Vault server that is included in the VM as follows:
cd vault- Run the Vault server with
vault server -config=vault.hcl > vault.log & export VAULT_ADDR=http://127.0.0.1:8200vault init -key-shares=1 -key-threshold=1- Be sure to notice the Unseal Key 1 and Initial Root Token which you will need. These will not be shown to you again.
- Unseal Vault with
vault unseal. Provide the Unseal Key 1 when prompted. You should get feedback saying that Vault is unsealed. - Export your Vault root token with
export VAULT_TOKEN=<root_token>, replacing <root_token> with the initial root token returned when you initialized Vault.
Your Vault server is now unsealded and ready to use, but we also want to add in the Vault AWS secret backend and set it up to dynamically provision AWS credentials for each Terraform run.
- Mount the Vault AWS Backend with
vault mount aws. - Write your AWS keys to Vault, replacing <your_key> and <your_secret_key> with your actual AWS keys:
vault write aws/config/root \
 access_key=<your_key> \
 secret_key=<your_secret_key>
You should see "Success! Data written to: aws/config/root"
- Add a policy to Vault with
vault write aws/roles/deploy policy=@policy.json. You should see "Success! Data written to: aws/roles/deploy". - Test that you can dynamically generate AWS credentials by running
vault read aws/creds/deploy. This will return an access key and secret key usable for 32 days. If you want the credentials to only be valid for 30 minutes, runcurl --header "X-Vault-Token:<your_root_token>" --request POST --data '{"lease": "30m", "lease_max": "24h"}' http://localhost:8200/v1/aws/config/lease, being sure to replace <your_root_token> with your initial Vault root token. You can repeat the previous command to verify that your generated AWS credentials are now only valid for 30 minutes.
You can now use Packer and Terraform to provision your AWS EC2 instances. Terraform has already been configured to retrieve AWS credentials from your local Vault server.
I've already used Packer to create a public Amazon Machine Image (AMI), ami-ed7f7296, which you can use as the basis for your EC2 instances. This AMI only exists in the AWS us-east-1 region. If you want to create a similar AMI in a different region or if you make any changes to any of the files in the aws or shared directories, you will need to create your own AMI with Packer. This is very simple. Starting from the /home/vagrant directory inside your Vagrant VM, do the following (being sure to specify the region in packer.json if different from us-east-1):
cd aws/packer
packer build packer.json
cd ..
Be sure to note the AMI ID of your new AMI and to enter this as the value of the ami variable in the terraform.tfvars file under the aws/env/us-east directory. Save that file.
Before using Terraform, you need to use one of your AWS EC2 key pairs or create a new one. Please download your private key and copy it to the aws directory to make connecting to your EC2 instances easier. Be sure to specify the name of your key in the value for the "key_name" variable in terraform.tfvars under the aws/env/us-east directory and save that file before continuing.
Now, you're ready to use Terraform to provision your EC2 instances. The current configuration creates 1 Server VM running Nomad, Consul, and Vault servers and 2 Client VMs running Nomad and Consul. Your Sock Shop apps will be deployed by Nomad to the Client VMs.
cd env/us-eastwhere you will find the Terraform files.- Run
terraform planto validate your Terraform configuration. You should see a message at the end saying that Terraform found 7 objects to add, 0 to chnage, and 0 to destroy. - Run
terraform applyto provision your infrastructure. When this finishes, you should see a message giving the public and private IP addresses for all 3 instances. Write these down for later reference. In your AWS console, you should be able to see all 3 instances under EC2 Instances. If you were already on that screen, you'll need to refresh it.
If you copied your private EC2 key pair to the aws directory of your Vagrant VM, you can connect to your Nomad server with ssh -i <key> ubuntu@<server_public_ip>, replacing <key> with your actual private key file (ending in ".pem") and <server_public_ip> with the public IP of your server instance.
After connecting, if you run the pwd command, you will see that you are in the /home/ubuntu directory. If you run the ls command, you should see 3 files: setup_vault.sh, sockshop.nomad, and ssh_policy.hcl.
Please do connect to your server instance before continuing. You might also want to connect to one of your client instances too, using one of the public client IP addresses. Note that you can connect to any of the EC2 instances from your laptop without first ssh-ing into your Vagrant VM.
You now need to set up the Vault server on your EC2 Server instance so that Nomad can retrieve a dynamically generated password when running the catalogue-db task which creates and runs a MySQL database. This password will be passed into the Docker container running the catalogue-db database and will be assigned to the MYSQL_ROOT_PASSWORD environment variable which sets the MySQL password for the root user of the database.
We're actually using the Vault SSH Secret Backend to generate One-Time SSH Passwords. I could not use the Vault MySQL Database Plugin because it requires a running database to dynamically generate database credentials. Unfortunately, the username and password actually used by the catalogue-db database at runtime are hard-coded in the Docker image's code. So, I could only dynamically generate the root user's password which the Docker image expects to be passed in via an environment variable.
I've provided a script to automate as much of the initialization of the AWS Vault server as possible, but you still need to manually initialize and unseal it. Please do the following steps on your server instance:
- Initialize your AWS Vault with
vault init -key-shares=1 -key-threshold=1. Be sure to write down your unseal key and root token, and don't confuse these with the ones for the Vault server running inside your Vagrant VM. - Unseal your AWS Vault with
vault unseal, providing your unseal key when prompted. export VAULT_TOKEN=<root_token>, replacing <root_token> with the root token returned in the previous step.- Run
./setup_vault.shto do the rest of the Vault initialization and to start the Nomad server. You should see output like this:
Before running this, you must first do the following:
vault init -key-shares=1 -key-threshold=1
which will give you and Unseal Key 1 and Initial Root Token
vault unseal
to which you must provide the Unseal Key 1
export VAULT_TOKEN=<Initial_Root_Token>
Setting up Vault policy and role
Policy 'nomad-server' written.
Success! Data written to: auth/token/roles/nomad-cluster
The generated Vault token is: a6065b61-1edb-0941-e5ee-ad44eff6a525
Setting up the Vault SSH secret backend
Successfully mounted 'ssh' at 'ssh'!
Success! Data written to: ssh/roles/otp_key_role
Testing that we can generate a password
Key Value
lease_id ssh/creds/otp_key_role/60849dd8-d537-f090-3723-19d379036b7b
lease_duration 768h0m0s
lease_renewable false
ip 172.17.0.1
key 5222138a-012e-a2c8-b035-100337777eb6
key_type otp
port 22
username root
Success! Data written to: sys/policy/ssh_policy
nomad start/running, process 28035
Verify that Nomad is running with ps -ef | grep nomad. You should see "/usr/local/bin/nomad agent -config=/etc/nomad.d/nomad.hcl".
You can verify that the sockshop Docker network was created with docker network ls. If you ssh-ed to one of your client instances, run this there too.
You could also verify that Weave Net and Weave Scope are running with ps -ef | grep weave and ps -ef | grep scope.
Launching the Sock Shop microservices with Nomad is very easy. Just run:
nomad run sockshop.nomad
You can check the status of the sockshop job by running nomad status sockshop. Please do this a few times until all of the task groups are running.
You should now be able to access the Sock Shop UI with a browser on your laptop. Just point your browser against http://<client_ip>, replacing <client_ip> with either of the client instance public IP addresses.
You can login to the Sock Shop as "Eve_Berger" with password "eve". You can then browse through the catalogue, add some socks to your shopping cart, checkout, and view your order.
You can use Weave Scope to see all the Docker containers that are running on your 2 client instances. Point your browser to http://<client_ip>:4040, replacing <client_ip> with either of the client instance public IP addresses. You can zoom in and out. You can also make various selections such as only seeing application containers, only seeing running containers, viewing a graph indicating how the containers are communicating with each other, or viewing a table. You can select containers and even enter shells for them.
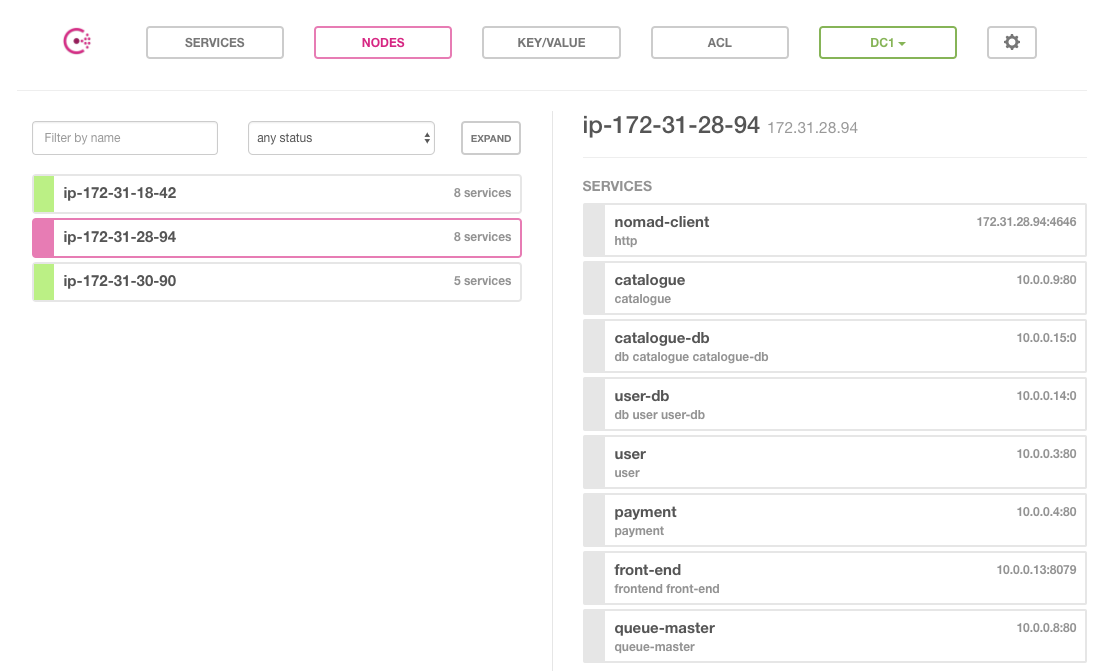
You can access the Consul UI by pointing your browser to http://<client_ip>:8500, replacing <client_ip> with either of the client instance public IP addresses. You can verify that all of the Sock Shop microservices are registered with Consul and easily determine which of the client instances the different services are running on. Note that the current configuration runs 2 instances of front-end (the UI) and 1 instance of all the other Sock Shop microservices.


