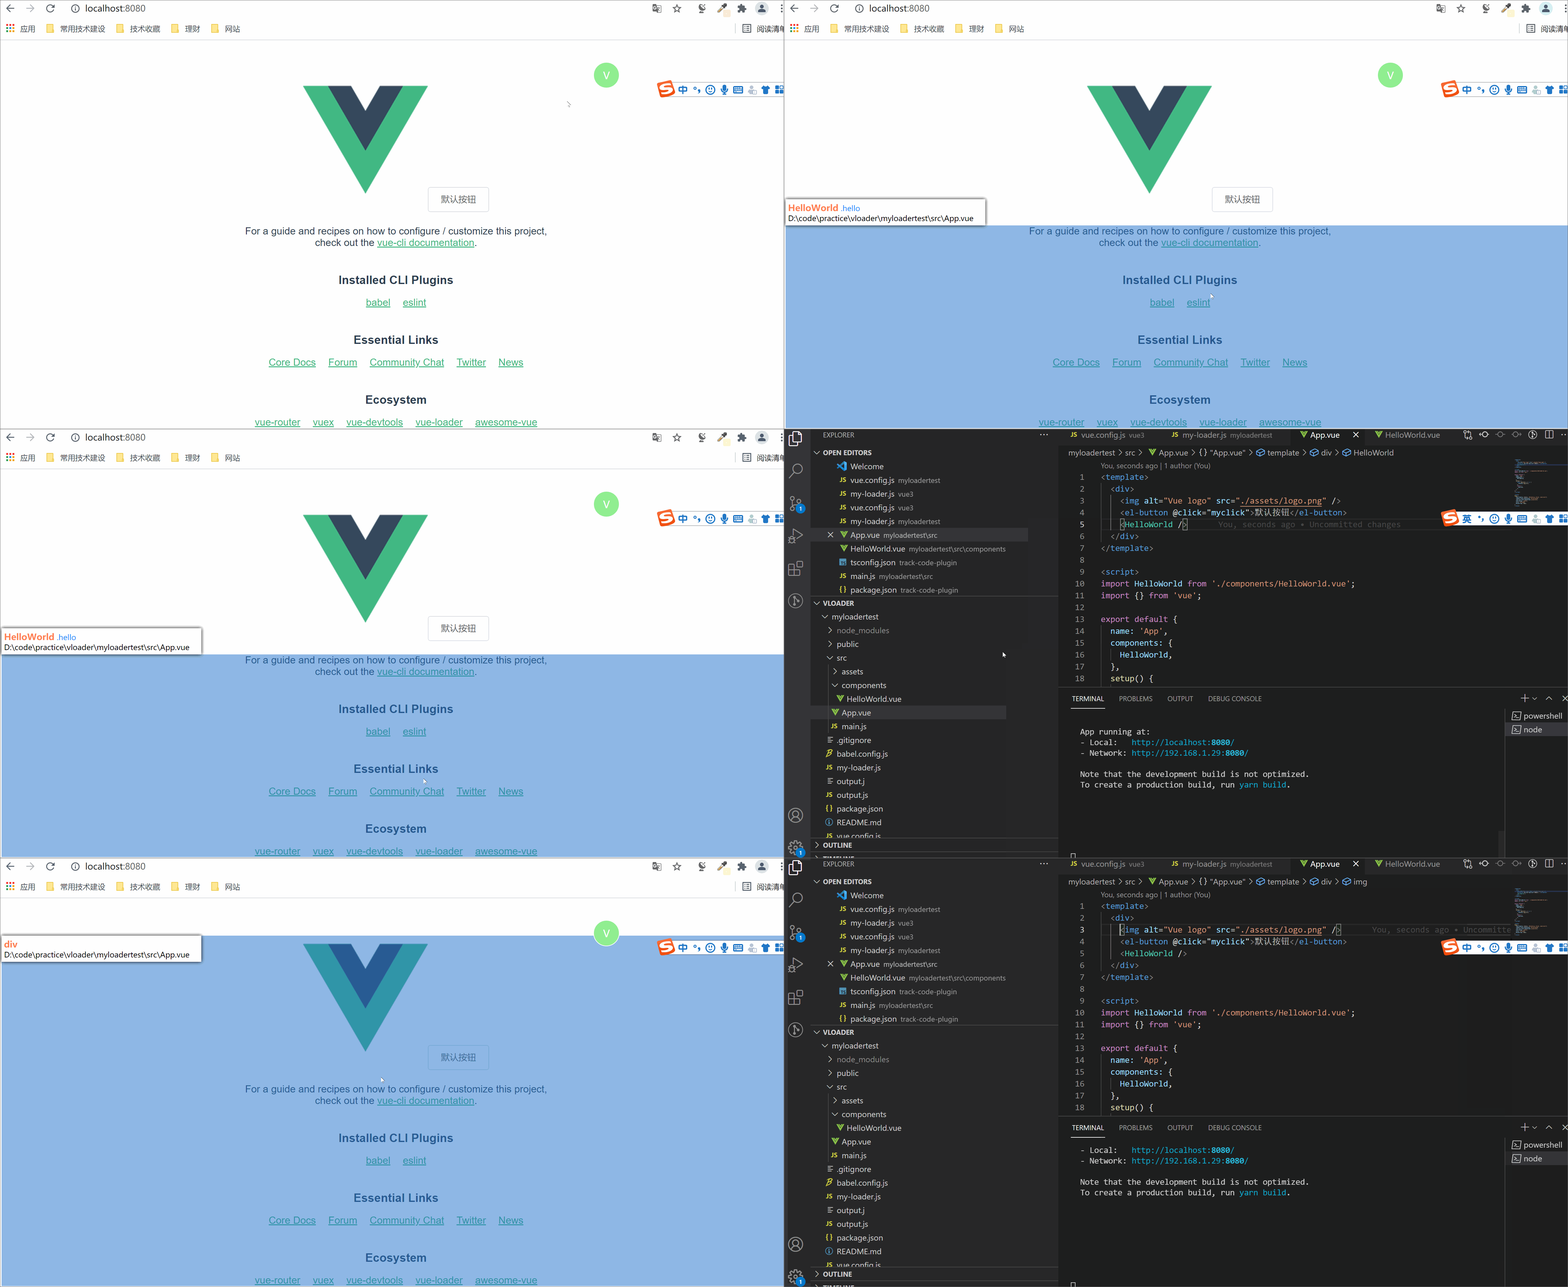
click the element of the page, it will open the vscode and jump to the source code of the element automatically.
Execute the following command at the root of the project:
yarn add webpack-vue-debug -D
# or
npm install webpack-vue-debug -DAdd the following configuration to the vue.config.js.(Note that you need to determine the environment, this configuration is only used in the development environment):
// vue.config.js
module.exports = {
  // ...other code
  chainWebpack: (config) => {
    if (process.env.NODE_ENV === 'development') {
      // add this configuration in the development environment
      const DebugPlugin = require('webpack-vue-debug-plugin');
      config.module
        .rule('vue')
        .test(/\.vue$/)
        .use('webpack-vue-debug-loader')
        .loader('webpack-vue-debug-loader')
        .end();
      config.plugin('webpack-vue-debug-plugin').use(new DebugPlugin());
    }
  },
};If you use Mac, you need to do the following:
-
Add a file named
.env.localunder the root directory of the project, and write the following contents to the.env.local:# editor VUE_EDITOR=code -
Execute
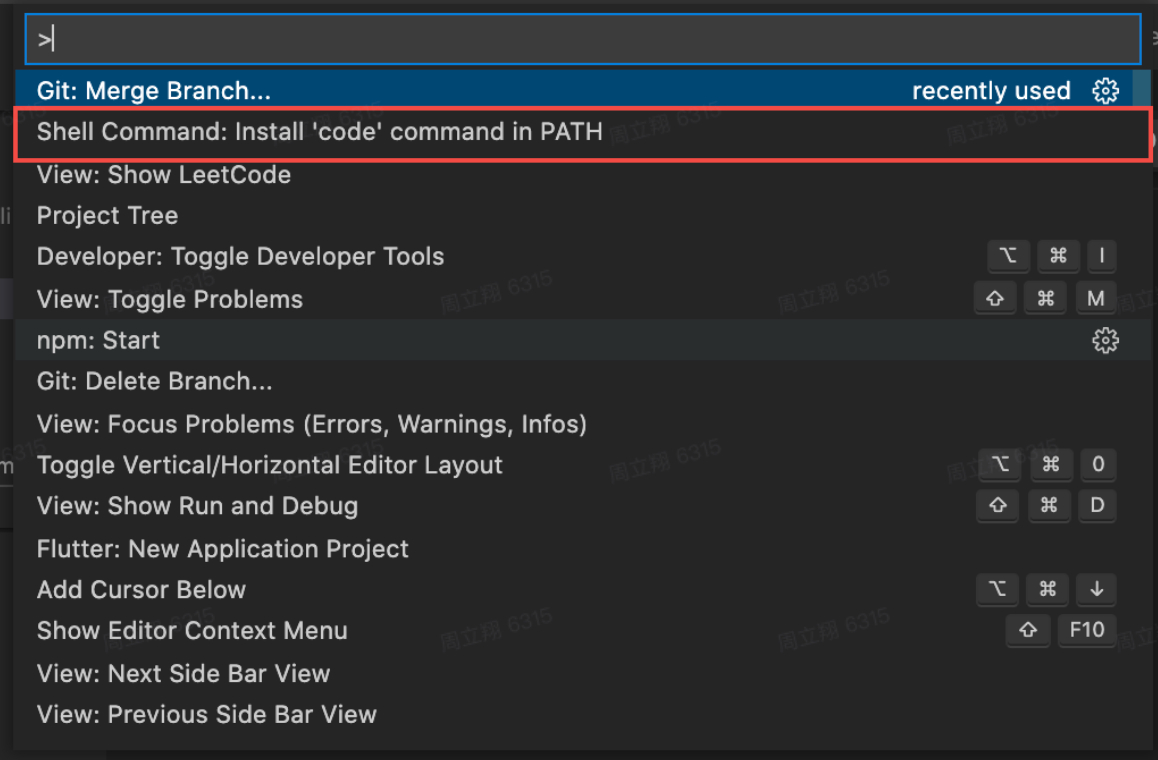
command + shift + pcommand in vscode, search and clickshell Command: Install 'code' command in Path:If the following popup window appears, your configuration is successful:
As shown in the figure below, click the floating window with V mark in the page. When it turns green, it means that the function is turned on. (click again to turn off the function)
When the function is turned on, the information will appear when the mouse moves to the page element. Click the element, it will open vscode and jump to the source code of element.
Tested by several large and medium-sized projects, the impact on the performance of build and rebuild is negligible.


