pinger
A simple Node.js app that returns information about the runtime environment.
Go here to read the command line reference.
Running pinger on a local machine.
The following steps describe how to run pinger on a standalone computer or virtual machine.
Please be advised that the machine needs to have Node.js and curl installed. An easy way to run this demo is to use a the Katacode Ubuntu Playground found at this URL:
https://katacoda.com/courses/ubuntu/playground
Step 1: Make sure that Node.js is running your computer or VM (virtual machine). Run the following command in a terminal window.
node -v
You'll get output similar to the following:
v8.11.3
(Version number may vary according to your machine.)
If Node.js in not installed, you'll get an error. In that case, you can find the instructions for downloading and installing Node.js here.
Step 2: Clone this repository to the local machine or VM.
git clone https://github.com/reselbob/pinger.git
Step 3: Navigate into the directory that has the pinger source code.
cd pinger/app
Step 4: Install the application's dependencies packages.
npm install
Step 5: Invoke the application.
node server.js
Step 6: Call the application for output using curl. In a new terminal
window execute the following command.
curl localhost:3000
WHERE 3000 is the default port.
You can alter the runtime port of the app by setting the environment variable, PINGER_PORT to the port number you want to use.
You get output similar to the following:
{
    "APIVersion": "v2",
    "startTime": "2018-10-23T22:54:27.516Z",
    "interfaces": [
        {
            "ifname": "eth0",
            "ipaddress": "10.32.0.13"
        }
    ],
    "secretMessage": "Kube is Cool",
    "processId": 5,
    "requestHeaders": {
        "host": "xxx.241.xxx.171",
        "upgrade-insecure-requests": "1",
        "user-agent": "Mozilla/5.0 (Macintosh; Intel Mac OS X 10_13_6) AppleWebKit/537.36 (KHTML, like Gecko) Chrome/69.0.3497.100 Safari/537.36",
        "accept": "text/html,application/xhtml+xml,application/xml;q=0.9,image/webp,image/apng,*/*;q=0.8",
        "accept-encoding": "gzip, deflate",
        "accept-language": "en-US,en;q=0.9",
        "x-cloud-trace-context": "78f550b3bbf754251021bb4a582f8bf0/17461875170587409562",
        "via": "1.1 google",
        "x-forwarded-for": "xx.169.xxx.145, xxx.241.xxx.171",
        "x-forwarded-proto": "http",
        "connection": "Keep-Alive"
    },
    "currentTime": "2018-10-24T15:06:49.046Z",
    "requestUrl": "/"
}
Building and running pinger as a Docker container on Katacoda
Step 1: Go to the Ubuntu Playground on Katacoda
https://katacoda.com/courses/ubuntu/playground
Step 2: Clone the project source from GitHub
git clone https://github.com/reselbob/pinger.git
Step 3: Navigate to the application source code directory
cd pinger/app/
Step 4: Build the container image.
(You must be connected to the internet for this step to work.)
docker build -t pinger:beta .
Step 5: Create the container get it running
docker run -d --name pinger -p 3000:3000 -e CURRENT_VERSION=beta pinger:beta
You'll get the container id as output, similar to this:
6a619a913e0c25df5adccd5e11de899a97405c43de9cfb1a0945ee81148068ae
Confirm the container is running:
docker ps -a | grep pinger
You'll get output similar to the following:
6a619a913e0c pinger:beta "node server.js" About a minute ago Up About a minute 0.0.0.0:3000->3000/tcp pinger```
Step 6: Call the application for output using curl.
curl localhost:3000/?type=networkInfo
You'll get output similar to the following:
{
    "lo": [
        {
            "address": "127.0.0.1",
            "netmask": "255.0.0.0",
            "family": "IPv4",
            "mac": "00:00:00:00:00:00",
            "internal": true,
            "cidr": "127.0.0.1/8"
        }
    ],
    "eth0": [
        {
            "address": "172.18.0.2",
            "netmask": "255.255.255.0",
            "family": "IPv4",
            "mac": "02:42:ac:12:00:02",
            "internal": false,
            "cidr": "172.18.0.2/24"
        }
    ]
}
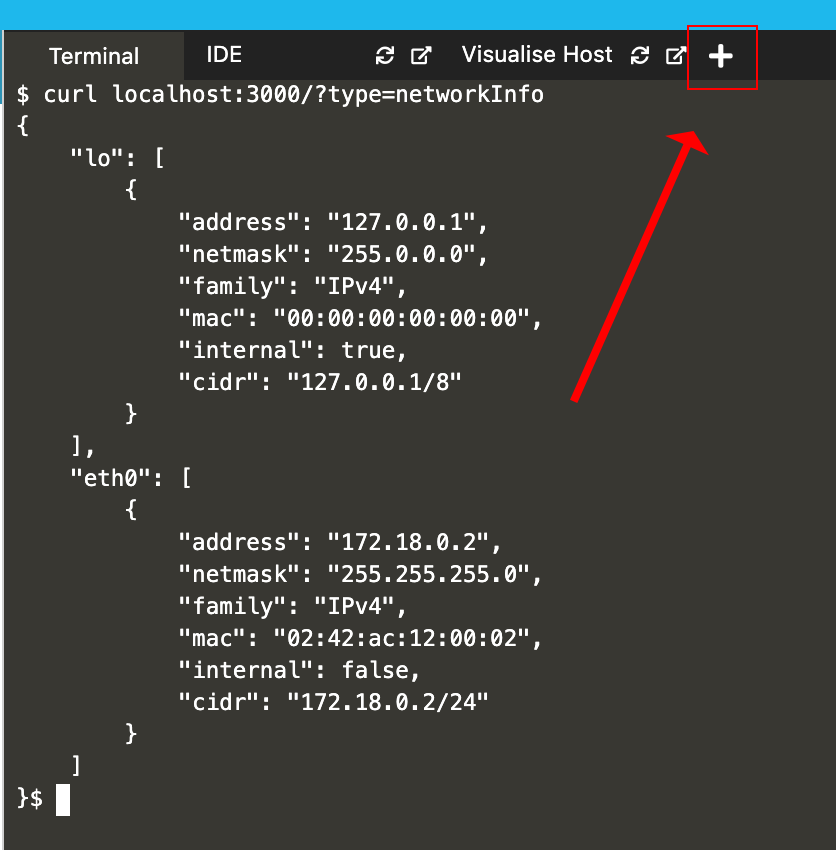
Step 7: Let's open pinger as a web page. Click the (+) sign on the right of the
Katacoda menu page/
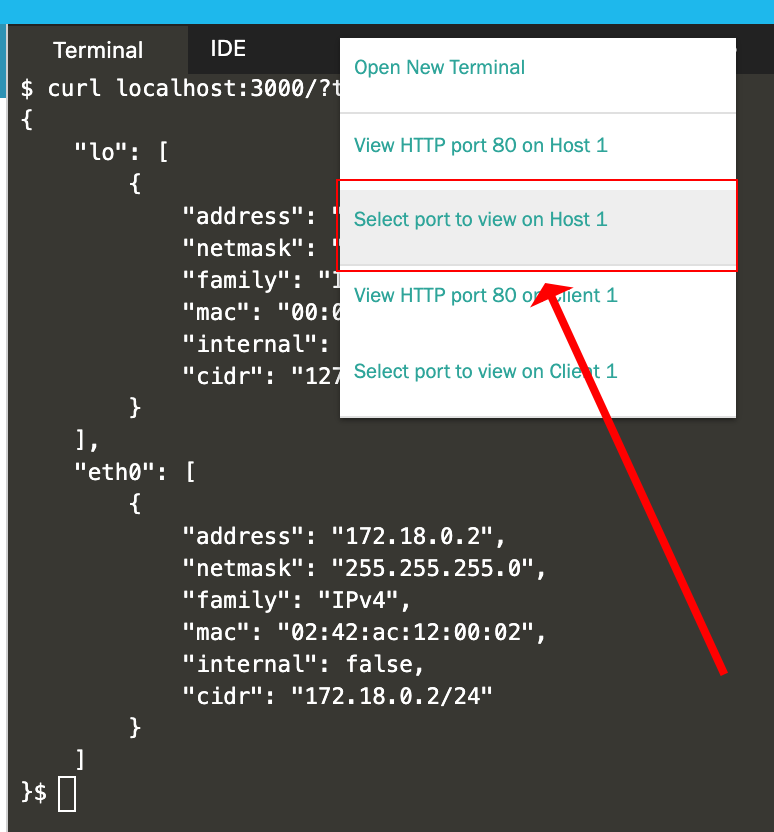
Step 8: click Select port to view on Host 1
Step 8: Enter the port number 3000 in the textbox on the
web page. Then click the button, Display Port
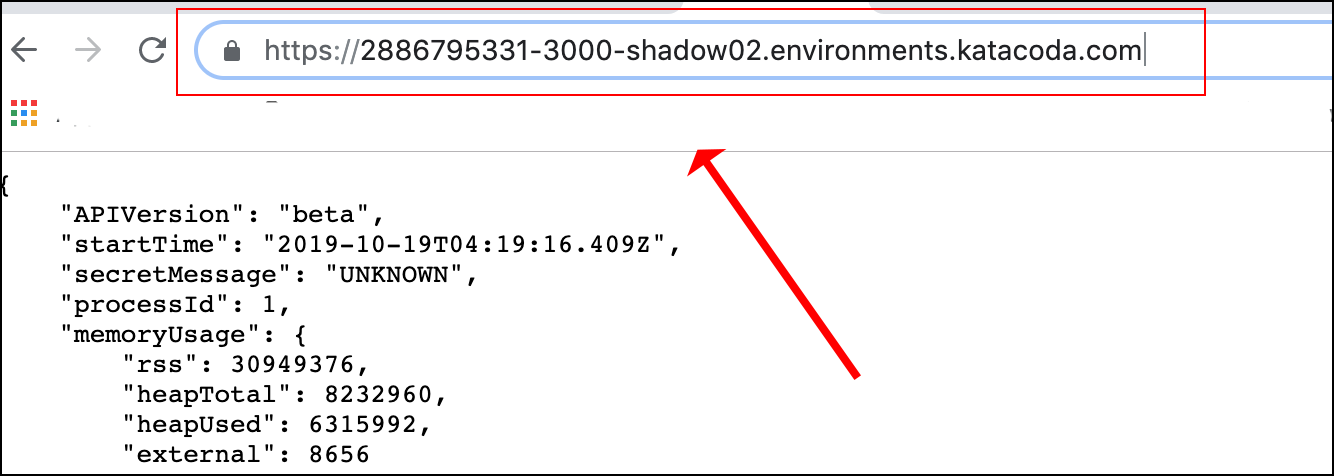
The web page will appear. It's calling back to the running instance of
pinger.
Step 9: If you need to work with pinger by calling into the Katacoda server,
copy the URL in your browser's address bar and save it in a text file.
Congratulations! You've completed the exercise.


