- Use Assistant dialog for better chatbot experience
- Use "customer-care" skill provided by Assistant
- Use Cloud Function to search Disco if question is "anything-else" and reply with disco passages
- Remove references to calling Disco directly
- Add action creds to .env
- Get the dialog to display a header message - "Here is what I found ..."
- Create better use case for invoking action from a real Assistant dialog node
- Format Disco results better in chatbot
- Use Assistant V2 API
Assumes completion of discovery setup described in https://github.com/rhagarty/watson-discovery-sdu-ui.
Note: additional notes in https://github.com/rodalton/watson-functions
- From IBM Cloud resource list, create
Newand selectFunctions. - Click on
Actionstab. Createand thenCreate Action.- Provide unique
Action Name, keep default package, and selectNode.js 10runtime. - Add code to action - use code in
/actions/disco-action.js.
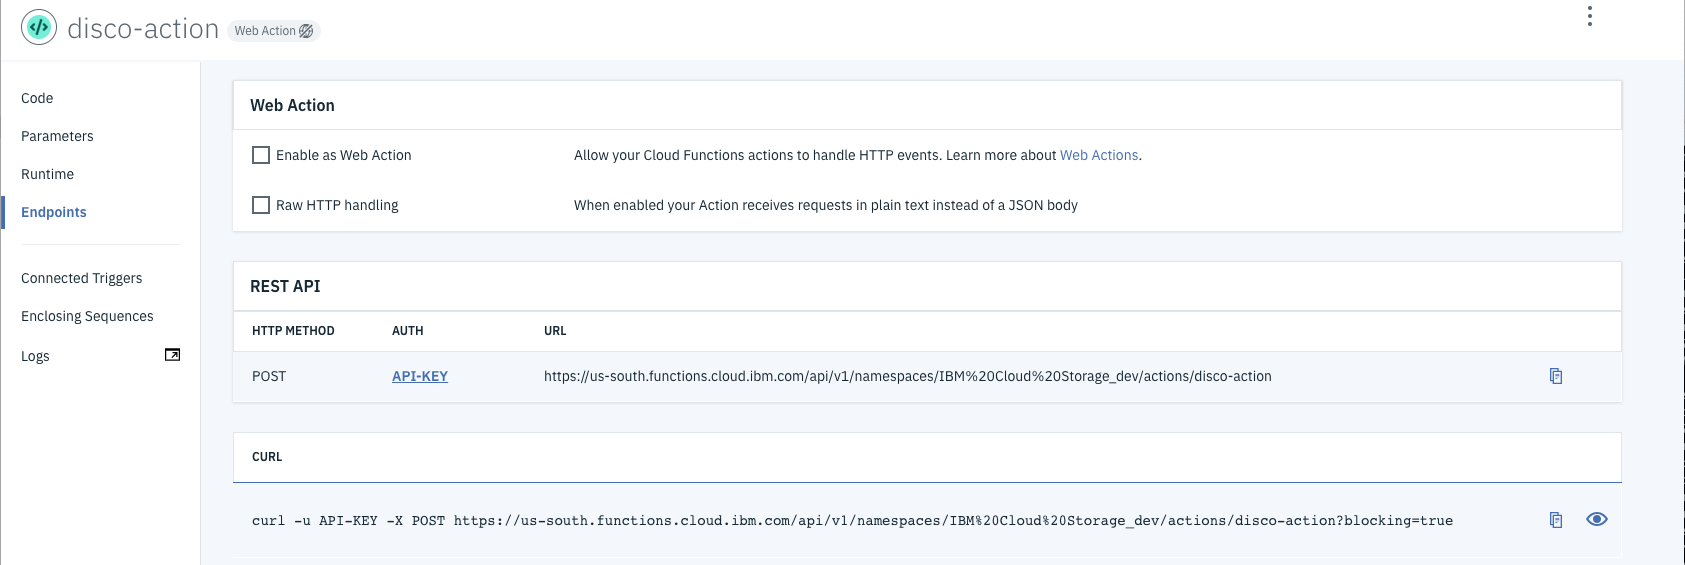
- Note your endpoint:
- The
curlcommand should work, if the params you entered are correct for the disco collection.
For this code pattern, we will be using the Custom Care Sample Skill that comes with the service. Either duplicate it, or use the original to complete the following steps.
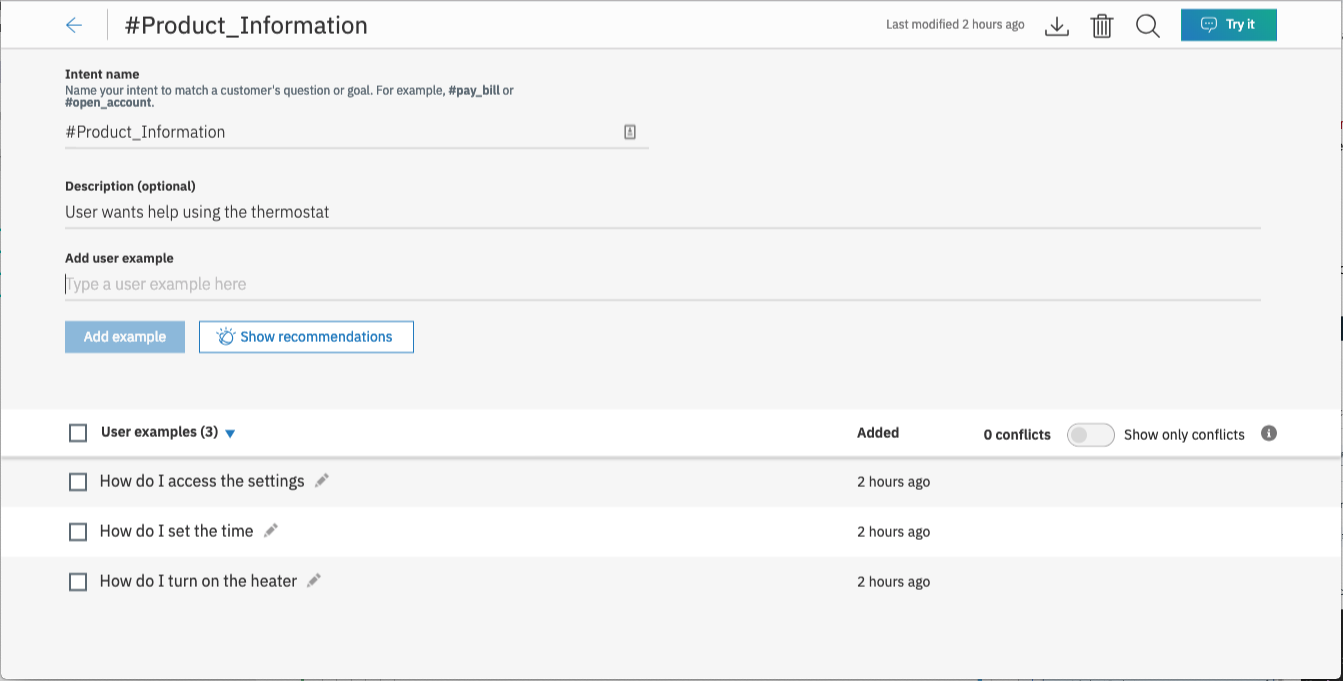
Create a new intent that can detect when the user is asking about operating the thermostat.
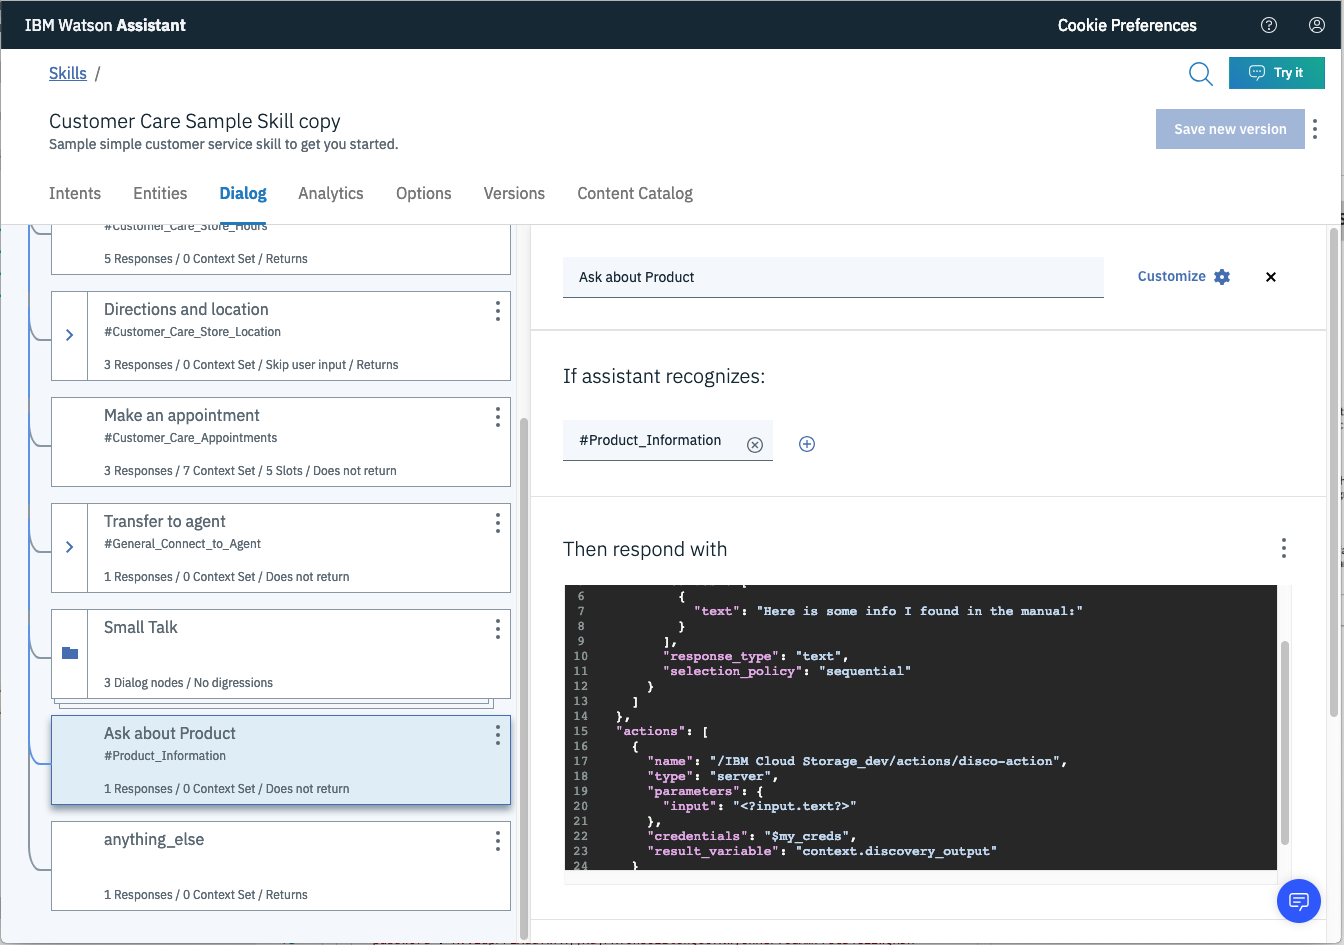
Insert a new dialog node to recognize the intent we just created.
In the response section, click on Open JSON Editor, and enter the following code snippet:
The code snippet is:
{
  "output": {
    "generic": [
      {
        "values": [
          {
            "text": "Here is some info I found in the manual:"
          }
        ],
        "response_type": "text",
        "selection_policy": "sequential"
      }
    ]
  },
  "actions": [
    {
      "name": "/IBM Cloud Storage_dev/actions/disco-action",
      "type": "server",
      "parameters": {
        "input": "<?input.text?>"
      },
      "credentials": "$my_creds",
      "result_variable": "context.discovery_output"
    }
  ]
}- Note the action
namevalue of/IBM Cloud Storage_dev/actions/disco-action. This is derived from your endpoint name listed in theFunctionsaction panel:
https://us-south.functions.cloud.ibm.com/api/v1/namespaces/IBM%20Cloud%20Storage_dev/actions/disco-action
Remove the host path, and translate encoded chars to ASCII (i.e. %20 to a blank char).
- Using the
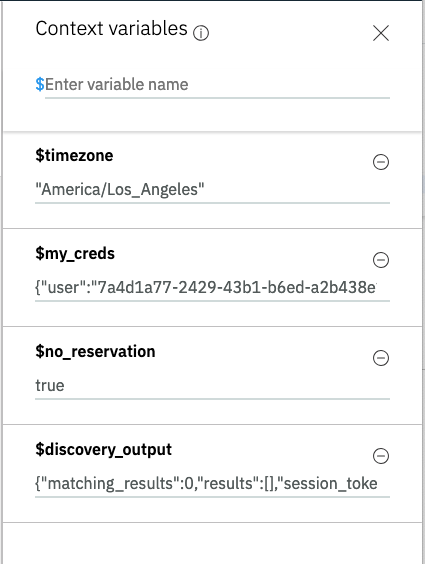
Try itfeature, add the context variablemy_credsand see if it works (probably won't return anything meaningful in the test window, but you should NOT get an error due to credentials).
Note: You must enter a response to trigger the assistant dialog node that calls the action.
The format of the credentials should be the following:
{"user":"7a4d1a77-2429-xxxx-xxxx-a2b438e15bea","password":"RVVEdpPFLAuuTwFXjjKujPKY0hUOEztxxxxxxxxxonHeF7OdAm77Uc34GL2wQHDx"}These values are pulled from the Functions action panel, click on API-KEY which then takes you to the API Key panel, where the key is found:
7a4d1a77-2429-xxxx-xxxx-a2b438e15bea:RVVEdpPFLAuuTwFXjjKujPKY0hUOEztxxxxxxxxxonHeF7OdAm77Uc34GL2wQHDxNote: the value before the
:is the user, and everthing after is the password. Do not include the:in either value.
- The Cloud Function credentials need to be assigned to the Assistant context variable name
my_creds, and passed in from your application to the Watson Assisant API.
    context.my_creds = {
      'user':'7a4d1a77-2429-xxxx-xxxx-a2b438e15bea',
      'password':'RVVEdpPFLAuuTwFXjjKujPKY0hUOEztxxxxxxxxxF7OdAm77Uc34GL2wQHDx'
};cp env.sample .envCopy the env.sample file and rename it .env and update the <***> tags with the credentials from your Assistant service.
# Copy this file to .env and replace the credentials with
# your own before starting the app.

# Watson Discovery
ASSISTANT_WORKSPACE_ID=<add_assistant_workspace_id>
ASSISTANT_IAM_APIKEY=<add_assistant_iam_apikey>

# Run locally on a non-default port (default is 3000)
# PORT=3000
Credentials can be found by clicking the Service Credentials tab, then the View Credentials option from the panel of your created Watson service.
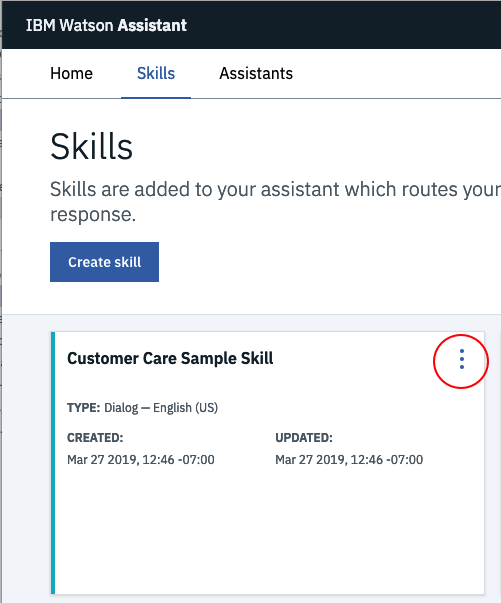
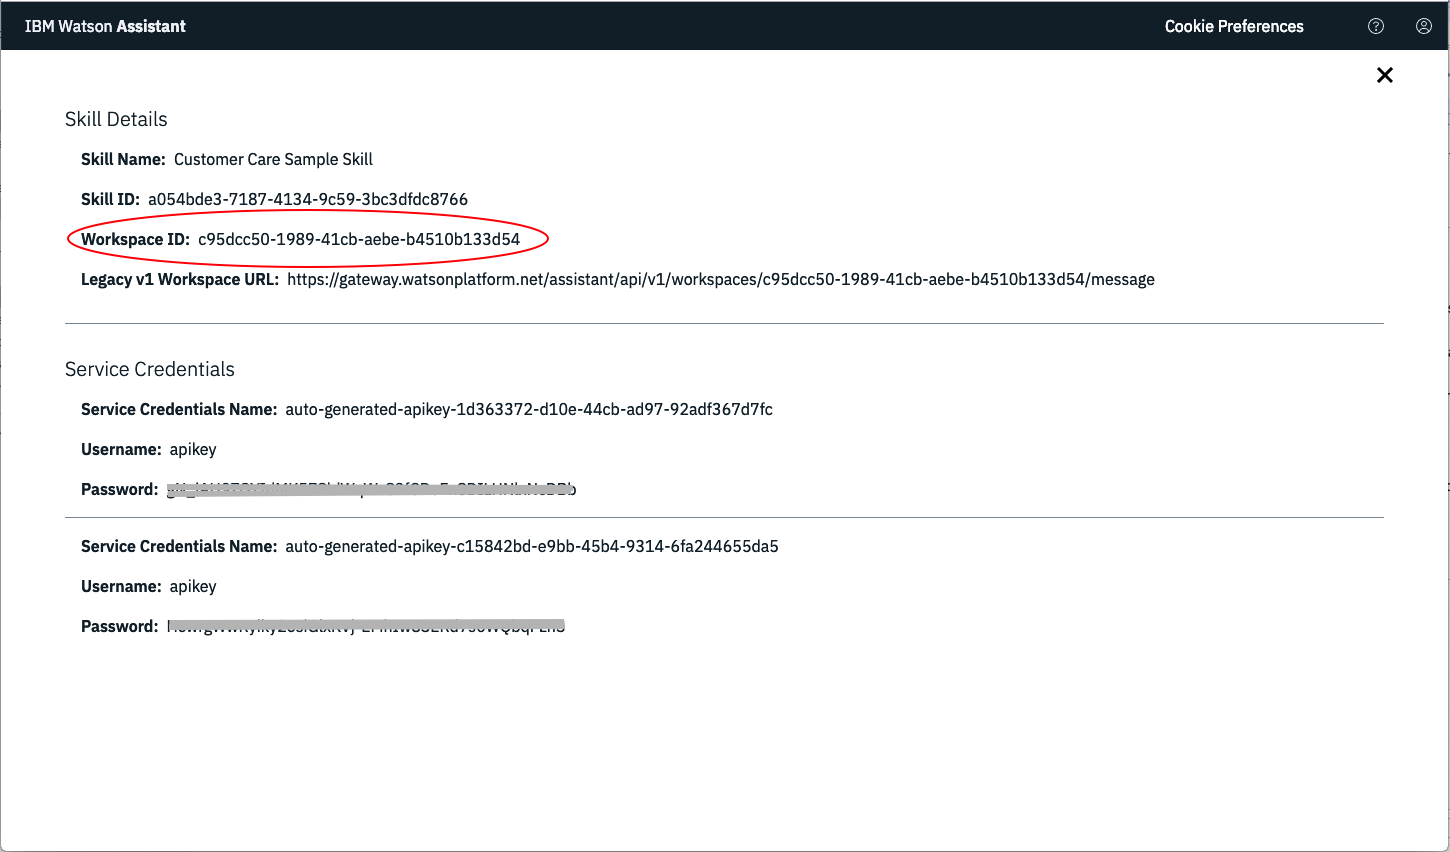
An additional WORKSPACE_ID value is required to access the Watson Assistant service. To get this value, select the Manage tab, then the Launch tool button from the panel of your Watson Assistance service. From the service instance panel, select the Skills tab to display the skills that exist for your service. For this tutorial, we will be using the Custom Skill Sample Skill that comes with the service:
Click the option button (highlighted in the image above) to view all of your skill details and service credentials:
npm install
npm start
Access the UI by pointing your browser at localhost:3000.
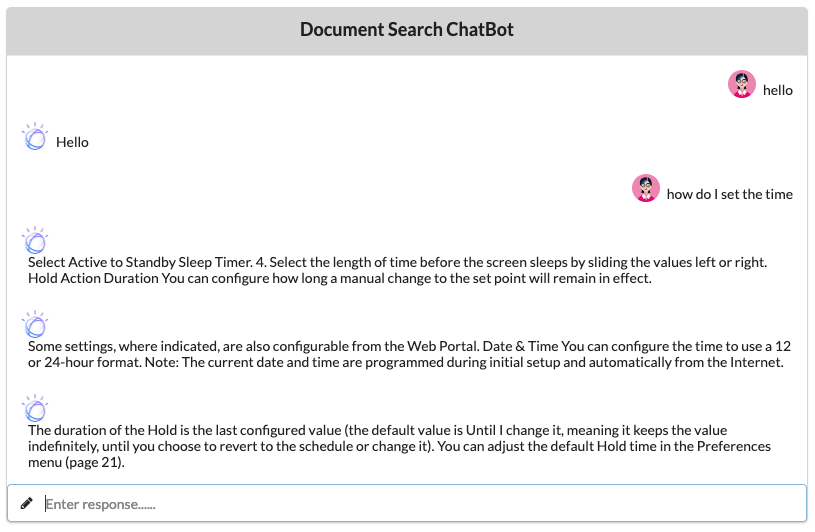
Sample questions:
- how do I set a schedule?
- how do I set the temperature?
- how do I set the time?

