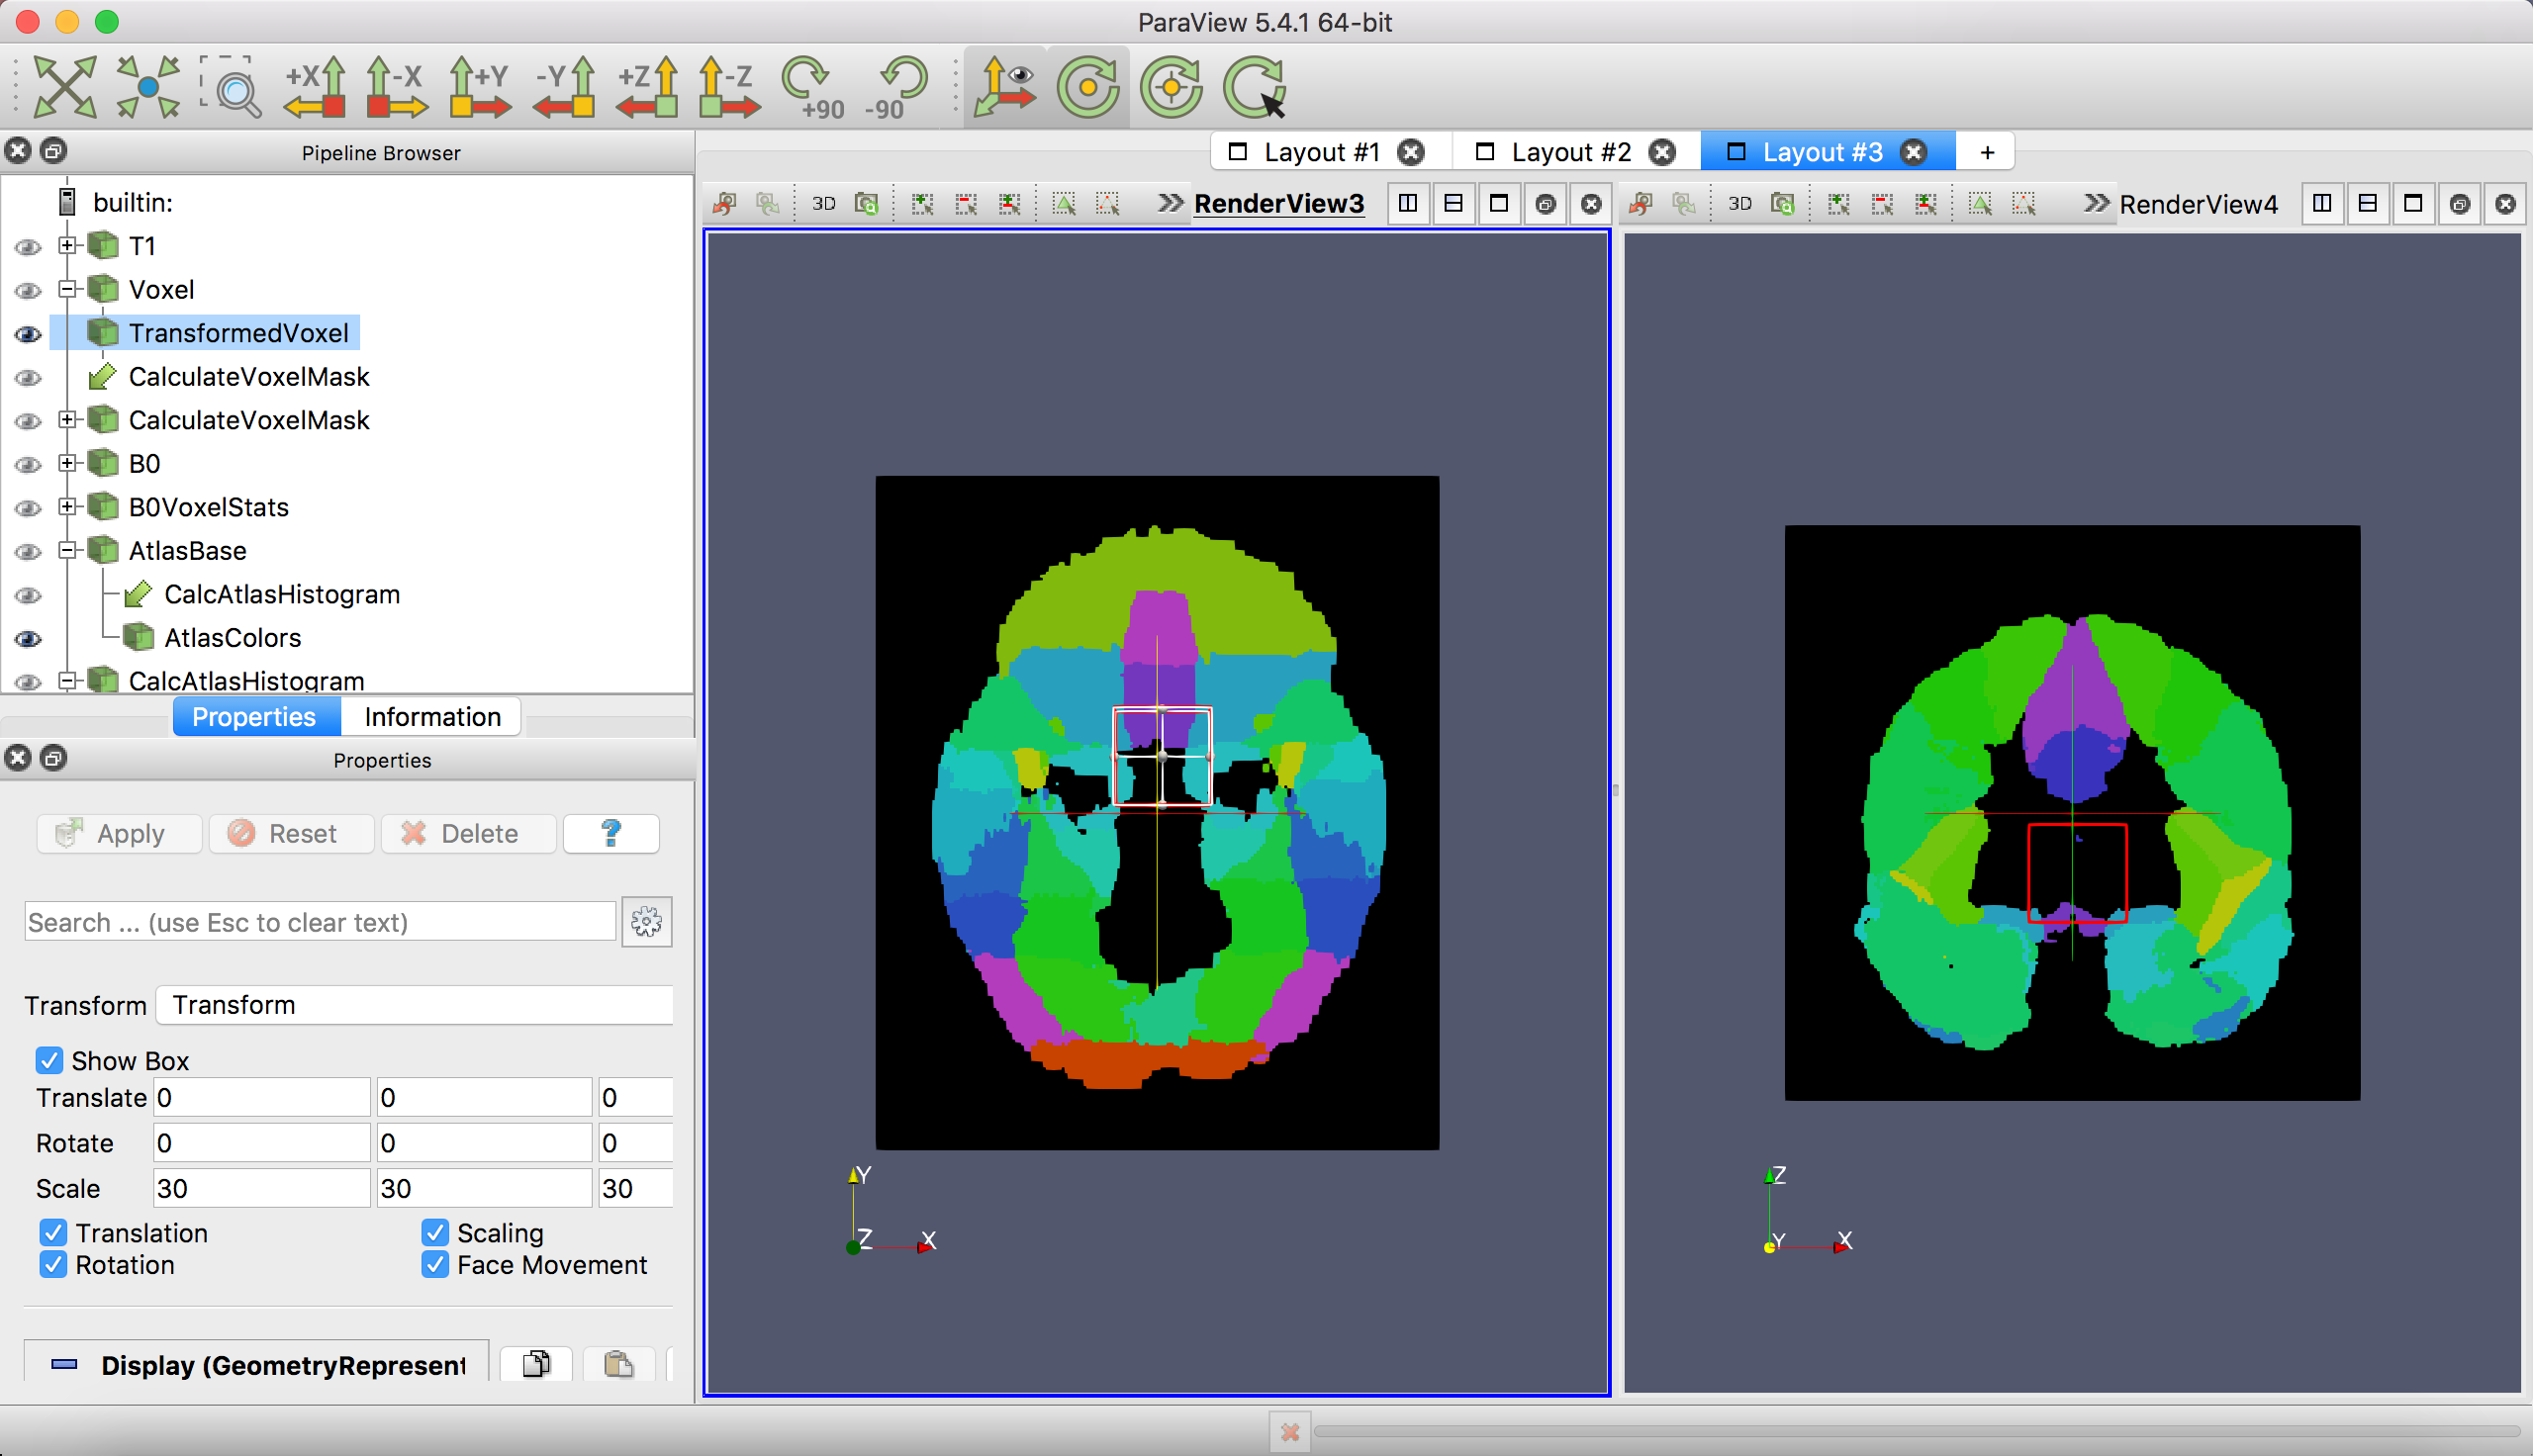
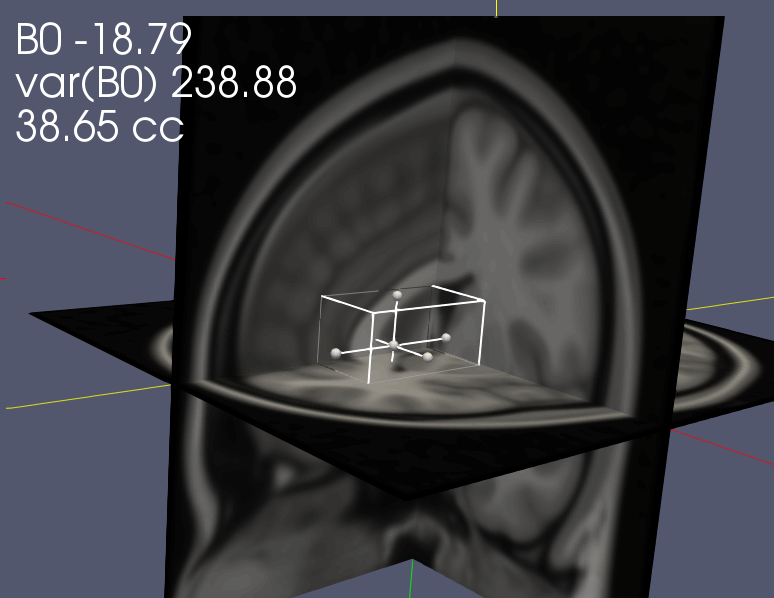
The Voxel Positioning System (VPS) is a tool prototyped as a ParaView pipeline for interactively placing bounding boxes on a 3D volume, intended as an aid for planning single voxel magnetic resonance spectroscopy (MRS) experiments.
VPS allows you to easily evaluate the feasibility of different voxel geometries based on expected field homogeneity, tissue fractions, and ROI content of a voxel. The desired geometry can then be saved as a transform that can be aligned to individual anatomy and/or entered directly into the scanner console to support systematic voxel placement across participants. Notably, this supports oblique voxel orientations around any axis.
- Interactive voxel positioning
- Oblique voxels
- Live display of
- B0 field inhomogeneity
- GM/WM/CSF proportions
- Atlas-based ROI overlap
- Calculates the linear transform matrix associated with the voxel position
- Download and install ParaView (tested with 5.4.1)
- Enable the ParaView AnalyzeNIfTIIO plugin (
Tools->Plugin Manager). Click the expand arrow next to the plugin name and check theAuto Loadbox to automatically load the plugin each time you use ParaView. ClickLoad Selectedand close the dialog.
Git LFS is needed to pull the template data from this repository. Follow the Git LFS install instructions and remember to git lfs install
- In ParaView, go to
File->Load Stateand select thevps.pvsmfile. ClickOk - In the
Load State Optionsdialog, selectSearch files under specified directoryand choose the main voxel tool directory. ParaView should find the required files underdata/templates.
- Find your ParaView app (e.g.
/Applications/ParaView-5.4.1) - If ParaView is installed as
/Applications/ParaView-5.4.1, just double clickstart_vps - If ParaView is somewhere else, edit the
start_vpsscript.
Four layouts are defined:
By default, slices are shown in neurological (left = left) orientation, but it is possible to reorient the axes.
The left bar chart is a histogram of the number of points (1mm voxels) within the voxel that are labelled as grey matter, white matter, or CSF. Template labels are maximum probability labels from the MNI152 tissues priors included in FSL. Relying on the template will likely overestimate the typical proportion of GM in your voxel.
The right bar chart is a histogram of the number of points (1mm voxels) within the voxel that are labelled as being part of an atlas-based ROI.
Another view for positioning the voxel.
Like Layout 1, the voxel is shown as a wireframe over slices of an anatomical volume. The volume in this case is the index atlas image. The template is the FSL Harvard-Oxford atlas.
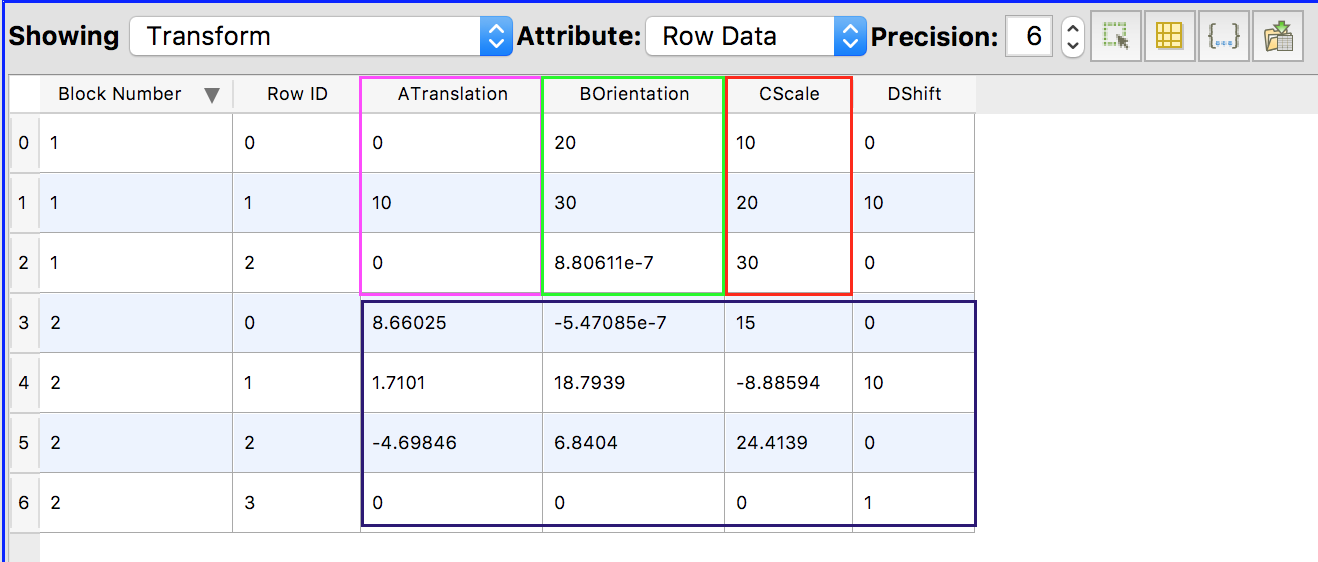
This layout displays the transform parameters. The parameters are confusingly shown in a MultiBlockDataset.
- Block 1 contains the 3x1 column vectors for translation, rotation (in degrees) and scaling parameters.
- Block 2 contains the 4x4 linear transform matrix.
These parameters can be saved to a spreadsheet.
The layouts are annotated with information about the mean and variance of the B0 field shift (in Hz) within the voxel, and the approximate volume of the voxel in cubic centimeters (cc). The annotation updates as you apply transformations to the voxel. The template B0 map is from POSSUM.
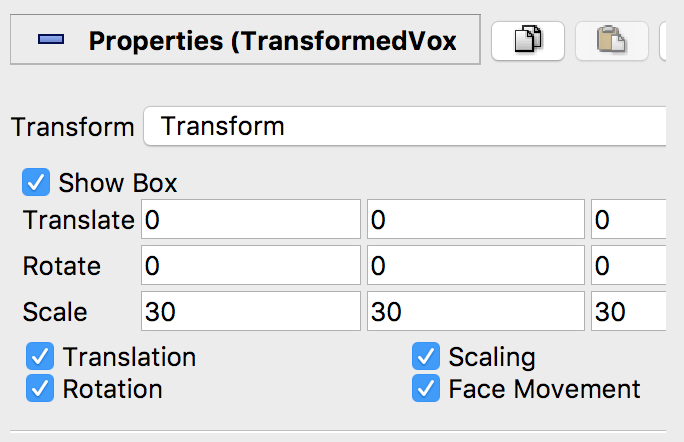
The Pipeline Browser pane on the left allows you to select and manipulate elements in the display. In the default use case with template images, you should only modify the properties of the T1, TransformedVoxel and AtlasColors objects.
- Click on one of the slice views in the layout (the selected view name will be bolded and underlined in a fit of typographical exuberance).
- Click on the displayed volume (either
T1orAtlasColors) in the Pipeline Browser. - Scroll to the bottom of the
Displaysection of the Properties tab to adjust theSlice Directionand index of the displayedSlice
- Select
TransformedVoxel(notVoxel!) in the Pipeline Browser - Enter the desired translation, rotation and scaling parameters.
Scaleshould be the dimensions of the voxel in mm. - Click
Apply
- Click on one of the slice views in the layout (the selected view name will be bolded and underlined in a fit of typographical exuberance).
- Adjust the slices and perspective (click and drag in the render window or use the axis toolbar buttons) so that the voxel wireframe is visible.
- Select
TransformedVoxel(notVoxel!) in the Pipeline Browser - Select and drag the small balls on the voxel wireframe to move and resize. The center ball moves, the others resize.
- Click and drag on a wireframe face to rotate the voxel.
- Click
Applyin theTransformedVoxelproperties page to update the transform. ClickResetto discard changes.
Why is the volume of the voxel shown in the annotation smaller than the volume of Transformed Voxel?
The volume in the annotation is calculated (in B0VoxelStats->Stats->AnnotVoxelSize) as (number of grid points within the voxel geometry)/1000. The number of grid points within the bounding box (which is not defined on a grid) depends somewhat on the orientation of the box with respect to the grid and will often be slightly less than the expected volume. From an acquisition perspective, your voxel geometry will be approximately the geometry of the bounding box, subject to the effectiveness of OVS and other scan parameters.
Yes. The NIfTI files used for the B0 map (B0), atlas (AtlasBase) and anatomical volume (T1) can be changed (e.g. to subject-specific data) by editing the File Name field in the respective Properties pages or changing the file selection when loading the state. The three volumes must all be in alignment and have the same grid size. A 1mm isotropic grid is assumed. Note that color scaling, the atlas histogram display and possibly other elements ofthe state may need to modified as well.


