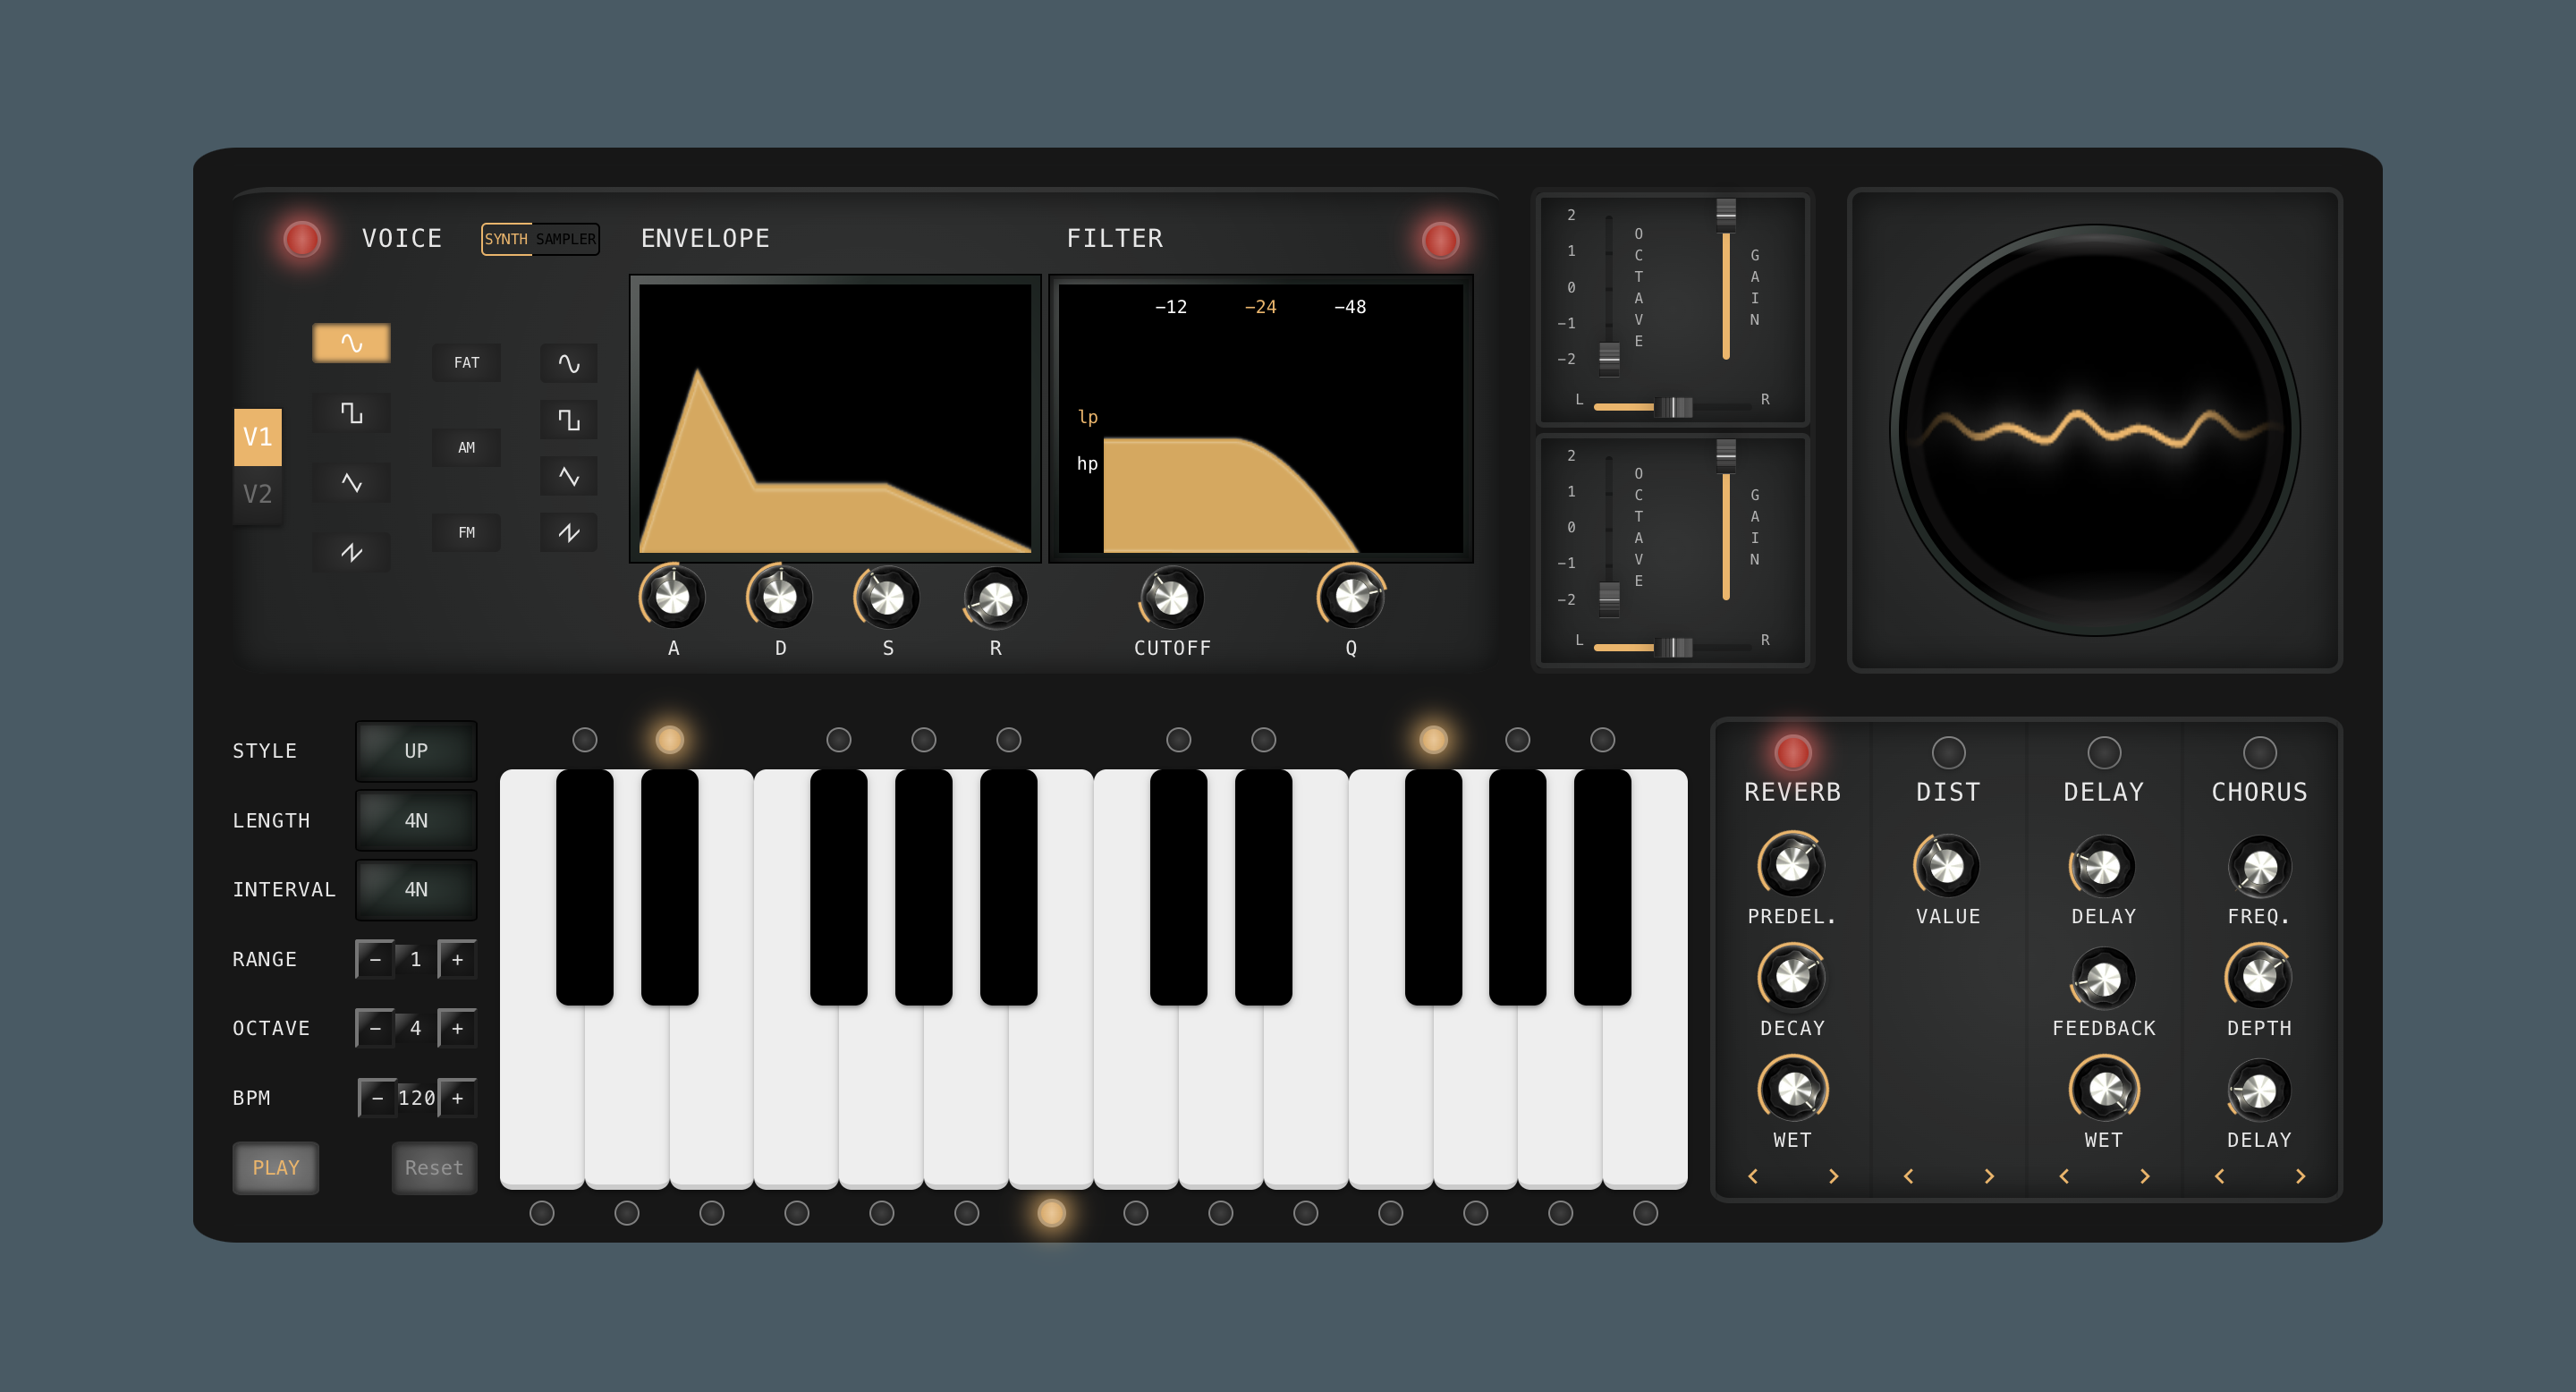
R2D ARP is an innovative polyphonic synthesizer and arpeggiator powered by the JavaScript library for audio synthesis and composition "Tone.js" and implemented using the framework "Vue".
R2D is thought as a playful yet powerful tool to discover sound synthesis and generate creative sound patterns. Its lighthearted intuitive-based interface encourages the user to discover its functionalities by trying himself all features and routing options combining various effects with each other. This versatile instrument offers a wide range of options for creating and manipulating unique and rich sounds, combining the flexibility of a synthesizer with the dynamism of an arpeggiator.
- Online Version here
- Locally: Clone git repo and run the following command in the project terminal:
npm installnpm updatenpm run serveto run development build ORnpm run build,npm install -g serve,serve -s distto run release build
Click the START button and play the arpeggiator with your computer keyboard: [a,w,s,e,d,f,t,g,y,h,u,j,k,o,l,p,ò,à]
R2D ARP is a dual-voice arpeggiator featuring selectable components in each voice: either an oscillator driven by three different synthesis engines or a sampler containing 15 unique instrument sounds. Both voices can be modulated using an ADSR Envelope and two filters. Additionally, there's a chain of four customizable effects for further sound shaping and the creation of wild noises.
The arpeggiator is a versatile tool designed for creating arpeggios with ease. It features a keyboard with two octaves, allowing users to play individual notes or select multiple notes simultaneously to define the arpeggio. Additionally, it includes various control buttons for selecting arpeggio patterns, note length, rate, octave range, and starting octave. Tempo can be adjusted from 40 to 200 BPM, and a play/stop button initiates or halts the arpeggio sequence. Finally, a button is provided to release selected notes and reset the sequence.
| “Keyboard” - Two octaves for playing individual notes or selecting multiple notes for the arpeggio pattern. | |
| Selection Buttons: 1. Patterns: “Pattern Selector” - Selects the arpeggio pattern. 2. Note Length: "Length Selector” - Sets the duration of each note. 3. Rate: "Rate Selector” - Adjusts the interval between notes. | |
| Octave Controls: 1. “Octave Repeat Control” - Sets the number of octaves each note repeats. 2. “Starting Octave Control” - Determines the initial octave for the keyboard and it refers to the first key button. Tempo Control: “BPM Adjuster” - Adjusts tempo from 40 to 200 BPM. | |
| “Play/Stop Button” - Initiates or halts the arpeggio sequence. “Reset Button” - Releases selected notes and resets the sequence. |
The synthesizer features two selectable voices running in parallel. Within each voice, you can choose between:
In addition to these voice options, the synthesizer includes a comprehensive mixer section for each voice, offering precise control over various parameters:
It is possible to shape the envelope of the selected synthesizer by mapping its form using dedicated knobs arranged in the following sequence:
Additionally, you can integrate either a Low Pass Filter or a High Pass Filter into the chain, each equipped with:
At the end of the audio chain, there are four sequential effects that can be rearranged using the down arrow keys to suit your preference:
- The framework of choice is Vue
- Visual effects are realized in plain CSS, using some elements from Quasar.
- Riccardo Corà - Project Management, Interface and Audio Core Developement, Animated Graphics -
riccardo.cora@mail.polimi.it - Riccardo Moschen - Front End Developement, UI Design, Routing and Synth Expert -
riccardo.moschen@mail.polimi.it - Dario Sorce - Front End Developement, UI Design, Routing and Synth Expert -
dario.sorce@mail.polimi.it


