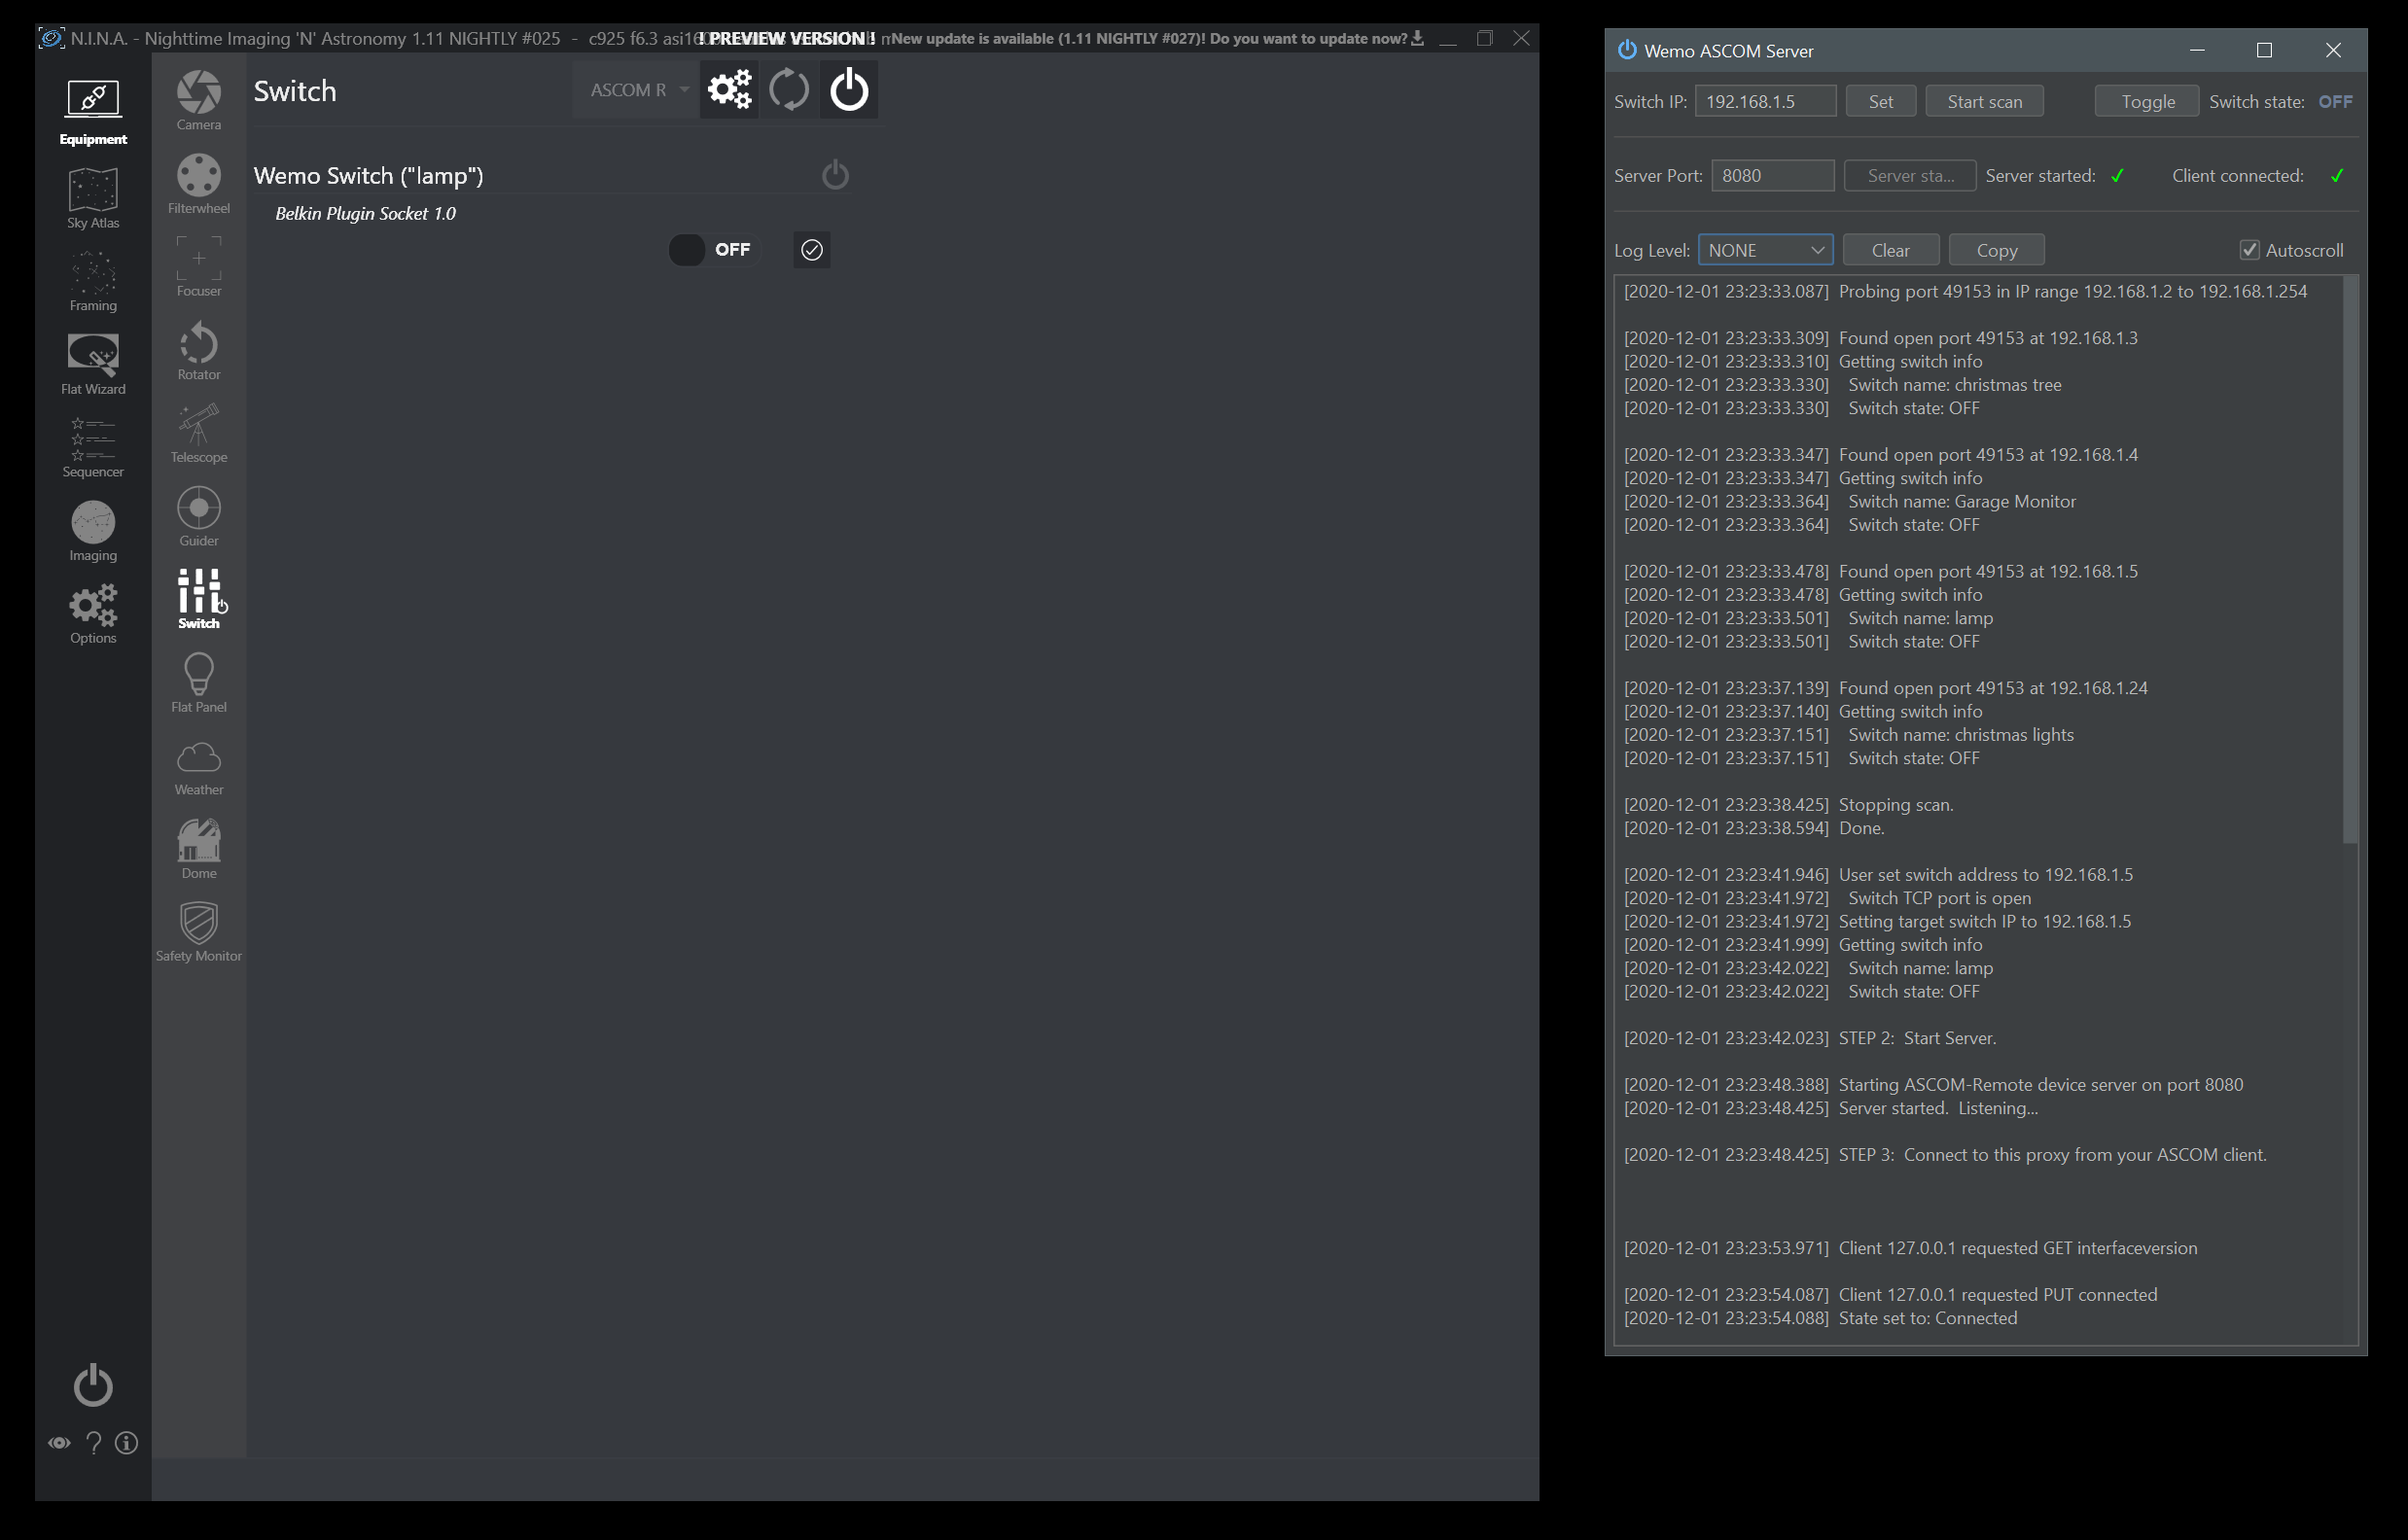
This appliation is designed to run alongside your astronomy software, relaying commands and status to and from a single Wemo smart plug.
 NINA astronomy software on the left, Wemo ASCOM Server on the right.
A Wemo smart plug connected to your local network.
ASCOM platform: https://ascom-standards.org/Downloads/Index.htm
ASCOM Alpaca, aka ASCOM Remote: https://github.com/ASCOMInitiative/ASCOMRemote/releases
Java runtime environment, if running the jar file (not needed if running the exe): https://www.java.com/en/download/
This application does not require installation. Just download the exe or jar file from the latest Release and save it anywhere on your filesystem.
https://github.com/rkinnett/ASCOM-Remote-Server-for-Wemo-Smart-Plugs/releases
The exe should work on most modern Windows platforms, but your antivirus may flag it as malicious, in which case you can either configure an exception for the exe file, or use the jar file instead (you'll need Java Runtime installed, as noted above). Or inspect the code and compile from source.
Start the exe or jar file by double-clicking in windows, or via command line.
The application provides instructions in the log area.
Step 0: Find out the local IP address of your Wemo switch. You can use the scan feature of this application to look for available devices on your local network. The scan feature displays information about any switches it finds, and takes no further action. It's up to you to figure out which IP address represents the switch you want to control.
Step 1: Set the IP address of your Wemo switch, press enter or click the Set button. If the application successfully connects to your switch, then information will be displayed in the log window and the application will enable the Start Server button. You can try toggling the switch from the server application at this point to test, if desired.
Step 2: Enter a port number (or use default 8080) for the ASCOM server and click Start Server.
Step 3: In the equipment connection menu for your astronomy software, load the ASCOM Remote Client driver as a switch device, and opent the driver settings menu. Select "http" service type, then enter 127.0.0.1 as the Remote Device Server IP Address if you're running this server on the same computer as your imaging software, otherwise enter the local network IP address of the computer on which you're running the server. Enter the port number you specified as the Server Port in the Wemo ASCOM Server application. Confirm these settings and start the device.
That's it! The name and state of your device should now be displayed in your astronomy software, and the switch should be controllable from both your astronomy software and the server application.
Note that you can run this application on any computer on your network. It doesn't have to be running on the same machine as your astronomy software. For example, you could deploy this on a Raspberry Pi and leave it running indefinitely. In Step 3, specify the IP address of the computer running the server application instead of localhost (127.0.0.1).
To start the server, you can simply double-click the exe or jar file as noted above to start the application, or you can start it from command line or a Windows shortcut. The server accepts three optional arguments: an IP address of the target switch, integer TCP port number for the server, and "start" instruction to automatically connect to the target switch and initiate the ASCOM interfaces. Supplying these arguments in a shortcut is a good way to save yourself a few steps each time you start the server.
wemoAscomServer
WemoAscomServer 192.168.1.100 start
WemoAscomServer 192.168.1.100 8081 start
java -jar WemoAscomServer.jar 192.168.1.100 start
This project was built in Netbeans IDE 12.1 with Gradle Build Tool, with JDK 1.8, in Win10 64-bit. Open the project folder in Netbeans and run Build. After compiling in Netbeans, the jar was signed using jarsigner, then the exe was compiled using launch4j to encapsulate the jar file with the Java Runtime Environment so the application can run on any Windows machine without Jave installed.
If you have any feedback - ideas, suggestions, complaints, or PRAISE - please let me know here: https://discord.gg/uFQWtcMw