A docker based multi machine render setup
Warning: This is only possible in Blender < 2.80. For newer Blender releases this plugin is no longer available so this project is deprecated as well.
$ docker pull d3v0x/blender-render-cluster
All Blender docker images are tagged since version 2.77a. To get a list of available versions, simply run
curl https://index.docker.io/v1/repositories/d3v0x/blender-render-cluster/tags
If you want to download a specific version, type
docker pull d3v0x/blender-render-cluster:2.77a
This will download a 2.77a Blender image.
$ docker build -t blender-render-cluster .
This will build the latest Blender version from my Gentoo d3v0x-overlay
$ docker run --name blender_master -e "RENDER_MODE=MASTER" -p 8000:8000 -d d3v0x/blender-render-cluster
RENDER_MODE will be set to SLAVE by default. You only have to connect/link to the master container.
$ docker run --name blender_slave --link blender_master:master -e "MASTER_PORT_8000_TCP_ADDR=master" -d d3v0x/blender-render-cluster
To connect to a master on another server/host you only have to override the environment variable MASTER_PORT_8000_TCP_ADDR and enter the master IP address
$ docker run -d -e "MASTER_PORT_8000_TCP_ADDR=192.168.178.21" blender_master
Sometimes it takes hours or maybe days to render a final image or an animation. I've got several virtual machines, some idle servers and much unused CPU/GPU. This time I want to show how to set up your own render farm with Blenders Network Renderer and my new Blender Cluster Docker image.
Requirements:
- Some servers or virtual machines
- A running docker daemon on each machine
Before we start we have to set up our master. This machine will maintain all the jobs and is the first contact for the client - your local workstation.
So lets log in to your server and download my Gentoo based Blender-Render-Cluster image. Of couse you can build the image by yourself if you want. All the sources can be found here at this repo. In this example I want to show how to set up your master and client machines with the prebuild Blender-Render-Cluster image from Docker Hub. You can get some details here.
First of all write down the IP of your master. This is important when we create the slaves on the other machines. Get the IP with
rin@rusty ~ $ ip addr
[...]
2: enp2s0: <BROADCAST,MULTICAST,UP,LOWER_UP> mtu 1500 qdisc pfifo_fast state UP group default qlen 1000
    inet 10.0.109.55/24 scope global enp2s0
    valid_lft forever preferred_lft forever
[...]
In this example my IP is 10.0.109.55.
Now we want to download the image and start up the master.
rin@rusty ~ $ docker pull d3v0x/blender-render-cluster
This will take some time and downloads the base image:
[...]
latest: Pulling from d3v0x/blender-render-cluster
137d1c317b8c: Downloading [==>                                                ] 10.25 MB/255.7 MB
c2418f02a306: Download complete
67174dd10795: Download complete
1c7a34115767: Downloading [========>                                          ] 17.28 MB/98.57 MB
7ddca3076d93: Download complete
3ca40110a232: Downloading [===========================>                       ] 16.85 MB/30.91 MB
f95d0e53882a: Download complete
[...]
After the download is completed you can see the new blender image in the list
rin@rusty ~ $ docker images
REPOSITORY                     TAG                 IMAGE ID            CREATED             VIRTUAL SIZE
d3v0x/blender-render-cluster   latest              1bbb3cc7d57c        3 hours ago         1.95 GB
And that's it. Now we can start our master image with
$ docker run -e "RENDER_MODE=MASTER" -p 8000:8000 -d --name blender_master d3v0x/blender-render-cluster
The RENDER_MODE environment variable is required because the python script for Blender within the container will set all the configuration of the network render add-on for you. And with this single image you can create master or slave containers based on this environment variable. The default / fallback will set the render mode to slave.
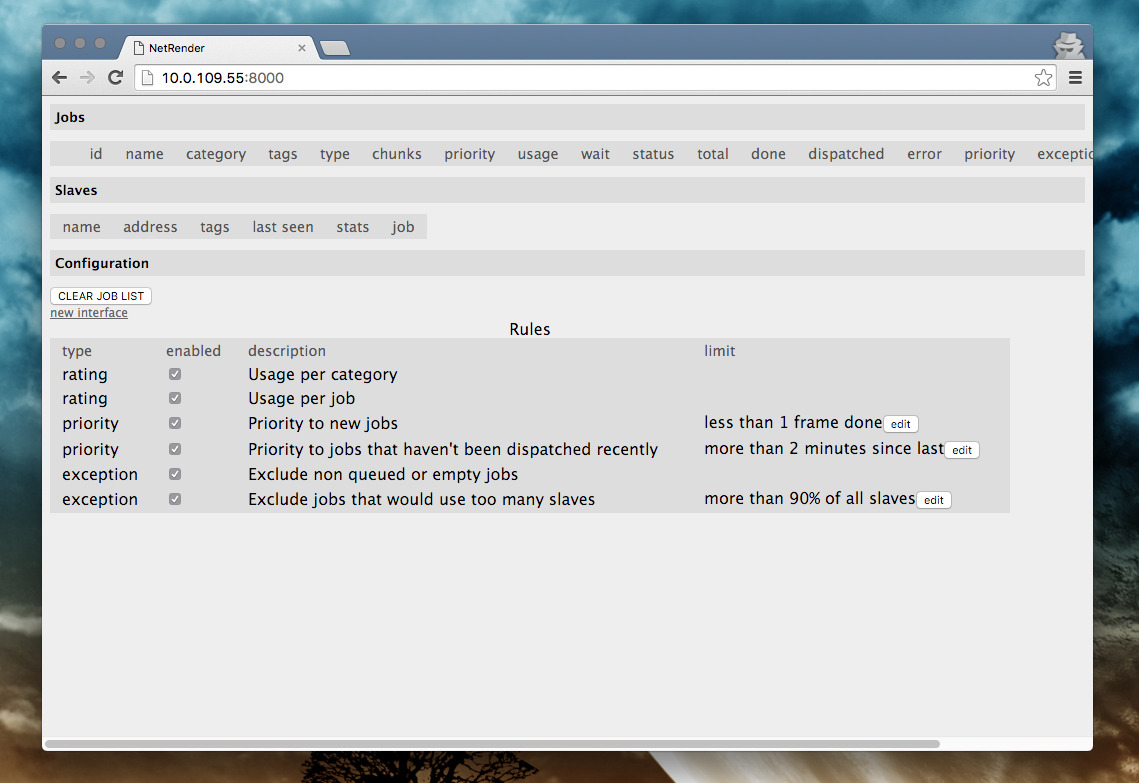
Now you can switch to your webbrowser and go to http://master-ip:8000 and get the web interface of your master render server. Now your master is online.
After the master is up and running we can start to connect some slaves. Log in to your next virtual machine and download the Docker image again.
rin@gentoo-vm ~ $ docker pull d3v0x/blender-render-cluster
But this time we want a slave which connects to the master. So we have to start the container with masters IP address:
rin@gentoo-vm ~ $ docker run --name blender_slave -d -e "MASTER_PORT_8000_TCP_ADDR=10.0.109.55" d3v0x/blender-render-cluster
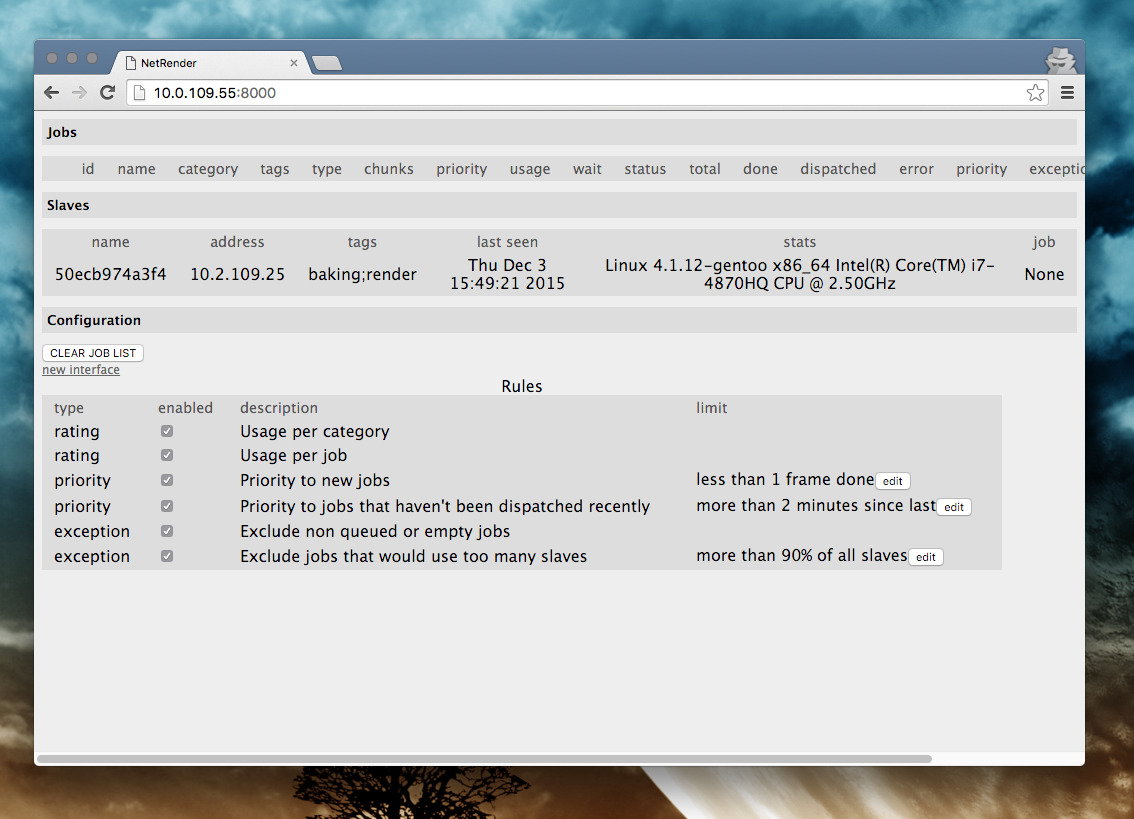
Replace the IP 10.0.109.55 with your masters IP of course. And now you've got your first slave in your list. Check the web interface to get some details. If your master and the slave is on the same machine you can link both docker containers together instead of overwriting the IP.
rin@gentoo-vm ~ $ docker run --name blender_slave -d --link blender_master:master -e "MASTER_PORT_8000_TCP_ADDR=master" d3v0x/blender-render-cluster
Repeat this for all your other machines.
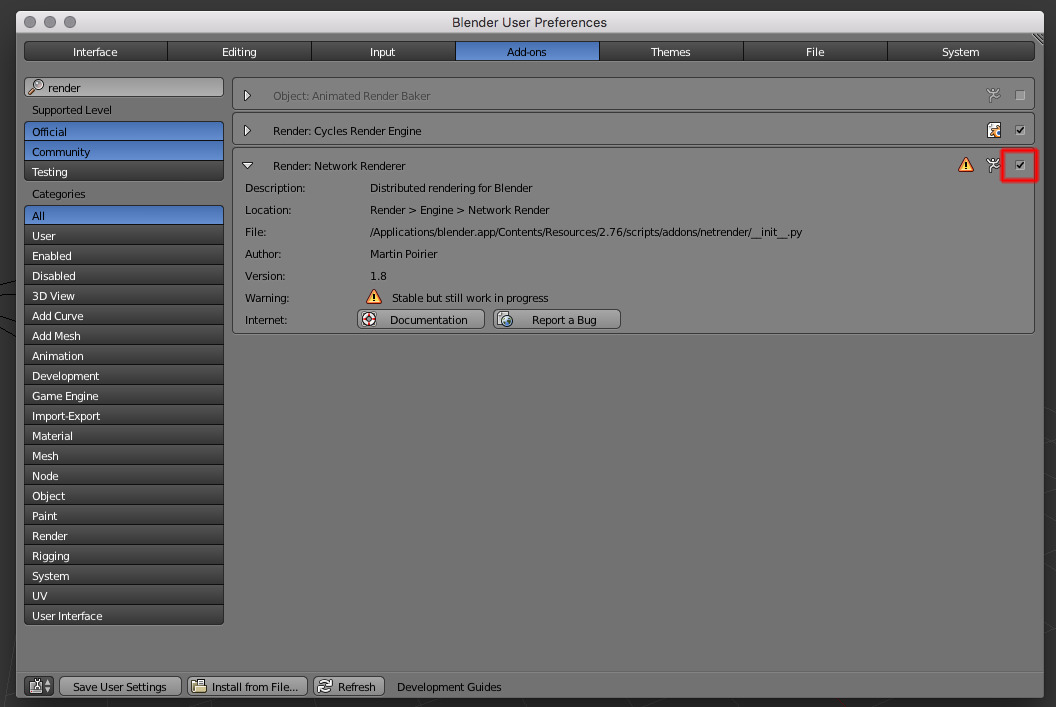
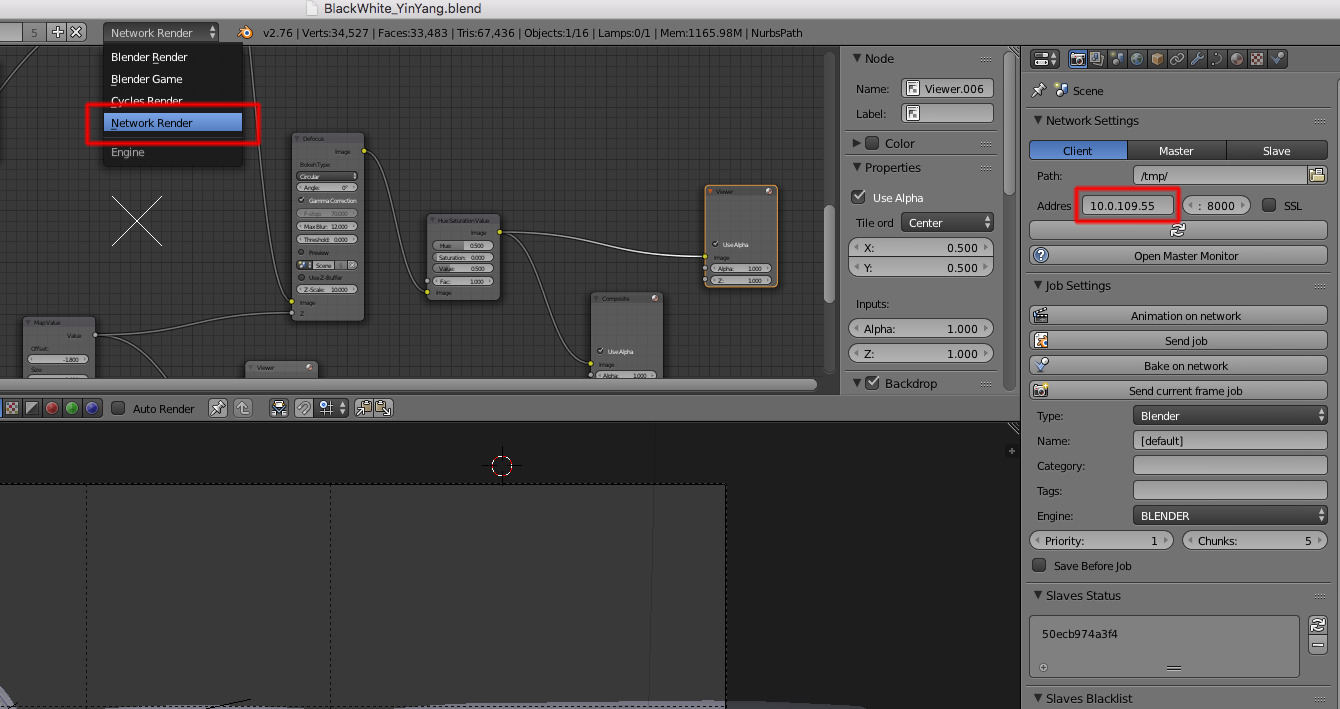
And now we want to render our animation within our new rendering network. Before we can send our jobs we have to enable the Blender Add-on "Render: Network Render" within the Blender User Preferences.
Next, switch to the Network Render Engine. Be sure you saved you're scene before because the file will be sent to the master.
Now you've got many new settings within your Render Section within the Properties Panel. Add your masters IP address and click on refresh at "Slaves Status". You should see all your slaves.
And that's it. Happy rendering!
