About
docker-lock is a cli-plugin
for docker that automates managing image digests by tracking them in a
separate Lockfile (think package-lock.json or Pipfile.lock). With
docker-lock, you can refer to images in Dockerfiles or
docker-compose files by mutable tags (as in python:3.6) yet receive the same
benefits as if you had specified immutable digests (as in python:3.6@sha256:25a189a536ae4d7c77dd5d0929da73057b85555d6b6f8a66bfbcc1a7a7de094b).
docker-lock ships with 3 commands that take you from development
to production:
docker lock generatefinds base images in your docker and docker-compose files and generates a Lockfile containing digests that correspond to their tags.docker lock verifylets you know if there are more recent digests than those last recorded in the Lockfile.docker lock rewriterewrites Dockerfiles and docker-compose files to include digests.
If you are unsure about the differences between tags and digests, refer to this quick summary.
Demo
Consider a project with a multi-stage build Dockerfile at its root:
FROM ubuntu AS base
# ...
FROM mperel/log:v1
# ...
FROM python:3.6
# ...
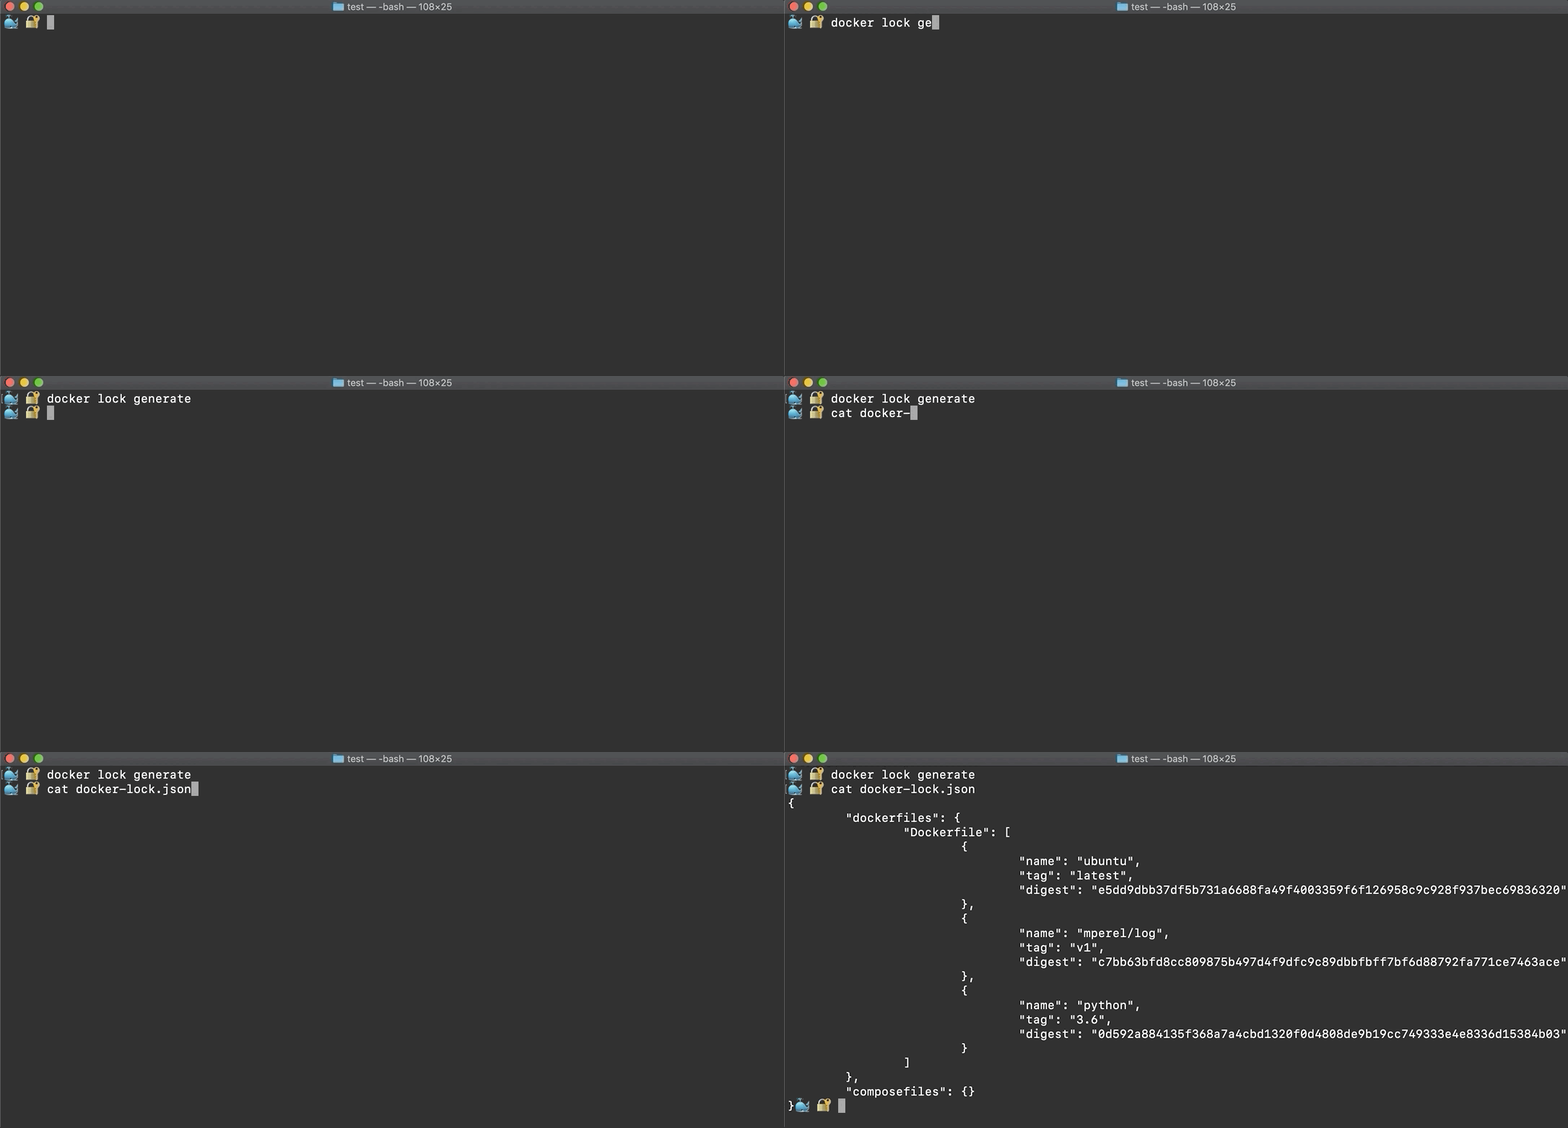
Running docker lock generate from the root queries each images'
registry to produce a Lockfile, docker-lock.json.
Note that the Lockfile records image digests so you do not have to manually specify them.
Running docker lock verify ensures that the image digests are the
same as those on the registry for the same tags.
Now, assume that a change to mperel/log:v1 has been pushed to the registry.
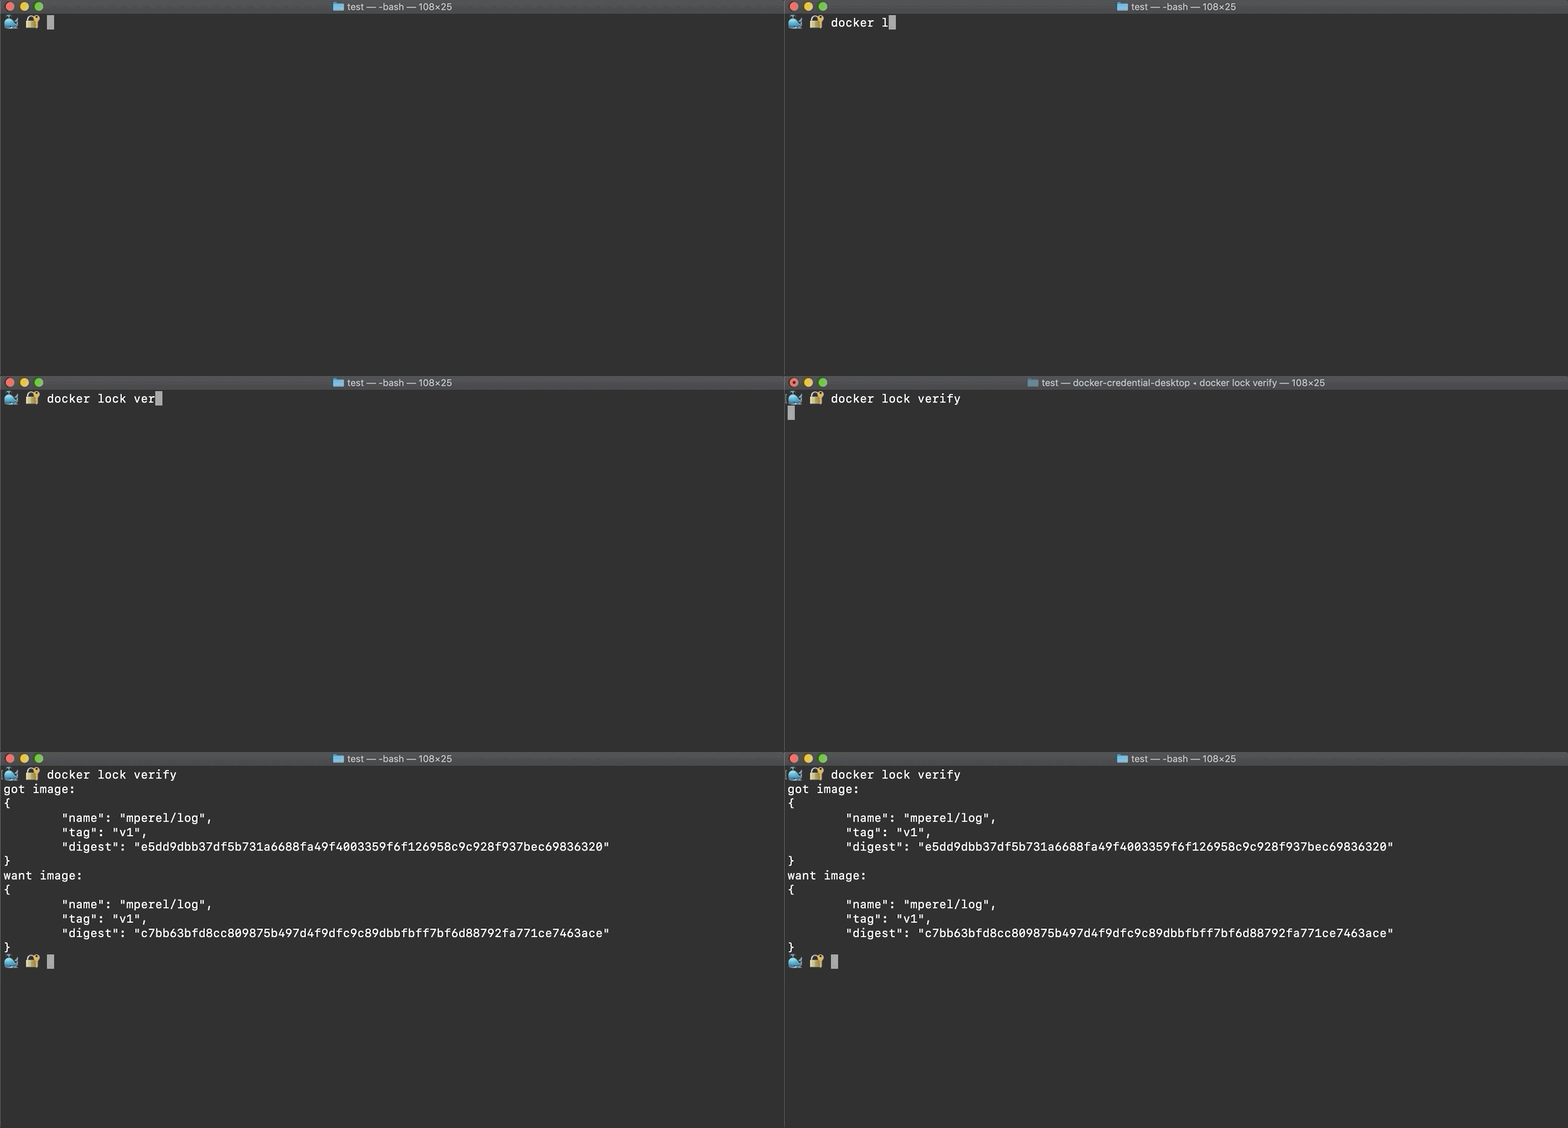
Running docker lock verify shows that the image digest in the Lockfile
is out-of-date because it differs from the newer image's digest on the registry.
While developing, it can be useful to generate a Lockfile, commit it to source control, and verify it periodically (for instance on PR merges). In this way, developers can be notified when images change, and if a bug related to a change in an image crops up, it will be easy to identify.
Finally, lets assume the Dockerfile is ready to be built and shared.
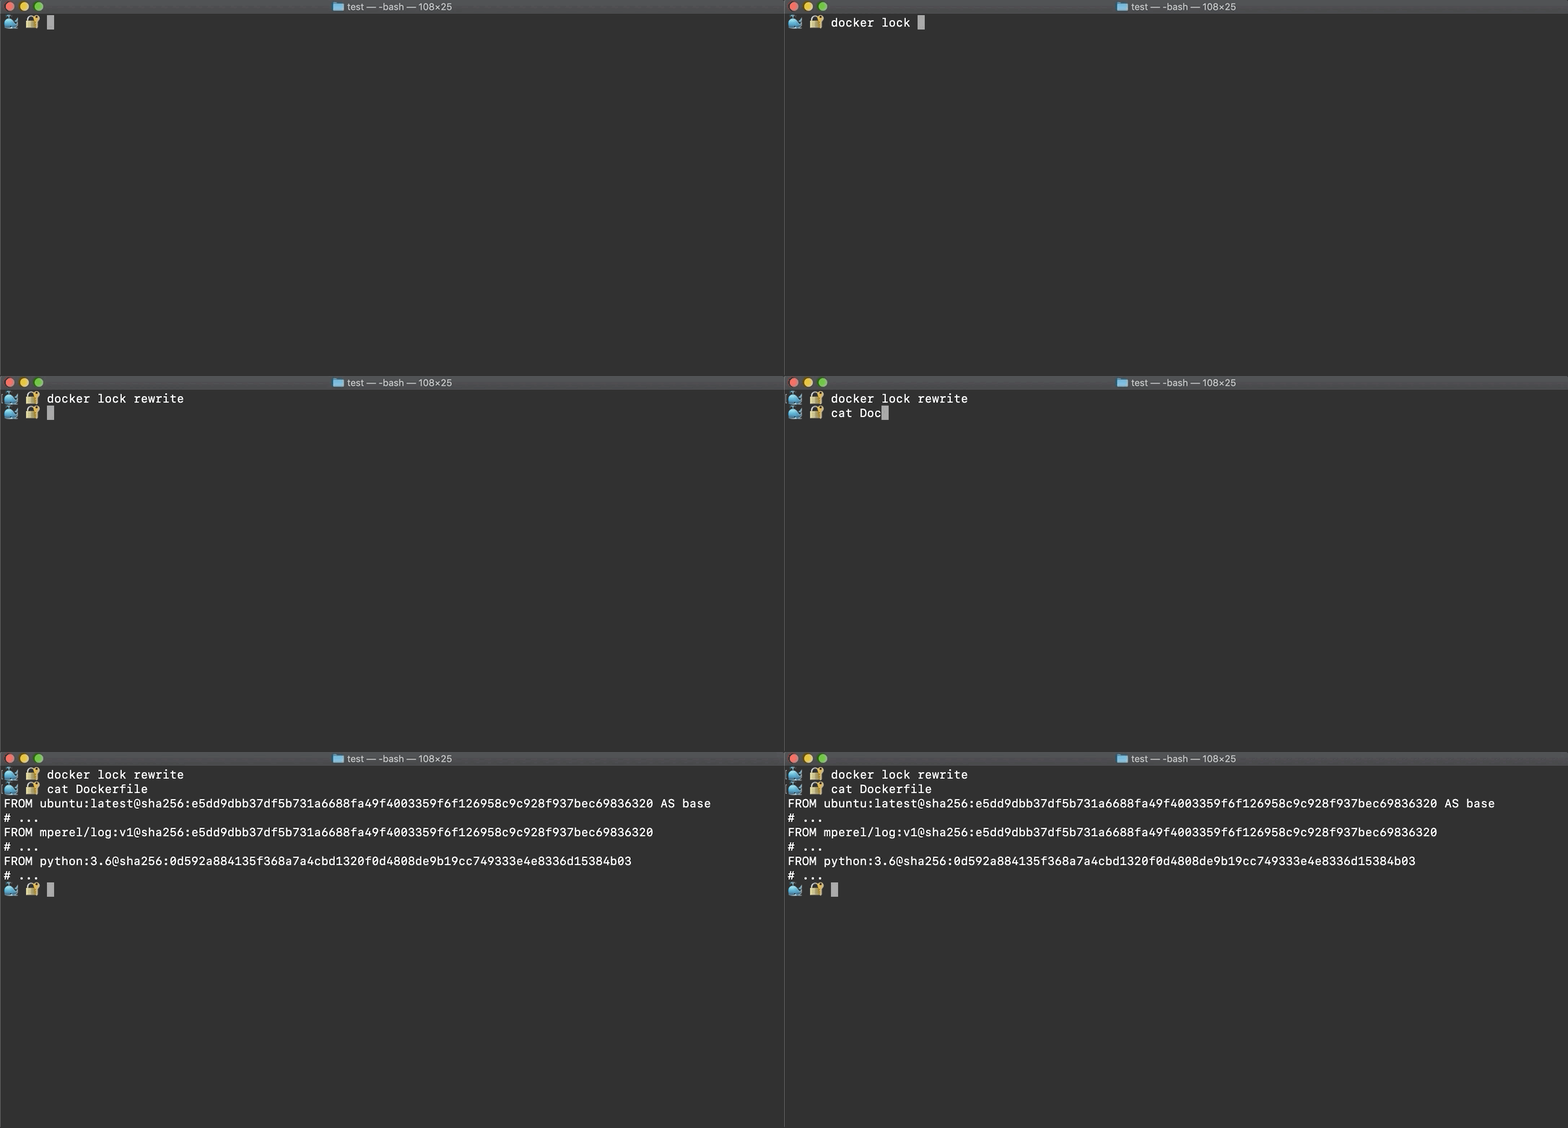
Running docker lock rewrite will add digests from the Lockfile
to all of the images.
At this point, the Dockerfile will contain all of the digest information from the Lockfile, so it will always maintain the same, known behavior in the future.
Install
Linux / Mac
- Docker version >= 19.03
mkdir -p ~/.docker/cli-pluginscurl -fsSL https://github.com/michaelperel/docker-lock/releases/download/{VERSION}/docker-lock-{OS} -o ~/.docker/cli-plugins/docker-lockchmod +x ~/.docker/cli-plugins/docker-lock
Windows
- Docker version >= 19.03
- Create the folder
%USERPROFILE%\.docker\cli-plugins - Download
docker-lock-windows.exefrom the releases page. - Rename the file
docker-lock.exe - Move
docker-lock.exeinto%USERPROFILE%\.docker\cli-plugins
Tags Vs. Digests
Images can be referenced by tag or digest. For instance, at the time of
writing this README, the official most recent version of the python 3.6
image on Dockerhub could be specified by tag, as in python:3.6, or by
digest of the image's contents, as in
python@sha256:25a189a536ae4d7c77dd5d0929da73057b85555d6b6f8a66bfbcc1a7a7de094b.
Images referenced by tag are mutable. The python maintainers could push a new
image to Dockerhub with the same 3.6 tag. Downstream applications that
required the previous python:3.6 image could break.
Images referenced by digest are immutable. Despite having the same tag, a newly pushed image will have a new digest. The previous image can still be referenced by the previous digest.
When deploying to Kubernetes, digests make it easy to rollback broken
deployments. If your previous, working deployment relied on myimage@sha256:2273f9a536ae4d7c77d6h49k29da73057b85555d6b6f8a66bfbcc1a7a7de094b
and the broken, updated deployment relies on
myimage@sha256:92038492583f9a3a4d7c77d6h49k29057b85555d6b6f8a66bfbcc1a7a7d1947f,
rolling back to the working deployment would be as easy as changing the digest
back to the previous digest. Alternatively, if the previous, working deployment
relied on myimage:v1 and the broken, updated image relies on myimage:v1,
it would be more challenging to rollback by distinguishing between the images.
Although digests solve mutability problems, manually specifying them comes with a host of problems. Namely:
- Applications will no longer benefit from updates (security updates, performance updates, etc.).
- Dockerfiles and docker-compose files will become stale.
- Digests are considerably less readable than tags.
- Keeping digests up-to-date can become unwieldly in projects with many services.
- Specifying the correct digest is complicated. Local digests may differ from remote digests, and there are many different types of digests (manifest digests, layer digests, etc.)
docker-lock solves all of these problems by storing digests in a Lockfile,
allowing developers to simply use tags since digests are recorded
in the background.
Contributing
Development
- A development container based on
ubuntu:bionichas been provided, so ensure docker is installed and the docker daemon is running.
If using VSCode's Remote Development Extension - Containers:
- Open the project in VSCode.
- In the command palette (ctrl+shift+p on Windows/Linux, command+shift+p on Mac), type "Reopen in Container".
- In the command palette type: "Go: Install/Update Tools" and select all.
- When all tools are finished installing, in the command palette type: "Developer: Reload Window".
- The docker daemon is mapped from the host into the dev container, so you can use docker and docker-compose commands from within the container as if they were run on the host.
If using vim:
- The development container includes the basic version of vim-awesome, vim-go, and NERDTree.
- Build the development container:
docker build -f .devcontainer/Dockerfile -t dev . - Mount the root directory into the container, and drop into a bash shell:
docker run -it -v ${PWD}:/workspaces/docker-lock -v /var/run/docker.sock:/var/run/docker.sock dev - Open vim and type
:GoInstallBinariesto initializevim-go - When all the tools have been installed, close and reopen vim.
CI
- Unit tests, integration tests, and linting run in the CI pipeline on pull requests.
- To format your code:
./tools/format.sh - To lint your code:
./tools/lint.sh - To run unit tests:
./tools/unittest.sh - To generate a coverage report:
./tools/coverage.sh - To view the coverage report on your browser, open a console, but not in
docker, run
go tool cover -html=coverage.out
Quick Hints
Registries
docker-lock's maintainers provide support for all registries inregistry/firstparty(private and public images onDocker HubandAzure Container Registry, etc.).docker-lock's community provides support for all registries inregistry/contrib.- To use
docker-lockwith public images onDocker Hub, no special instructions are required. However, to usedocker-lockwith private images onDocker Hub, you can choose from the following options:- Login to docker and then use
docker-lock.docker-lockwill get your credentials from the default locations of your docker config file.- If your config file is stored elsewhere, use the flag
--config-file. - If your config file references a credential store such as
osxkeychain,wincredorpass,docker-lockwill read from the store.
- Export the environment variables
DOCKER_USERNAMEandDOCKER_PASSWORDand then usedocker-lock.- These variables can be set in an environment variable file and
loaded with the flag
--env-file.
- These variables can be set in an environment variable file and
loaded with the flag
- Login to docker and then use
- To use
docker-lockwithAzure Container Registry, you can follow step i and then choose from steps ii and iii:- (REQUIRED) Export the environment variable
ACR_REGISTRY_NAME. For instance, if your image can be referenced bymyregistry.azurecr.io/myimage, thenACR_REGISTRY_NAMEmust equalmyregistry.ACR_REGISTRY_NAMEcan be set in an environment variable file and loaded with the flag--env-file.
- Same as option i for
Docker Hub. - Same as option ii for
Docker Hub, except useACR_USERNAMEandACR_PASSWORDinstead ofDOCKER_USERNAMEandDOCKER_PASSWORD.
- (REQUIRED) Export the environment variable


