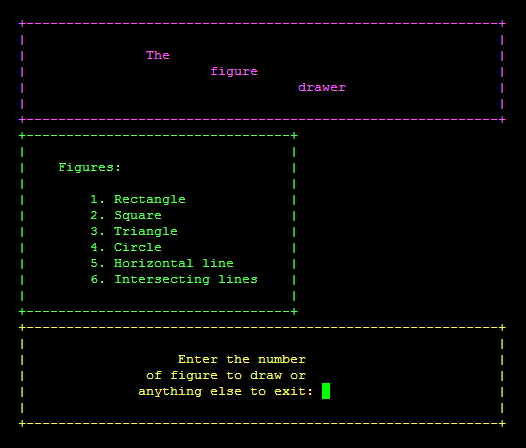
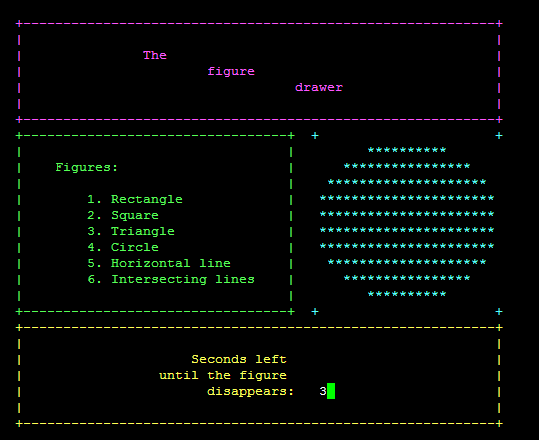
All the customization of the drawing area (FIG_AREA) can be done in the output.h file. THe file's description is self-explanatory. Customization of other fields can be done in the display.c file.
-
Raspberry Pi, Model 3B (further: RPi)
-
"RJ45" Ethernet cable (further: e-cable)
-
Power supply for the RPi (one of the following):
- USB cable + seperate device's USB port (PC, laptop, etc.)
- Common external power supply
-
Main operating computer (PC, laptop, etc.; further: MOC)
-
Launch the RPi
-
Make the object files and the sound.a application by running the following command:
~$ make
- Run the application by entering the following command:
~$ ./figures.a
- Enter the number of the figure to be drawn
- The program will be showing the figure during some period of time and then it will go back to the initial state, asking for further instructions. The period of time depends on the RES_DELAY constant value (default: 3 seconds) in the output.h file.
- To quit the program, enter anything except numbers defined by constants in the
output.h file:
- RECTANGLE (default: 1)
- SQUARE (default: 2)
- TRIANGLE (default: 3)
- CIRCLE (default: 4)
- HLINE (default: 5)
- XLINES (default: 6)
-
RPi (5):
- .c files (3):
- display.c
- main.c
- makeFigure.c
- .h files (1):
- comm.h
- Other files (1):
- makefile
- .c files (3):
-
Other (4):
- README.md
- LICENCE
- TUI_active_state.png
- TUI_initial_state.png
This project is licensed under the GNU General Public License. See the LICENSE file for details
- Roman Bezusiak - Initial work - github.com
- Wikimedia Foundation Inc., Wikipedia - Encyclopedia materials - wikipedia.org

