- Requirements
- Configuration de Mosquito DB
- OT-Recorder installation and configuration
- Setting up a reverse proxy with Nginx
- Smartphone configuration
- Customize view
Requirements
OwnTracks can be easily installed with Debian 9
You can download the latest version here
We assume your Debian installation is already done and well configured
To finalize the installation, just run sudo apt-get install curl git gnupg gnupg2
Configuration de Mosquito DB
Installation
Source of Mosquitto DB configuration here
OwnTracks needs a Mosquito DB, to send data throught MQTT protocol.
Run apt-get install mosquitto mosquitto-clients to install Mosquitto DB and dependencies.
After the installation, run /etc/init.d/mosquitto stop to stop Mosquitto DB (which perform an automatic startup after installation)
Setting up a user
You have to set up a password to perform a secure connection to your database, you can use the following command :
mosquitto_passwd -c /etc/mosquitto/passwd dbo
You will be asked for your password twice, enter that too
The accountdbowill be use to establish secure connection to Mosquitto DB
Easily generate CA and certificates
git clone https://github.com/owntracks/tools.git
cd tools
./mosquitto-setup.sh
Then, move certificates and keys to rights directories and change certificate and key filenames :
mv /etc/mosquitto/conf.d/ca* /etc/mosquitto/ca_certificates/
mv /etc/mosquitto/conf.d/$(hostname -f).* /etc/mosquitto/certs/
mv /etc/mosquitto/certs/*.crt /etc/mosquitto/certs/mosquitto.crt
mv /etc/mosquitto/certs/*.key /etc/mosquitto/certs/mosquitto.key
mv /etc/mosquitto/certs/*.csr /etc/mosquitto/certs/mosquitto.csr
The file /etc/mosquitto/ca_certificates/ca.crt needs to be on your smartphone to establish secure connection, between Mosquitto database and OwnTracks application
Configure Mosquitto DB
Edit /etc/mosquitto/mosquitto.conf with the following content :
allow_anonymous false
password_file /etc/mosquitto/passwd
include_dir /etc/mosquitto/conf.d

pid_file /var/run/mosquitto.pid

persistence true
persistence_location /var/lib/mosquitto/

log_dest file /var/log/mosquitto/mosquitto.log
log_dest syslog
log_dest stdout
log_dest topic
log_type error
log_type warning
log_type notice
log_type information
connection_messages true
log_timestamp true
Edit /etc/mosquitto/conf.d/mosquitto.conf with the following content :
listener 1883 127.0.0.1

listener 8883
tls_version tlsv1.2

cafile /etc/mosquitto/ca_certificates/ca.crt
certfile /etc/mosquitto/certs/mosquitto.crt
keyfile /etc/mosquitto/certs/mosquitto.key
require_certificate false

autosave_interval 1800

connection_messages true
log_dest stderr
log_dest topic
log_type error
log_type warning
log_type notice
log_type information
log_type all
log_type debug
log_timestamp true

persistence true
persistence_file mosquitto.db
persistent_client_expiration 1m

retained_persistence true
Test Mosquitto DB
On a first terminal, launch the following command :
/usr/sbin/mosquitto -c /etc/mosquitto/mosquitto.conf
On a second terminal, launch the following command :
mosquitto_sub -t '#' -u dbo -d -p 8883 -P <YOUR PASSWORD> --cafile /etc/mosquitto/ca_certificates/ca.crt
Adapt
<YOUR PASSWORD>to themosquitto_passwdcommand above
Output in second terminal terminal should look like :
Client mosqsub/3355-tuto sending CONNECT
Client mosqsub/3355-tuto received CONNACK
Client mosqsub/3355-tuto sending SUBSCRIBE (Mid: 1, Topic: #, QoS: 0)
Client mosqsub/3355-tuto received SUBACK
Subscribed (mid: 1): 0
On a third terminal, run the following command :
mosquitto_pub -t 'hello' -m world -u dbo -P <YOUR PASSWORD> -p 8883 --cafile /etc/mosquitto/ca_certificates/ca.crt
If Mosquitto DB is well configured, the output of the second terminal should looks like :
Client mosqsub/3355-tuto sending PINGREQ
Client mosqsub/3355-tuto received PINGRESP
Client mosqsub/3355-tuto sending PINGREQ
Client mosqsub/3355-tuto received PINGRESP
Client mosqsub/3355-tuto received PUBLISH (d0, q0, r0, m0, 'hello', ... (5 bytes))
world
Client mosqsub/3355-tuto sending PINGREQ
Client mosqsub/3355-tuto received PINGRESP
Congratulations, Mosquitto DB is ready to receive data from OwnTracks !
You can leave all terminals, and just run /etc/init.d/mosquitto start
OT-Recorder installation and configuration
Installation
Run the following commands :
curl https://raw.githubusercontent.com/owntracks/recorder/master/etc/repo.owntracks.org.gpg.key | apt-key add -
echo "deb  http://repo.owntracks.org/debian stretch main" | tee /etc/apt/sources.list.d/owntracks.list > /dev/null
apt-get update
apt-get install ot-recorder
Initialize LMBD database of OwnTracks
Run the following command : ot-recorder --initialize
Configuration
Edit /etc/default/ot-recorder, to uncomment and change these values :
OTR_PORT=8883
OTR_USER="dbo"
OTR_PASSWORD="<YOUR PASSWORD>"
OTR_CAFILE="/etc/mosquitto/ca_certificates/ca.crt"
Check OT-Recorder configuration
In a first terminal launch the following command :
tail -f /var/log/mosquitto/mosquitto.log
In a second terminal, launch the following command :
ot-recorder 'owntracks/#'
The output in the second terminal should looks like :
ot-recorder[4283]: version 0.8.4 starting with STORAGEDIR=/var/spool/owntracks/recorder/store
ot-recorder[4283]: connecting to MQTT on localhost:8883 as clientID ot-recorder-tuto-4283 with TLS
ot-recorder[4283]: HTTP listener started on 127.0.0.1:8083
ot-recorder[4283]: Using storage at /var/spool/owntracks/recorder/store with precision 7
ot-recorder[4283]: Subscribing to owntracks/# (qos=2)
Congratulations, OwnTracks is almost configured
Automatic launch of the recorder
Use systemctl enable ot-recorder.service command to allow ot-recorder to be launched at the startup of your server.
Then, launch systemctl start ot-recorder.service to finally launch OwnTracks recorder
Setting up a reverse proxy with Nginx
Requirements
Install nginx and certbox with apt-get install nginx apache2-utils
Self signed certificate
Use the following command to generate self signed certificates :
mkdir /etc/nginx/TLS

openssl req -x509 -nodes -days 365 -newkey rsa:4096 -keyout /etc/nginx/TLS/owntracks.key -out /etc/nginx/TLS/owntracks.crt
Generate a Diffie-Hellman key with openssl dhparam -out /etc/nginx/TLS/dhparam.pem 2048
Generate Diffie-Hellman keys can be long, have some cofee...
About security
Hide server version
Edit /etc/nginx/nginx.conf and uncomment server_tokens off;
Nginx will not show the server version in case of error page
Use passwd to secure access to folders
Source here
To secure some directories, we needs authentification with login and password.
Use htpasswd -c /etc/nginx/.owntracks.passwd <USERNAME HERE> to create a login and a associated password. This account will be used to access on restricted pages.
You can add new users with the same command, without
-cargument (to add to the file)
Usingbcryptalgorithm withhtpasswdcan cause 500 errors with nginx
Configure virtual host
Remove the default virtual host symlink with rm /etc/nginx/sites-enabled/default
Full example of nginx virtual host configuration can be found here
OT-Recorder website files are located to/usr/share/owntracks/recorder/htdocs
Create and edit /etc/nginx/sites-available/owntracks and paste the following content :
server {

        listen       80;
        server_name  <WEB SERVER IP HERE/FQDN>;
        auth_basic              "Hey you !?";
        auth_basic_user_file    "/etc/nginx/.owntracks.passwd";

        return 301 https://$host$request_uri;
}

server {

        listen               443;
        ssl                  on;
        ssl_certificate      /etc/nginx/TLS/owntracks.crt;
        ssl_certificate_key  /etc/nginx/TLS/owntracks.key;

        ssl_session_cache  builtin:1000  shared:SSL:10m;
        ssl_protocols  TLSv1 TLSv1.1 TLSv1.2;
        ssl_ciphers HIGH:!aNULL:!eNULL:!EXPORT:!CAMELLIA:!DES:!MD5:!PSK:!RC4;
        ssl_prefer_server_ciphers on;

        access_log              /var/log/nginx/owntracks_access.log;
        error_log               /var/log/nginx/owntracks_error.log;

        auth_basic              "Hey, who are you ?!";
        auth_basic_user_file    "/etc/nginx/.owntracks.passwd";


        # Main page
        location / {

                proxy_pass              http://127.0.0.1:8083;
                proxy_http_version      1.1;
                proxy_set_header        Host $host;
                proxy_set_header        X-Forwarded-For $proxy_add_x_forwarded_for;
                proxy_set_header        X-Real-IP $remote_addr;

                autoindex               off;
                auth_basic              off;

                # Redirect to main map
                rewrite ^/$ https://$host/last/index.html permanent;

        }

        # Main page
        location /table {

                proxy_pass              http://127.0.0.1:8083;
                proxy_http_version      1.1;
                proxy_set_header        Upgrade $http_upgrade;
                proxy_set_header        Connection "upgrade";
                proxy_set_header        Host $host;
                proxy_set_header        X-Forwarded-For $proxy_add_x_forwarded_for;

        }

        # OwnTracks Recorder Views
        location /owntracks/views/ {
                proxy_buffering         off;            # Chrome
                proxy_pass              http://127.0.0.1:8083/views;
                proxy_http_version      1.1;
                proxy_set_header        Host $host;
                proxy_set_header        X-Forwarded-For $proxy_add_x_forwarded_for;
                proxy_set_header        X-Real-IP $remote_addr;

        }


        location /owntracks/static/ {

                proxy_pass              http://127.0.0.1:8083/static/;
                autoindex               off;
                proxy_http_version      1.1;
                proxy_set_header        Host $host;
                proxy_set_header        X-Forwarded-For $proxy_add_x_forwarded_for;
                proxy_set_header        X-Real-IP $remote_addr;
        }


}
Then, create a symlink with ln -s /etc/nginx/sites-available/owntracks /etc/nginx/sites-enabled/
Smartphone configuration
Launch OwnTracks application.
- Tap on menu icon, in top left corner

- Go to Preferences menu

Then go to Connection menu to configure application
- In Mode option, choose MQTT

- In Host option, specify IP address of your Mosquitto database, and port 8883. Finally disable websockets

- In Identification option, specify
dbousername and associated password. Specify aDevice IDand aTracker ID

- In Security option, enable TLS support and select your certificate create at this step

- Finally, check connection to your Mosquitto database from
iicon on right top corner of the application

Customize view
OwnTracks allow you to customize maps with views
View example here
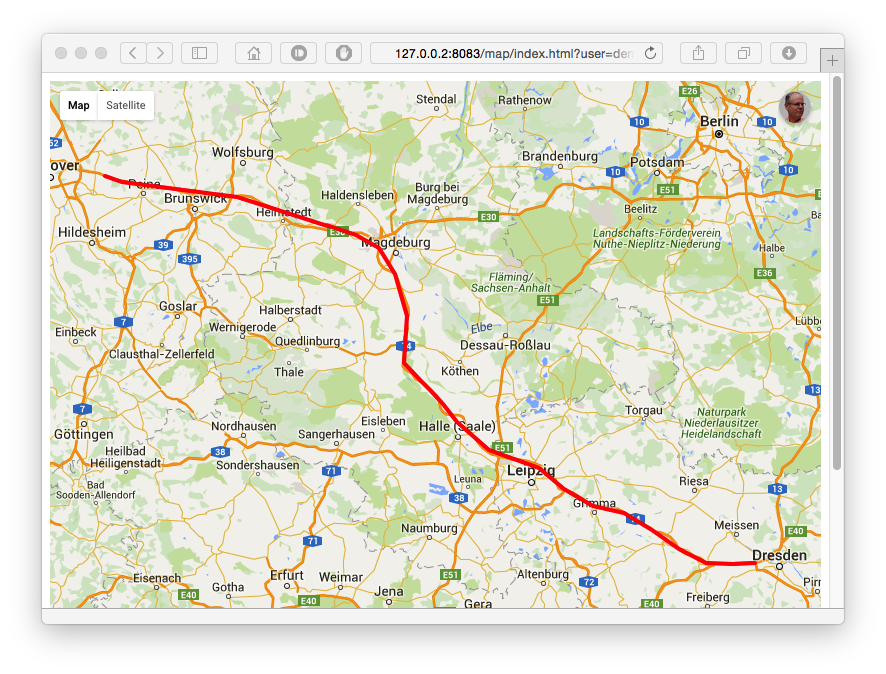
With our configuration, we can craft url with the following settings :
https://<WEBSERVER>/map/index.html?user=dbo&device=MySmartphone&format=geojson&from=2019-01-01

https://<WEBSERVER>/map/index.html?user=dbo&device=MySmartphone&format=linestring&from=2019-01-01
The first URL could provide the following result :
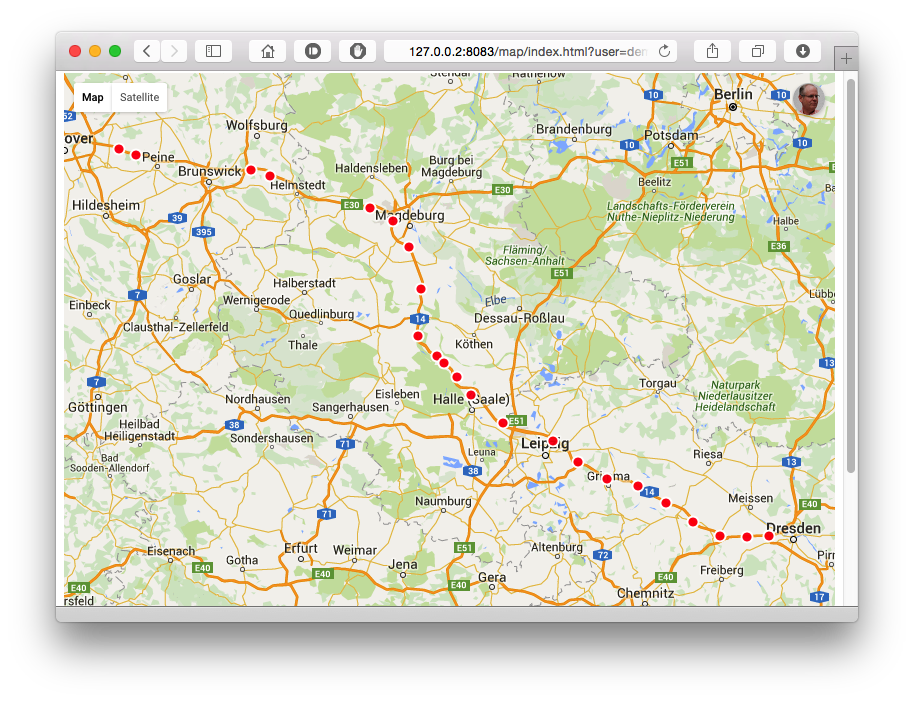
The second URL could provide the following result :