Behavioral Cloning Project
The goals / steps of this project are the following:
- Use the simulator to collect data of good driving behavior
- Build, a convolution neural network in Keras that predicts steering angles from images
- Train and validate the model with a training and validation set
- Test that the model successfully drives around track one without leaving the road
- Summarize the results with a written report
- model.py containing the script to create and train the model
- drive.py for driving the car in autonomous mode
- model.h5 containing a trained convolution neural network
- README.md summary and discussion of the results
The model.py file contains the code for training and saving the convolutional neural network. The file shows the pipeline I used for training and validating the model, and it contains comments to explain how the code works. I had enough memory to not need to chunk the data for training, so you won't see any generators for training. I also plot the training and validaion loss for each epoch and save that plot.
Using the Udacity provided simulator and my drive.py file, the car can be driven autonomously around the track by executing
python drive.py model.h5and if you'd like to record a video, you can run:
python drive.py model.h5 name_of_folderThen run the video.py script on that folder to assemble the video
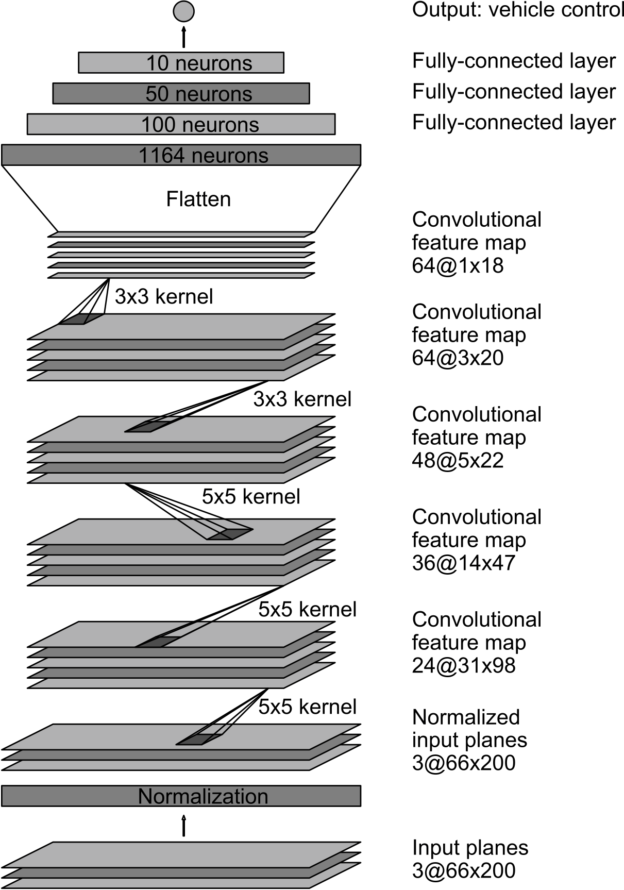
My model is based on the NVIDIA network described in the lectures. After seeing really good performance with this network on a limited set of data, it seemed like a great choice for the application. It's a deep, convolutional neural network, and here is the architecture of my modified version of the network.
- Image normalization
- Image cropping (75px top, 25px bottom)
- 2D Convolution: 5x5 kernel, strides: 2x2, filter: 24, activation: RELU
- 2D Convolution: 5x5 kernel, strides: 2x2, filter: 36, activation: RELU
- 2D Convolution: 5x5 kernel, strides: 2x2, filter: 48, activation: RELU
- 2D Convolution: 3x3 kernel, filter: 64, activation: RELU
- 2D Convolution: 3x3 kernel, filter: 64, activation: RELU
- Flatten
- Dropout 50%
- Fully connected: 100
- Dropout 50%
- Fully connected: 50
- Dropout 50%
- Fully connected: 10
- Fully connected: 1 (output)
The first layer of the network performs image normalization so all image values are in the range of -0.5 to 0.5. After this, I crop the image - removing the top 75 px and the bottom 25 px. This removes the sky and the hood of the vehicle. These features weren't useful to the final steering calculation, and would have added unnecessary time to the training.
The next part of the network are the convolutional layers. These serve the purpose of feature extraction in the network. The first three layers use a 2x2 strided convolutions with a 5×5 kernel. The last two layers are non-strided convolutions with a 3×3 kernel size. The model introduces nonlinearity using RELU activations for each of the convolutional layers.
The final layers of the network are fully connected, first with 100 neurons, then 50, 10 and finally the output. The reason for this design is discussed in the NVIDIA paper as follows:
The fully connected layers are designed to function as a controller for steering, but we noted that by training the system end-to-end, it is not possible to make a clean break between which parts of the network function primarily as feature extractor, and which serve as controller.
I added dropout layers between the fully connected layers to try and reduce overfitting, which is discussed later.
The final model architecture is implemented in the nvidiaNetwork function from model.py lines 71-86.
Here is a visualization of the architecture from the NVIDIA paper mentioned earlier (note this doesn't include the dropout layers that I added):
The model used an adam optimizer, so the learning rate was not tuned manually (model.py line 91).
The overall strategy for the model architecture was to create a network that took in images from the vehicle cameras and outputted a steer angle for that given image. This would allow new images from the vehicle to be given a steer angle so the car can negotiate a track autonomously.
My first step was to use the LeNet network as I thought this model might be appropriate because it was introduced for classifying images, and this seemed to be a classification problem. We are giving the model an image, and need it to output a steer angle. I didn't have the best of luck with the LeNet architecture, so I started looking at the NVIDIA network as described in the lectures. I saw an immediate improvement in the performance of the car in autonomous mode, so I decided to use this model as a starting point.
In order to gauge how well the model was working, I split my image and steering angle data into a training and validation set. Comparing the training loss to the validation loss is an indicator of the level of over or underfitting of the model - if the model has a low loss on the training set, but a high loss on the validation set then this points towards overfitting.
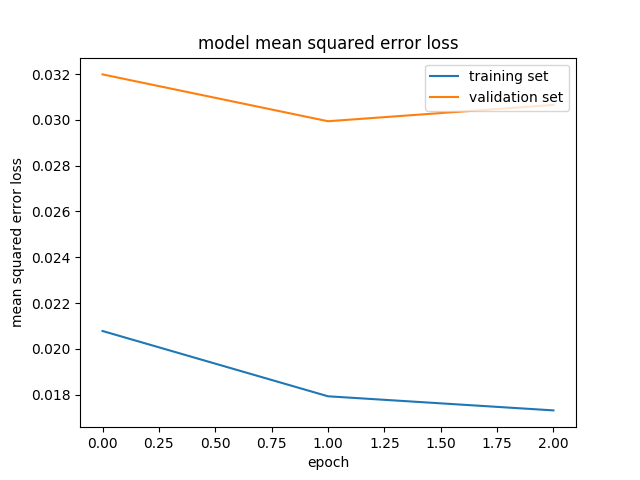
I was consistently finding my models tended to overfit the training data. To combat the overfitting, I modified the model to included dropout layers between the fully connected layers before the output of the network. I also only ran the network for 3 epochs to try and reduce overfitting more. Looking at the loss outputs of the training routine, I probably could have reduced this to two epochs as well. I still ended with the training loss being lower than the validation loss, as shown in this chart:
I tried tweaking a few of the layers in the network - increasing and decreasing the number of neurons in the fully connected layers, and changing the parameters in the convolutional layers, but didn't see much improvement in the performance of the model in autonomous mode, so I reverted to the more standard network.
When running the network in the simulator, I found that some areas were harder for the vehicle to navigate than others, I addressed this with adding more data in these areas, which I discuss later.
At the end of the process, the vehicle is able to drive autonomously around the track without leaving the road.
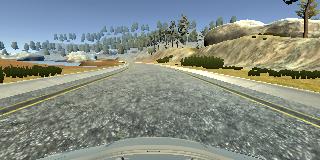
Training data was chosen to keep the vehicle driving on the road. I drove the 1st track only for my dataset. I put in two smooth laps of driving in the center of the lane in the forwards direction, a lap of recovery driving from the edges, and also some more sweeps of the corners and problem areas.
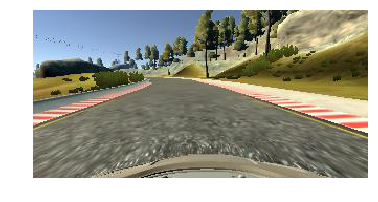
Here is an example image of center lane driving:
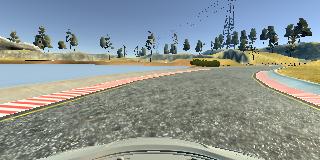
I then recorded the vehicle recovering from the left side and right sides of the road back to center so that the vehicle would learn to turn sharply if it was approaching the edge of the road. These images show what a recovery looks like. The vehicle starts pointed at the edge of the track, when it get's to the edge, I turn the wheel sharply and recover back to the center of the road.
I repeated this process on various areas of the track to capture the different road edge types.
To augment the dataset, I flipped all the images and adjusted the steering angles by a factor of (-1). The first track is biased to left turns, so I hoped that this would train the network equally for left and right turns. Here's what a normal and flipped image look like:
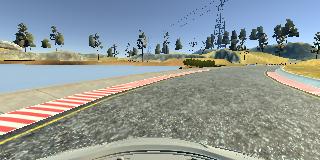
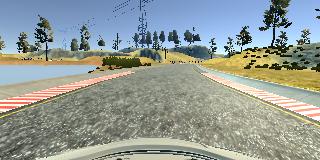
I also used the images taken from left and right side of the car, and added a correction factor the the steering angle to factor in the change of perspective. Here's what those images look like:
After the collection process, I had 8916 number of data points in CSV file. This translates to 53496 data points when the images are flipped, and the left and right images are used.
The data was shuffled before being used for training, and also split into a 20% validation set and 80% training set, which results in 42796 samples in the training set and 10700 samples for validation. The validation set helped determine if the model was over or under fitting. The ideal number of epochs was probably 2, as the validation loss didn't seem to decrease after that, and the model was just overfitting to the training set.
