This repo houses some of the files that were used to demo kubernetes at a Deep South Devs Meetup in March 2022.
While the demo demonstrated a number of different kubernetes features, such as deployments of pods, cronjobs, services, hpa scaling etc and also helm, and that on a kubernetes cluster spun up on GCP, these files will bring up only a subset of the services and show only subset of k8s functionality originally demo'd. It will do so on a minikube VM.
Note because you are running this locally on a minikube VM things will be much slower than was demo'd on a GCP cluster because of a few factors one being your slower internet connection etc etc. Image downloads thus take longer on initial POD creation.
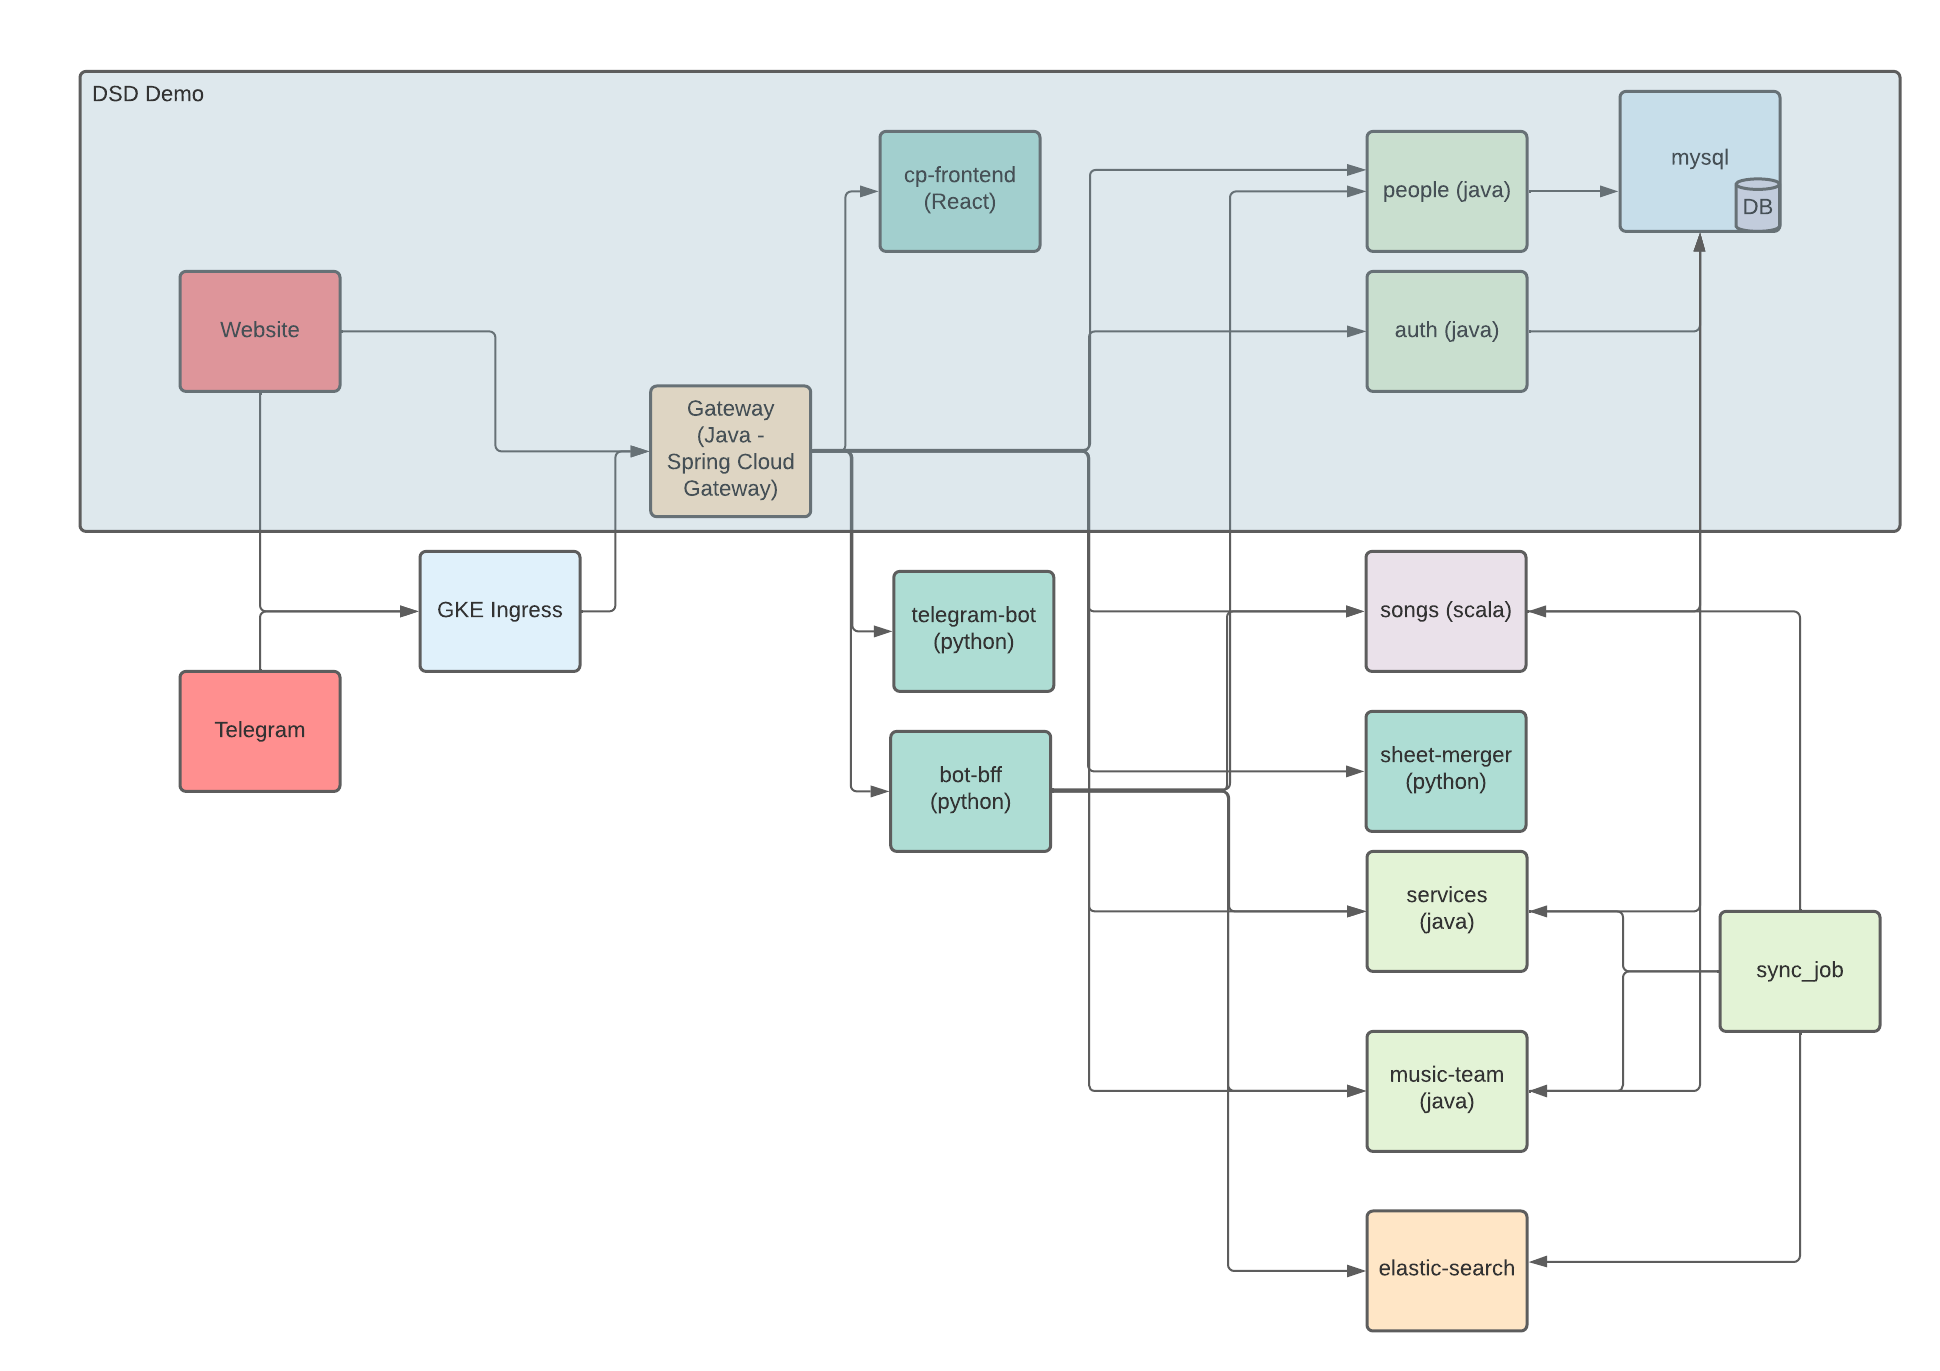
Below is a basic diagram showing the services that will be spun up. Only the section marked as DSD demo will be spun up.
- kubectl is the kubernetes command line tool that allows you to run commands against kubernetes clusters.
- Install it by following the instructions listed here
- Minikube is a local kubernetes that allows for easy learning and development on kubernetes. In our case it will be great since it runs on your local machine and costs nothing. To install, follow instructions listed here
- start minikube if not started already. Run
minikube startin the terminal minikube startshould point your kubectl to the minikube cluster. If you already using kubectl for other things like work, be careful and check that kubectl is pointing to the minikube cluster before continuing.
- Run
kubectl apply -f mysql/data-persistentvolumeclaim.yamlto create a persistent volume claim which will be used by the mysql pod - Run
kubectl apply -f mysql/mysql-deployment.yamlto create a mysql pod. - Run
kubectl apply -f mysql/mysql-service.yamlto allow the myql pod to be reachable throughout the cluster (remember a cluster could have more than one node and the pod can be deployed to any node belonging to the cluster. Of course in minikube case there will only be 1, but this will definitely not be the case in a real world scenario). - You can run
kubectl get podsto see if the pod has started successfully. Similarly runkubectl get servicesandkubectl get pvcto check the services and private volume claim respectively. Note that the POD may take quite long to spin up since it has to download the mysql image for the first time.
- Run
kubectl apply -f church-auth/church-auth-deployment.yamlto create a church auth pod - Run
kubectl apply -f church-auth/church-auth-service.yamlto allow the church-auth pod to be accessible to others inside the cluster - You can run
kubectl get podsto see if the pod has started successfully. Similarly, runkubectl get servicesto check the services.
- Run
kubectl apply -f church-gateway/church-gateway-deployment.yamlto create a church gateway pod - Run
kubectl apply -f church-gateway/church-gateway-service.yamlto allow the church-gateway pod to be accessible to others inside and outside of the cluster. The type is Nodeport.
A NodePort service is the most basic way to get external traffic directly to your service. NodePort, as the name implies, opens a specific port, and any traffic that is sent to this port is forwarded to the service. Read more here
- You can run
kubectl get podsto see if the pod has started successfully. Similarly, runkubectl get servicesto check the services. - Note that you will not be able to access this service until you create a tunnel to access it. Run the following command (keep it running to keep the tunnel up) and store the URL of the church-gateway-service. The frontend pod will need this to be able to know where to connect to.
minikube service --url church-gateway-service.
As discussed in the demo session, helm is a kubernetes deployment tool. It can be seen as a package manager for kubernetes. helm makes it easy for developers to provide a consistent way to install an application into the cluster through its concept called charts. Read more here. You can following these instructions to install helm locally. Once installed:
- Run
helm upgrade --install church-people ./church-people-chart. Note already how easy it is to spin up both the pod deployment and the service. - Run
kubectl get podsto see if the church-people pod has been created (or busy creating at least) - Run
kubectl get servicesto see if the church-people-service has been created.
- The first thing you have to do before spinning up the frontend container is to configure it to point to the gateway service on minikube as the backend. Previously you obtained the URL when setting up the tunnel. From that value take its IP (should be 127.0.0.1) and insert it in the
church-people-chart/values.yamlfile for the app.host config. Take the port and set it to the app.port value in the values.yaml file. - Then install the frontend. Run
helm upgrade --install church-people-frontend ./church-people-frontend-chart - Run
kubectl get podsto see if the church-people-frontend pod has been created (or busy creating at least) - Run
kubectl get servicesto see if the church-people-frontend has been created.
- In your browser navigate to the url that was created by the
minikube service --url church-gateway-servicecommand. - User name is
admin, password ispasswordNote, only the church people page will work since not all the services have been spun up. You can also add new auth users on the settings section.
