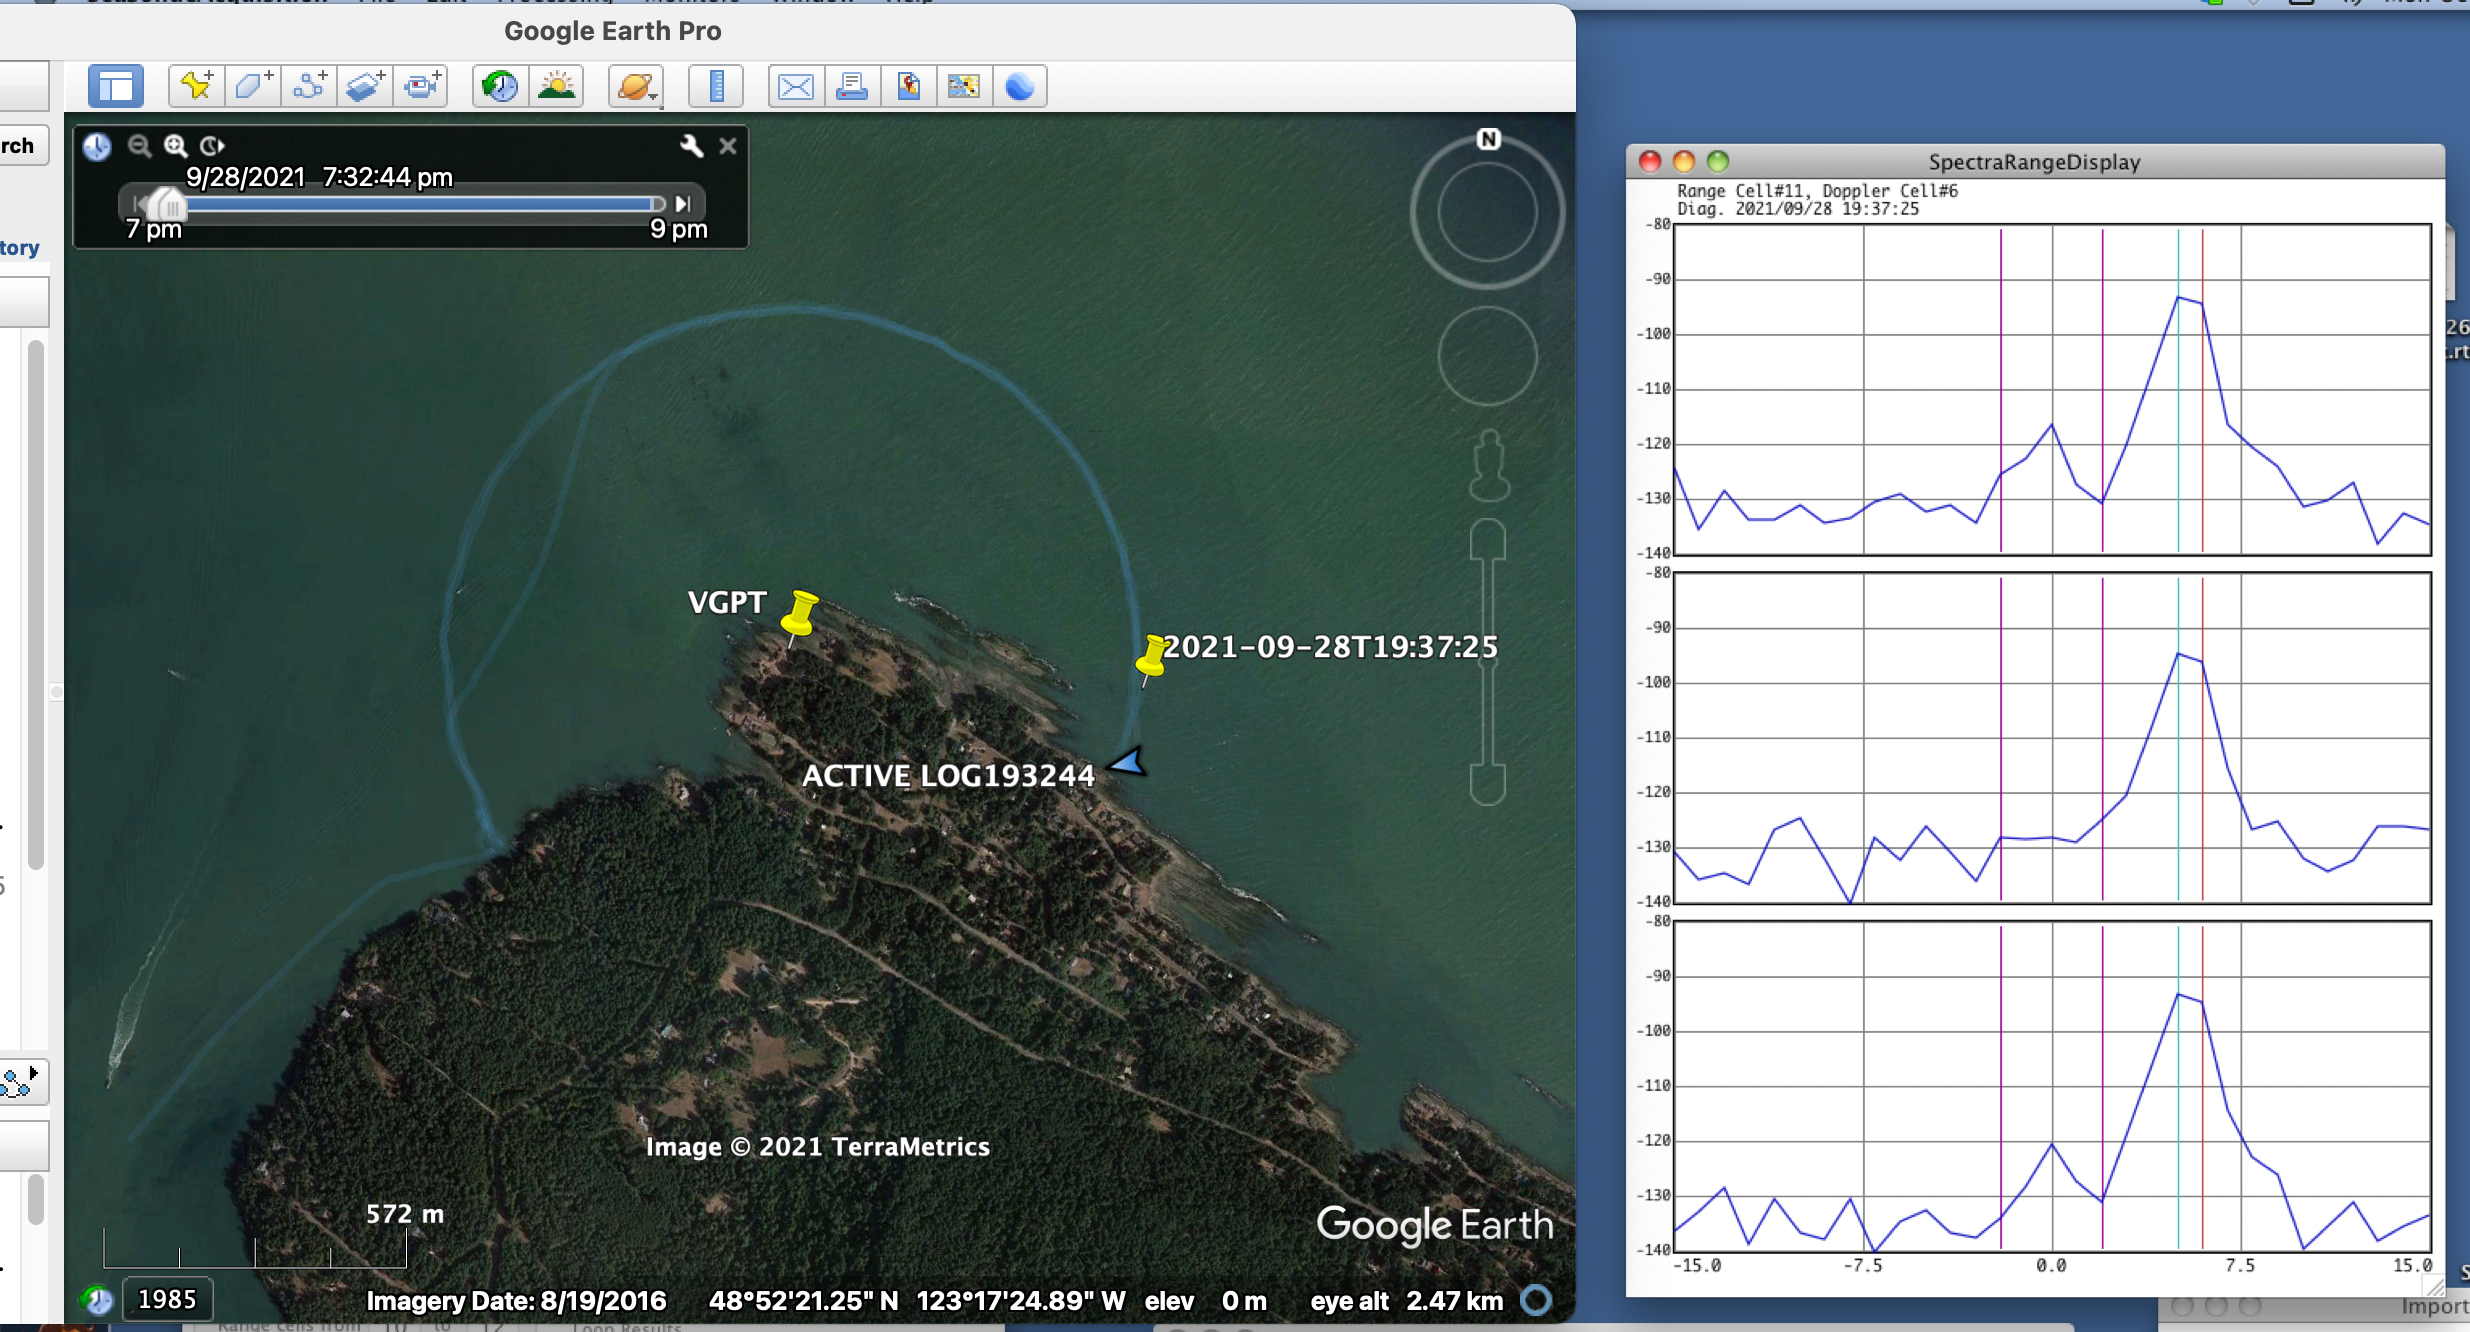
Use Google Earth to view the "current" transponder location as SeaSondeAcquisition plays back APM data.
n.b., not compatible with python2; requires python3.
The first step in creating a new CODAR antenna pattern from data acquired during an Antenna Pattern Measurement (APM) is the generation of a Loop file. Loop files are generated by the SeaSondeAcquisition program (with "Loop Diagnostics" enabled). SeaSondeAcquisition plays back the GPS and Time Series data from the APM in chronological order, writing the Loop file as it goes.
SeaSondeAcquisition displays the "current" transponder signal strength in its SpectraRangeDisplay window as it progresses, but it does not display the location of the transponder as the boat carrying it moves along its preprogrammed route. This is unfortunate, because knowing the transponder location makes it easier to make sense of the signal strength, which varies as the transponder passes through the antenna nulls or perhaps behind an island or point of land.
The python3 script continuous_loop_to_kml.py remedies this by parsing the Loop file as it grows and writing the most recent transponder location to a .kml file. This .kml file can then be displayed in Google Earth (either on the processing computer or another computer on the same network). The result is a Google Earth placemark that moves around the APM route in synchronization with the Loop Diagnostics processing, making the Loop file generation more intuitive for the operator.
- continuous_loop_to_kml.py takes the path of a GPS file as its sole input argument. The GPS file can be a .gpx file, uploaded directly from your GPS, but this requires that the gpxpy python package be installed on your processing computer. If your processing computer does not have the gpxpy package installed, it will be necessary to convert the .gpx file to an ASCII file consisting of lines of the form
48.4166818,-124.0477753,2021-09-24T22:15:56(i.e., comma-separated values of decimal latitude, decimal longitude, and time).
A .gpx file can be converted to CSV format using an online converter like the one at https://mygeodata.cloud (unlike many online converters, this one returns time in addition to latitude and longitude). You could also use the gpsbabel program. e.g.,
gpsbabel -t -i gpx -f apm.gpx -x nuketypes,waypoints,routes -o unicsv -F apm.csv
Whether you use an online converter or gpsbabel, you'll need to convert the resulting CSV file into the specific lat,lon,time format required by this script, possibly using a combination of sed, awk, and/or python. Here's the conversion of the CSV file generated by gpsbabel in the example above:
cat apm.csv | sed -n '2,$ p' | sed 's#/#-#g' | awk -F , '{printf "%f,%f,%sT%s\n",$2,$3,$8,$9}' > apm_formatted.csv
The exact column numbers for awk to output ($2, $3, etc.) will depend on the format of your particular CSV file.
If you aren't a sed/awk wizard, converting to the required CSV format can also be done in a spreadsheet program like Excel.
- Once you have your GPS data in the required format (either a .gpx file or a lat,lon,time CSV file), run this script on the SeaSonde processing computer with the syntax:
python3 continuous_loop_to_kml.py path_to_gps_file
where path_to_gps_file is the fully qualified path to your .gpx or .cvs file. For example,
python3 /Users/codar/Documents/bin/continuous_loop_to_kml.py /tmp/apm_formatted.csv
-
In Google Earth (either on the processing computer or another machine on the same network), select
Add >> Network Linkand browse to /Users/codar/Public/continuous_loop_to_kml.kml (you may need to do this after the following step if there are no existing Loop files yet). In the Refresh tab, set the view to refresh "periodically" with a refresh period of 1 second. -
On your processing computer, run SeaSonde Acquisition with Loop Diagnostics selected as usual. The Loop file that is generated will be detected automatically by this script and the GPS location will begin to be displayed in Google Earth.
