This project uses the Raspberry Pi Pico built-in USB port and an additional USB port created from the PIOs to make a MIDI data filter. You plug the PC into the Raspberry Pi Pico's MicroUSB port. You plug your MIDI keyboard or other MIDI device into the added USB Host port. The added USB Host port enumerates your MIDI device and then initializes the Pico's USB Device port so it looks to your PC just the same as the downstream USB device. Because the Pico now sits between your PC and your MIDI device, it can maniputlate the MIDI data stream to filter it as required.
This program demostrates translating some Mackie Control protocol button messages from the Arturia Keylab Essential 88 to other Mackie Control protocol button messages so that they work correctly with the Cubase DAW, and it demostrates Mackie Control fader pickup (because it seems Arturia Keylab Essential only supports pickup with HUI. See the FAQ). However, the code is structured so that it may be modified to perform just about any other filtering. That is, this code should serve as a reasonable starting point for other more sophisticated processing such as
- Removing MIDI clock or Activie Sensing messages
- Transposing notes
- Re-scaling note velocity
- Inserting controller messages or program change messages
- Changing MIDI channel for notes in a range (to perform keyboard split, for example).
- etc.
Any brand name stuff I mention in this README file is just documentation of what I did. This is not an advertisement. I don't get paid to do this.
This project would not have been possible without the code of the TinyUSB project and the Pico-PIO-USB project. Thank you to the developers for publishing the source on github.
If you find issues with this document or with the code, please report them on this project's github page.
Note that this project may not work well for if you operate it in a noisy environment. The Pico-PIO-USB PIO program does not implement a differential receiver. It only samples the USB D+ pin. Also, if your project requires USB-IF certification, this project won't work for you.
This project uses the RP2040's built-in USB port as the USB downstream MIDI device port (connects to a PC's USB host port or an upstream USB hub port). It also uses two GPIO pins, PIO0 and ARM core core1 of the RP2040 to create an upstream USB MIDI host port (connects to your MIDI keyboard or other MIDI device). The circuit board and the MIDI device get power from the PC host port or upstream USB hub. Because this project uses the RP2040's on-board USB for MIDI, it can't use it for stdio debug prints. This project uses UART0 for the stdio debug UART. If your project needs the debug UART pins for something else, please disable the stdio UART in the Cmake file.
The Pico board circuit described here has no current limiting, ESD protection, or other safeguards. Measure voltages carefully and please don't hook this to your expensive computer and MIDI equipment until you have done some testing with at least some basic test equipment. It uses GP0 and GP1 (Pico board pins 1 and 2) for USB host D+ and D-, and it uses pins GP16 (Pico Board pin 21) and GP17 (Pico Board pin 22) for the debug UART0 I/O. The LED is on RP2040 GP25.
If you don't want to make your own hardware from a Pico board and want a bit more robust circuit, you can configure this project to work with the Adafruit RP2040 Feather with Type A USB Host board. That board uses GP16 and GP17 for the USB Host, GP18 to enable the USB host power supply, and GP0 and GP1 for the UART interface. The LED is on GP13. Sadly, this board does not support the RP2040's Single Wire Debug interface. Skip to the Software section if you are using this board.
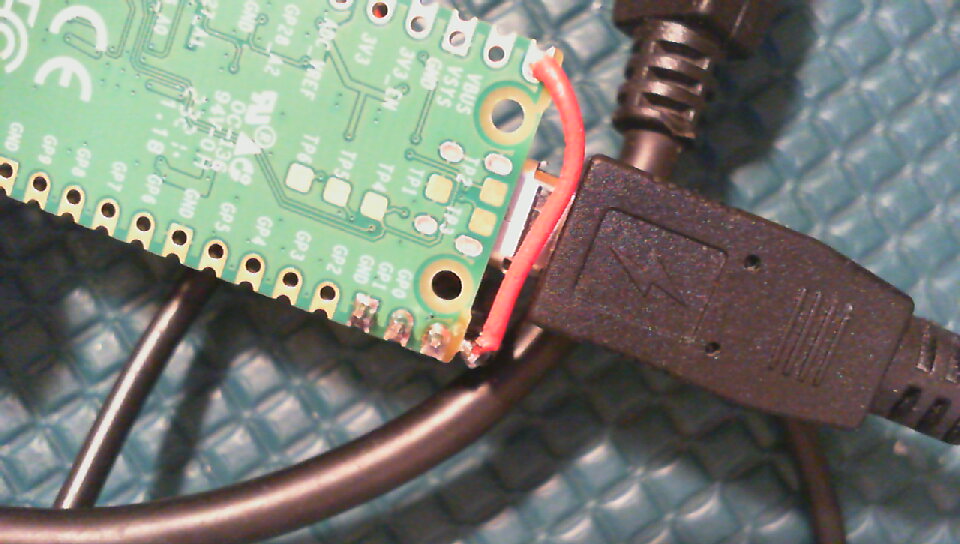
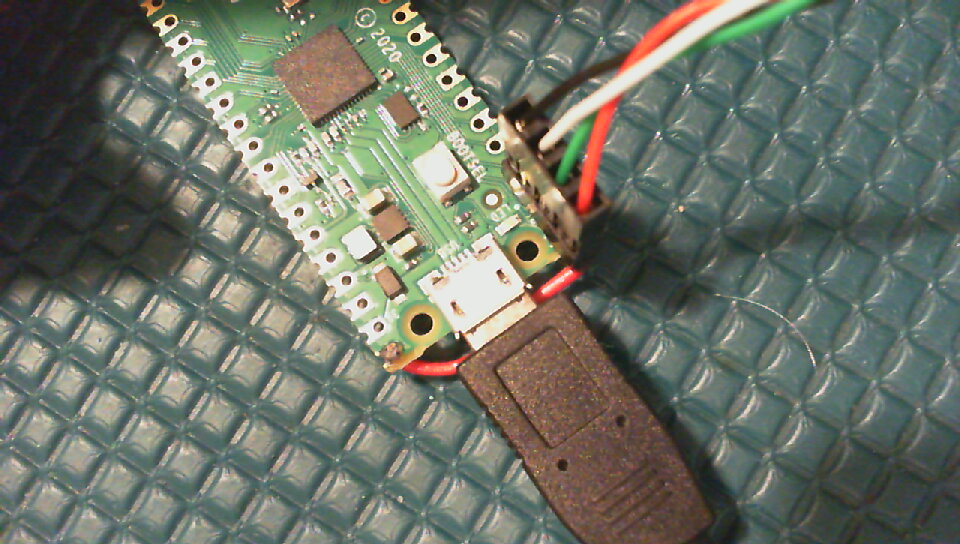
I used a Sparkfun CAB-10177 with the green and white wires (D+ and D- signals) swapped on the 4-pin female header connector. I soldered a 4-pin male header to pins 1-3 of the Pico board and left one of the pins hanging off the edge of the board. I soldered a wire from that pin hanging off the edge of the board to Pin 40 of the Pico board (VBus). I then plugged the 4-pin female header connector so the black wire (ground) connects to Pin 3 of the Pico board, the red wire connects to pin hanging off the edge of the Pico board, the green wire connects to pin 1 of the Pico board, and the white wire connects to pin 2 of the Pico board. If you want to add series termination resistors to D+ and D-, resistors between 22 and 33 ohms are probably close. I didn't bother and it seemed good enough for my testing.
Here is a photo of the bottom view wiring.
Here is a photo of the top view wiring.
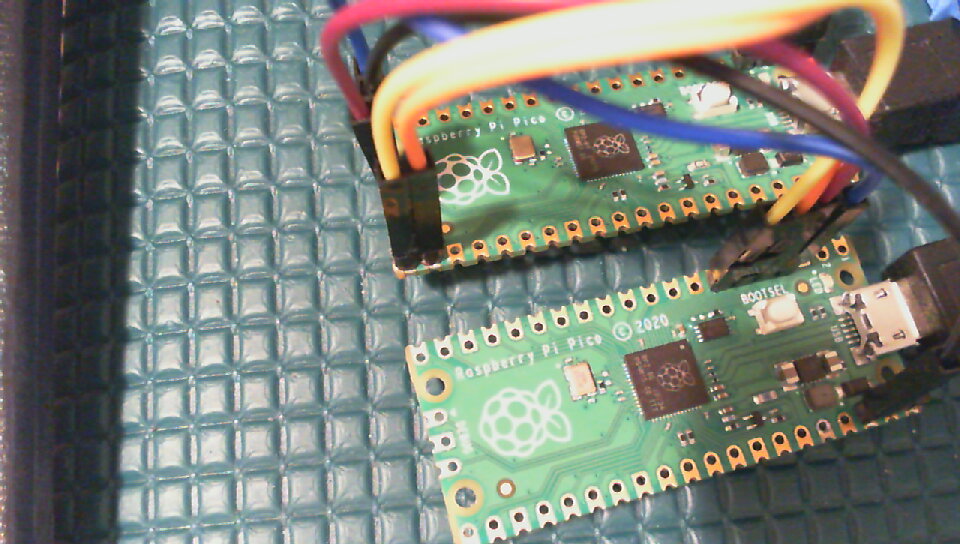
I like to use a Debugprobe (formerly called a picoprobe) (see Appendix A of the Getting Started with Raspberry Pi Pico guide) for code development in a Microsoft Visual Studio Code IDE. I soldered in a 3-pin male header on the 3 DEBUG pins at the bottom edge of the Pico board. I also soldered a 2-pin male header to pins 21 and 22 (GPIO pins GP16 and GP17) for the debug UART. I wired the GND, SWCLK and SWDIO as shown in the Appendix. However, because I used Pico board pins 1 and 2 for the USB host, I had to wire the debug UART to different pins. Connect the Pico A UART 1 Rx on Pico A pin 7 to Pico B UART0 Tx signal on Pico B Pin 21 (not 1). Connect the Pico A UART Tx on Pico A pin 6 and the Pico B UART0 Rx signal to target Pico board pin 22 (not 2).
Here is a photo of my complete setup with the Pico Probe attached. The Pico Probe board is the lower Pico board.
The USB host port hardware created from the PIO is not compliant with the USB specification, but it seems to work OK in my experimental setup. The specification deviations that I know about are:
- The D+ and D- pins are wired directly to the I/O pins and don't use termination resistors to match the 50 ohm impedance the USB spec recommends. You can try to do better by adding in-line resistors as described above.
- As mentioned, the USB port receiver is not differential. The software that decodes the USB signaling only uses the D+ signal to decode the NRZI signal.
- I wired in no current limiting for the USB host port Vbus supply. It relies on the current limiting from the upstream PC's USB host that supplies power to the Pico board.
Someone who has an oscilloscope capable of looking at the USB eye pattern should recommend correct resistor values to fix termination issues given you can't easily place resistors close to the pins on the RP2040 chip on an off-the-shelf Raspberry Pi Pico board.
This project relies on the Raspberry Pi Pico SDK, which includes the TinyUSB library. For best results, please use version 2.0 or later of the Pico SDK. This project can work with version 1.5.1 of the Pico SDK with some tweaks.
This project also relies on the TinyUSB library and usb_midi_host library.
As of this writing, the Pico SDK version 2.0 needs some adjustment
before it will work with this project. Follow first the instructions here. You can ignore the section called Building the usb_midi_host Library in Your Project.
Set your current directory to some project directory ${PROJECTS}
(e.g. ${HOME}/projects/pico) and then clone the pico-usb-midi-filter project:
cd ${PROJECTS}
git clone https://github.com/rppicomidi/pico-usb-midi-filter.git
TinyUSB has a few checks in it that break the ability of the USB Device driver to copy the USB descriptor from the device plugged to the USB host port. The project code will not build unless you apply these patches. Because this is special purpose, I suggest you apply the patches in a branch of the TinyUSB git submodule:
git checkout -b ep0sz-fn
git apply ${PROJECTS}/pico-usb-midi-filter/tinyusb_patches/0001-Allow-defining-CFG_TUD_ENDPOINT0_SIZE-as-a-function.patch
git add src/
git commit -m 'Allow defining CFG_TUD_ENDPOINT0_SIZE as a function'
Note: If you need to update TinyUSB in the future, follow these steps
from the ${PICO_SDK_PATH}/lib/tinyusb directory to undo the patch:
git checkout master
git branch -D ep0sz-fn
git pull
Then update TinyUSB and repeat the patching process above.
The command line build process is pretty common for most Pico projects. I have the pico-sdk installed in $HOME/projects/pico/pico-sdk.
export PICO_SDK_PATH=$HOME/projects/pico/pico-sdk/
cd [the parent directory where you cloned this project]/pico-usb-midi-filter
mkdir build
cd build
cmake ..
make
To make a version of code for the Adafruit RP2040 Feather With USB Type A Host board
or a circuit with similar GPIO pin usage, replace cmake .. with
cmake -DPICO_BOARD=adafruit_feather_rp2040_usb_host ..
If the board is a Pico board but you are wiring the USB Host pins like the Feather board, use
cmake -DPICO_BOARD=pico -DUSE_ADAFRUIT_FEATHER_RP2040_USBHOST=1 ..
This process should generate the file pico-usb-midi-filter\build\pico_usb_midi_filter.uf2.
Connect a USB cable to your PC. Do not connect it to your Pico board yet.
Hold the BOOTSEL button on your Pico board and plug the cable to your Pico board's microUSB
connector. The Pico should automount on your computer. Use the PC file manager to drag and
drop the pico-usb-midi-filter.uf2 file to the Pico "file system". The Pico should
automatically unmount when the file copy is complete.
If you are using the Raspberry Pi Pico VS Extension for VS Code, click
the Pico icon on the left toolbar and import this project. If you are using
an older setup, the hidden .vscode directory will configure the project for
VS Code if you use the file menu to open this project folder as long as the
environment variable PICO_SDK_PATH points to the pico-sdk directory and
the build toolchain is in your PATH environment variable.
To make a version of code for the Adafruit RP2040 Feather With USB Type A Host board,
set the PICO_BOARD CMake variable as described in the usb_midi_host README.
If the board is a Pico board but you are wiring the USB Host pins like the Feather board,
set -DPICO_BOARD=pico and add another item -DUSE_ADAFRUIT_FEATHER_RP2040_USBHOST=1
using the pre-0.15.2 Pico VS Code extension workflow.
Once you have successfully imported or opened this project, you should be able to build and run the code by following the instructions in the Getting started with Raspberry Pi Pico document.
Before messing with a DAW, plug your MIDI device to the Pico's added USB host port and, from the Linux command line, type
amidi -l
You should see something like this if you have the Arturia KeyLab Essential plugged to the Pico's added USB Host port:
Dir Device    Name
IO  hw:1,0,0  Arturia KeyLab Essential 88 MID
IO  hw:1,0,1  Arturia KeyLab Essential 88 DAW
You will need to use the appriate Mac or PC Tools to run low level tests using those computers as hosts.
This program should just pass MIDI data transparently between the PC and whatever other MIDI device you have connected. If you plug an Arturia Keylab Essential keyboard to the Pico's added USB host port, and set the Controller Map to DAW mode, you can see the MIDI filter in action.
If you have an Arturia Keylab Essential, make sure you set the keyboard Map Setup to DAW mode and you use Arturia Midi Control Center software to set the Controller Map DAW Mode to Mackie Control and the DAW Fader mode to Jump. The Mackie Control commands will come out of virtual MIDI cable 1, which is called something like MIDIIN2 and MIDIOUT2 in Windows and DAW in Linux or Mac.
If you want to test it with Cubase, follow the instructions for setting up Cubase to work with Mackie control here. With this code, the Save, Undo and Punch buttons work as the button labels suggest. The Metro button functions as the marker add button. And the faders will have soft pickup instead of jumping the first time you move them.
I created the filter I needed for my project. However, you may need
your own filter. The API for your filter is in midi_filter.h. Create a new filter source file (e.g., mykeyboard_split_filter.c)
and make sure you implement all functions in the midi_filter.h.
Remove keylab_essential_mc_filter.c from CMakeLists.txt and
replace it with the name of your filter source file. Rebuild
the project, and it all should just work.


