The Iris Ice Project is a build of the Iris keyboard with custom made case composed of a 3D printed switch top plate, a translucent laser cut acrylic middle plate and a brushed still bottom plate.
Backlight LEDs are mounted reversed to create a cold white underglow. The TRRS cable is also custom made to fit the right size. Keycaps are from the SA "Ice Cap" keyset from signature plastic.
Here is the result:

In this repository, you will find all the material needed to reproduce this build.
Here is the list of material you'll need for this build:
- The Iris PCB kit with LED support components (no LED strip underglow)
- 100 white LEDs (pay attention to the color select, default is orange)
- 2 Elite-C (or pro-micro)
- Peel-A-Way sockets (optional)
- SA "Ice Cap" keyset
- 68 switches of your choice (I used jailed, lubed MX blue)
- A black with sheath TRRS cable
- 2 TRRS plugs
- Sand paper (I use 120 and 220 grits)
- Primer spray
- Carbon black spray paint
- Matte finish spray
- M2 x 3mm insert nuts
- M2 x 8mm flat head cross countersunk screws
- 55% translucent acrylic sheet
This build also assume that you have:
- A solder iron
- A 3D printer (or a way to order printing jobs)
- A laser cutter (or a way to order a cutting job)
- The bottom metal plate is ordered on LaserBoost
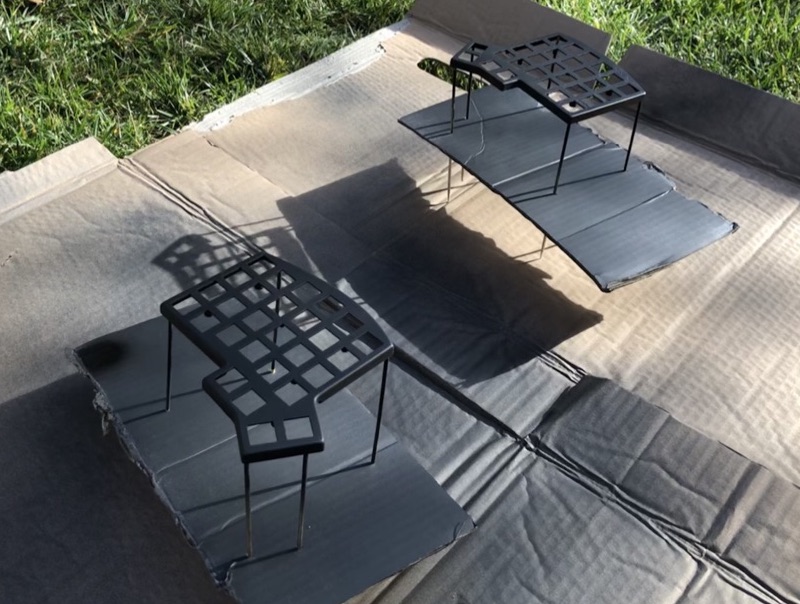
- Print the top-left.stl and top-right.stl.
- Sand each piece to remove the printing lines and get a smooth surface
- Apply 2–3 layers of primer
- Apply 3 layers of paint
- Apply 2-3 layers of matte finish
- Using the pointy tip of a solder iron, insert 5 M2 inserts into the screw holes of each case
- Insert the switches


- Follow the Iris Build Guide
- [Optional] Use peel-a-way sockets to solder the controller
- When it comes to the LEDs, solder them on the bottom side of the PCB, before inserting the switches. It is better to fold the led 90° so it can fit better in the case. You may want to fold them on the opposite direction as on the picture below though
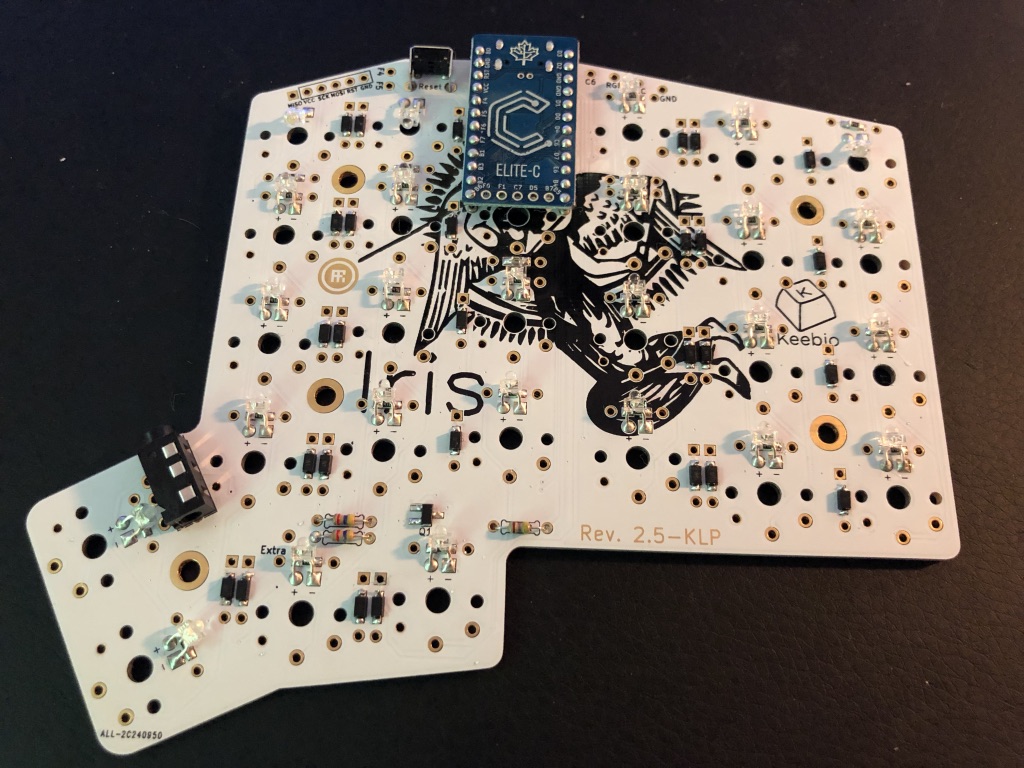
- Align the PCB with the top layer switches and solder

Cut 2 pieces in the acrylic using middle.dxf. The kerf is assumed to be 0.09, make sure to edit it if your laser cutter requires a different setup.
Go on LaserBoost and upload the [bottom.dxf] file. Select "Stainless Steel", "304 Stainless Steel Shiny Finish", 3mm. In the "special request for this part" text area, write:
Please brush the edges. Add countersink to all the holes in order to hide a GB819-M2. Make the same piece twice but in mirror (countersinks on opposite side).

Cut the TRRS cable at the desired length, and solder the plugs.