Using Obsidian Git for the tech unfamiliar (minimal command line usage)
Creating an account
Make an account at github.com. Create an empty repository.
Software installation
Install git for windows.
When installing, make sure to enable the command line PATH, otherwise obsidian git has no means of accessing and automating the backup for you.
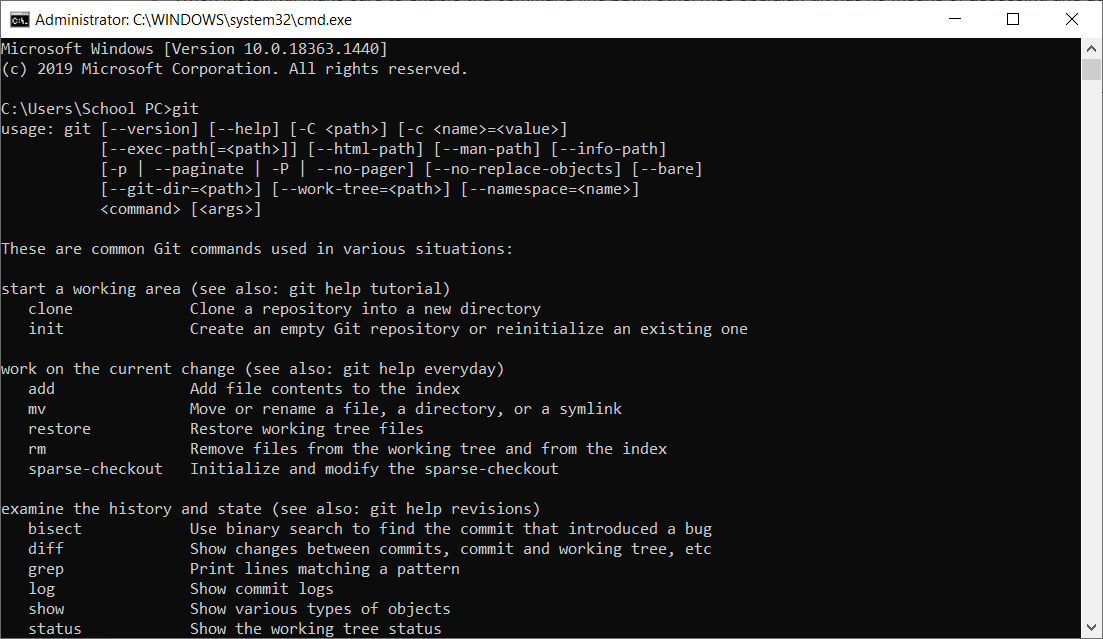
Check if git was installed successfully by opening the command line interface [windows+r , cmd, enter ] and inputting git and pressing enter.
If successful, it should output something like this.
If this doesn't appear, refer to fixing path.
Afterwards, install github desktop. We'll be using github desktop to set up the repository as well as manage credentials.
Cloning the repository and setting up your credentials
Once in github desktop, select File > Options > Account, and log in to your github account.
Now, press File > Clone Repository, and select the empty repository you just created. Where you clone this repository doesn't matter, as long as you remember its location.
In the top toolbar once again, select Repository > Open in Command Prompt. Paste git config --global credential.helper wincred and press enter. That should set up your credentials.
Viewing hidden files
In explorer:
-
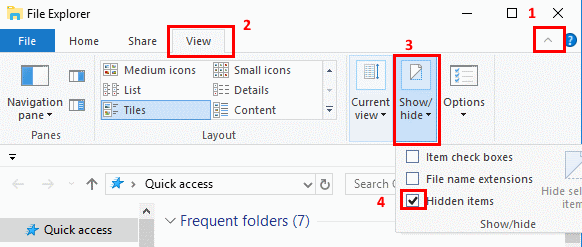
Select View > Options > Change folder and search options.
-
Select the View tab and, in Advanced settings, select Show hidden files, folders, and drives and OK.
Making your vault a repository
Open the location of the cloned repository and select the formerly hidden .git folder. Cut this folder and paste it into your vault's root directory.
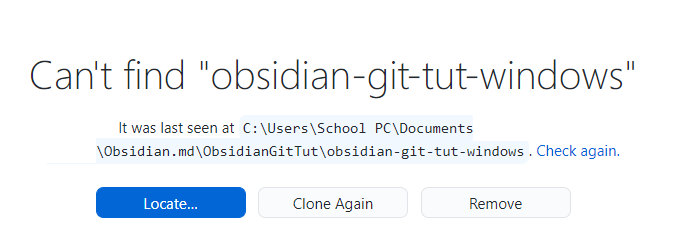
Open github desktop. It should normally have a notification informing you it can no longer find your repository.
Press locate, and point it to the location of your vault, which should now also house the .git folder.
Github desktop will have registered a vast number of changes made to your repository. This is perfectly normal. In the bottom-left corner, fill in the summary and description and then press commit.
After committing, press push origin. This button may also read Publish repository to Github.
Installing the Obsidian Git plugin
Disable safe mode in the community plugins tab if you haven't already. Browse the community plugins and search for Obsidian Git. Install and enable it. Open the command palette (ctrl+p) and type git, and select commit and push all changes. If this tutorial was followed successfully, you should have received a notification that you just successfully committed and pushed files.
In the obsidian git plugin options, you can set a backup interval, to determine how often automatic backups are made. You can still use the above method to guarantee that important changes are definitely pushed to github however.
If you're accessing your vault through git across multiple devices, the github desktop application can be useful to resolve conflicts, but is otherwise no longer needed, as the obsidian git plugin will have automated the committing and pushing process.


