This tutorial is being updated continually and is subject to change. If you see anything missing, use the Edit on GitHub button at the top right of every page to suggest improvements.
Note: at the moment we use Game and Experiment almost interchangeably. Soon, this will be fixed.
Basic Tutorial: Guess the Correlation Game
Empirica is an open-source JavaScript framework for running multiplayer interactive experiments and games in the browser. This tutorial walks you through building a simple, but a fully functional experiment that demonstrates many of the core features of Empirica.
This will guide you step by step, from installing and running a local instance to deploying and testing your first Empirica experiment in the real world. For this tutorial, we will build a multiplayer and interactive 'Guess the Correlation' game. This is similar to the experiment we used for our paper: The Wisdom of the Network: How Adaptive Networks Promote Collective Intelligence
The intended audience for this tutorial is someone who:
-
Is familiar with experiment design and understanding what we mean by random assignment, treatments, independent variables.
-
Knows the basics of the JavaScript and React. If you have never used React before, that's fine -- it's quite easy to learn. Before continuing with this tutorial, complete the Intro To React tutorial.
Although Empirica's backend was build using the Meteor framework, you will only need to use pure JavaScript to develop the backend of your experiment. This will become clearer later on in the tutorial.
The design philosophy of Empirica is to handle for you all the tedious logistics and allowing you to get straight to what interests you, whatever that may be. So it was built with the experiment developer in mind. Your time should not be spent in implementing reinventing the wheel every time you try to experiment with your ideas.
All the code for the project that you will build during the tutorial can be found [here]. If you have questions, comments, or suggestions, please add a Github issue to that repo.
Running the default app
Installation and running a local instance
First of all, You will need Meteor, for which you can find installation instruction here.
Then, you will need to clone Empirica's default app that comes bundled when you clone or fork the repository. We reccomend forking by going to the Empirica repo and then from the top-right corner of the page, click Fork. If you want to directly clone the repo then run this command from the terminal.
git clone https://github.com/empiricaly/empirica.git
Then cd empirica and run meteor npm install to update local npm dependencies. Now you can start the
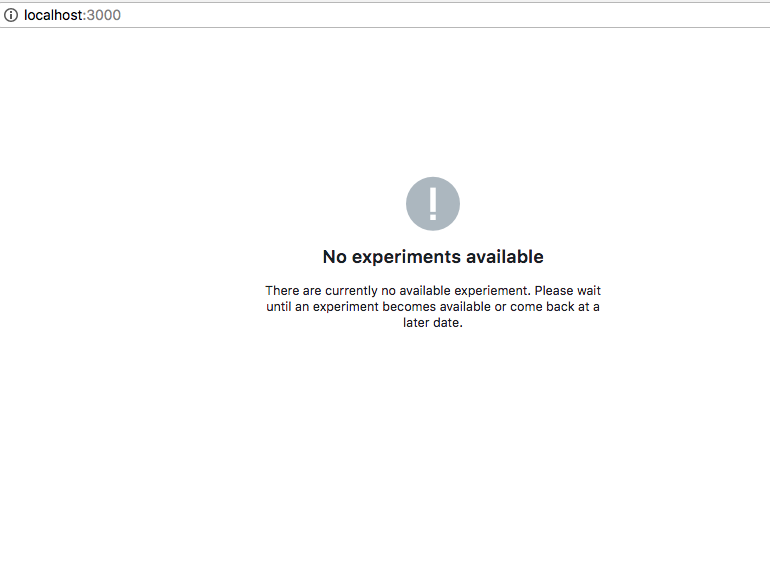
local webserver by running meteor. Then open a browser and navigate to http://localhost:3000/ to verify that all is working properly. You should see the following:
The default path / is what will the experiment participant see. In this case, if a participant would try to join your experiment now, they will be shown a message indicating that there are no available experiments.
Let's change that. There is another path where the experiment designer can configure and monitor the experiment. Navigate to http://localhost:3000/admin. You will be prompted to enter a username and password. The login credentials can be found in /import/core/startup/server/bootstrap.js.
We highly recommend that you change the username and password in the bootstrap.js' file and then reset your app using meteor reset' from the terminal (you have to do meteor reset when you are inside the empirica/ directory). After you are logged in, you should see the following:
setting up your experiment configurations
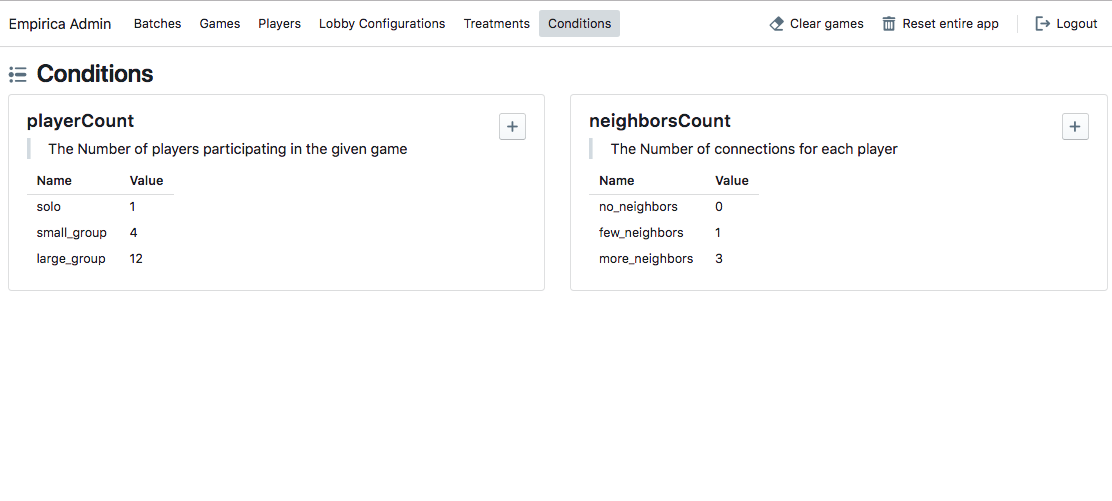
Now go to conditions from the navigation bar. A condition (also called a factor, a dimension, or an independent variable) is a variable that will be manipulated in the experiment. Empirica requires having the number of players as a mandatory condition. This is how many people will belong to the same instance of the game. All other conditions are experiment specific.
For now, let's try different values for the playerCount. 1 player (i.e., solo game) to a small group (3 players) to a larger group (12 players). We can add these values by clicking on the + next to the playerCount condition. You should have something like this (it can be different labels & values).
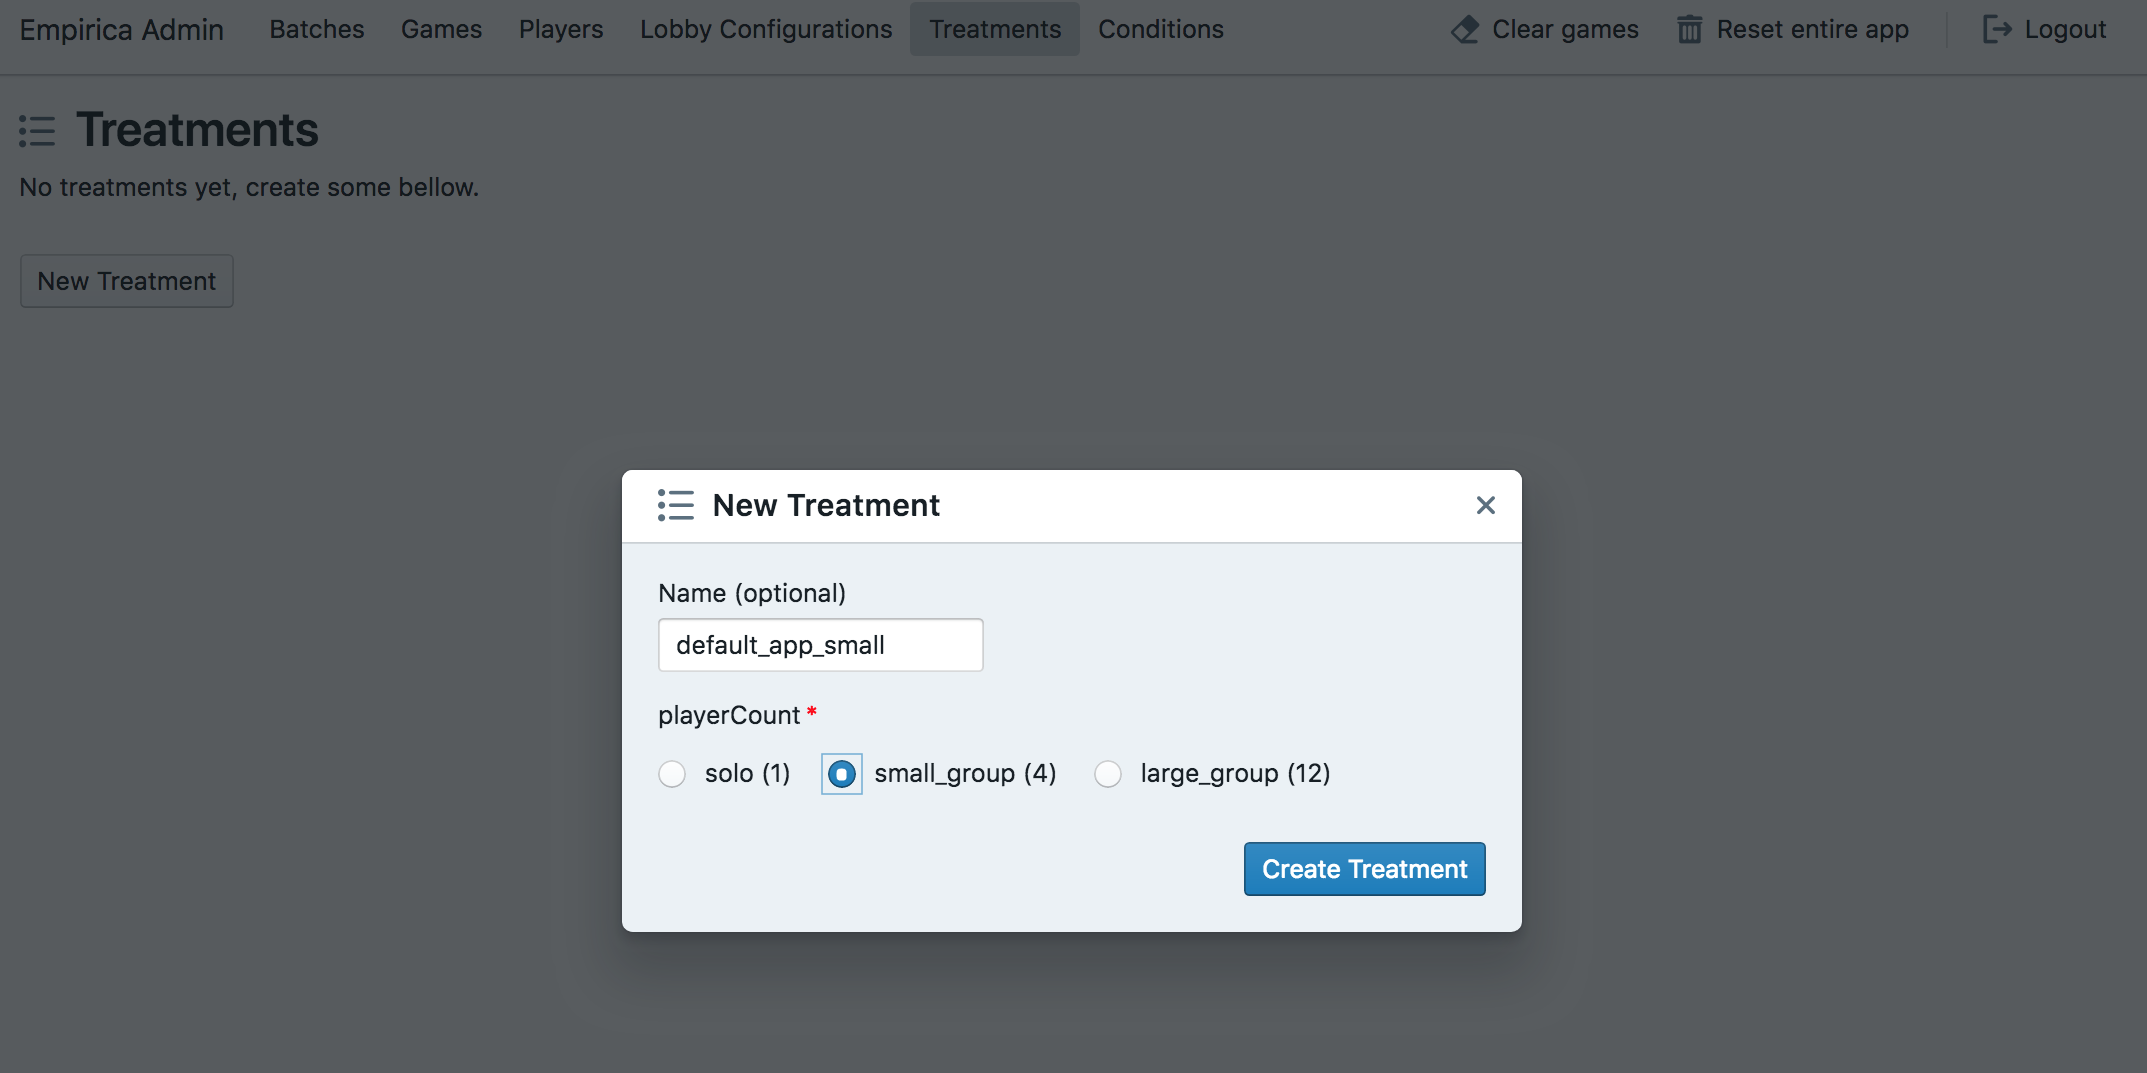
Now go to Treatments from the navigation bar. A treatment is a combination of conditions. At the moment, we have only one condition in our design, so there is not much to do here. Typically, as we will see later in this tutorial, you will have more than one condition in your experiment (say, the number of following). For now, let's add two treatments (e.g., 1 solo and then add another treatment with small_group).
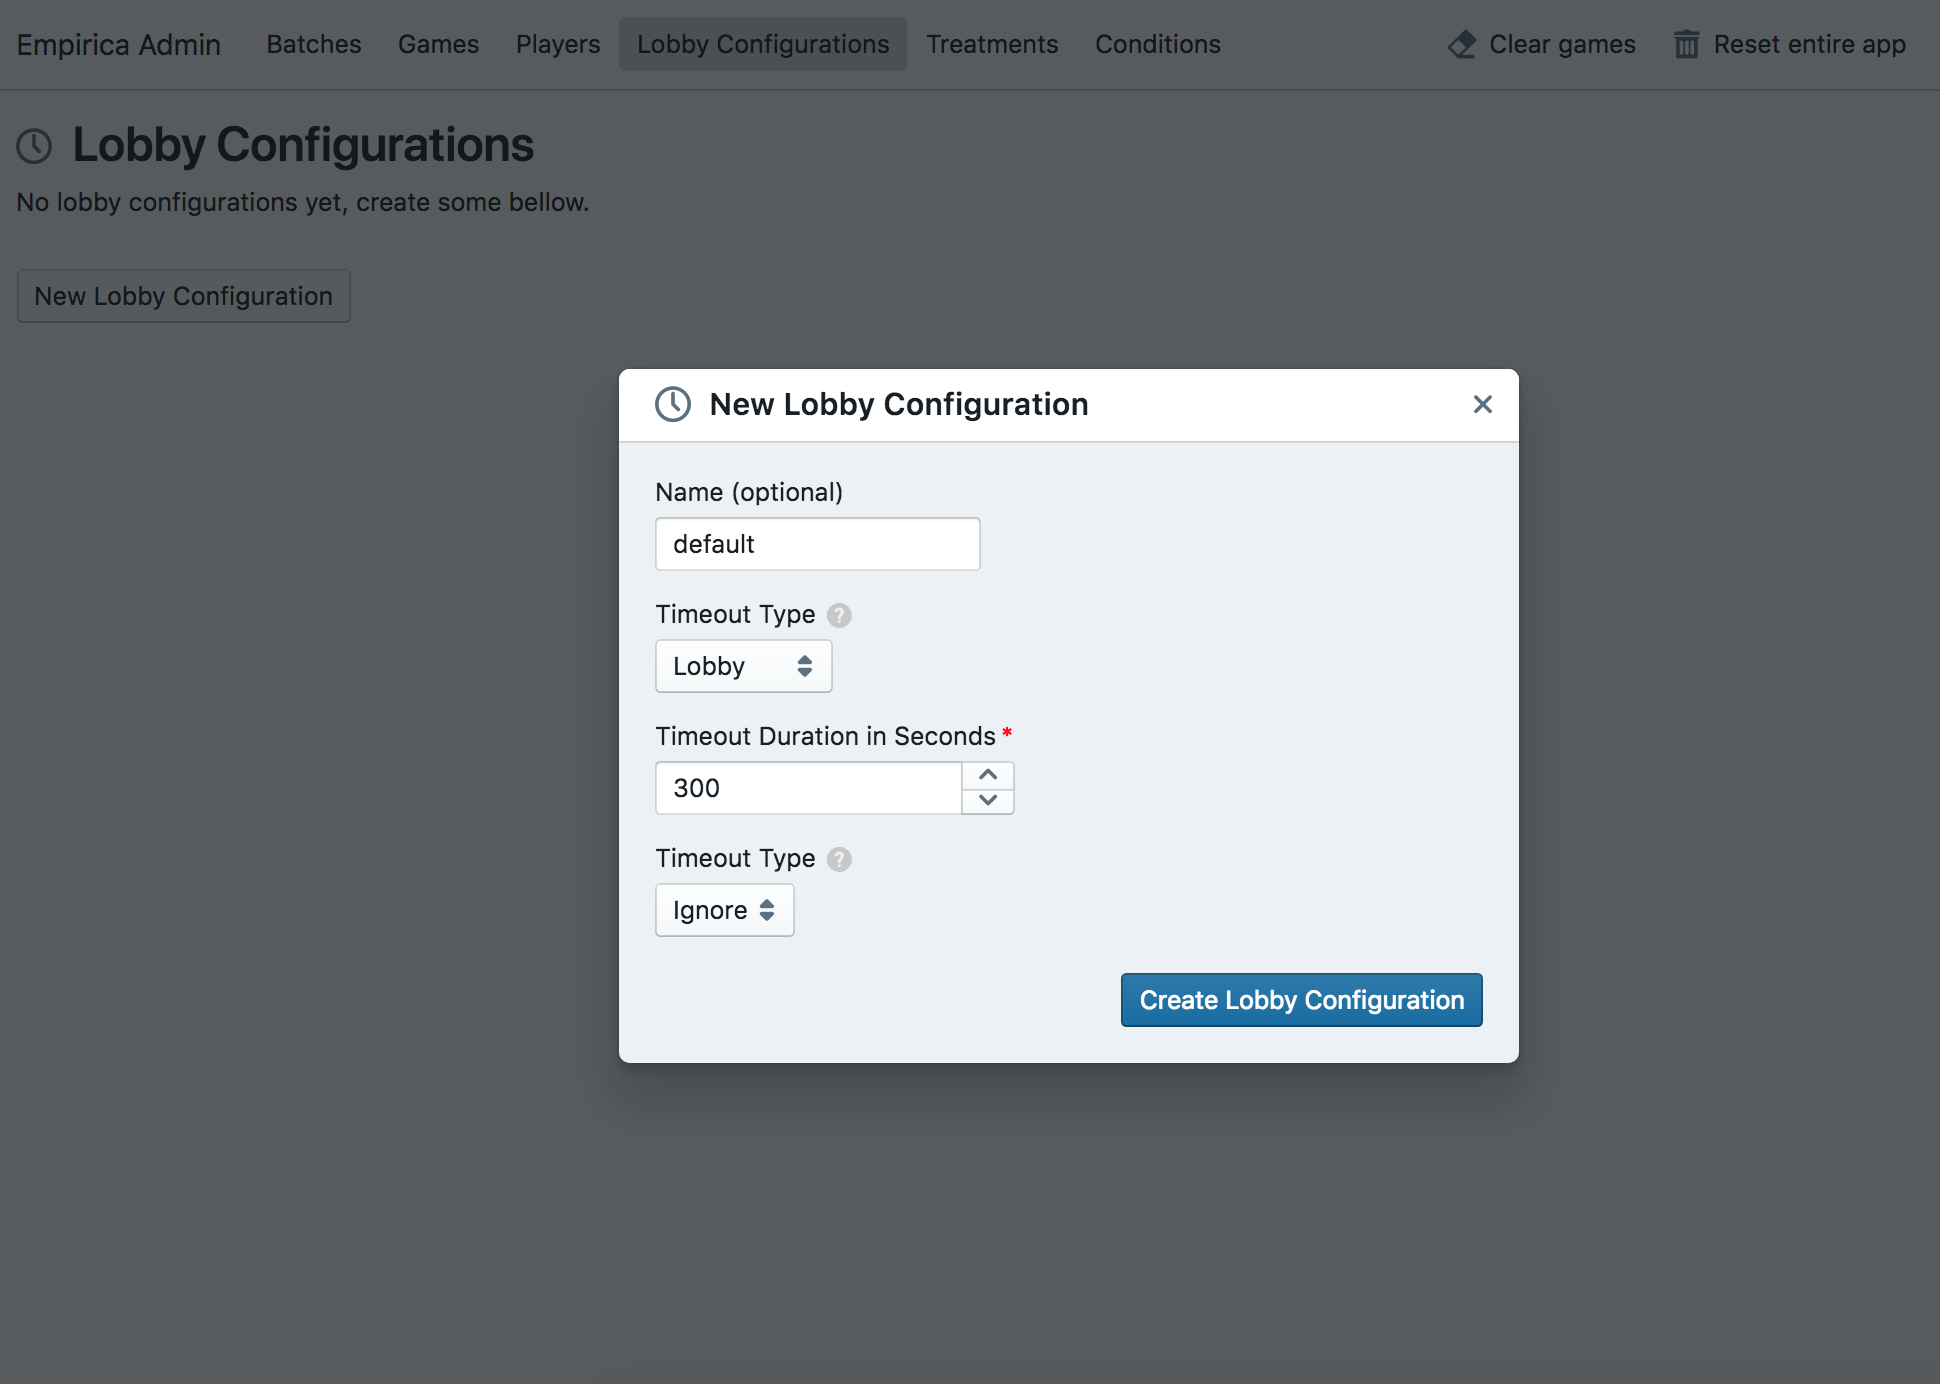
Now go to Lobby Configuration from the navigation bar. A lobby has the purpose of monitoring how long players have been waiting (within the same instance or game) and starting the actual game experience when certain criteria are met. These criteria include:
- A certain number of players is simultaneously connected (i.e., the
PlayerCountis achieved). - The maximum waiting time has expired (canceling the game, starting the game with groups of any size, or adding artificial players).
You can choose any lobby configurations at this time. We will go into the details and implications of different choices in the documentation.
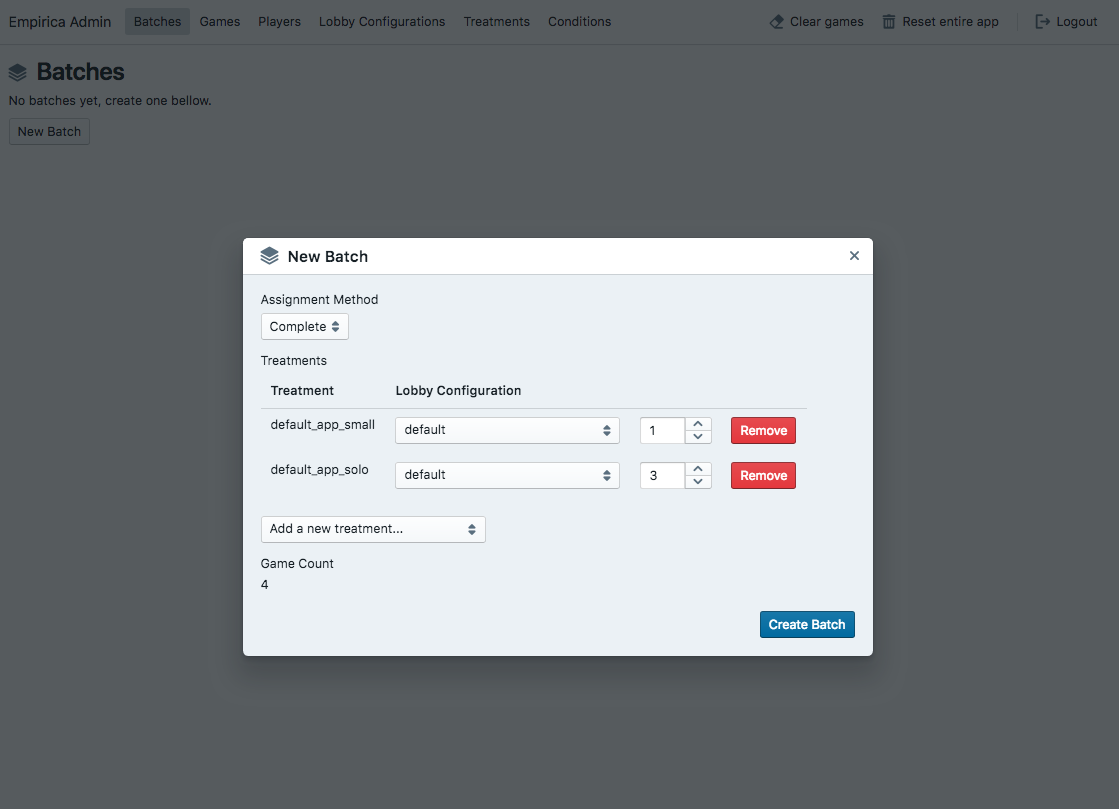
We are almost done configuring our experiment. Now go to the Batches from the navigation bar. A batch is a group of games. The batch defines what treatments will be active, how many of each, and the randomization method. Once all of the games in a batch are consumed (i.e., all games in the batch have started), anyone that goes to the experiment link, will be shown the message 'No experiments available.'
Let's choose the assignment method complete, which allows you to decide how many games of each treatment do you want. This is unlike the simple assignment where you only specify the total number of games, and Empirica will flip a coin for each player as they join. In the simple assignment case you are not guaranteed the same number of games across treatments. More about this in the randomization section in the documentation (coming soon!).
Running the default app with your configuration
Now the batch is created. All you have to do is to click the start button, and the games in it will be activated. This means that the main / path will be activated and participants will see the consent form.
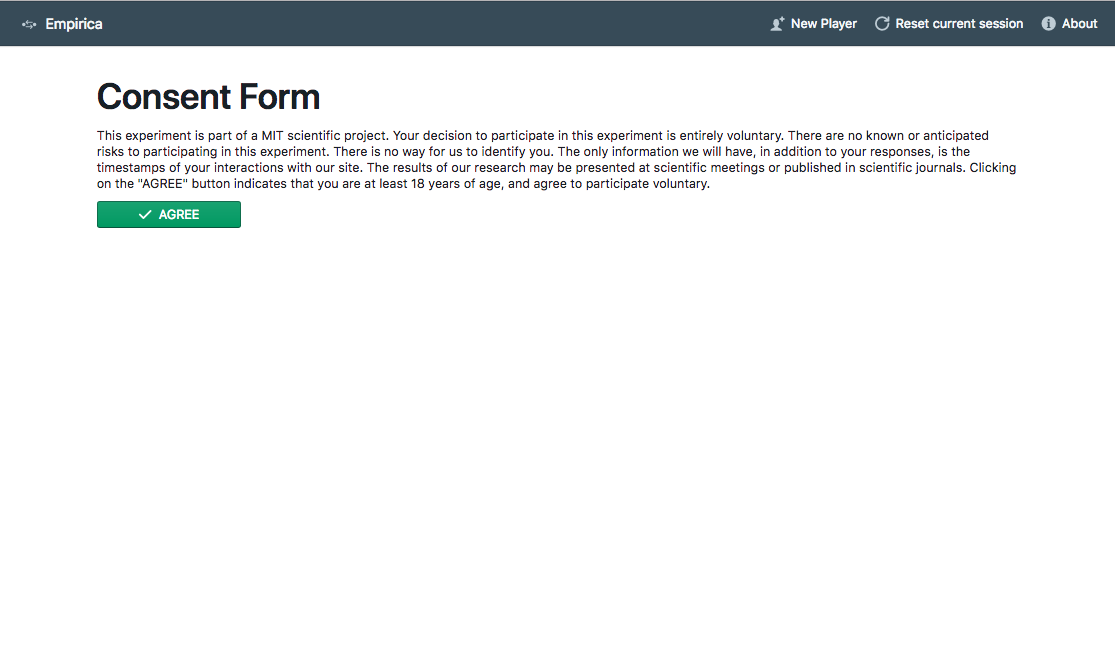
Note that in the header there are experiment designer helpers. They only appear in development. Once you deploy the actual experiment. They will disappear. For example, clicking on New Player will open another tab in the same browser, but Empirica will treat it as a new player. This will allow you to easy 'pretend' to be more than one player when designing your game (e.g., handy to test interactions, etc).
Well, just go ahead and try playing few games, go to the admin page and play around a bit. Then, we will go to transform this default dummy app into an actual more useful experiment!
Simple guess the correlation game
In our paper The Wisdom of the Network, we developed a web-based experiment that allowed us to identify the role of dynamic networks in fostering an adaptive "wisdom of crowds". Participants (n = 719) from Amazon Mechanical Turk. Participants engaged in a sequence of 20 estimation tasks. Each task consisted of estimating the correlation of a scatter plot, and monetary prizes were awarded in proportion to performance. Participants were randomly allocated to groups of 12 (n = 60 groups), and each group was randomized to one of three treatment conditions: a solo treatment, where each individual solved the sequence of tasks in isolation; a static treatment, in which participants were randomly placed in static communication networks; and a dynamic treatment, in which participants at each round were allowed to select up to three neighbors to 3 communicate with.
In this tutorial, we will stick to the first two treatments (solo players, and groups in static communication networks). However, for the second treatment, we will add another condition that controls how many other neighbors they can communicate with. A more elaborate and advanced version of the game can be found [here].
The file structure
Empirica was built with the experiment developer in mind. The core of Empirica has been separated from the experiment. The folder structure reflects this organization method. While from the admin dashboard we were allowed to specify parameters about the experiment without the need for any code to be written, including things like: conditions (independent variables), treatments (combination of values of the conditions) the lobby logic, randomization procedure, and participants' authorization rules.
However, to develop the actual experience of the game, you will only be interested in a couple of folders:
imports/experiment: Here the code for the actual experience using four objects (i.e.,game,round,stage,player) with helper functions that make it super easy to control the experience of the participantsexperiment/client: Everything about the interface./client/game: The component of the interface. By default, we provide examples of what can go there for typical experiments./client/intro: Things that happen before the actual experience: things like the consent form, instructions, and attention checks (i.e., quizzes)./client/outro: The exit survey and potentially a thank you message./client/index.js: Loading the client files. In most cases, you will not need to use it, but it might be a good idea to have a look at it./client/style.less: The styling of the experiment interface. You can change this with anything you like.
experiment/server: The server-side stuff using similar four objects (i.e., game, round, stage, player).server/game: the files that contain the logic of the gameconditions.js: The conditions that you saw in the admin UI. This will be fully controlled from the interface in future versions.init.js: Initiating the game. This returns an array of rounds and players.callbacks.js: What happens at the beginning and end of the rounds and between the stages.
bots.js: specifying the behavior of artificial bots. We will not use this in this tutorial.index.js: Loading the server files. In most cases, you will not need to use it, but it might be a good idea to have a look at it.
All other folders contain core Empirica code, which you should not need to change in the vast majority of cases.
Adding a condition: number of neighbors
Now, let's first add the condition that controls the number of neighbors when in the group condition. To do this, go to imports/experiment/server/conditions.js and add the neighborsCount condition, so you have the following code:
import SimpleSchema from "simpl-schema";

export const conditions = {
  playerCount: {
    description: "The Number of players participating in the given game",
    type: SimpleSchema.Integer,
    min: 1,
    max: 100
  },
  neighborsCount: {
    description: "The Number of connections for each player",
    type: SimpleSchema.Integer,
    min: 0,
    max: 12,
    optional: false
  },
};
Now, if you navigate to http://localhost:3000/admin/conditions you will see that there is an additional condition called neighborsCount. Let's add value to it, so we have the following three values (or levels):
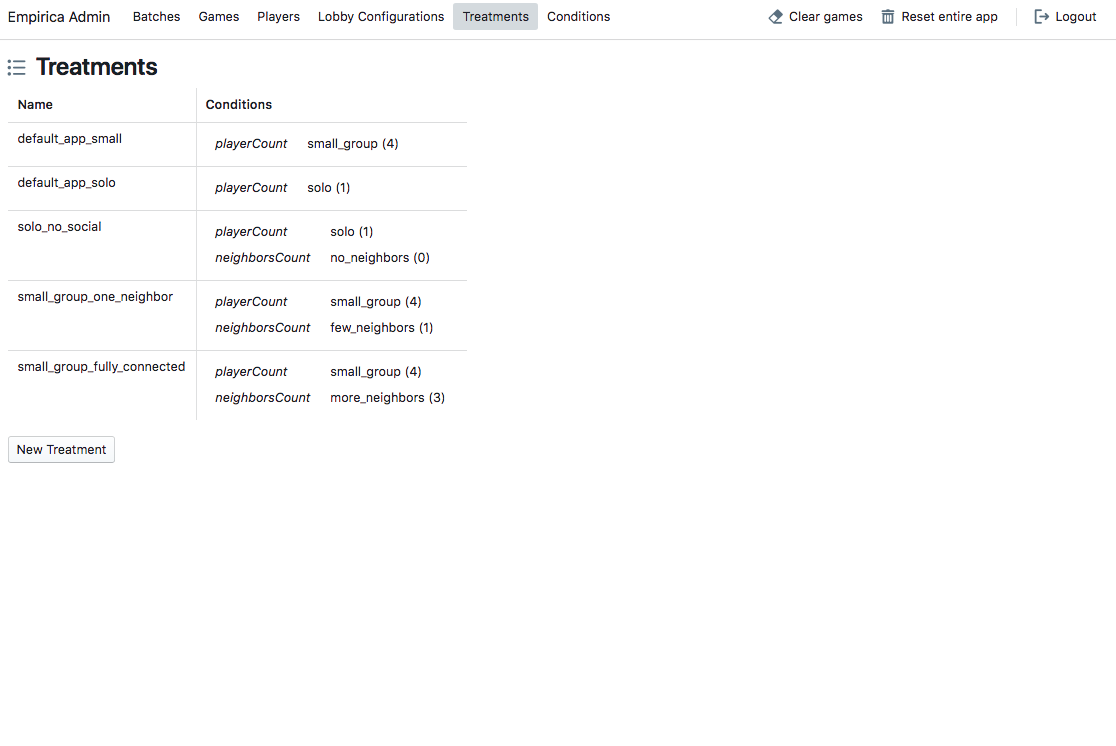
Now, when we go to the Treatments in the admin navigation part, we can see how treatments actually work when we have more than one condition. Let's add the three treatments that we are interested in studying:
- solo players (i.e., group of size 1) with no neighbors
- group of size 4 with 1 neighbor
- group of size 4 with 3 neighbors (fully connected network)
You should have something like this:
As you can see, you can easily cross your conditions (i.e., two conditions are crossed if every level of one occurs with every level of the other in the experiment) or nest nest your conditions (i.e., A condition "A" is nested within another condition "B" if the levels or values of "A" are different for every level or value of "B"). Note: in the future version of Empirica, we will probably rename conditions to factors as recommended by our advisors.
Adding the task information
Now, let's add some task data. In our case, the task is the correlation plots. So, in imports/experiment/server/constants.js let's add the following task information:
export const taskData = [
  {
    _id: 0,
    correctAnswer: 0.09,
    path: "/experiment/tasks/0.png"
  },
  {
    _id: 1,
    correctAnswer: 0.78,
    path: "/experiment/tasks/1.png"
  },
  {
    _id: 2,
    correctAnswer: 0.91,
    path: "/experiment/tasks/2.png"
  },
  {
    _id: 3,
    correctAnswer: 0.47,
    path: "/experiment/tasks/3.png"
  },
  {
    _id: 4,
    correctAnswer: 0.08,
    path: "/experiment/tasks/4.png"
  }
];
and let's add the images of the plots (you can download them from here and don't forget to unzip) by placing the /task folder in public/experiment/so now you have public/experiment/tasks/
Initiating the game
In experiment/server/game/init.js we can make the players more interesting by adding more attributes to them. Let's change score to comulativeScore, and add random neibhorsIds only when the treatment contains a social condition:
  init(treatment, players) {
    const playerIds = _.pluck(players, "_id");
    players.forEach((player, i) => {
      const alterIds = _.sample(
        _.without(playerIds, player._id),
        treatment.altersCount
      );
      player.set("avatar", `/avatars/jdenticon/${player._id}`);
      player.set("difficulty", difficulties[i % 3]); //equal number of difficulties
      player.set("alterIds", alterIds);
      player.set("cumulativeScore", 0);
    });
    .....
So, in the guess the correlation game for each round (i.e., for each task or scatter plot) there are three stages:
- stage one (response): the participants make a guess about the true correlation independently
- stage two (interactive): in the case of social interactions, then they can observe the guesses of their neighbors.
- stage three (outcome): they see the outcome, which includes the correct score, and the scores of the neighbors.
So let's update the init.js file to reflect those changes:
    //only add the "interactive" stage to the round if the game has social interaction
    if (treatment.neighborsCount > 0) {
      stages.push({
        name: "interactive",
        displayName: "Interactive Response",
        durationInSeconds: 30
      });
    }

    //always add the "outcome" stage to the round
    stages.push({
      name: "outcome",
      displayName: "Round Outcome",
      durationInSeconds: 15
    });

    rounds.push({
      stages,
      task: taskData[i]
    });
  });
The callbacks (what to do between rounds and stages)
So, we need to compute the score for each player after their initial guess and after their interactive guess. So in experiment/server/game/callbacks.js let's update the function onStageEnd to the following:
export const onStageEnd = (game, round, stage, players) => {
  const isSocial = game.treatment.neighborsCount > 0;
  const isResponseStage = stage.name === "response";
  const isInteractiveStage = stage.name === "interactive";

  if ((isResponseStage && !isSocial) || (isInteractiveStage && isSocial)) {
    const correctAnswer = round.get("task").correctAnswer; //the correct answer for this round
    //update the score for each player
    players.forEach(player => {
      const guess = player.round.get("guess");
      // If no guess given, score is 0
      const score = !guess
        ? 0
        : Math.round((1 - Math.abs(correctAnswer - guess)) * 100);
      player.round.set("score", score);
    });
  }
};
After the round ends, we want to add the round score to the cumulative score of the player. So, let's update onRoundEnd(.) to the following:
export const onRoundEnd = (game, round, players) => {
  //update the cumulative Score for everyone after the round
  players.forEach(player => {
    const currentScore = player.get("cumulativeScore");
    const roundScore = player.round.get("score");
    player.set("cumulativeScore", Math.round(currentScore + roundScore));
  });
};
Notice that we save the cumulativeScore at the player level, while we save the score at the round level. Therefore, in our database, we will have a score per round per player, and one cumulativeScore per player per game.
Now, we are done with everything we need with the backend, we move to the frontend to give the users the experience they expect.
Social Exposure only when there is social interaction
Now that we have three (or two in case of the solo players) stages, we should control what the player sees in each stage. So, to show the social exposure only during the interactive stage, we need to update the code in /imports/experiment/client/game/Round.jsx to reflect that:
export default class Round extends React.Component {
  render() {
    const { round, stage, player, game } = this.props;

    return (
      <div className="round">
        <div className="content">
          <PlayerProfile player={player} stage={stage} game={game} />
          <Task round={round} stage={stage} player={player} game={game} />
          {game.treatment.neighborsCount > 0 && stage.name === "interactive" ? (
            <SocialExposure stage={stage} player={player} game={game} />
          ) : null}{" "}
        </div>
      </div>
    );
  }
}
Displaying the task
We need to display the correct task (i.e., correlation plot) in each round. So let's go to /imports/experiment/client/game/TaskStimulus.jsx and ensure that we display the task path from the round data. To make things pretty, we will make the scatter plot transparent during the round outcome stage
export default class TaskStimulus extends React.Component {
  render() {
    const { round, stage } = this.props;

    //make the image transparent if it is round outcome
    const classes = ["task-image"];
    if (stage.name === "outcome") {
      classes.push("transparent");
    }

    const taskPath = round.get("task").path; //getting the task data

    return (
      <div className="task-stimulus">
        <img src={taskPath} className={classes.join(" ")} />
      </div>
    );
  }
}
Customizing the task response
In the guess the correlation game, the slider is the main way of inputting data from the player. However, we want to show the correct answer and disable the slider during the round outcome stage. While this block of code might look involved, it is not! Just small changes to the current default slider such that it looks like this:
import { Slider } from "@blueprintjs/core";
import React from "react";

export default class TaskResponse extends React.Component {
  handleChange = num => {
    const { stage, player } = this.props;
    if (stage.name !== "outcome") {
      const guess = Math.round(num * 100) / 100;
      //we want to store the guess at the round and stage level
      //this is so we can compare their final answer with their initial answer in the analysis
      player.stage.set("guess", guess);
      player.round.set("guess", guess);
    }
  };

  handleSubmit = event => {
    event.preventDefault();
    this.props.player.stage.submit();
  };


  renderSlider(player, isOutcome) {
    const value = player.round.get("guess");
    return (
      <div className={`pt-form-content ${value === undefined ? "empty" : ""}`}>
        <Slider
          min={0}
          max={1}
          stepSize={0.01}
          labelStepSize={0.25}
          onChange={this.handleChange}
          value={value}
          showTrackFill={false}
          disabled={isOutcome} //disable the slider when it is round outcome
        />
      </div>
    );
  }

  renderFeedback(player, round) {
    //show the final guess, the correct answer, and the score increment
    return (
      <table className="pt-table  pt-html-table pt-html-table-bordered">
        <thead>
          <tr>
            <th>Your guess</th>
            <th>Actual correlation</th>
            <th>Score increment</th>
          </tr>
        </thead>
        <tbody>
          <tr>
            <td align="center">
              {player.round.get("guess") || "No guess given"}
            </td>
            <td>{round.get("task").correctAnswer}</td>
            <td>+{player.round.get("score")}</td>
          </tr>
        </tbody>
      </table>
    );
  }

  render() {
    const { stage, round, player } = this.props;

    //if the player already submitted, don't show the slider or submit button
    if (player.stage.submitted) {
      return (
        <div className="task-response">
          <div className="pt-callout pt-icon-automatic-updates">
            <h5>Waiting on other players...</h5>
            Please wait until all players are ready
          </div>
        </div>
      );
    }

    const isOutcome = stage.name === "outcome";

    return (
      <div className="task-response">
        <form onSubmit={this.handleSubmit}>
          <div className="pt-form-group">
            {this.renderSlider(player, isOutcome)}
          </div>

          {isOutcome ? this.renderFeedback(player, round) : null}

          <div className="pt-form-group">
            <button type="submit" className="pt-button pt-icon-tick pt-large">
              {isOutcome ? "Next" : "Submit"}
            </button>
          </div>
        </form>
      </div>
    );
  }
}
I will improve the TaskStimulus.js part of the tutorial soon to highlight only the changes.
Social Exposure
During the interactive stage, we show the player his neighbors answers in realtime. While this works by default (as part of the default Empirica app), however, recall that we changed the player main input from value to guess so we need to reflect that in the SocialExposure.jsx componenet. So all we need to change the following line const value = otherPlayer.round.get("value") || 0; in renderSocialInteraction(otherPlayer) with const value = otherPlayer.round.get("guess") || 0;.
Player Profile
While the default app displayed the score as part of the player profile, we want to display the cumulativeScore for the guess the correlation game. So let's go ahead and change <span>{player.get("score") || 0}</span> with <span>{player.get("cumulativeScore") || 0}</span> in PlayerProfile.jsx.
We are almost done!
Now just navigate in the browser to http://localhost:3000/admin, create a new batch like we did before, add to the batch the new treatments, start the batch! That's it, if you go to http://localhost:3000 it will just work! you have an experiment with three treatments. Players will be randomized and the experience will render correctly!
things to add
- adding bots
- exporting data
- deployment
- live example
- add the tutorial code
