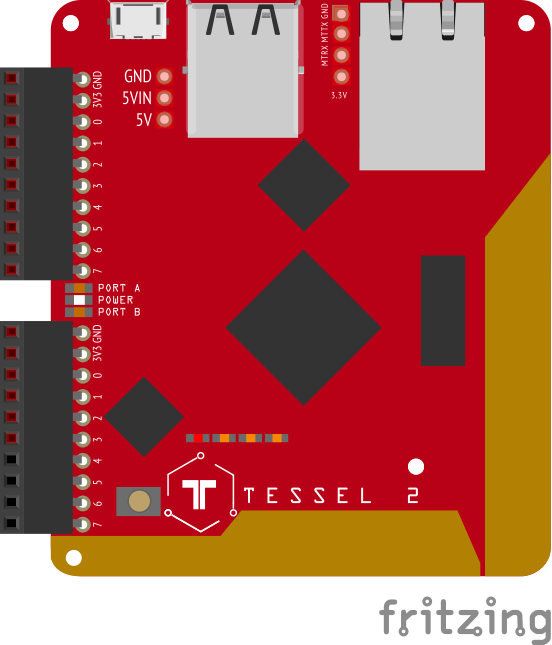
Tessel-IO is an IO Plugin that enables writing JavaScript Robotics programs with Johnny-Five, that run on a Tessel 2. This project was built at Bocoup
| Tessel 2 Firmware Version | Tessel-IO Version |
|---|---|
| >= 0.1.0 | >= 1.0.0 |
| <= 0.0.16 | <= 0.11.0 |
If you have prior experience with Johnny-Five, this is all you need:
npm install t2-cli tessel-io johnny-fiveIf you have limited prior experience with Johnny-Five, or are generally new to NodeBots, or just want to read more about how this all works together, you'll want to read Say 'Hello World' with Johnny-Five on Tessel 2
"use strict";

const five = require("johnny-five");
const Tessel = require("tessel-io");
const board = new five.Board({
  io: new Tessel()
});

board.on("ready", () => {
  // Write your program locally and push to the Tessel 2 when ready!
});For testing and development, run in RAM:
t2 run <program file name>
When your program is ready for deployment, push to flash:
t2 push <program file name>
There are two primary ports on the Tessel2: Port "A" and Port "B". There is also a bank of onboard LEDs which are controllable from a port we are calling "L". Note that "L0" and "L1" should be reserved for system functions (ERR and WLAN) so you should avoid using them. Instead, consider using "L2" and "L3" which are intended to be more informational in nature.
| Port | Number | Johnny-Five Compatible Name |
|---|---|---|
| A | 0 | "a0" or "A0" |
| A | 1 | "a1" or "A1" |
| A | 2 | "a2" or "A2" |
| A | 3 | "a3" or "A3" |
| A | 4 | "a4" or "A4" |
| A | 5 | "a5" or "A5" |
| A | 6 | "a6" or "A6" |
| A | 7 | "a7" or "A7" |
| B | 0 | "b0" or "B0" |
| B | 1 | "b1" or "B1" |
| B | 2 | "b2" or "B2" |
| B | 3 | "b3" or "B3" |
| B | 4 | "b4" or "B4" |
| B | 5 | "b5" or "B5" |
| B | 6 | "b6" or "B6" |
| B | 7 | "b7" or "B7" |
| L | 0 | "l0" or "L0" |
| L | 1 | "l1" or "L1" |
| L | 2 | "l2" or "L2" |
| L | 3 | "l3" or "L3" |
See examples for basic, non-Johnny-Five examples.
Originally written for Tessel 2's Firmware Docs
| Port | Pin | Digital I/O | SCL | SDA | TX | RX | Analog In | Analog Out | Interrupt | PWM | Pull Up/Down |
|---|---|---|---|---|---|---|---|---|---|---|---|
| A | 0 | ✓ | ✓ | ||||||||
| A | 1 | ✓ | ✓ | ||||||||
| A | 2 | ✓ | ✓ | ✓ | |||||||
| A | 3 | ✓ | ✓ | ||||||||
| A | 4 | ✓ | ✓ | ✓ | |||||||
| A | 5 | ✓ | ✓ | ✓ | ✓ | ✓ | |||||
| A | 6 | ✓ | ✓ | ✓ | ✓ | ✓ | |||||
| A | 7 | ✓ | ✓ | ✓ | ✓ | ||||||
| B | 0 | ✓ | ✓ | ✓ | |||||||
| B | 1 | ✓ | ✓ | ✓ | |||||||
| B | 2 | ✓ | ✓ | ✓ | ✓ | ||||||
| B | 3 | ✓ | ✓ | ✓ | |||||||
| B | 4 | ✓ | ✓ | ✓ | |||||||
| B | 5 | ✓ | ✓ | ✓ | ✓ | ✓ | ✓ | ||||
| B | 6 | ✓ | ✓ | ✓ | ✓ | ✓ | ✓ | ||||
| B | 7 | ✓ | ✓ | ✓ | ✓ | ✓ |
Notes:
- Whenever possible, avoid using pins AO, A1, B0 and B1 for digital or analog input.
There are several examples of how to use this library in its raw form. Make sure you have installed the Tessel 2 CLI and provisioned the board first. After that is complete, you can run any of the examples:
t2 run eg/onboard-led.js