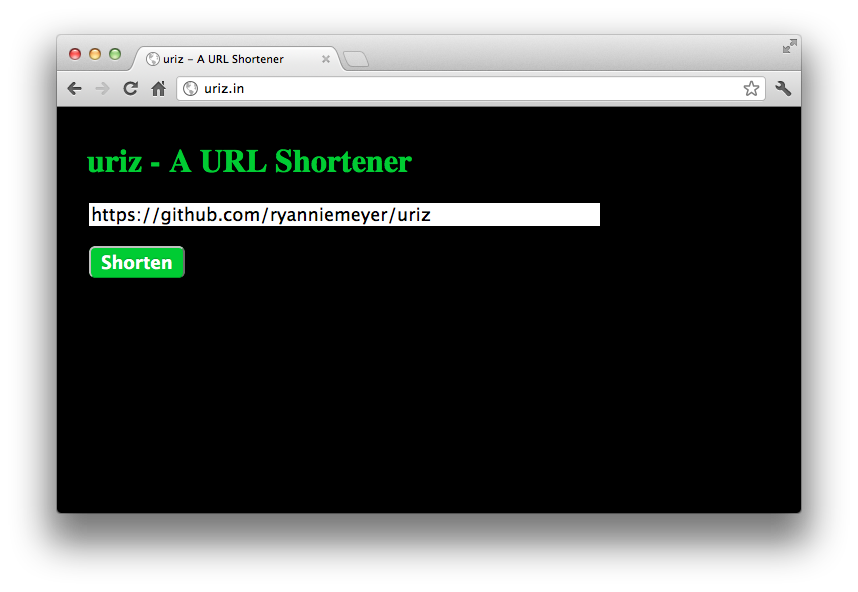
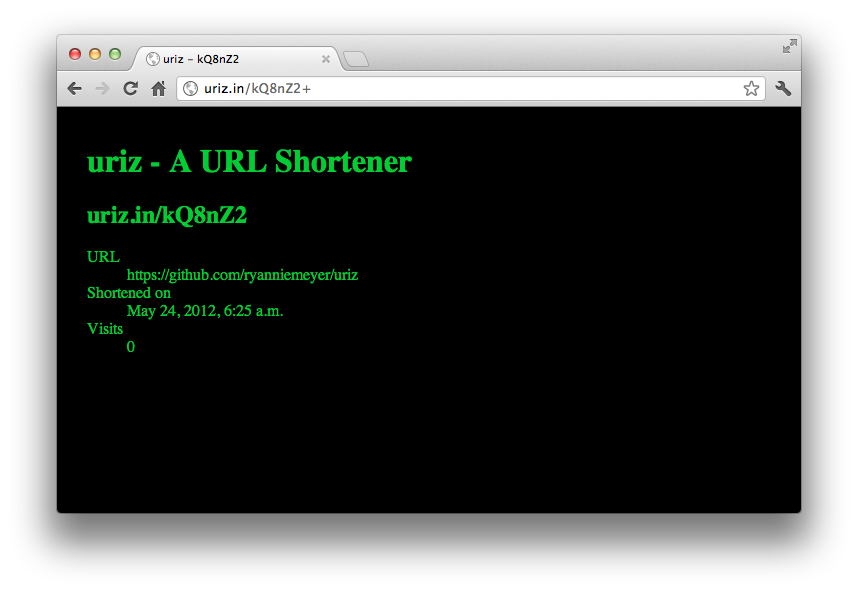
uriz is a simple, non-production example of a URL shortener Django site. The purpose of this project is to walk someone through the steps for deploying a simple web app utilizing the following Amazon Web Services (AWS):
- EC2 for the web nodes
- S3 + CloudFront for static content
- DynamoDB for storage
- Route53 for DNS
- ELB to balance load to the EC2 web nodes
This tutorial assumes you've already created an AWS account.
The first step is obtaining a domain for your URL shortener from your favorite domain registrar (e.g. Namecheap). I picked uriz.in, so you can simply fork this project and replace all occurrences of uriz.in with whatever your domain is.
After you've registered your domain, we'll switch its DNS over to Amazon Route53 to make it easier to take advantage of other Amazon services.
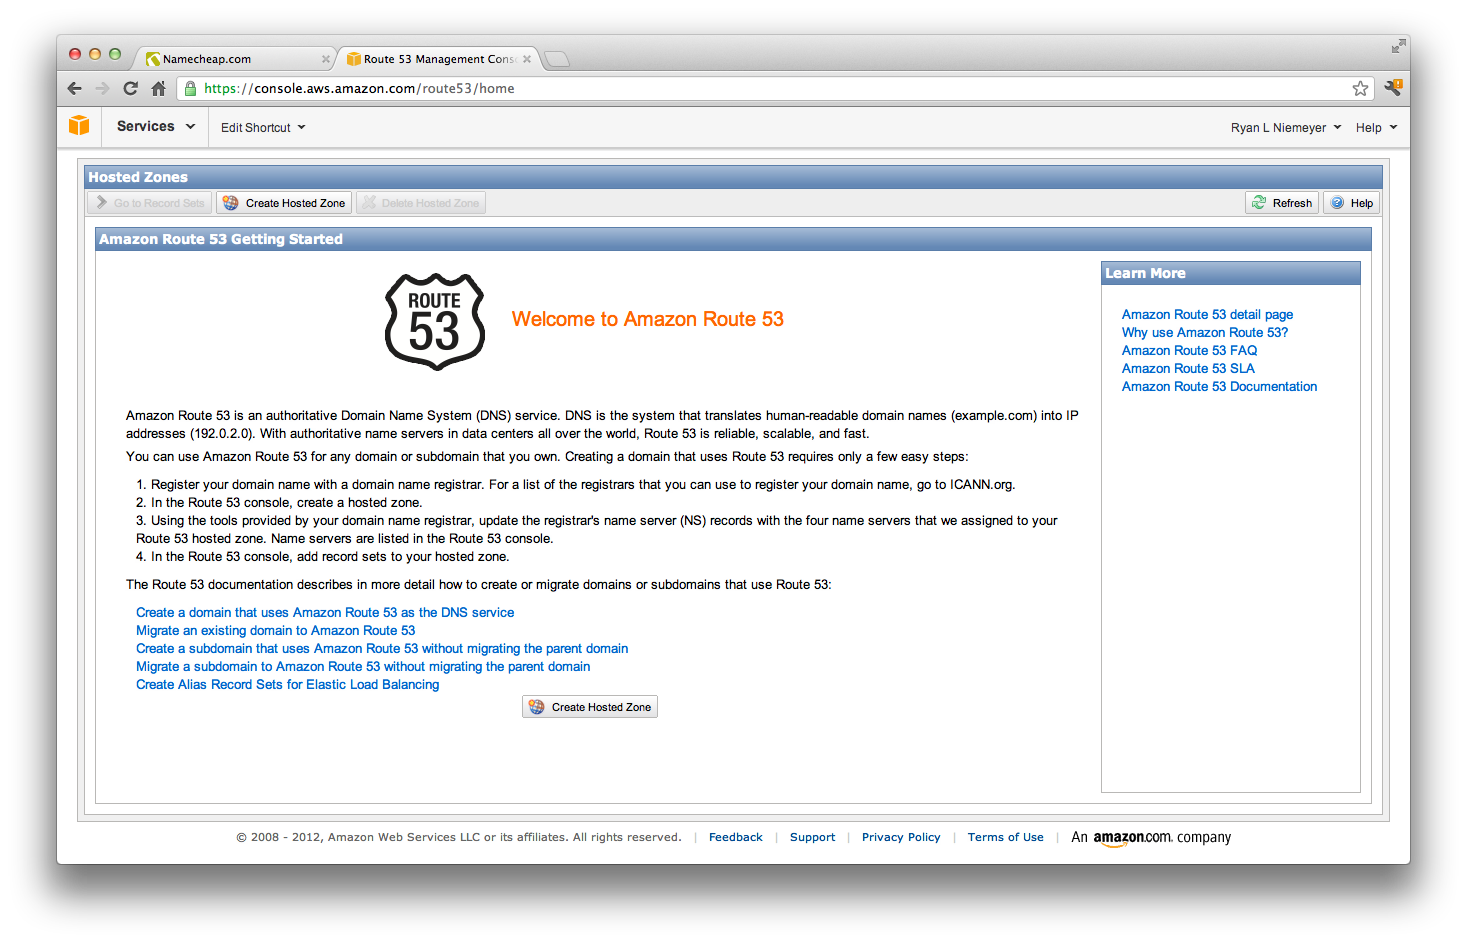
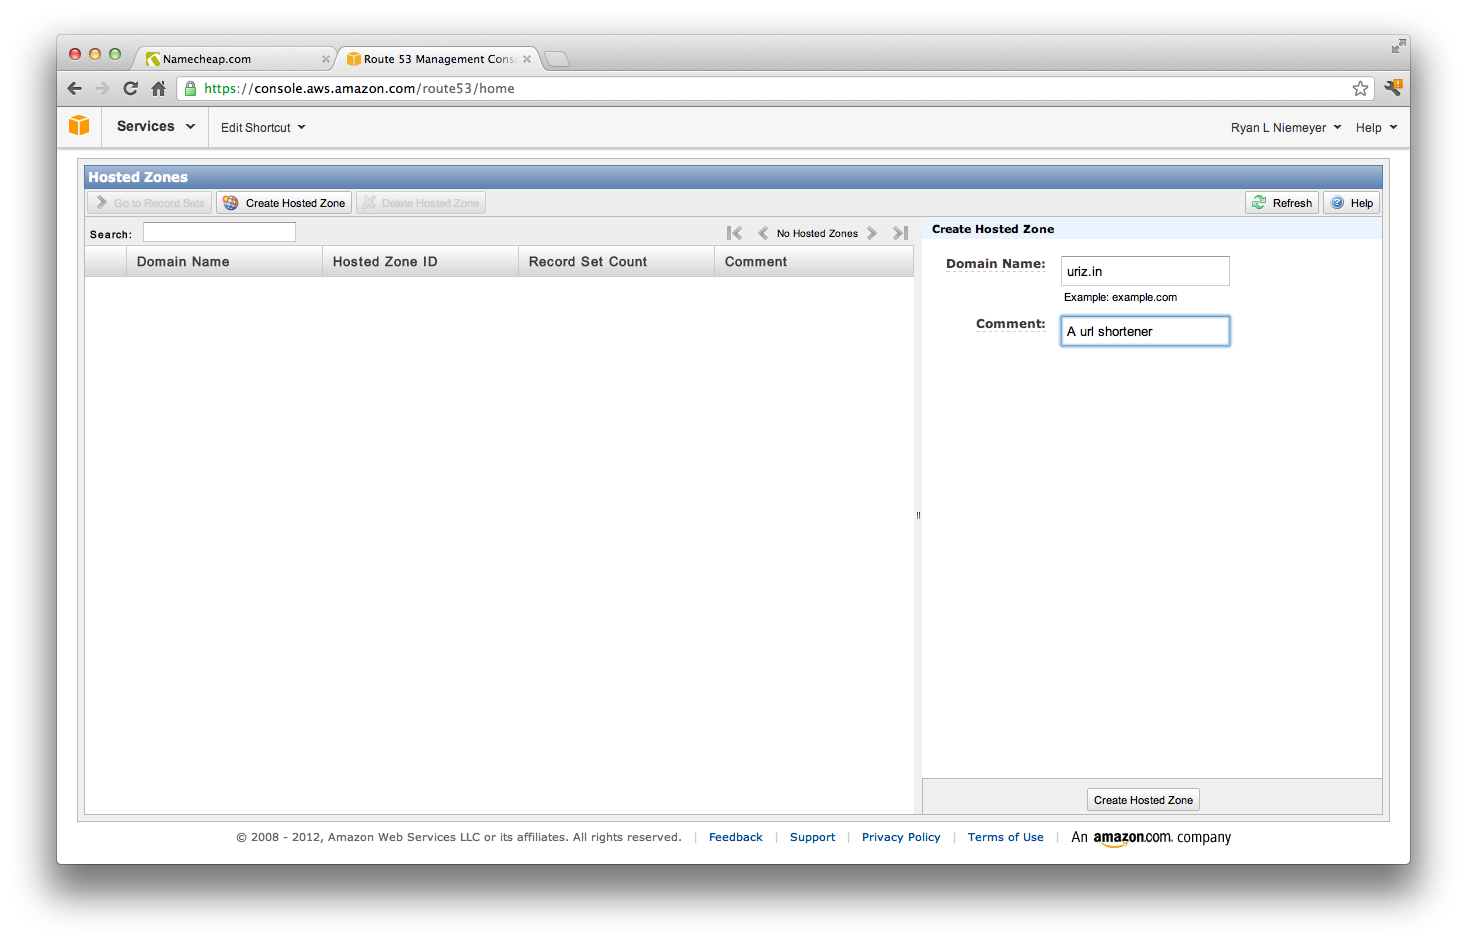
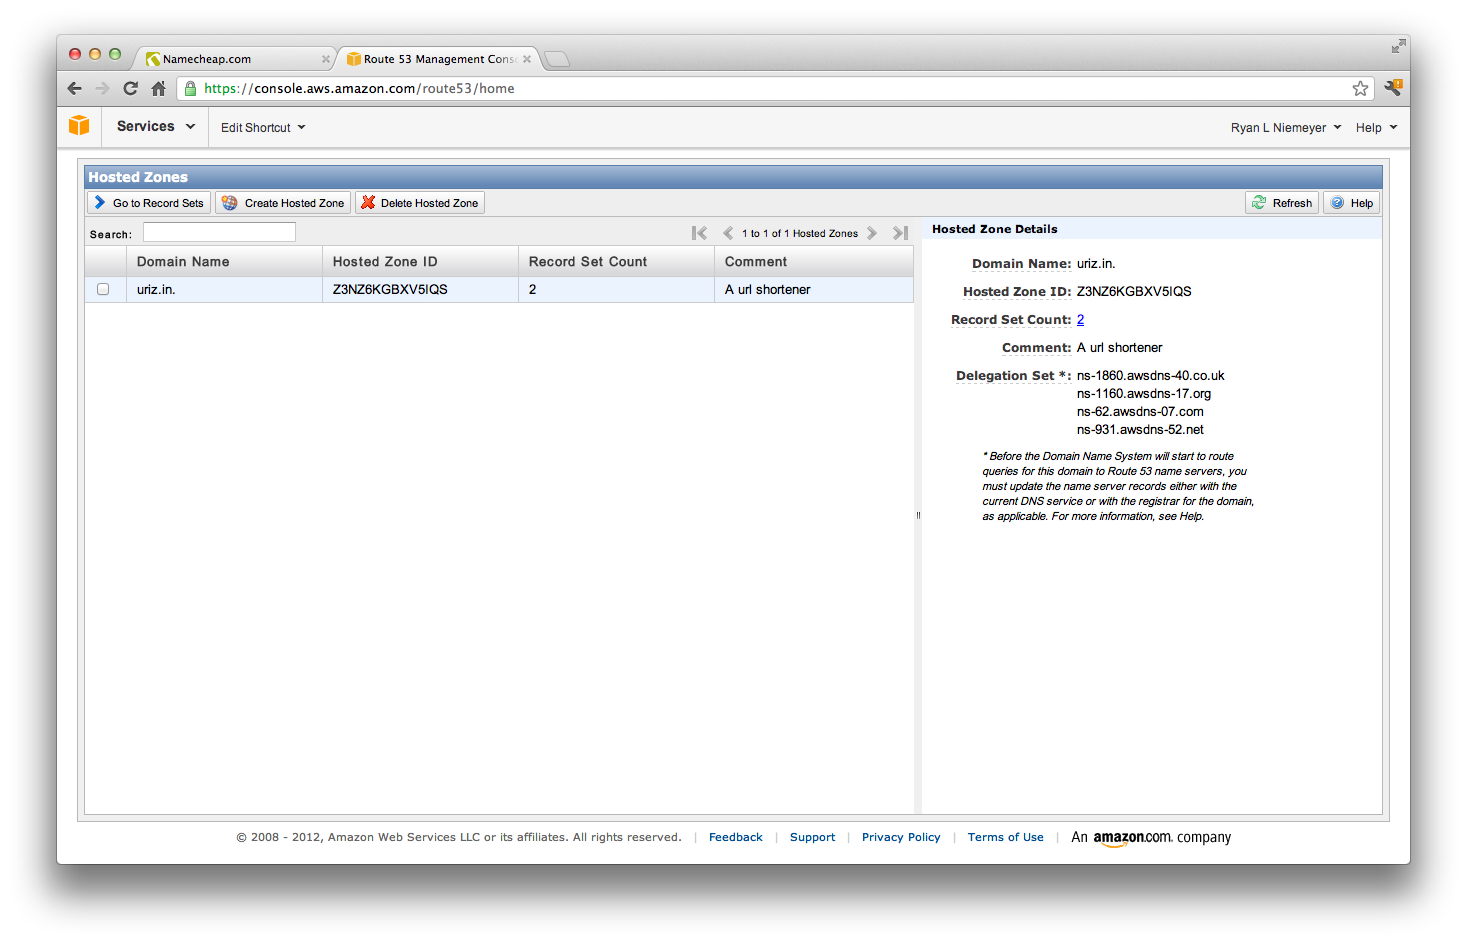
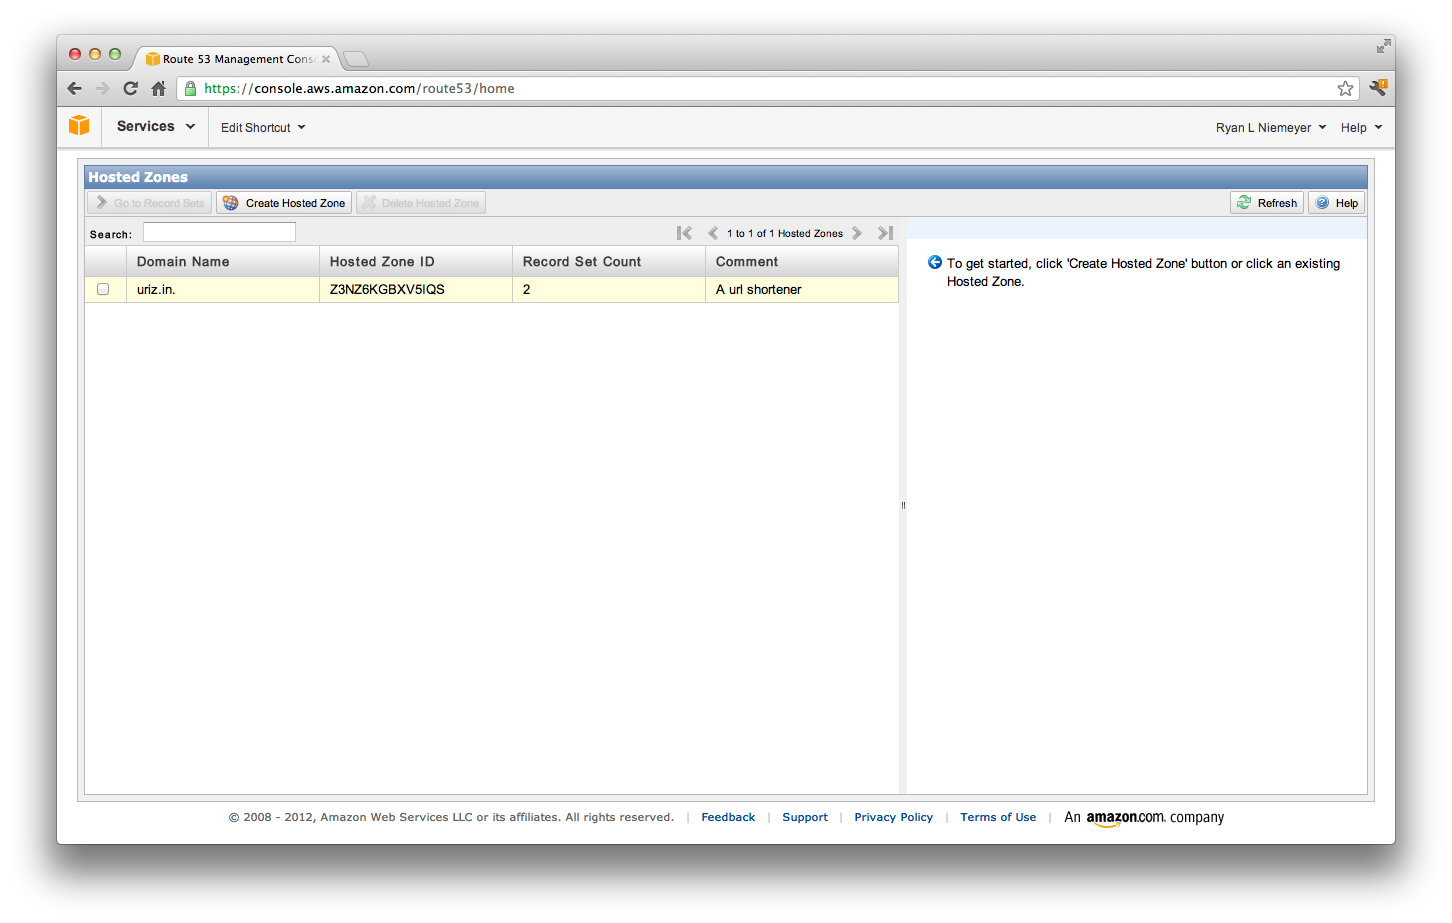
Create a Route53 hosted zone via the AWS console:
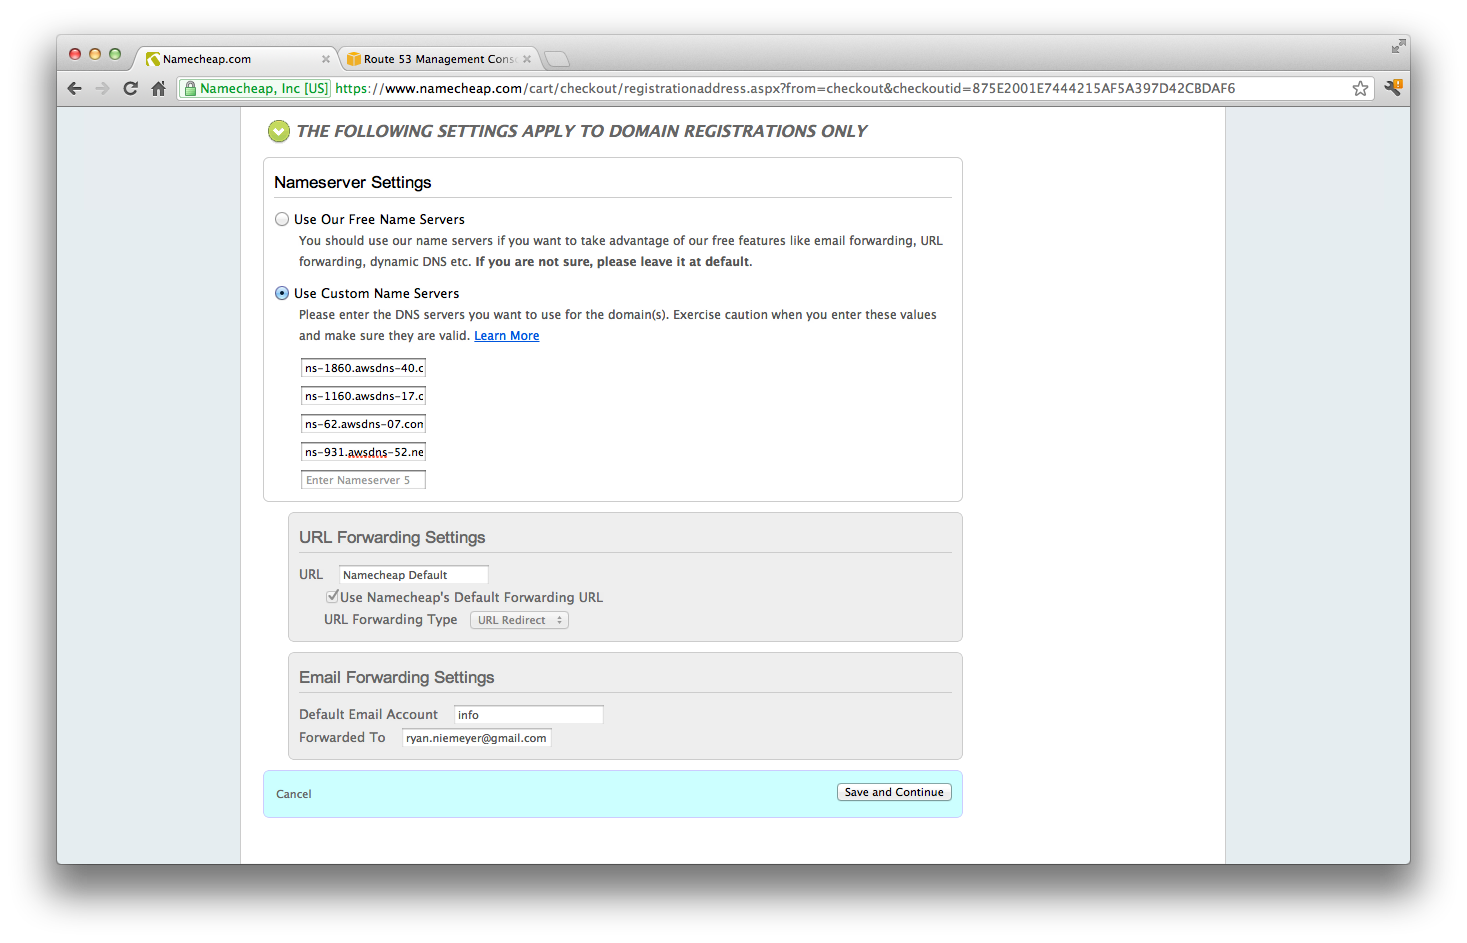
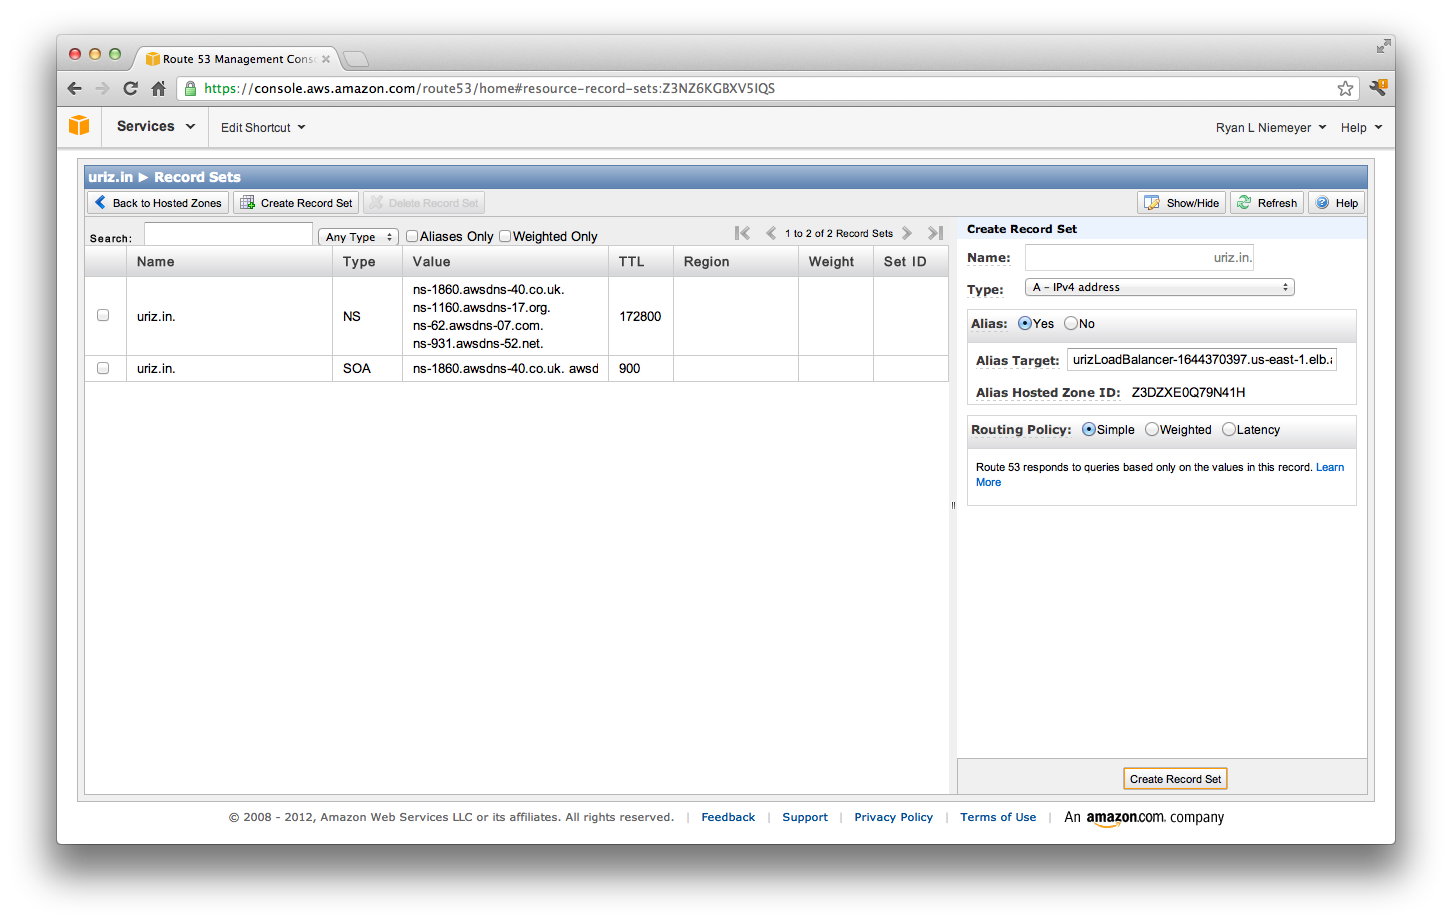
Then, change your domain's name servers to your Route53 hosted zone's name servers:
Note that it may take a while for the DNS changes to propagate, which is why I put this step first.
Now that we've got our URL shortener domain and have it pointing to our Amazon DNS, let's set up our database. For this example we'll be using DynamoDB, Amazon's high performance, scalable and reliable key-value store.
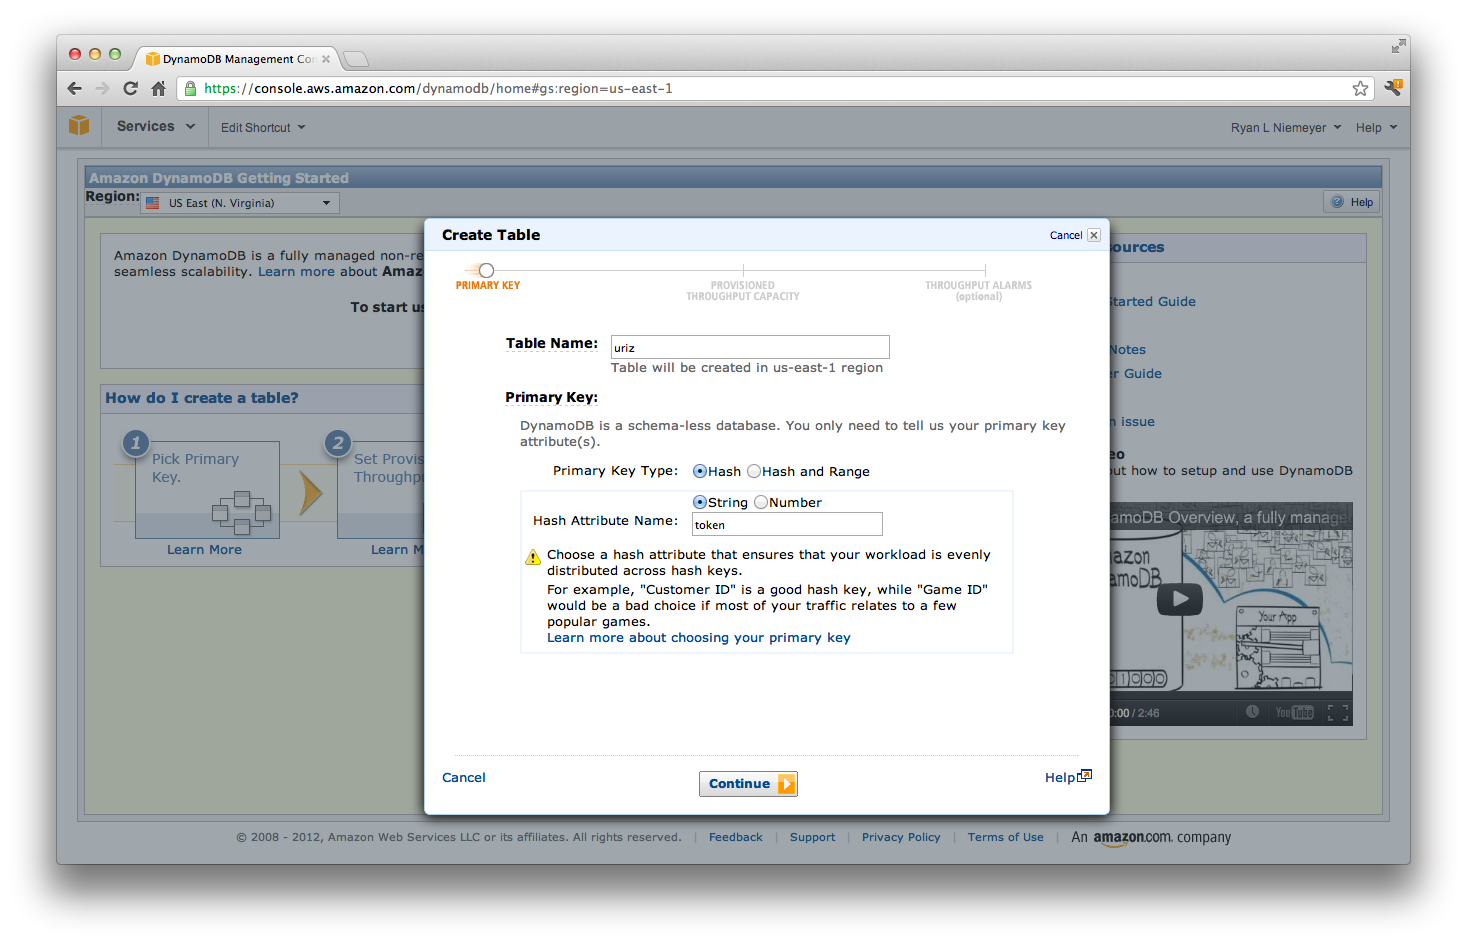
We'll have one table where our short URL tokens are the primary key and the value has metadata including the long URL, when the URL was first shortened and a count of how many times the short URL is visited. We'll also have a table that serves as a reverse index where the long URL is the primary key. There are certainly better ways to implement a URL shortener, but I'm not trying to demonstrate a bit.ly killer here, so bear with me.
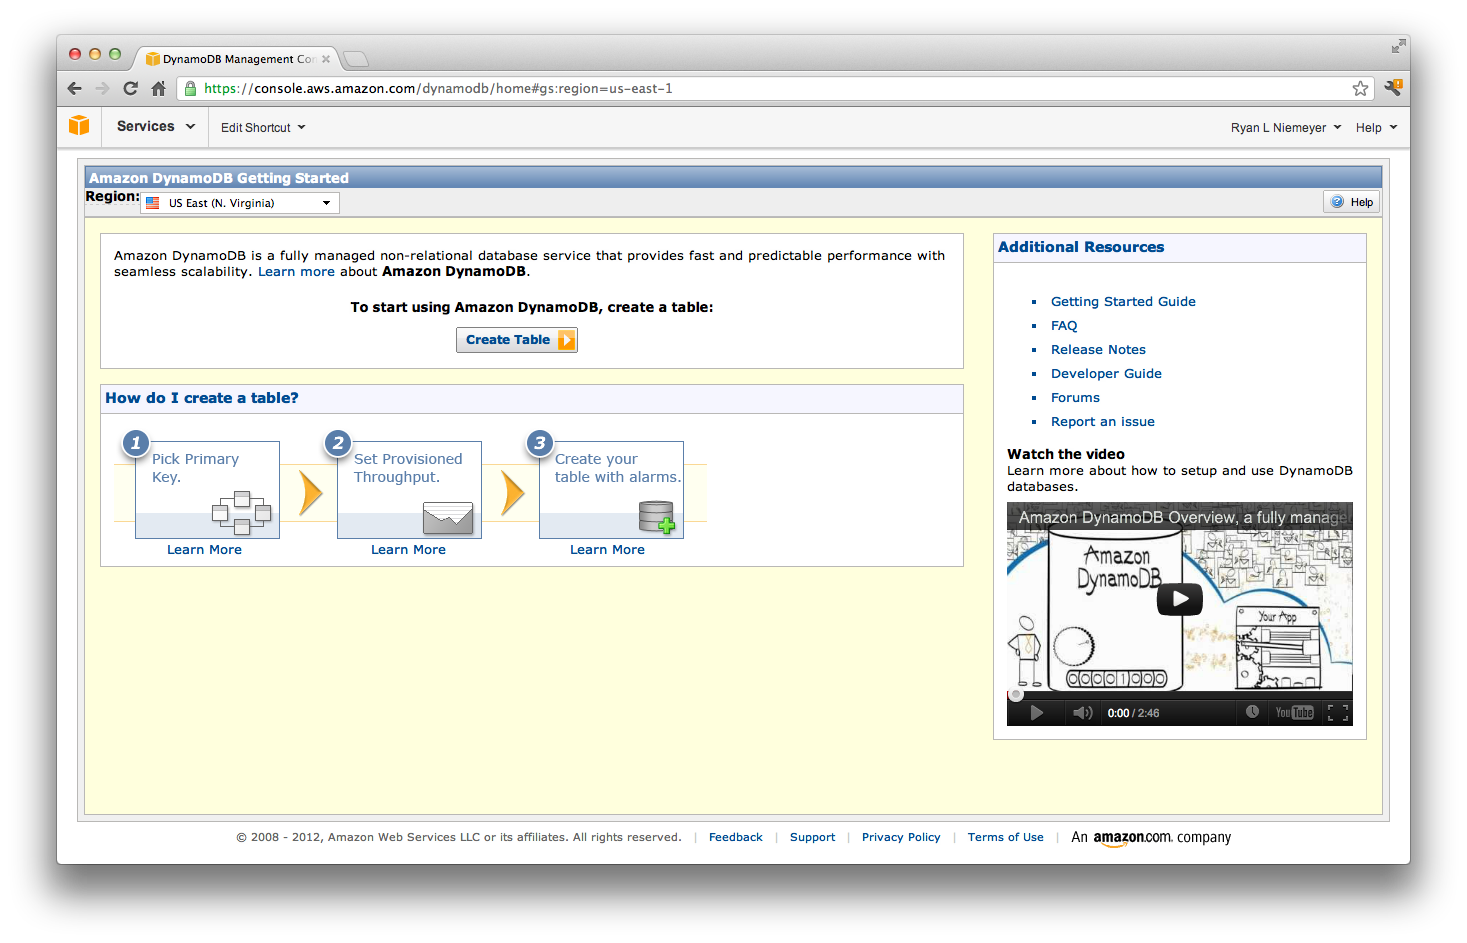
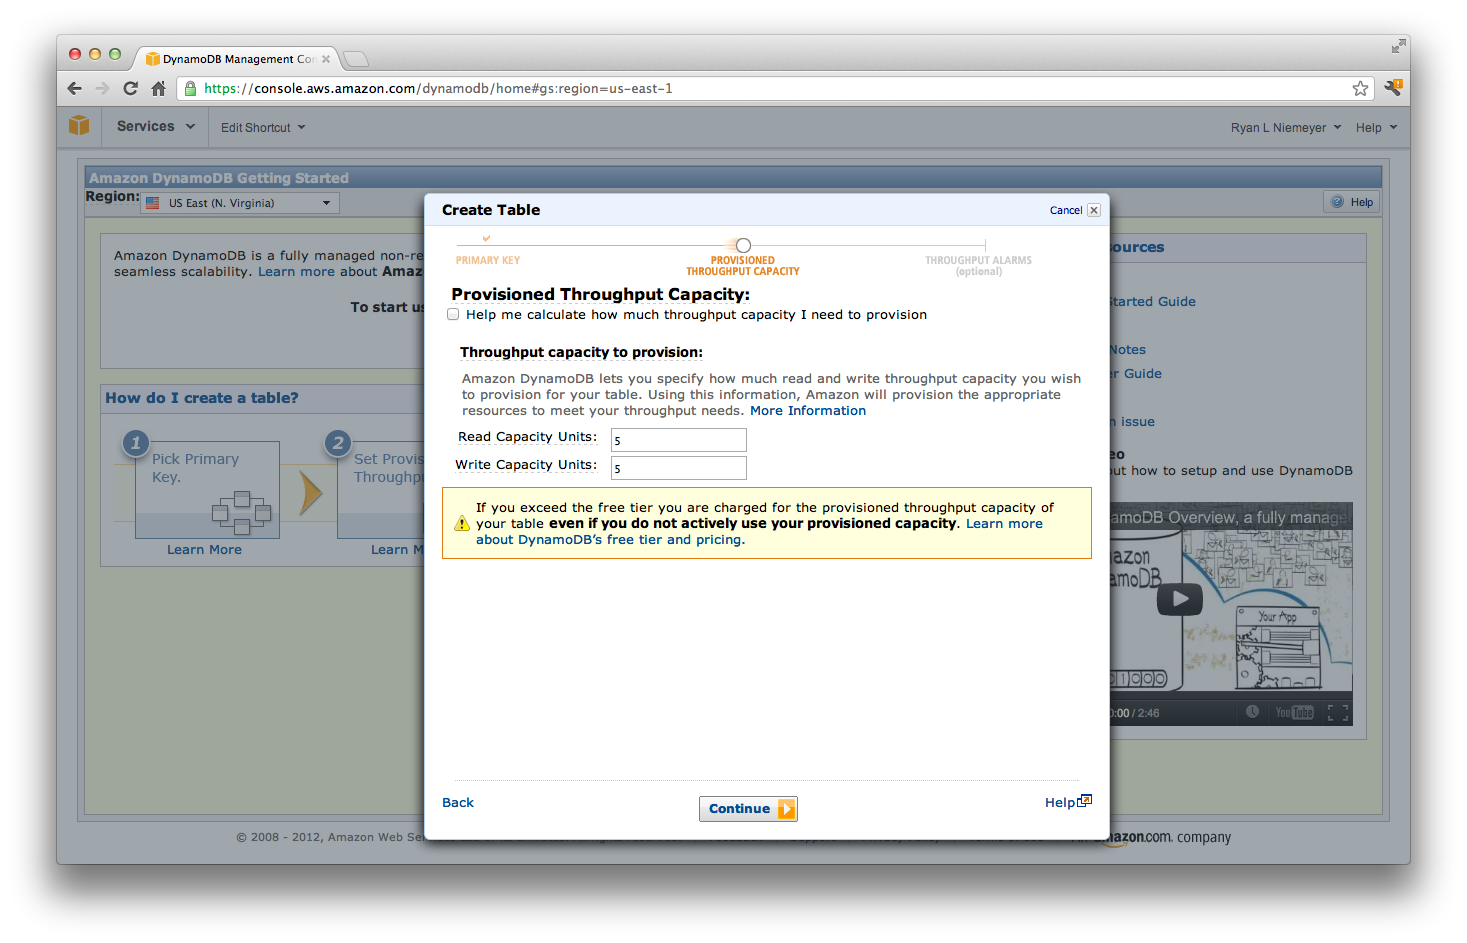
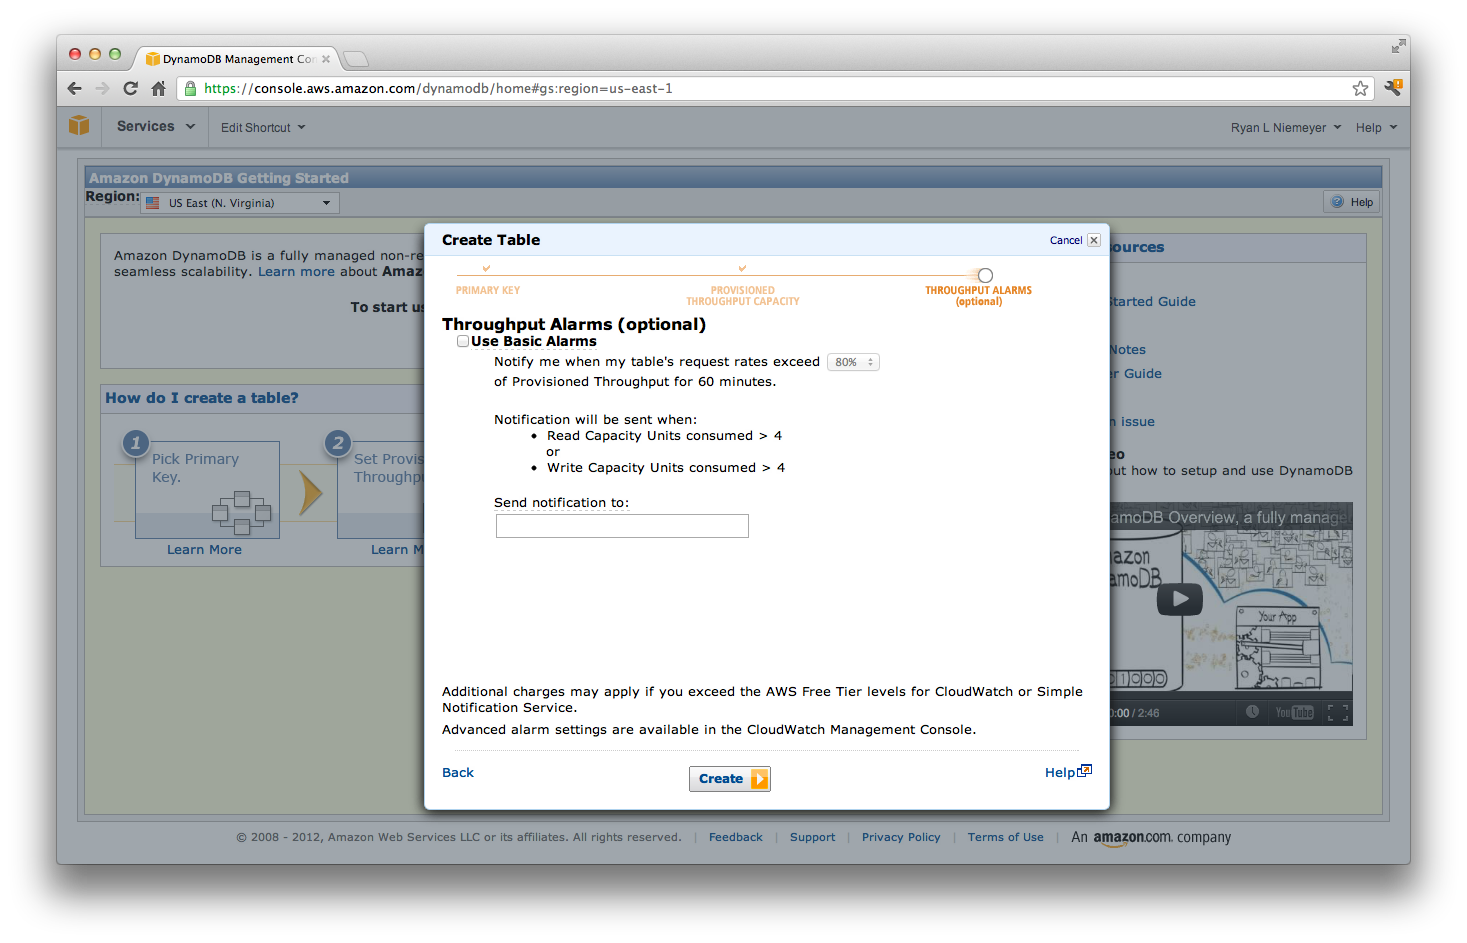
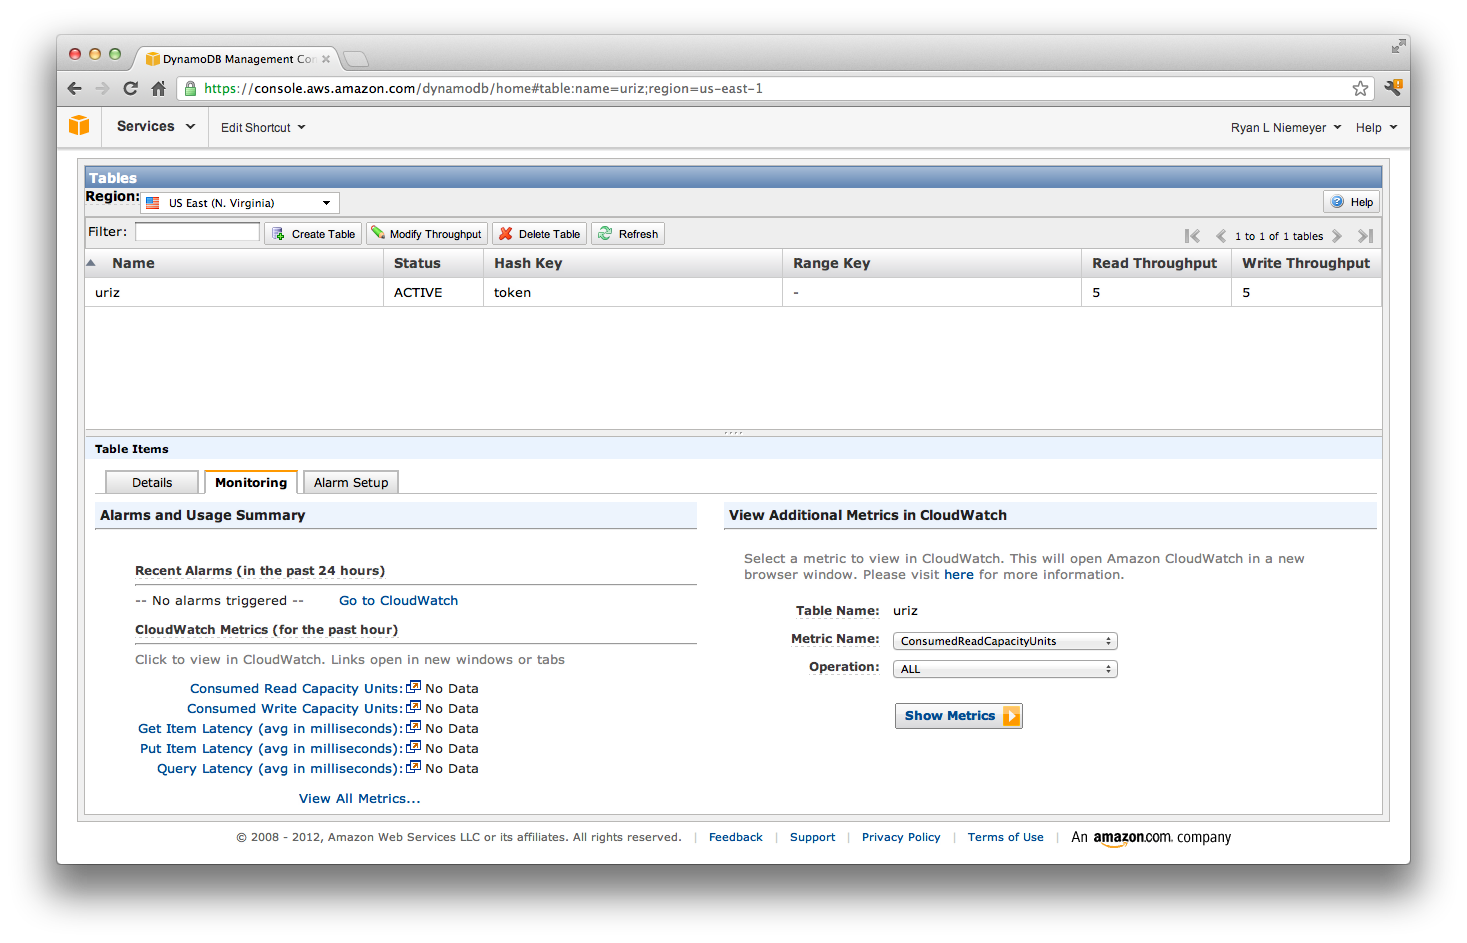
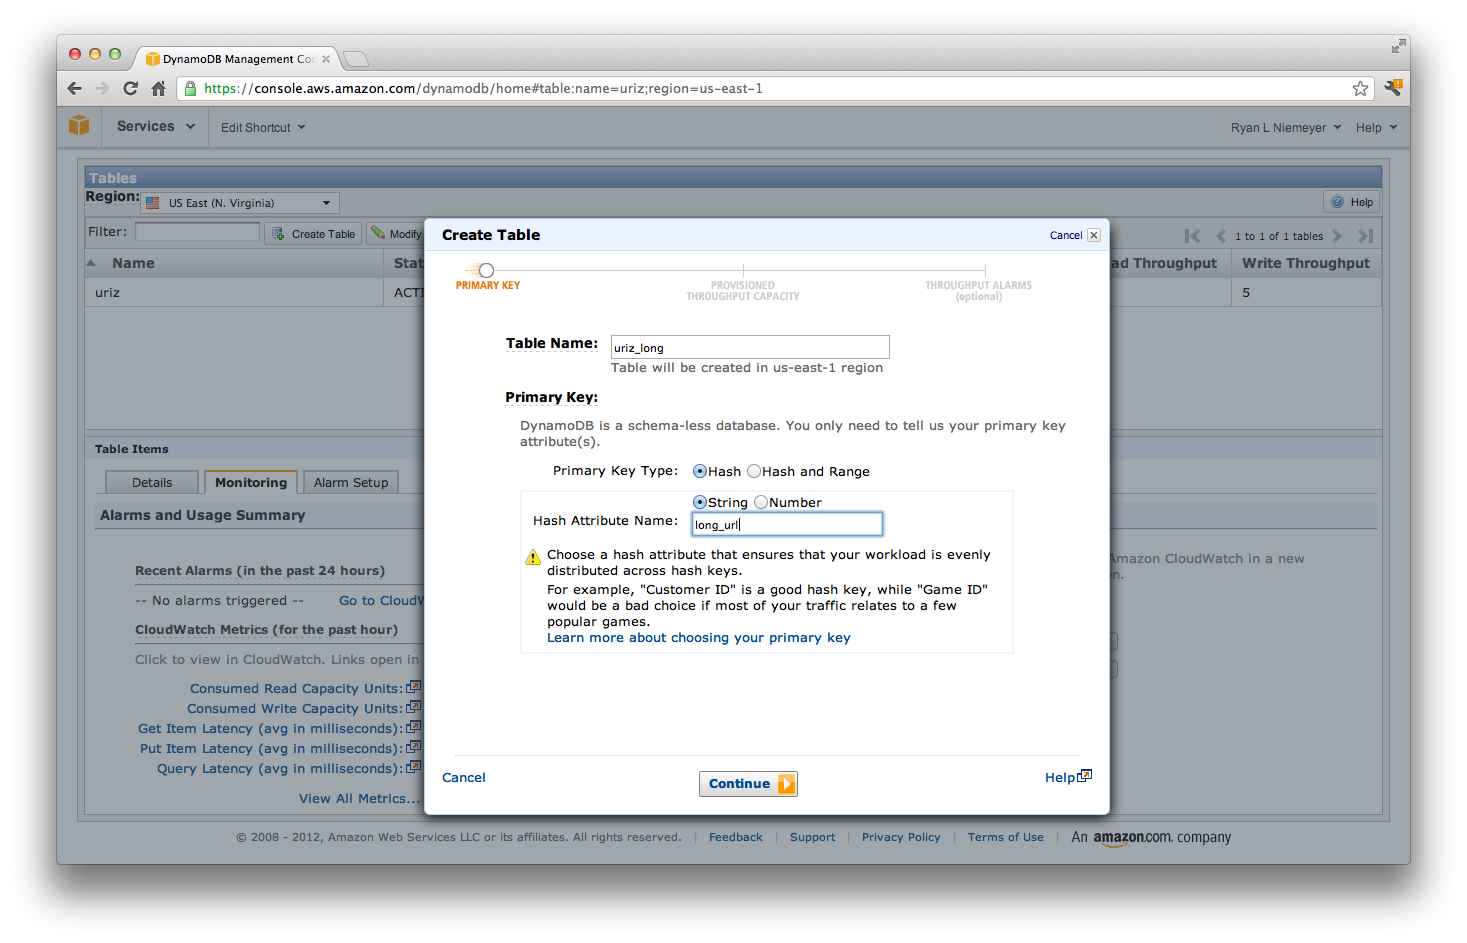
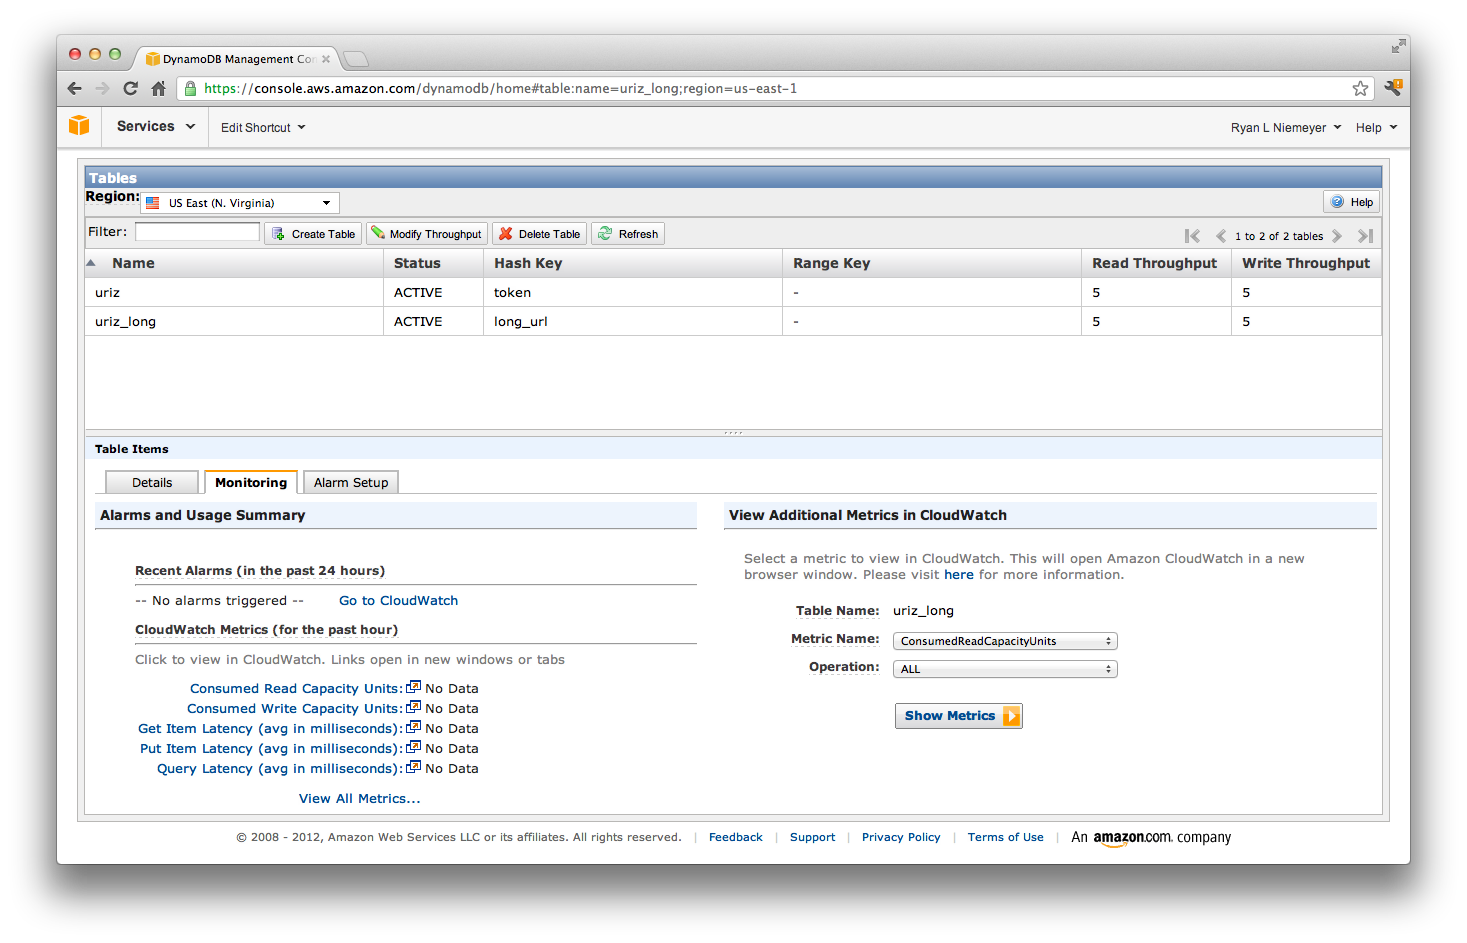
You can use the DynamoDB APIs or your favorite AWS client SDK to add/remove/edit your tables, but for this example we'll use the web console to create our two tables (uriz and uriz_long):
DynamoDB has a nice free tier, so this shouldn't cost you anything to play around with.
Before we deploy our code, let's get our static content into S3 and have it served up via Amazon's CDN (CloudFront). In this example I simply have a single versioned CSS file. Probably the most amazing CSS anyone has ever or will ever create, I might add.
Checkout or clone this project (or your fork of this project) to your local machine. You'll need the project checked out to upload the s-1.css file in the uriz/static/css directory to S3 and later to run the command that deploys to your web nodes.
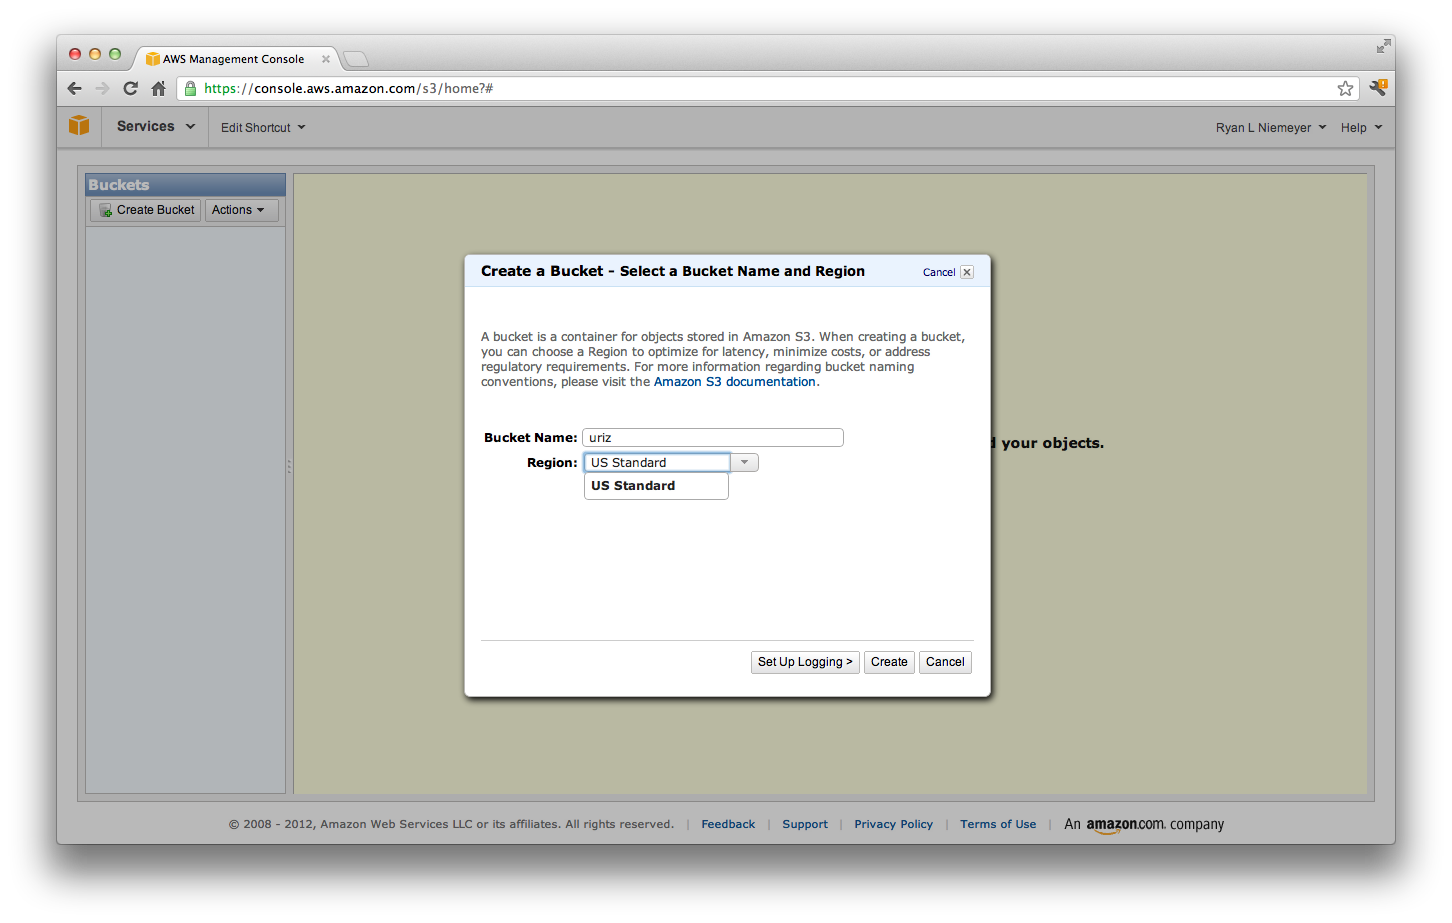
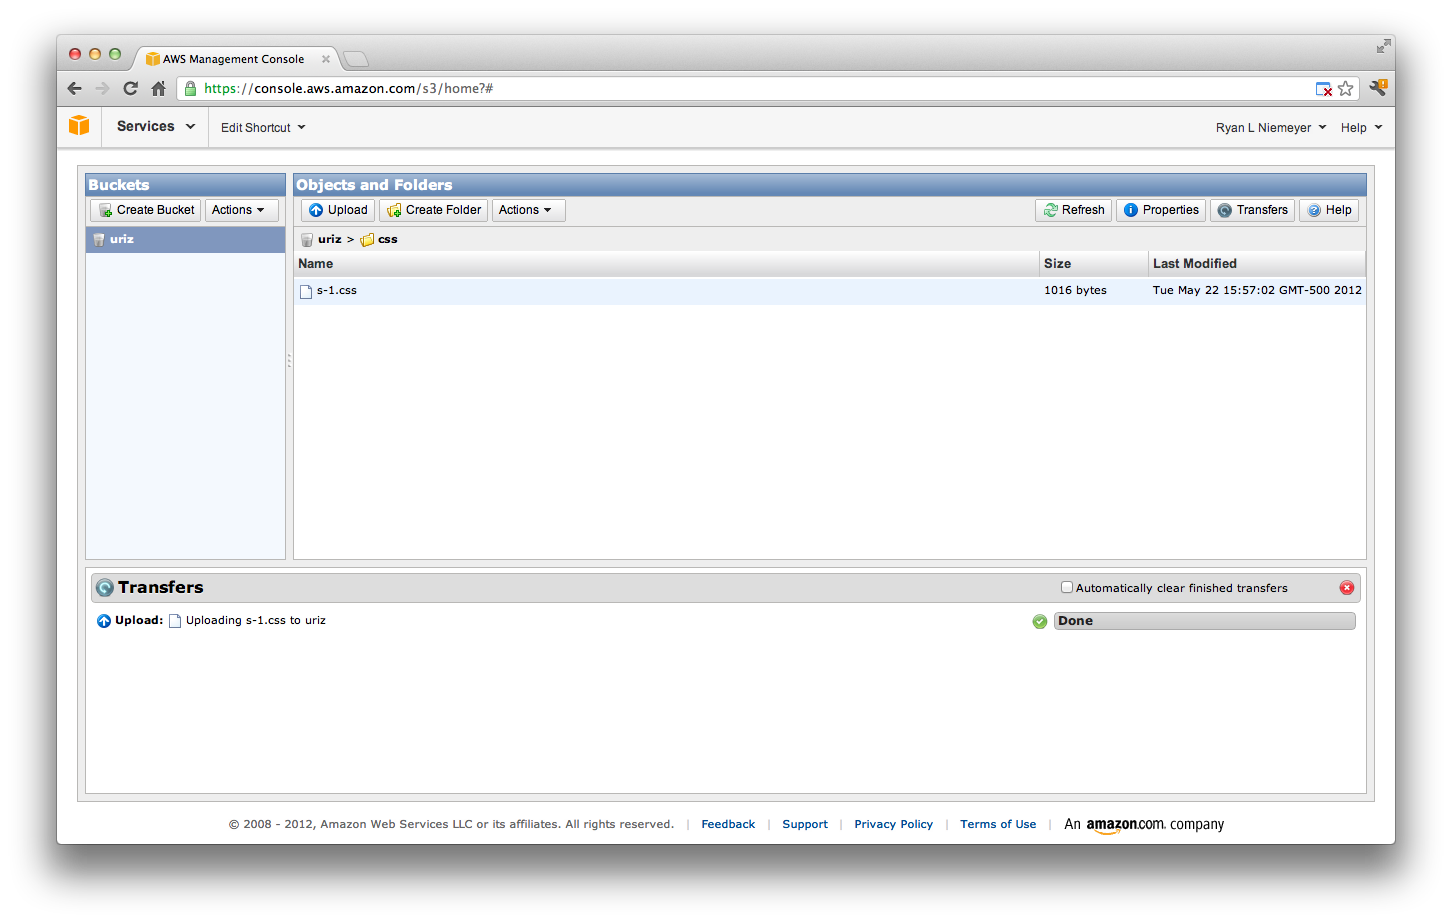
After you get the code on your machine, go back to the AWS console and find the S3 service. Create a bucket with a css folder and upload s-1.css into it:
Be sure to mark the css folder and the s-1.css file as public via the Actions drop down menu.
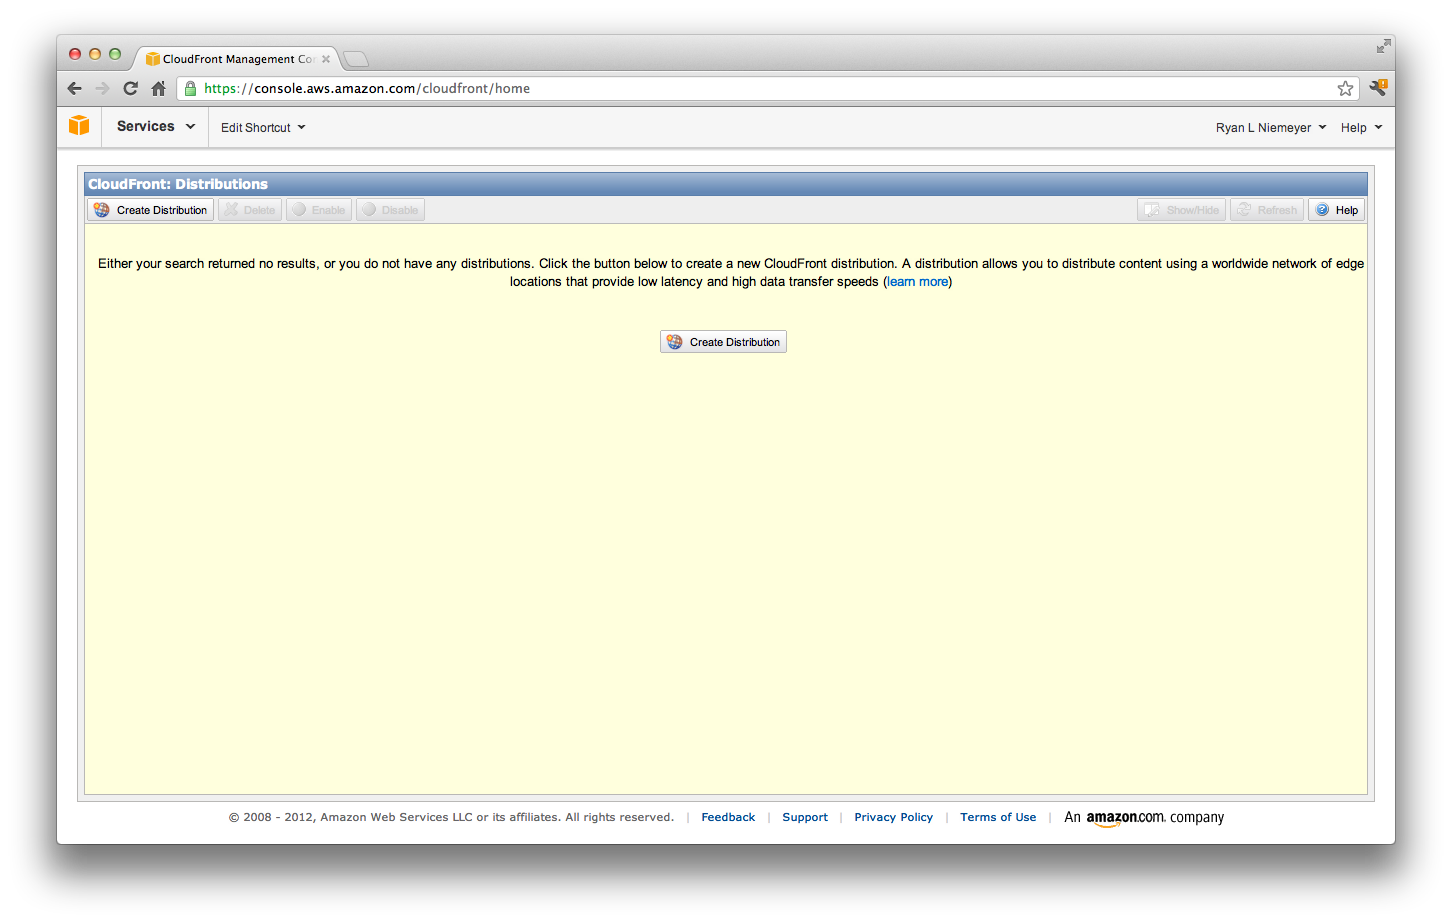
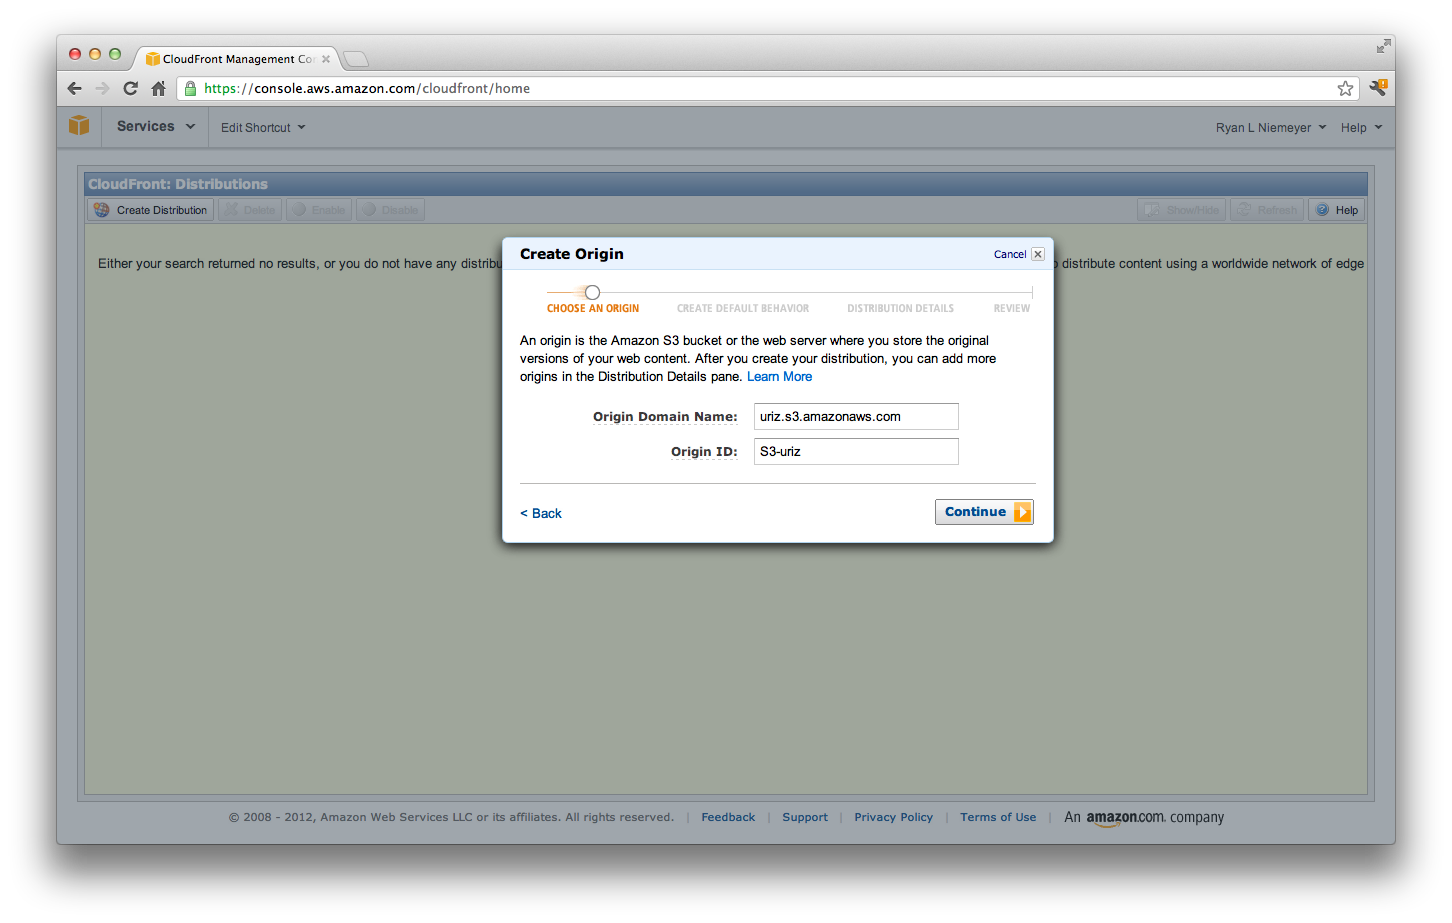
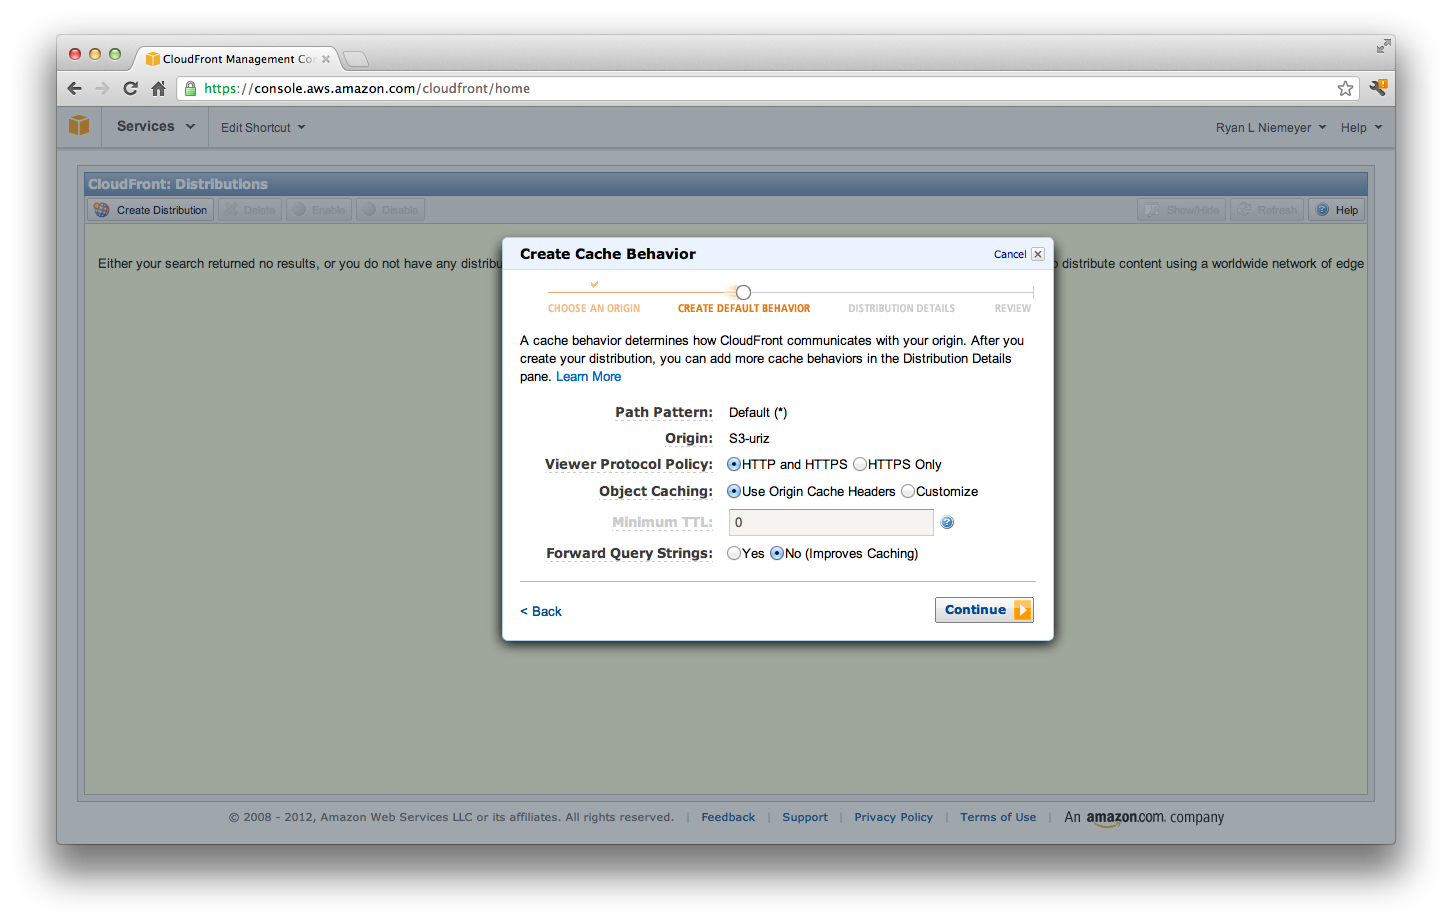
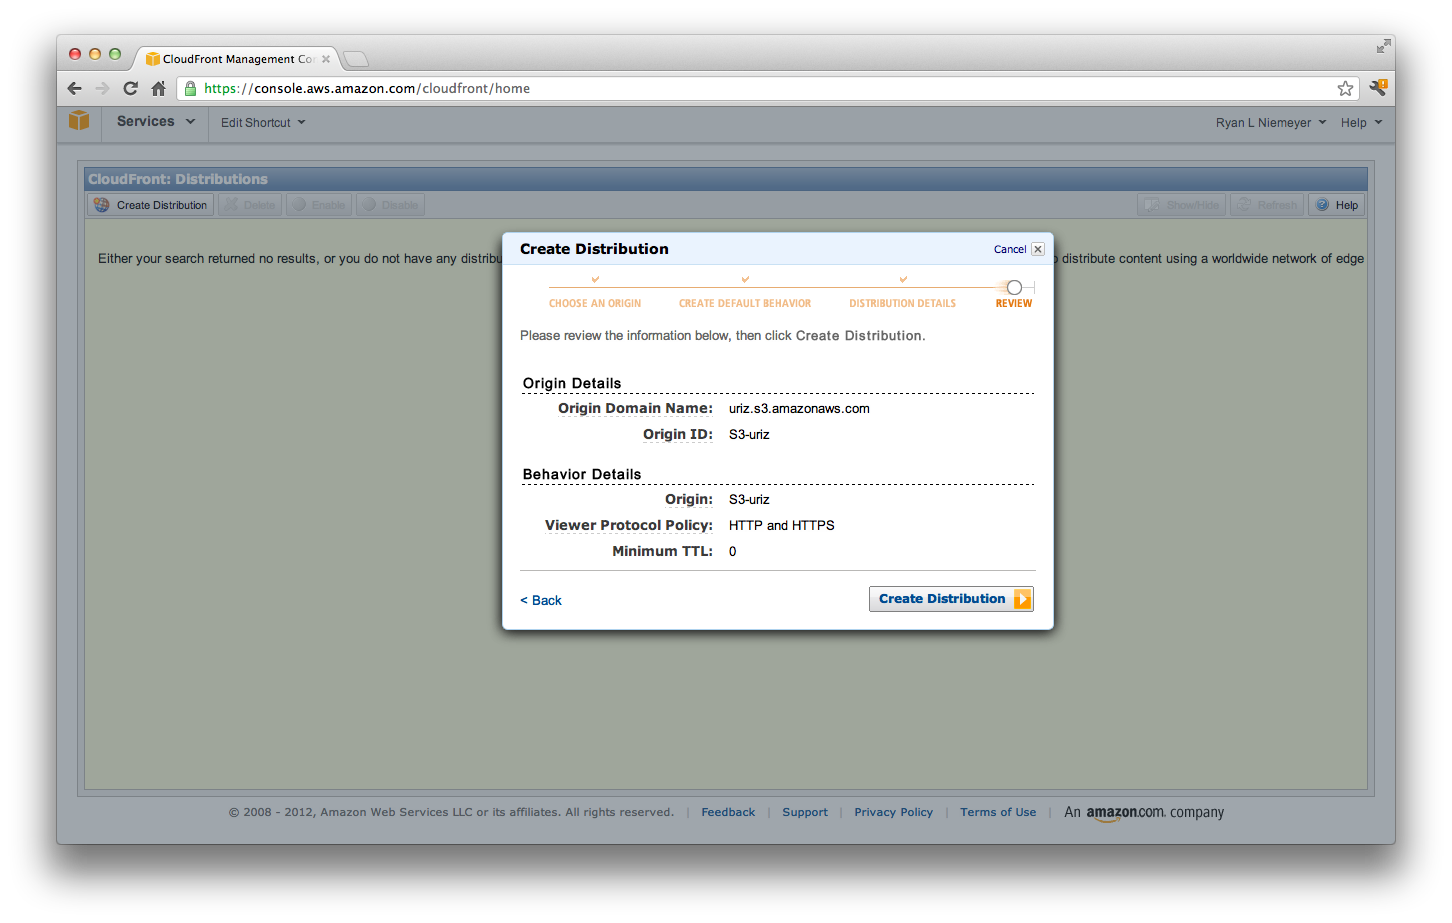
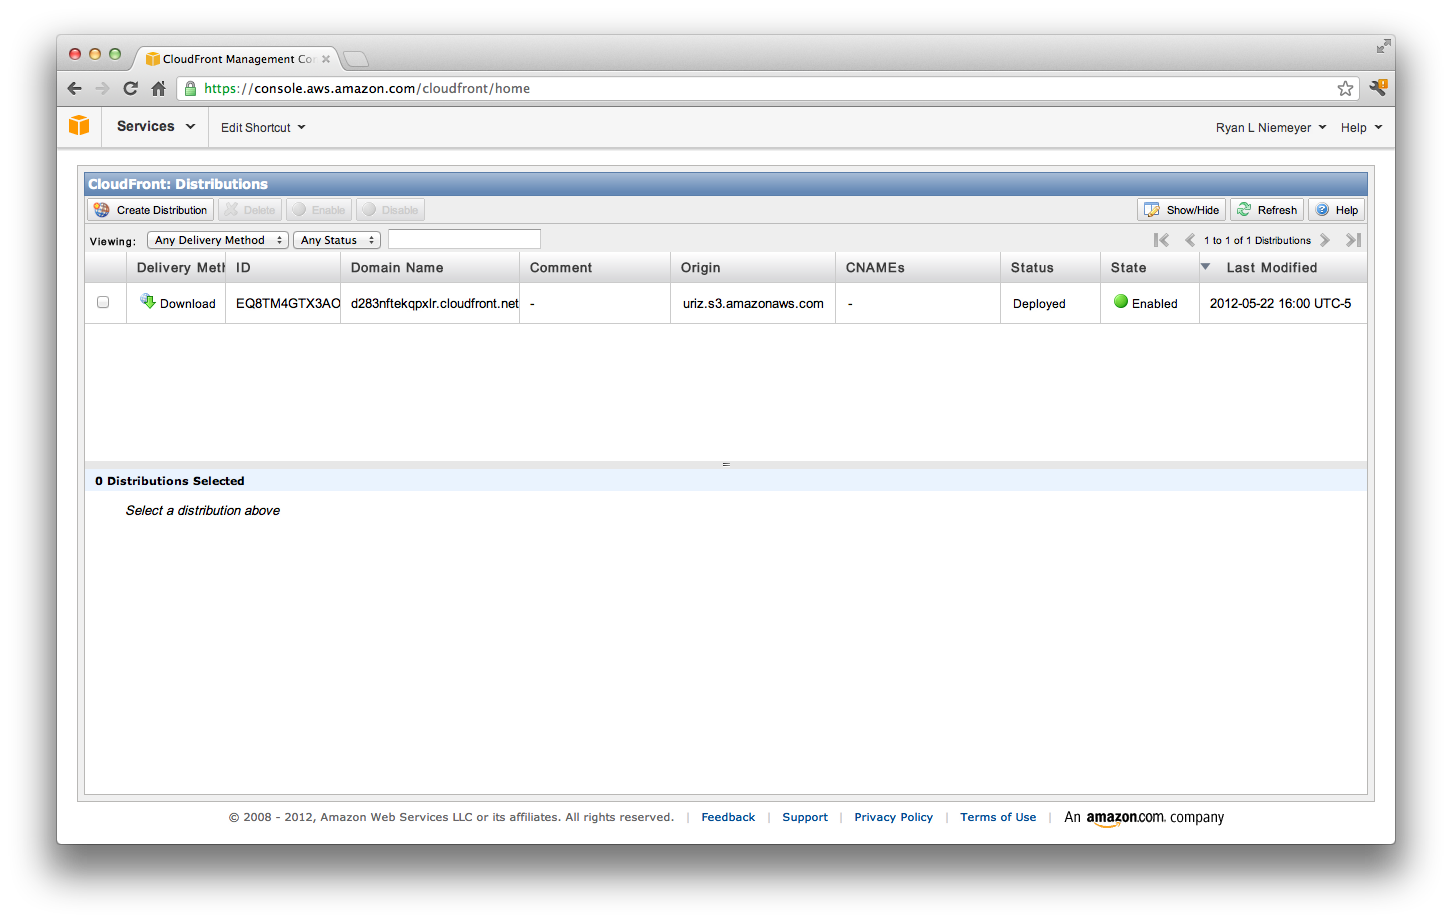
Now locate CloudFront in the AWS console. Create a distribution on top of that S3 bucket so your CSS is served as close to your users as possible:
In a production setting you'd want to automate the process of pushing your static content to S3, probably also doing things like compiling LESS/SASS, minifying, etc, but I'll leave that exercise to the reader.
Ok, we've got our DynamoDB tables out there, our static content served up via CloudFront and our domain is pointed to Amazon's DNS. Now let's deploy the uriz Django app to EC2.
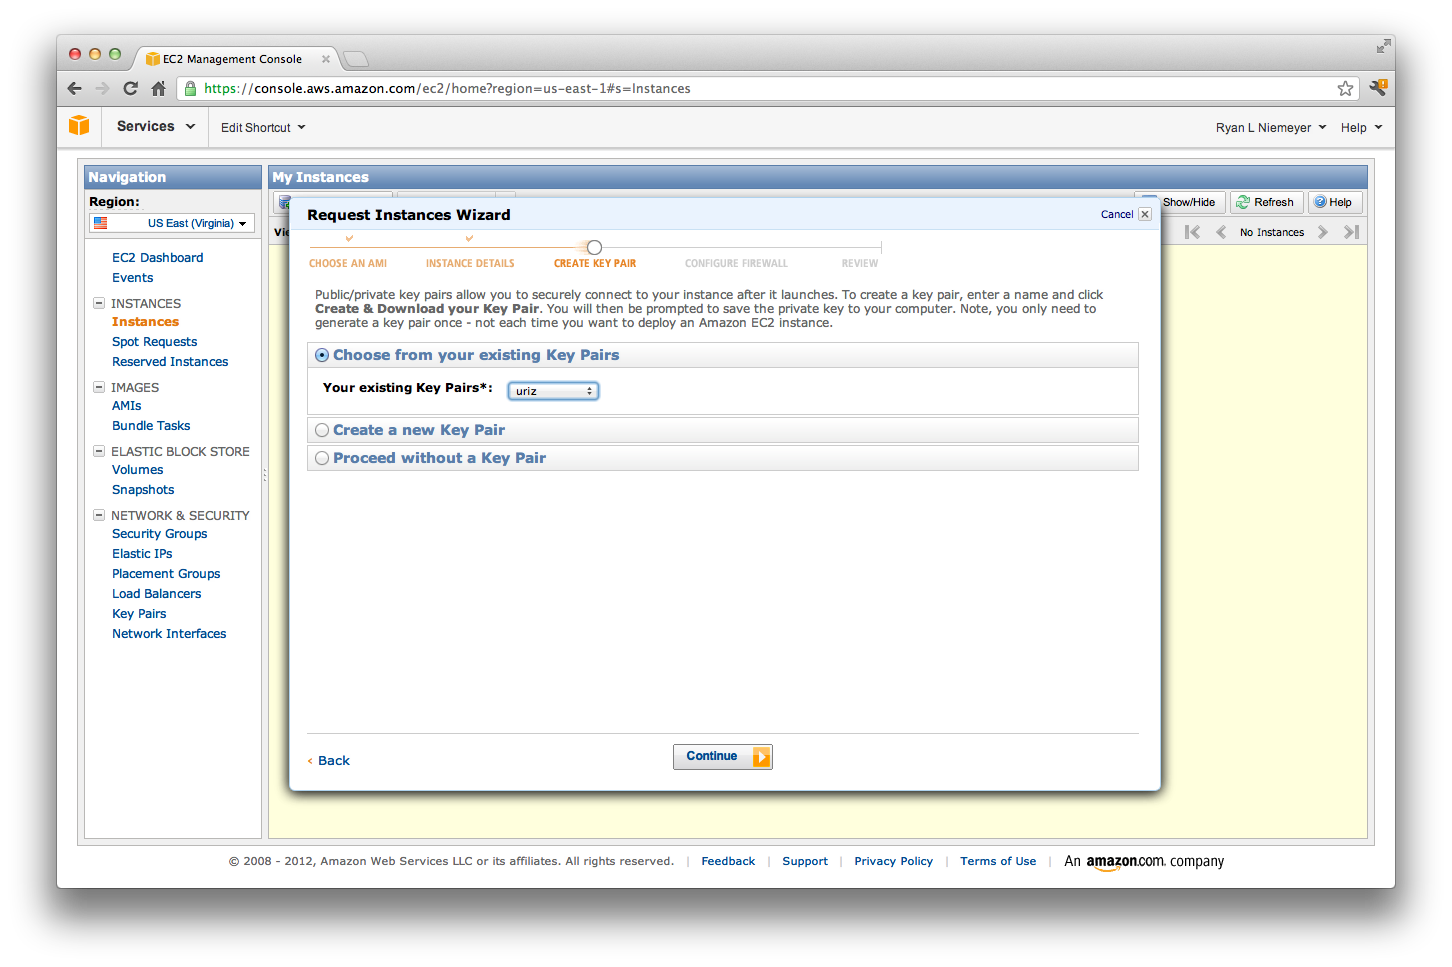
First thing we'll do is create a Key Pair that will allow us to SSH. This lets us deploy the code and log into the box should things go wrong. In the EC2 web console, go to the "Key Pairs" page and create a new pair. Name it uriz or something similar. When it downloads, save it to your local machine in the path /ec2/accounts/uriz/uriz.pem (if you want to save it somewhere else or pick a different Key Pair name, you'll simply need to change that path in uriz/fabfile.py mentioned below).
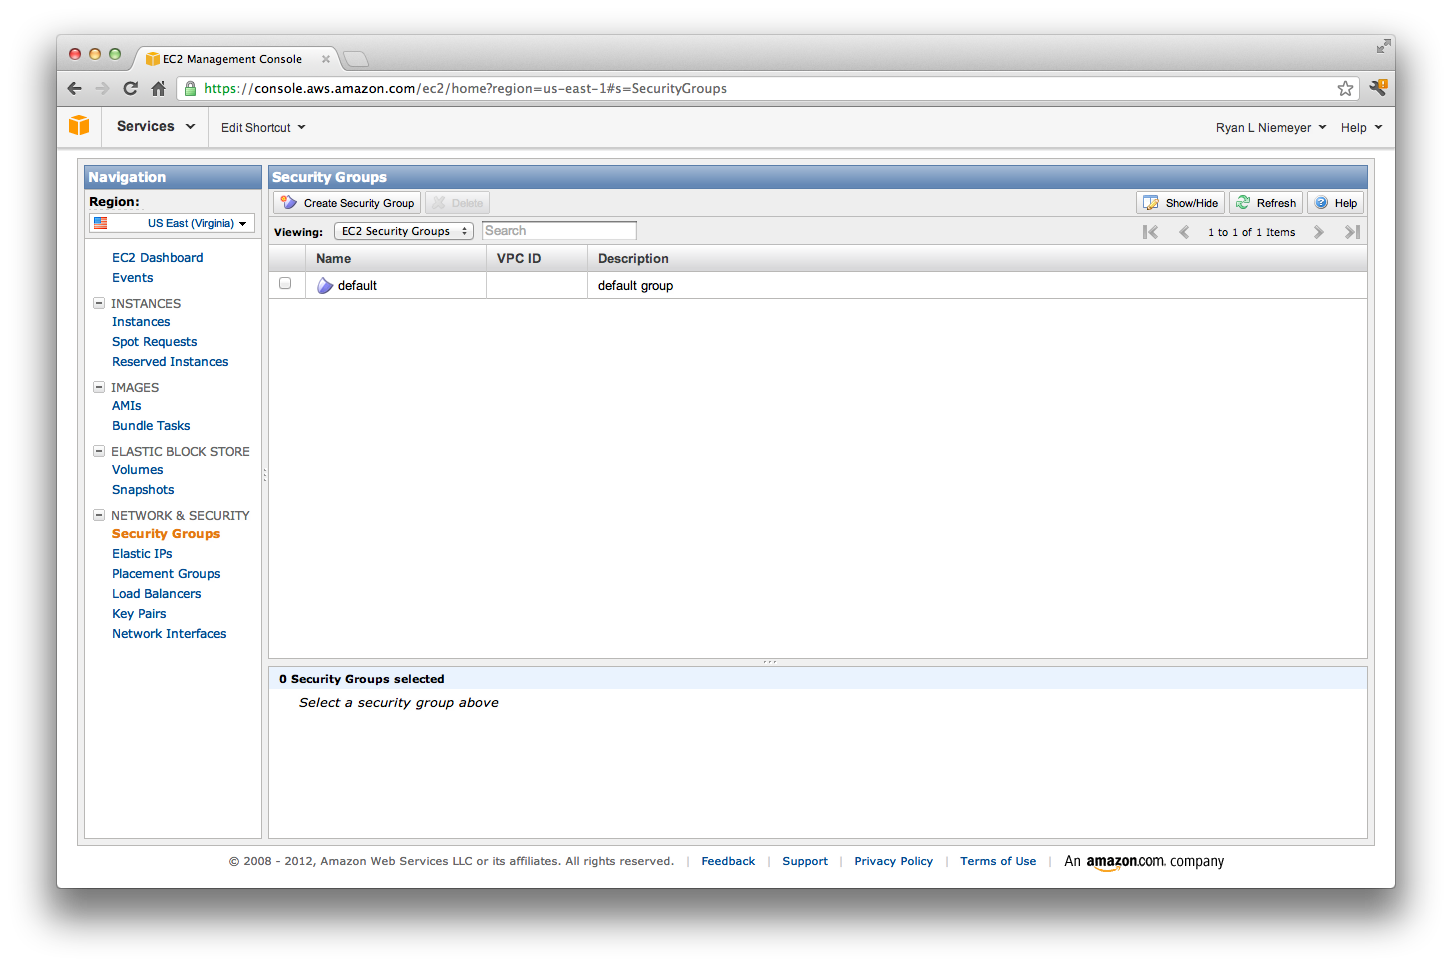
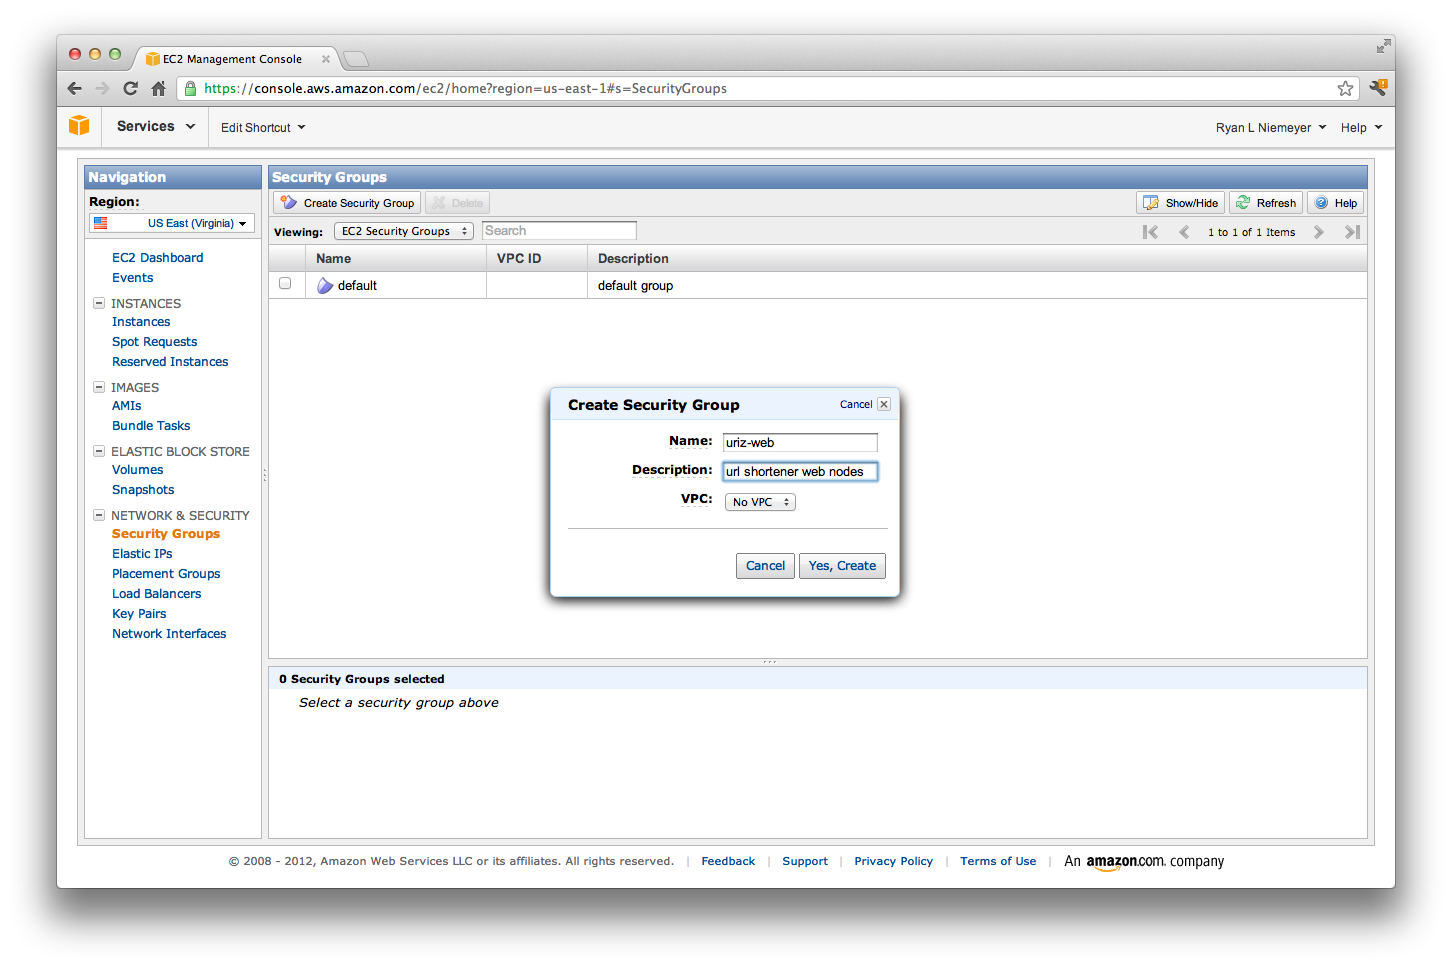
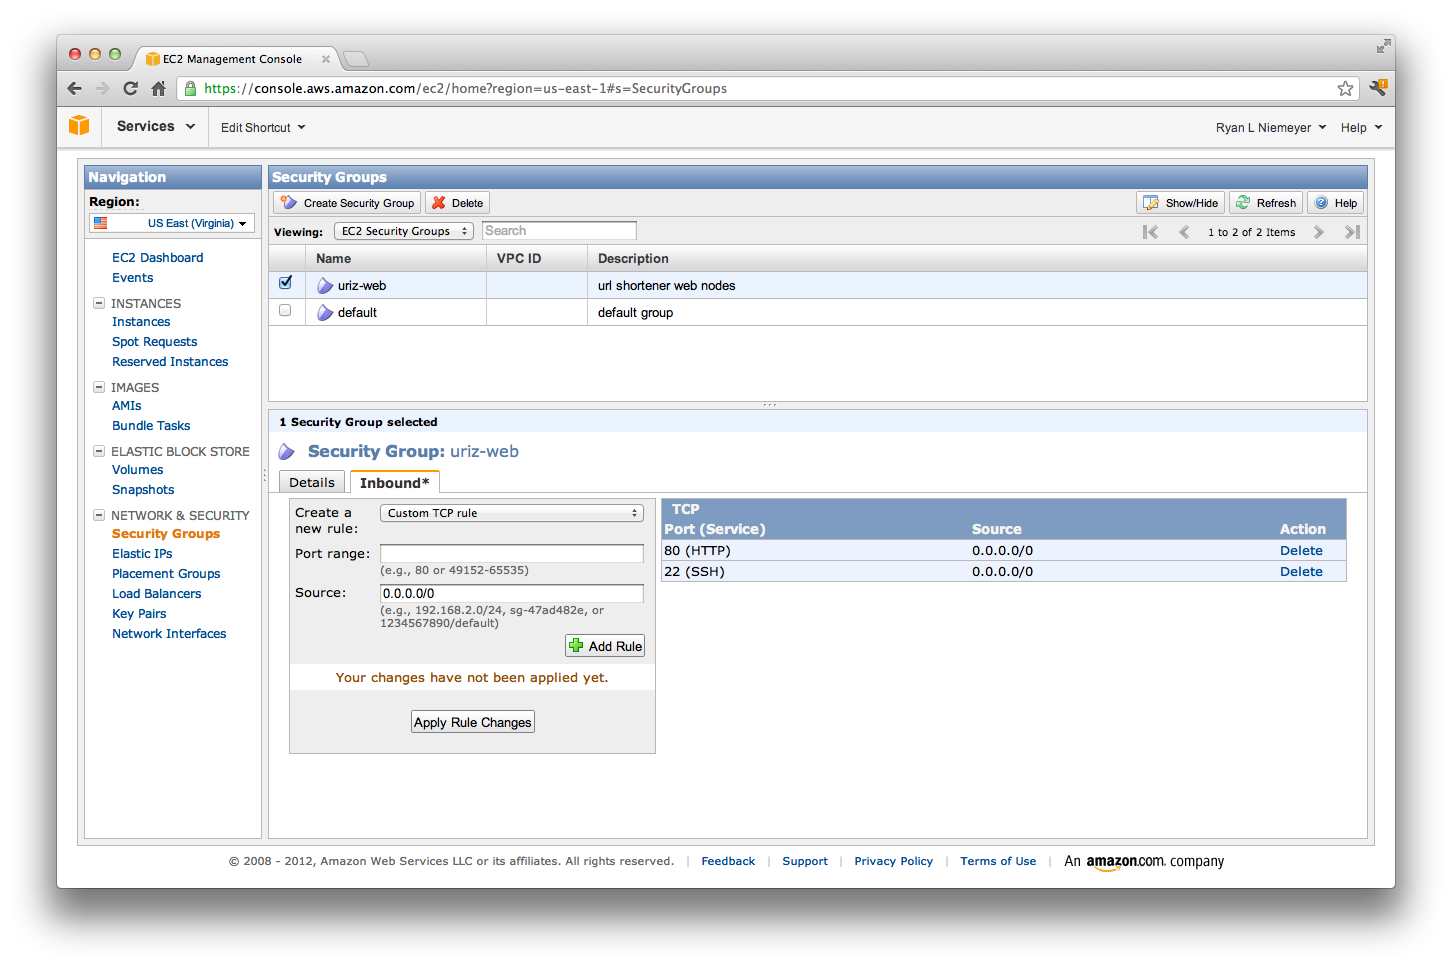
Next, we'll define a security group for our web nodes that tells each box to only open port 22 (SSH) and port 80 (HTTP). Do that via the "Security Groups" page in the EC2 console, making sure to click the Apply Changes button when you're done:
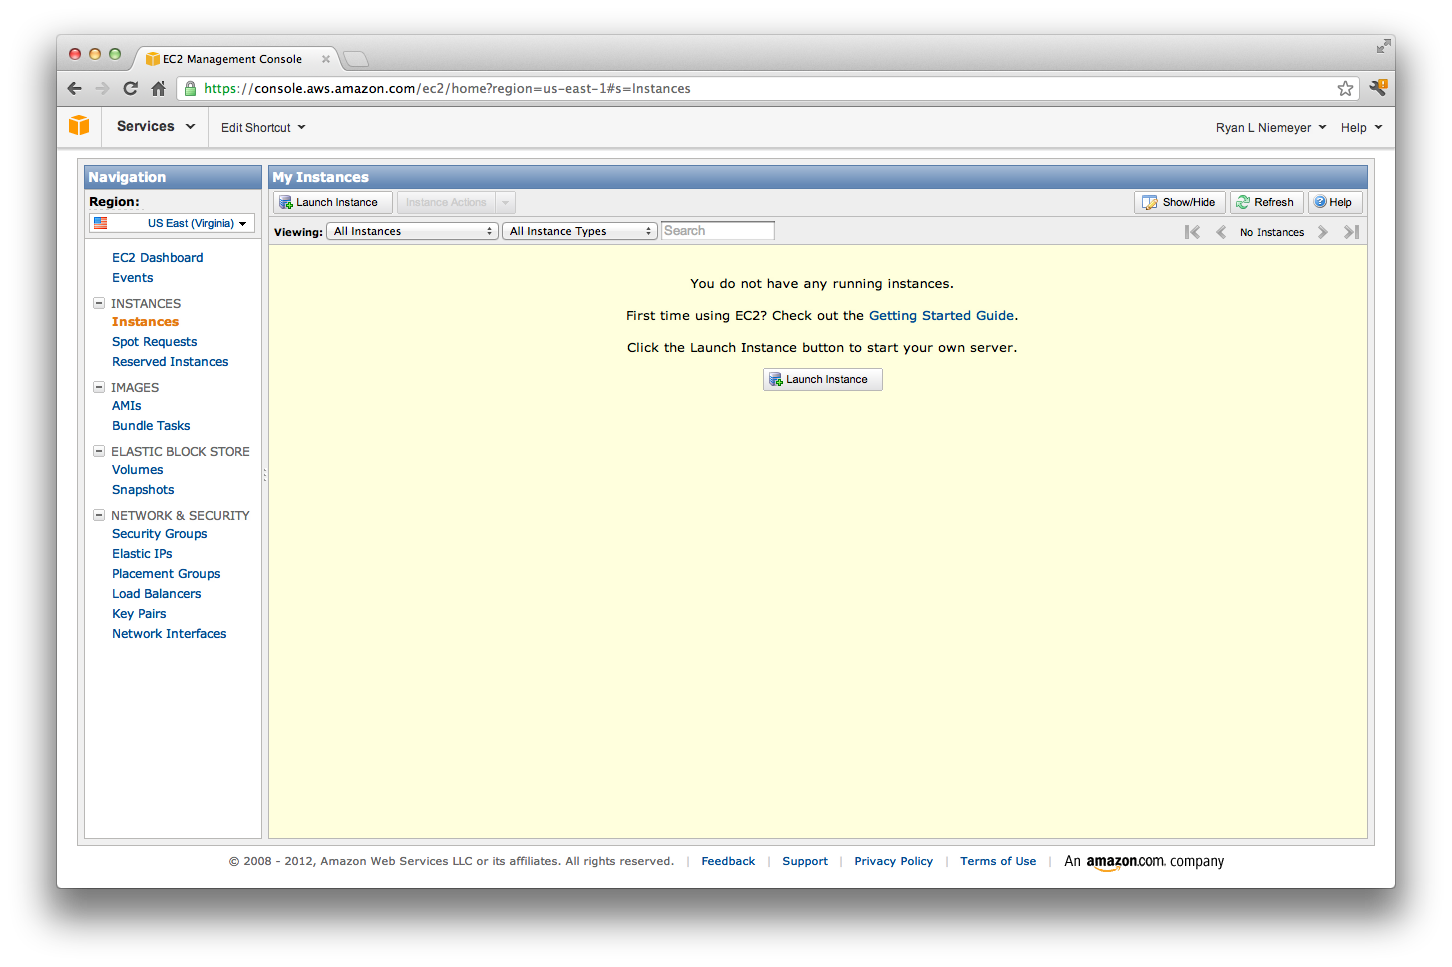
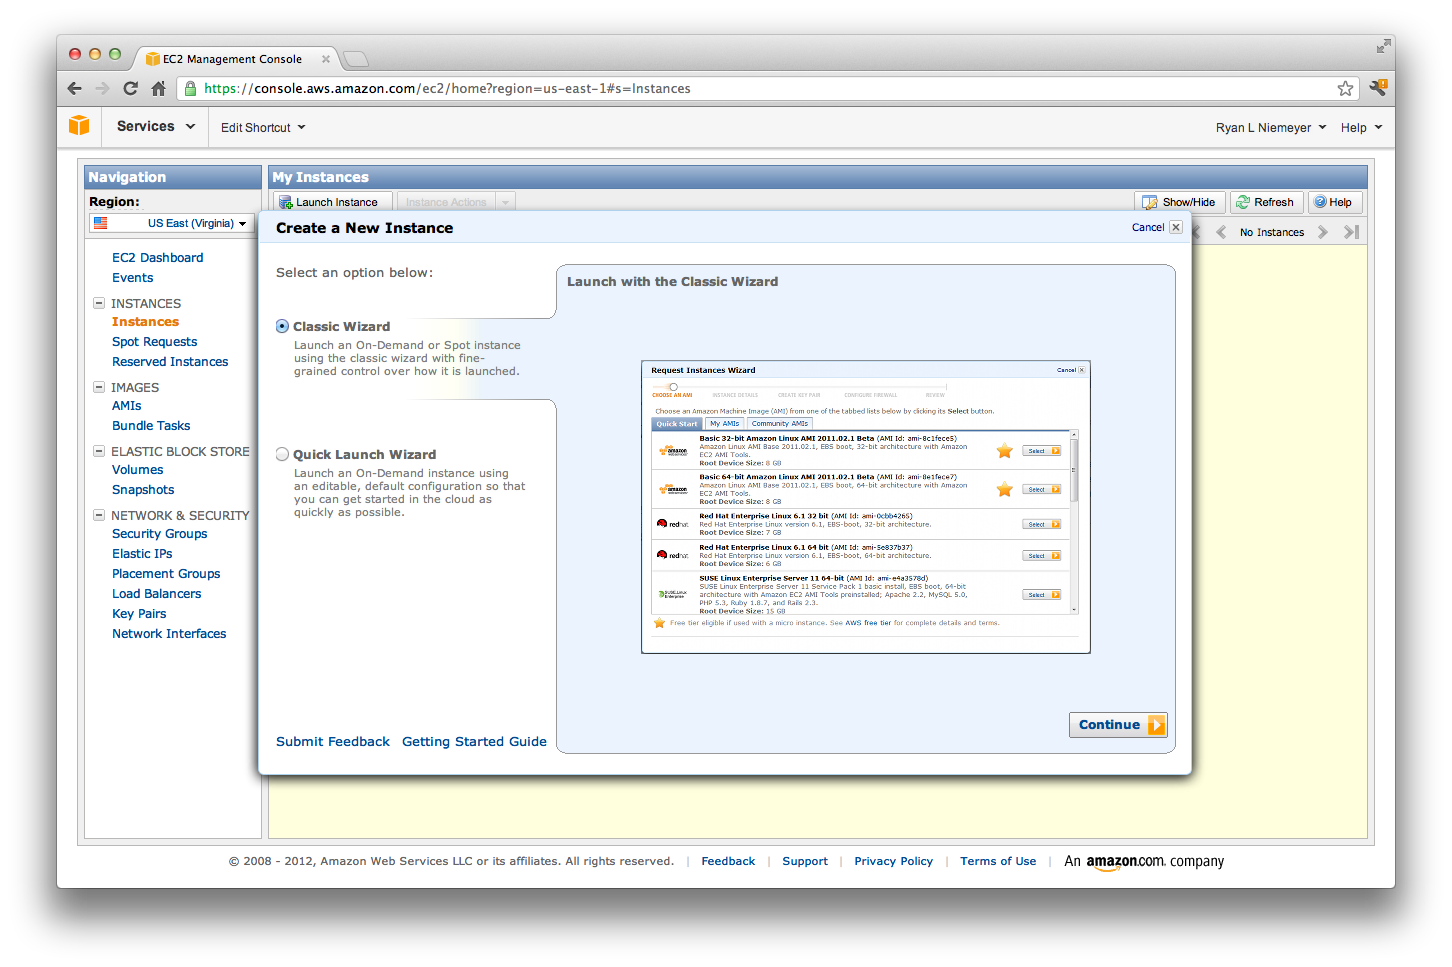
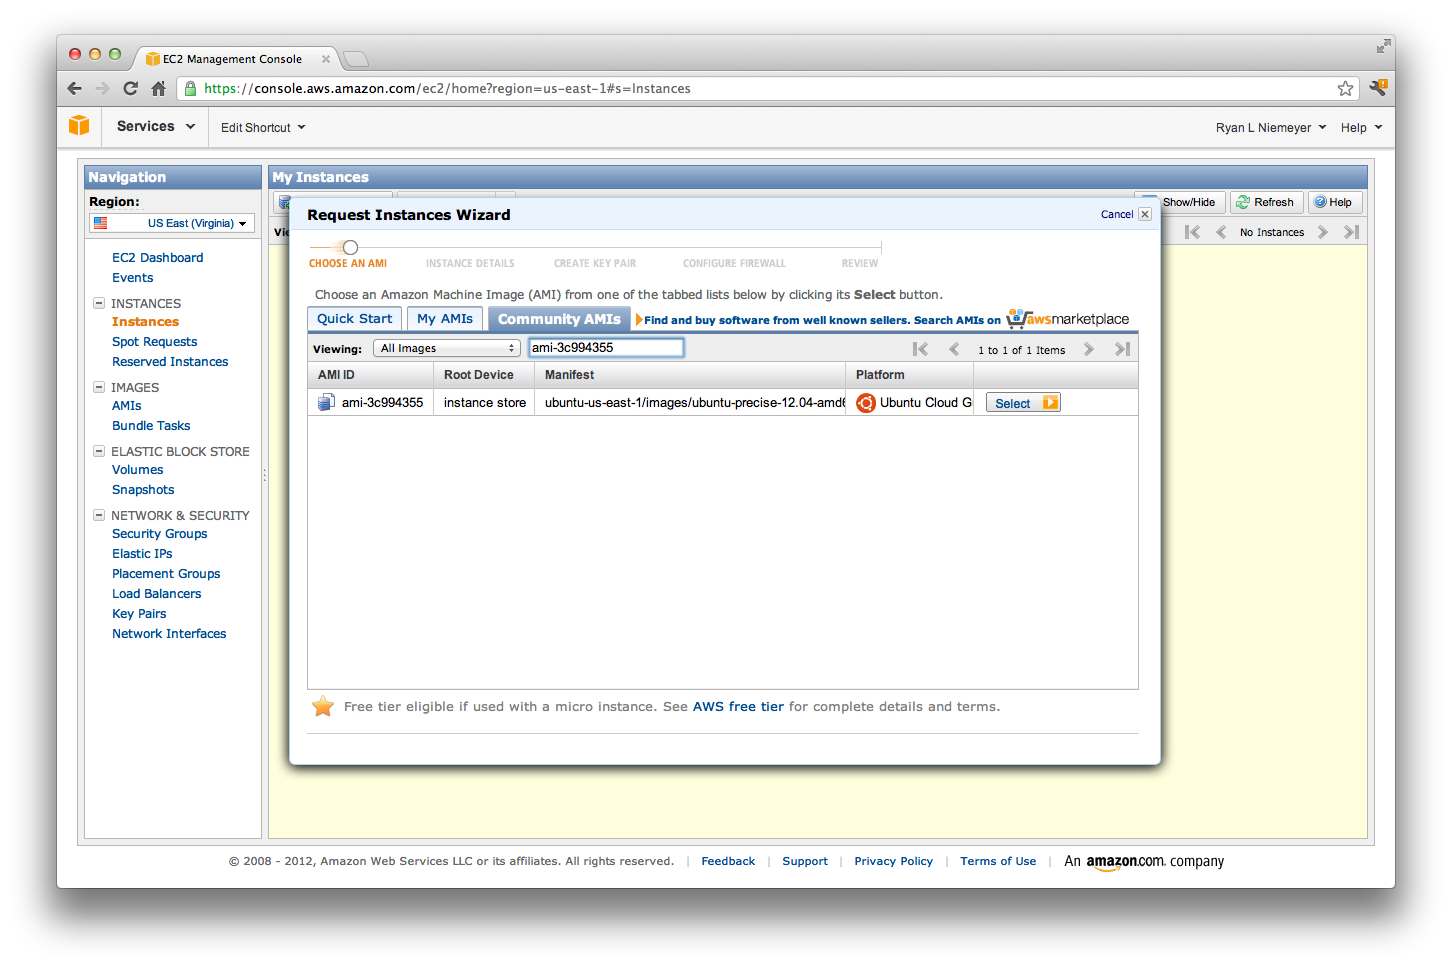
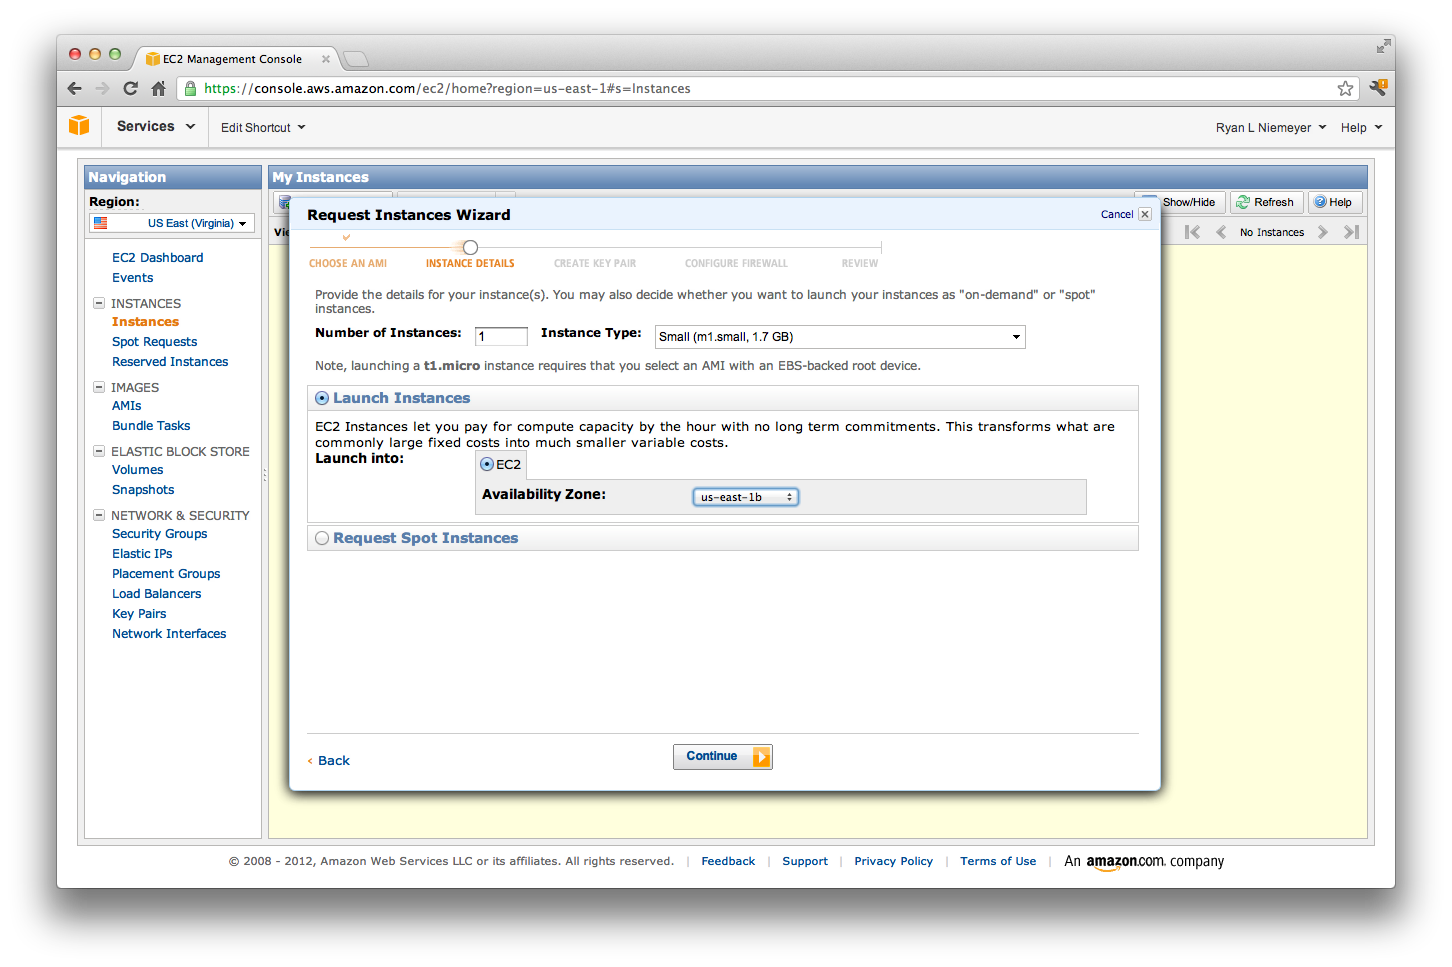
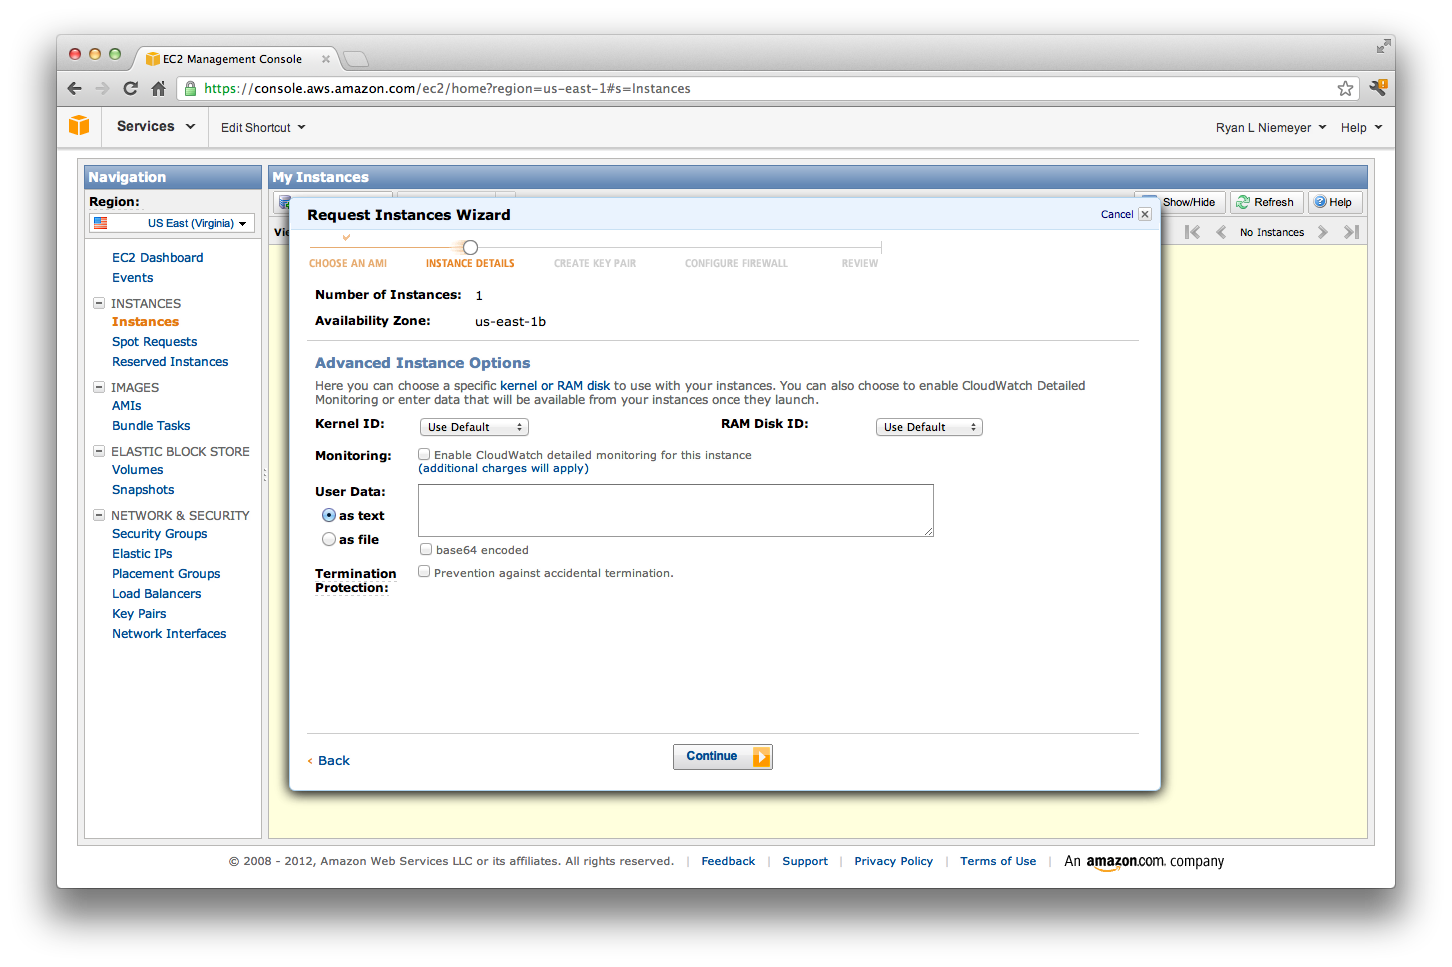
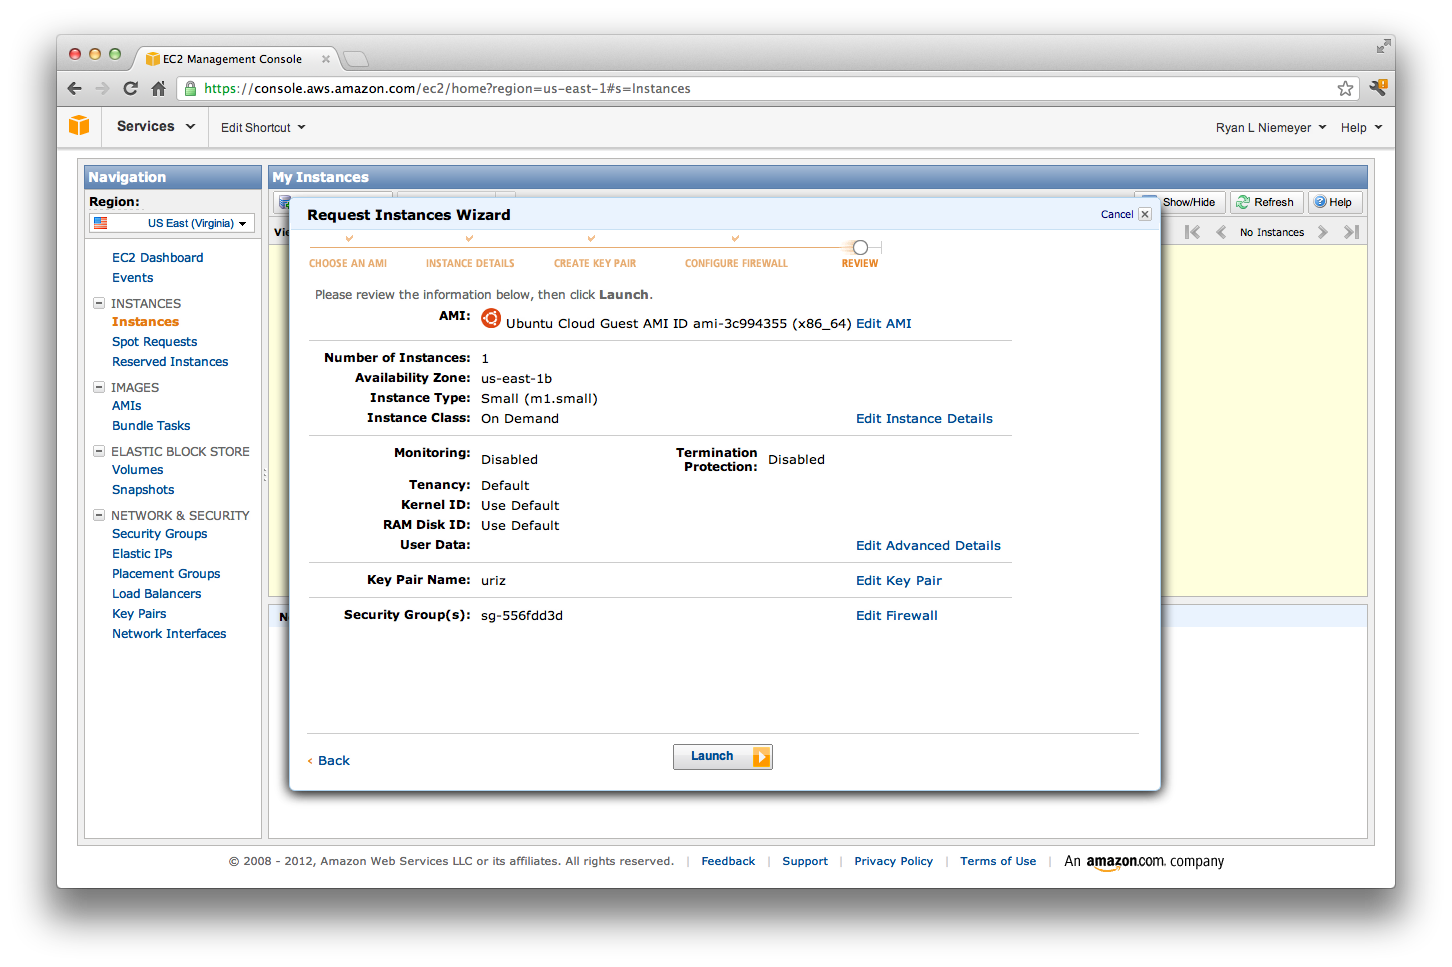
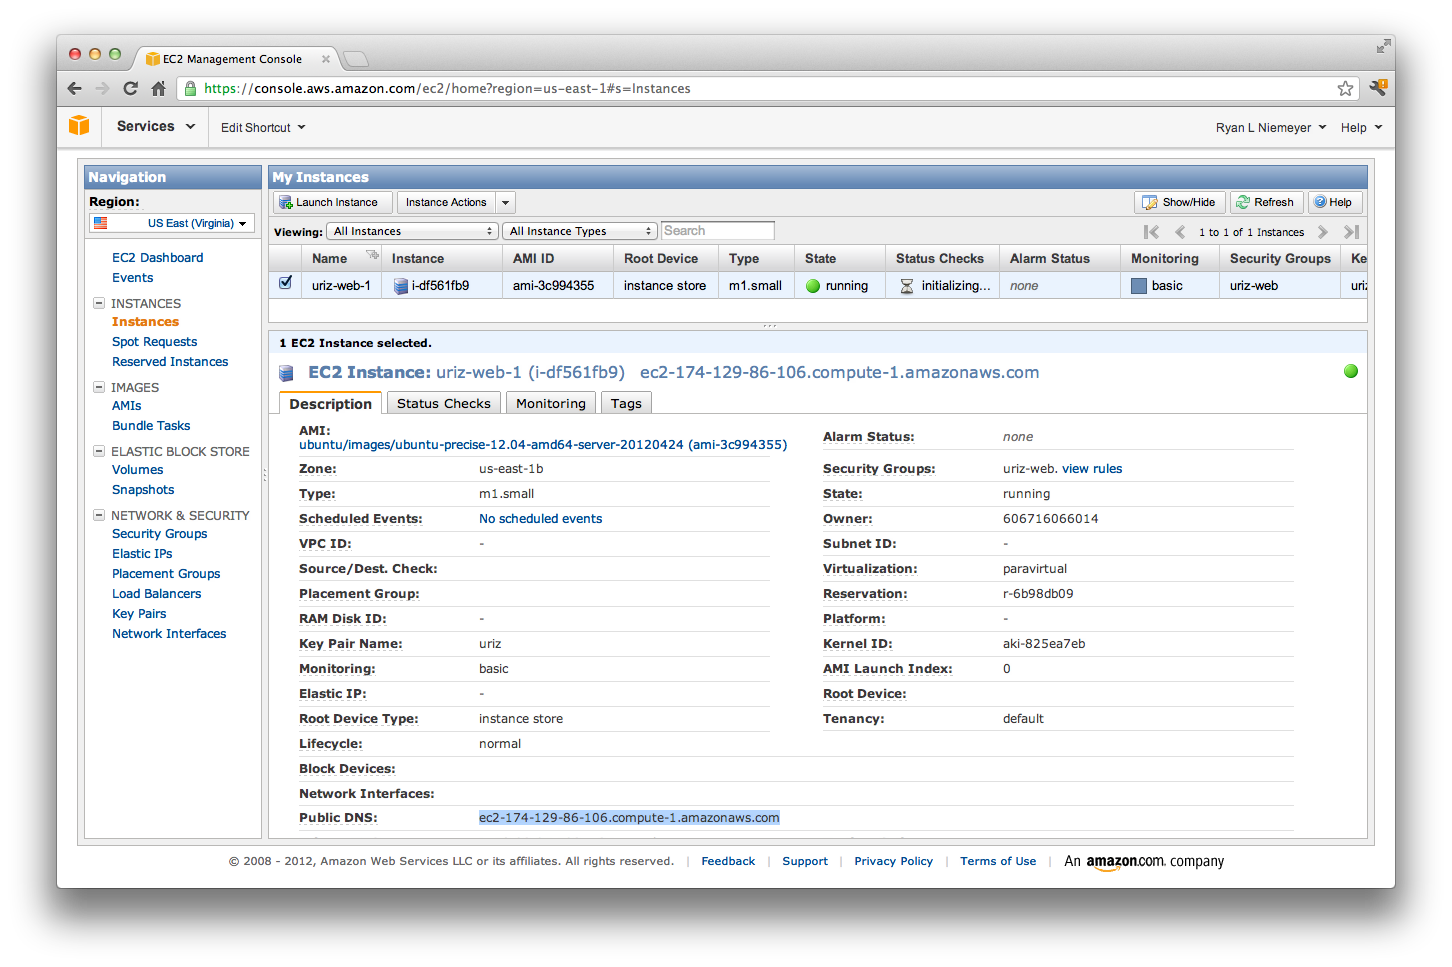
Now we're ready to launch a new machine in the cloud. In this example I'm using a bare bones Ubuntu 12.04, 64-bit instance storage Amazon Machine Image (AMI) ami-3c994355. Let's launch a single box using the Key Pair and security group we just created:
Sweet! We've got an Ubuntu 12.04 small instance running! Make note of your new instance's Public DNS address, as you'll need to know that to deploy the code.
Now let's install everything our Django app needs to run. To do that, we're using fabric, which is a really nice Python library for running SSH commands on remote or local hosts.
To run the fabric task that configures and deploys the uriz app to your new EC2 instance, you'll need a local Python environment that has fabric installed. In general, this means follow the instructions you'll find all over the interwebs that walk you through:
- Installing Python 2.7
- Installing easy_install
- easy_install pip
- pip install virtualenv
- pip install virtualenvwrapper
- mkvirtualenv uriz
- workon uriz
- pip install fabric
Isn't Python packaging great? Once you've got those things working it is! Hopefully things get much easier to setup in Python 3.3+, but I digress.
One more thing we need to do before deploying the code is enter your Amazon account's access key/secret so the app can read and write to DynamoDB via Amazon's APIs. You can retrieve your key/secret from your AWS account's "Security Credentials" link, which is in the drop down in the upper right of most AWS console pages. After locating your key and secret, add a file to your local clone/fork of the uriz project inside of the uriz app named my_aws_settings.py. In my_aws_settings.py you'll need to define two variables, which should look something like this:
AWS_ACCESS_KEY_ID = 'BZEDKIEFHLYIHZDQTQKB'
AWS_SECRET_ACCESS_KEY = 'FazbumeFuCCA14ED7ahBtd/evqyGSWCtwcugF7vJ'
(Don't worry, that isn't my actual key/secret and I've added my_aws_settings.py to this project's .gitingore, so it will only be on your local machine, not checked into github.)
The fabfile will use those variables to write a similar file to your deployed uriz web apps.
Alright, now let's setup our new EC2 boxes by running the newbox fabric command, passing in your instance's Public DNS address in the -H host(s) argument:
$ workon uriz
$ cd ~/uriz
$ fab -H ec2-50-17-41-254.compute-1.amazonaws.com newbox
This command may take a few minutes to run, most of the time spent updating the OS and installing packages. After it's finished we can check if it worked.
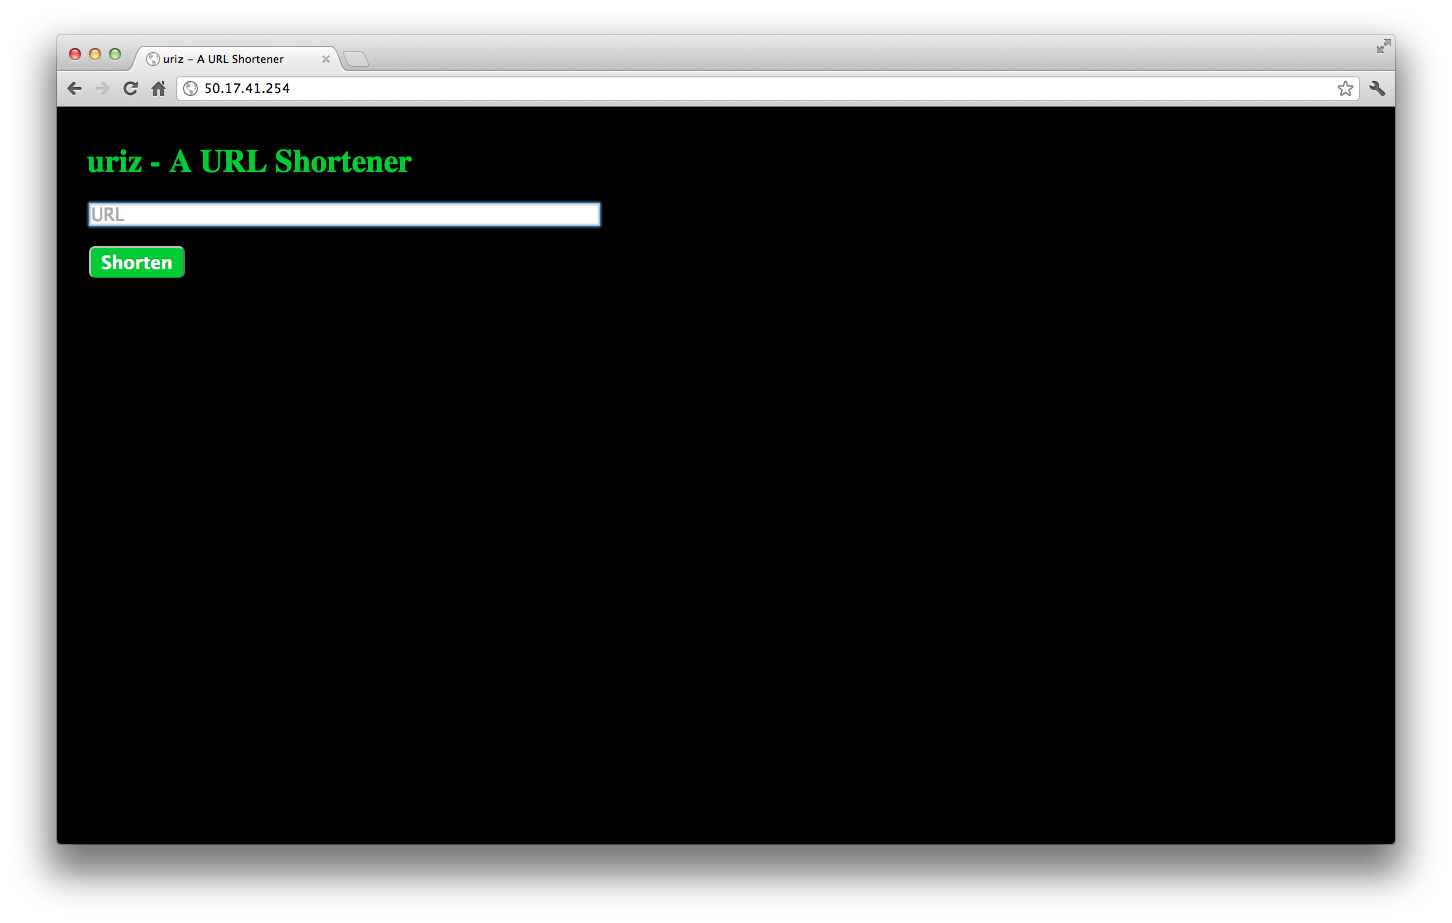
We haven't told the DNS (Route53) about this new box yet, but we can hit it directly via the public IP. Visit that in your browser, e.g. http://50.17.41.254/ if your instance's Public DNS address was ec2-50-17-41-254.compute-1.amazonaws.com. If everything went well you should see a state-of-the-art URL shortener that looks something like this:
Hitting the box directly works, but you obviously don't want to send users to that single machine's ip address, so let's point our domain's DNS to our EC2 instance(s). What we want to do here is use Amazon's Elastic Load Balancer (ELB) so we can easily add and remove web nodes from our running website to handle changes in traffic and no-downtime upgrades and technology changes.
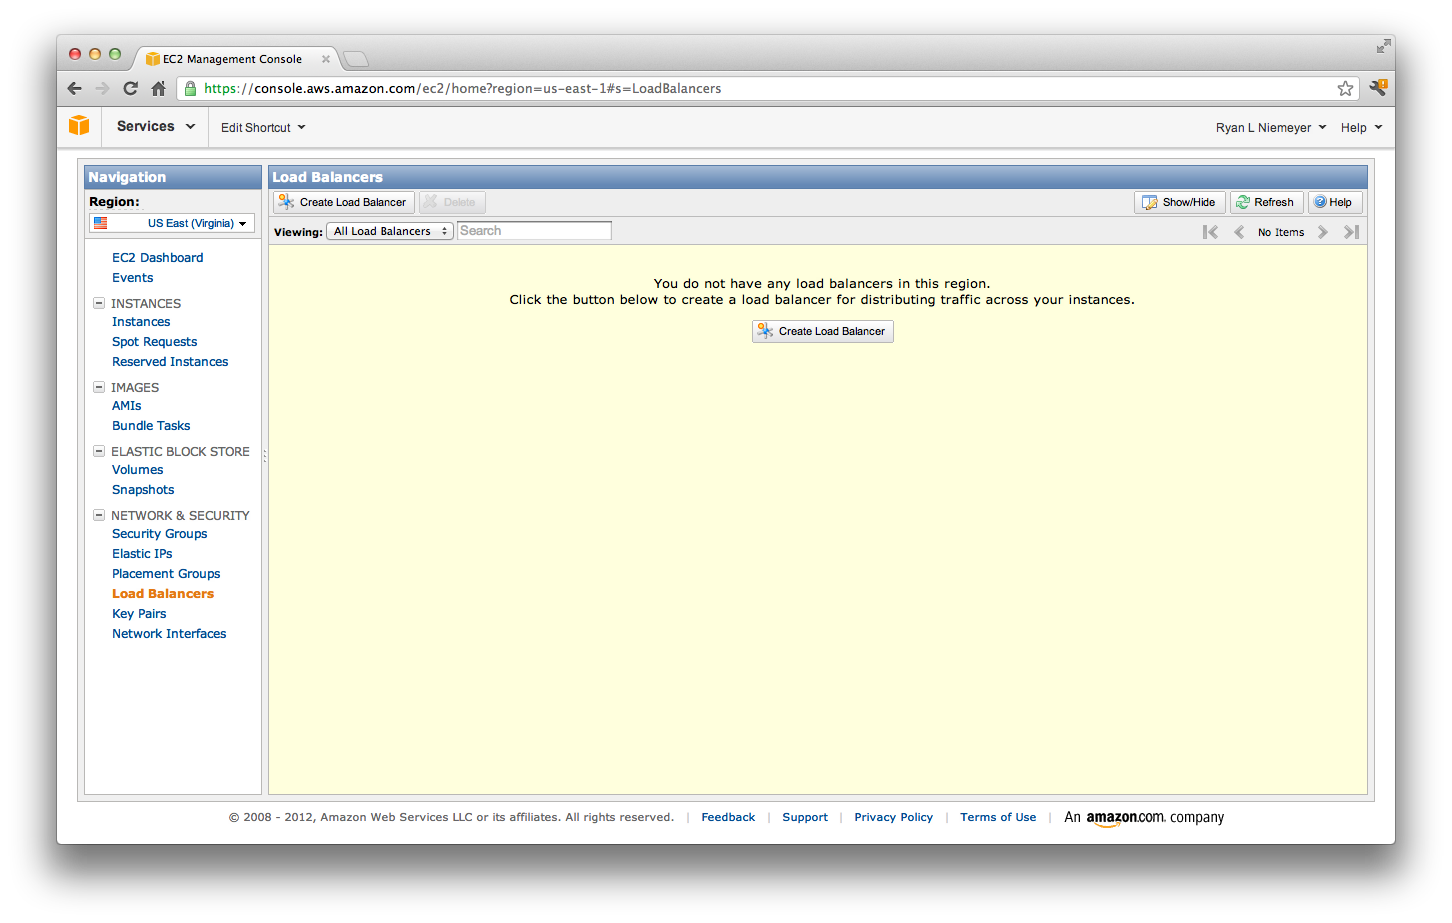
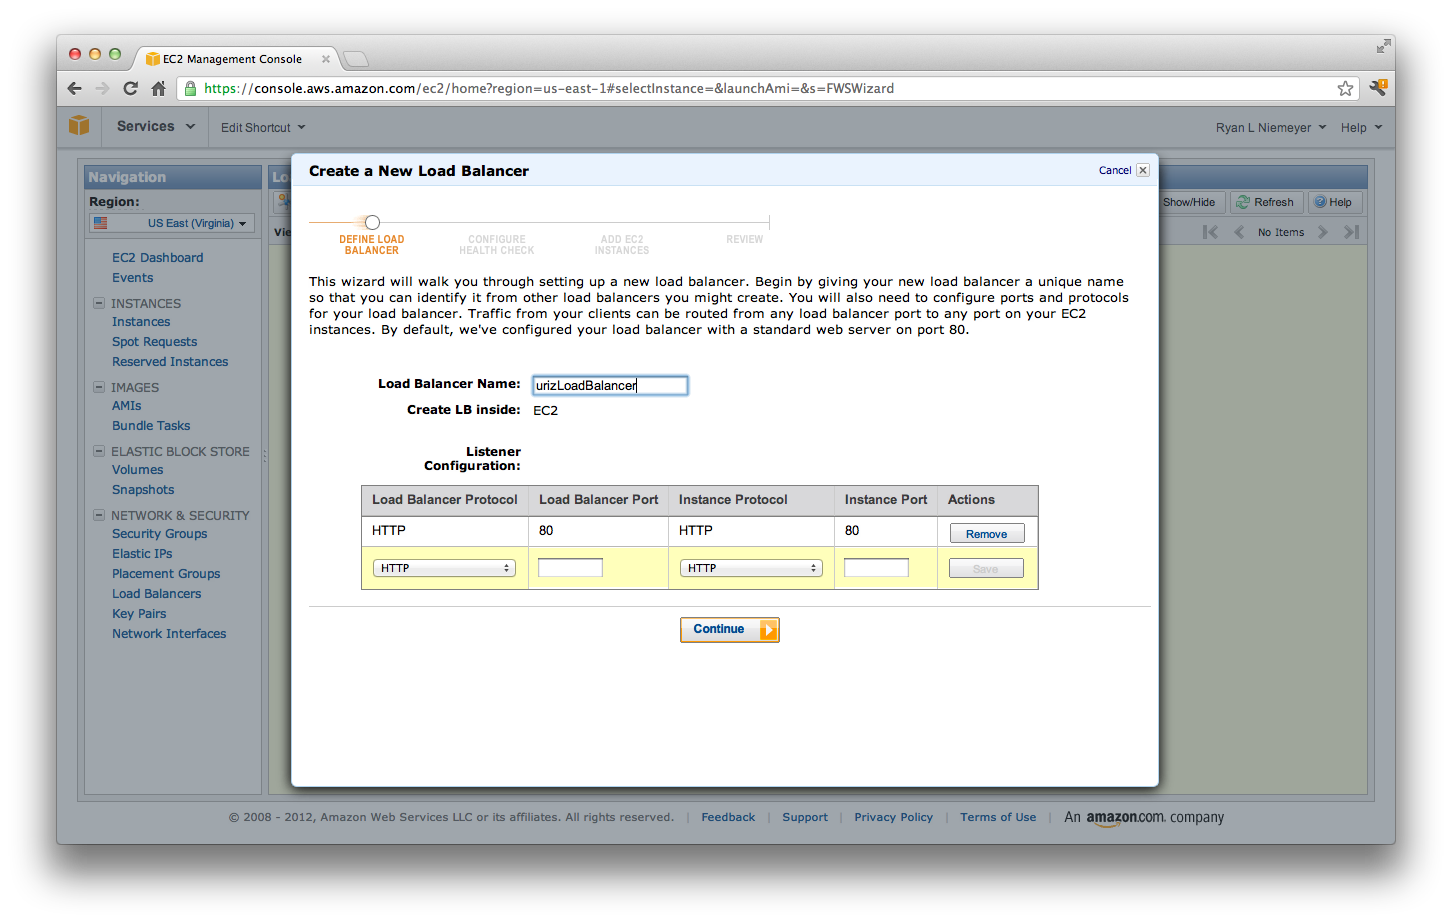
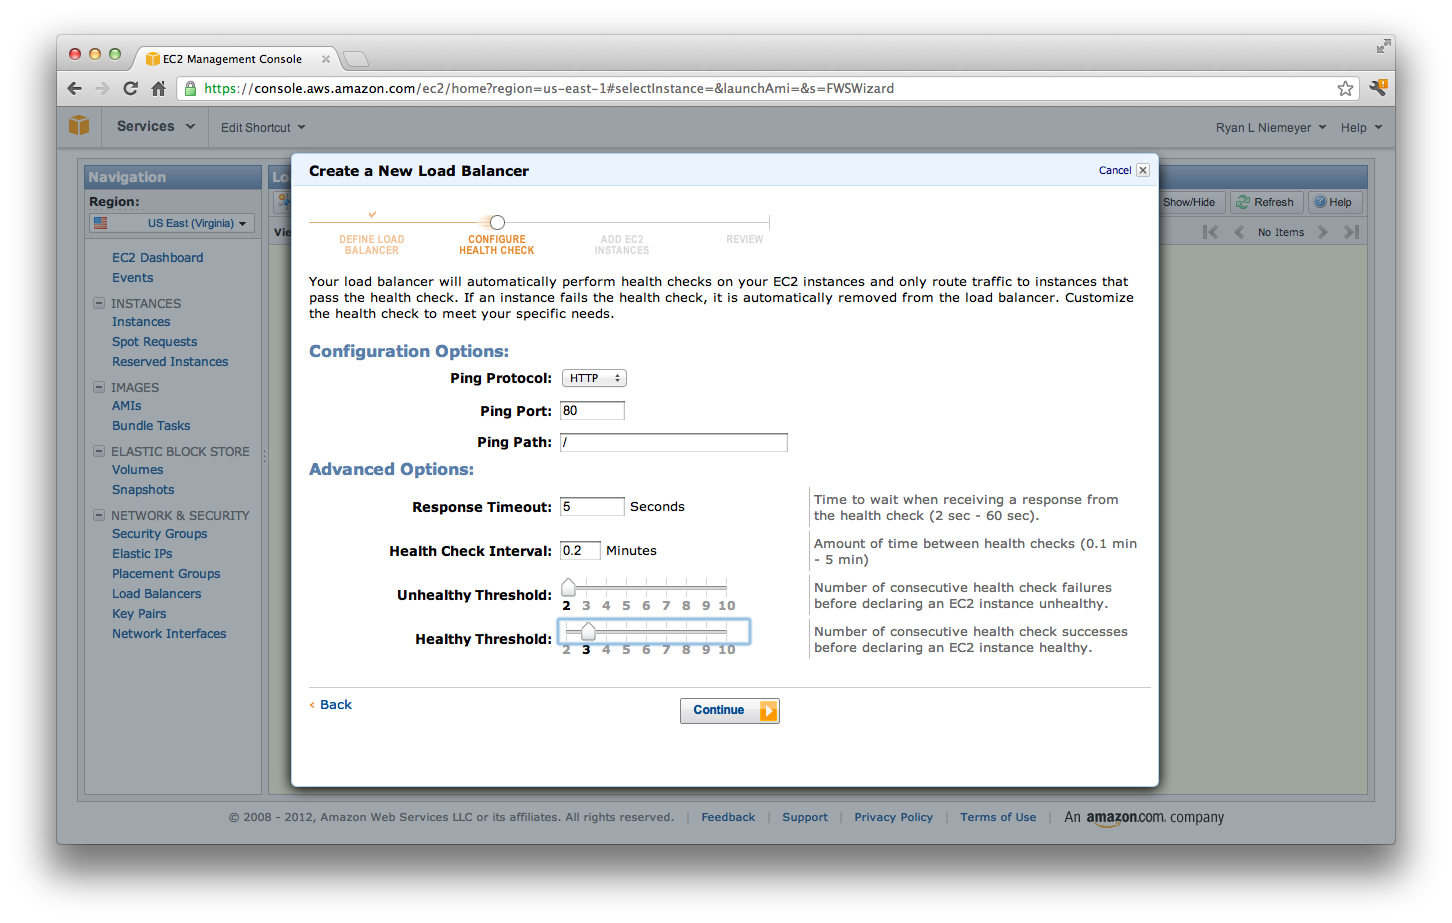
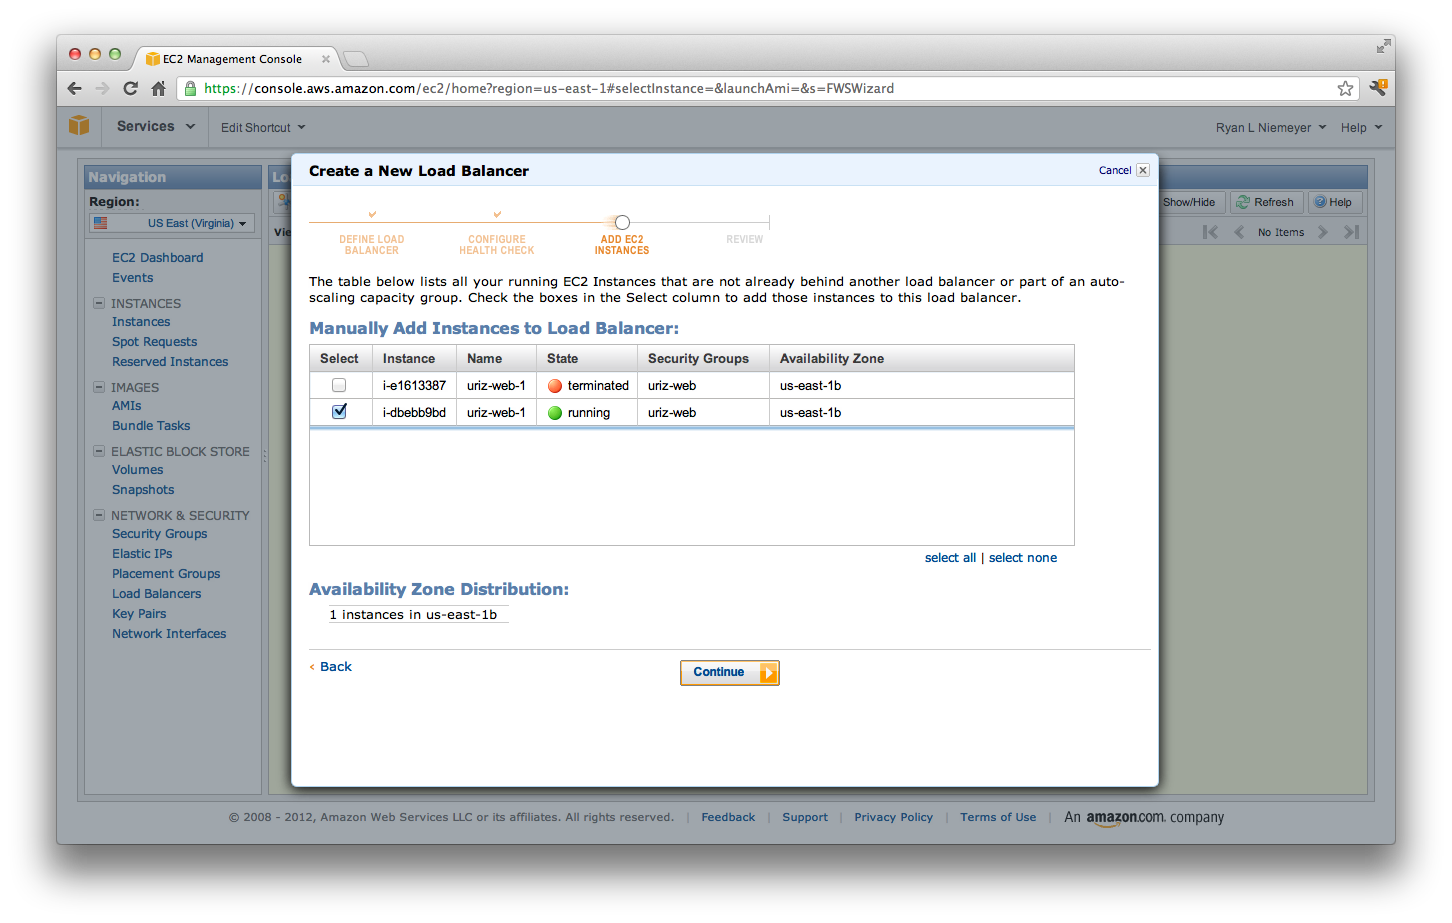
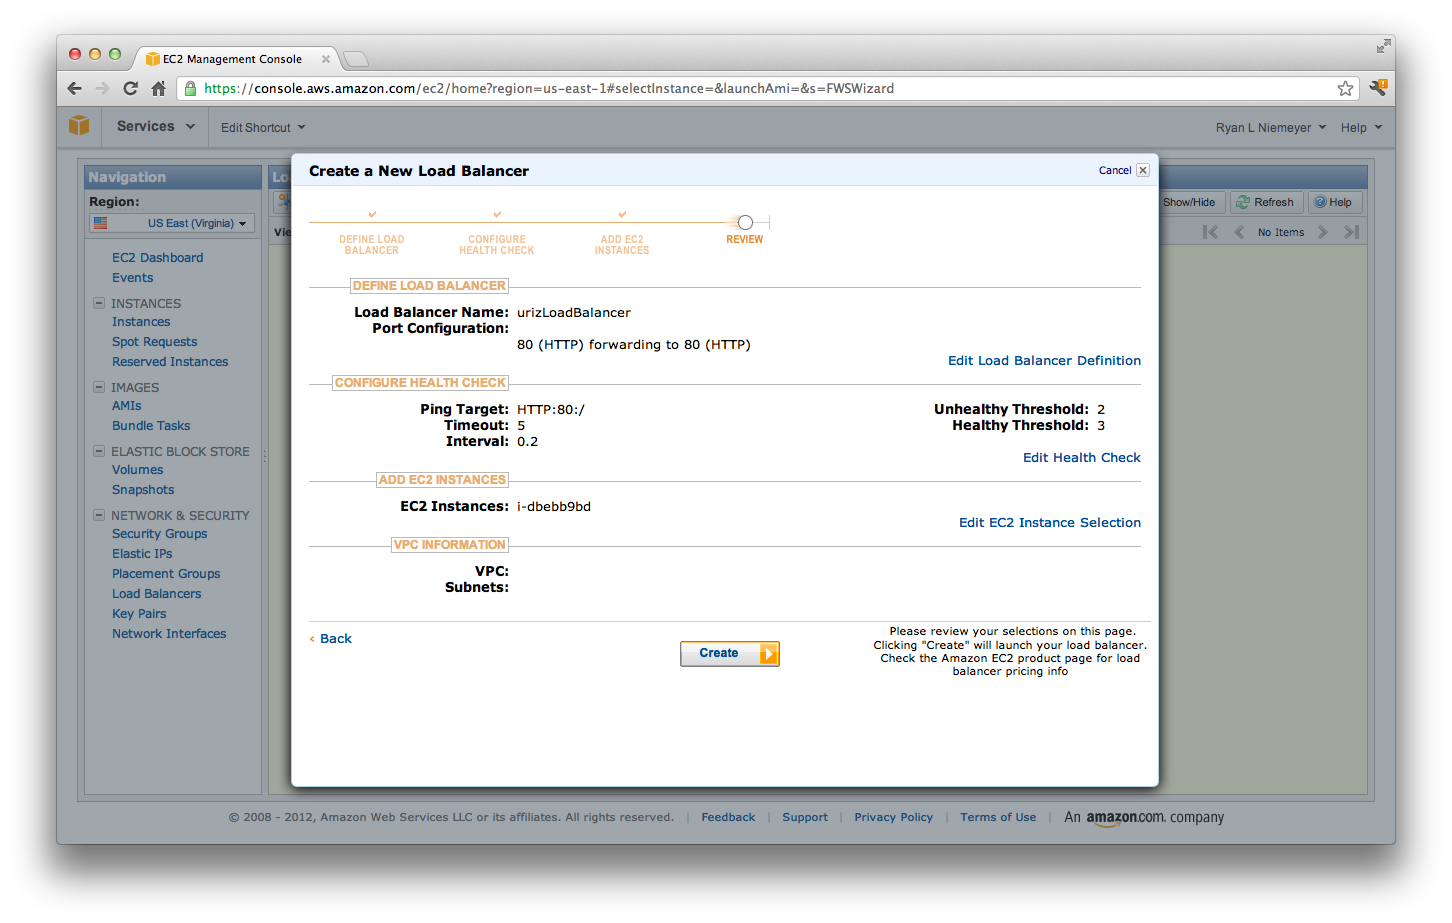
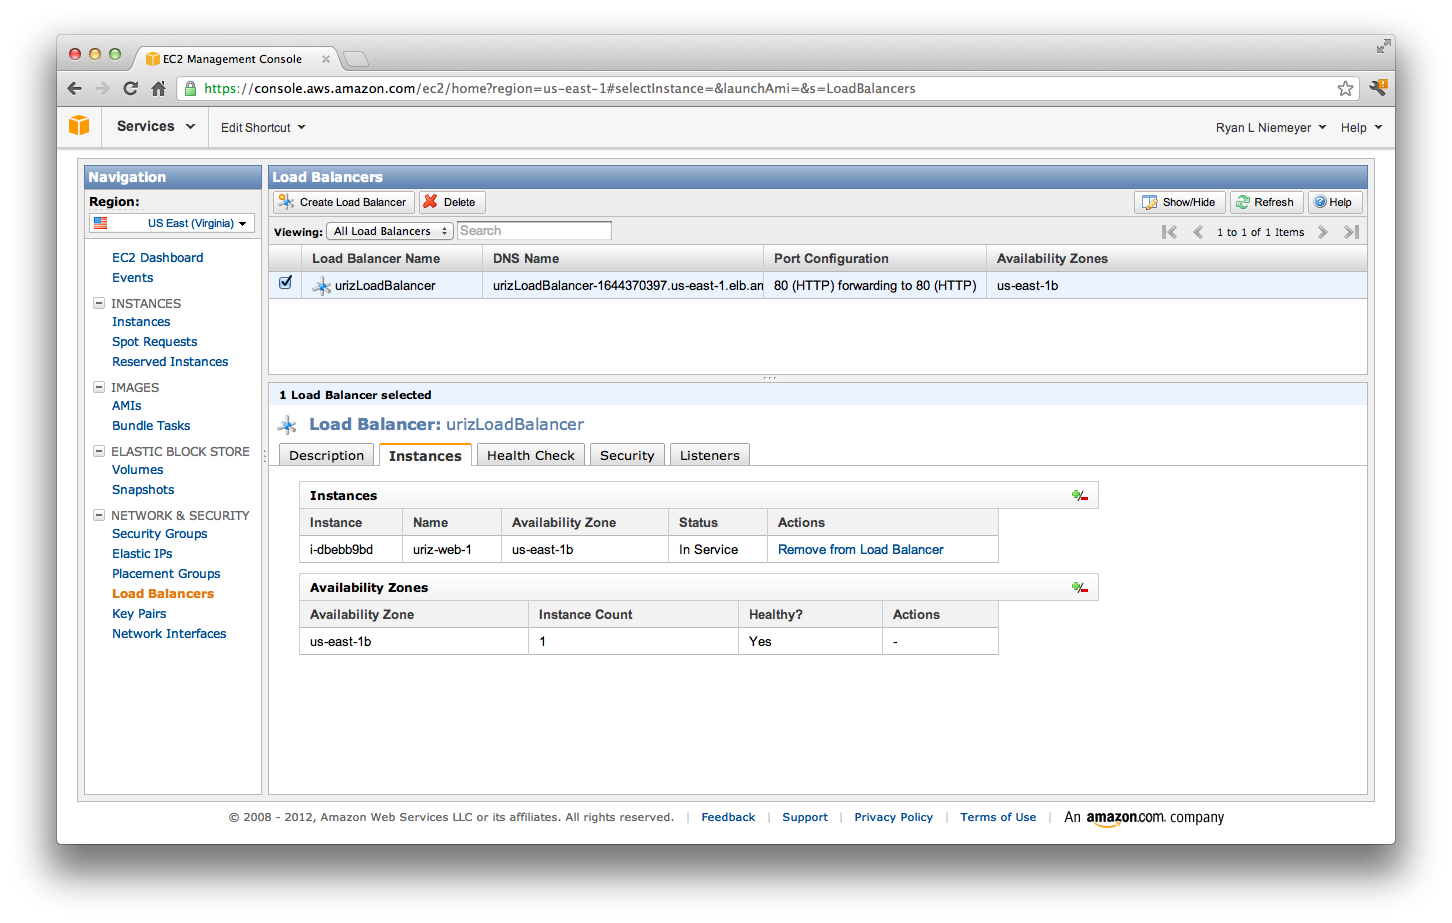
Creating a load balancer is fairly straight forward in the EC2 console:
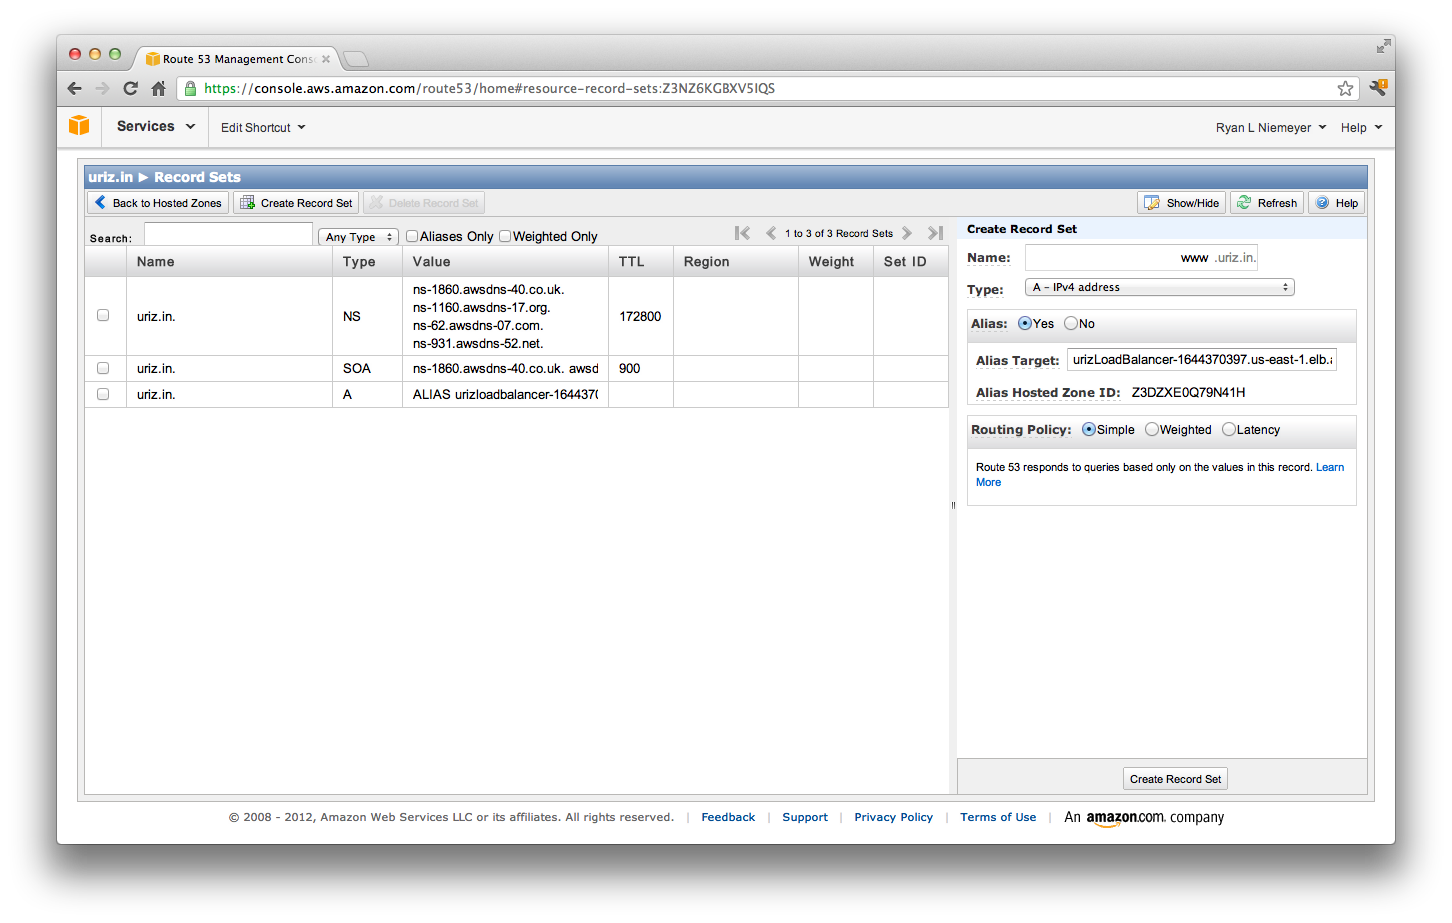
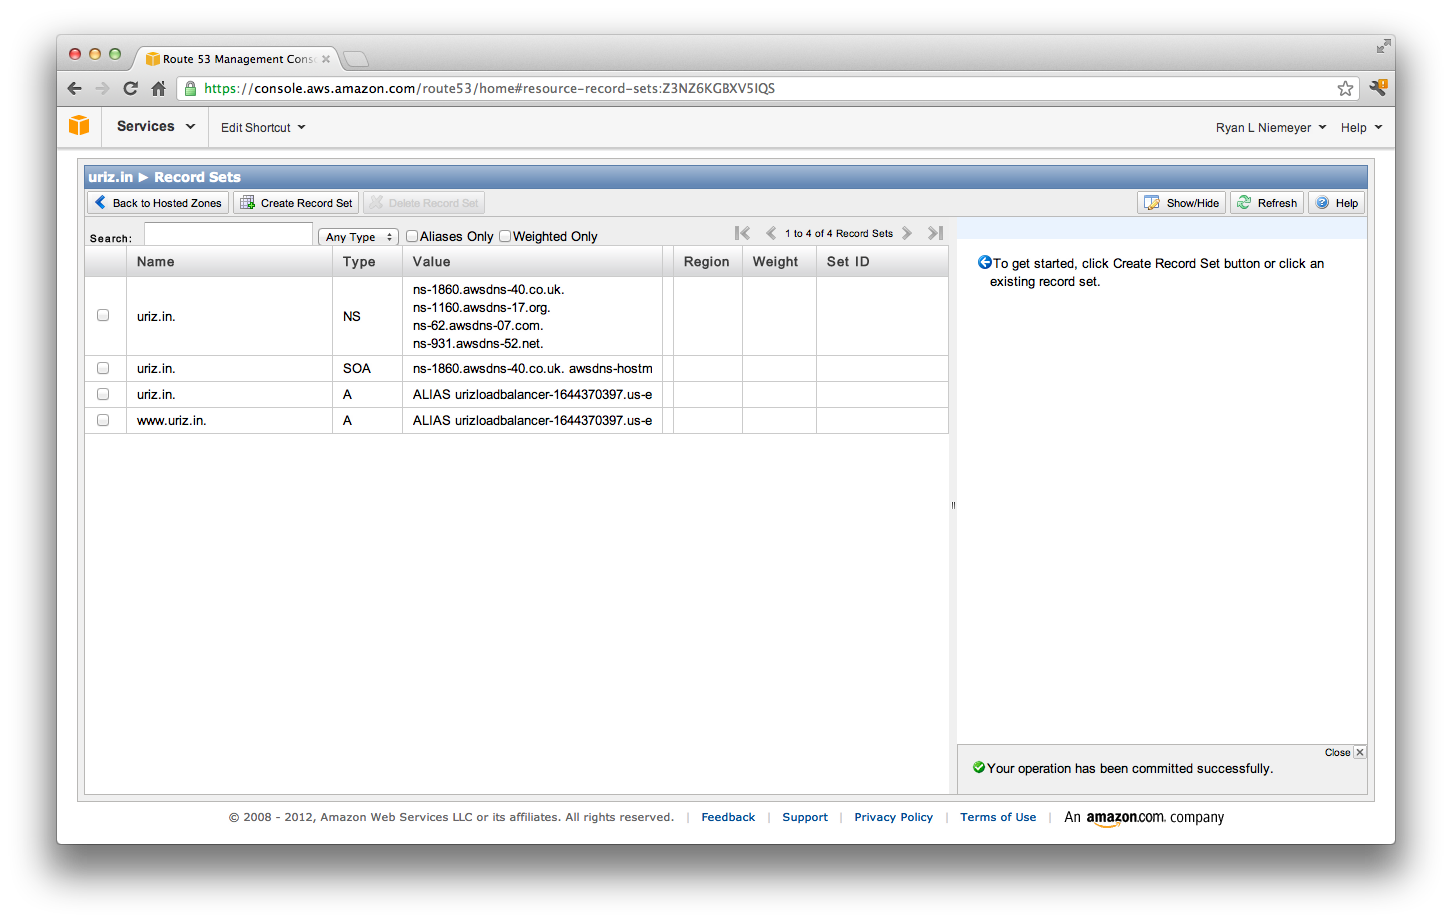
Now that our load balancer is created and our instance is "In Service", let's add this load balancer to our DNS so traffic for our domain starts hitting the ELB. We'll point both the naked domain (uriz.in) and the www subdomain (www.uriz.in) to our load balancer:
After those changes, try hitting your URL shortener domain in your browser. It should work:
Sweet. We've got Route53->ELB->EC2+DynamoDB+CloudFront working. Our load balancer is only pointing to a single web node, which isn't cool because machines go down, especially boxes "in the cloud". Plus, this is the best URL shortener anyone has ever produced, so it's highly likely to go viral when Justin Bieber catches wind of it. We've got to be ready for his tweets!
Follow the steps above to create another EC2 instance and run the newbox fabric command on your new box's host. After your new box is up and running, go back to the Load Balancers section of the EC2 console and add your new box to your existing load balancer. It should now be very easy to add/remove as many web nodes as you need.
Now you're probably not going to survive a Bieber tweet with two small web nodes, but you're well on your way. The next move is creating AMIs and taking advantage of some of the AWS auto scaling features. That's a bit advanced and can be tricky depending on what all you have in your stack, so I'll leave that to another example project for another day.
That's it! Not quite Heroku or App Engine simple, but the trade off for the additional complexity is more control over the technologies you can use to construct your app. I'm a huge fan of AWS and I hope this helps someone out there get started with some of these services.
O yeah, one more thing... Don't forget to shut down your EC2 instances if you're no longer needing them, the meter is running! Chances are http://uriz.in/ won't be up when you read this, the point of this project is for you to deploy your own :)
